Create a Lithium Column
Updated
Sprinklr supports a number of engagement features for Lithium Account, once you've added your Lithium Account to the platform. In this guide, we'll walk through how to create a Lithium Column in the Engagement Dashboard.
Before You Begin
In order to be able to monitor and engage with Lithium, you'll first need to add a Lithium Account. For more information, see Add an Account article.
To Subscribe to Lithium Webhooks
We have added webhooks to the current grabber framework for Lithium accounts. This means that you will get your Lithium updates in real-time by creating a column in Engagement Dashboards. This will help improve latency and increase efficiency. After webhooks are subscribed in Lithium, Sprinklr will automatically start consuming them and messages will sync in real-time.
On the Community Admin window, under the System tab, select Subscriptions on the left side pane.
On the Subscriptions section, check the box next to Turn on event subscriptions.
Points to Remember
If Turn on event subscriptions is not available, raise a Khoros Support ticket to get access.
Once enabled, the webhooks should be reflected in Sprinklr within a couple of hours.
Steps To Create a Lithium Column
Click the New Tab icon
. Under the Sprinklr Social tab, click Engagement Dashboards within Engage.
On the Engagement Dashboard, select Add Column in the top right corner to create a new Engagement Dashboard Column.
Select Lithium from the Add New Column window. You can also search for it in the search bar above.
On the Add New Lithium Column window, select a Column Type. The column types available will depend on the column category you selected.
Provide the Basic Information for your column. Note that the preview of your column will render on the right side of the window.
While creating a Lithium Replies column, you can bring in all accepted solutions from Lithium to Sprinklr by selecting Is Accepted Solution field as desired. It will enable you to search for accepted solutions and select one as a reply to a message.
Enter Workflow Properties as desired. Workflow properties refer to the properties applied in Sprinklr, either automatically or manually, that determine the message's workflow status, user assignment, priority, Spam designation, and sentiment.
Provide the Custom Properties as desired. Configuring additional properties in an Engagement Dashboard column, you can specify messages to include or exclude based on the properties that have been applied to the message.
After you've provided all the details for your column, click Create Column in the bottom right corner to create a new column. Upon creation, your column will be available in the current dashboard.
Note : Once a lithium column is created in Sprinklr, you can view all the message tags created in Lithium. Additionally, you can't create Message Tags in Sprinklr. You can only view the Lithium Message Tags in Sprinklr. To view Lithium message tags within the Engagement columns, please get in touch with your Success Manager. |
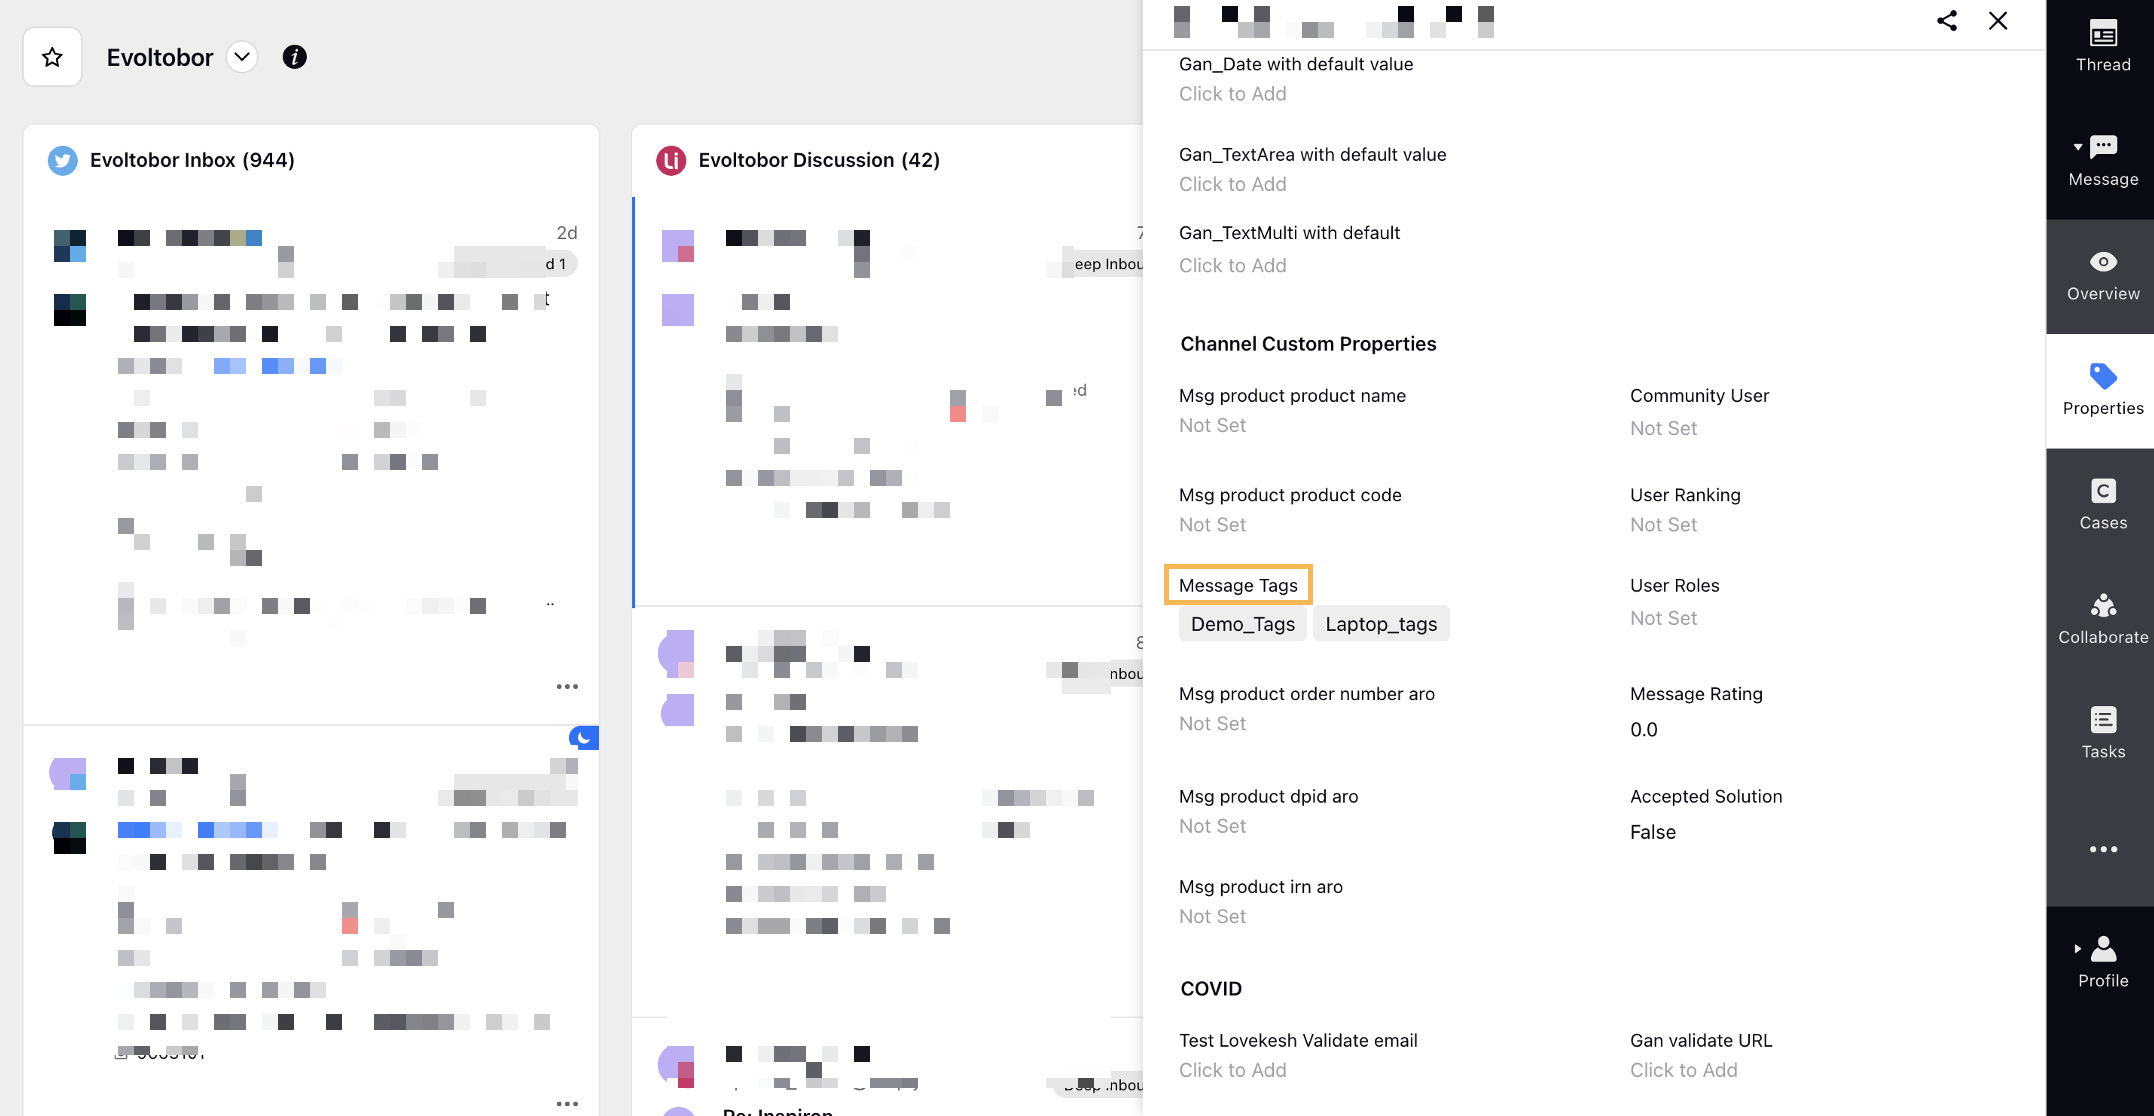
Additionally, you can configure Message Tags via Rule Engine.
To Mark Comments as Solution in Engagement Dashboards
Click the New Tab icon
On the Engagement Dashboard, select the Lithium column for Comments.
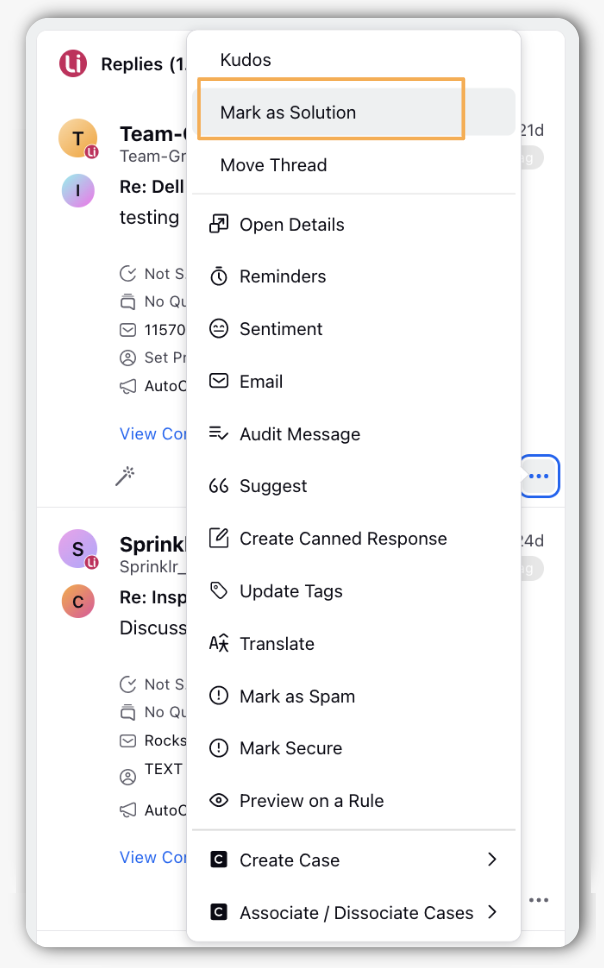
Click the More Options icon in the bottom right corner of the column.

Select Mark as Solution.
To Move Threads across Lithium Boards in Engagement Dashboards
Click the New Tab icon
On the Engagement Dashboard, select the Lithium column for Discussions or Replies.
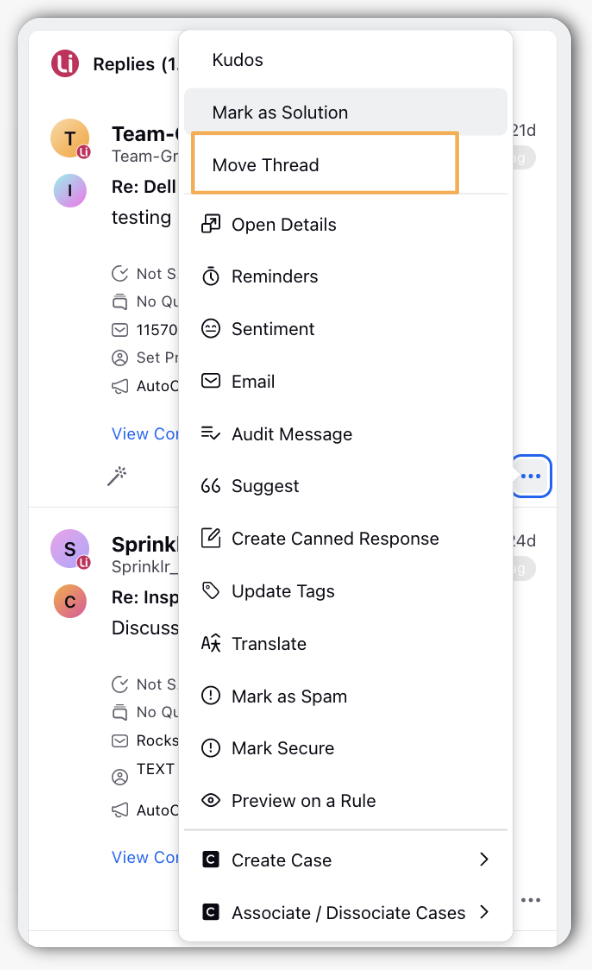
Click the More Options icon in the bottom right corner of the column.
Select Move Thread.
In the Move Thread window, select the Board ID in the given field.
Toggle on Include Replies if you want to include replies.
Enter Placeholder Text in the given field.
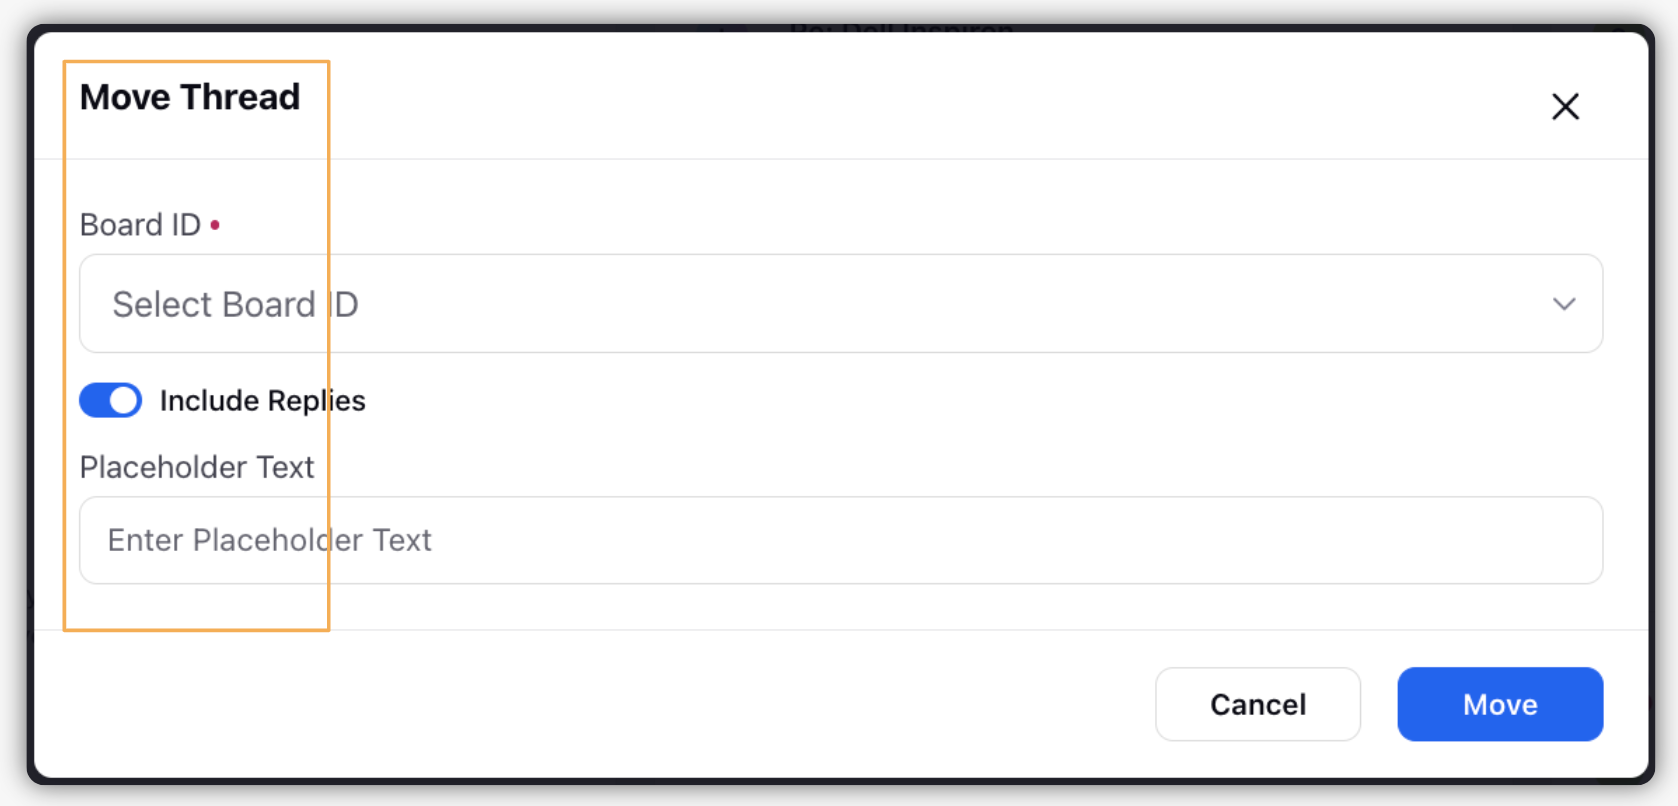
Click Move in the bottom right corner.
