Manage accounts at scale simplified with Macros
Updated
You have the ability to create macros for the asset type Account. Additionally, you will be able to set/unset account properties in bulk in the account settings window using macros.

Internal Note
For Account Macros use the following DP: ACCOUNT_MACRO_ENABLED("account.macro.enabled", BOOLEAN, PARTNER)
To manage permissions for Account Macro
Click the New Tab icon
. Under the Platform Modules, click All Settings within Listen.
In the Platform Settings window, in the right pane either select Workspace Roles or Global Roles within Manage Workspace and Manage Customer in the left pane, respectively.
In the Roles (Settings) window, click Create Role in the top right corner to add a role.
In the Create New Role window, fill in the following details:
Enter a Name to identify the role (ex: Marketing Team, Customer Care Team) and an optional Description for the role.
Under the Users and User Groups section, select the Assigned Users and Assigned User Groups from the drop-down menu.

Tip
Permissioning User Groups can be a great way to assign multiple users on your team to a role quickly. When a user gets added (or removed) to a group, that user will automatically have all the permissions assigned to the group.
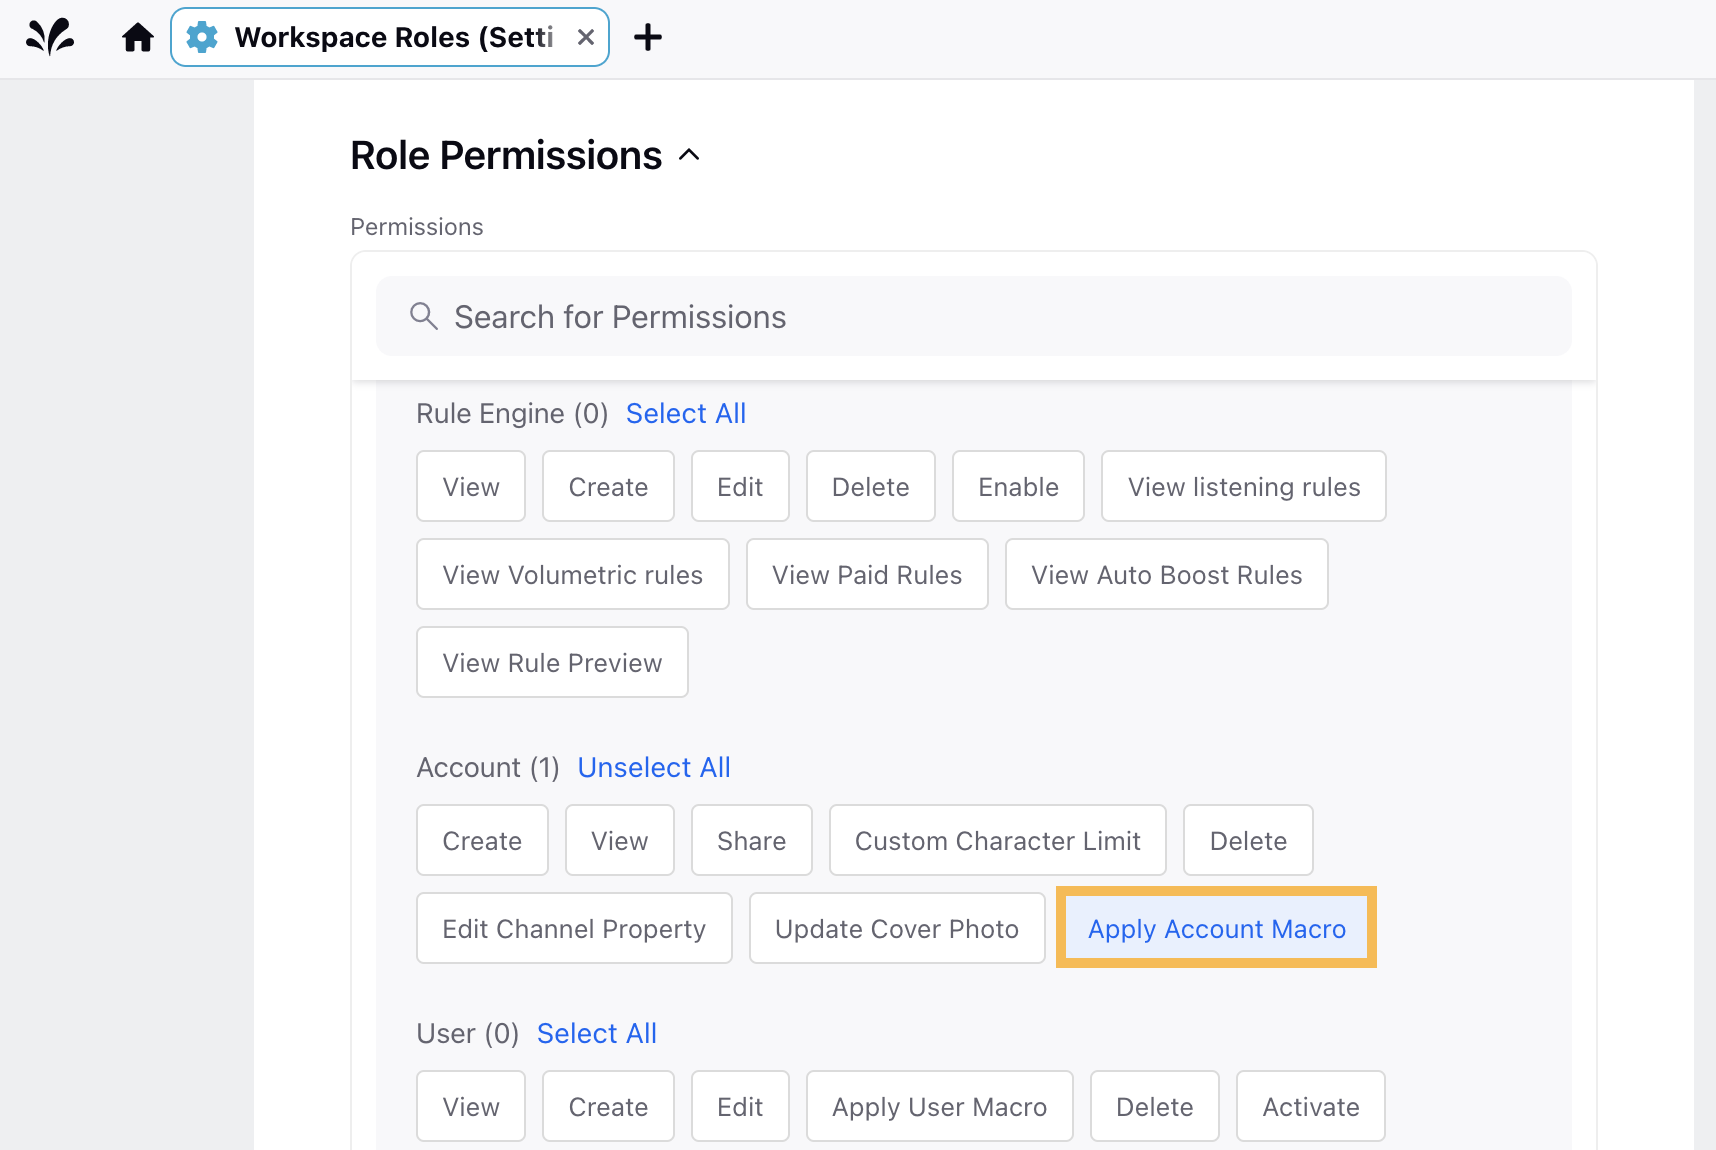
Under the Role Permissions section, search and select the Apply Account Macro permissions (or select Apply Account Macro permissions under Account with Setup).
Click Save in the bottom right corner to define roles and permissions for any user.
To Create an Account Macro
Click the New Tab icon
Click Create Macro in the top right corner of the Macros(Settings) window.
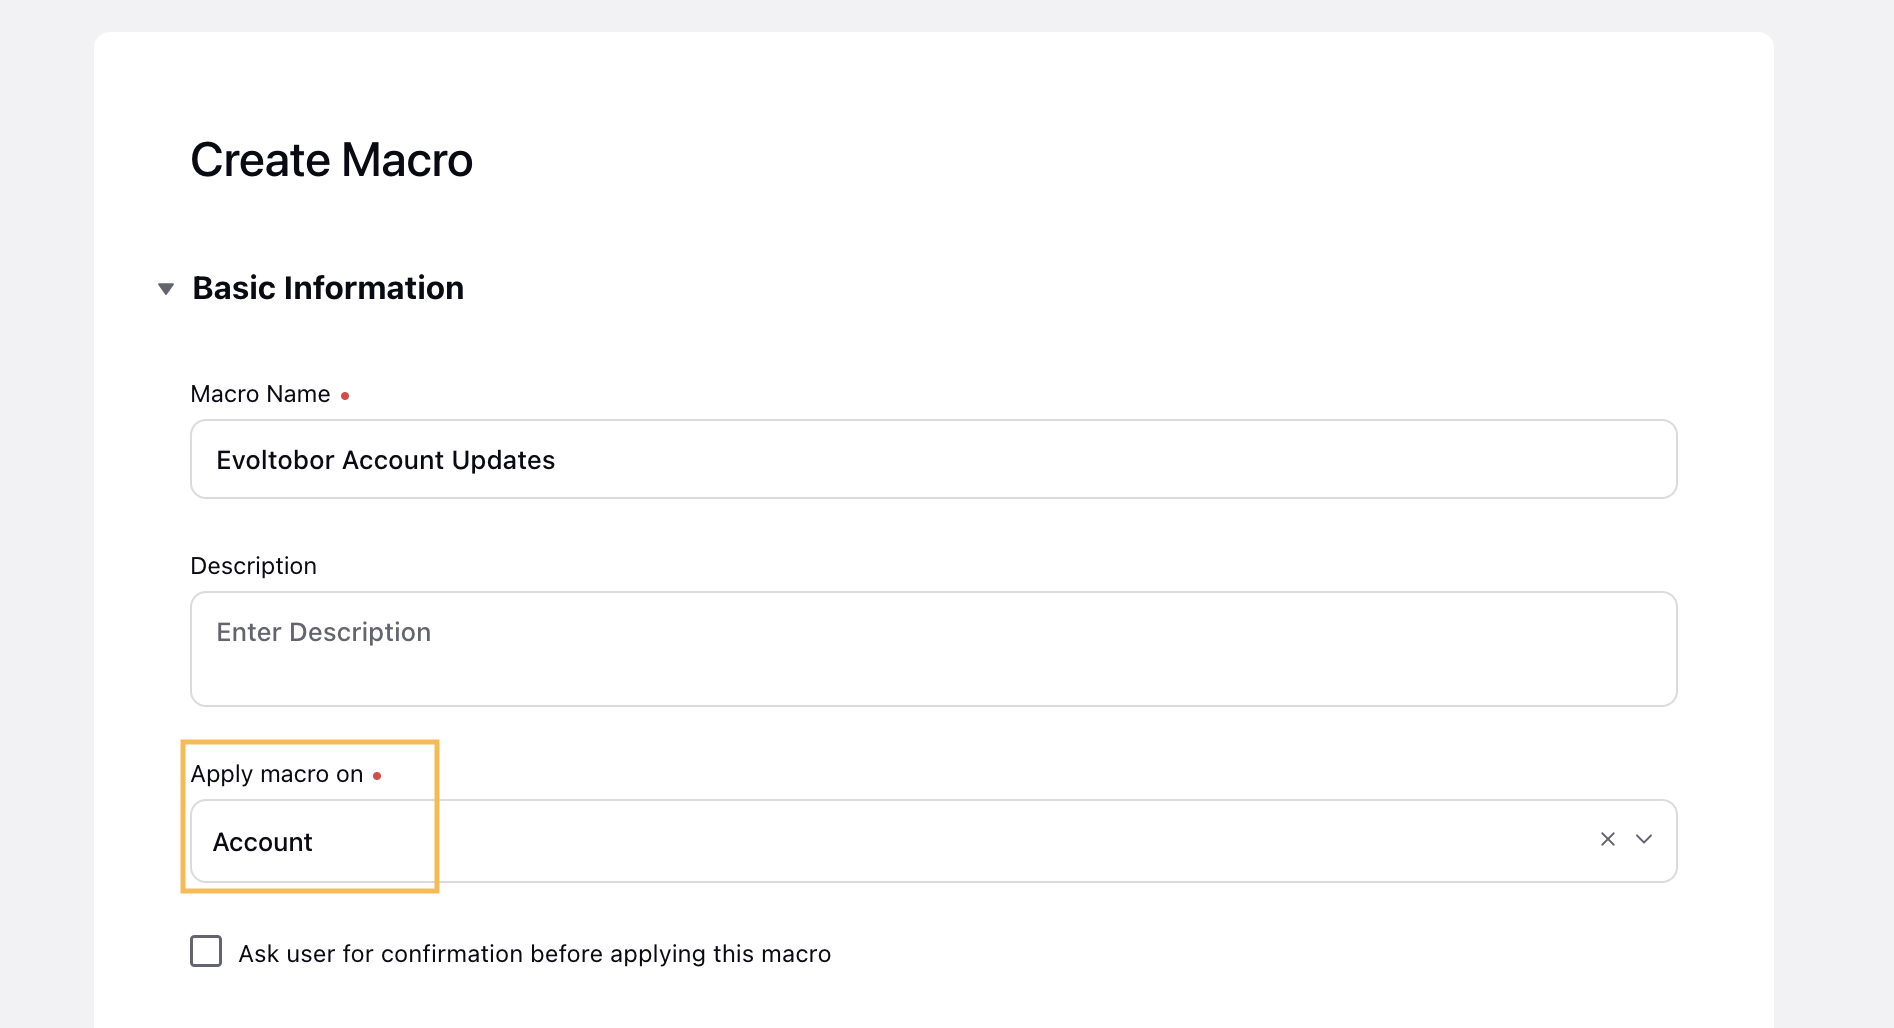
On the Create Macro window, fill in the required details. Make sure to select Account in the Apply macro on option. For more information, see Create a Macro.
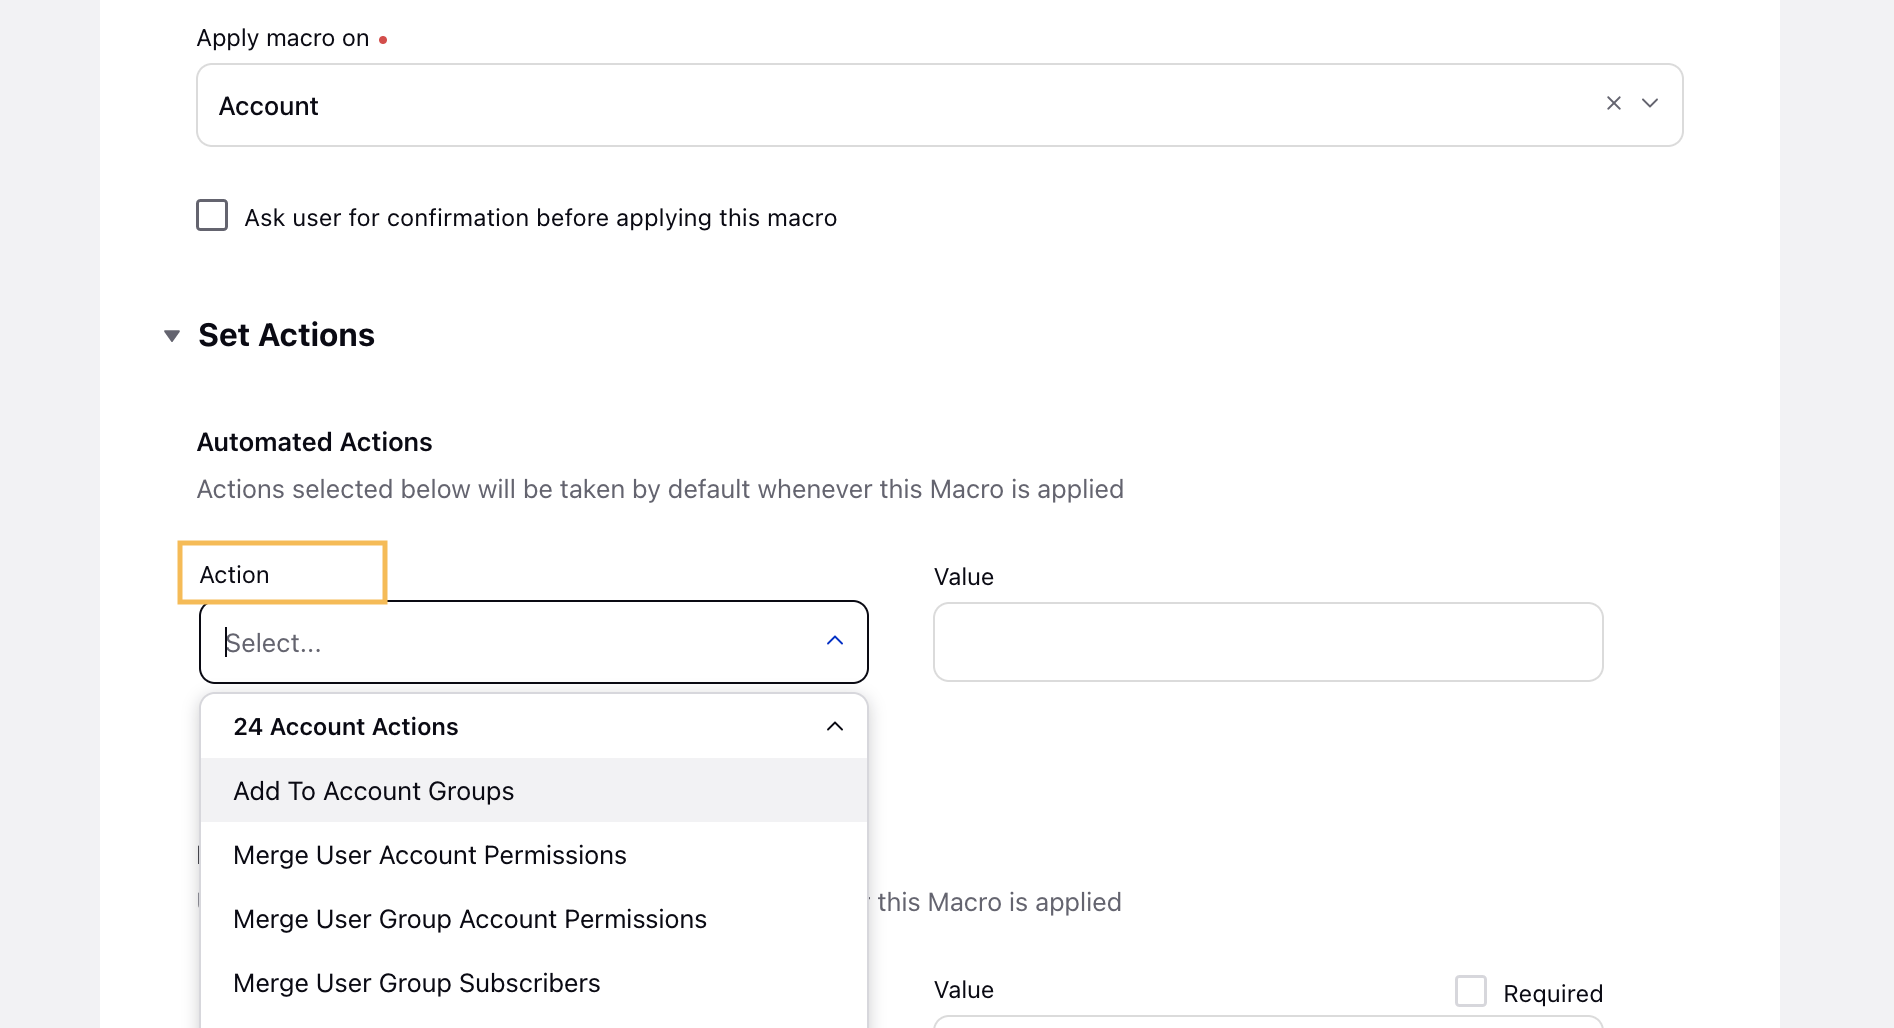
Under Set Actions, you will find account-specific actions available. For more information, see Available Account Actions.
Click Save in the bottom right corner of the Create Macro window.
Available Account Actions
Add To Account Groups | Merge Workspace Visibility | Remove User Subscribers | Set User Group Account Permissions |
Merge User Account Permissions | Remove From Account Groups | Remove Workspace Group Visibility | Set User Group Subscribers |
Merge User Group Account Permissions | Remove Timezone | Remove Workspace Visibility | Set Workspace Group Visibility |
Merge User Group Subscribers | Remove User Account Permissions | Set Default URL Shortener | Update Account Owner |
Merge User Subscribers | Remove User Group Account Permissions | Set Timezone | Merge User Group Subscriber |
Merge Workspace Group Visibility | Remove User Group Subscribers | Set User Account Permissions | Set Workspace Visibility |

Tip
Additionally, you can either Set or Merge or Remove the Account Global Properties & Account Workspace Properties.

To Apply Macros in Account (Settings) window
Click the New Tab icon
In the Account (Settings) window, check the box to the left side of the Account Name.
Next, click Apply Macro in the botttom center of the Account (Settings) window.
Next, select the created macro from the drop-down menu.