Add Audience Profiles for Email Marketing, SMS and WhatsApp
Updated
In this article, you will learn how to add Audience Profiles by importing an Excel Template for Email Marketing, SMS and WhatsApp.
Downloading the Excel Template:
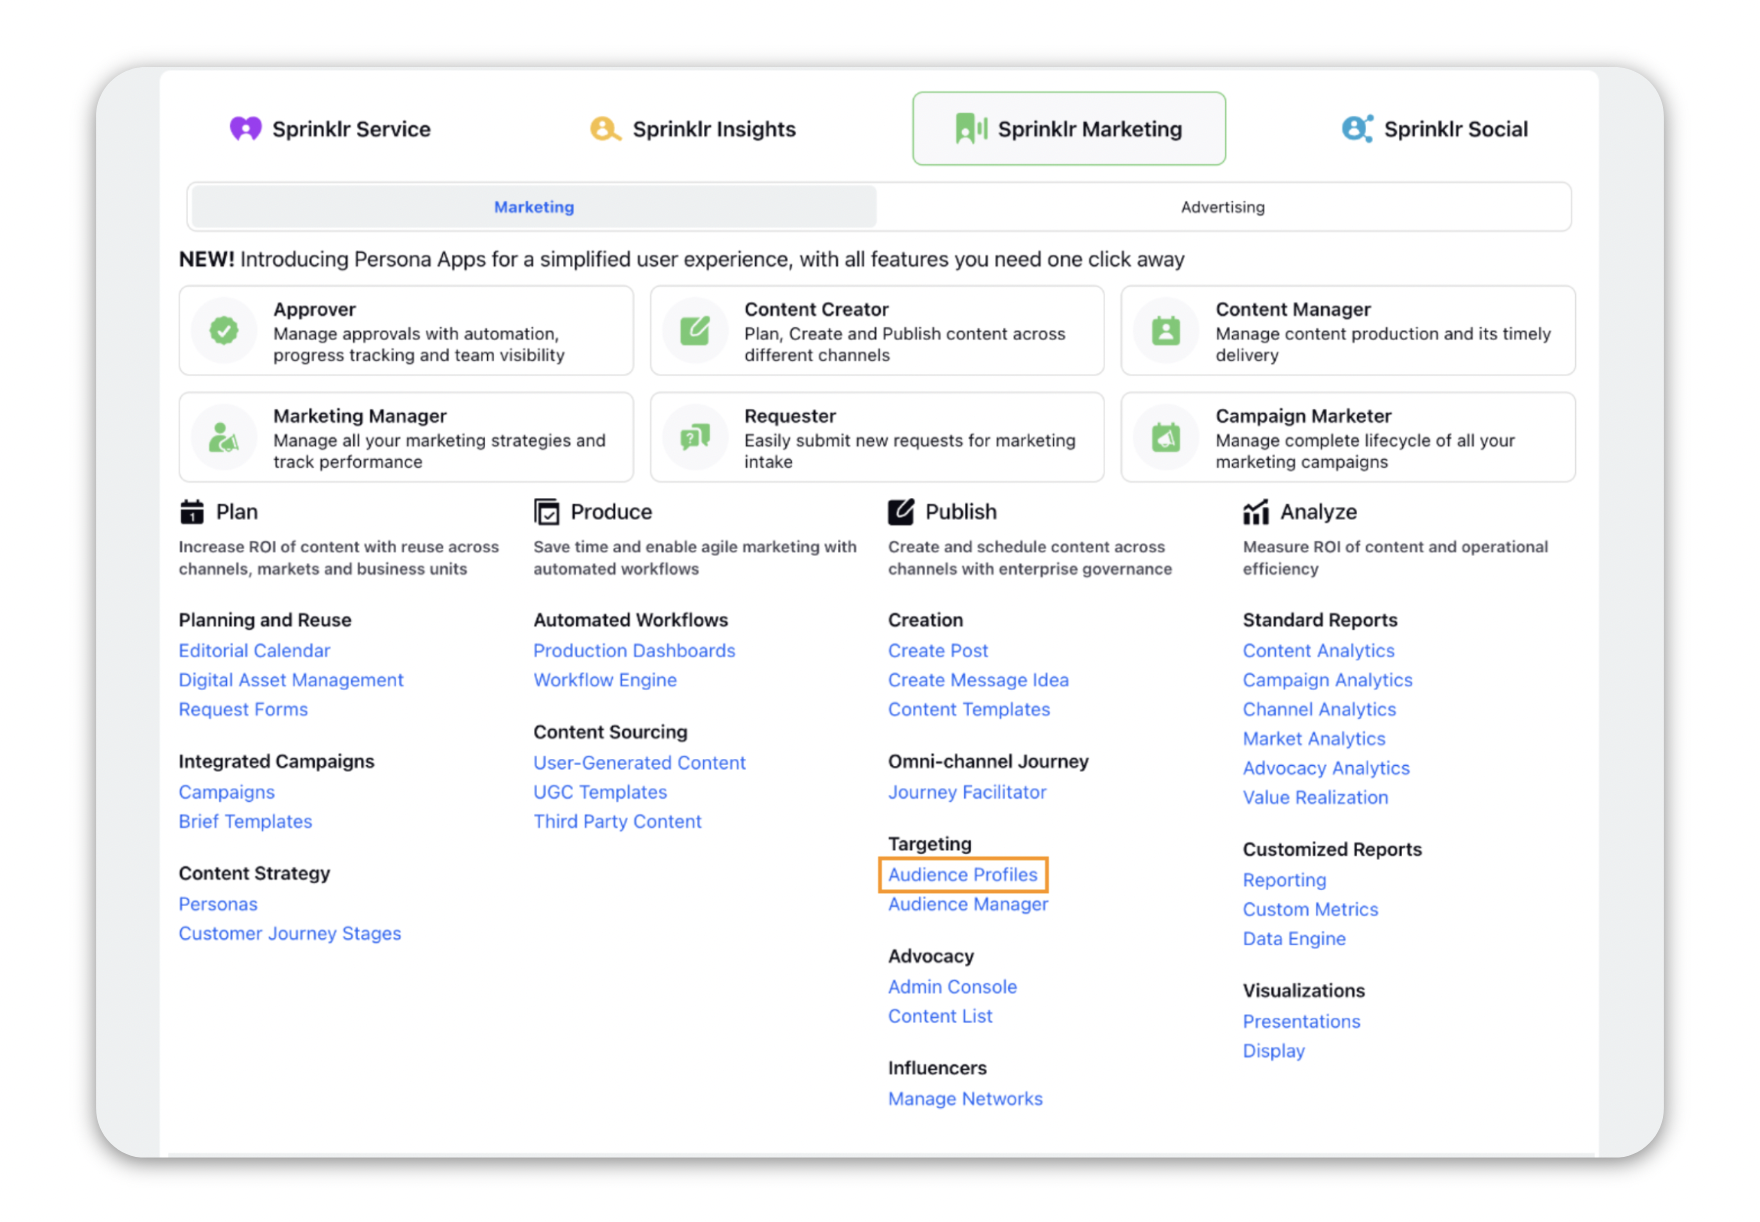
Click the New Tab icon. Under the Sprinklr Marketing tab select the Marketing section, then click Audience Profiles within Publish.
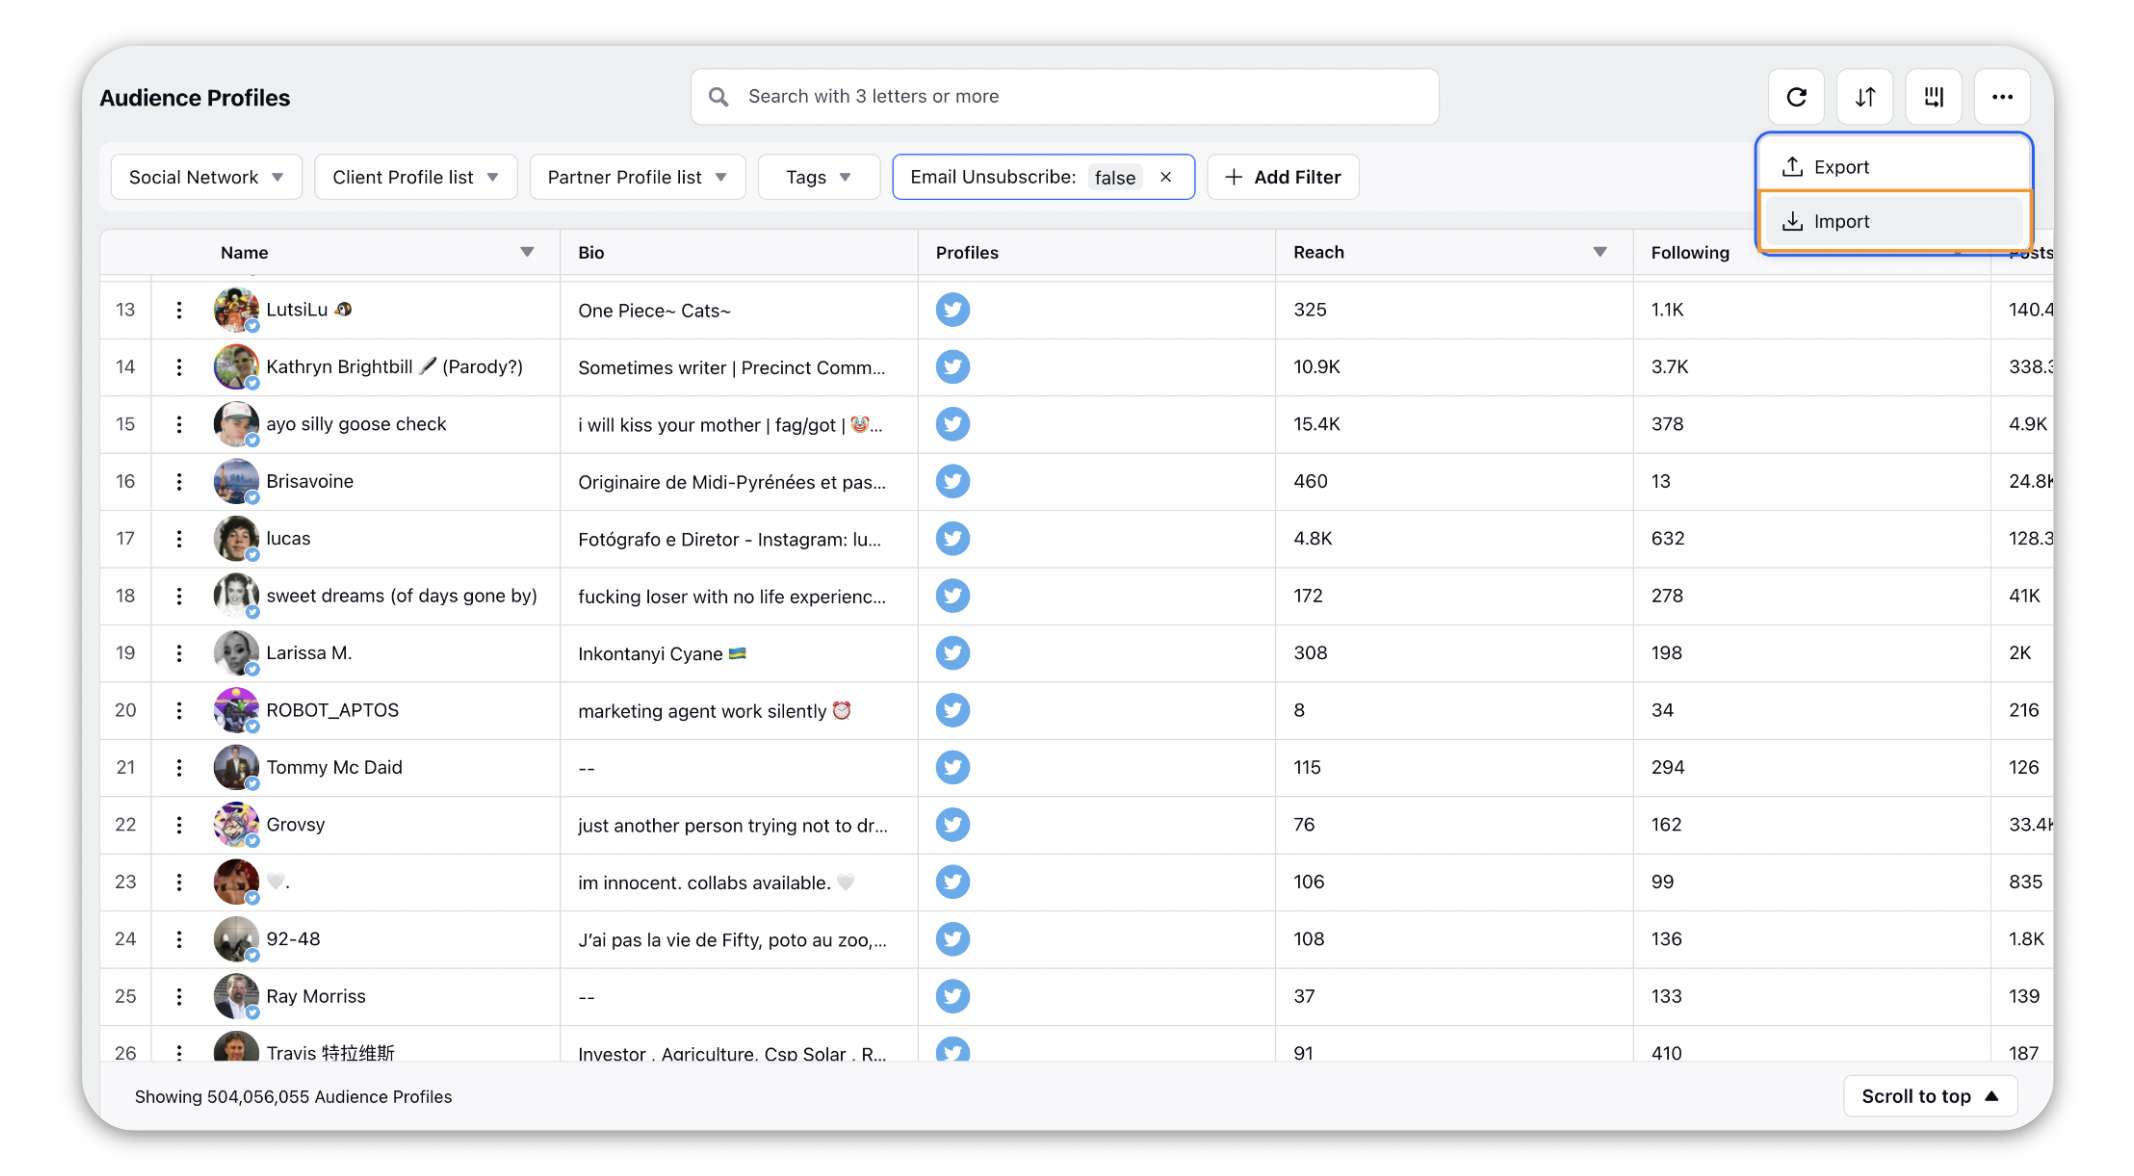
On the Audience Profiles window, click the Options icon on the top right corner and select Import.
Within the Import Audience Profiles window, click Download Excel Template.
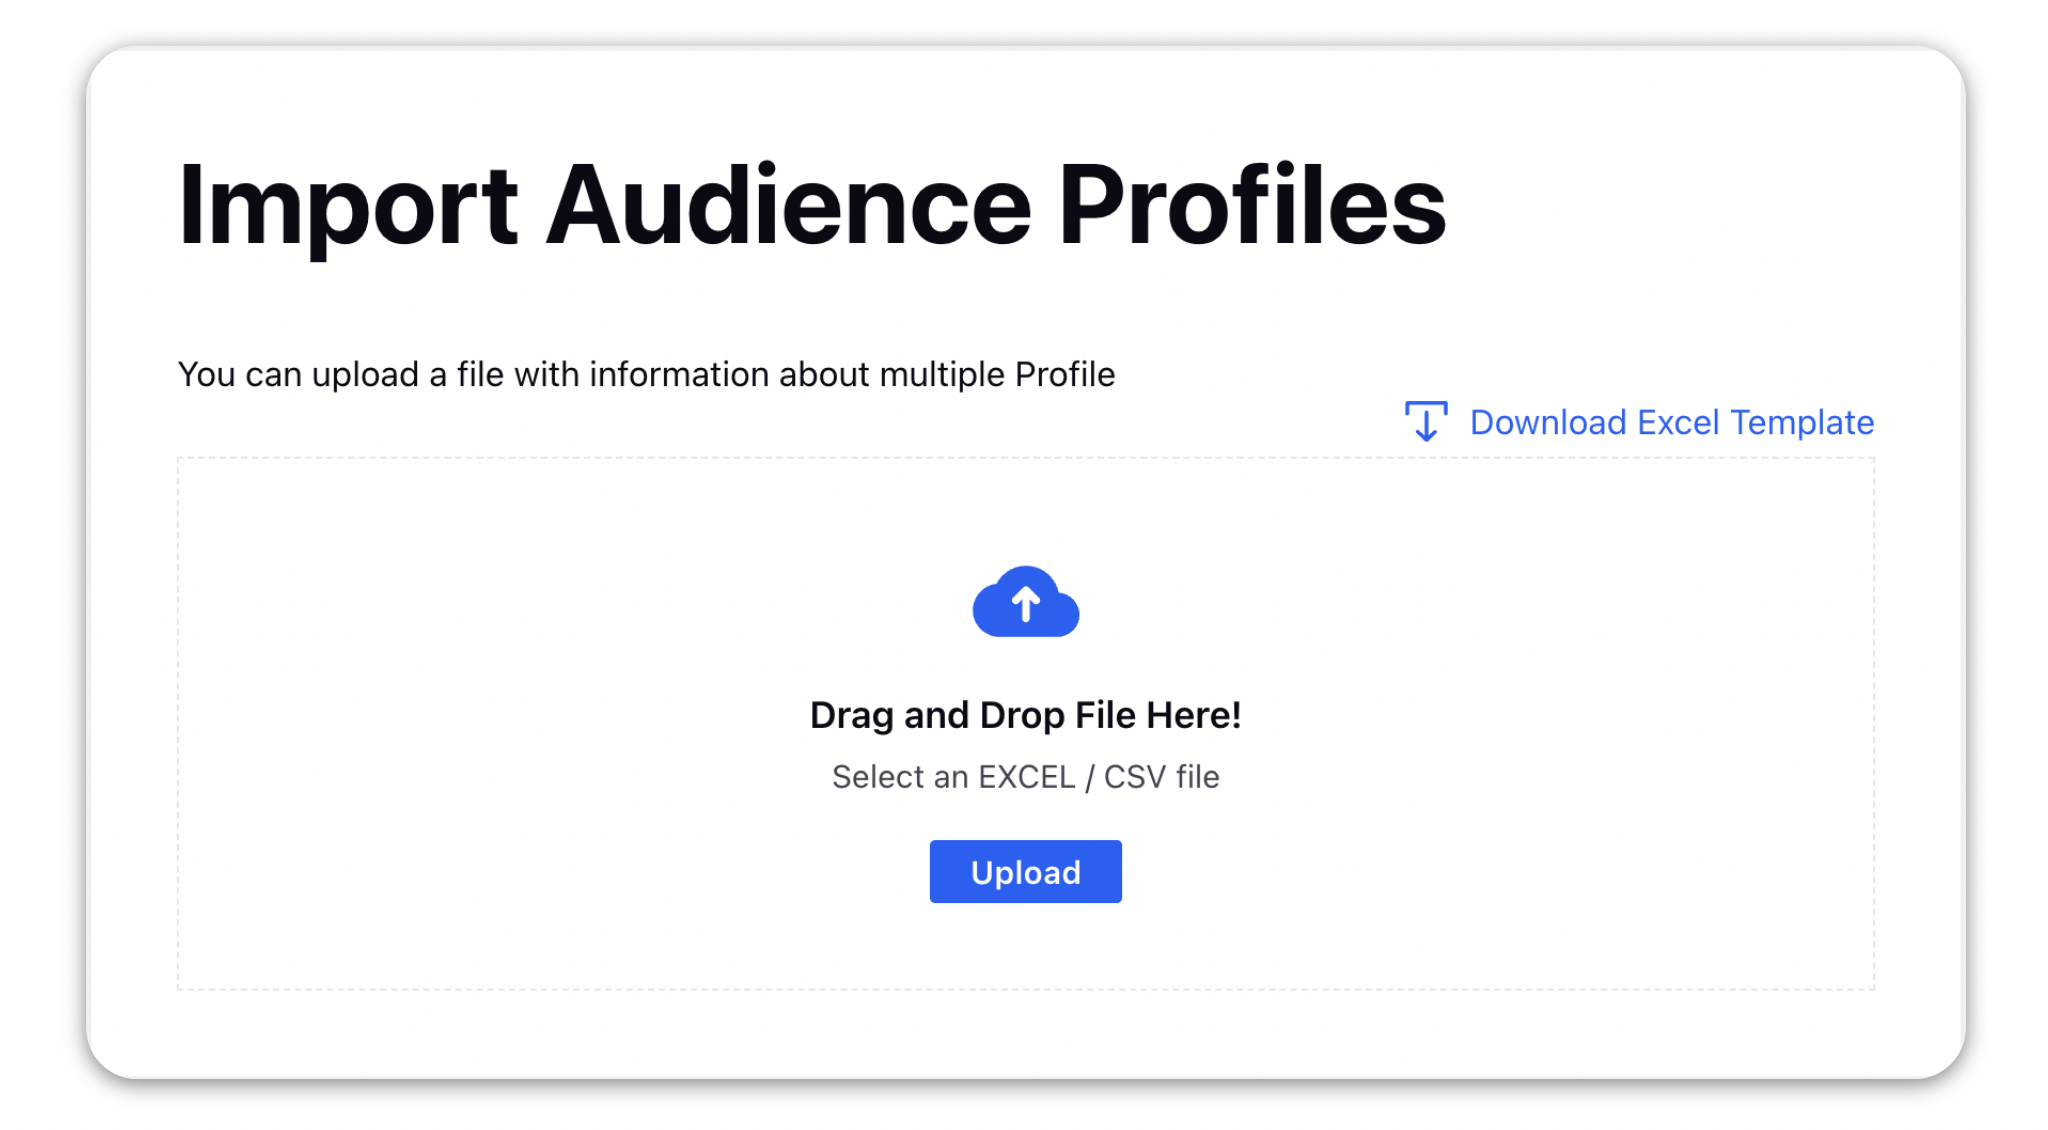
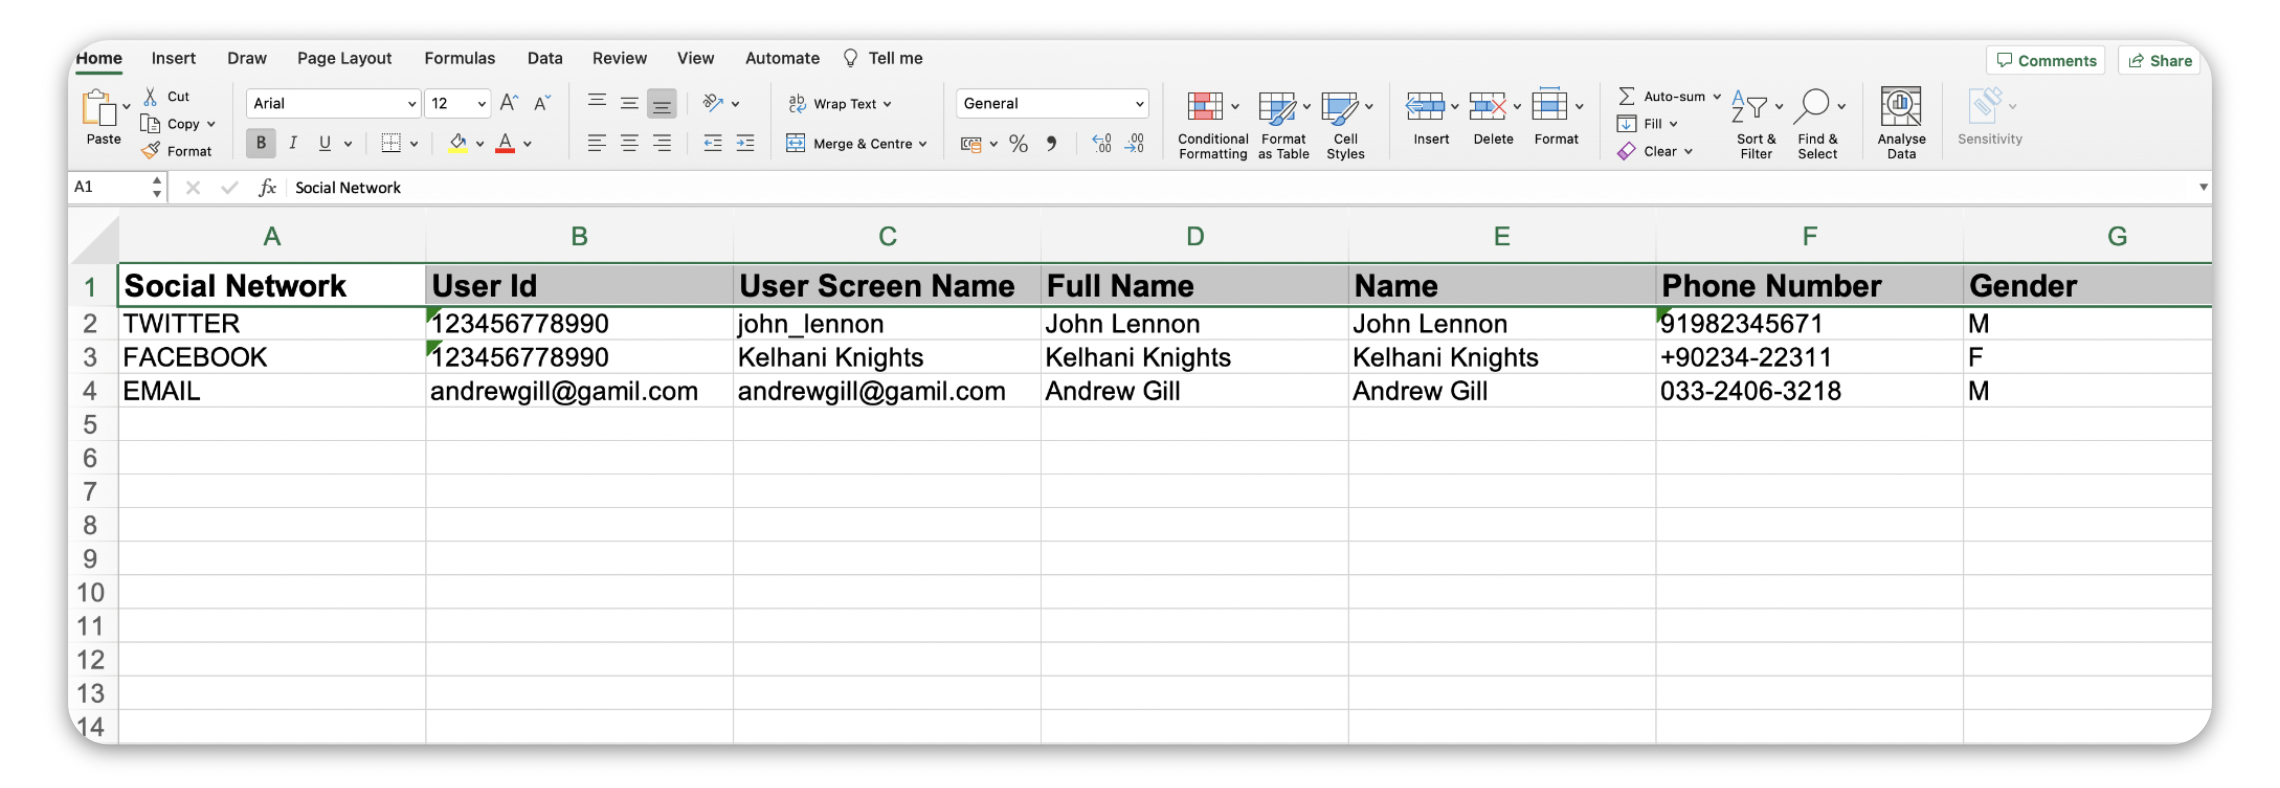
Fill the downloaded Excel template with all the necessary details.
Note: The first 4 fields (columns A, B, C, and D) are mandatory.
|
Filling Mandatory Columns
For Email Marketing profile addition the mandatory columns should be filled as follows -
Column Name | Value |
Social Network | |
User ID | Enter the email address of the recipient |
User Screen Name | Display name of the recipient, this will appear on the Profile third pane. |
Full Name | Full Name of the recipient |
For SMS profile addition the mandatory columns should be filled as follows -
Column Name | Value |
Social Network | SMS |
User ID | Phone no of the user with the country code |
User Screen Name | Display name of the recipient, this will appear on the Profile third pane. |
Full Name | Full Name of the recipient |
For WhatsApp profile addition the mandatory columns should be filled as follows -
Column Name | Value |
Social Network | WHATSAPP_BUSINESS |
User ID | Phone no of the user with the country code |
User Screen Name | Display name of the recipient, this will appear on the Profile third pane. |
Full Name | Full Name of the recipient |
Note: You can use the profile lists directly to target your audience or create Audience Segments for more granular targeting. |
Create an Audience Segment from the imported leads
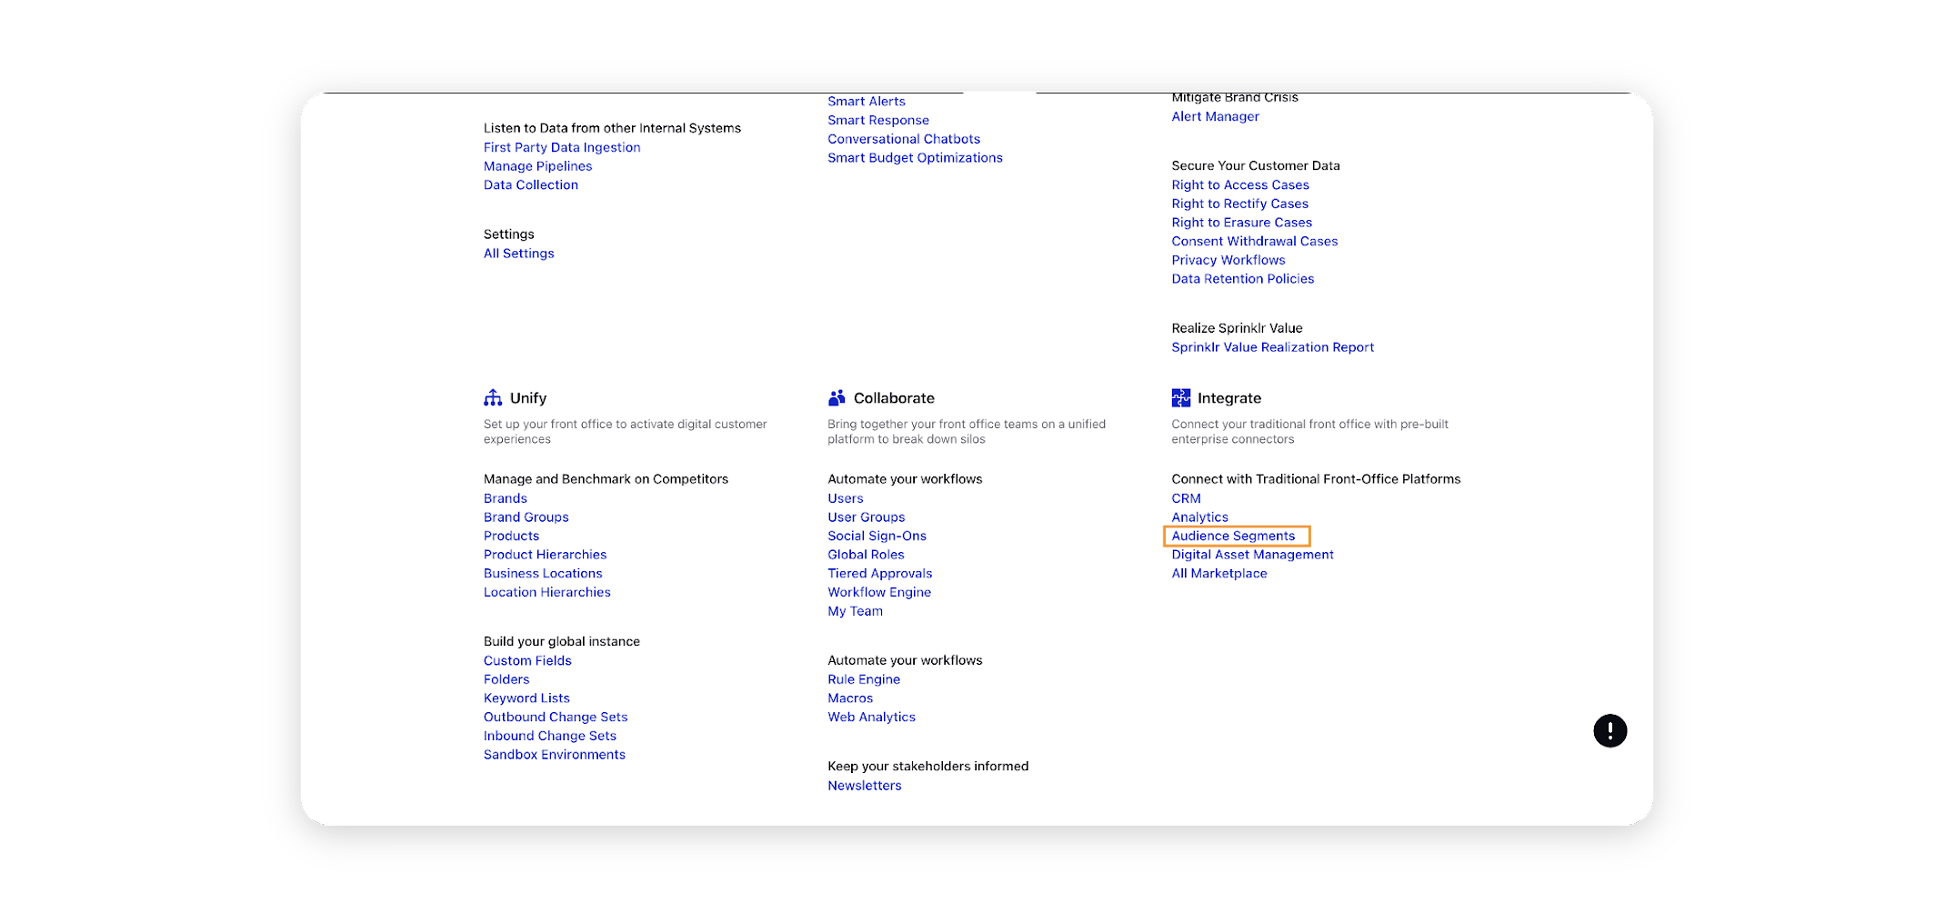
Click the New Tab icon. Under Platform Modules, click Audience Segments within Integrate.
On the Segment Manager window, you can either create a new segment or edit the existing segment.
To create a new segment from the profile list created earlier, click on the Create Segment button on the top right corner of the screen.
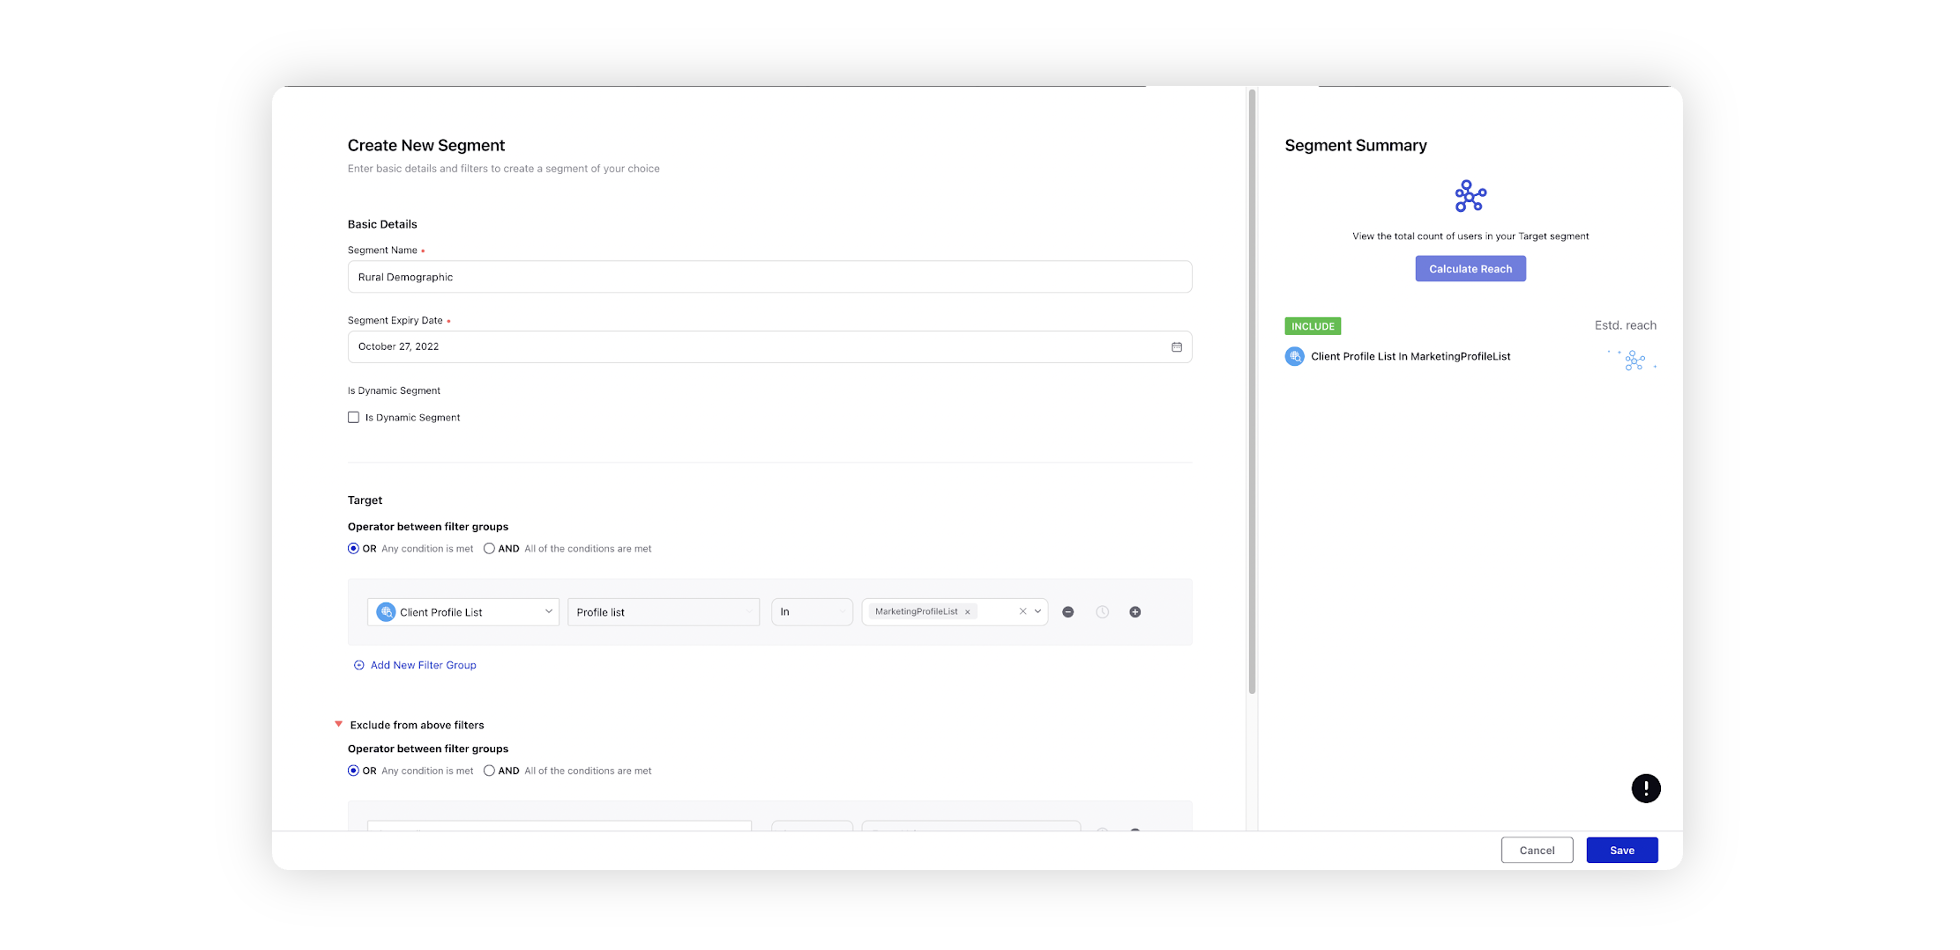
On the Create New Segment window, first enter the name and expiry date of the segment.
In the Select Attribute dropdown for the targeting filter group, select Client/Partner Profile List based on the type of profile list imported earlier, or you can segment based on a Profile Custom Field.
You can add multiple groups with different filters, profile lists and segments. You can also add groups to be excluded.
Click Save once done to create your audience segment.