Add Facebook Page In Sprinklr
Updated
Pages are places on Facebook where artists, public figures, businesses, brands, organizations, and non-profits can connect with their fans or customers. When someone likes or follows a Page on Facebook, they can start seeing updates from that Page in their News Feed.
Know more about Facebook Pages here.
In this article, you will learn about how to add a Facebook Page in Sprinklr.
![]() Note:
Note:
Any Facebook page will be treated as a company page within Sprinklr.
A social account can only be added to a single Workspace. To add the same account in different workspaces, admins are required to share that social account with other workspaces. For more information, see Sharing an Account.
The Facebook page addition will be based on the OAuth method.
Steps to Add Facebook Page In Sprinklr
Under the Sprinklr Social tab, click Owned Social Accounts within Listen.

In the Accounts window, click Add Account in the top right corner.
In the Add Account window, search and select Facebook Page from the list of channels.

Click Go to Facebook in the popup window to authorize Sprinklr on Facebook.

In the Select the accounts you want to add pop-up window, select the Page(s) you wish to add, and click Add in the bottom right corner.
 Note: If you have gotten access for a page very recently on your profile after the Last Synced time, or you are finding any page missing in the list, click Resync to fetch the latest list of Pages associated to your Facebook account.

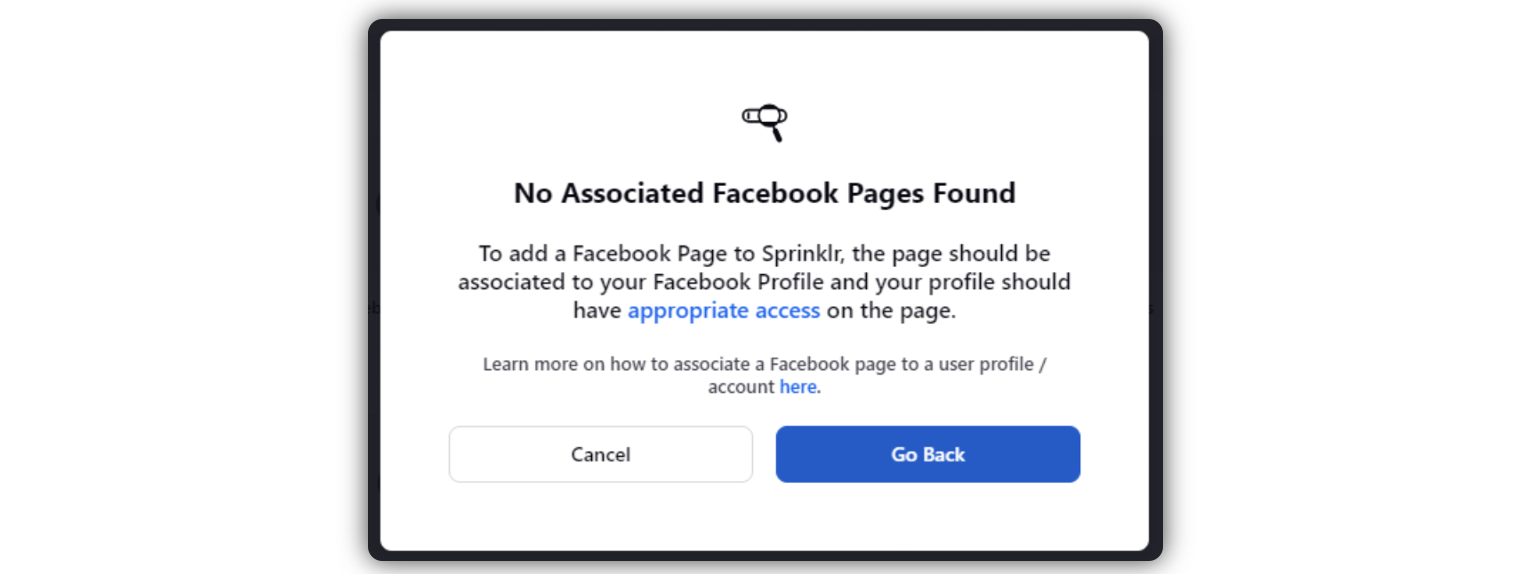
If you do not find the page you are looking for, you will see an error message in a popup window, asking you to check if the page exists on your native account.
Set up your Account Details and permission in the Update Account window.
Edit basic details of your account in Account Details, including changing the name of the account as it appears in Sprinklr, changing the Sprinklr User who is the owner of the account, creating a custom character count (which will apply to replies sent in Sprinklr), a default URL shortener, and an auto-populated signature to appear in replies sent from Sprinklr.
Under Permissions, permission channel actions to Users and User Groups who should have access to the account. Learn more in Account Permissions.
Under Share this Account Across Spaces, choose the Workspaces that you would like the account to be visible in or share across all Workspaces to make the account visible globally within your Customer environment.
Under Subscribers, select Users or User Groups to subscribe them to account notifications.
Under Timezone, select a country and time zone to associate to the account if desired.
Under Properties, set any account properties as needed.
Click Save in the bottom right corner.