Add Facebook Pages In Sprinklr(Limited Availability)
Updated
This functionality is built for Admins who have a large number of pages associated with their profile and are facing issues with the standard account addition process.
Pages are places on Facebook where artists, public figures, businesses, brands, organizations, and nonprofits can connect with their fans or customers. When someone likes or follows a Page on Facebook, they can start seeing updates from that Page in their News Feed. In this article, you will learn about how to add a Facebook Page in Sprinklr.
Steps to Add Facebook Pages In Sprinklr
Under the Sprinklr Social tab, click Owned Social Accounts within Listen.
In the Accounts window, click Add Account in the top right corner and select Facebook.
In the Facebook log-in window, enter the Email and Password for the account that you want to add.
On the authentication window, follow the prompts to give Sprinklr permission to access your account.
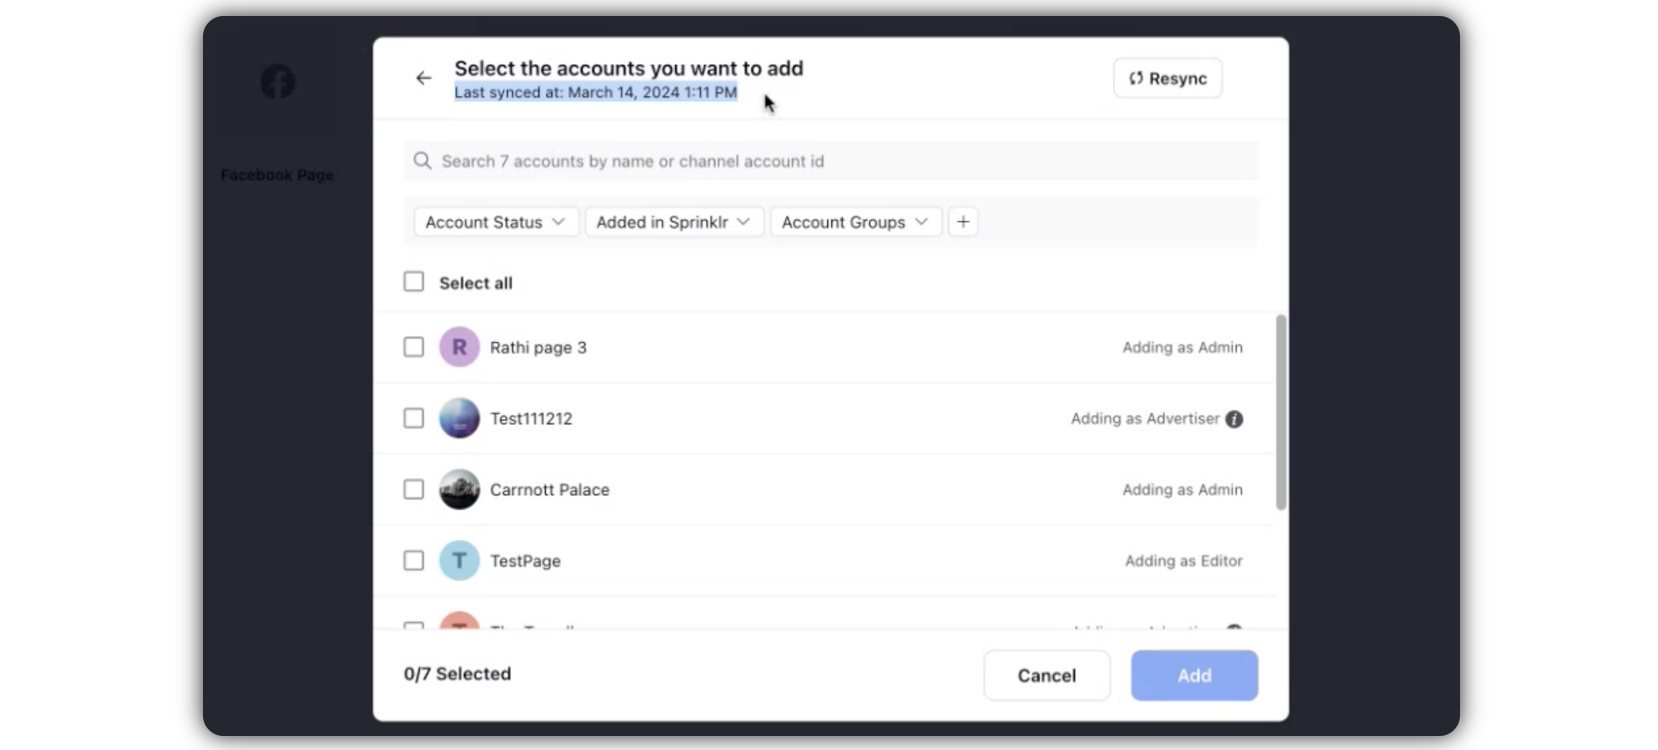
In the Select the accounts you want to add pop-up window, select the Page(s) you wish to add, and click Add in the bottom right corner.
Note: We have set up backend syncronization for such accounts, so that these FB Page accounts are fetched in parts and stored in Sprinklr. Whenever you try to add FB Page accounts with your profile, these pages will be readily available for you.
If you have gotten access for a page very recently on your profile after the Last Synced time, or you are finding any page missing in the list, click Resync button to fetch the latest list of Pages associated to your Facebook Profile.

Now, you can set up your Account Details and permission.
Edit basic details of your account in Account Details, including changing the name of the account as it appears in Sprinklr, changing the Sprinklr User who is the owner of the account, creating a custom character count (which will apply to replies sent in Sprinklr), a default URL shortener, and an auto-populated signature to appear in replies sent from Sprinklr.
Under Permissions, permission channel actions to Users and User Groups who should have access to the account.
Under Share this Account Across Spaces, choose the Workspaces that you would like the account to be visible in or share across all Workspaces to make the account visible globally within your Customer environment.
You can set Subscribers, Timezone and other properties of the account as desired.
Click Save in the bottom right corner.