Add Anthropic as a Provider in AI+ Studio
Updated
This guide provides step-by-step instructions on integrating Anthropic as a provider in AI+ Studio using the Bring Your Own Key (BYOK) integration method.
Prerequisites
Before you begin, ensure the following requirements are met:
Permissions: You must have Edit, View, and Delete permissions for AI+ Studio.
Note: Access to this feature is controlled by a dynamic property. Kindly reach out to your Success Manager to enable this feature in your environment. Alternatively, you can submit a request at tickets@sprinklr.com.
Adding Anthropic Provider Using Own Key
Follow these steps to add Anthropic as a provider in AI+ Studio.
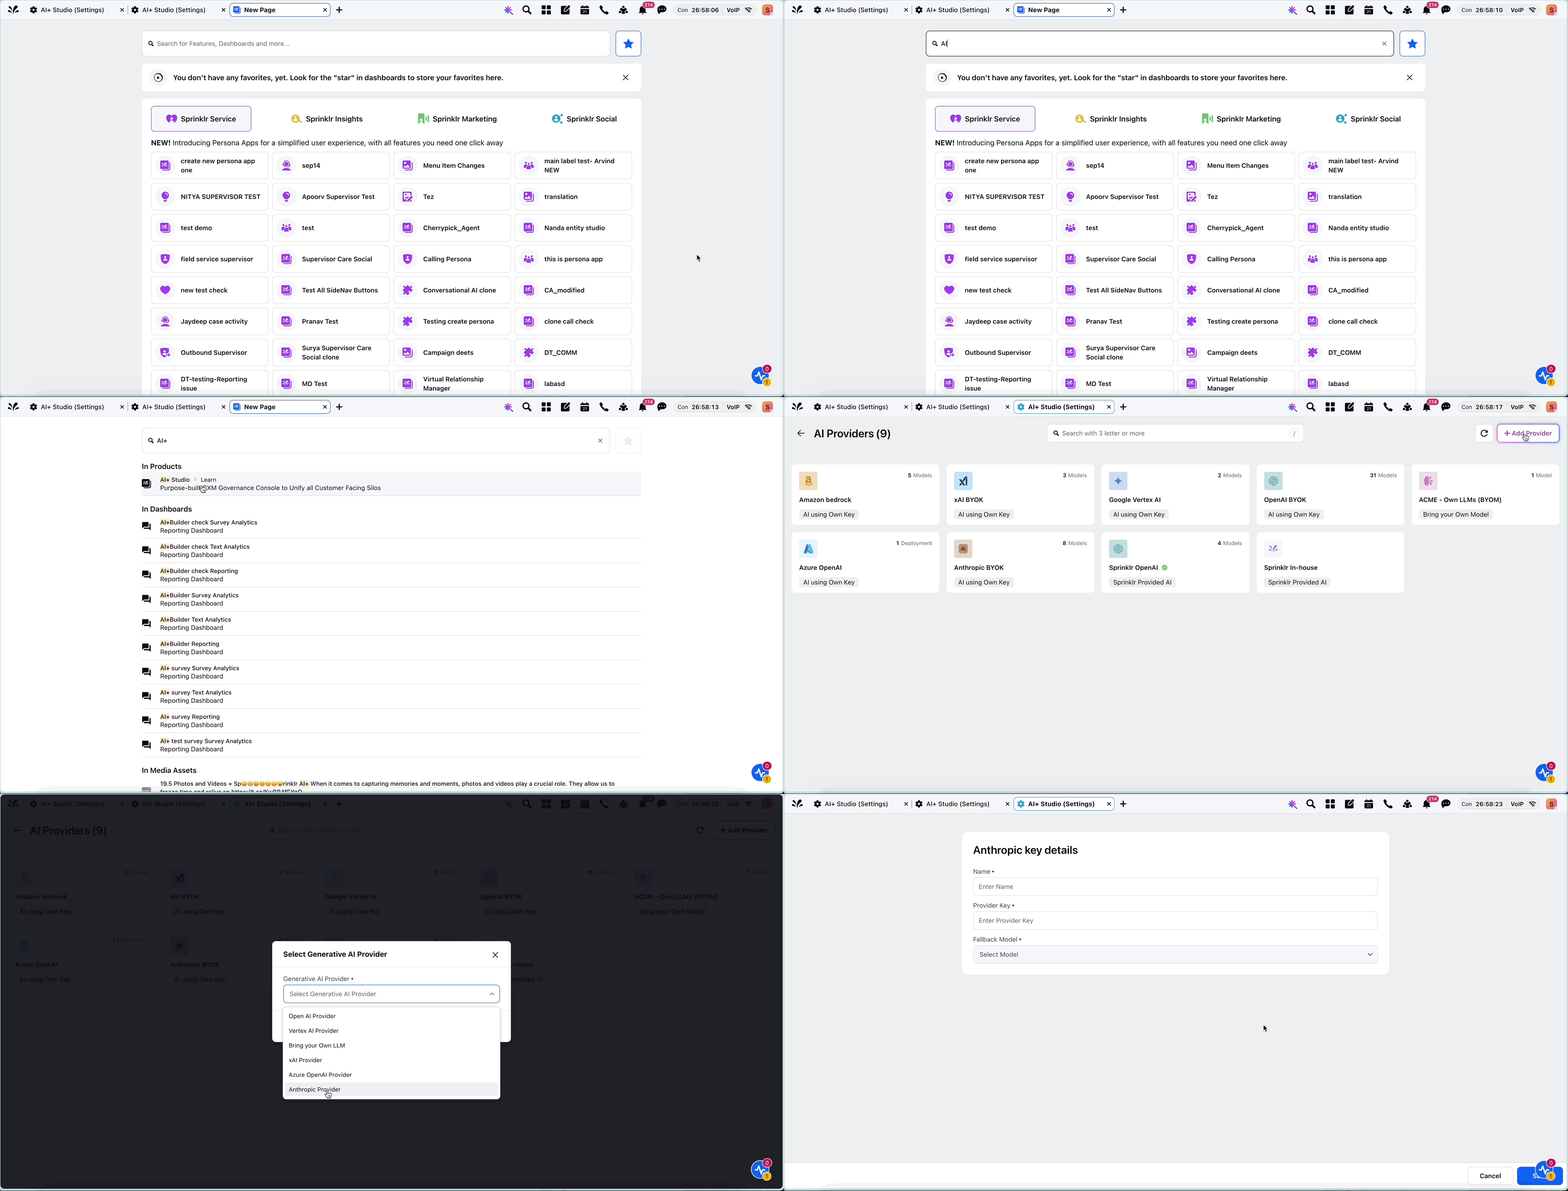
1. Navigate to AI+ Studio
Access AI+ Studio from the Sprinklr launchpad.
Click on the “Provider and Model Settings” card.
2. Add a New Provider
On the AI Provider screen, click the “Add Provider” button located at the top right corner.
3. Select Anthropic Provider
From the “Select Generative AI Provider” dropdown, choose Anthropic Provider and click “Next”.
4. Enter Anthropic Key Details
In the Anthropic key details window, fill in the required information as described below:
Input Field | Description |
Name | Assign an appropriate name to the provider as preferred. |
Provider Key | Enter your Anthropic key. |
Fallback Model | Select the fallback model from the dropdown. A fallback model is a backup model used for global deployments in case this is the first provider being added for the partner. This ensures continuity and consistent functionality of your AI features. |
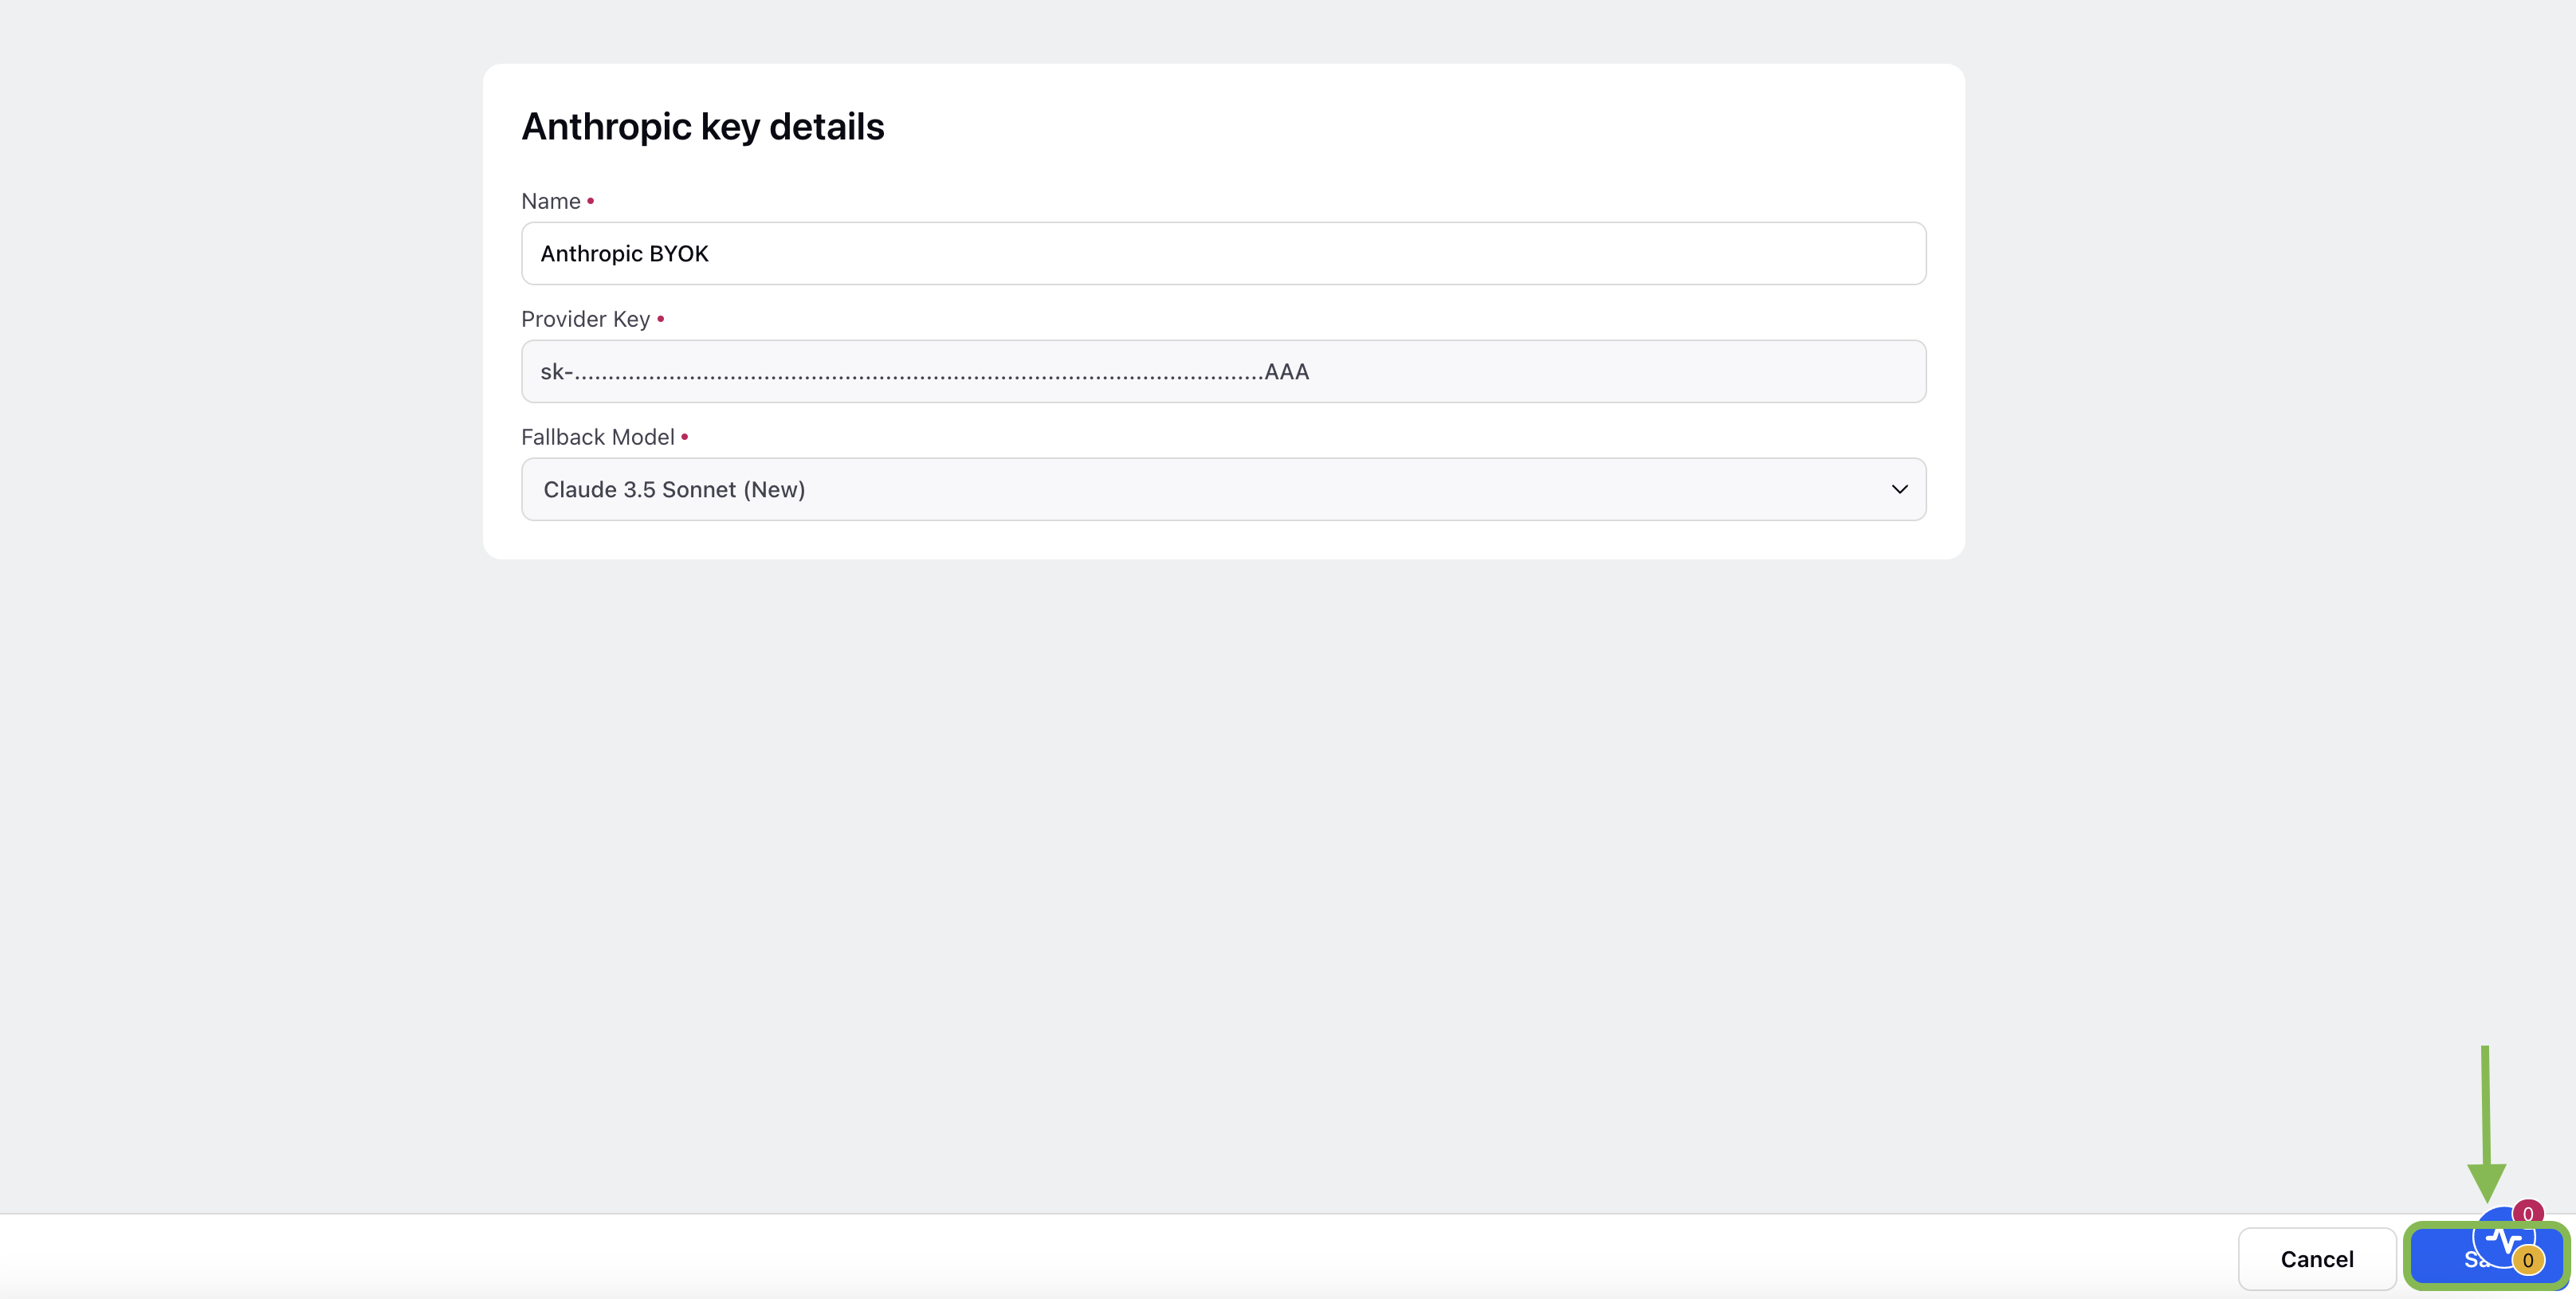
The following fallback models are supported for Anthropic:
Claude 2.0
Claude 2.1
Claude 3 Sonnet
Claude 3 Haiku
Claude 3 Opus
Claude 3.5 Haiku
Claude 3.5 Sonnet
Claude 3.5 Sonnet (New)
5. Save the Provider
Click 'Save' to add the Anthropic provider using your own key.
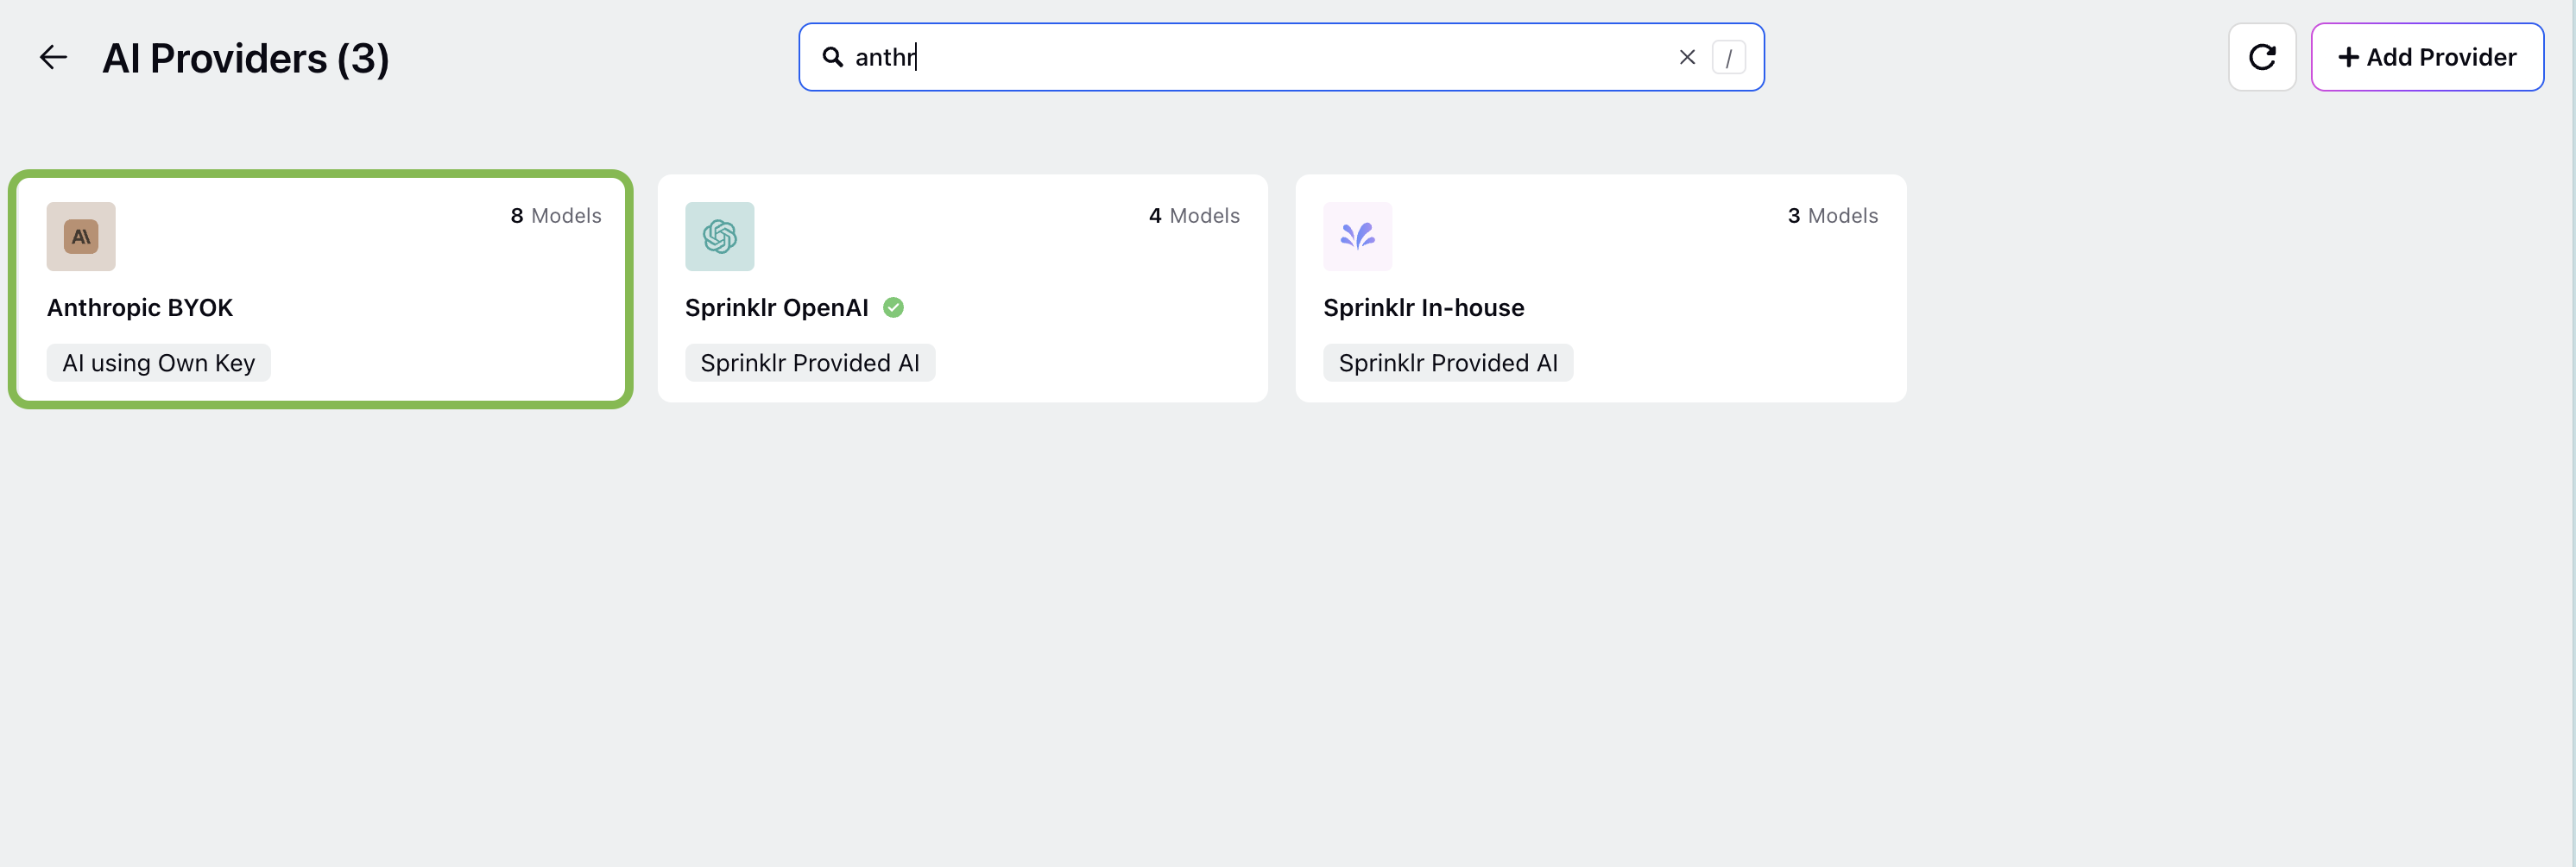
You will see the Anthropic Provider added in the Providers Record Manager with a tag “AI using Own Key”.
Create a Deployment Using Anthropic Provider
This section explains how to create a deployment in AI+ Studio using Anthropic as a Provider.
Follow the steps below to create a deployment using Anthropic Provider.
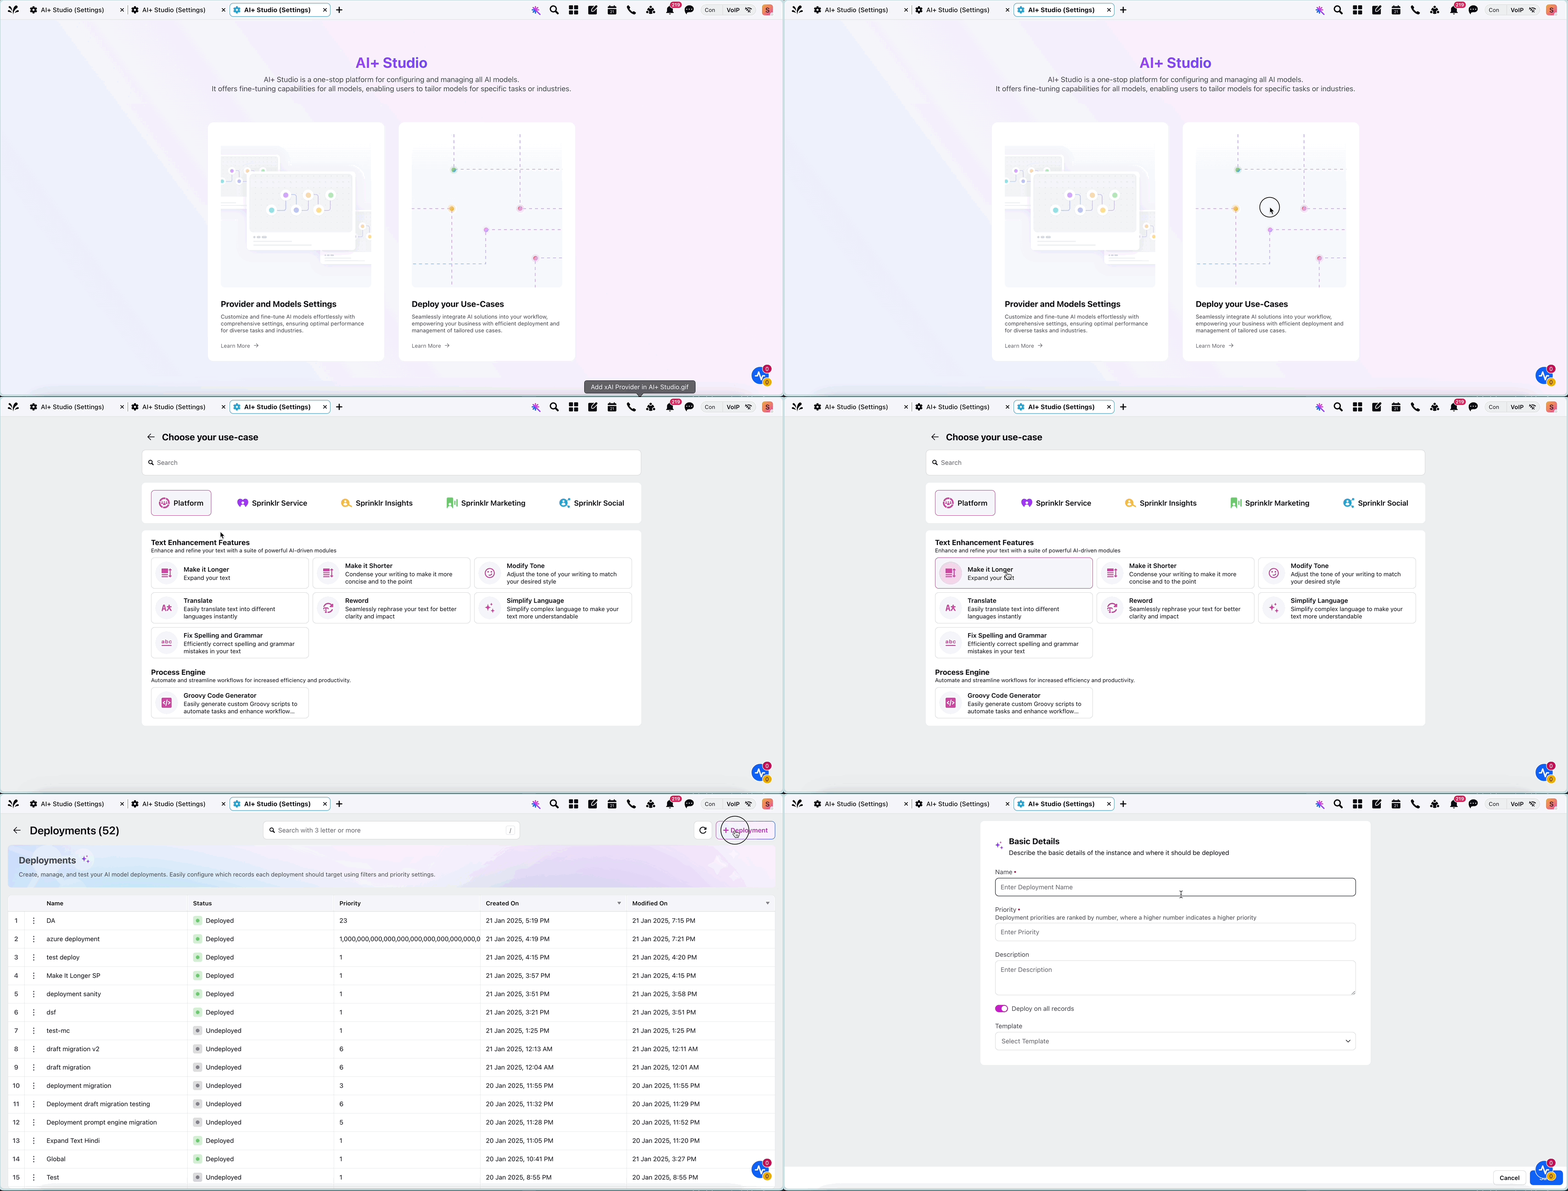
1. Navigate to AI+ Studio
Open AI+ Studio from the Sprinklr Launchpad.
Click the Deploy Your Use-Case card.
Select the use case for which you want to create a deployment.
The system will redirect you to the Deployment Record Manager.
2. Add a Deployment
Click '+ Add Deployment' in the top-right corner of the page.
In the Basic Details window, enter the required details for your deployment.
The following table describes the input fields of Basic Details screen:
Input Field | Description |
Name (Required) | Enter a clear, meaningful name to make the deployment easily identifiable. |
Priority (Required) | Specify the deployment’s priority level. If multiple deployments apply to the same record, the system prioritizes the one with the highest priority. |
Description (Optional) | Provide a detailed description outlining the purpose and intended audience for the deployment. |
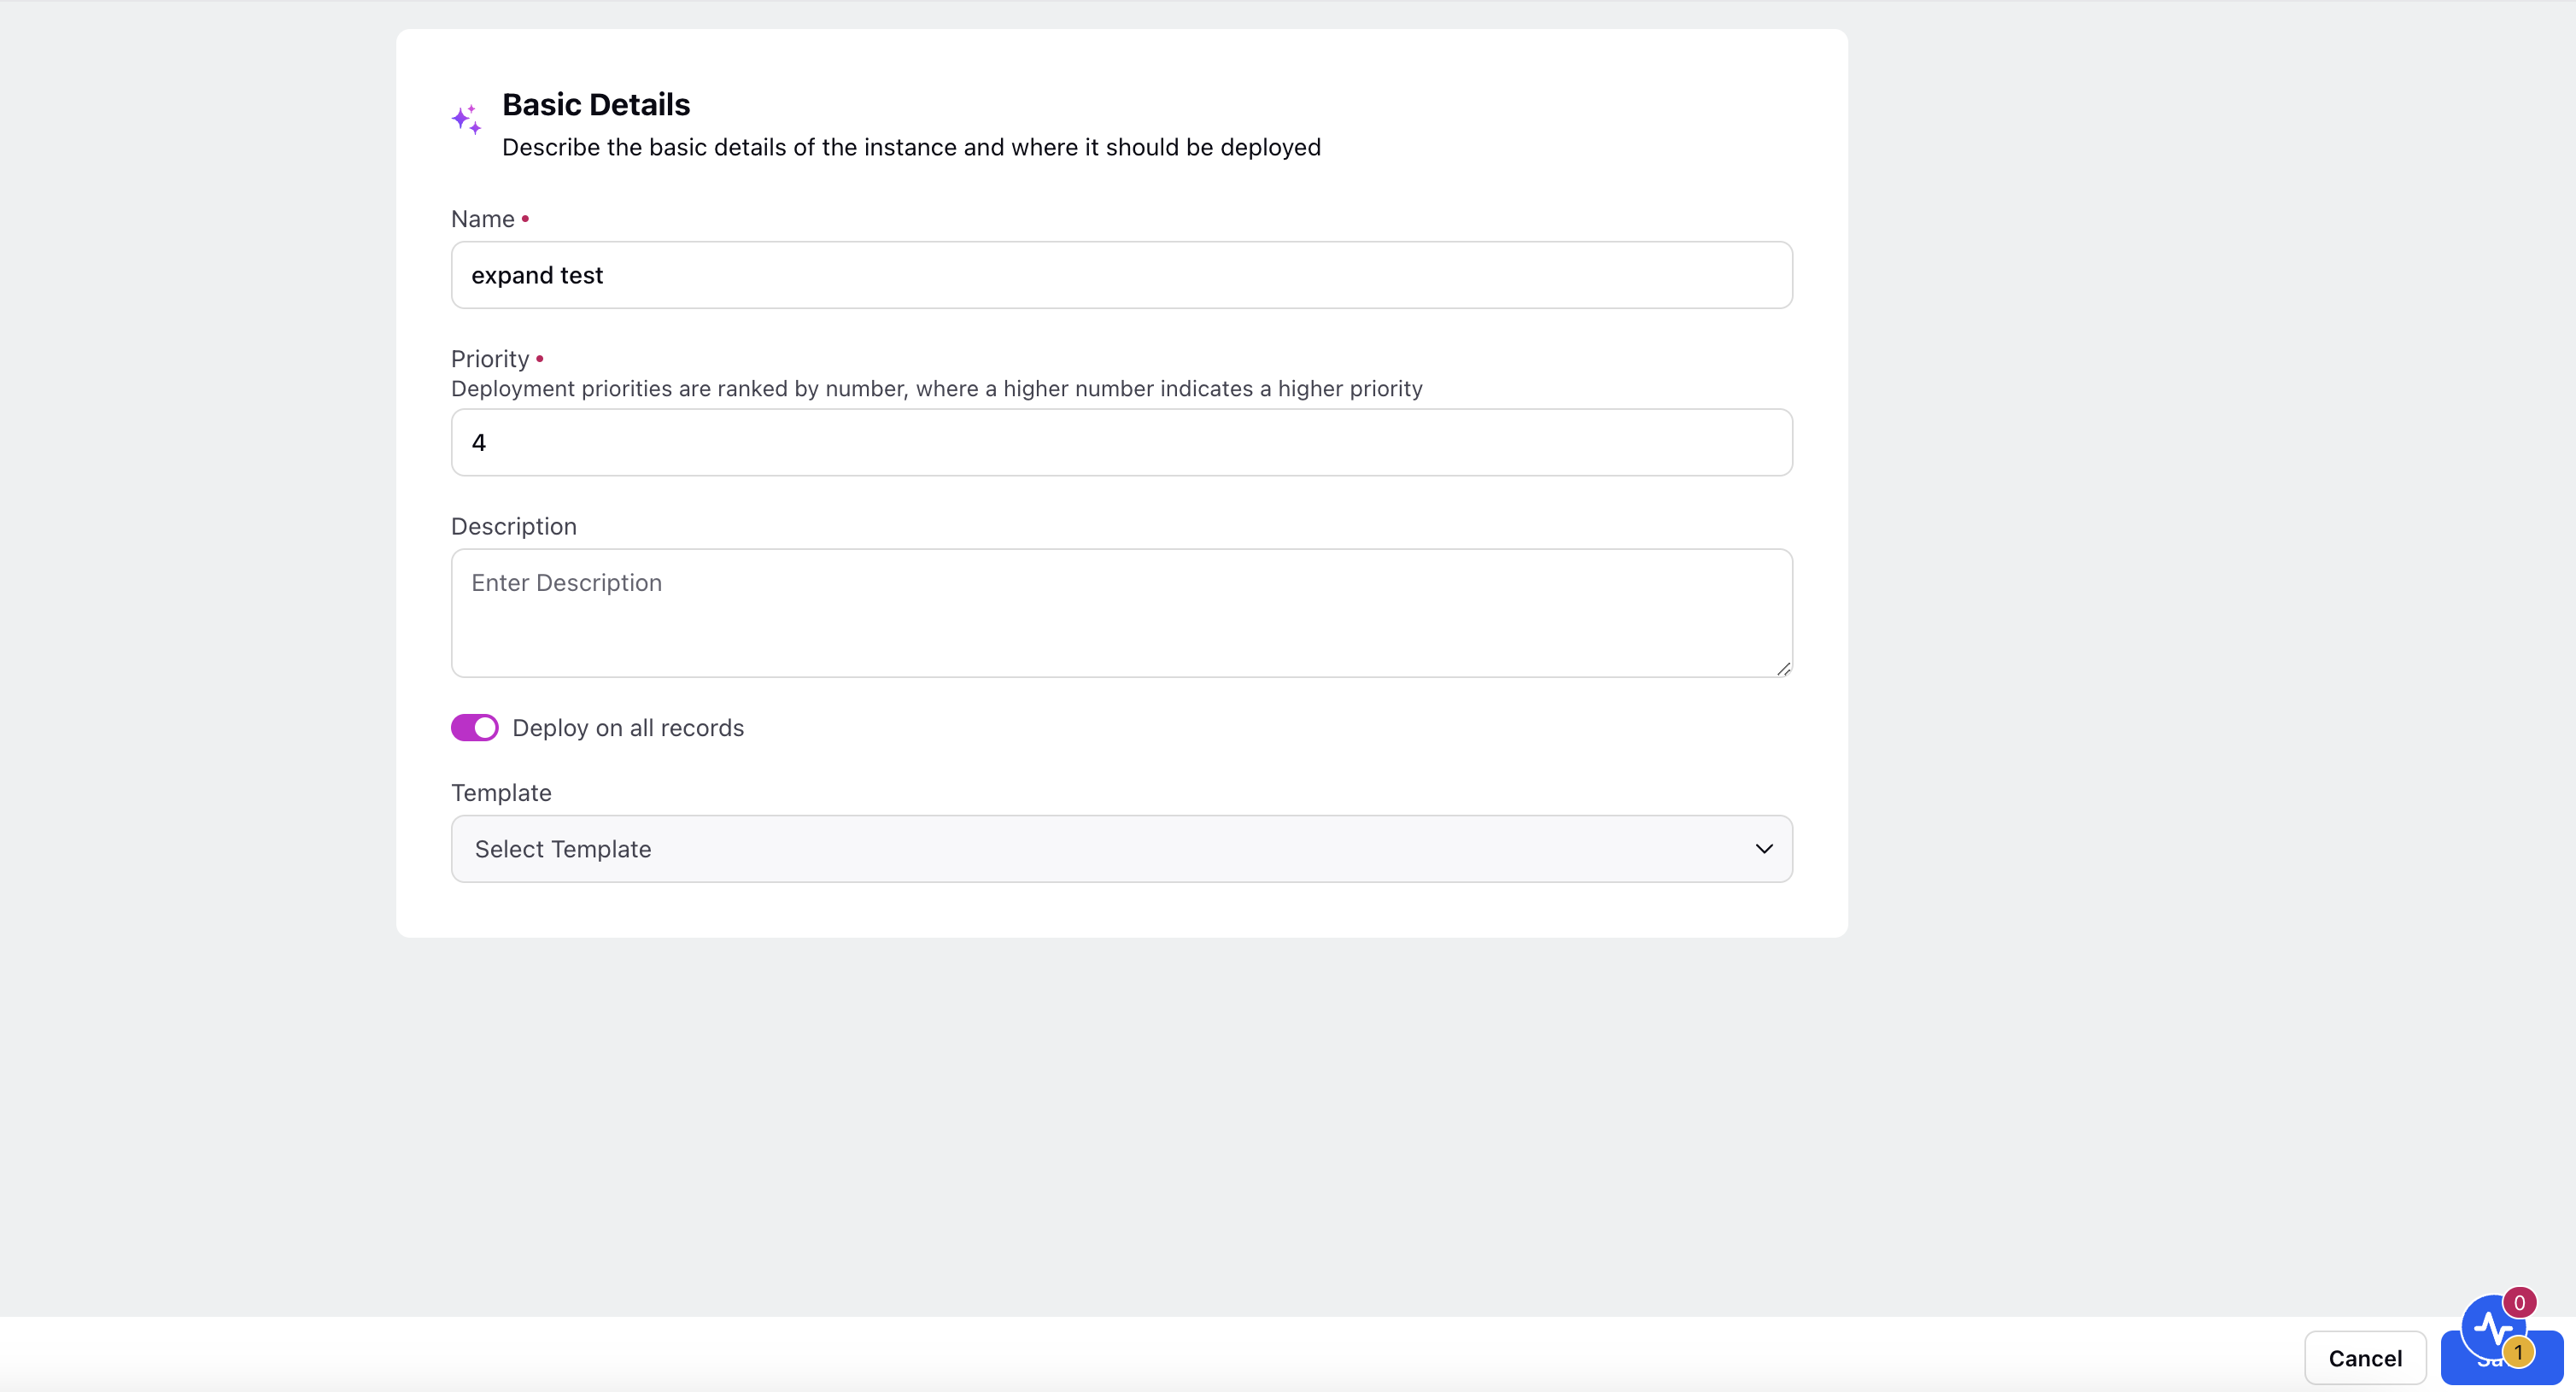
Click Save to save the basic information.
3. Configure the AI Workflow
After saving the basic details, you will be directed to the Process Engine screen, where you can configure your AI workflow.
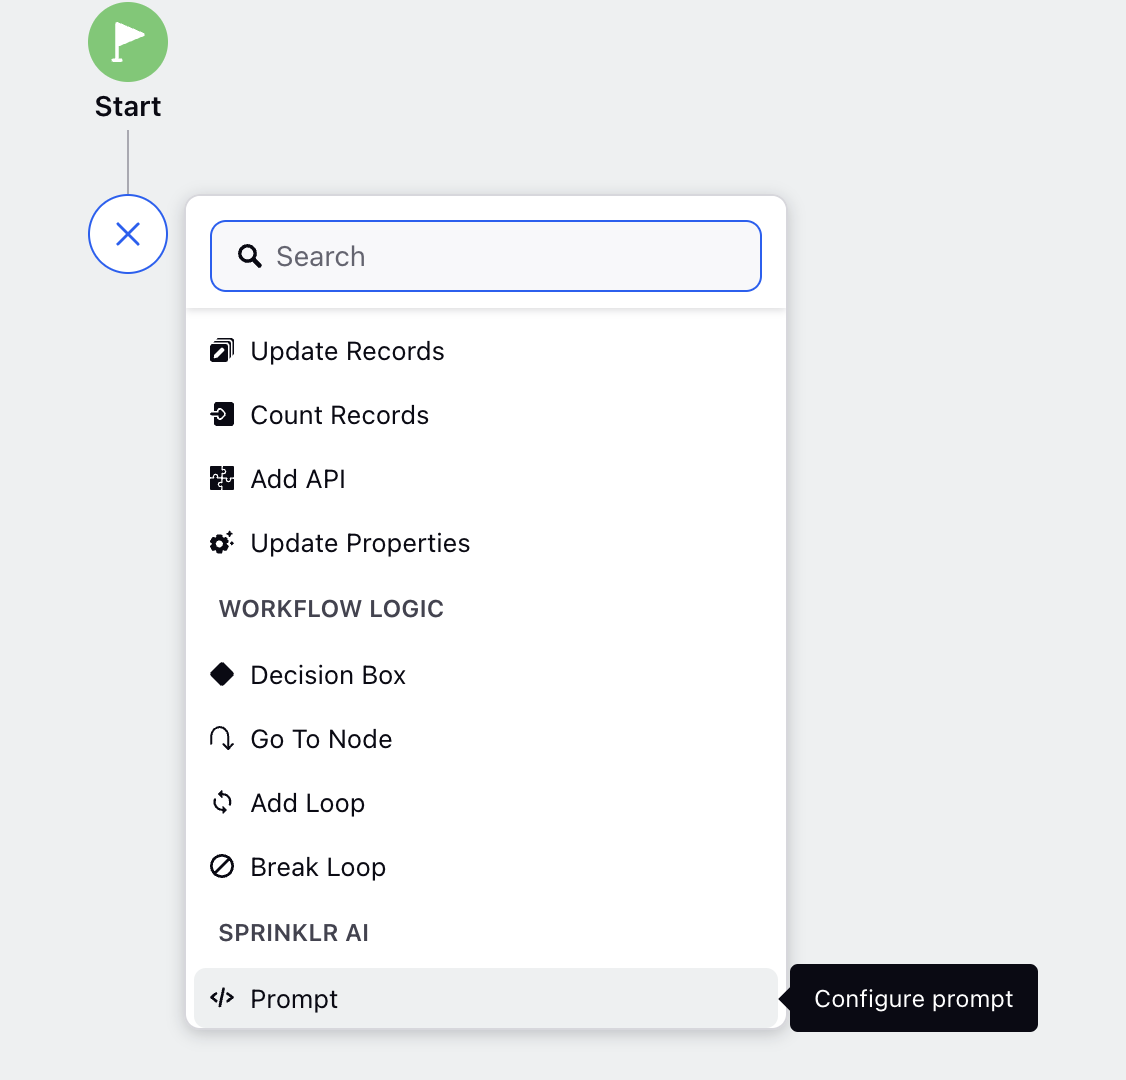
Add a Prompt Node
a. From the Node dropdown menu, select Prompt to configure an AI prompt.
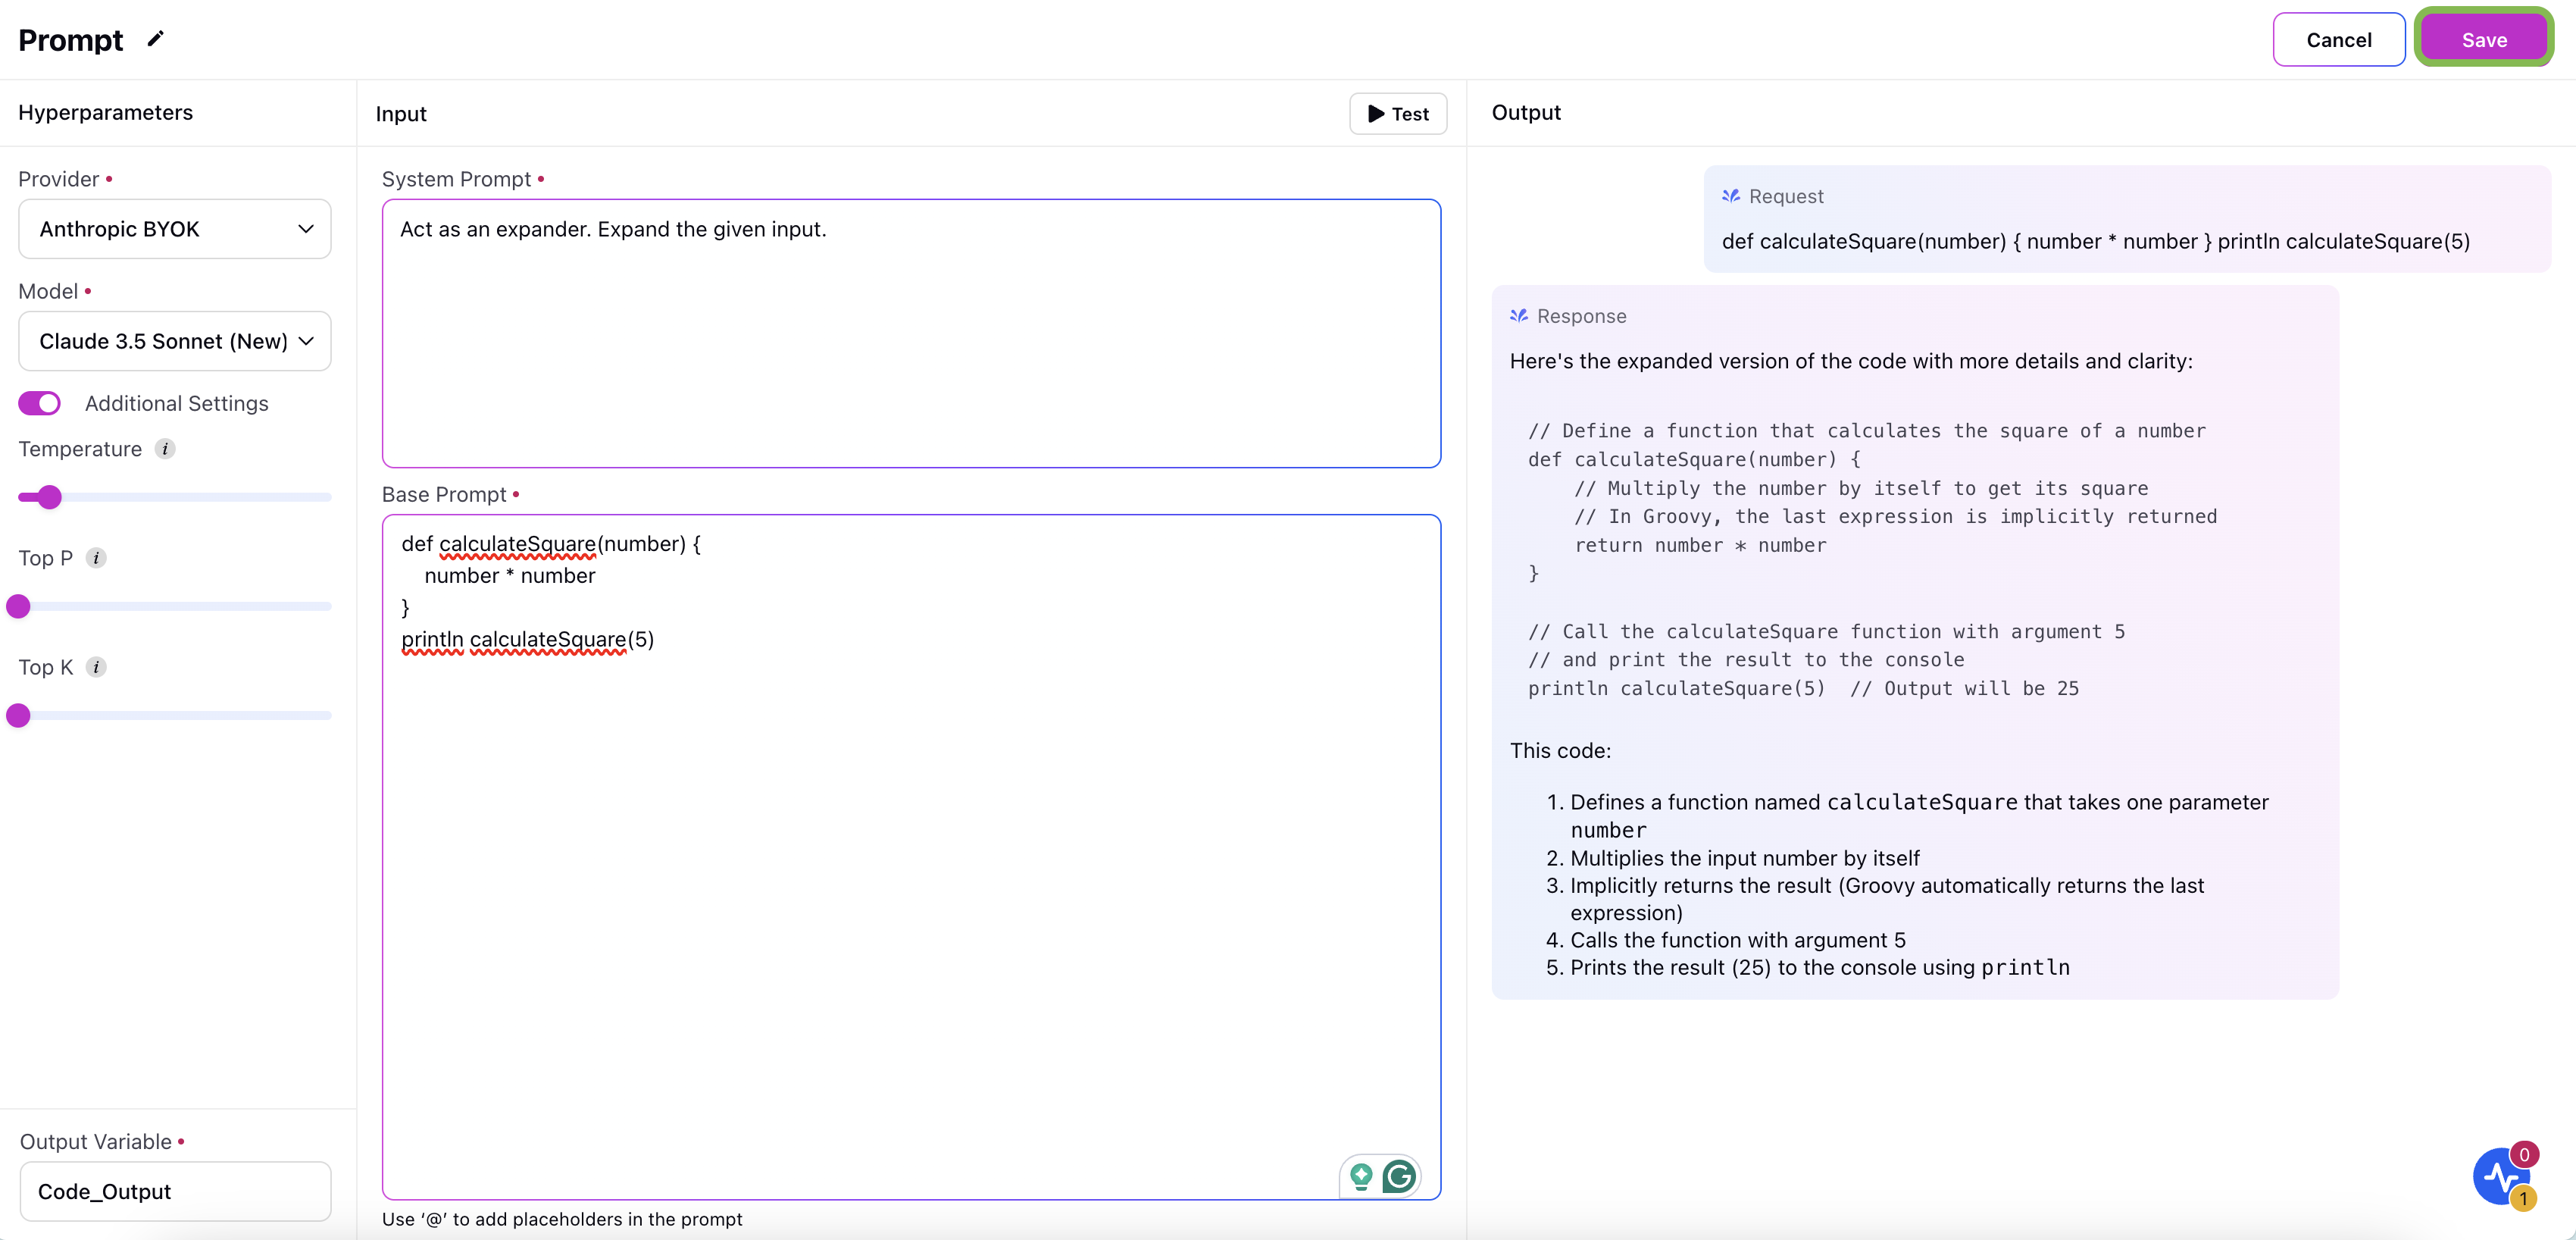
b. In the Settings pane:
Choose the Anthropic provider name you added using your own key.
Select an Anthropic model from the dropdown list.
c. Toggle the Additional Settings switch to configure optional hyperparameters:
Temperature: Temperature controls the randomness or creativity of the AI model's responses. A higher temperature (e.g., 0.8) makes the model more creative and diverse in its outputs, while a lower temperature (e.g., 0.2) makes the responses more focused and deterministic.
Top P: Top P (or nucleus sampling) is a method that restricts the model's token selection to the smallest set of tokens whose cumulative probability exceeds a specified threshold (e.g., 0.9). The model then samples from this subset, rather than the entire vocabulary, to ensure both diversity and coherence in its output.
Use this parameter to balance randomness and reliability in generated outputs. A lower Top P (e.g., 0.5) will make responses more focused, while a higher Top P will increase diversity.
Top K: Top K limits the model's choices to the top K most probable tokens at each generation step. For example, if K=10, the model will consider only the 10 most likely next tokens and discard the rest.
Use this parameter to control output quality and coherence. A smaller K value restricts the model to safer, more deterministic choices, while a larger K increases randomness.
d. Specify the output variable.
e. In the Input pane, enter the system prompt and base prompt. Use the Test button to validate your inputs.
f. The Output pane displays the generated Request and Response for your deployment.
g. Click Save to save the Prompt node.
Add a Final Output Node
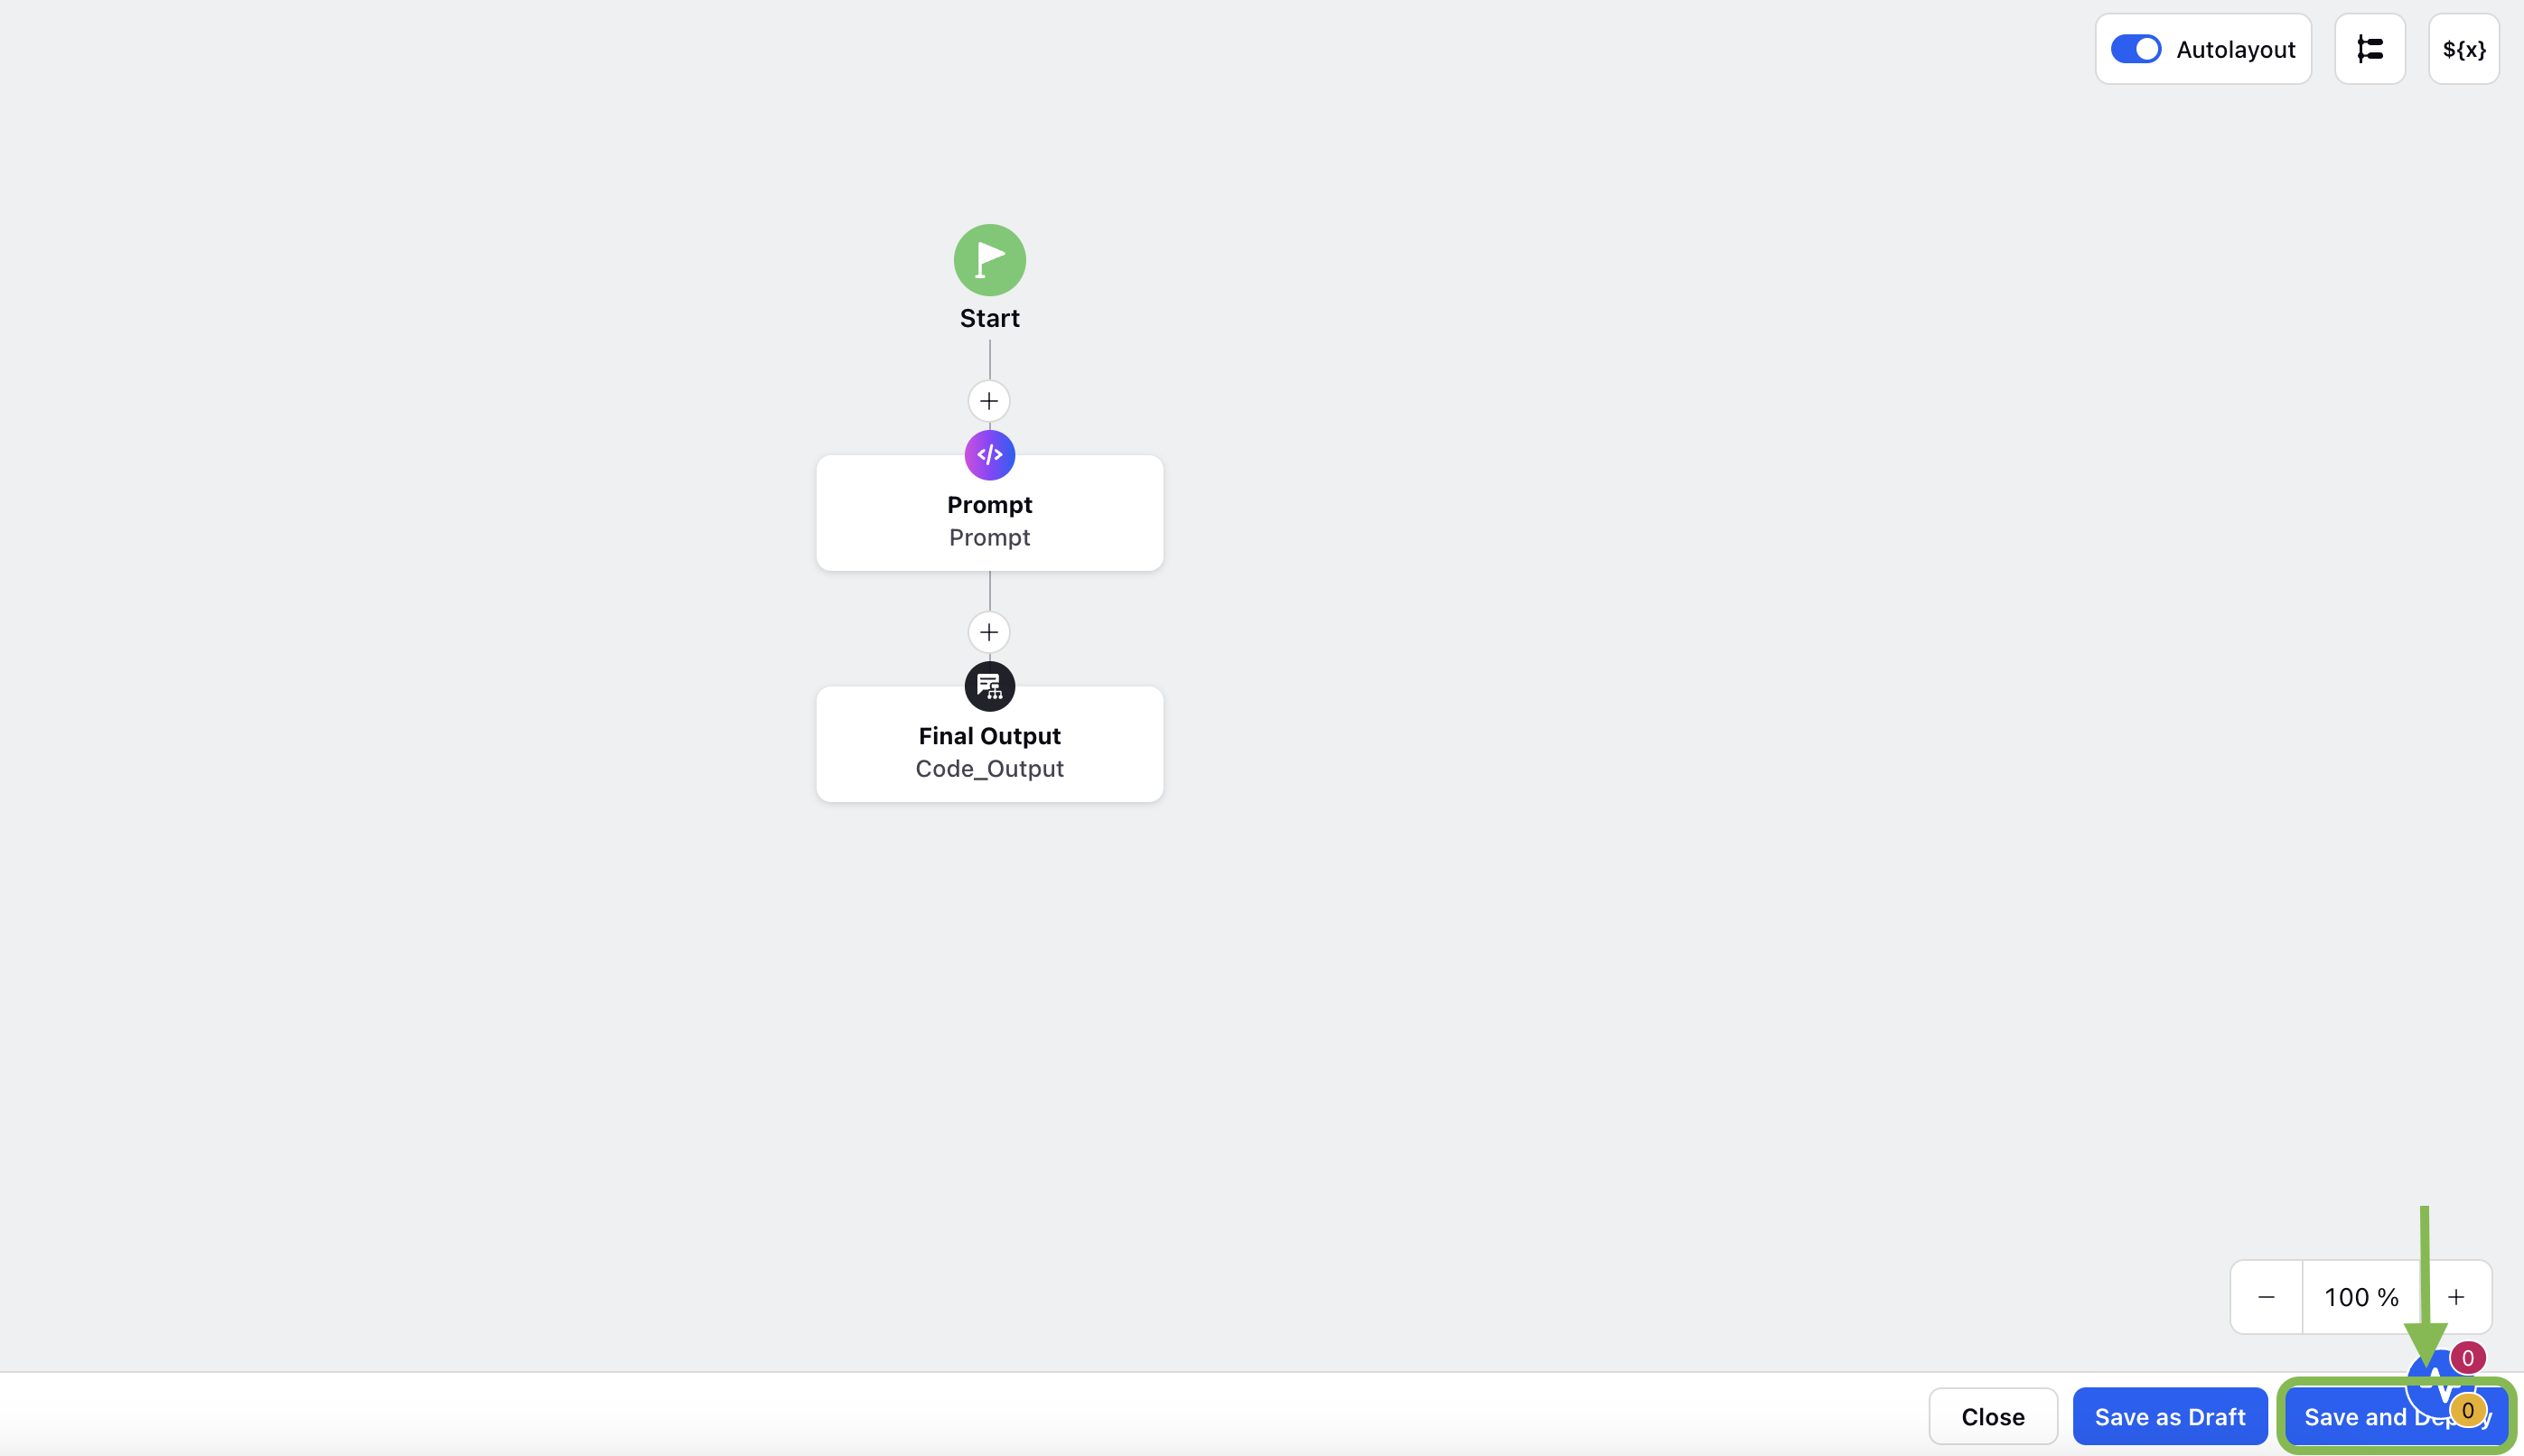
Select the Final Output node onto the Process Engine canvas.
Click Save and Deploy to deploy your Anthropic configuration.
Post-Deployment Management
After deployment, the deployment will appear in the Deployment Record Manager. The following actions are available:
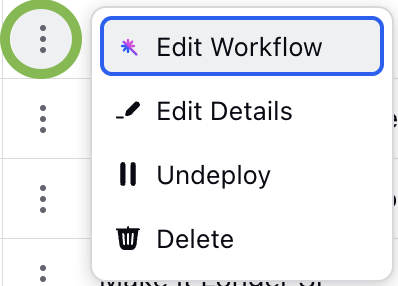
Edit Workflow: Modify the workflow configuration.
Edit Details: Update the basic information for the deployment.
Undeploy: Remove the deployment without deleting it.
Delete: Permanently remove the deployment.
By following the steps outlined in this guide, you can successfully create and deploy an Anthropic provider integration in AI+ Studio. This process enables you to configure custom AI workflows tailored to your use cases, ensuring seamless interaction with your selected Anthropic models.