How to Apply QA Checklists in Ads Composer
Updated
Eliminate the risk of off-brand advertising with an automated QA Checklist.
Campaign QA checklist serves as a crucial tool for verifying essential campaign details such as objectives, budgets, timelines, and ad types. By automating this process, you can enhance governance and streamline the approval of campaigns across various advertising platforms.
![]()
![]() Enablement Note: The use of this capability requires that Sprinklr Marketing (Ads) be enabled in your environment. To learn more about it, please work with your Success Manager.
Enablement Note: The use of this capability requires that Sprinklr Marketing (Ads) be enabled in your environment. To learn more about it, please work with your Success Manager.
Ensuring compliance with advertising guidelines is crucial for maintaining brand integrity and adhering to regulatory standards. This article will walk you through the essential steps and best practices to effectively utilize compliance checklists within Ads Composer, ensuring your advertising campaigns meet all necessary requirements.
![]() Note: If you missed our previous explanation on what a campaign QA checklist entails, you can see it here.
Note: If you missed our previous explanation on what a campaign QA checklist entails, you can see it here.
Steps to apply QA Checklist in Ads Composer
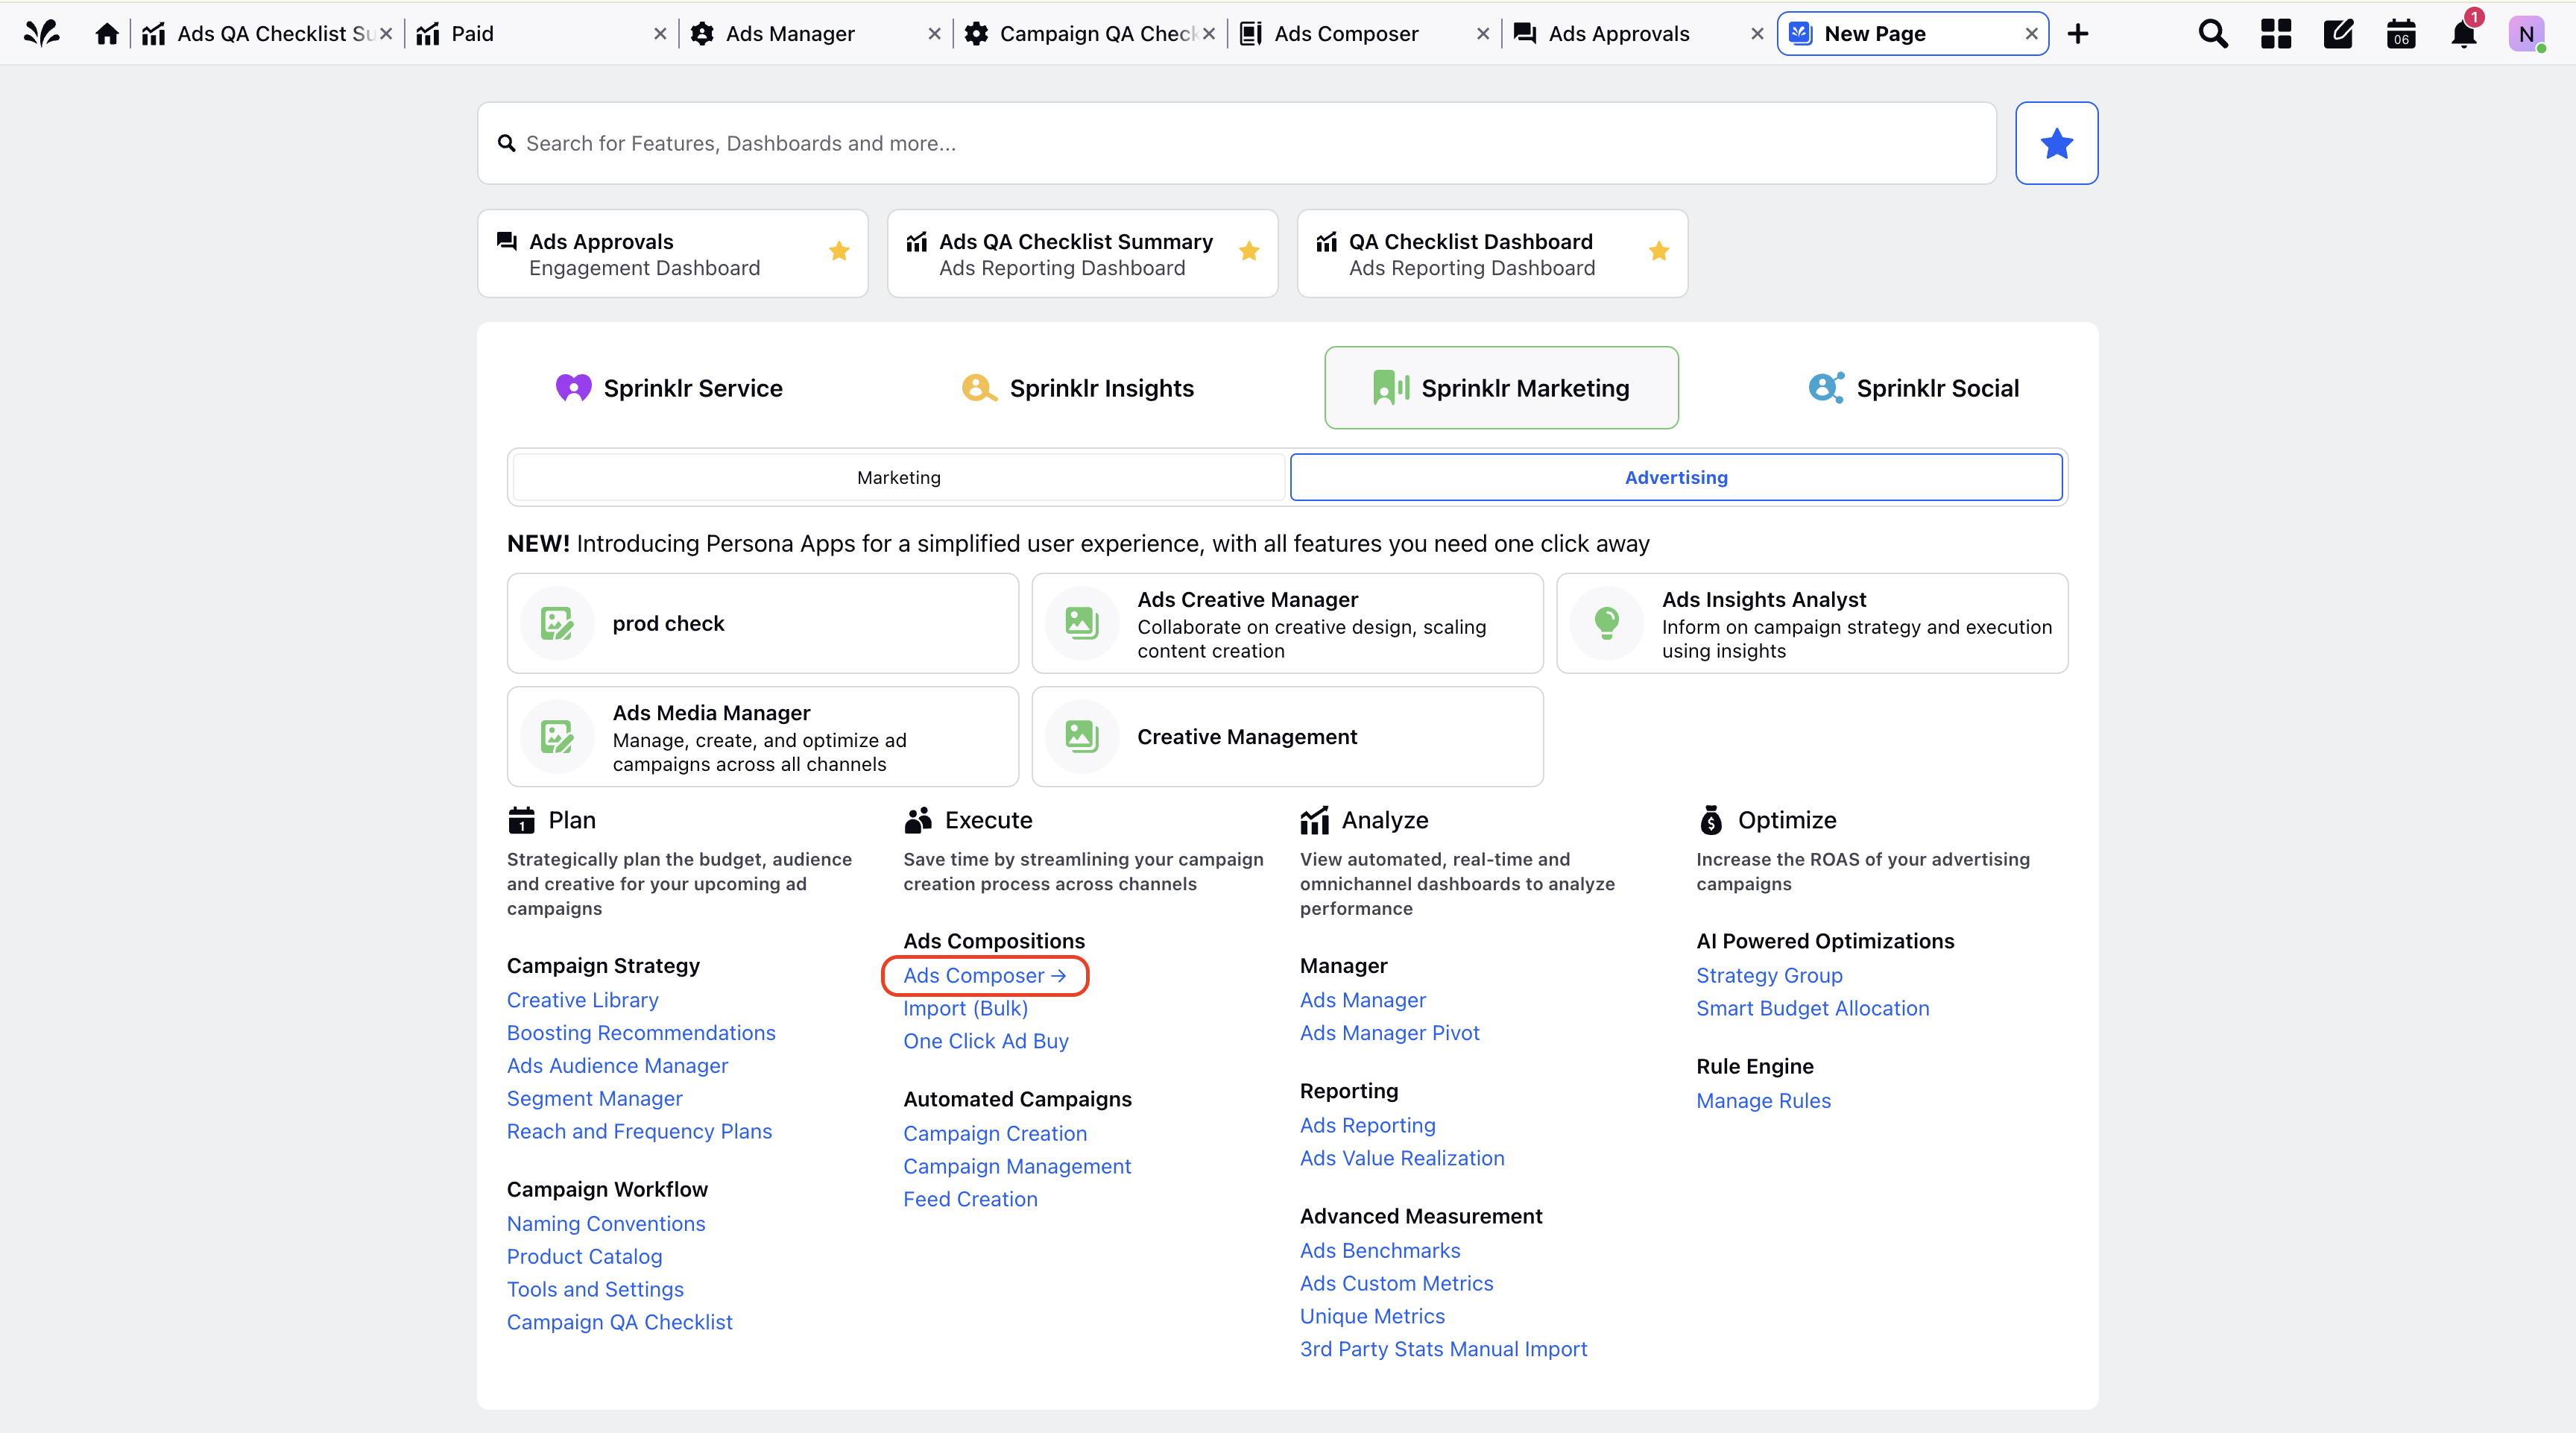
In Sprinklr Marketing product, under Advertising module, go to Ads Composer as shown in the image below
Choose an Ad Account which has a checklist created beforehand to create a new Paid Initiative.
Paid Initiative Section
Enter all the relevant fields at Paid Initiative level in Ads Composer, ensure they adhere to guidelines shown in preview.
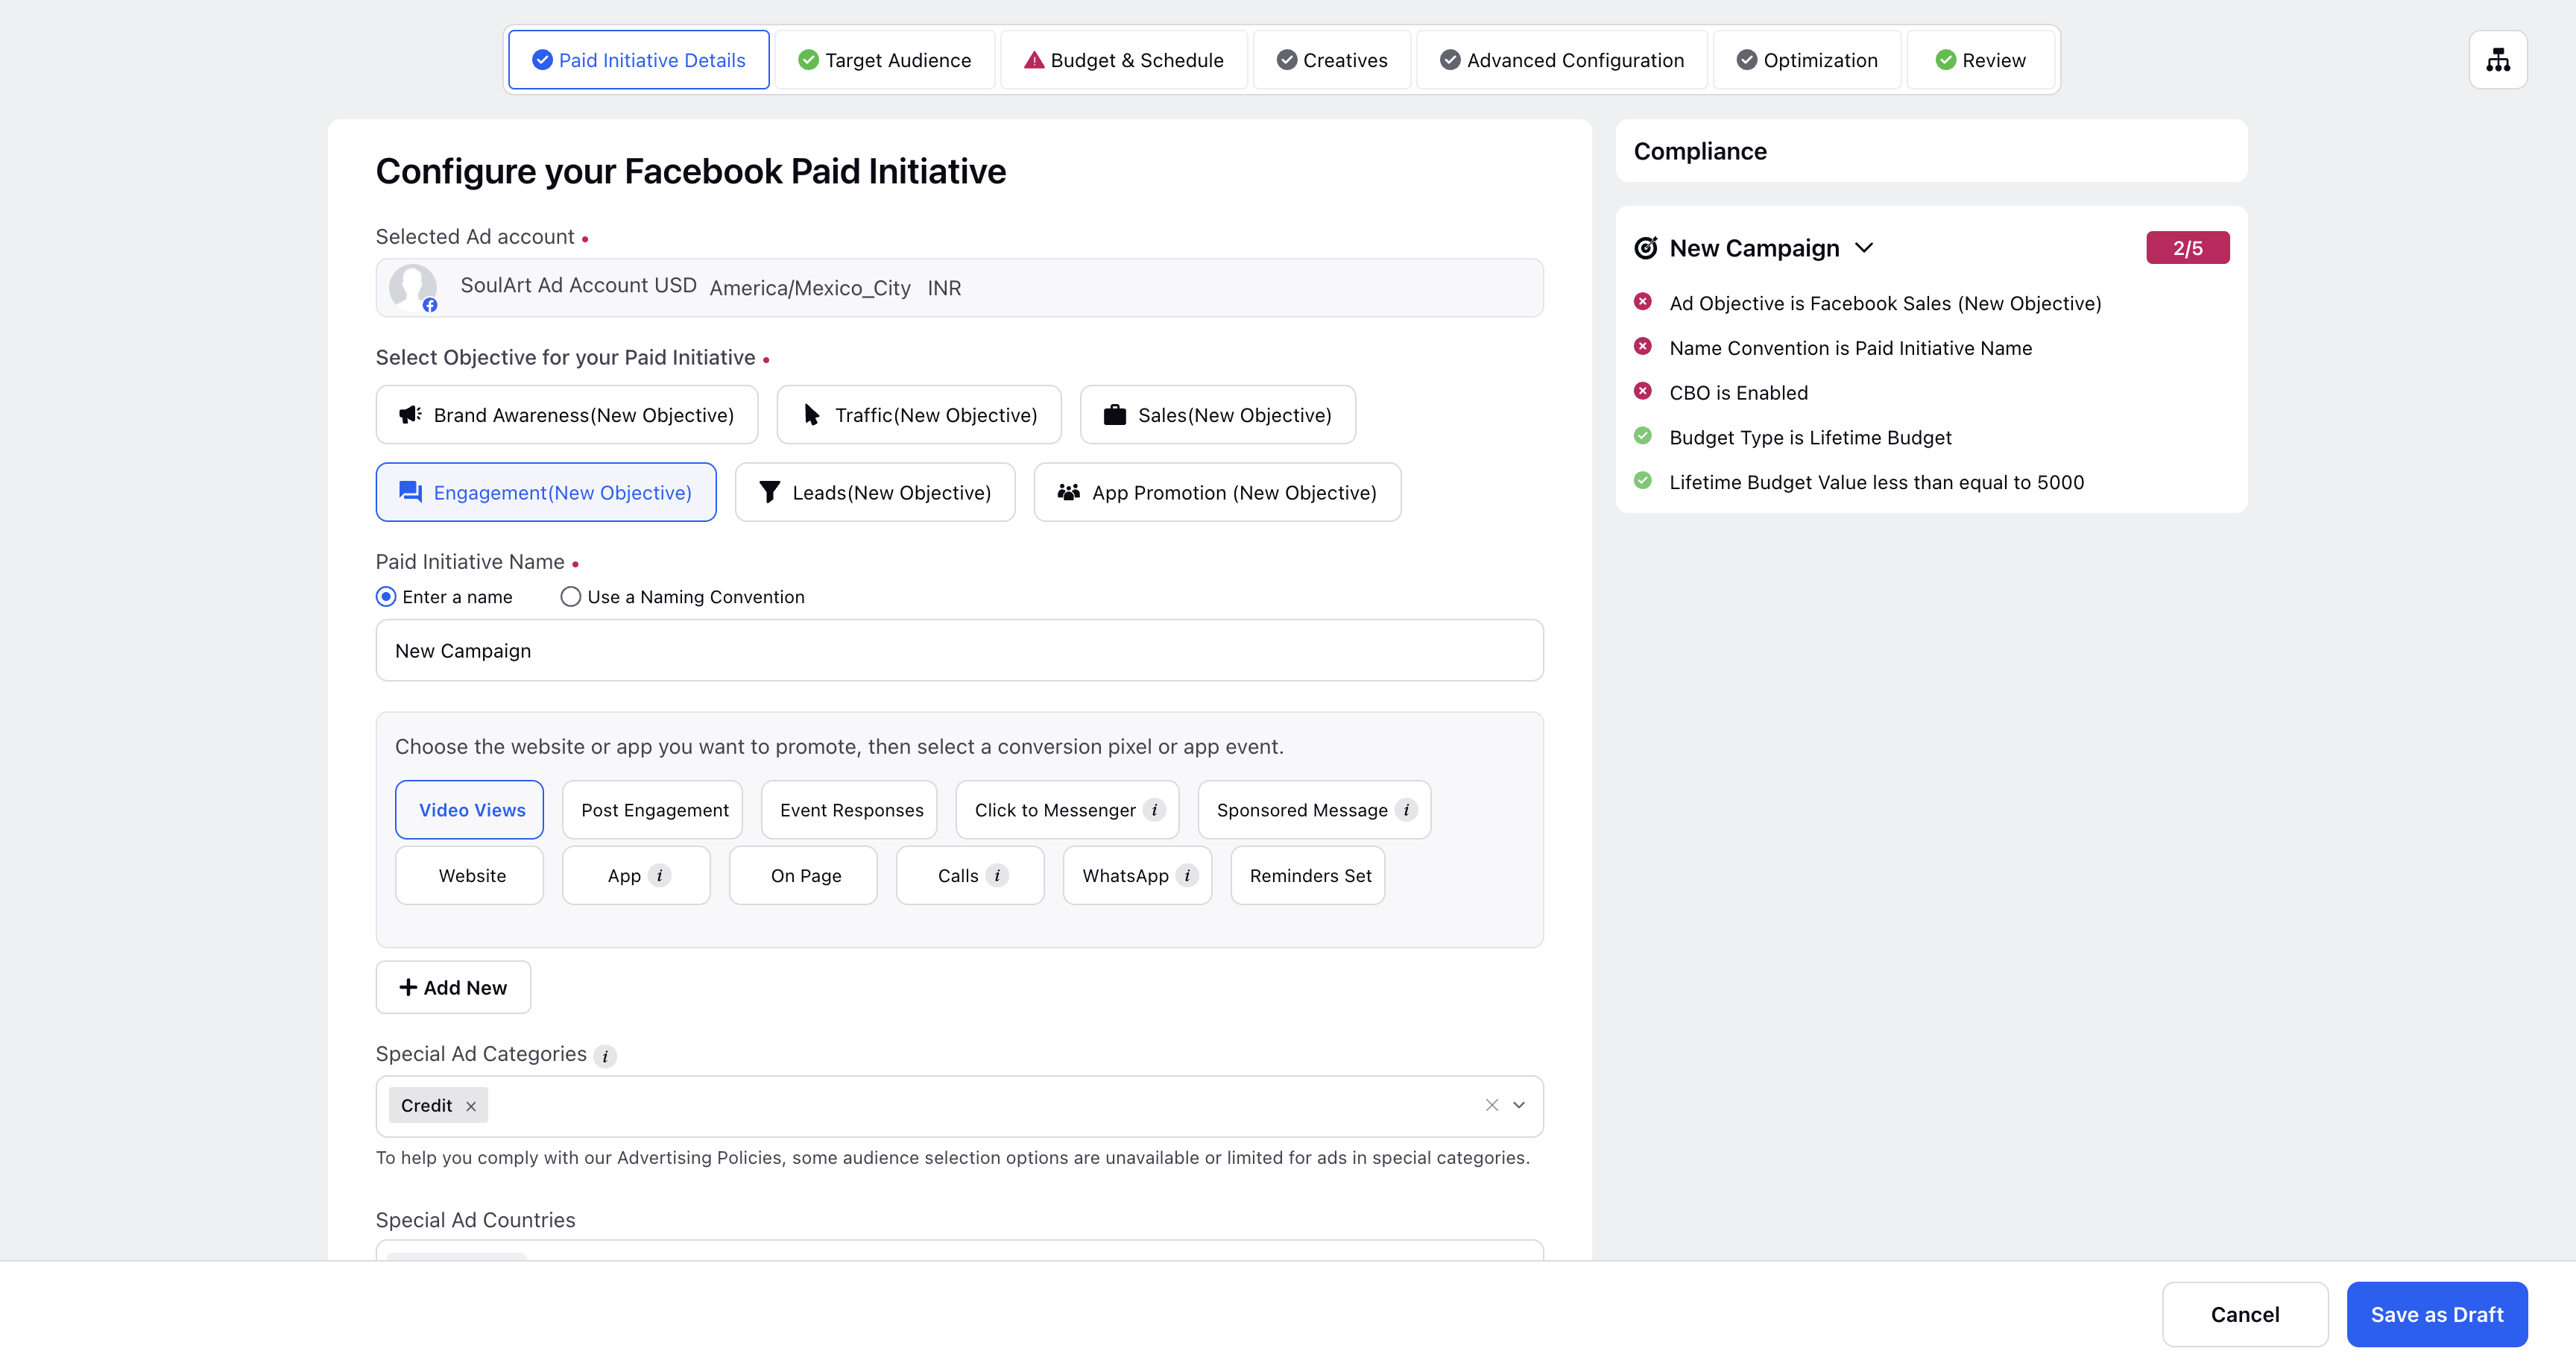
In this snapshot, you can observe that all compliance checks for this paid initiative that are correct are marked with green checks, indicating their correctness, and the incorrect ones are marked with red cross. The number at the top indicates the correct checks over the total checks.
After completing all necessary fields for creating a Paid Initiative in Ads Composer, proceed by selecting the target audience, defining the budget and schedule, and uploading creative assets for the ad.
![]() Note: If you see the message "No further checks are applicable for this path of the campaign," it indicates that the ad complies with all required standards and guidelines for the particular path chosen in the campaign.
Note: If you see the message "No further checks are applicable for this path of the campaign," it indicates that the ad complies with all required standards and guidelines for the particular path chosen in the campaign. 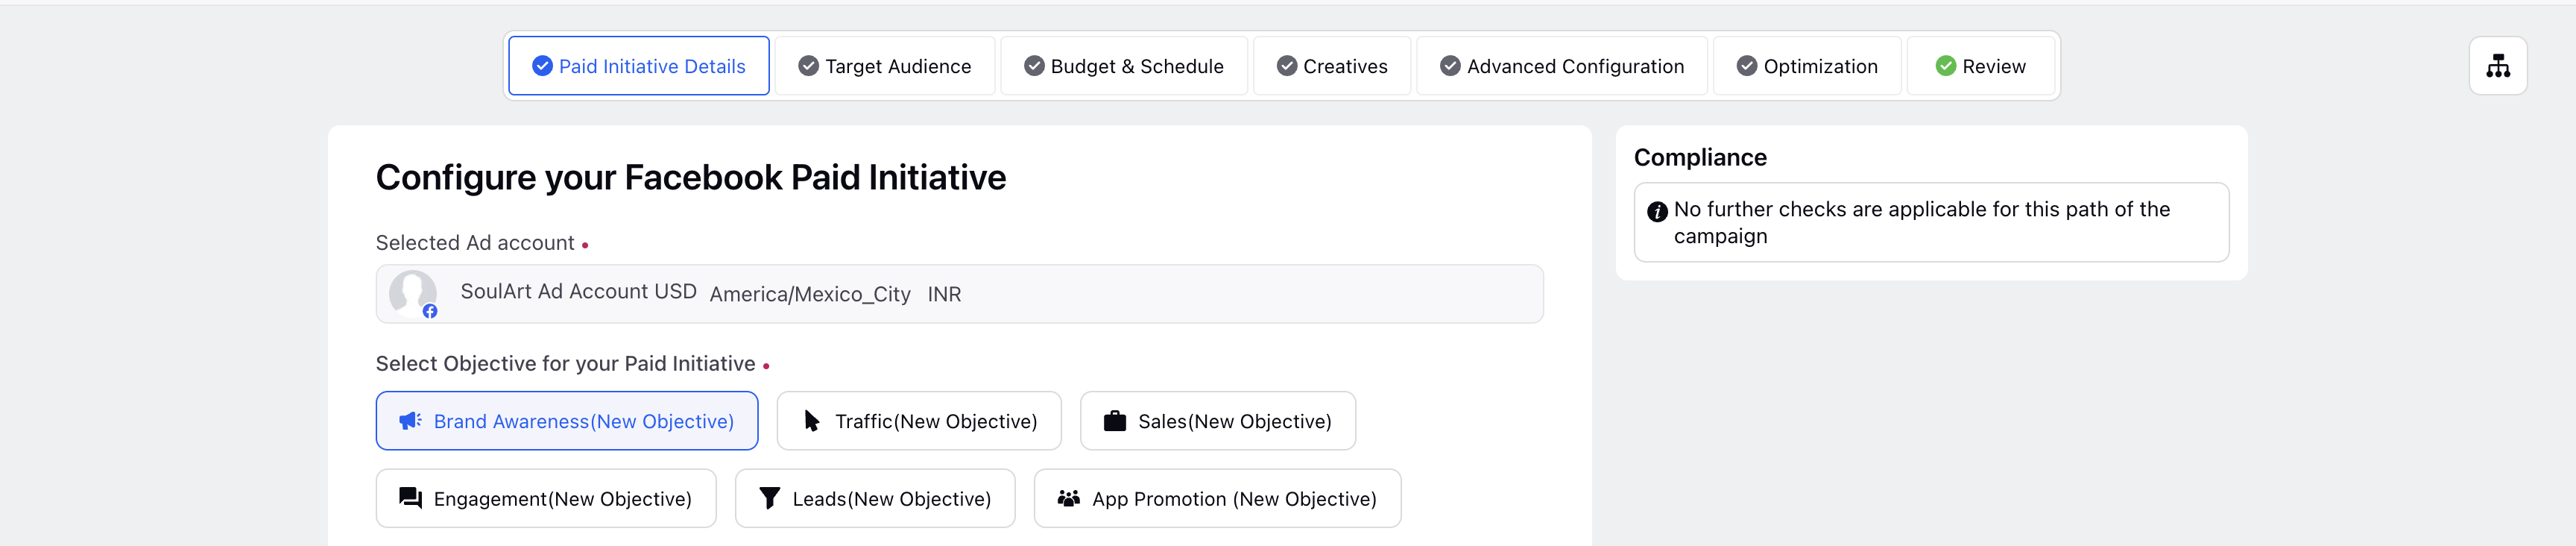
Audience Section
When selecting the audience for a campaign, an existing saved audience can be chosen, or a new one can be creared from scratch. Checklist is applied on both, and fields like location, gender, language, interests, etc are covered.
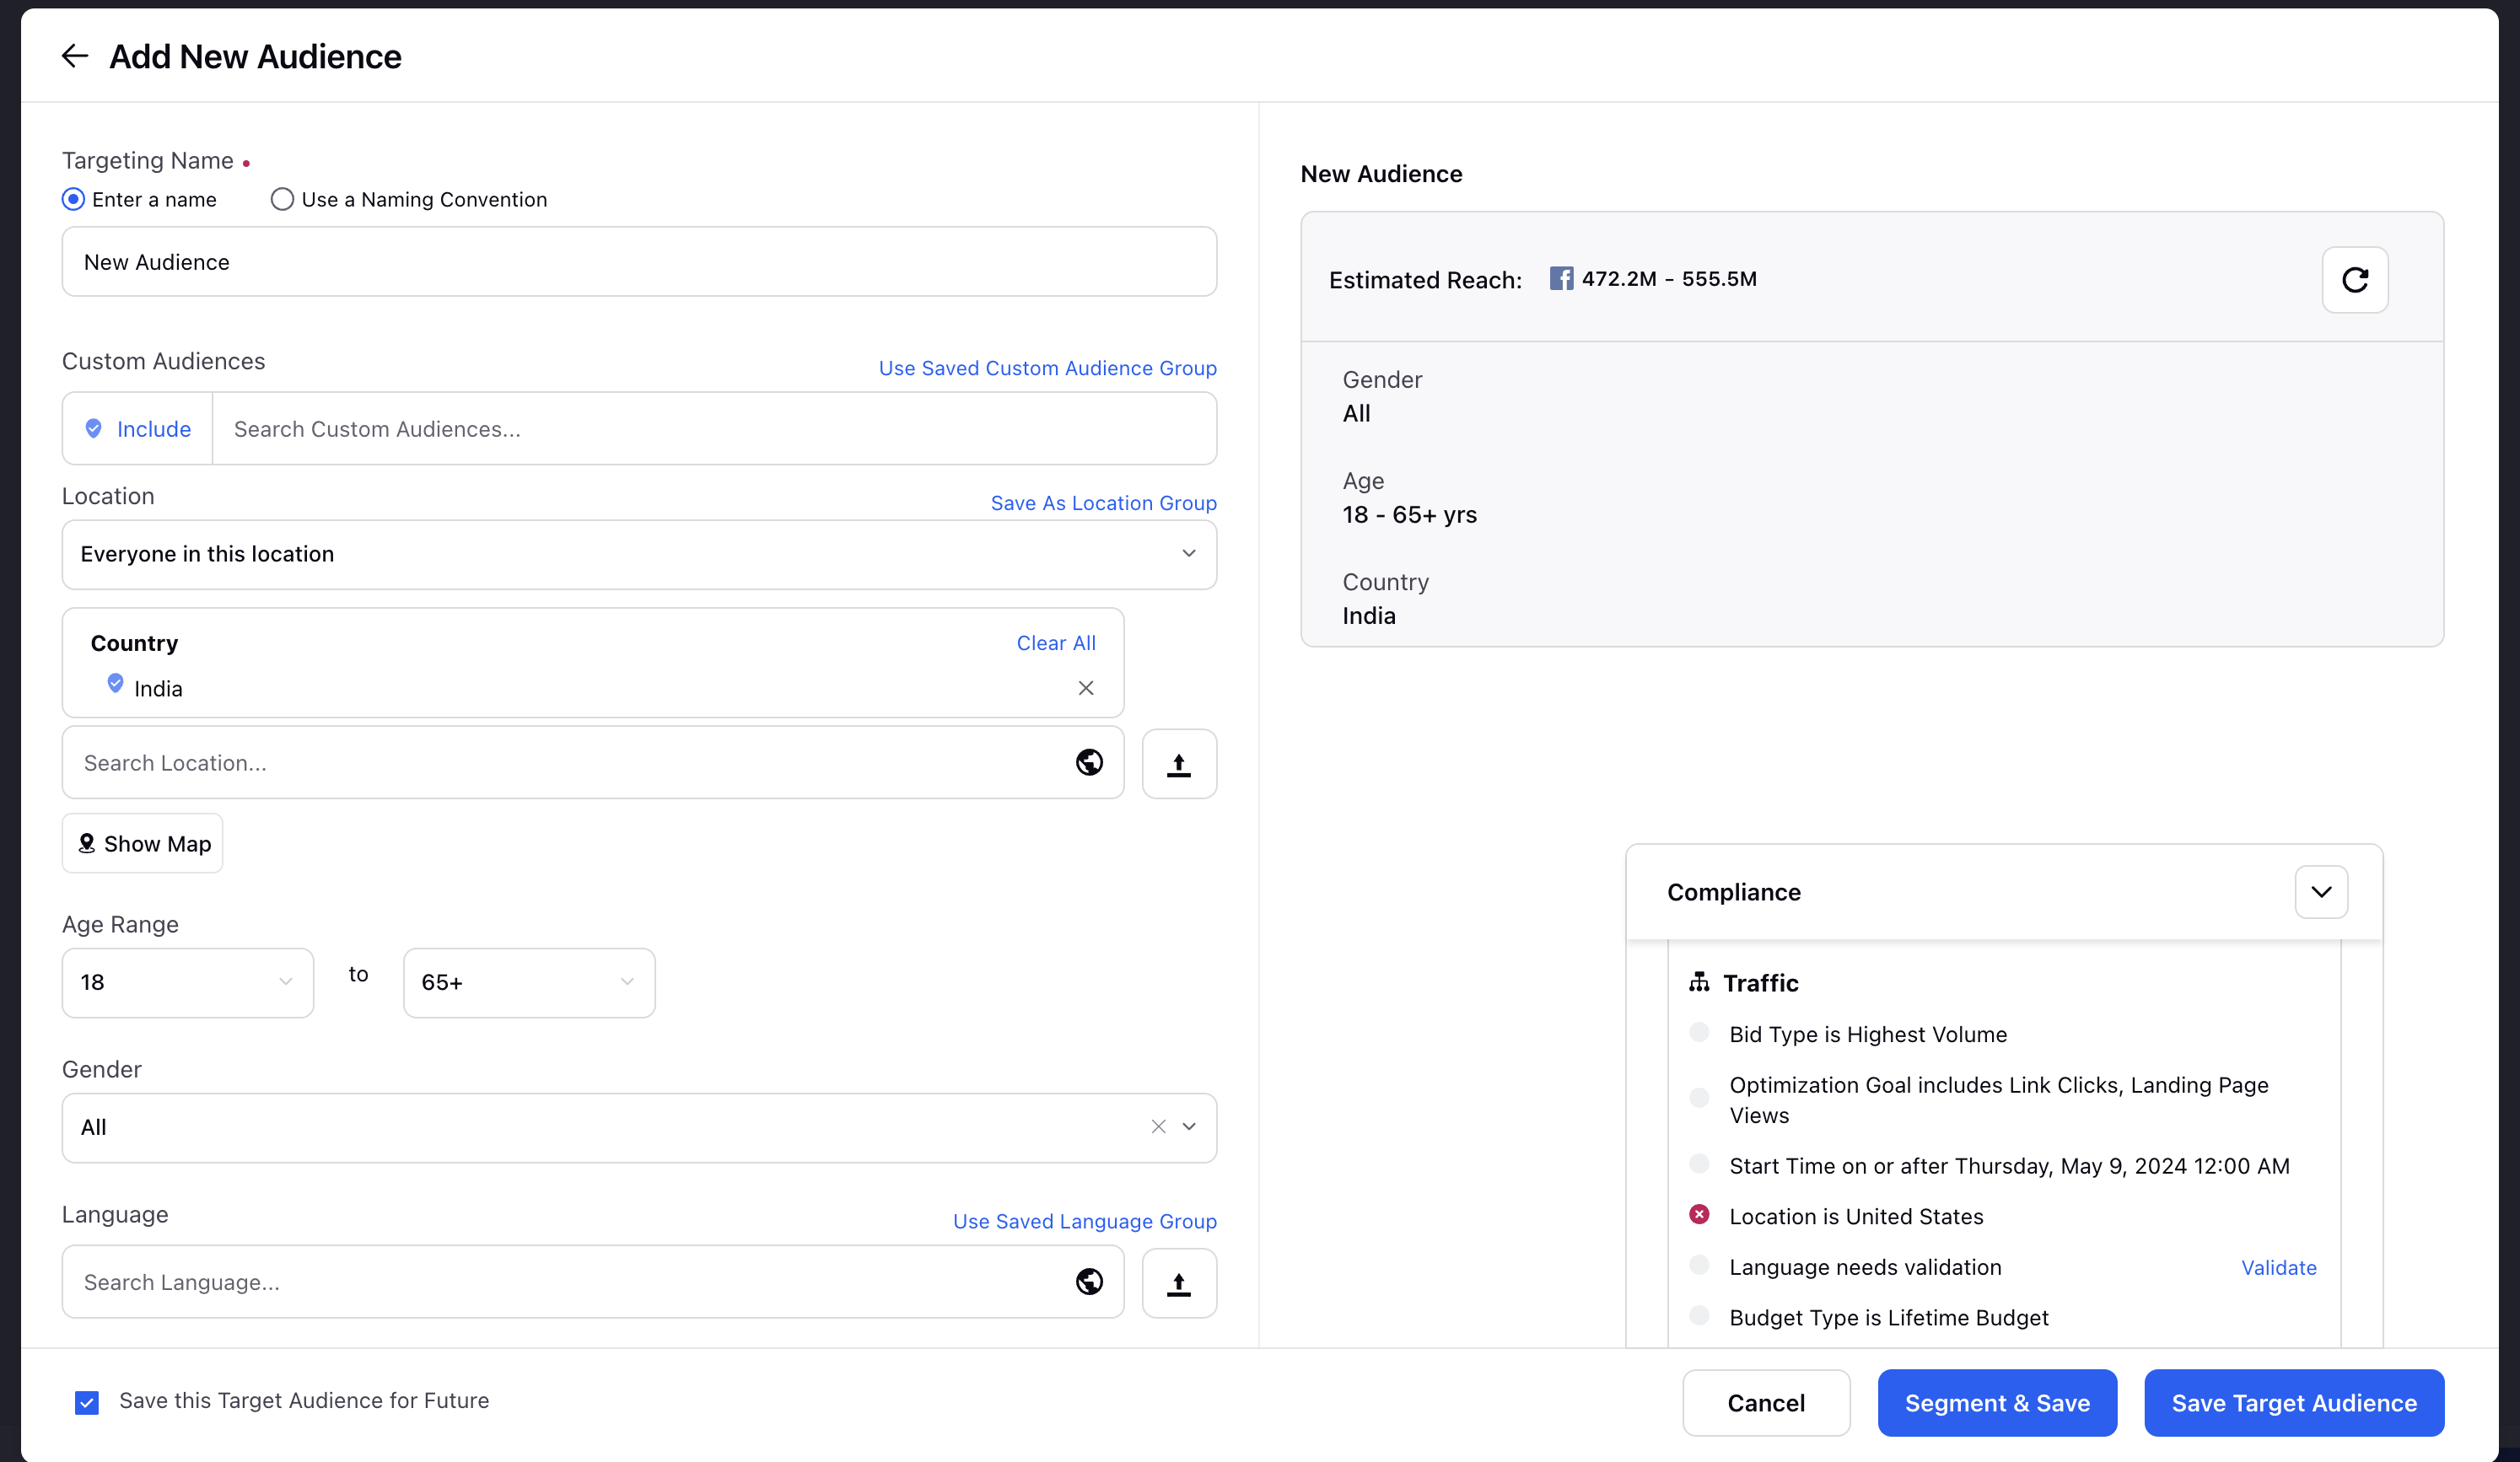
All the fields in which values have not yet been entered, will remain un-evaluated; and the ones which require manual validation will be incorrect until validated externally.
Budget and Schedule Section
Then enter fields for budgeting and scheduling of the campaign, supported fields include bid type & value, budget type & value, placements, start & end date, optimisation goal and more.
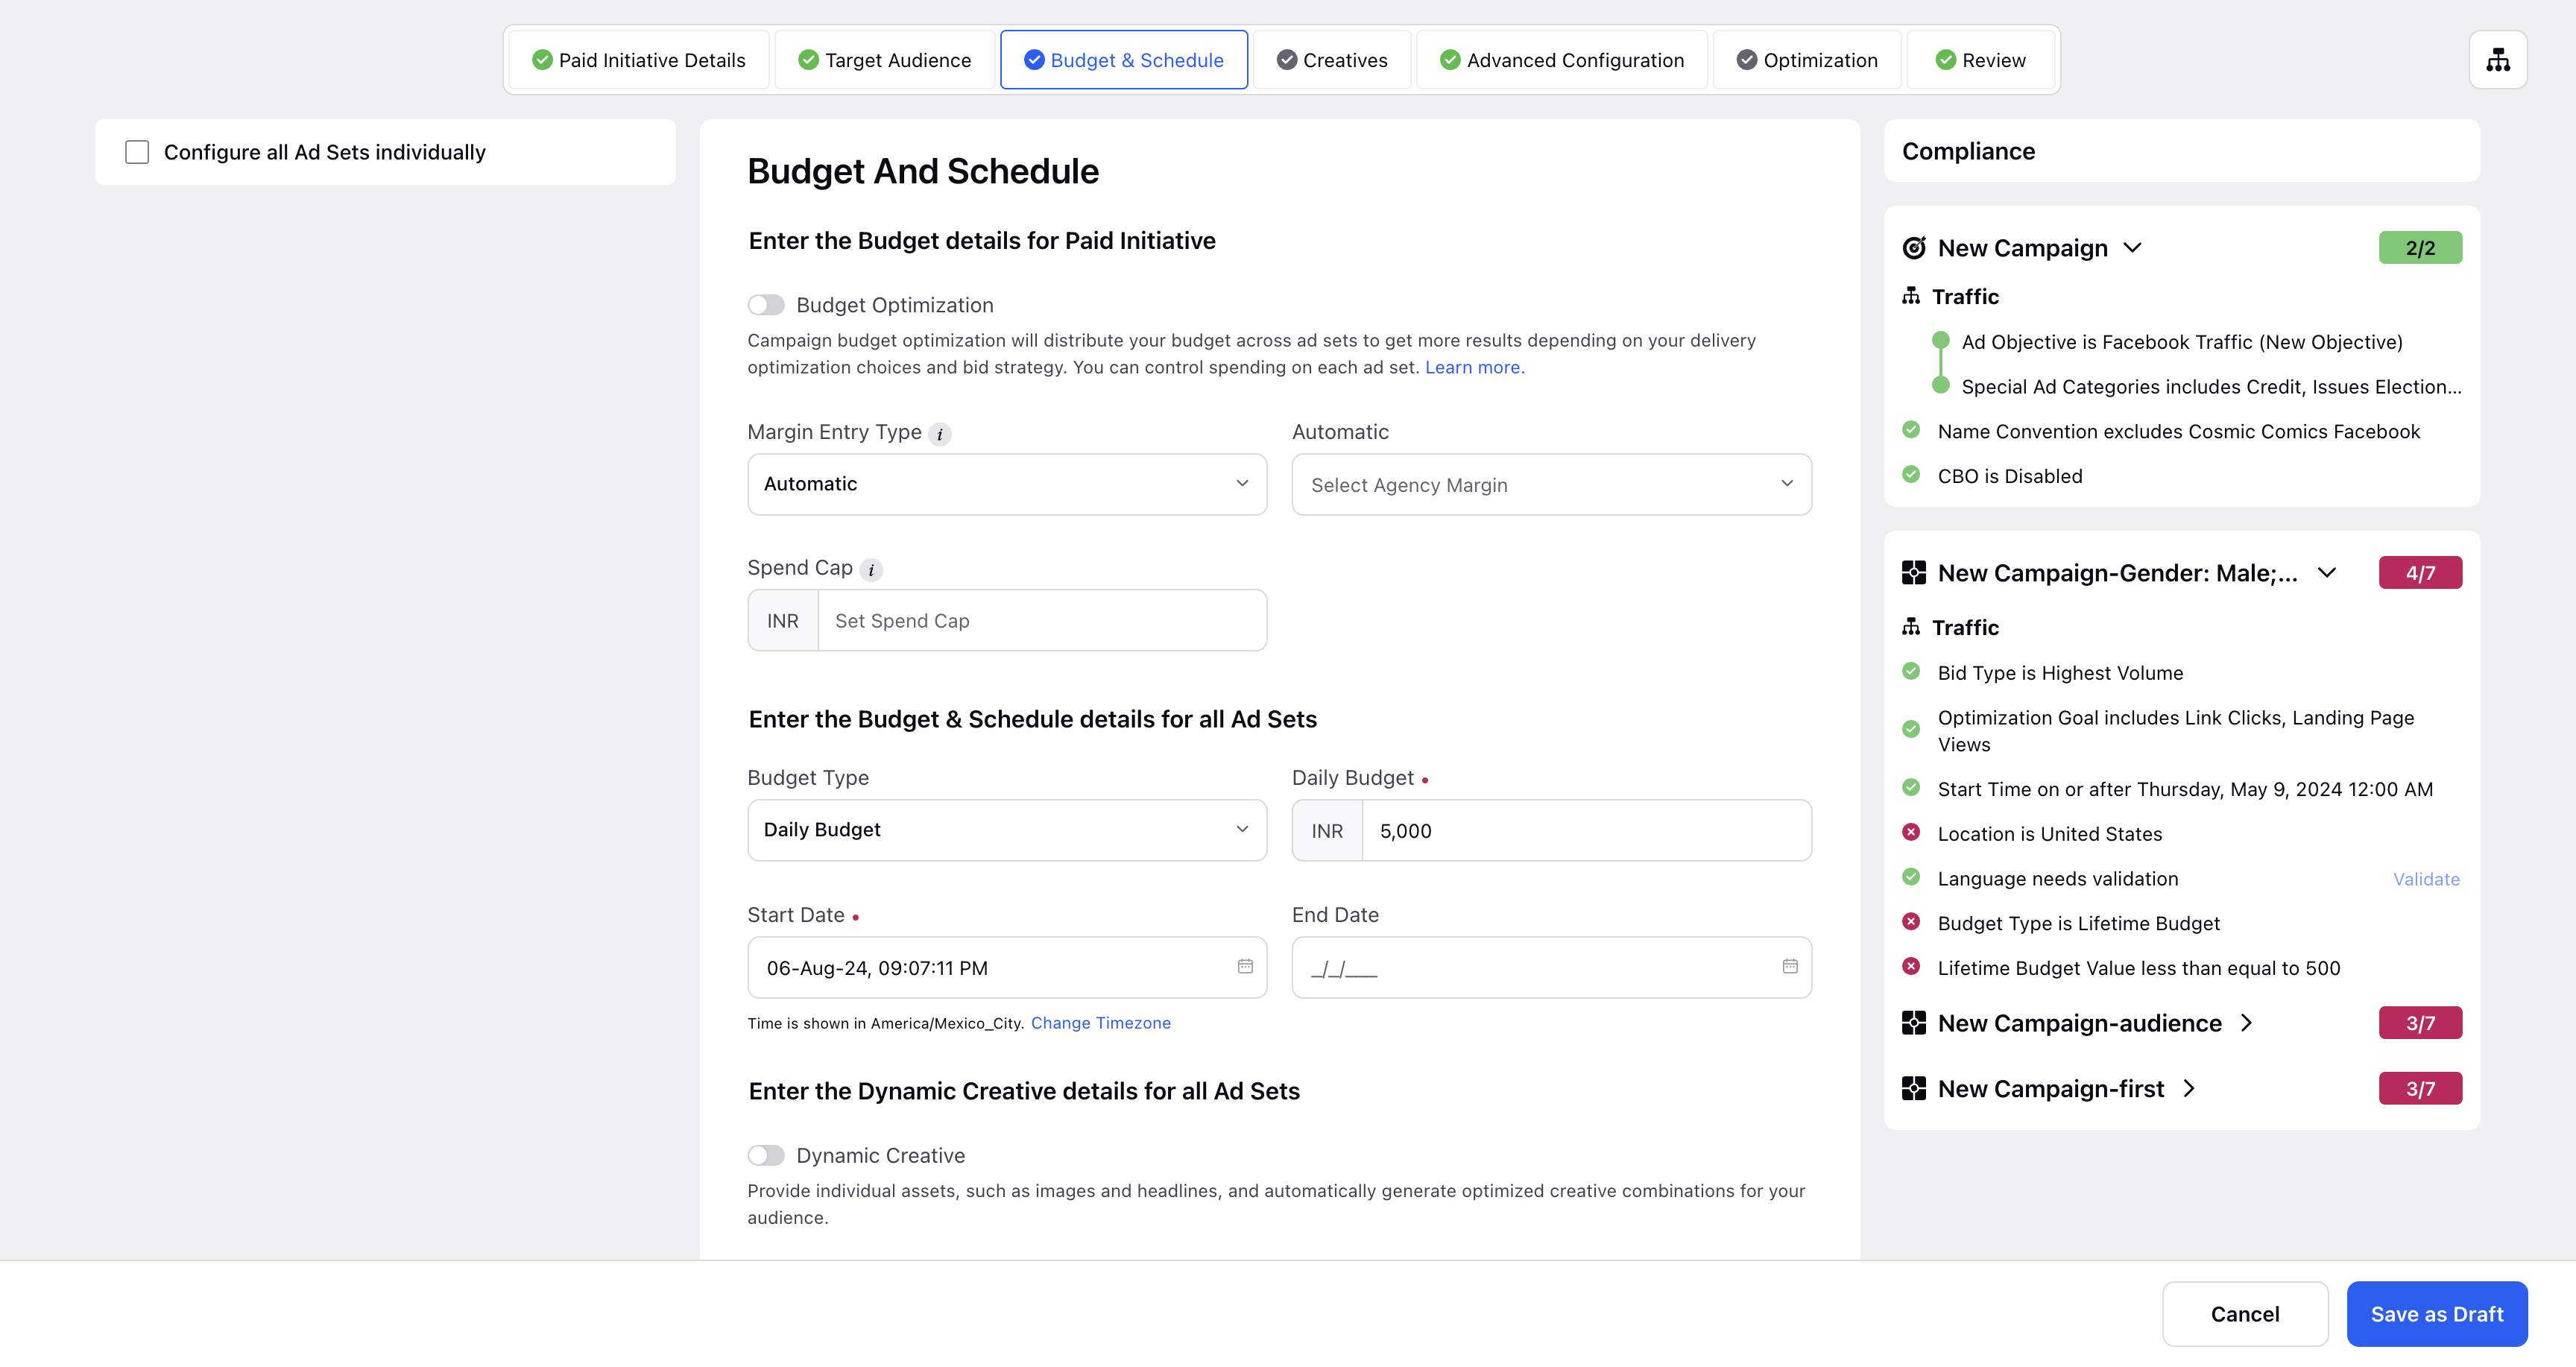
These checks will be applied on multiple ad sets together, but validation needs to be done separately.
Creative Section
Similar to target audiences, the checklist guidelines are applied on existing chosen creatives, as well as new ones created from scratch.
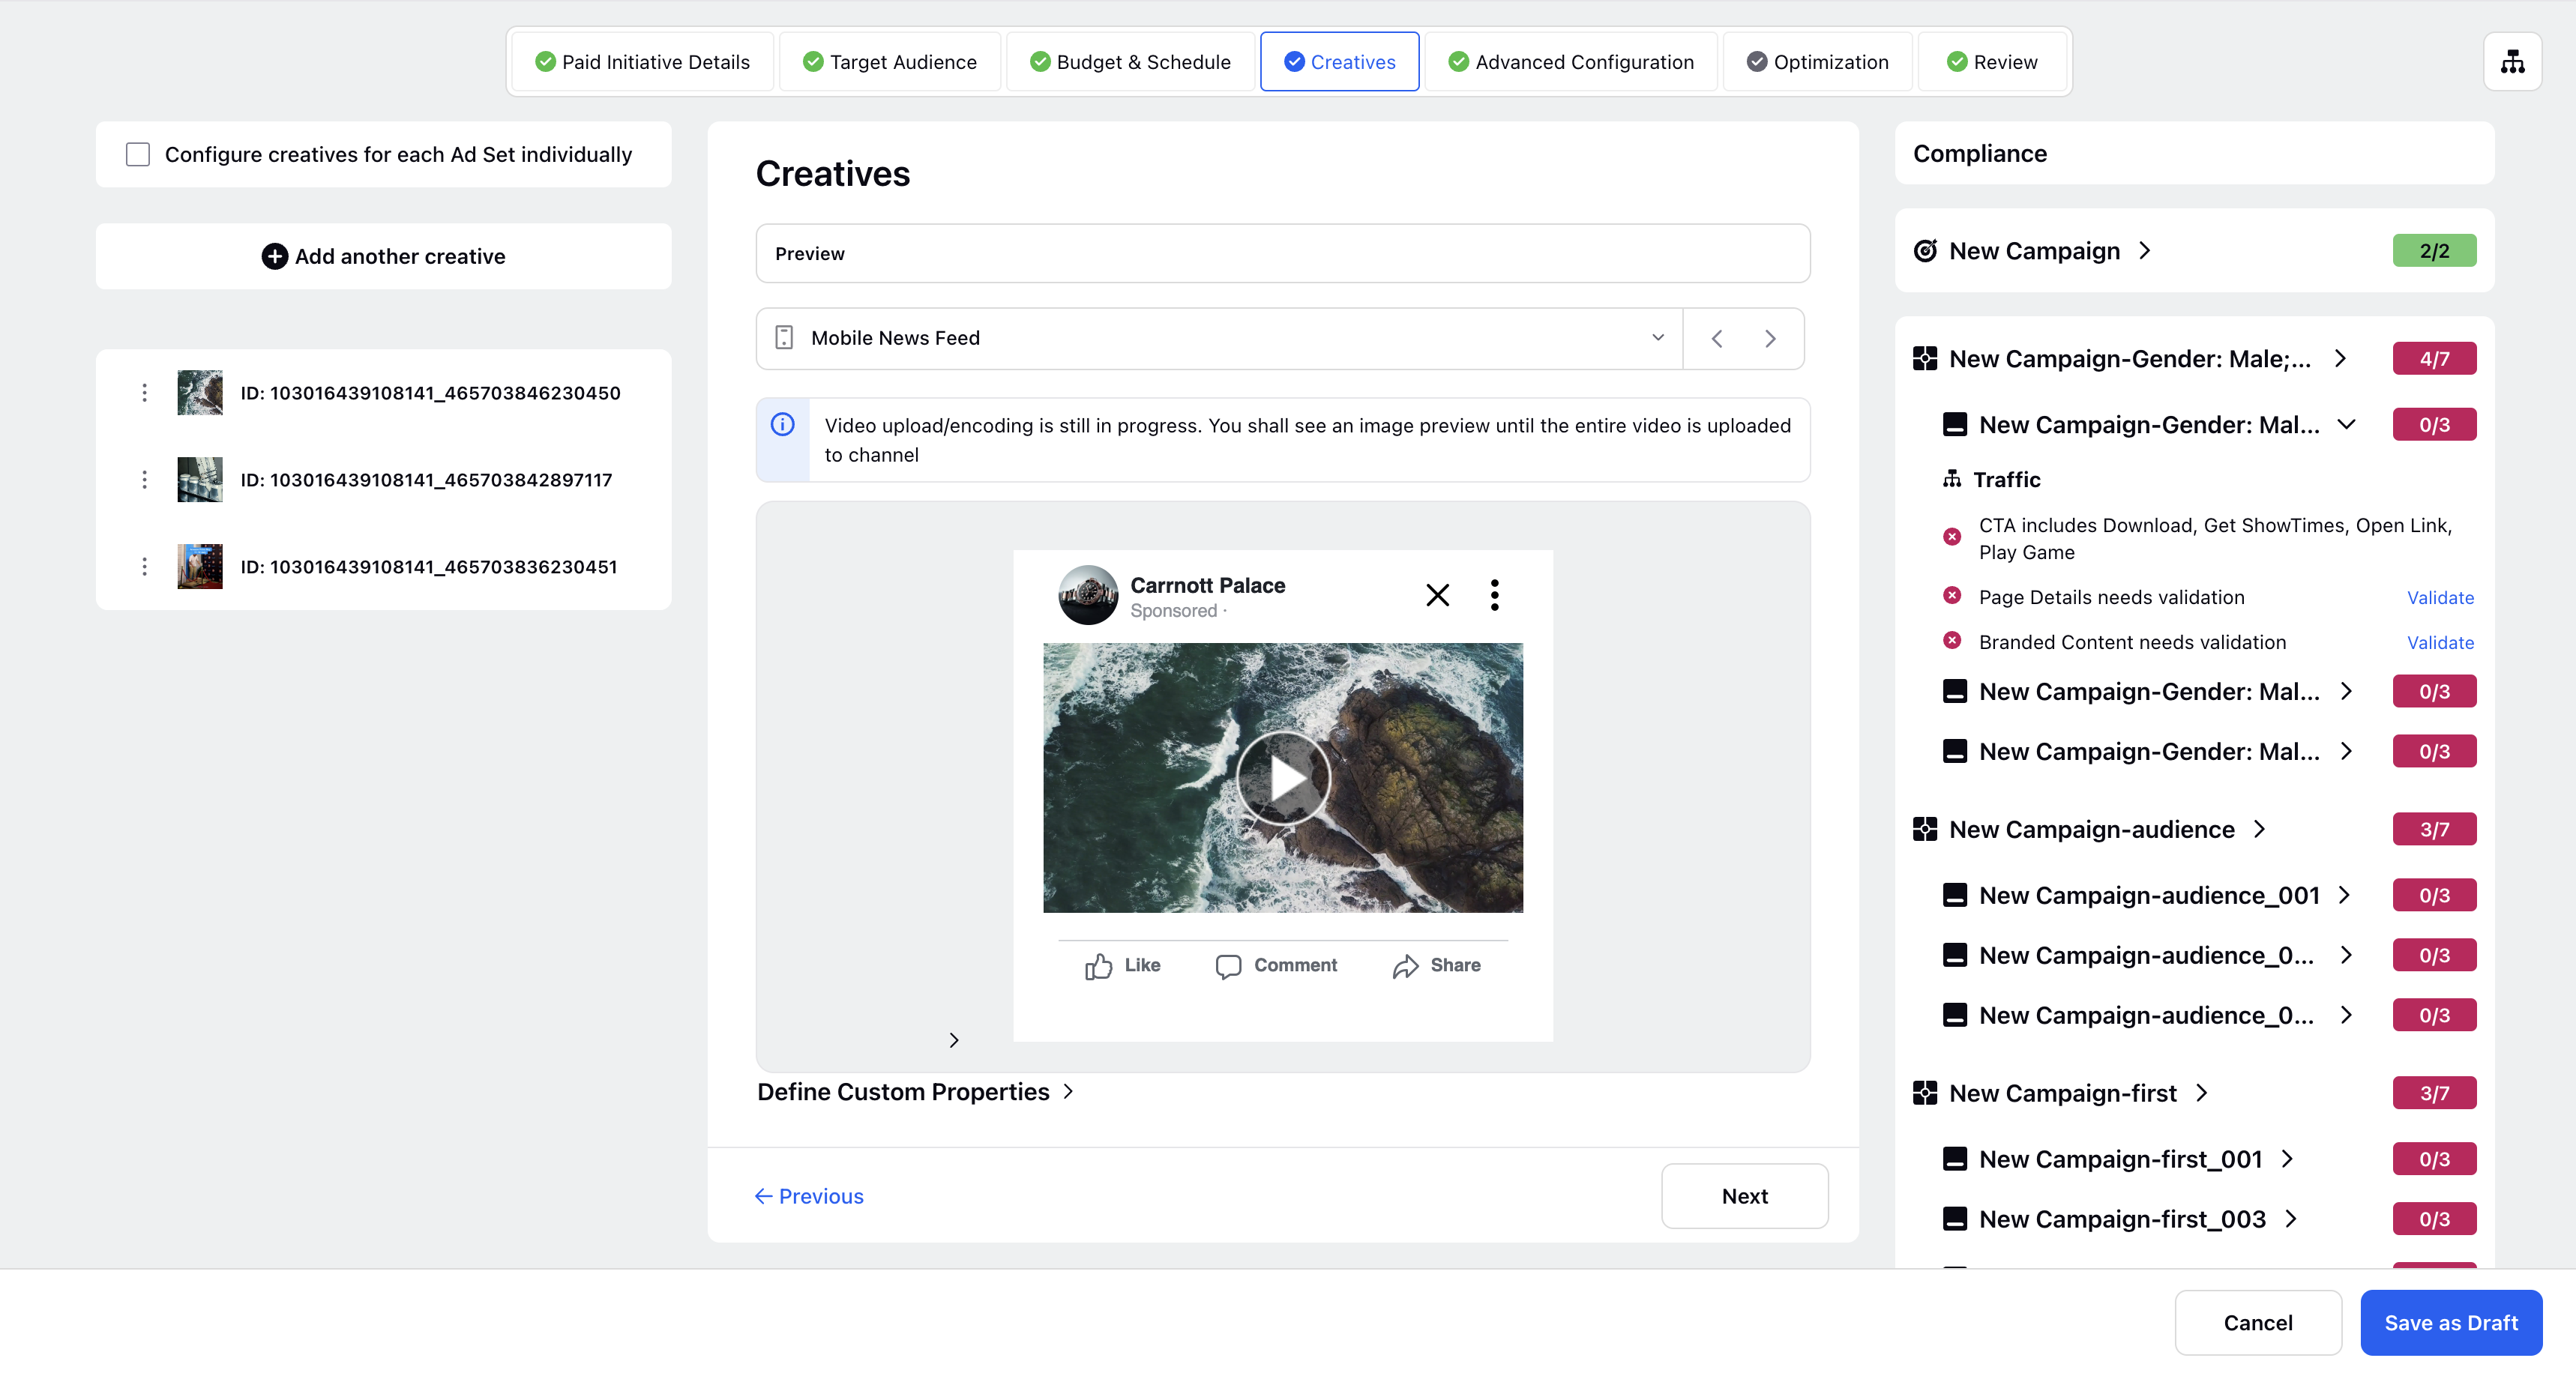
Checks at the Ad Variant include CTA, Page details, Web Analytics, URLs, etc.
Optimisation and Advanced Configuration Section
Checks also include Strategy groups, Sprinklr campaign and custom fields.
Those can be set in these two sections.
Review Screen
The review screen gives a bird eye view of the compliance of the campaign against the applied checklist, with details of all ad sets and ads as well as the errors in each.
User can open each section, and click on resolve to rectify the errors and enter the correct values according to checklist.
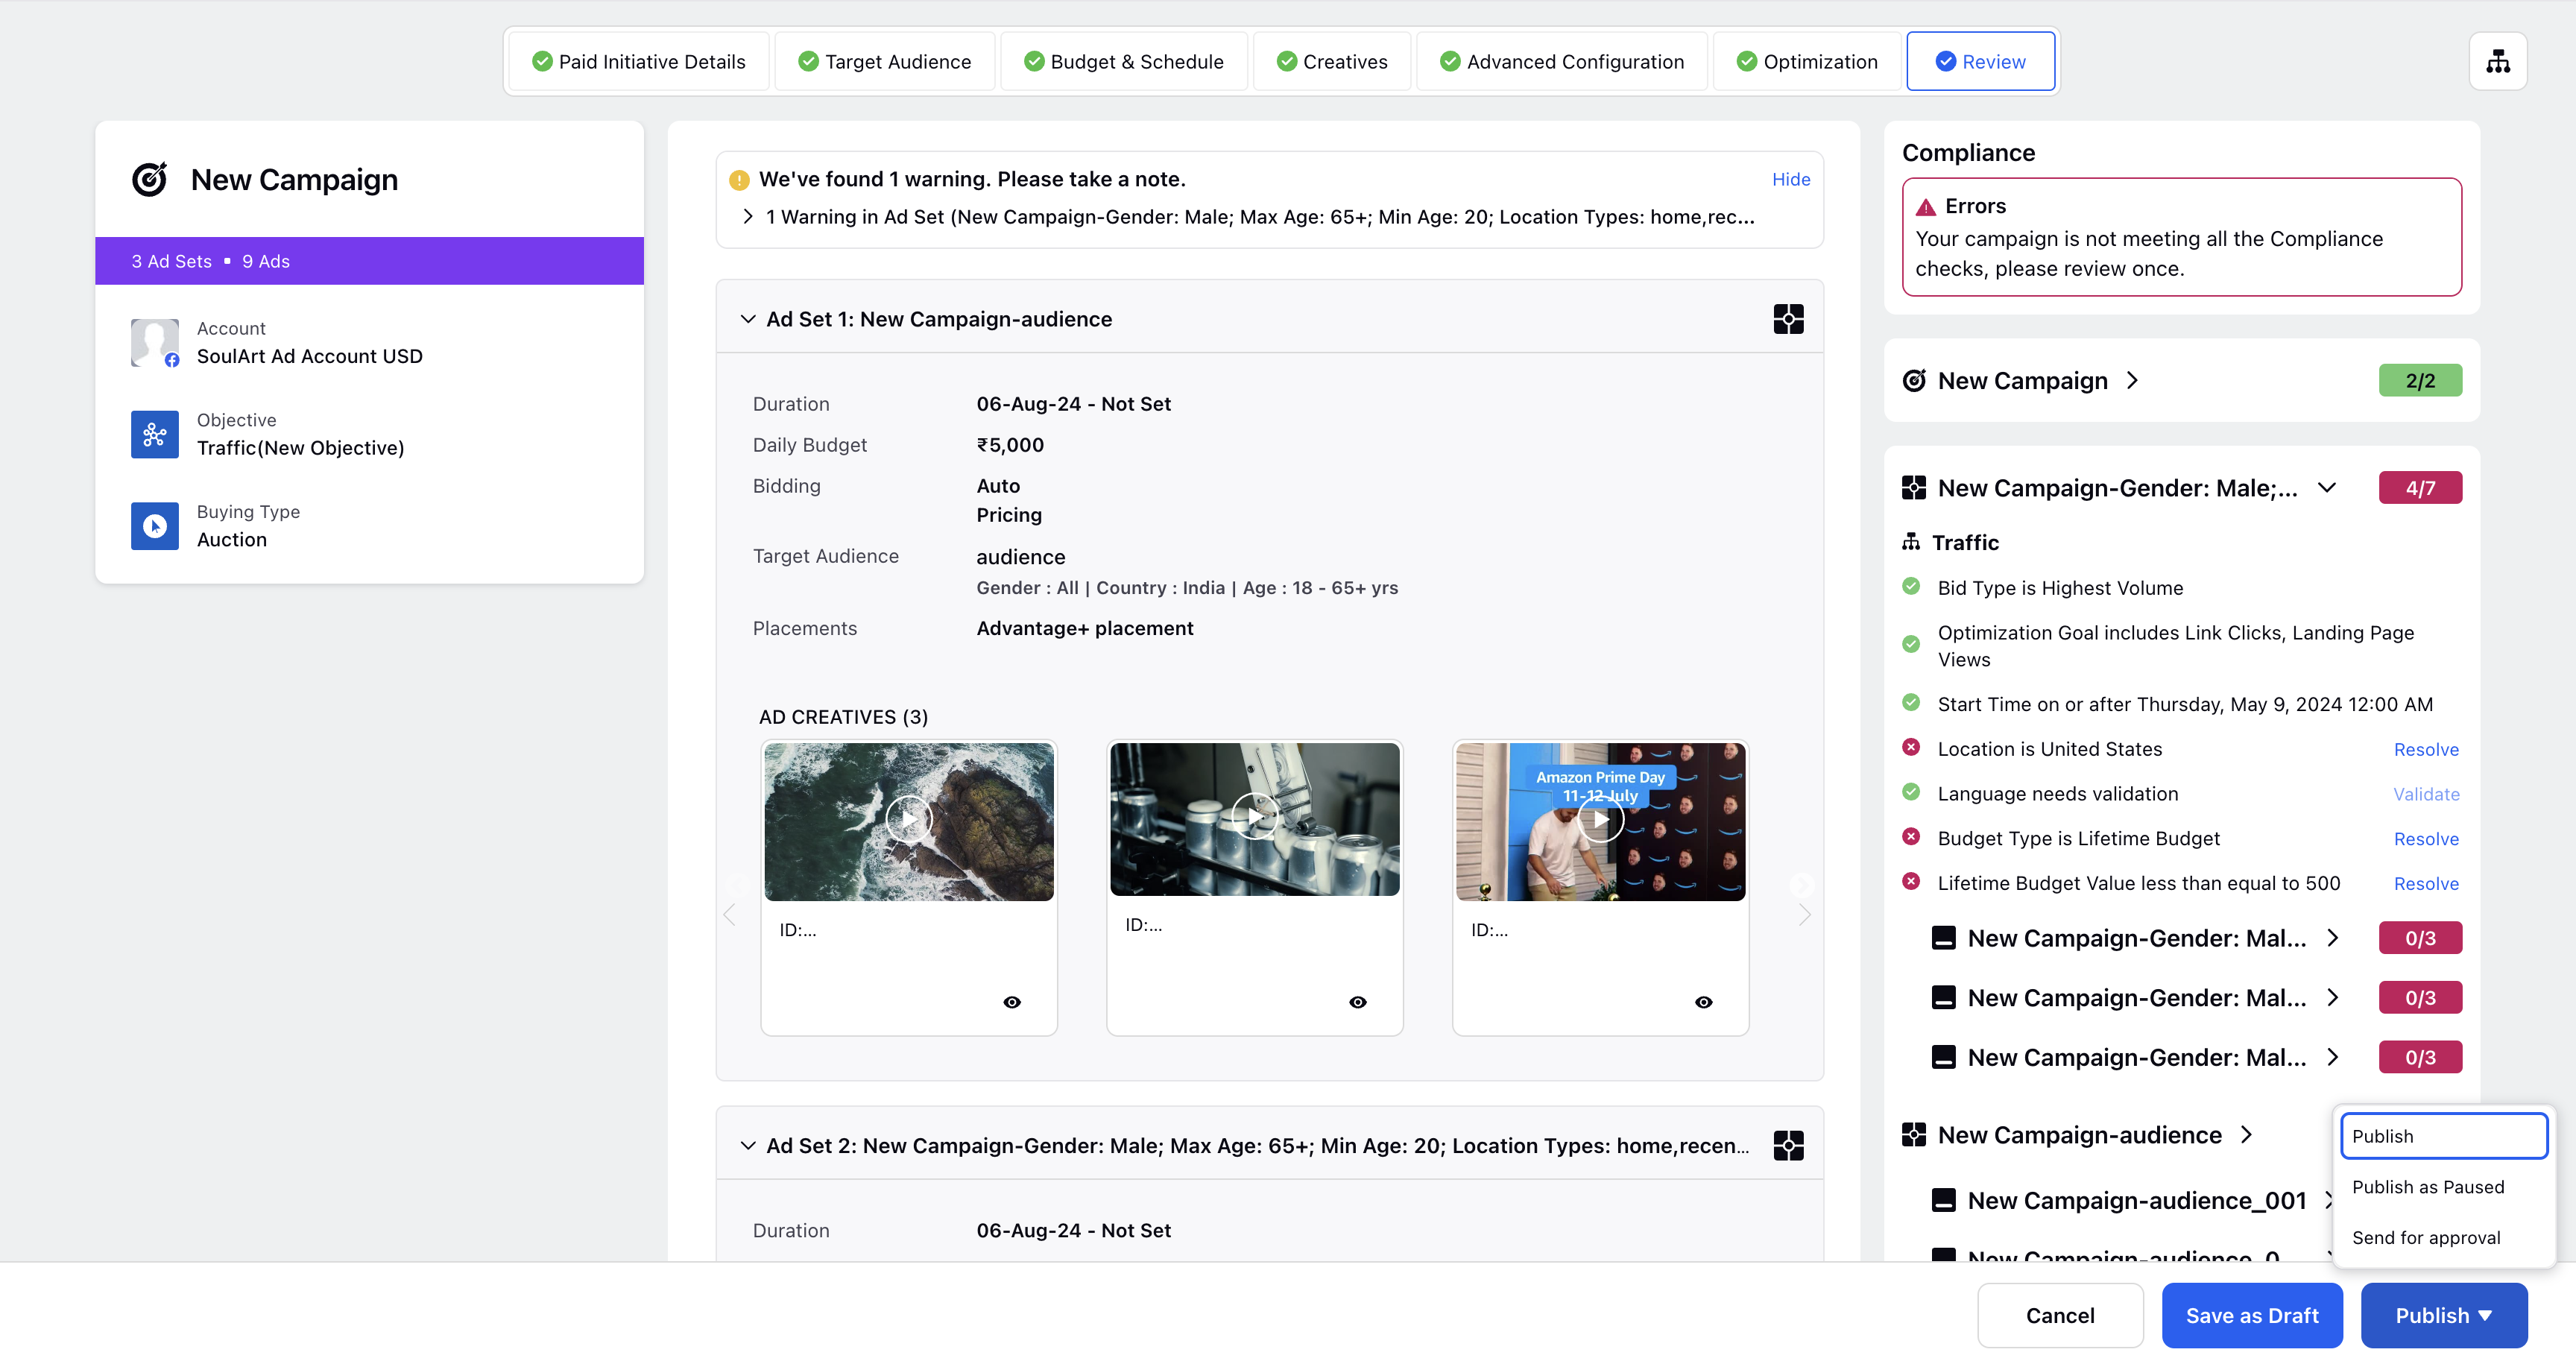
User can either "save as draft" to make further changes or send the campaign for approval or publish the campaign as live or paused.
 Note: If checklist errors persist, user can only publish campaign if so configured during the checklist creation.
If approval has already been applied via checklist, then campaign will directly go for approval, and user can view it in engagement dashboard.
Save your changes and exit the composer!
To View AI Checks
Navigate to the Creatives tab and add a creative to view the AI check evaluations in the QA Checklist pane. All AI checks are grouped together and highlighted with the ![]() icon next to each check.
icon next to each check.
![]() Note: AI checks evaluation is not real-time and may take upto 1 minute.
Note: AI checks evaluation is not real-time and may take upto 1 minute.