How to add quick filters?
Updated
Save time by utilizing quick filters, which enable you to save your filter configurations for easy reuse whenever you need to apply the same filter settings. In this article, you will learn how to create Quick Filters in the Production Dashboard.
To Add Quick Filters
Navigate to the Production Dashboards.
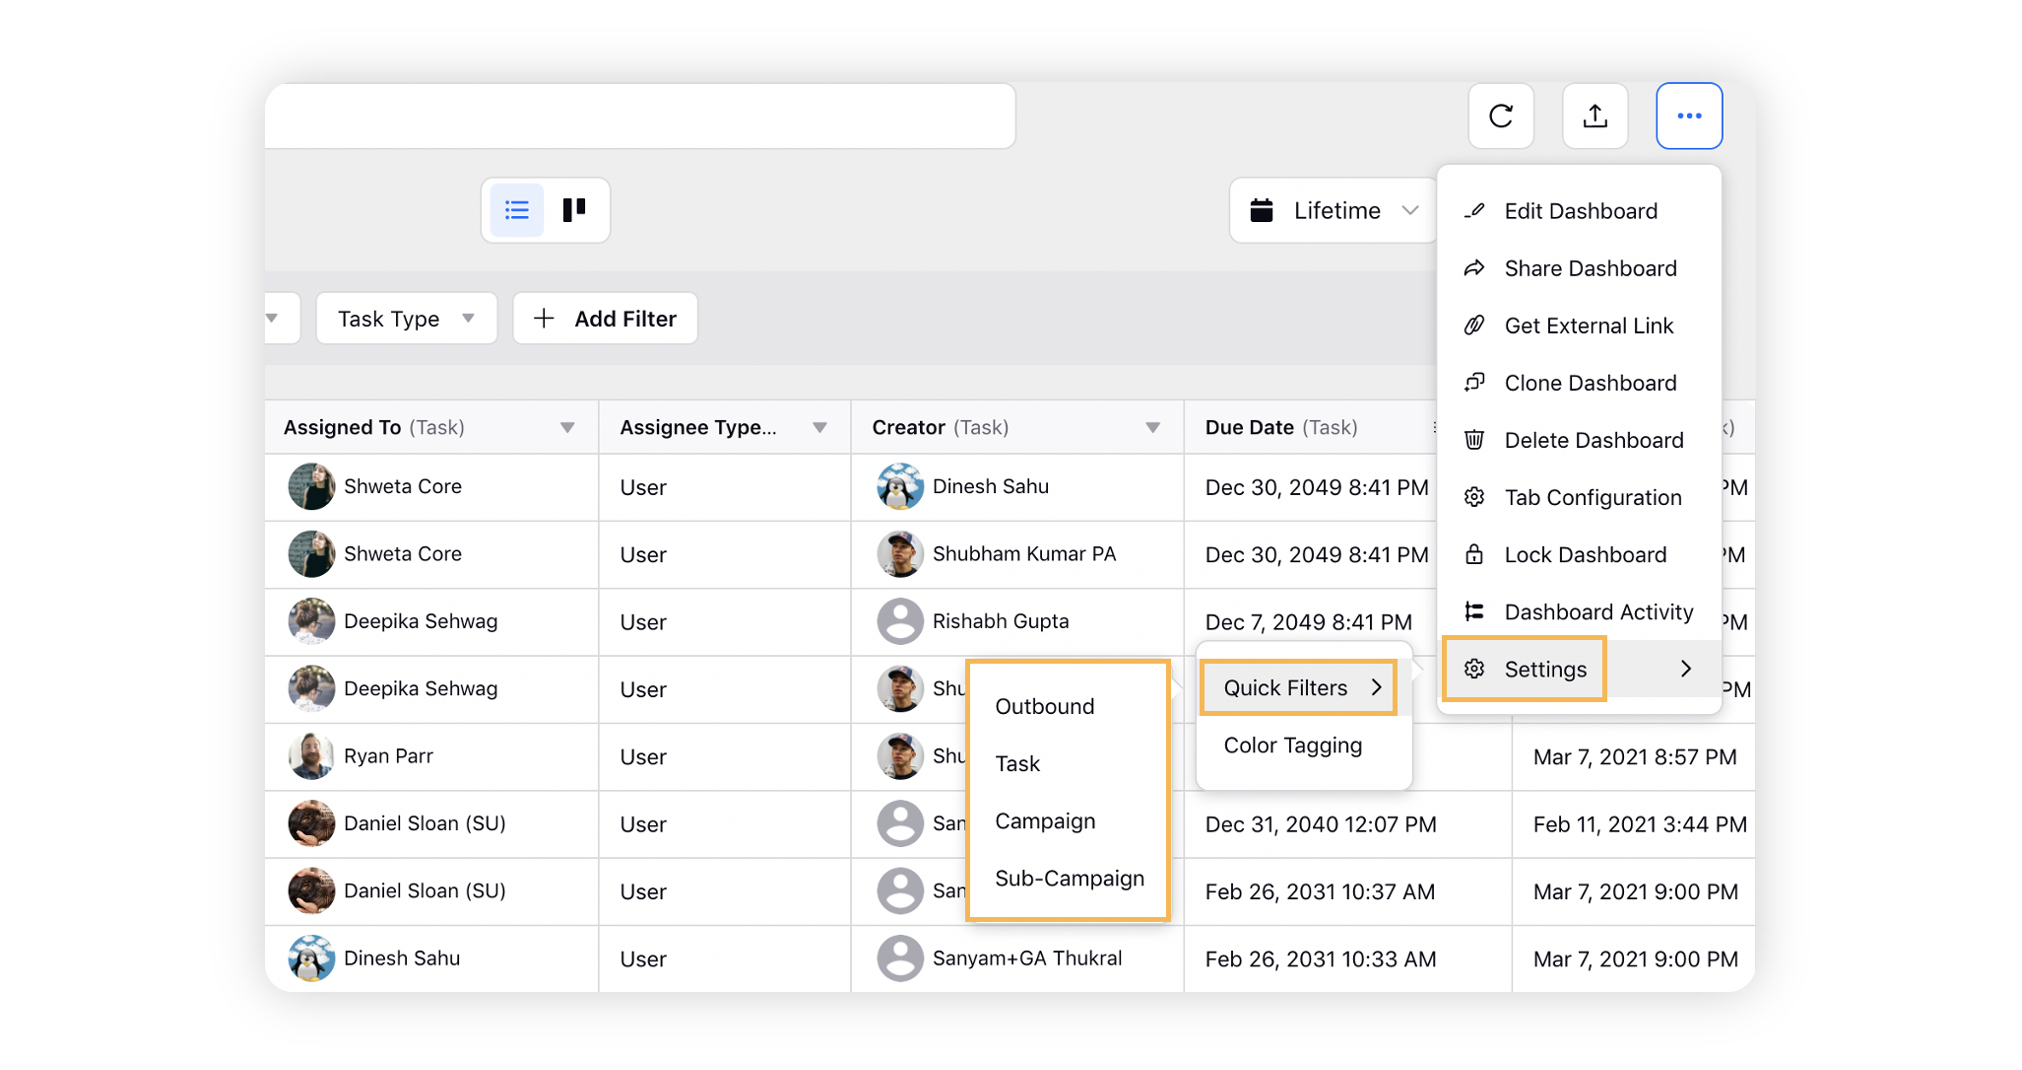
In the top right corner of the Production Dashboards window, click the Options icon and select Settings > Quick Filters.
Select either Outbound [Message], Tasks, Campaigns, or Sub-Campaigns to specify the Quick Filter type.
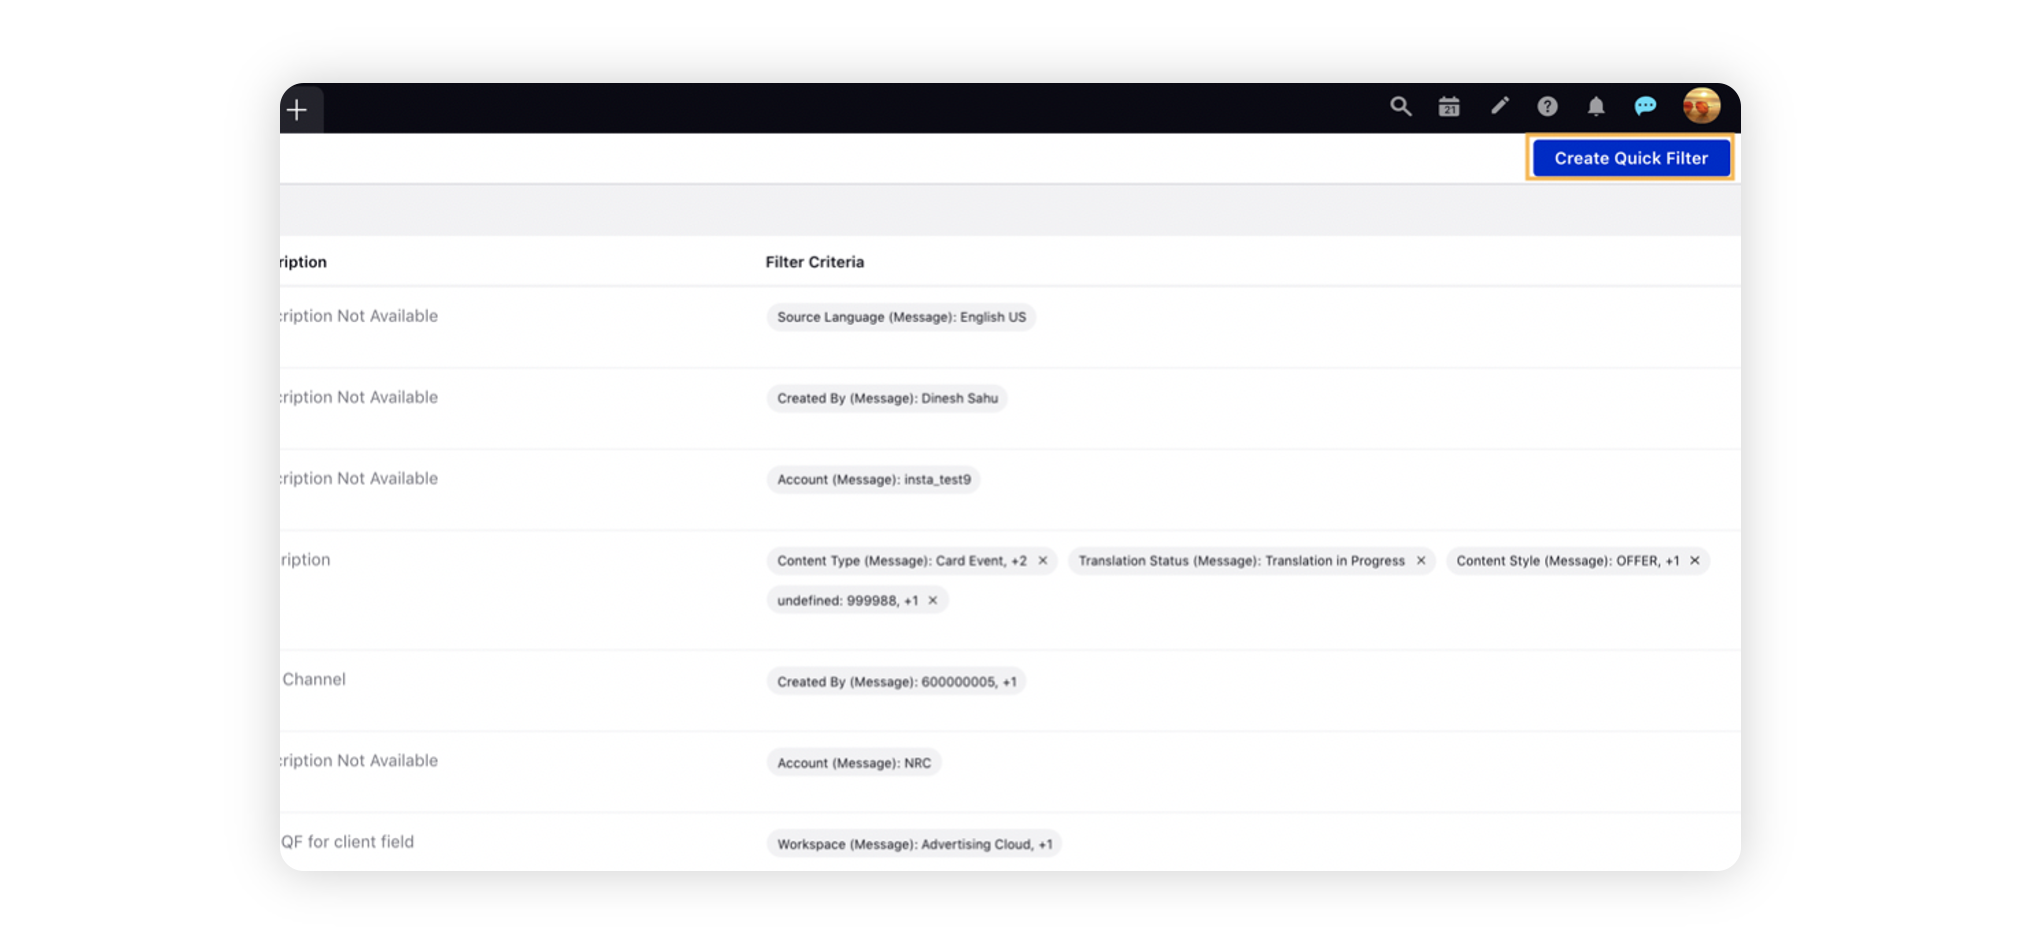
On clicking Outbound, Task, Campaign, or Sub-Campaign, you will be redirected to the Quick Filters Configuration window.
Click on Create Quick Filter (top right corner).
Fill in the required details in the Quick Filter Creation Form (Field Descriptions are mentioned below).
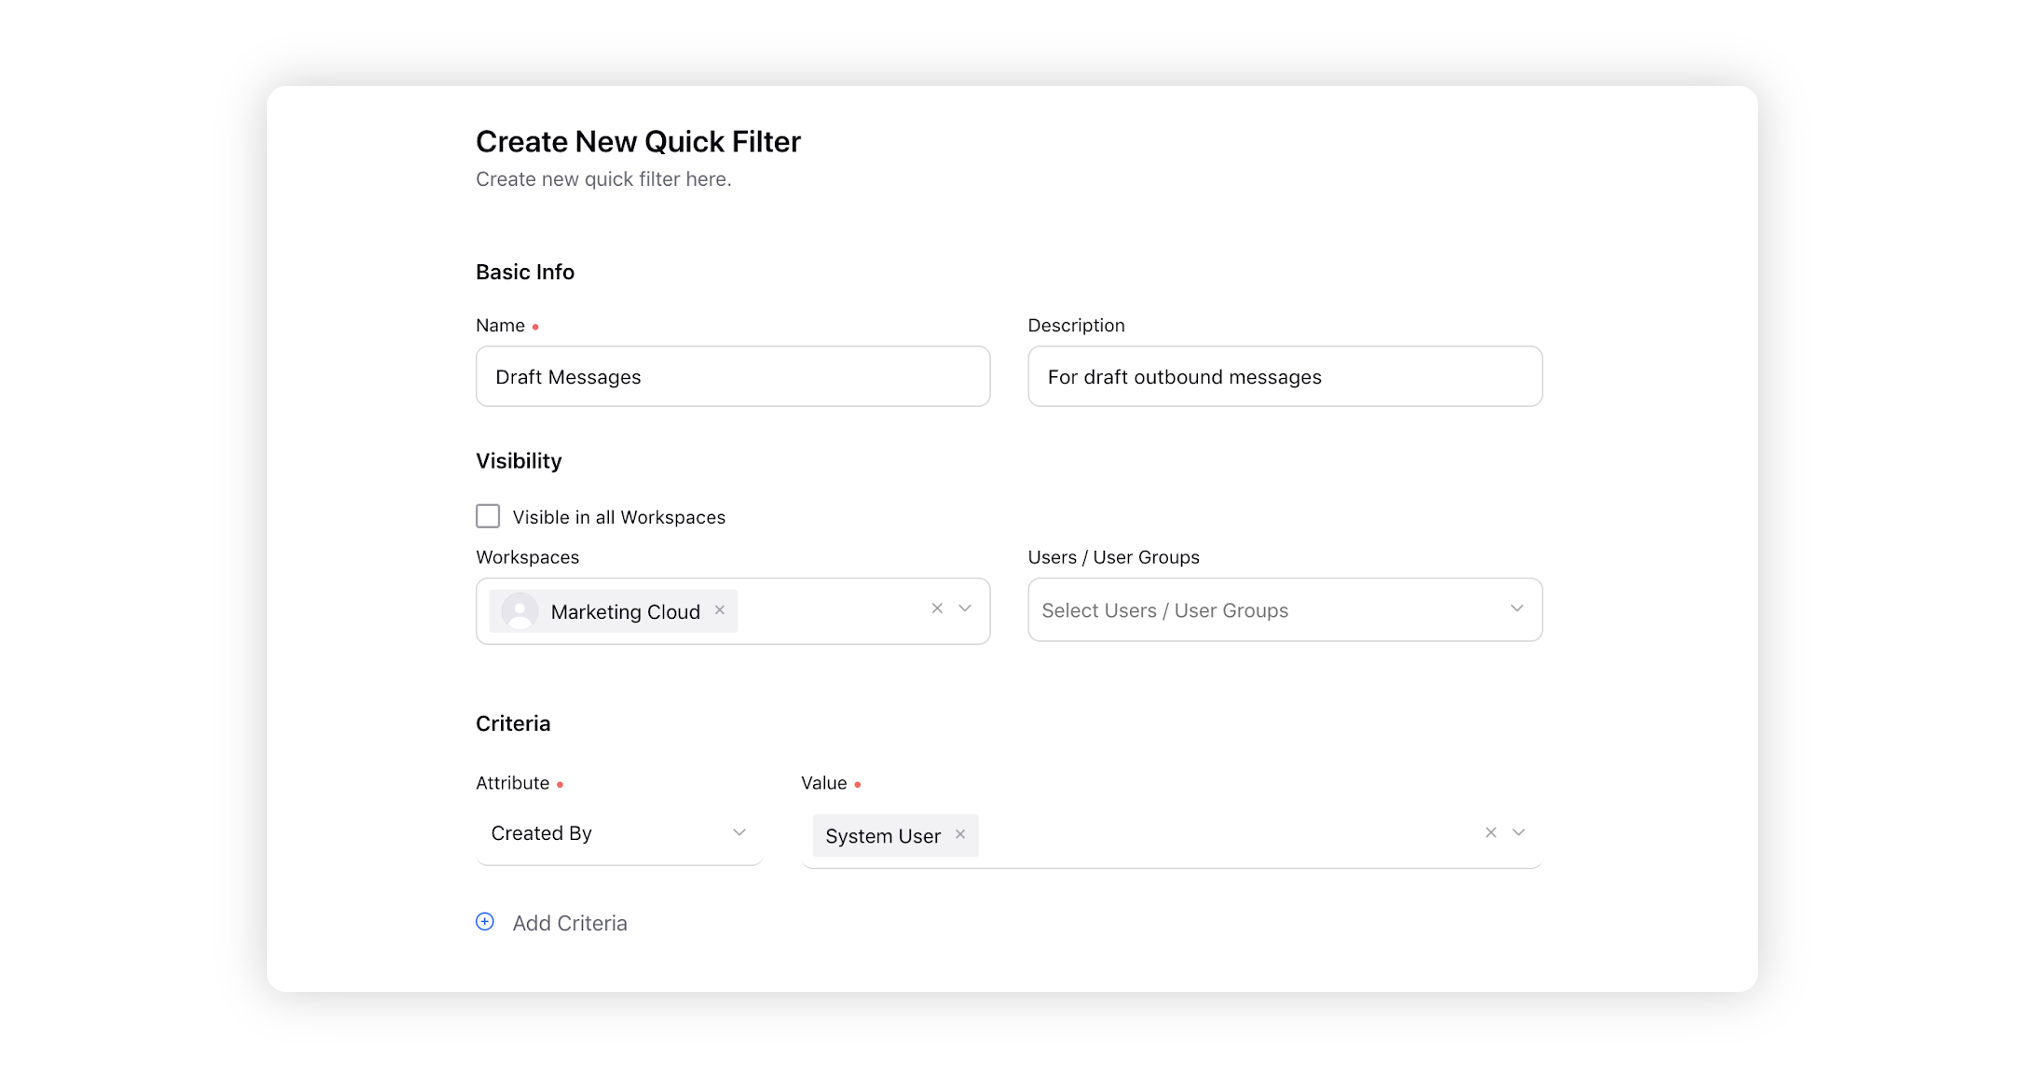
Click Save (bottom right corner).
Quick Filters — Field Descriptions
Term | Description |
Name | Provide a name for your quick filter. |
Description | Provide a description of your quick filter. |
Visibility | Select your visibility preferences.
|
Criteria | Click Add Criteria to enter Attributes and their respective values. (these will be available depending on the initial Channel Type selected). You can add multiple attributes and select multiple values within each attribute. |
Note: |
Quick Filters appear on Dashboard Tabs based on the associated Source Type of the Tab and the Quick Filter (i.e. only Outbound Message Quick Filters will appear on an Outbound Message Tab). |