How to Use External Sources such as FTP/SFTP/S3 in Scheduled Exports
Updated
Learn how you can store your Sprinklr exports in an external source like FTP, SFTP, or S3.
Sprinklr allows you to store exports in your own databases. We support FTP, SFTP, and S3 as External Storage options to store exports externally. Through this External Storage support in exports, files can be transferred and stored seamlessly on the client side.
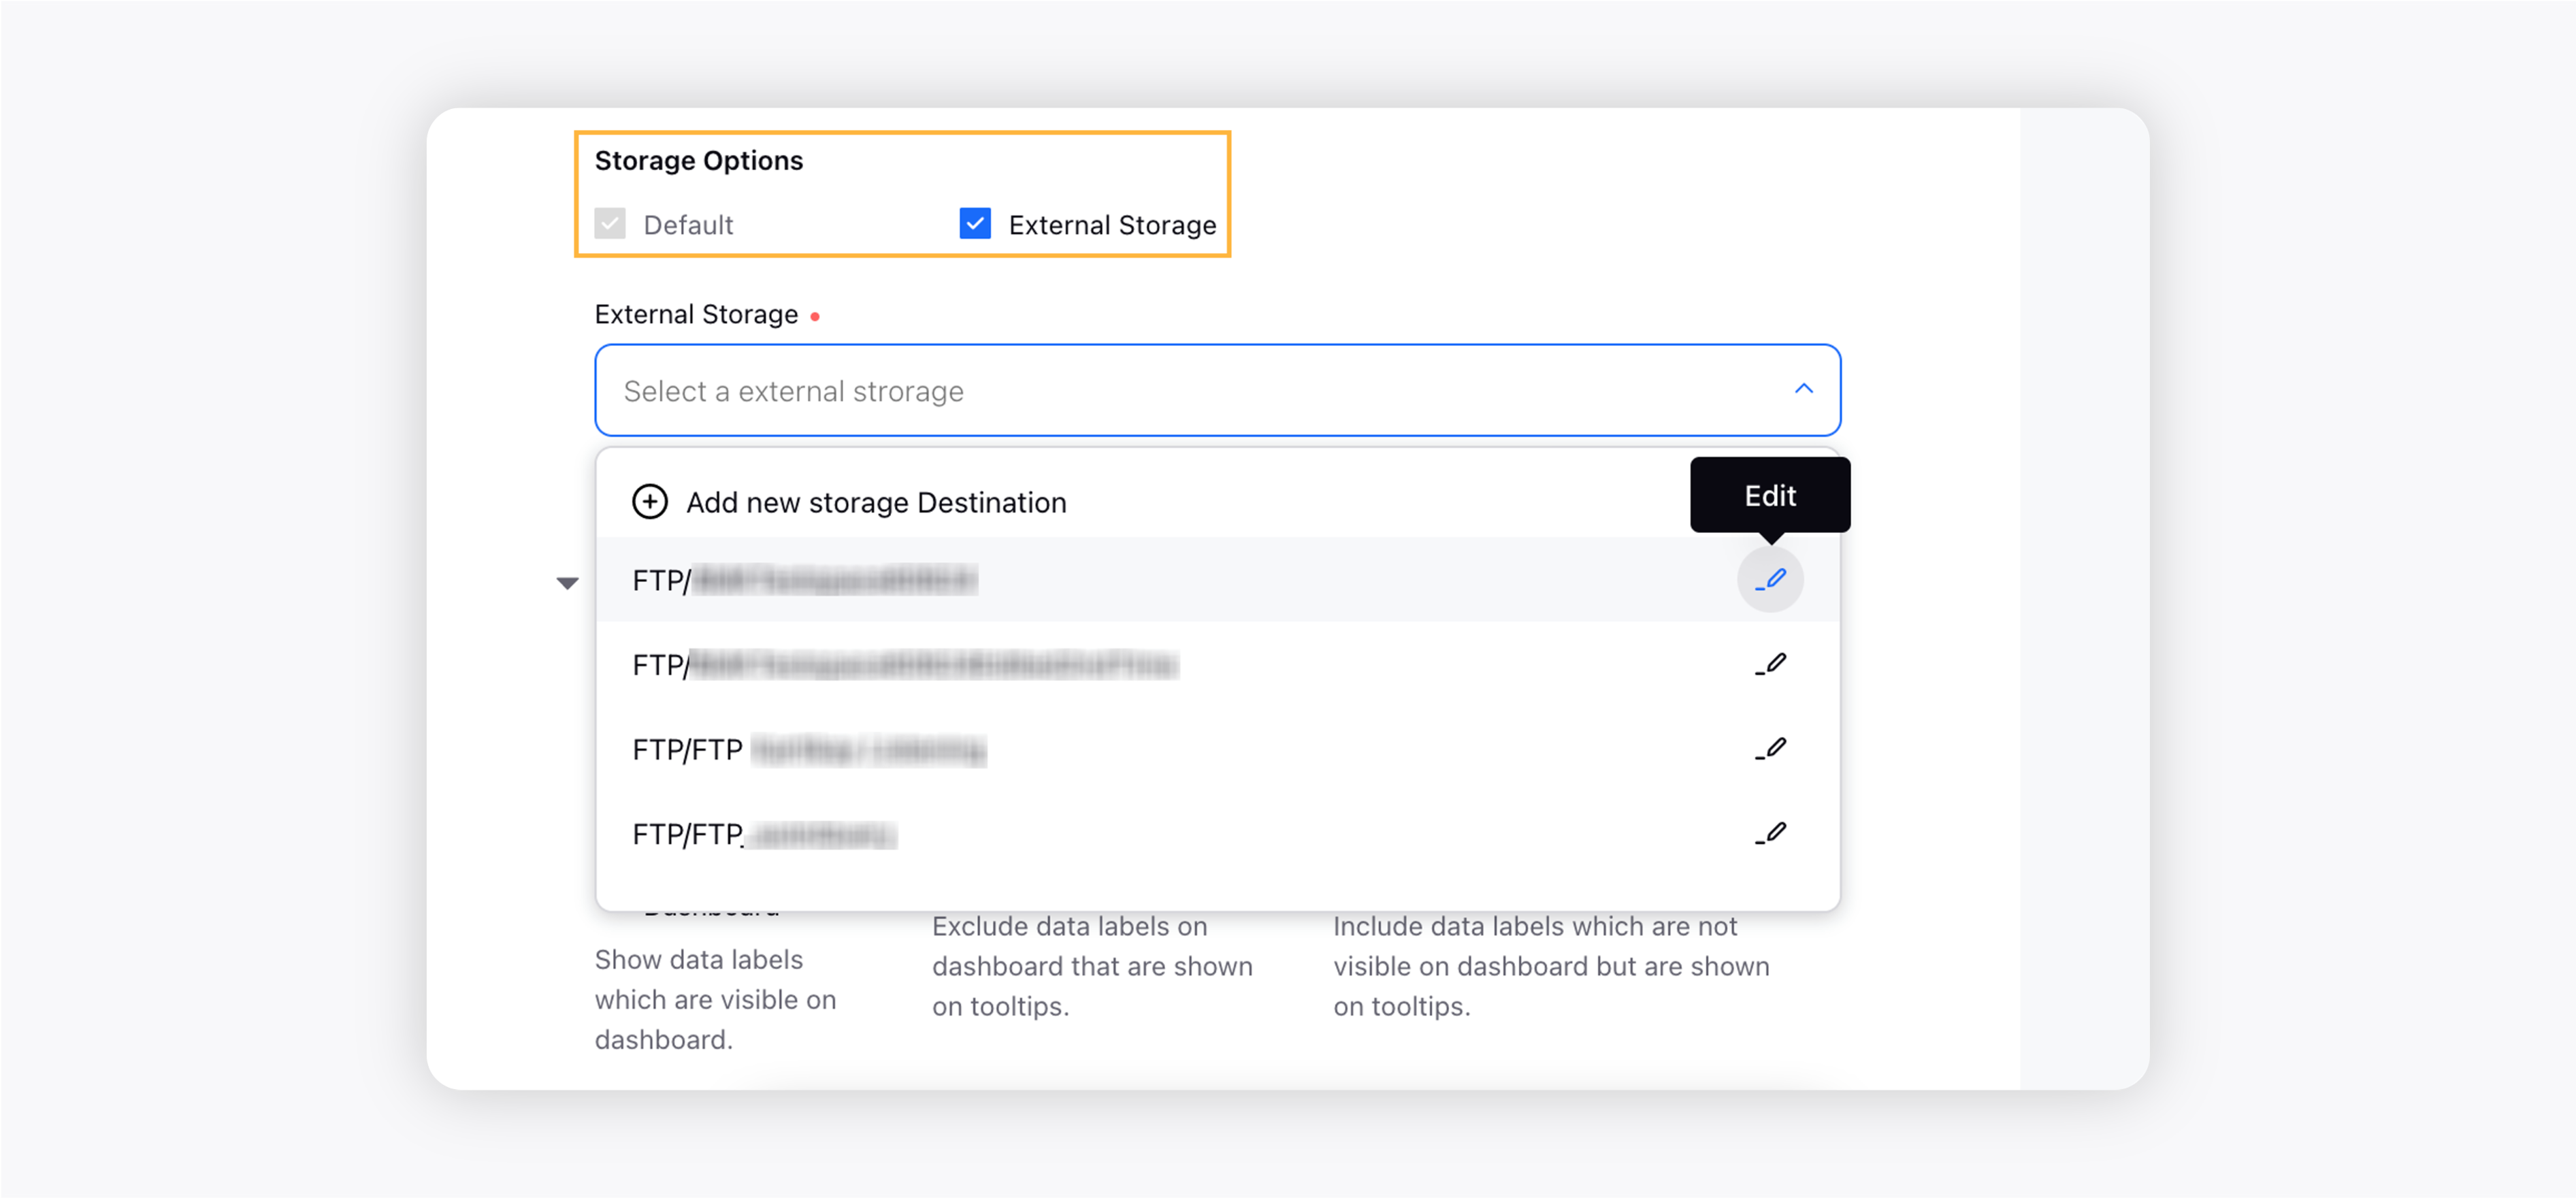
In the Advance & Scheduled Export Settings window, you will see two storage options:-
Default: This will send the export in an email. It is checked by default.
External Storage: This will transfer and store your exports externally on FTP, SFTP, and/or S3.
Note:
|
Set up a new FTP/SFTP/S3
There are two ways to set up a new external source (FTP/SFTP/S3) –
Click the New Tab icon. Under the Governance Console tab, click All Settings within Listen.
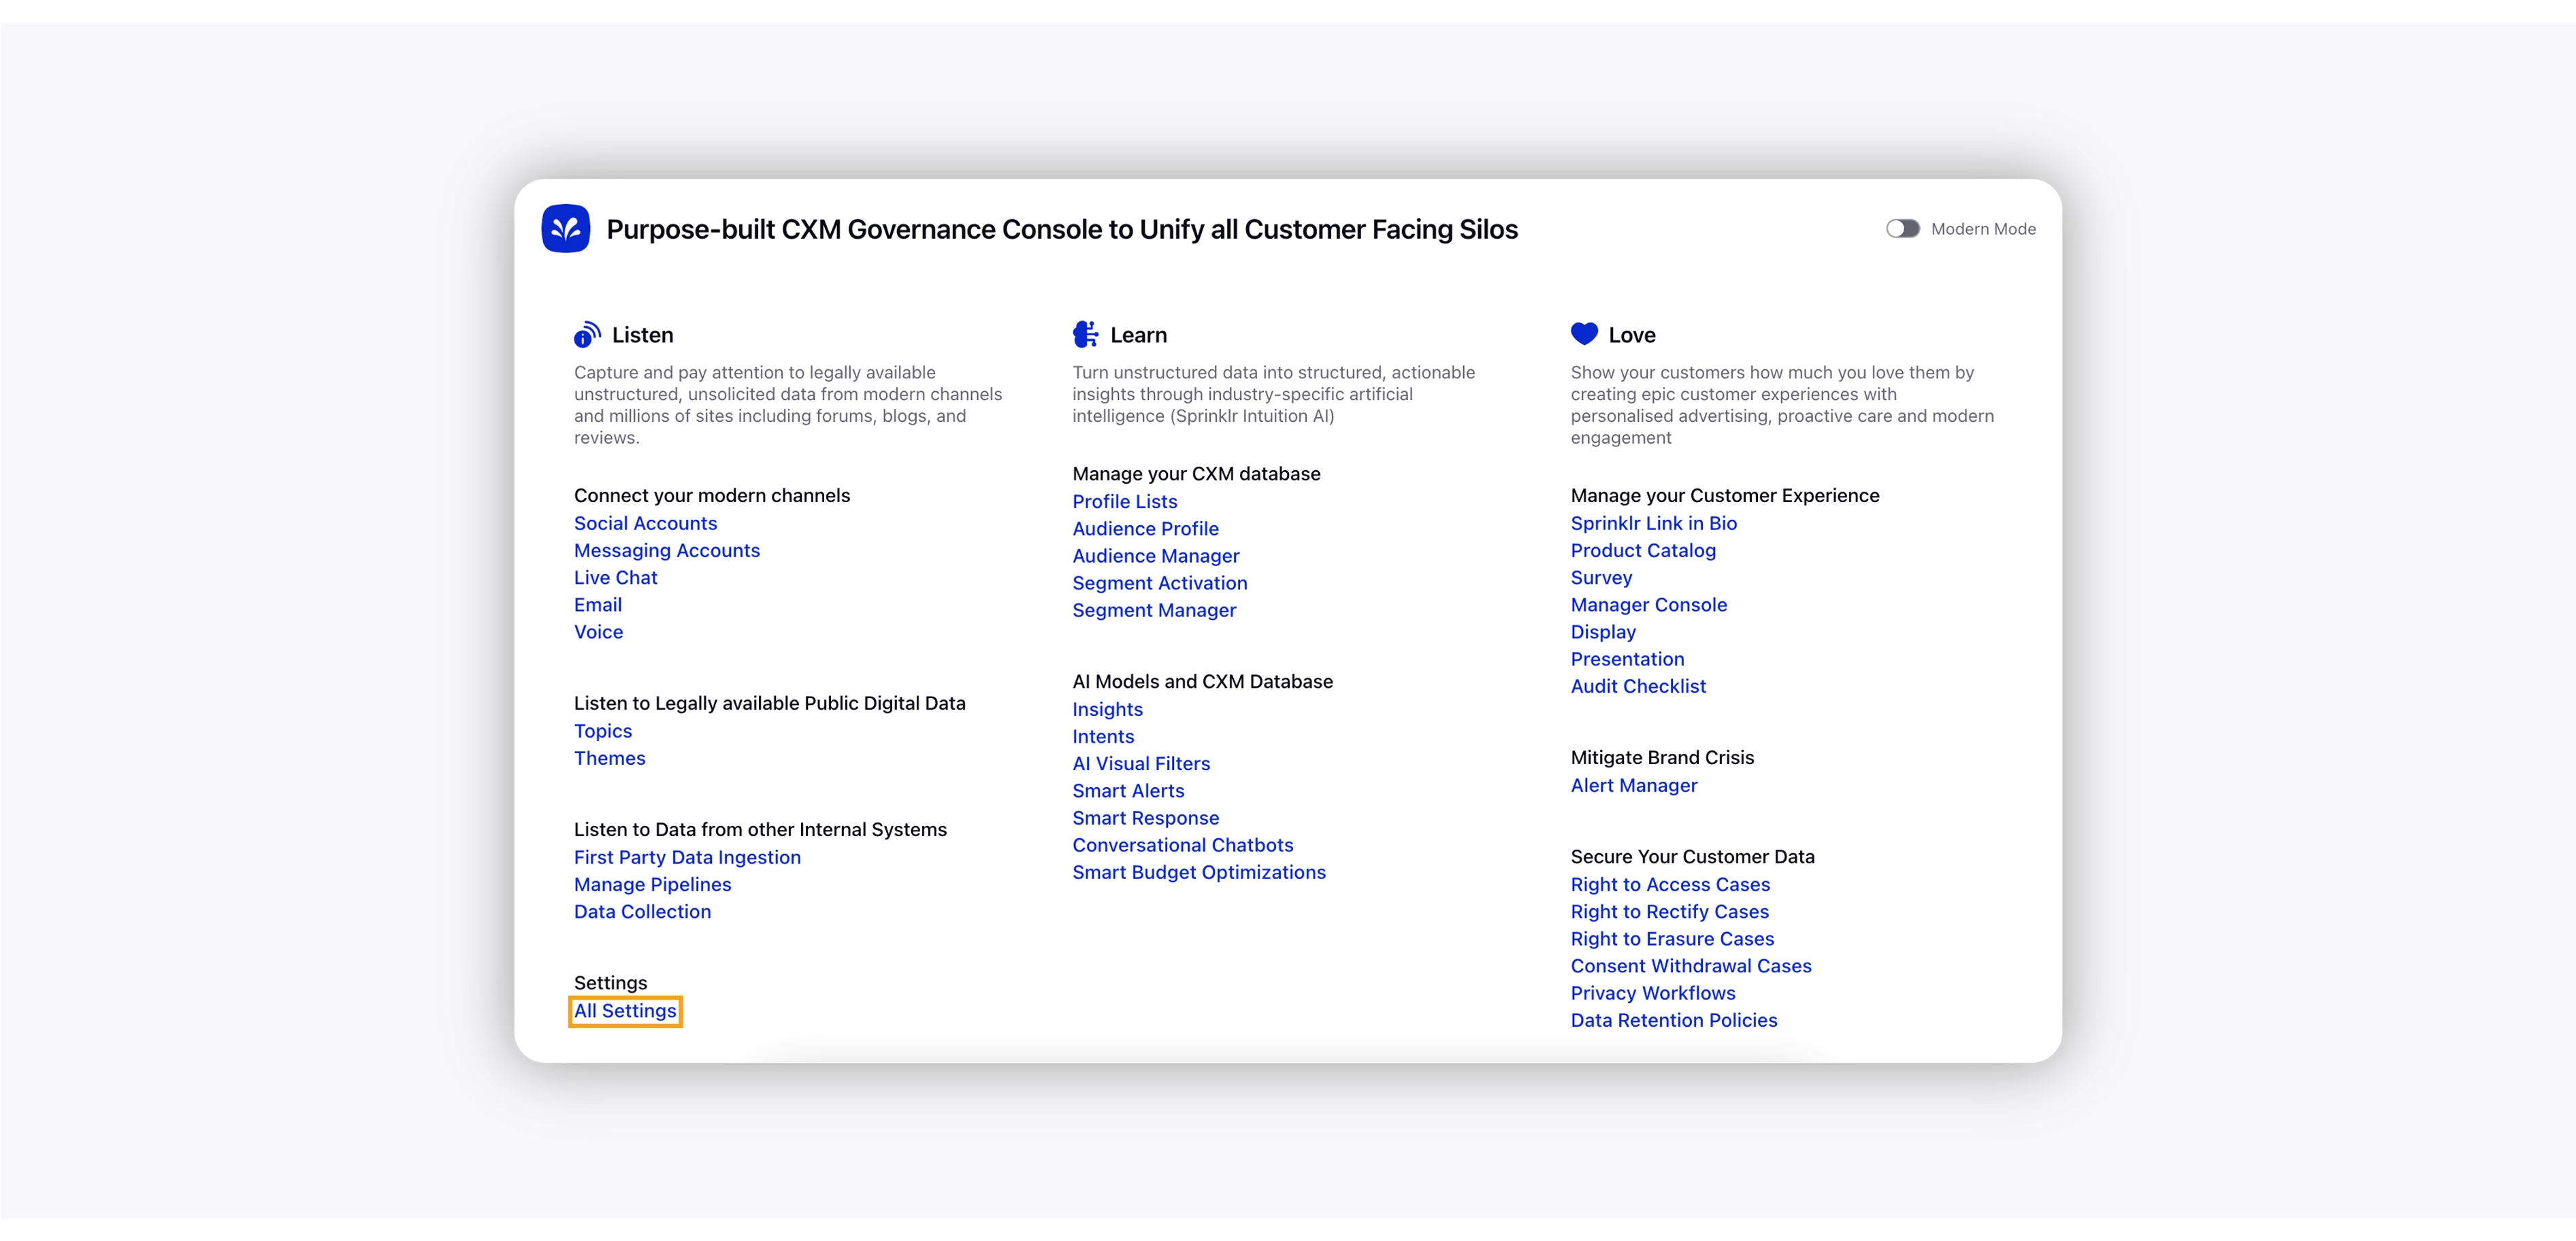
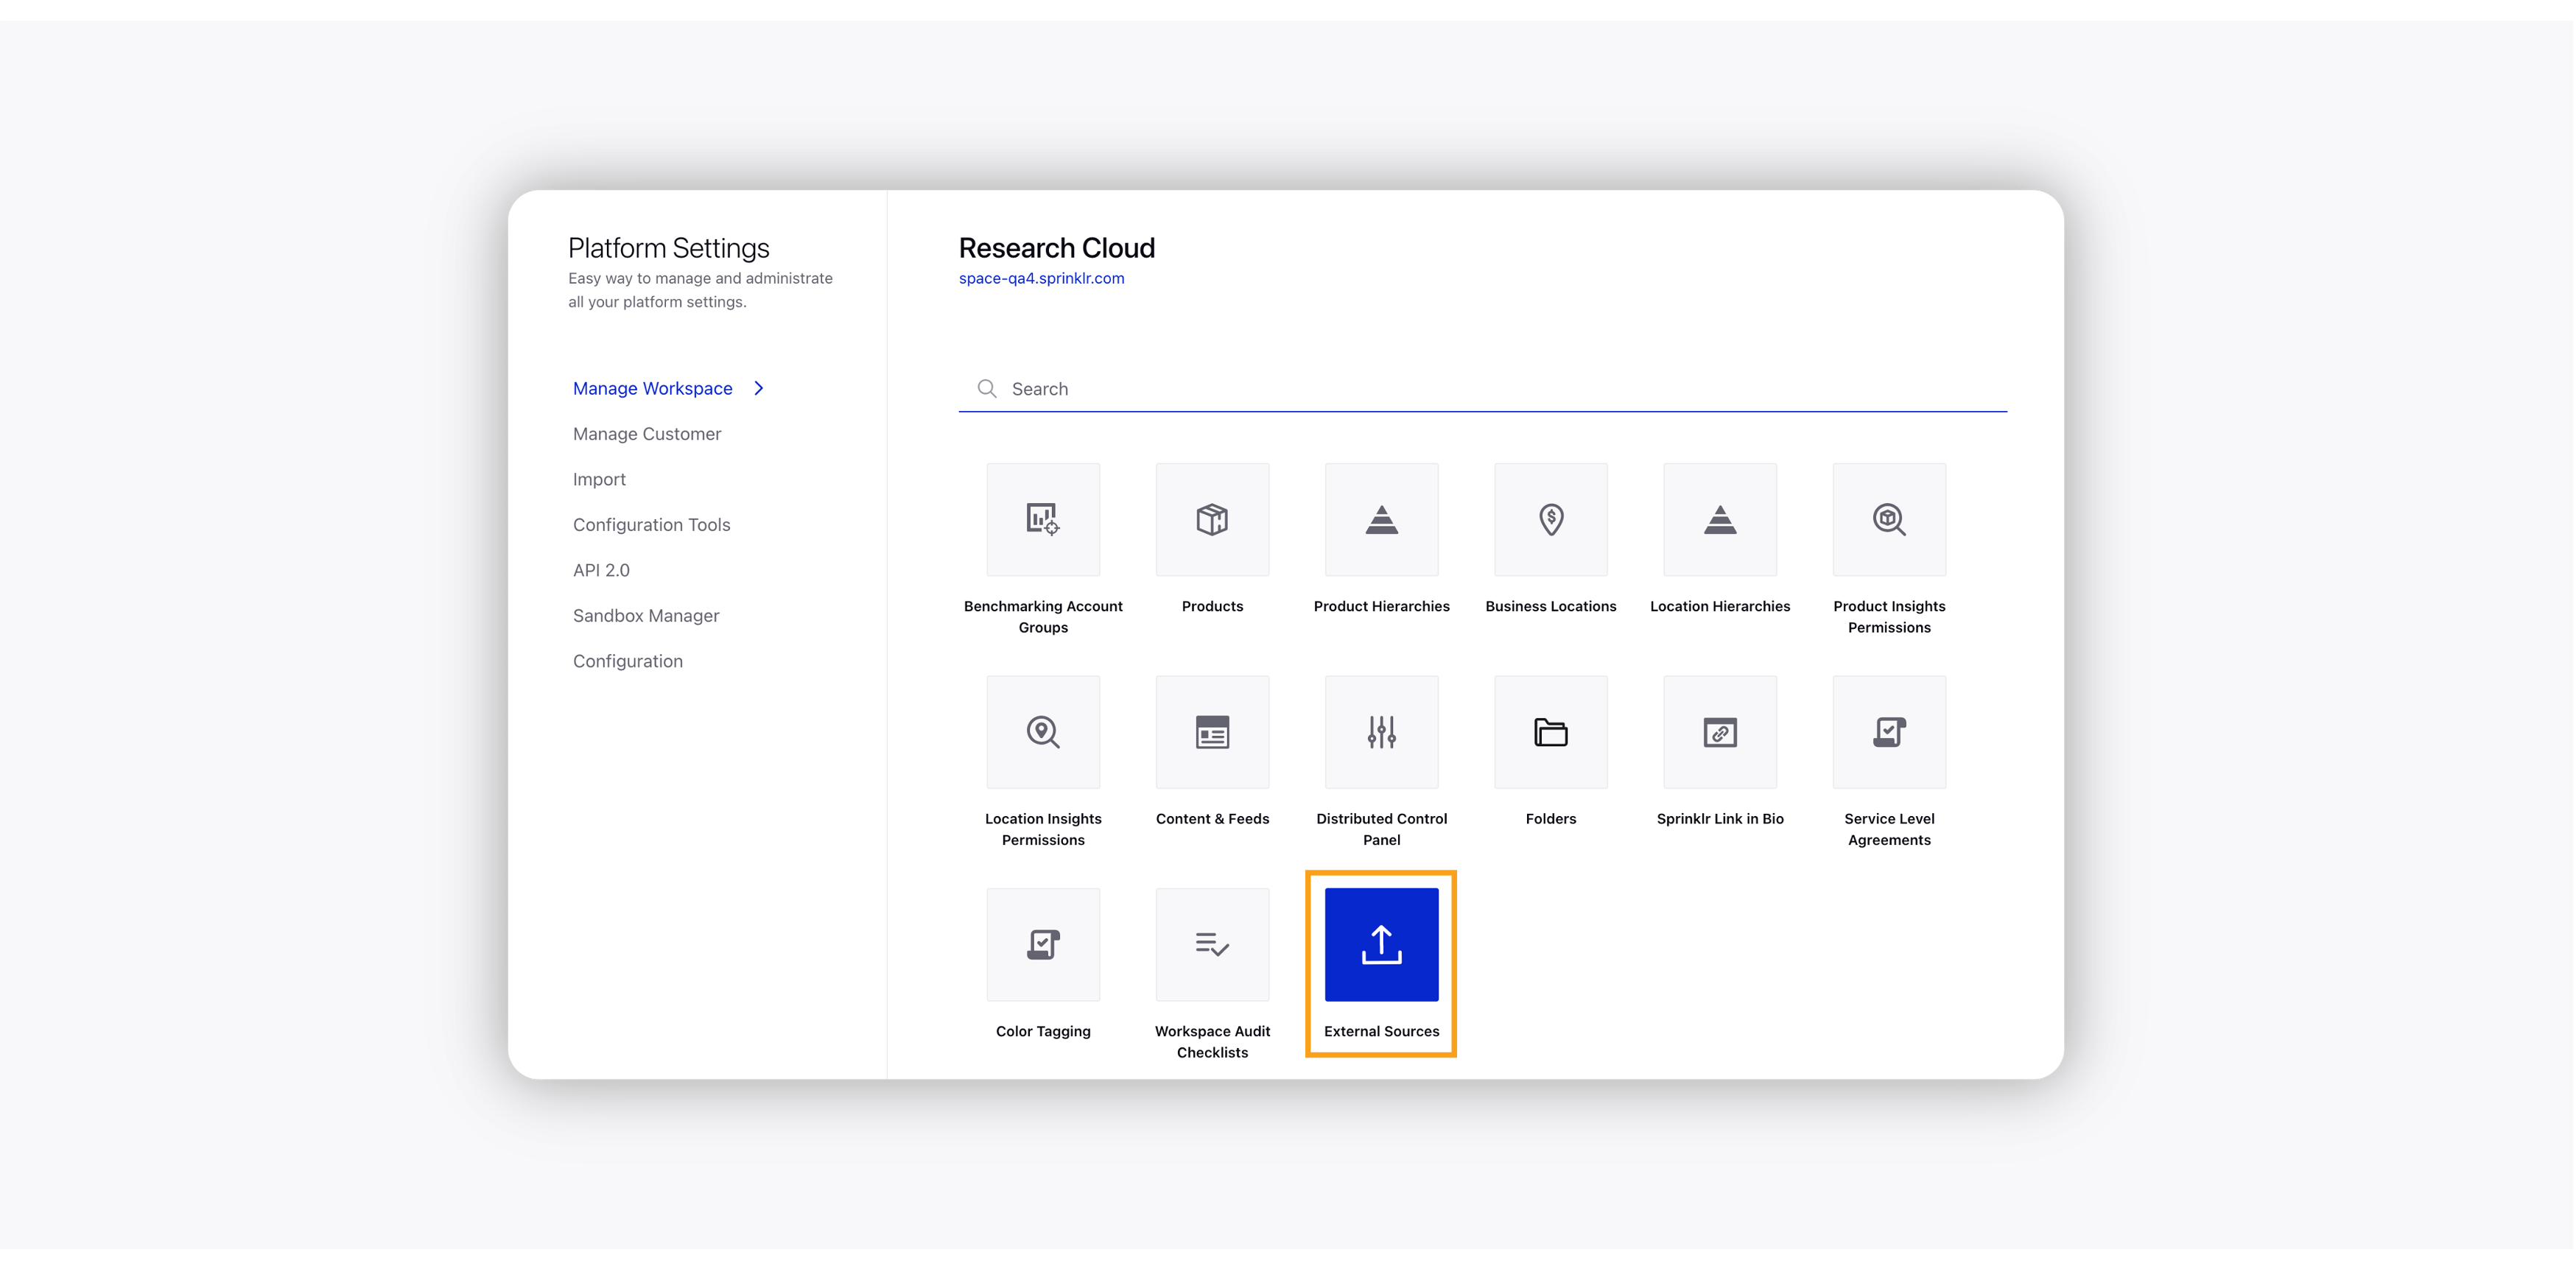
On the Platform Settings window, search for External Sources and click it.
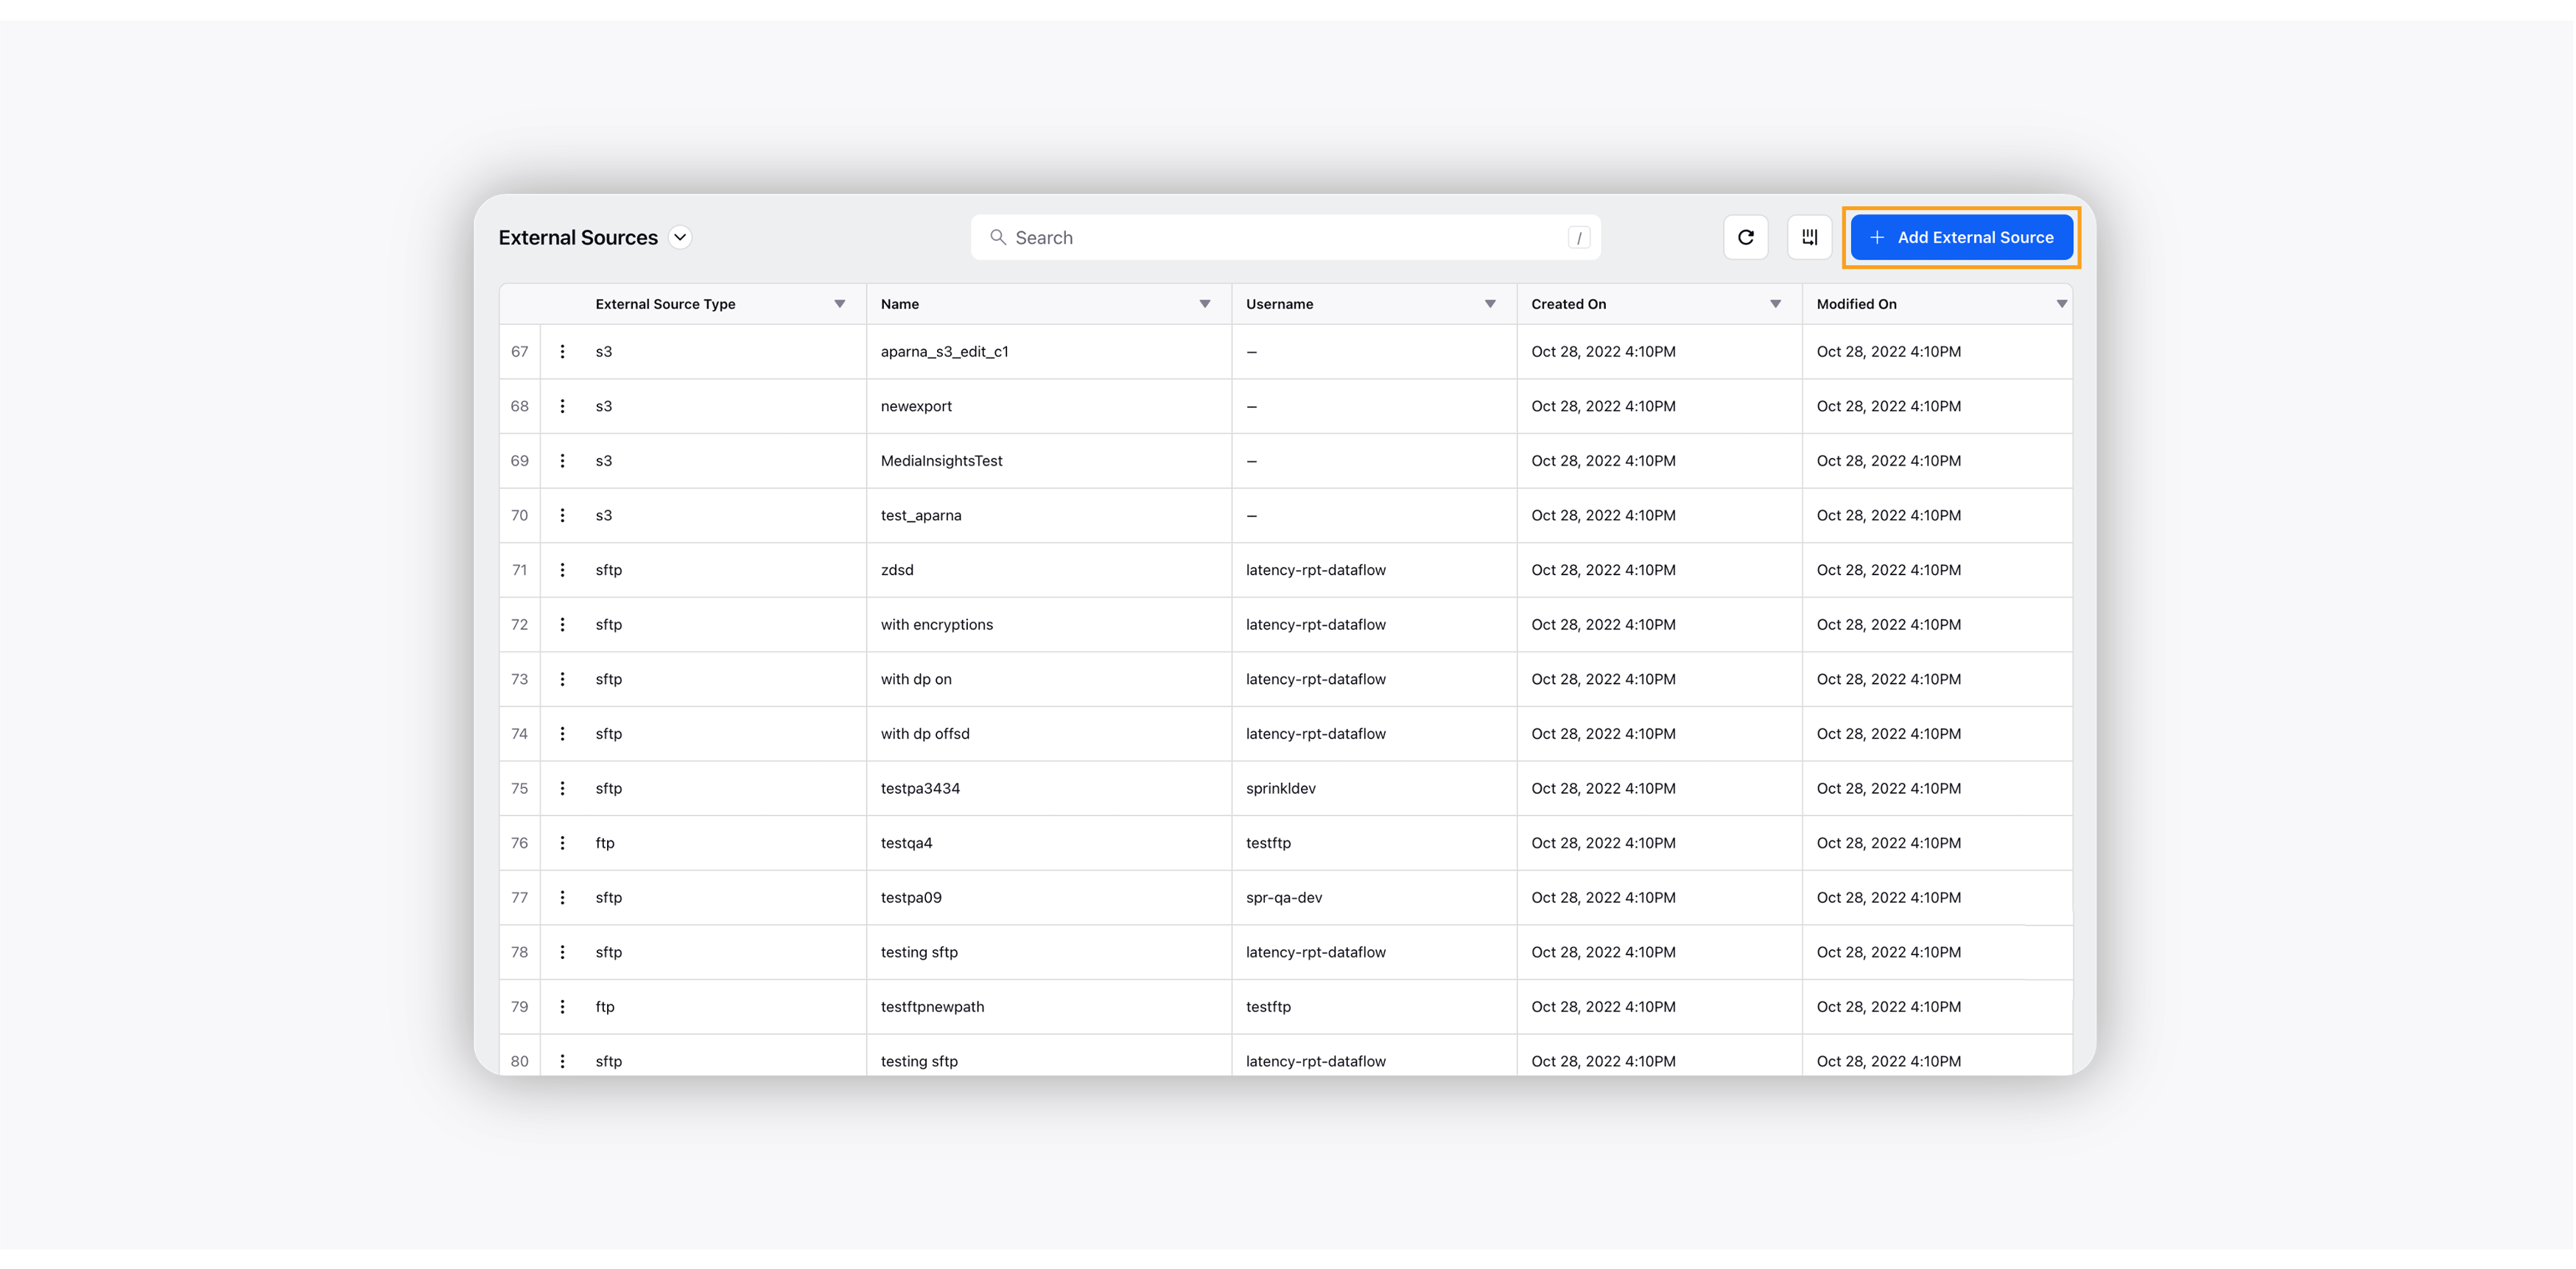
On the External Sources record manager window, click the Add External Source button in the top right corner.
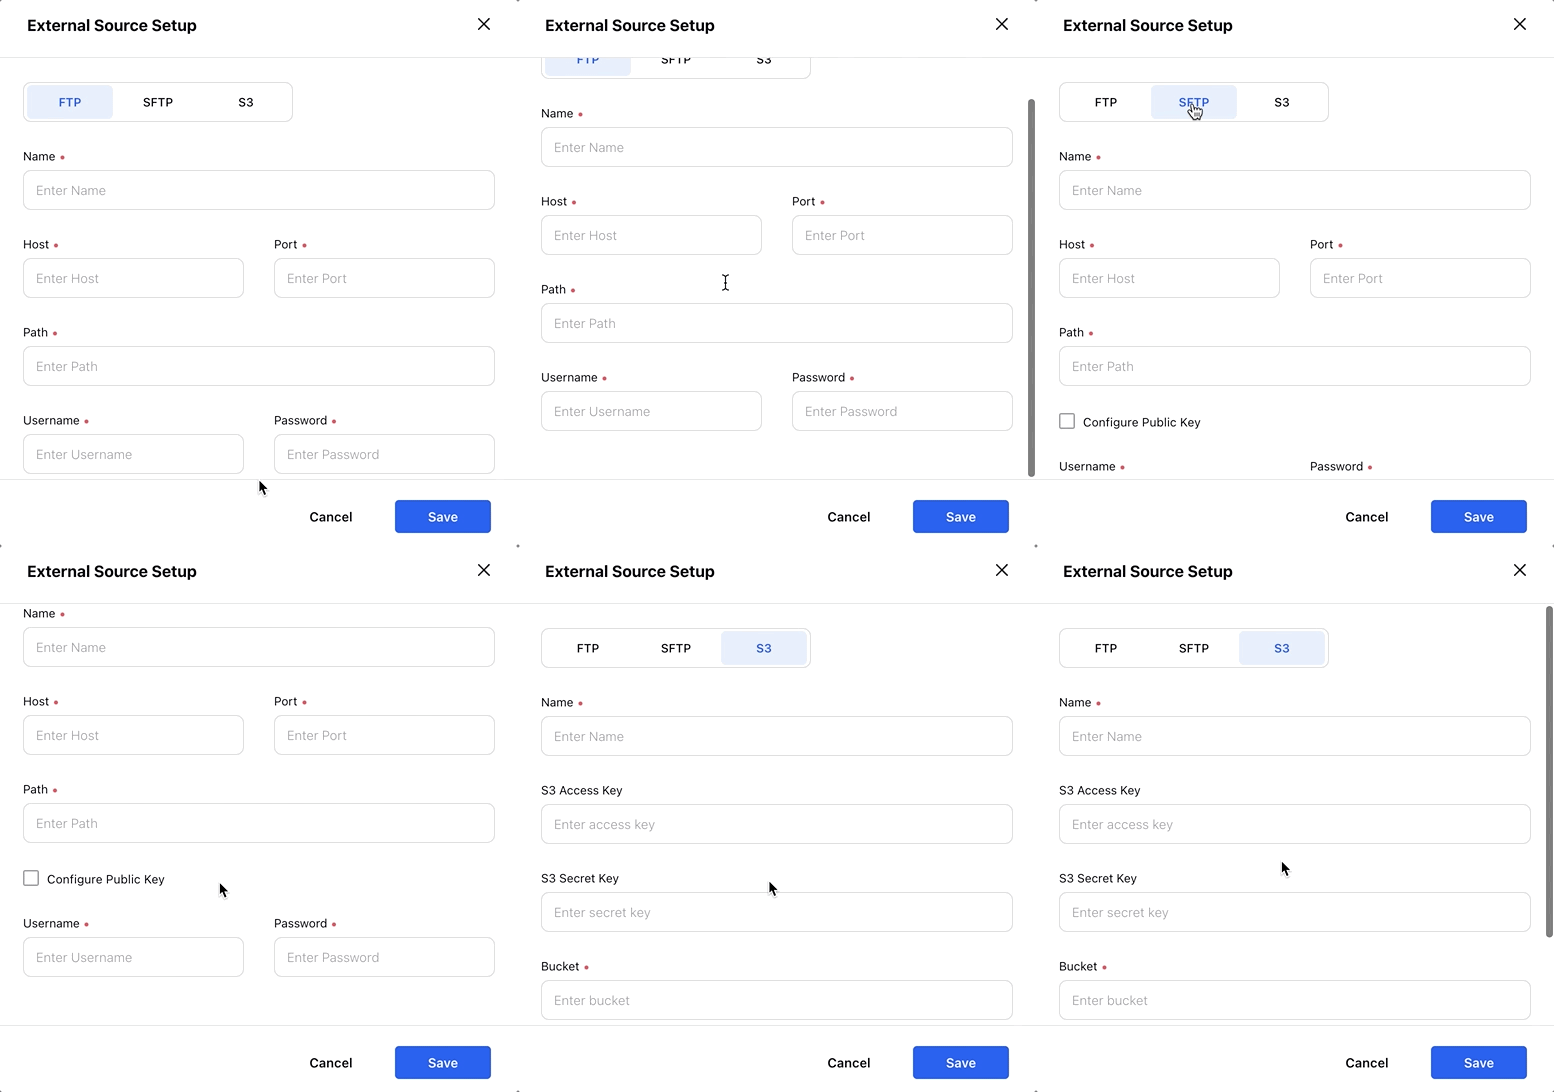
On the External Source Setup dialog box, select any of the three storage options – FTP, SFTP, or S3. Fill in the relevant information in the given fields.
Click Save.
Note:
|
To store exports in an existing FTP/SFTP/S3
Click the New Tab icon. Under the Sprinklr Marketing - Advertising tab, click Exports within Act.
On the Scheduled Export (Settings) window, click Add Scheduled Export in the top right corner.
On the Scheduled Exports dialog box, select the dashboard that you want to export and also fill in other information. For more information, see Advanced & Scheduled Export Settings.
Scroll down to the Storage Options. There are two options: Default and External Storage. To store exports externally, select the External Storage option.
Click the dropdown arrow under External Storage, and select any of the existing FTP/SFTP/S3 from the list.
Click Export in the bottom right corner to export the dashboard.
Note: You will receive a notification if the scheduled export fails using FTP/SFTP/S3 as a storage option. |
FTP/SFTP Setup — Fields & Description
Field | Description |
Name | Enter the name of the FTP/SFTP server. |
Host | Enter the host of the FTP/SFTP server. |
Port | Enter the FTP/SFTP port. The default FTP port is TCP 21. |
Path | Enter the FTP/SFTP path. FTP path is a location referenced internally using a URL-style path format. |
Username | Enter the username of your FTP/SFTP server. |
Password | Enter the password of your FTP/SFTP server. |
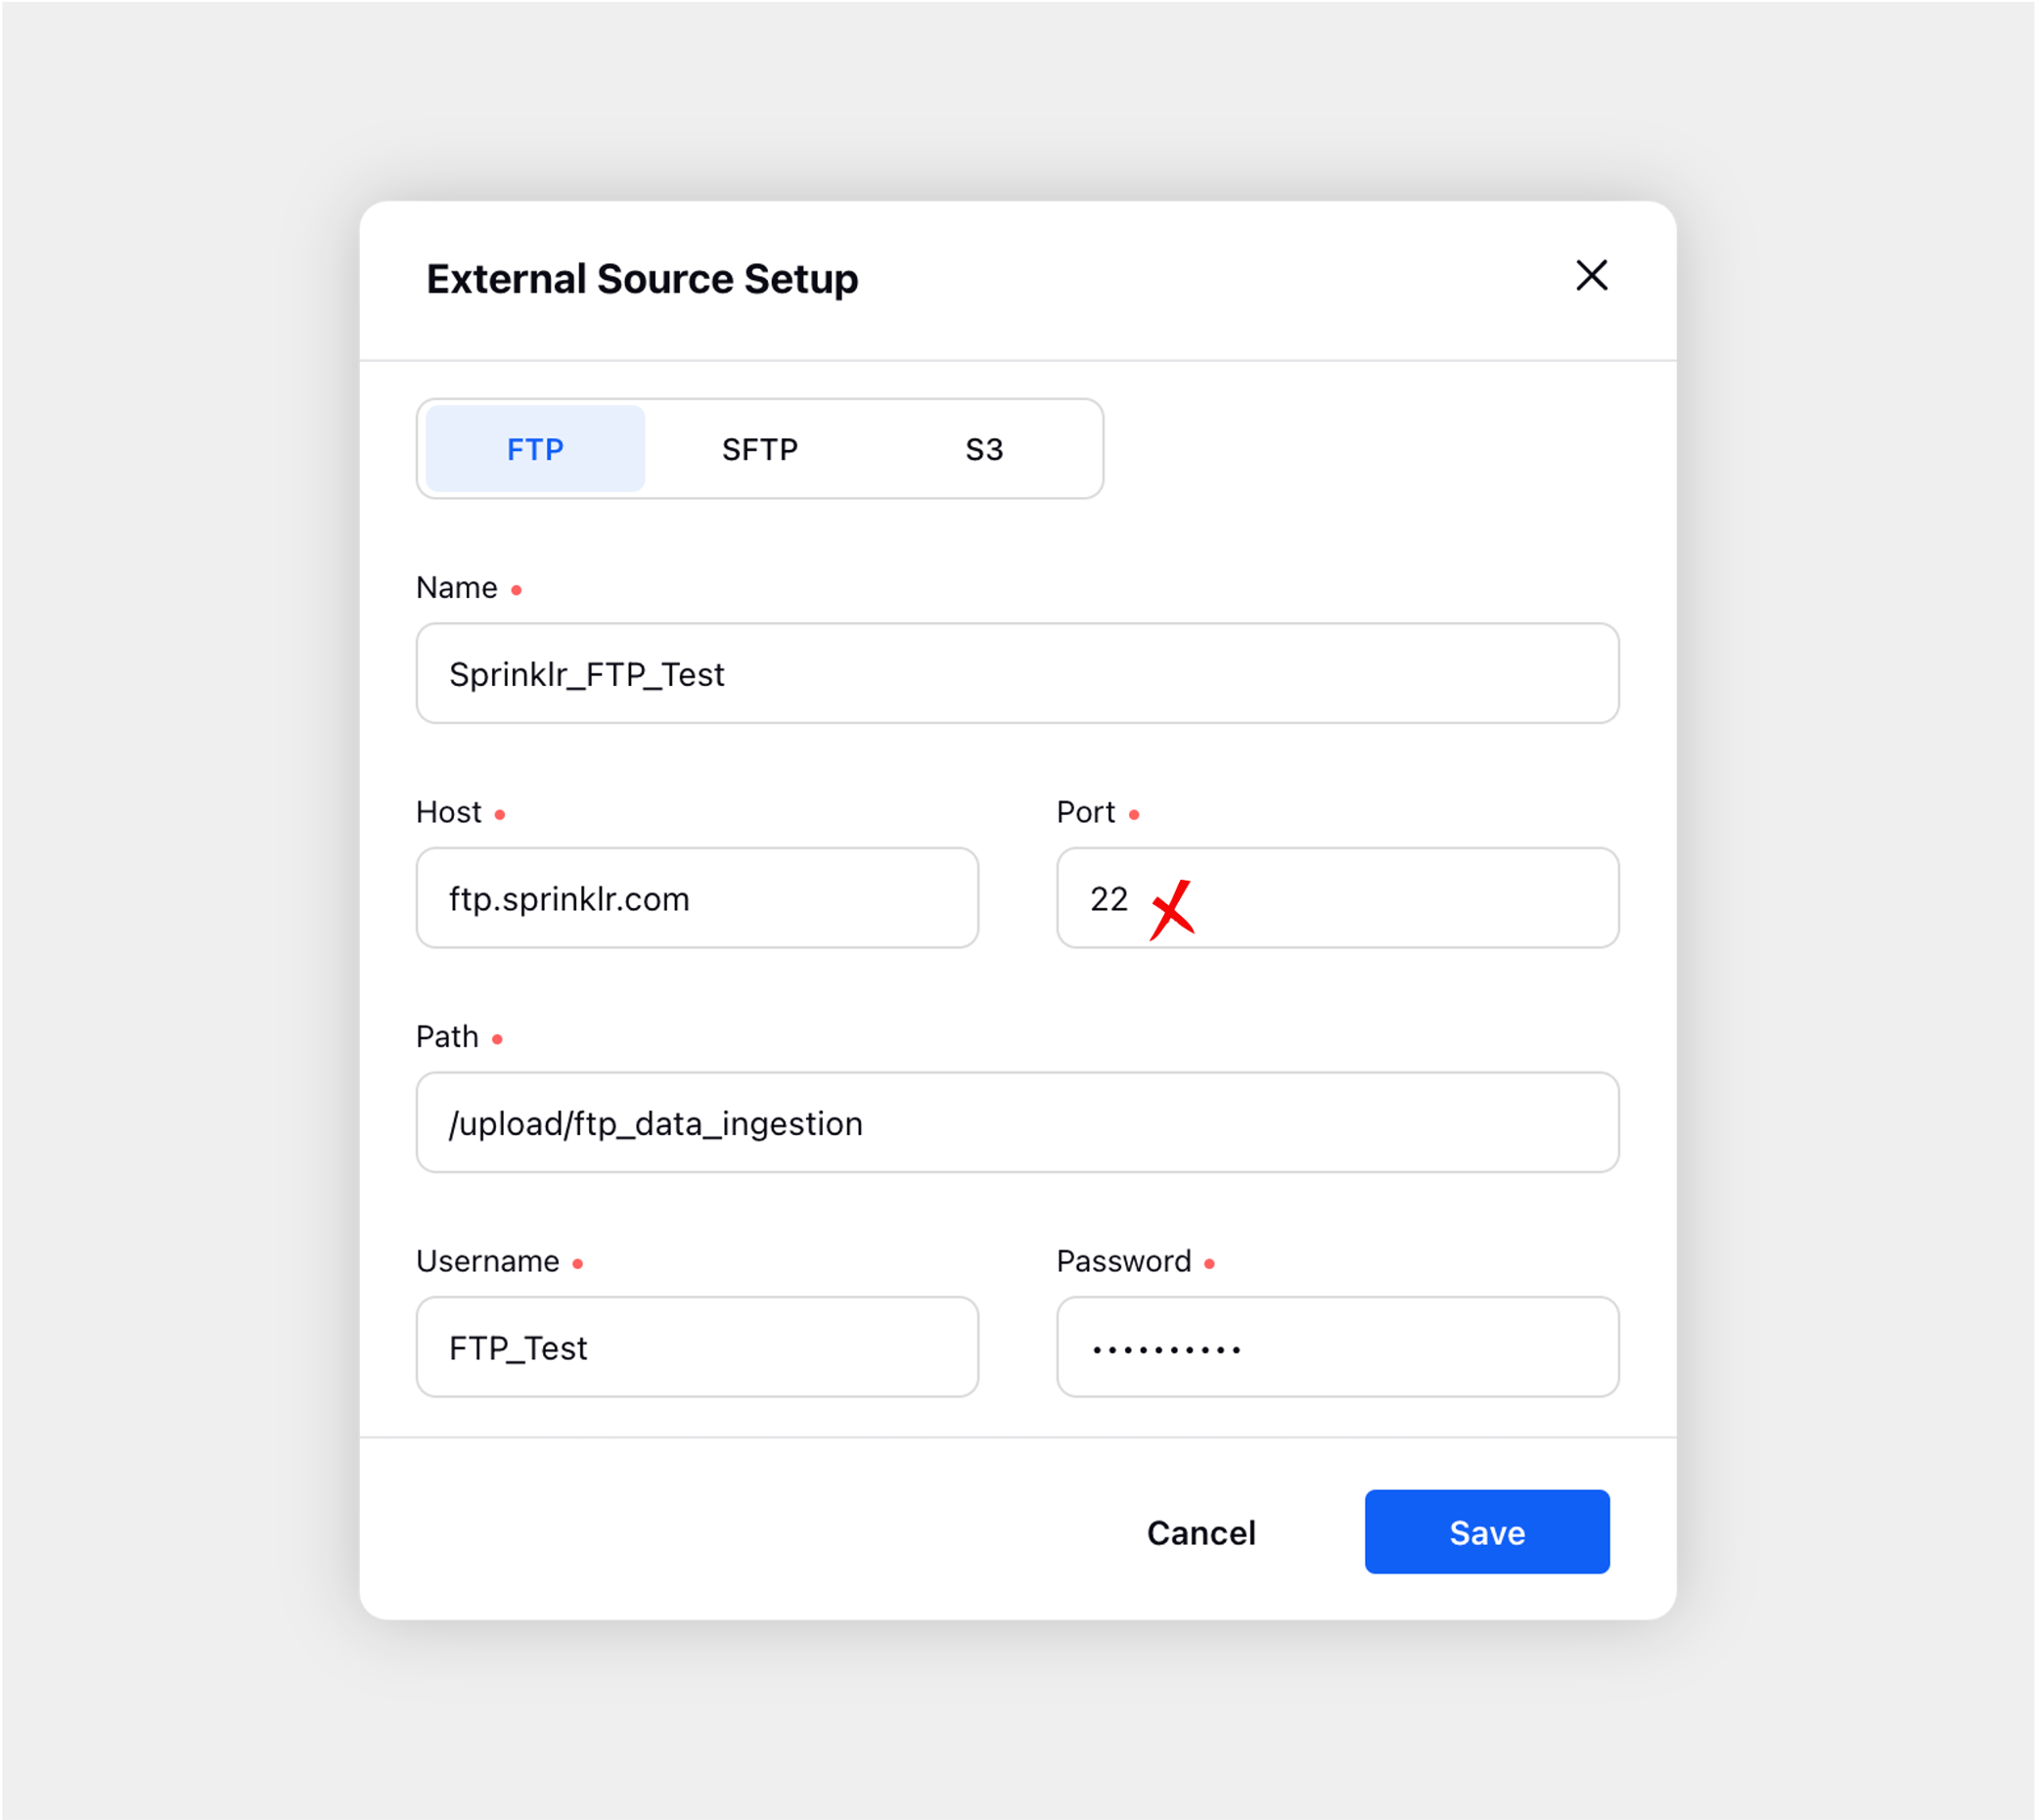
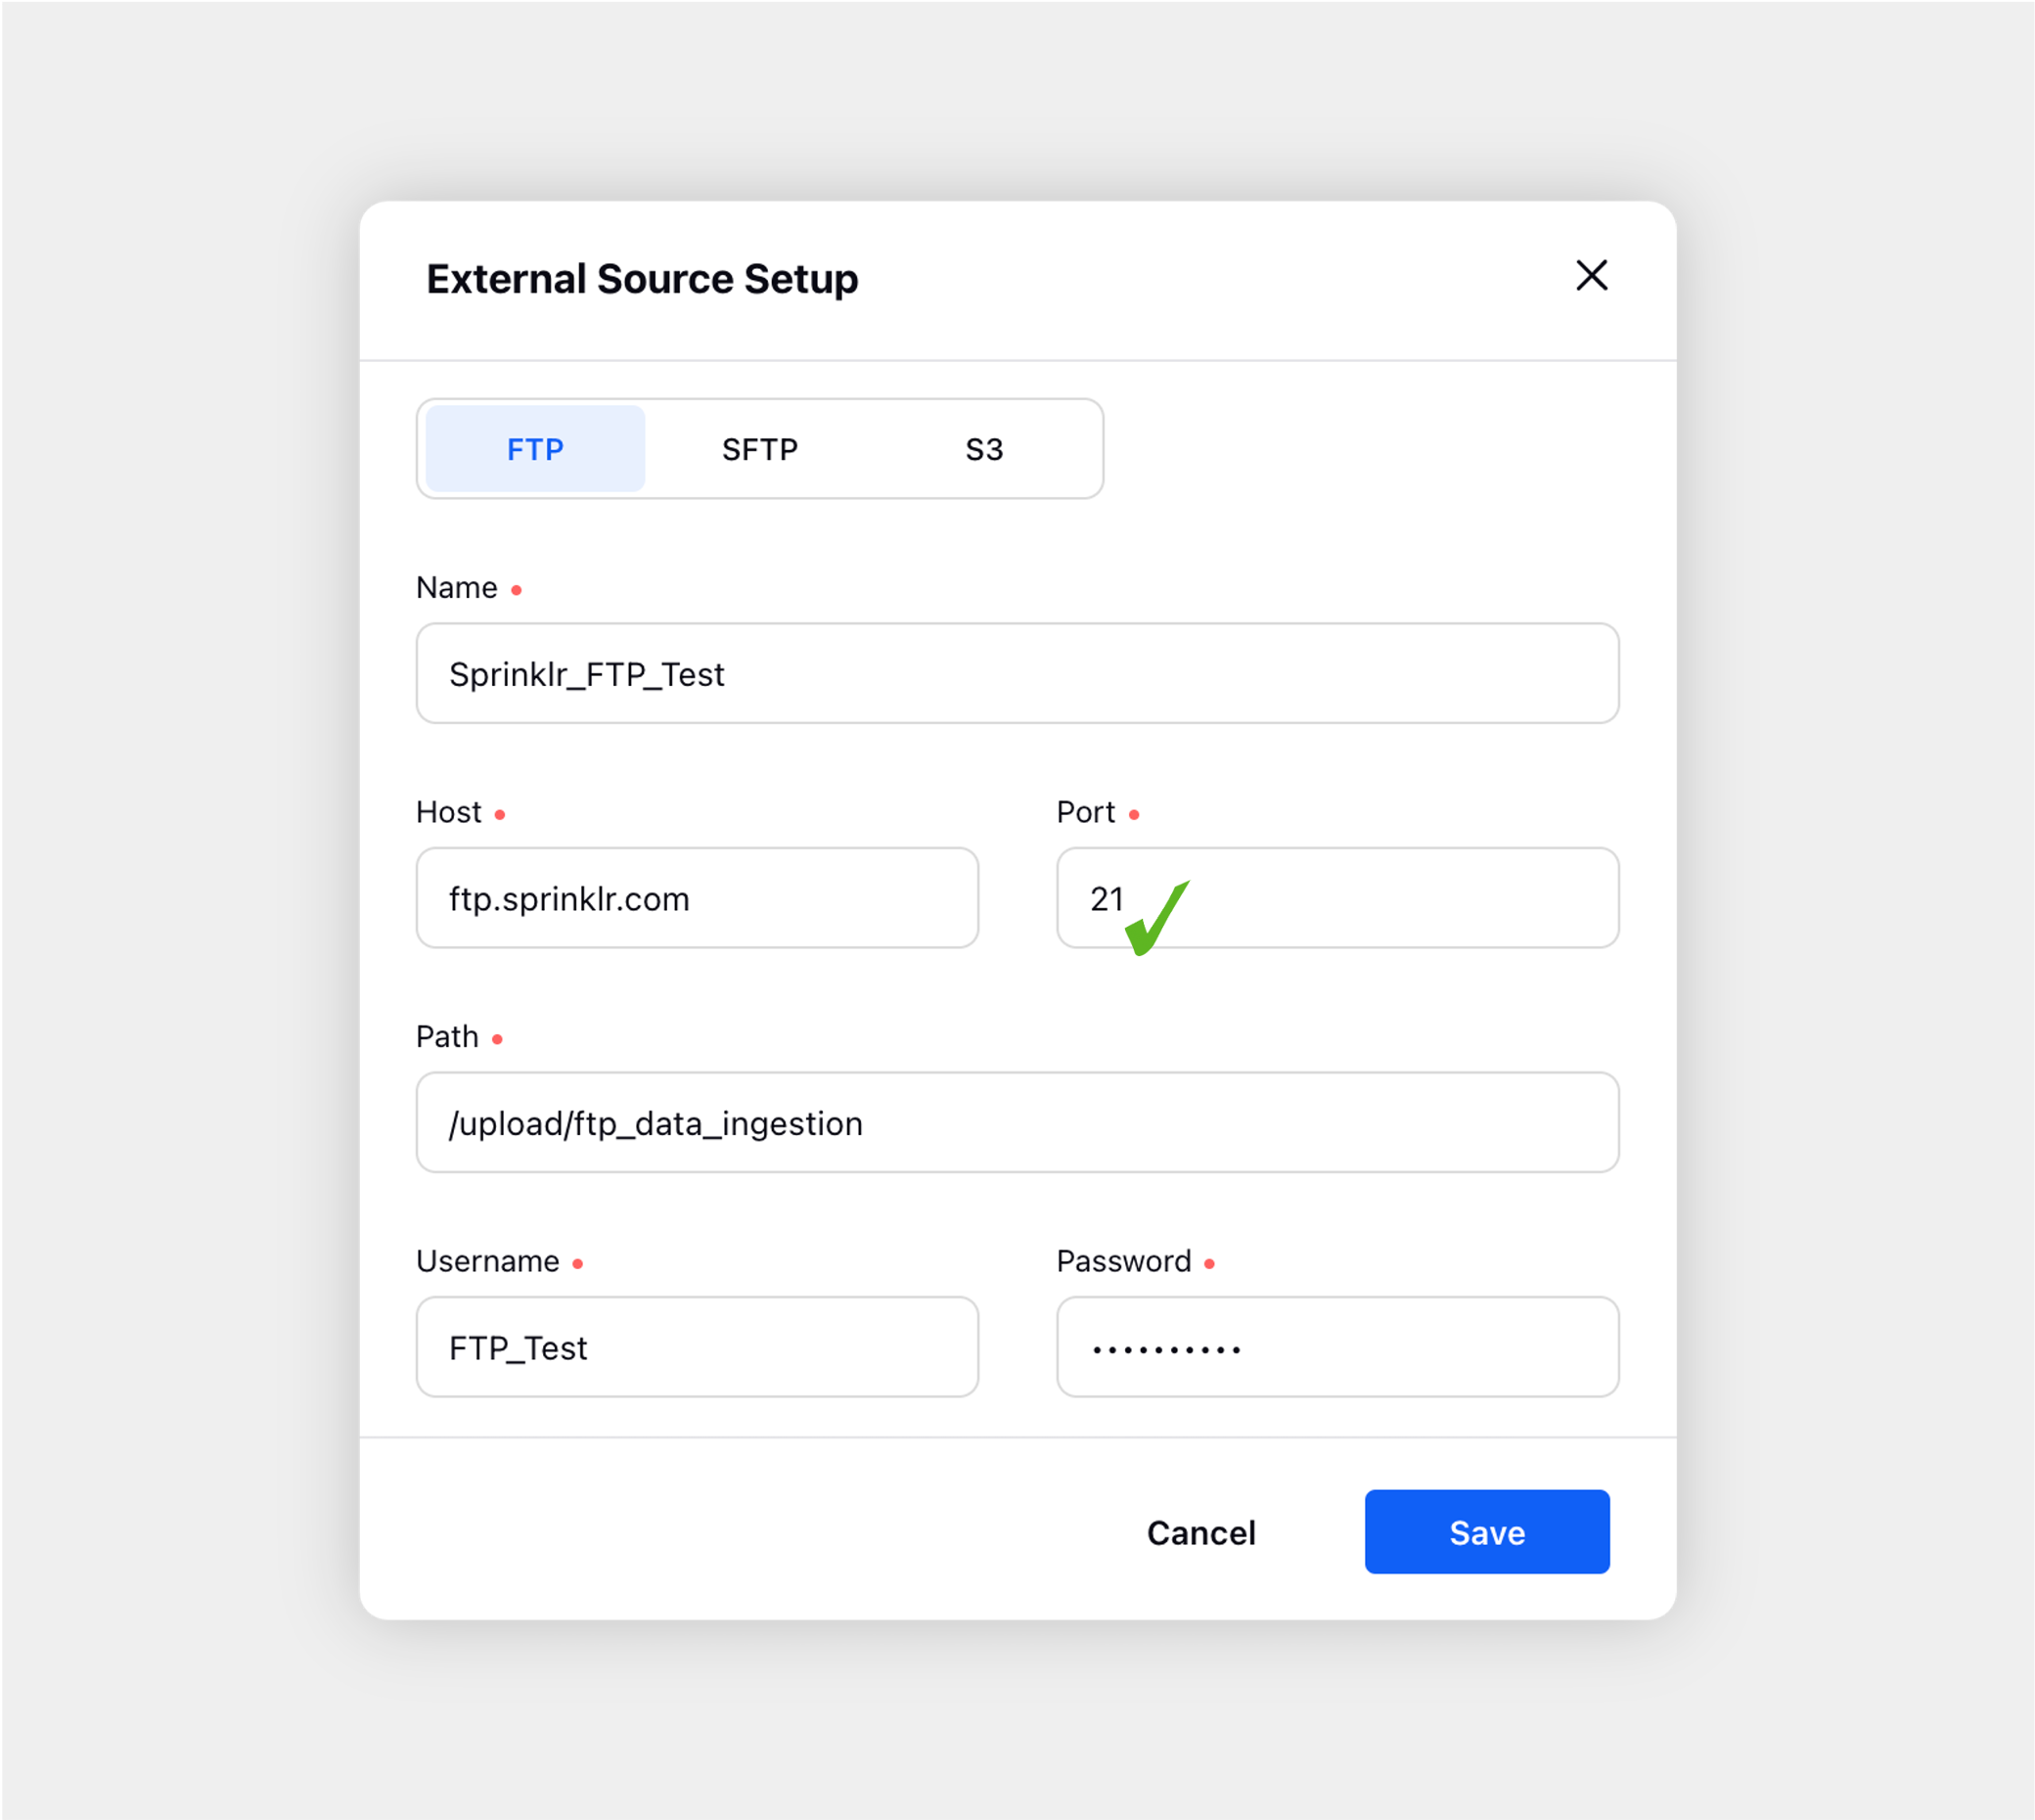
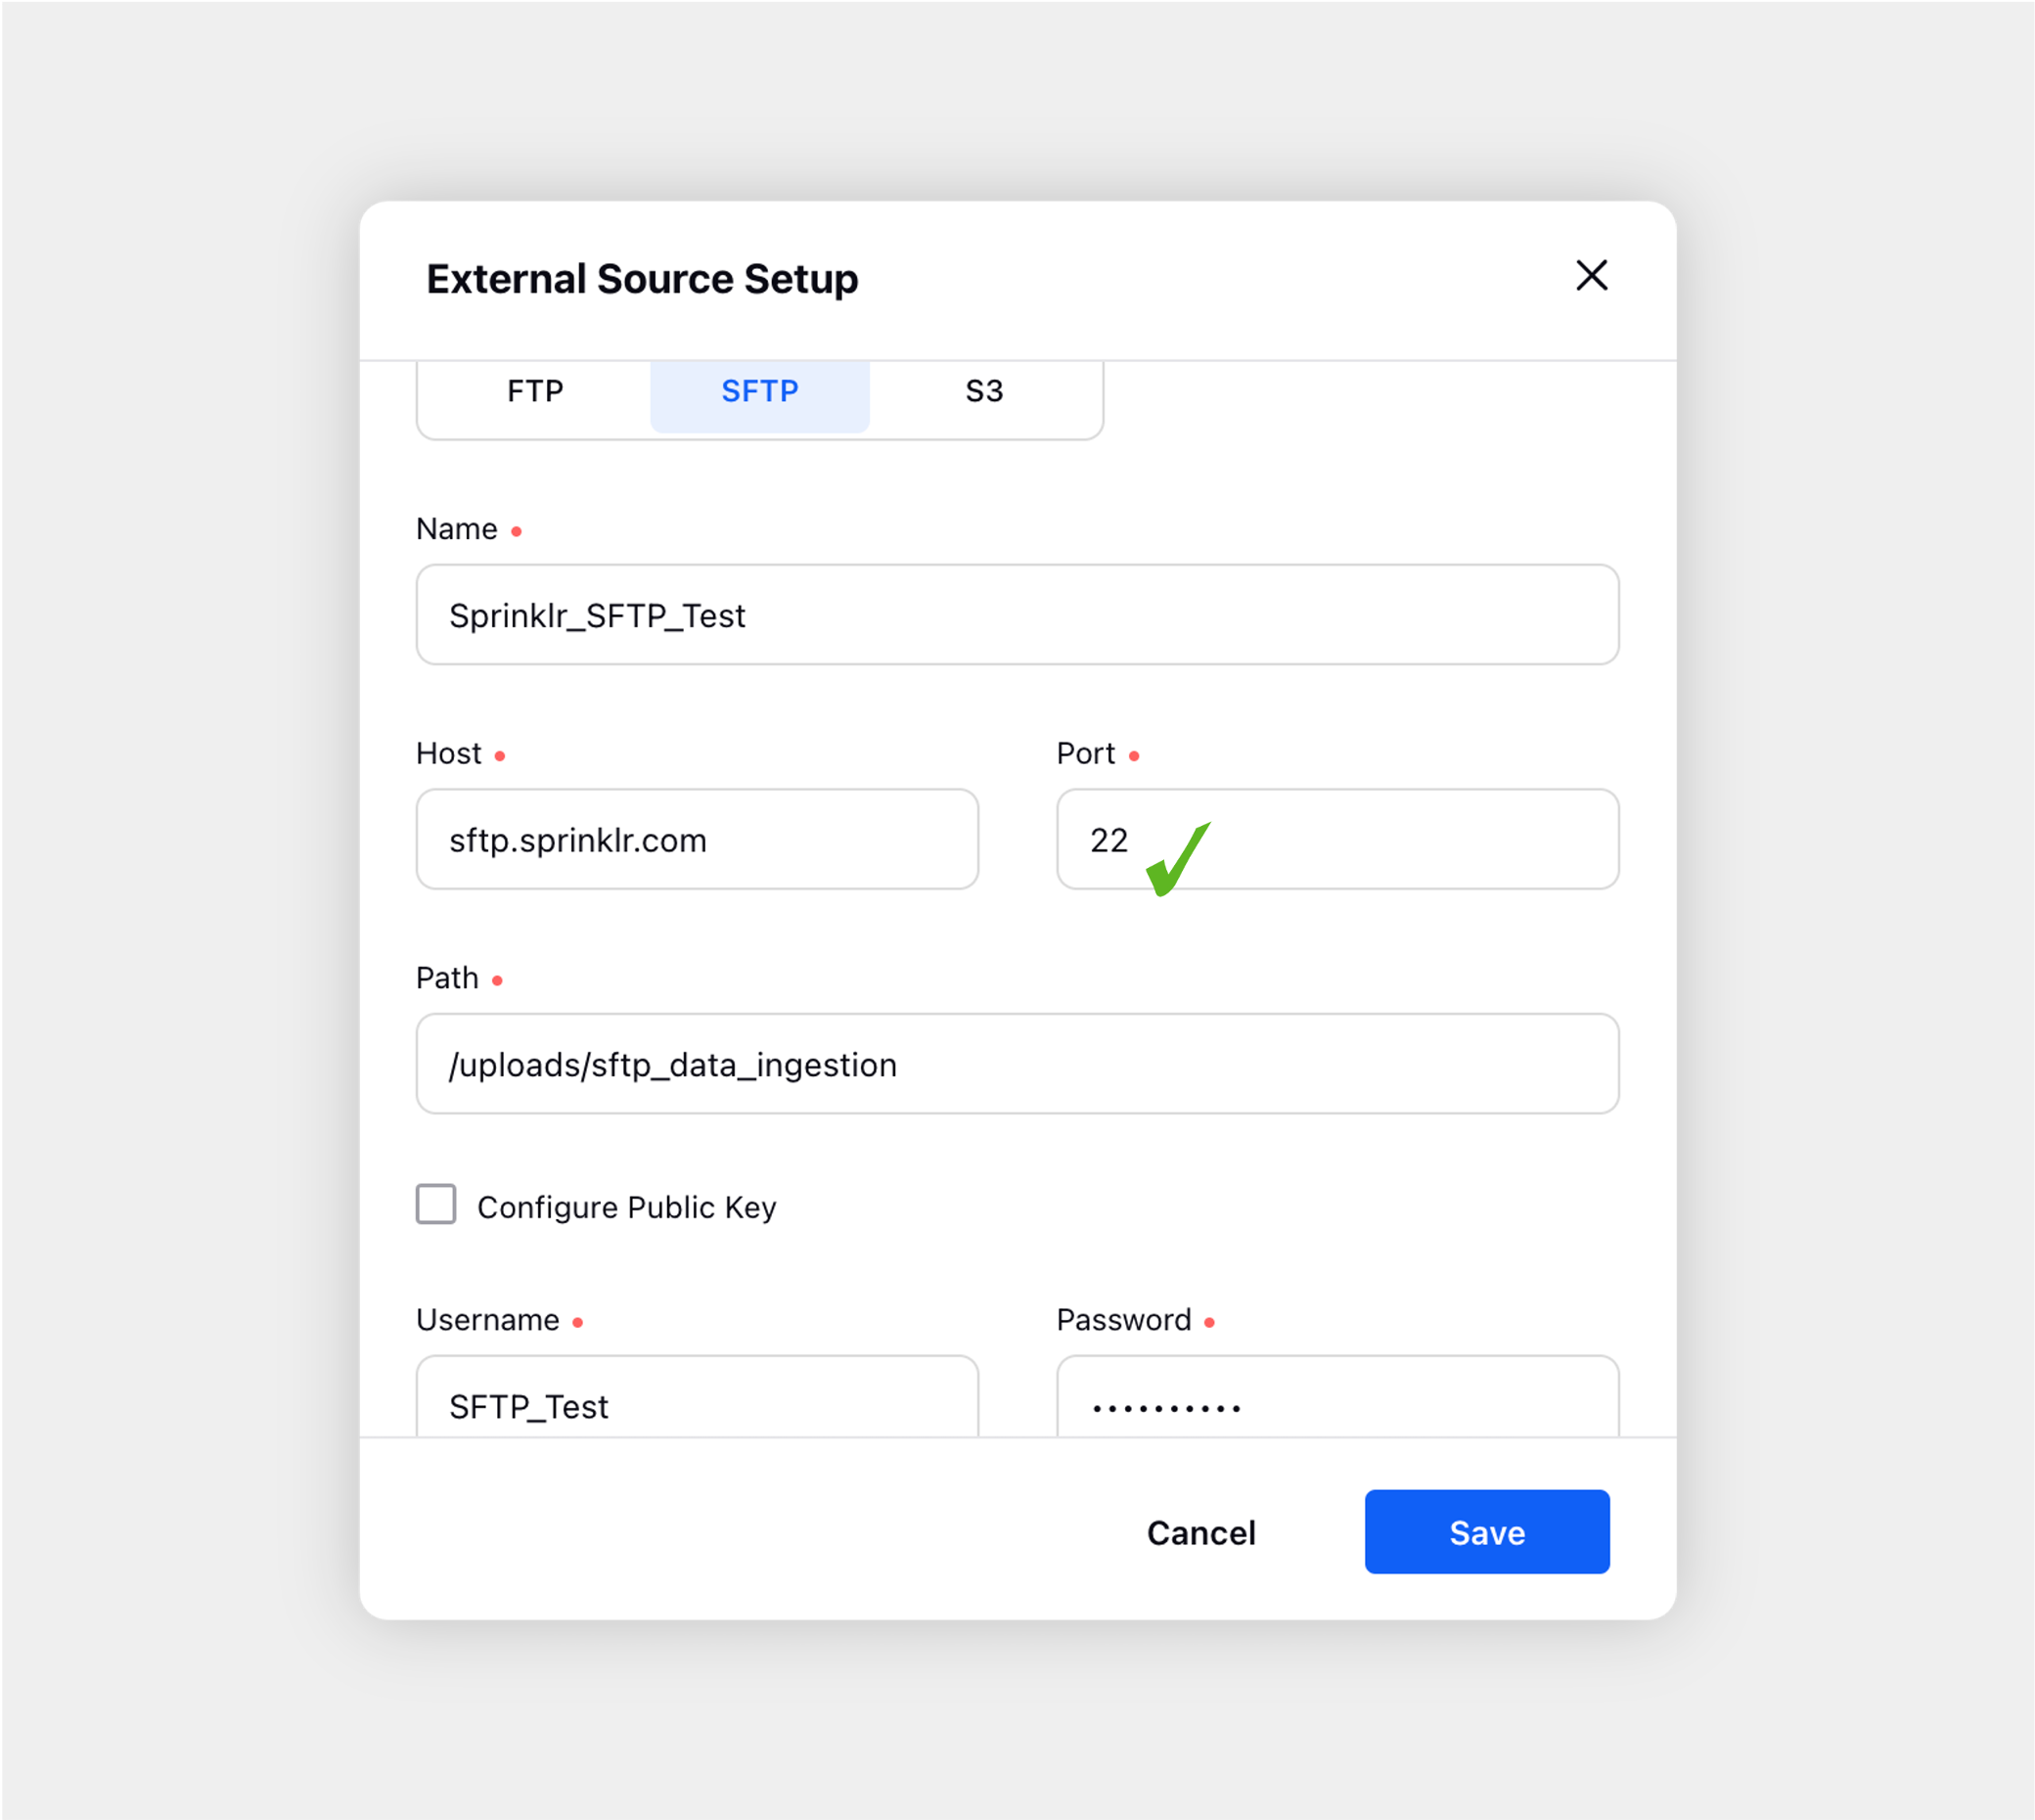
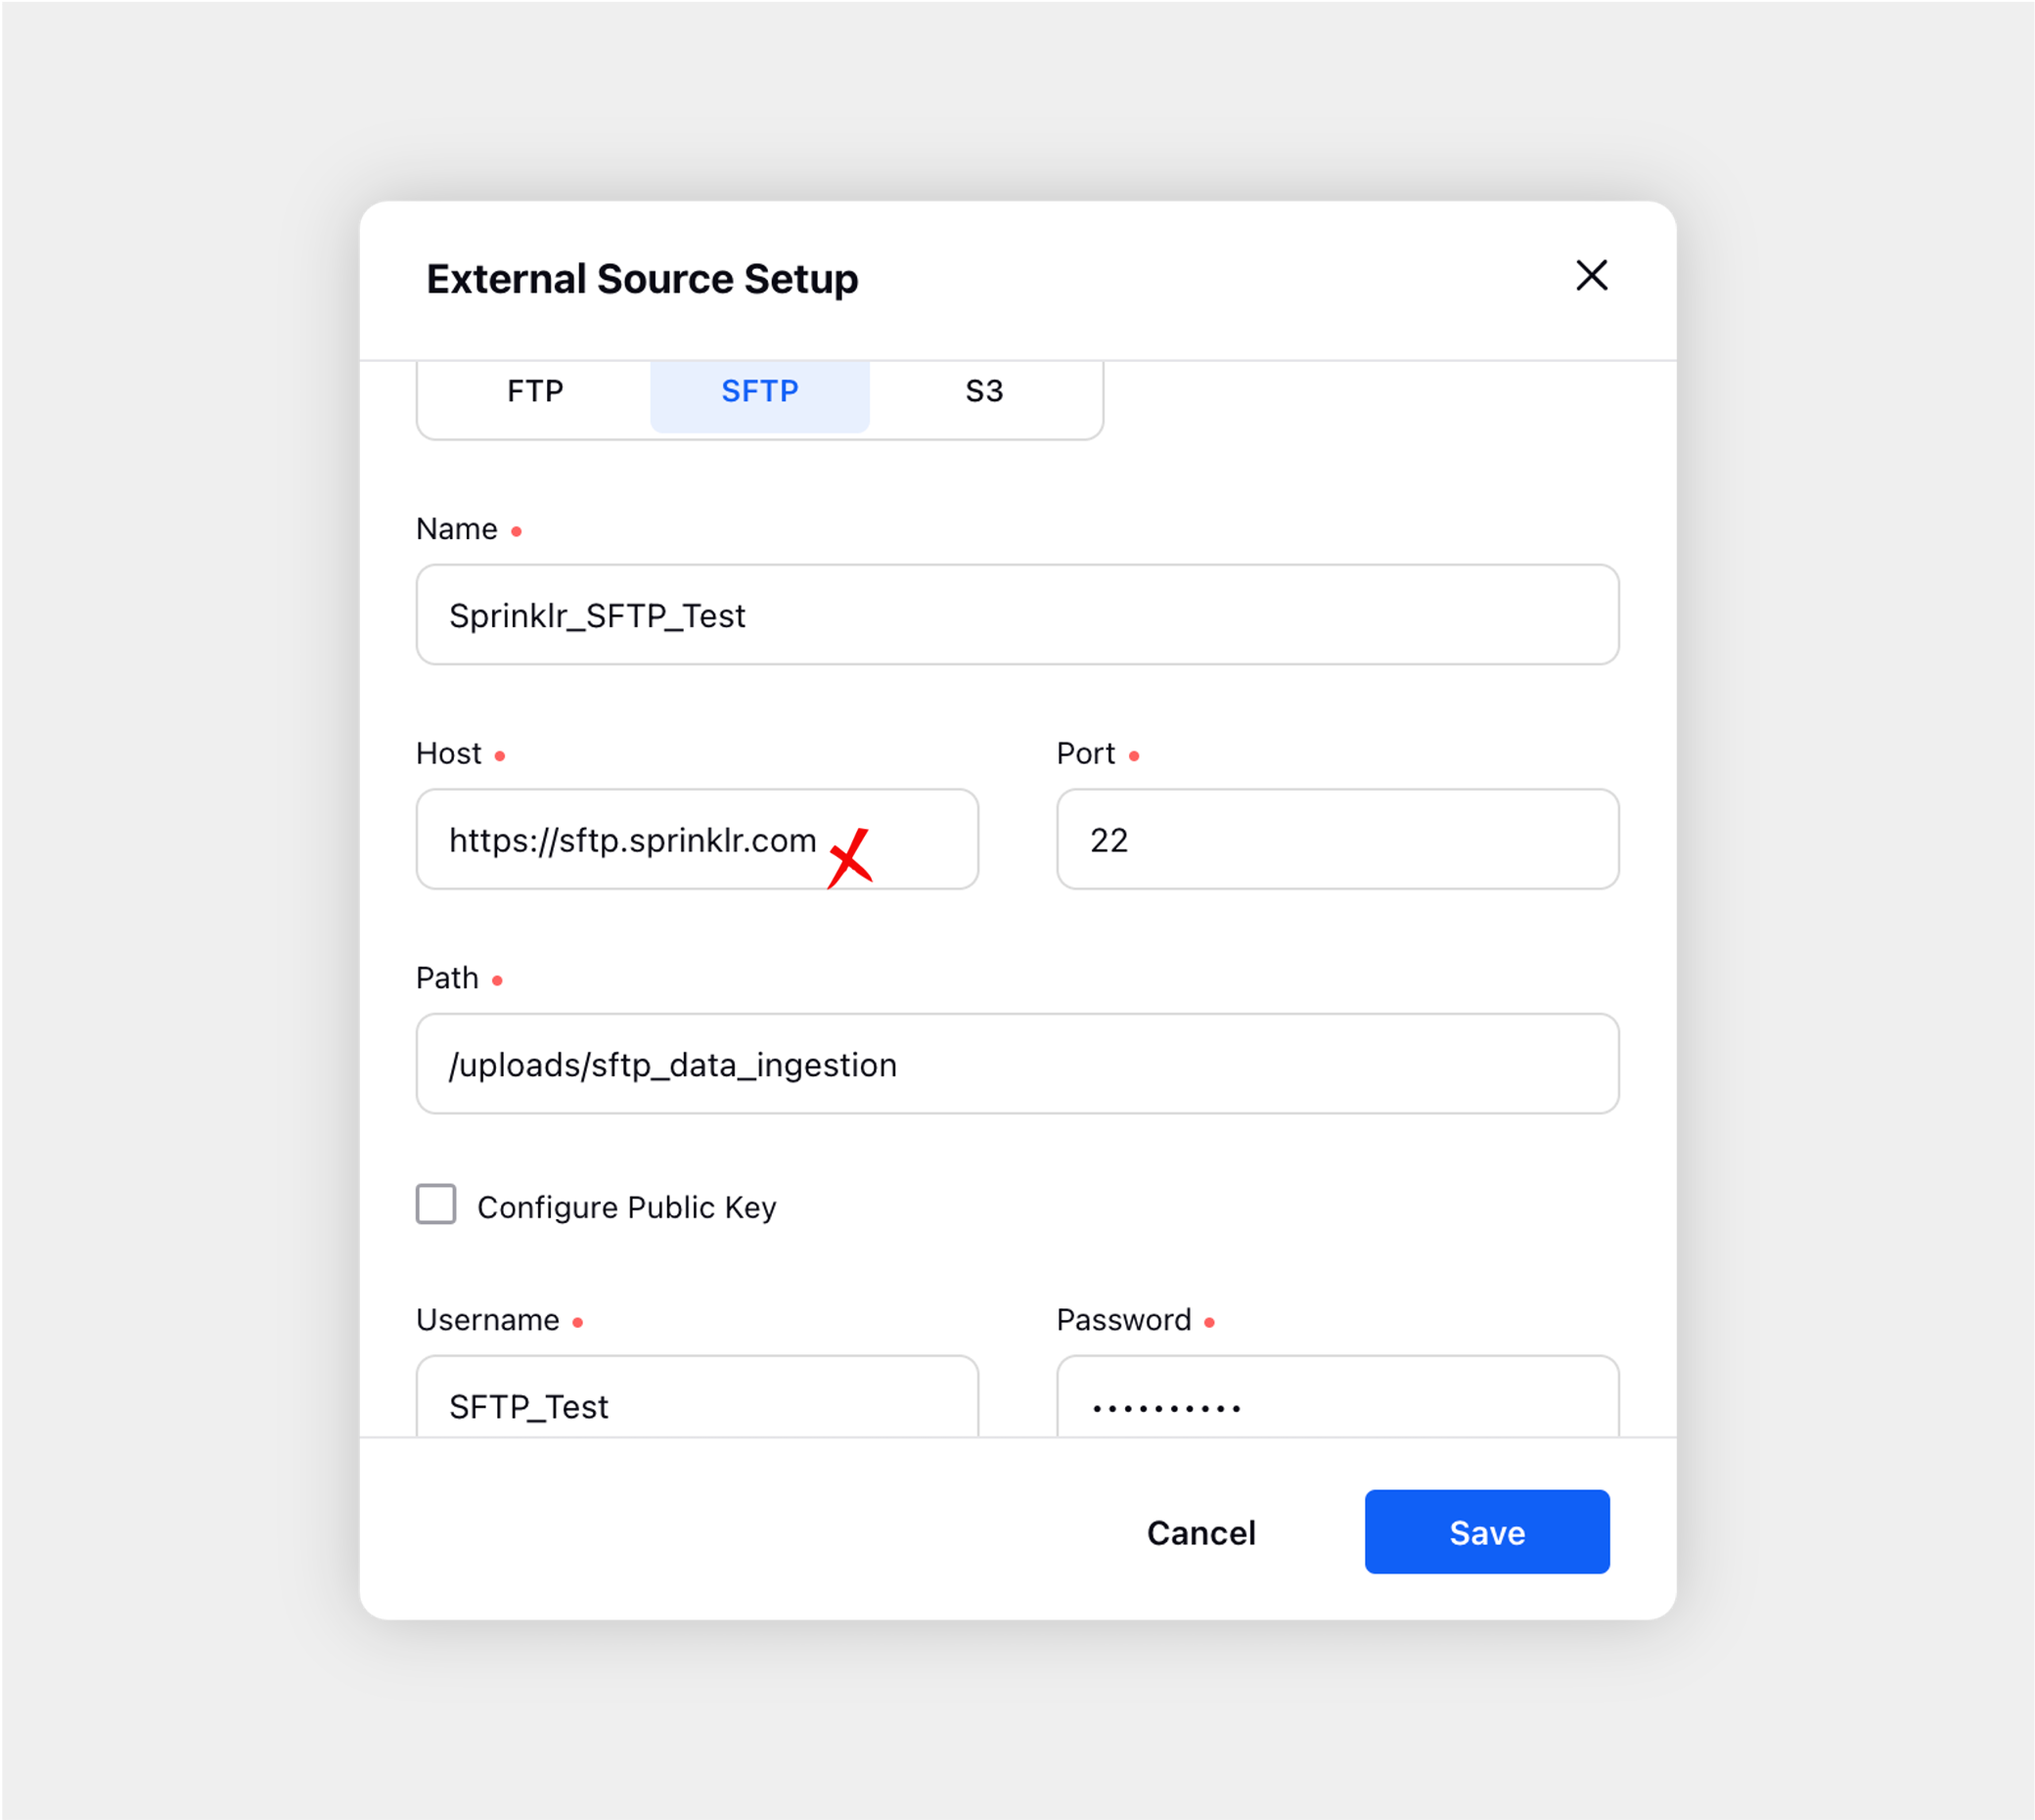
While filling out the information for FTP/SFTP setup, you might come across the below scenarios –
Incorrect FTP Port | Correct FTP Port |
|
|
Incorrect FTP Host | Correct FTP Host |
|
|
Incorrect SFTP Port | Correct SFTP Port |
|
|
Incorrect SFTP Host | Correct SFTP Host |
|
|
S3 Setup — Fields & Description
Field | Description |
Name | Enter the name of the S3 server. |
S3 Access Key | Enter your S3 access key. The S3 access key will look something like this – AMIAIOSFUD7EXAMPLE |
S3 Secret Key | Enter your S3 secret key. The S3 secret key will look something like this – wJalrXUtFEMI/K7MDELG/bPxRfiCYEXAMPLEKEY |
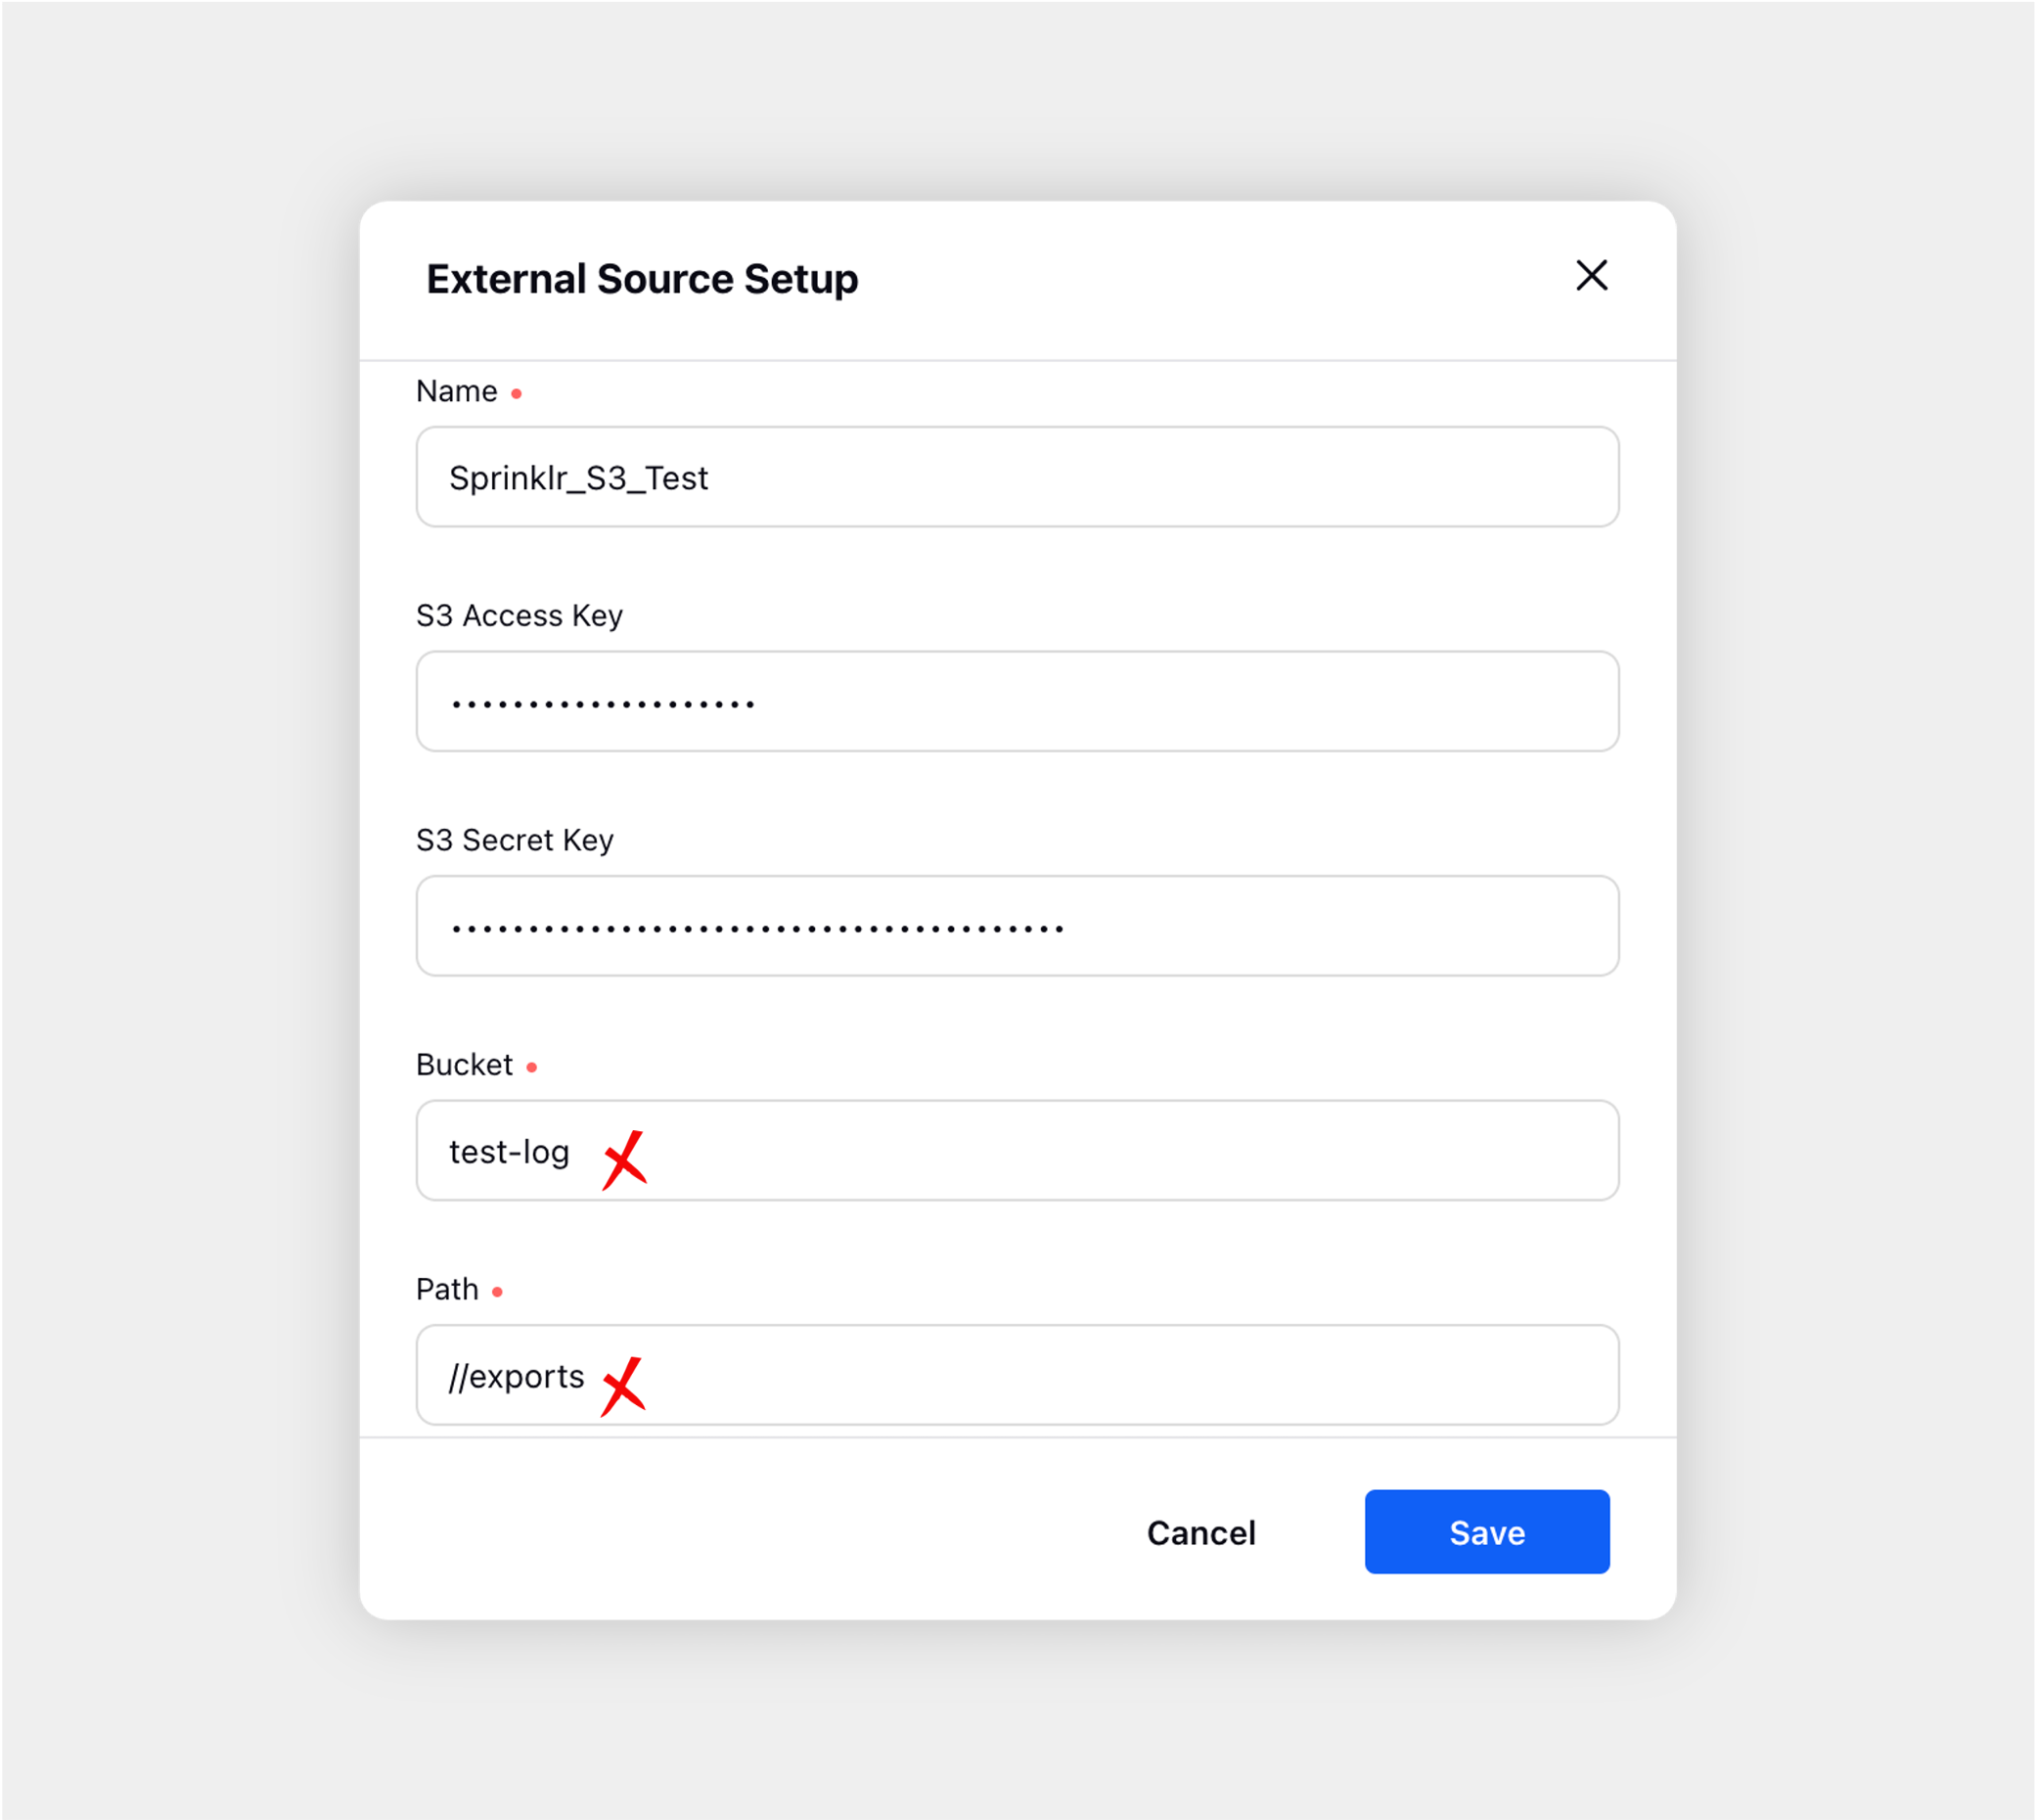
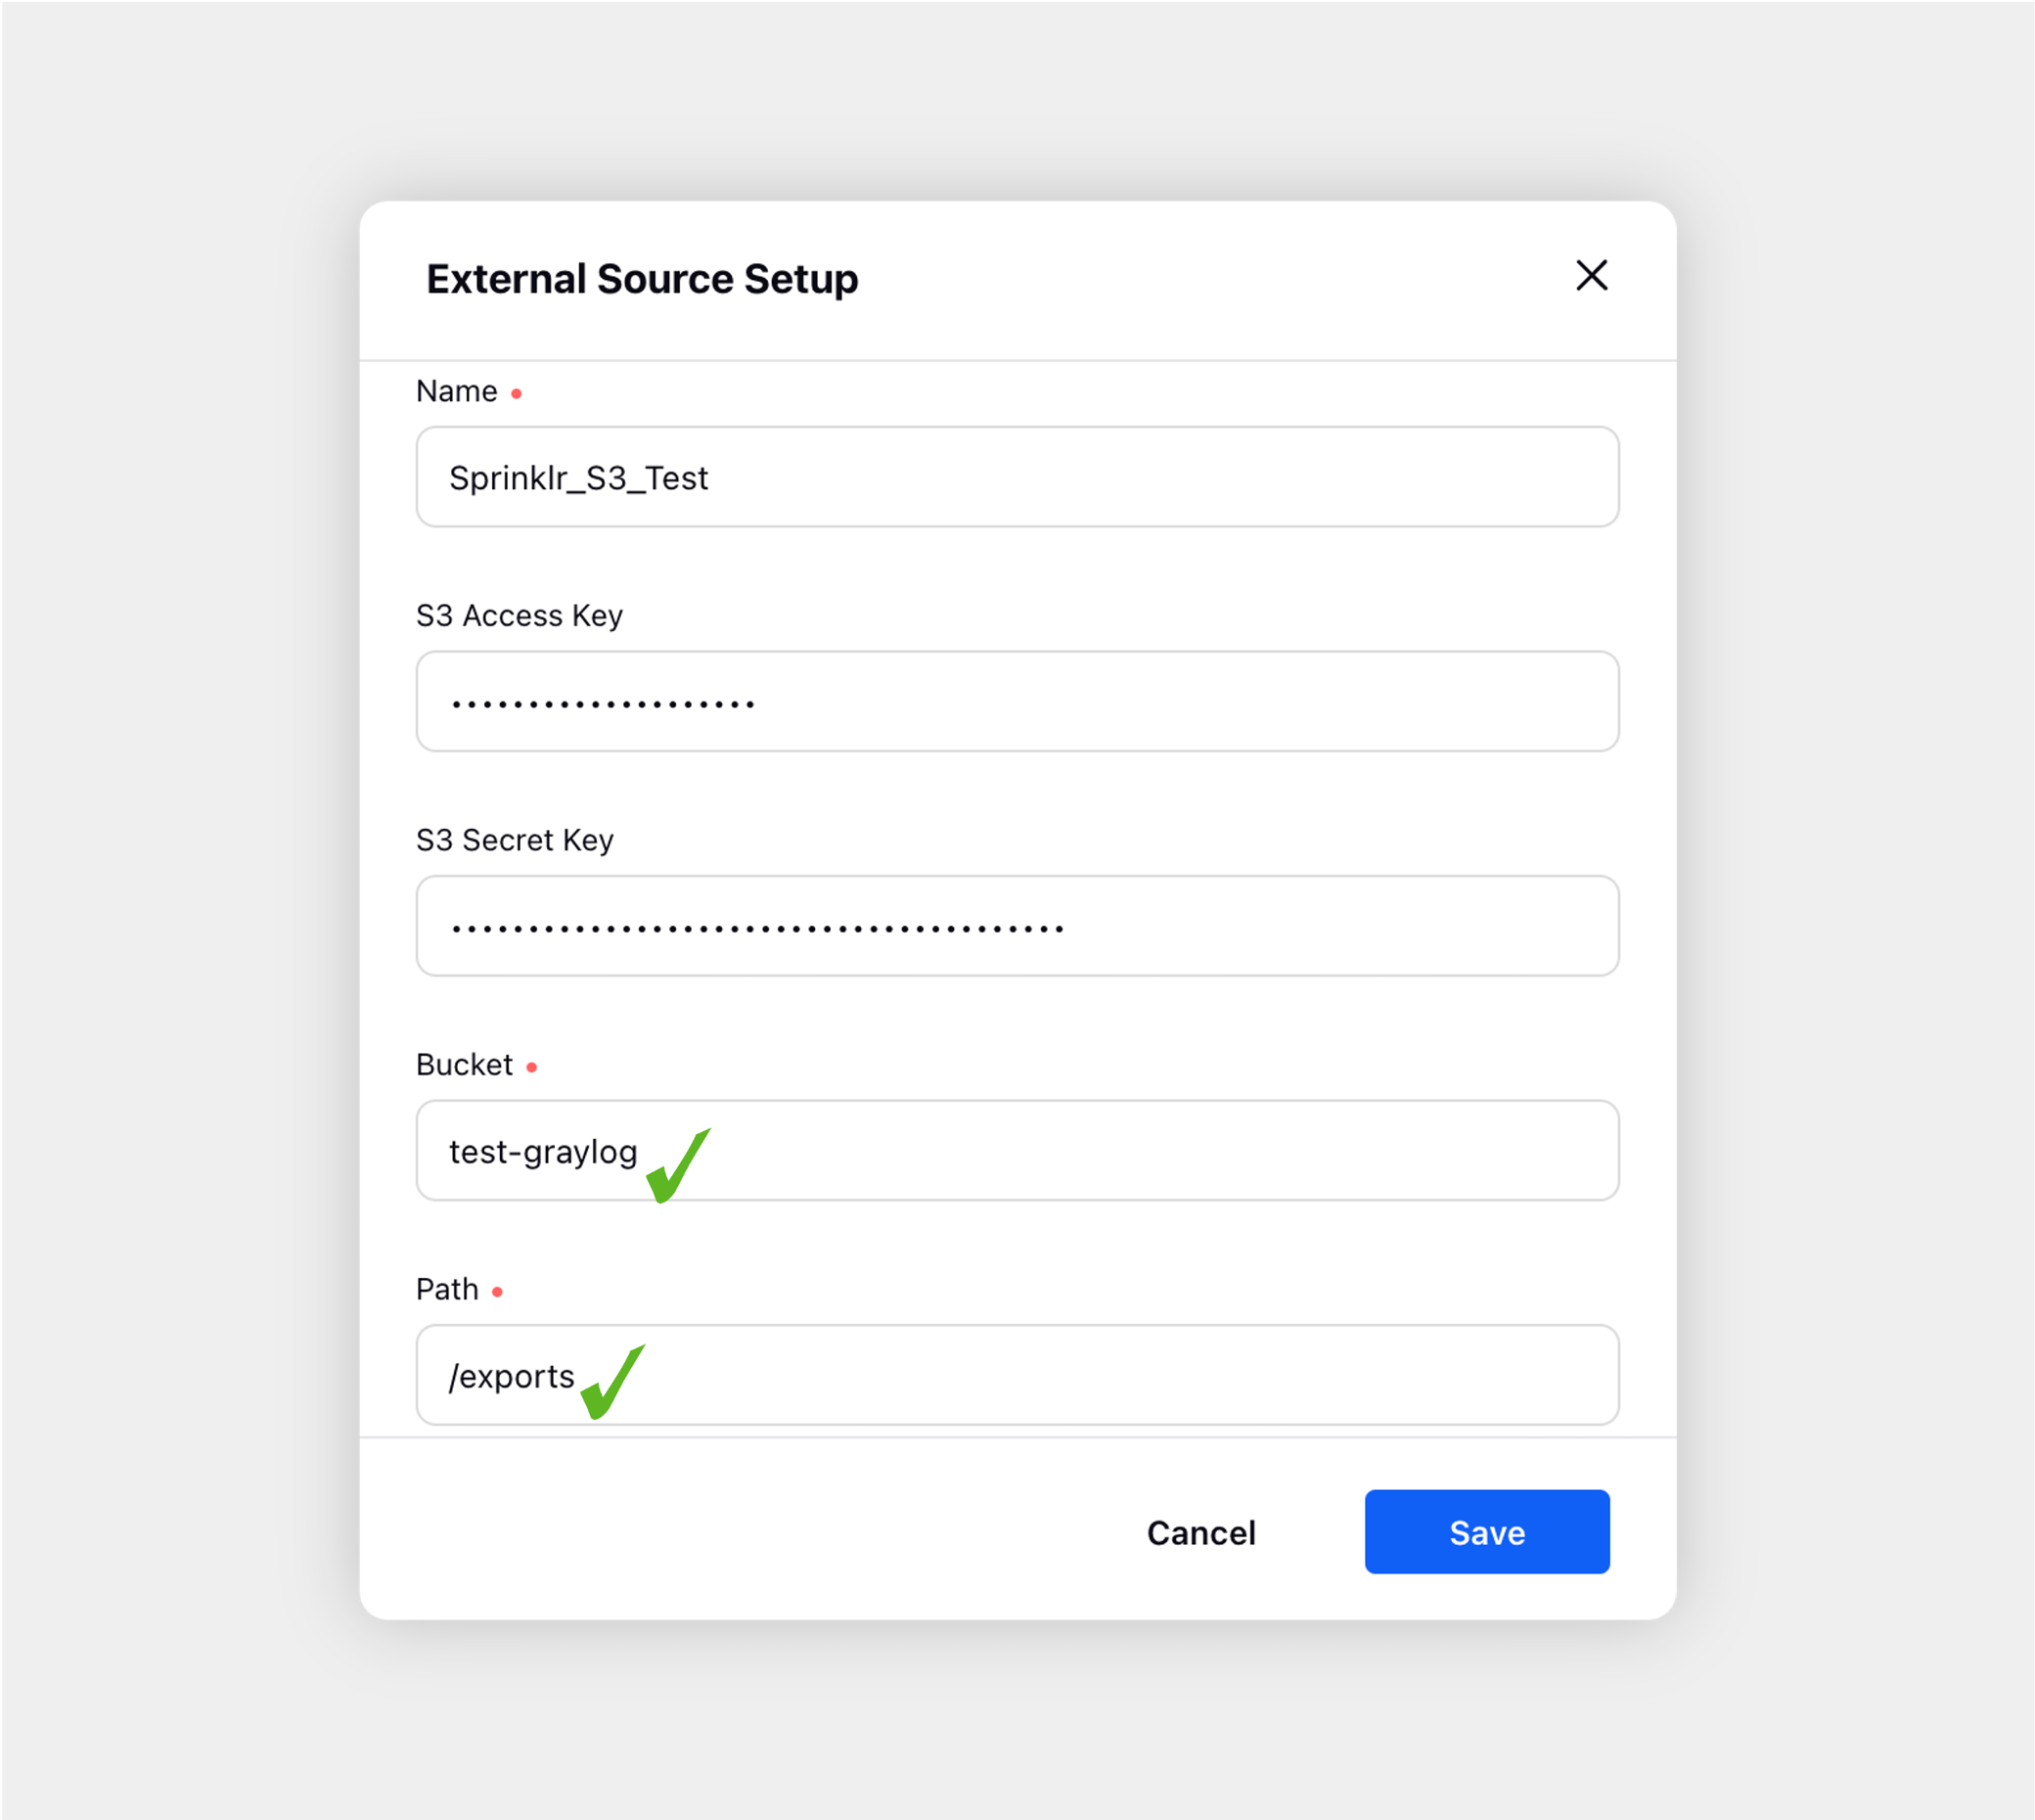
Bucket | Enter the bucket name of your S3 server. The bucket name is a part of the domain name in the URL. |
Path | Enter the location of your S3 bucket. |
Refer to the image below for the correct way for the S3 setup –
Incorrect S3 Setup | Correct S3 Setup |
|
|
External Source record manager
Whenever you set up an external source like FTP, SFTP, or S3, it will be listed in the External Sources record manager from where you can manage your external sources like editing, deleting, and/or sharing them.
Please note that the external sources created from the Scheduled Exports window will also be listed here.
To navigate to the External Sources record manager, click All Settings within Listen under the Governance Console tab on the platform.

On the Platform Settings window, search for External Sources and click it.

On the External Sources record manager window, all the external sources (FTP, SFTP, and/or S3) that have been created by you and/or shared with you will be listed in a tabular form.
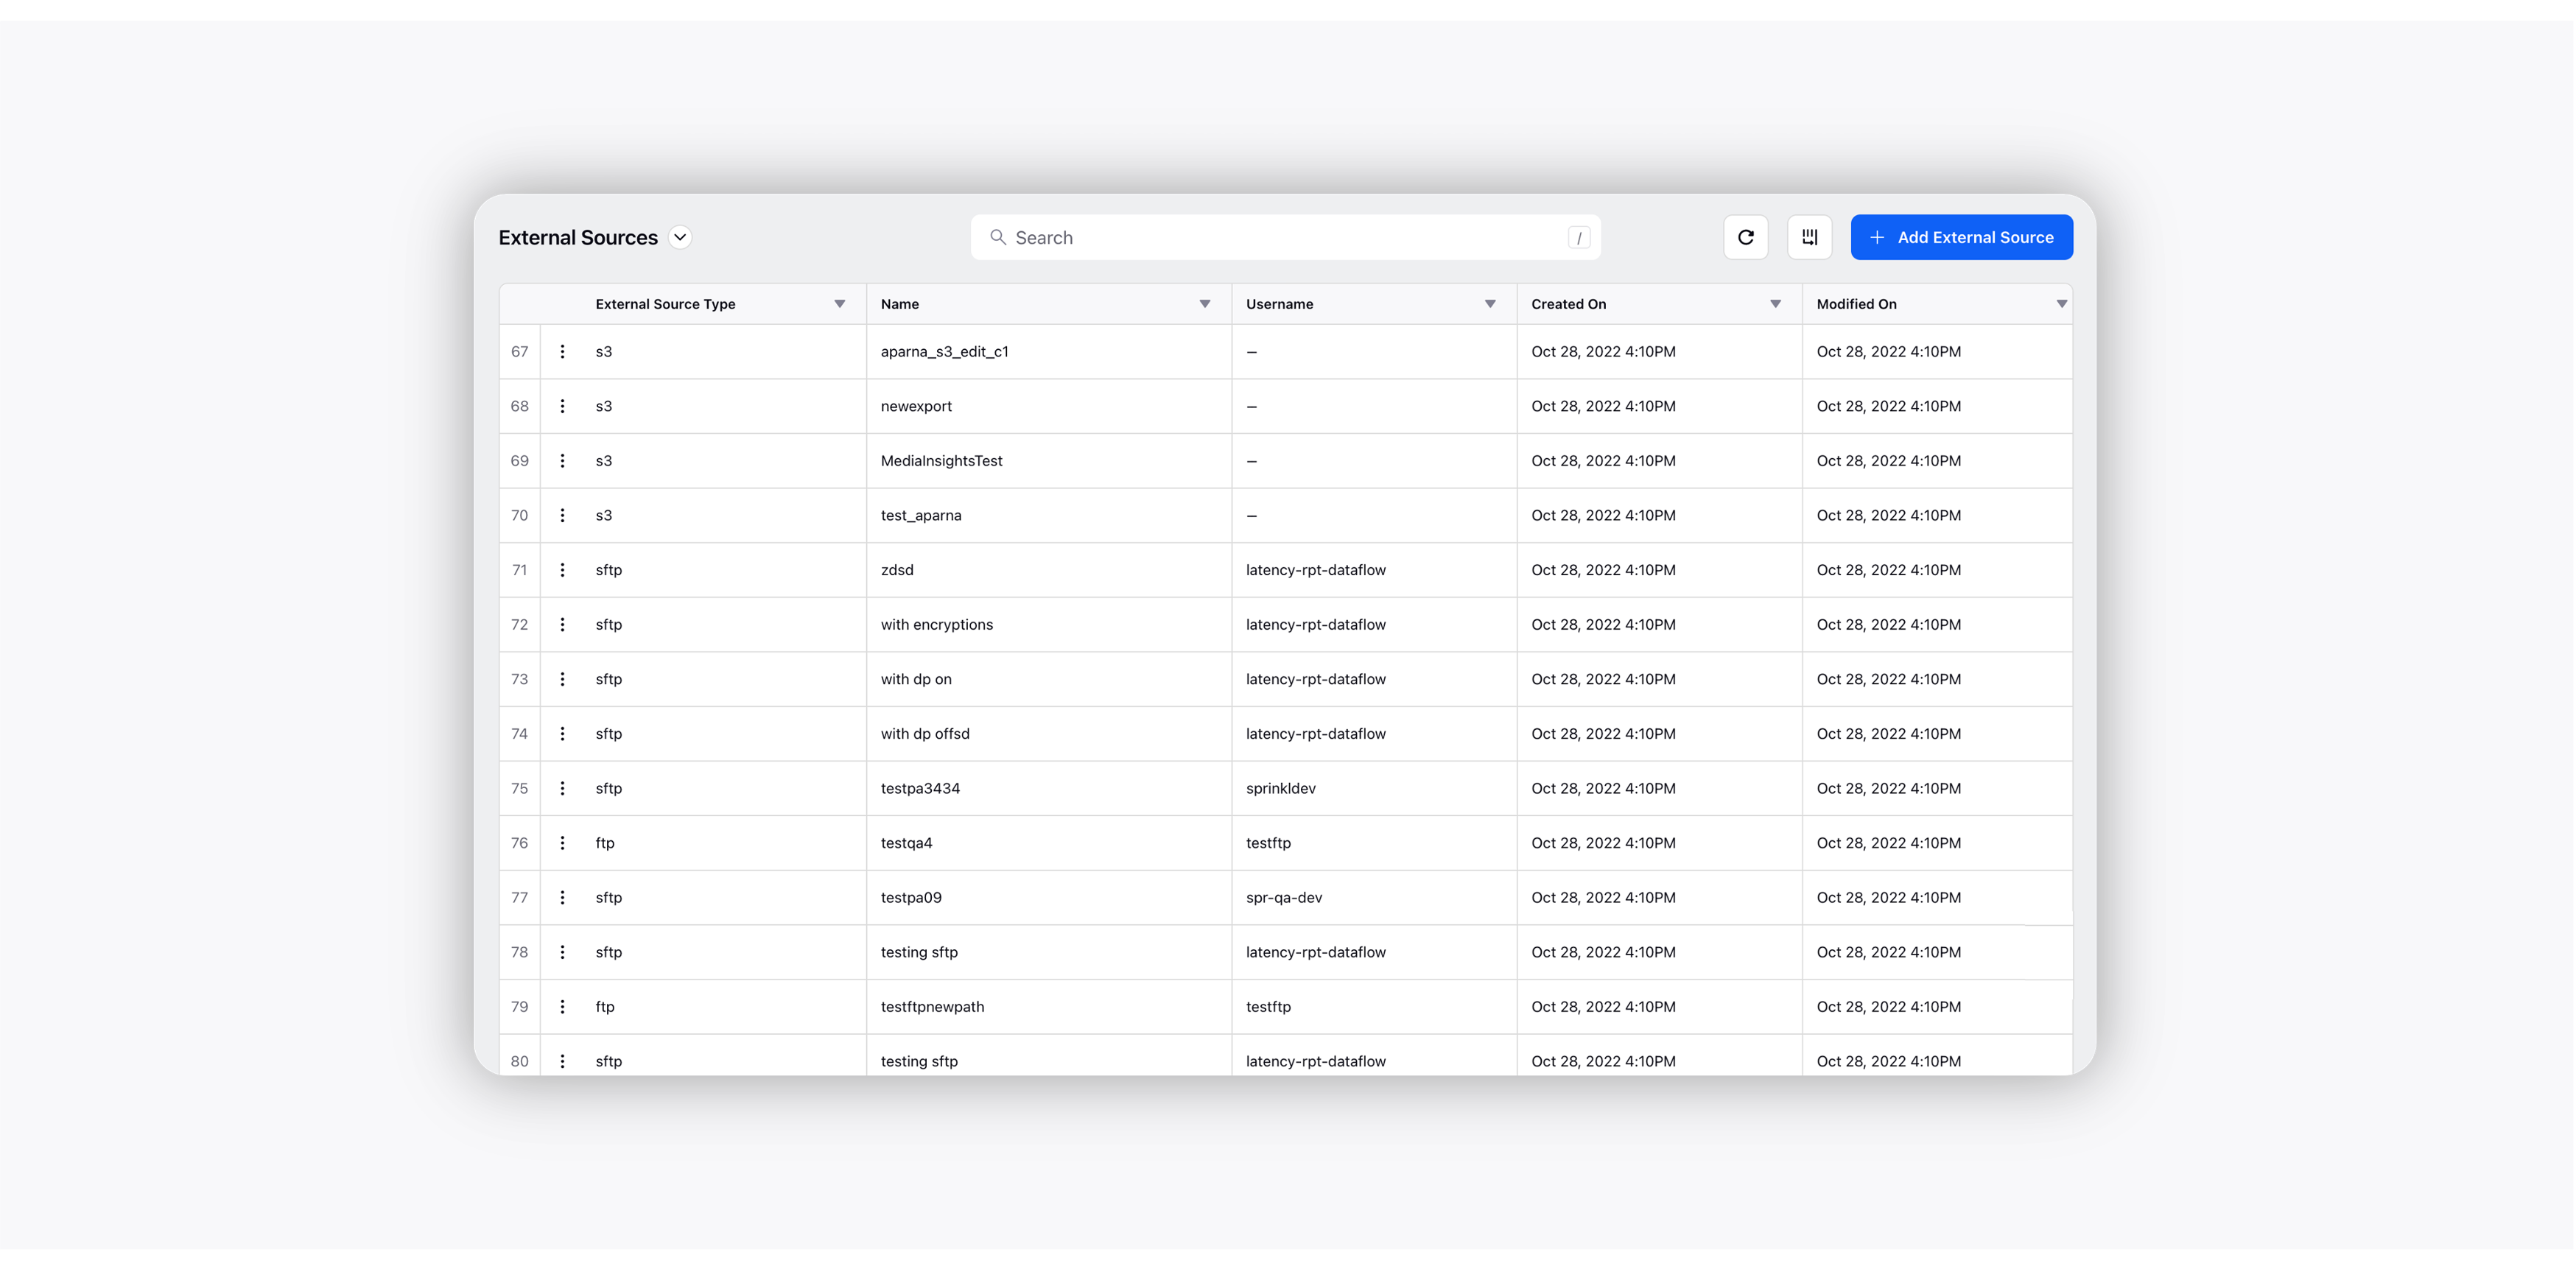
Hover over the Options icon next to the external source you want to manage.
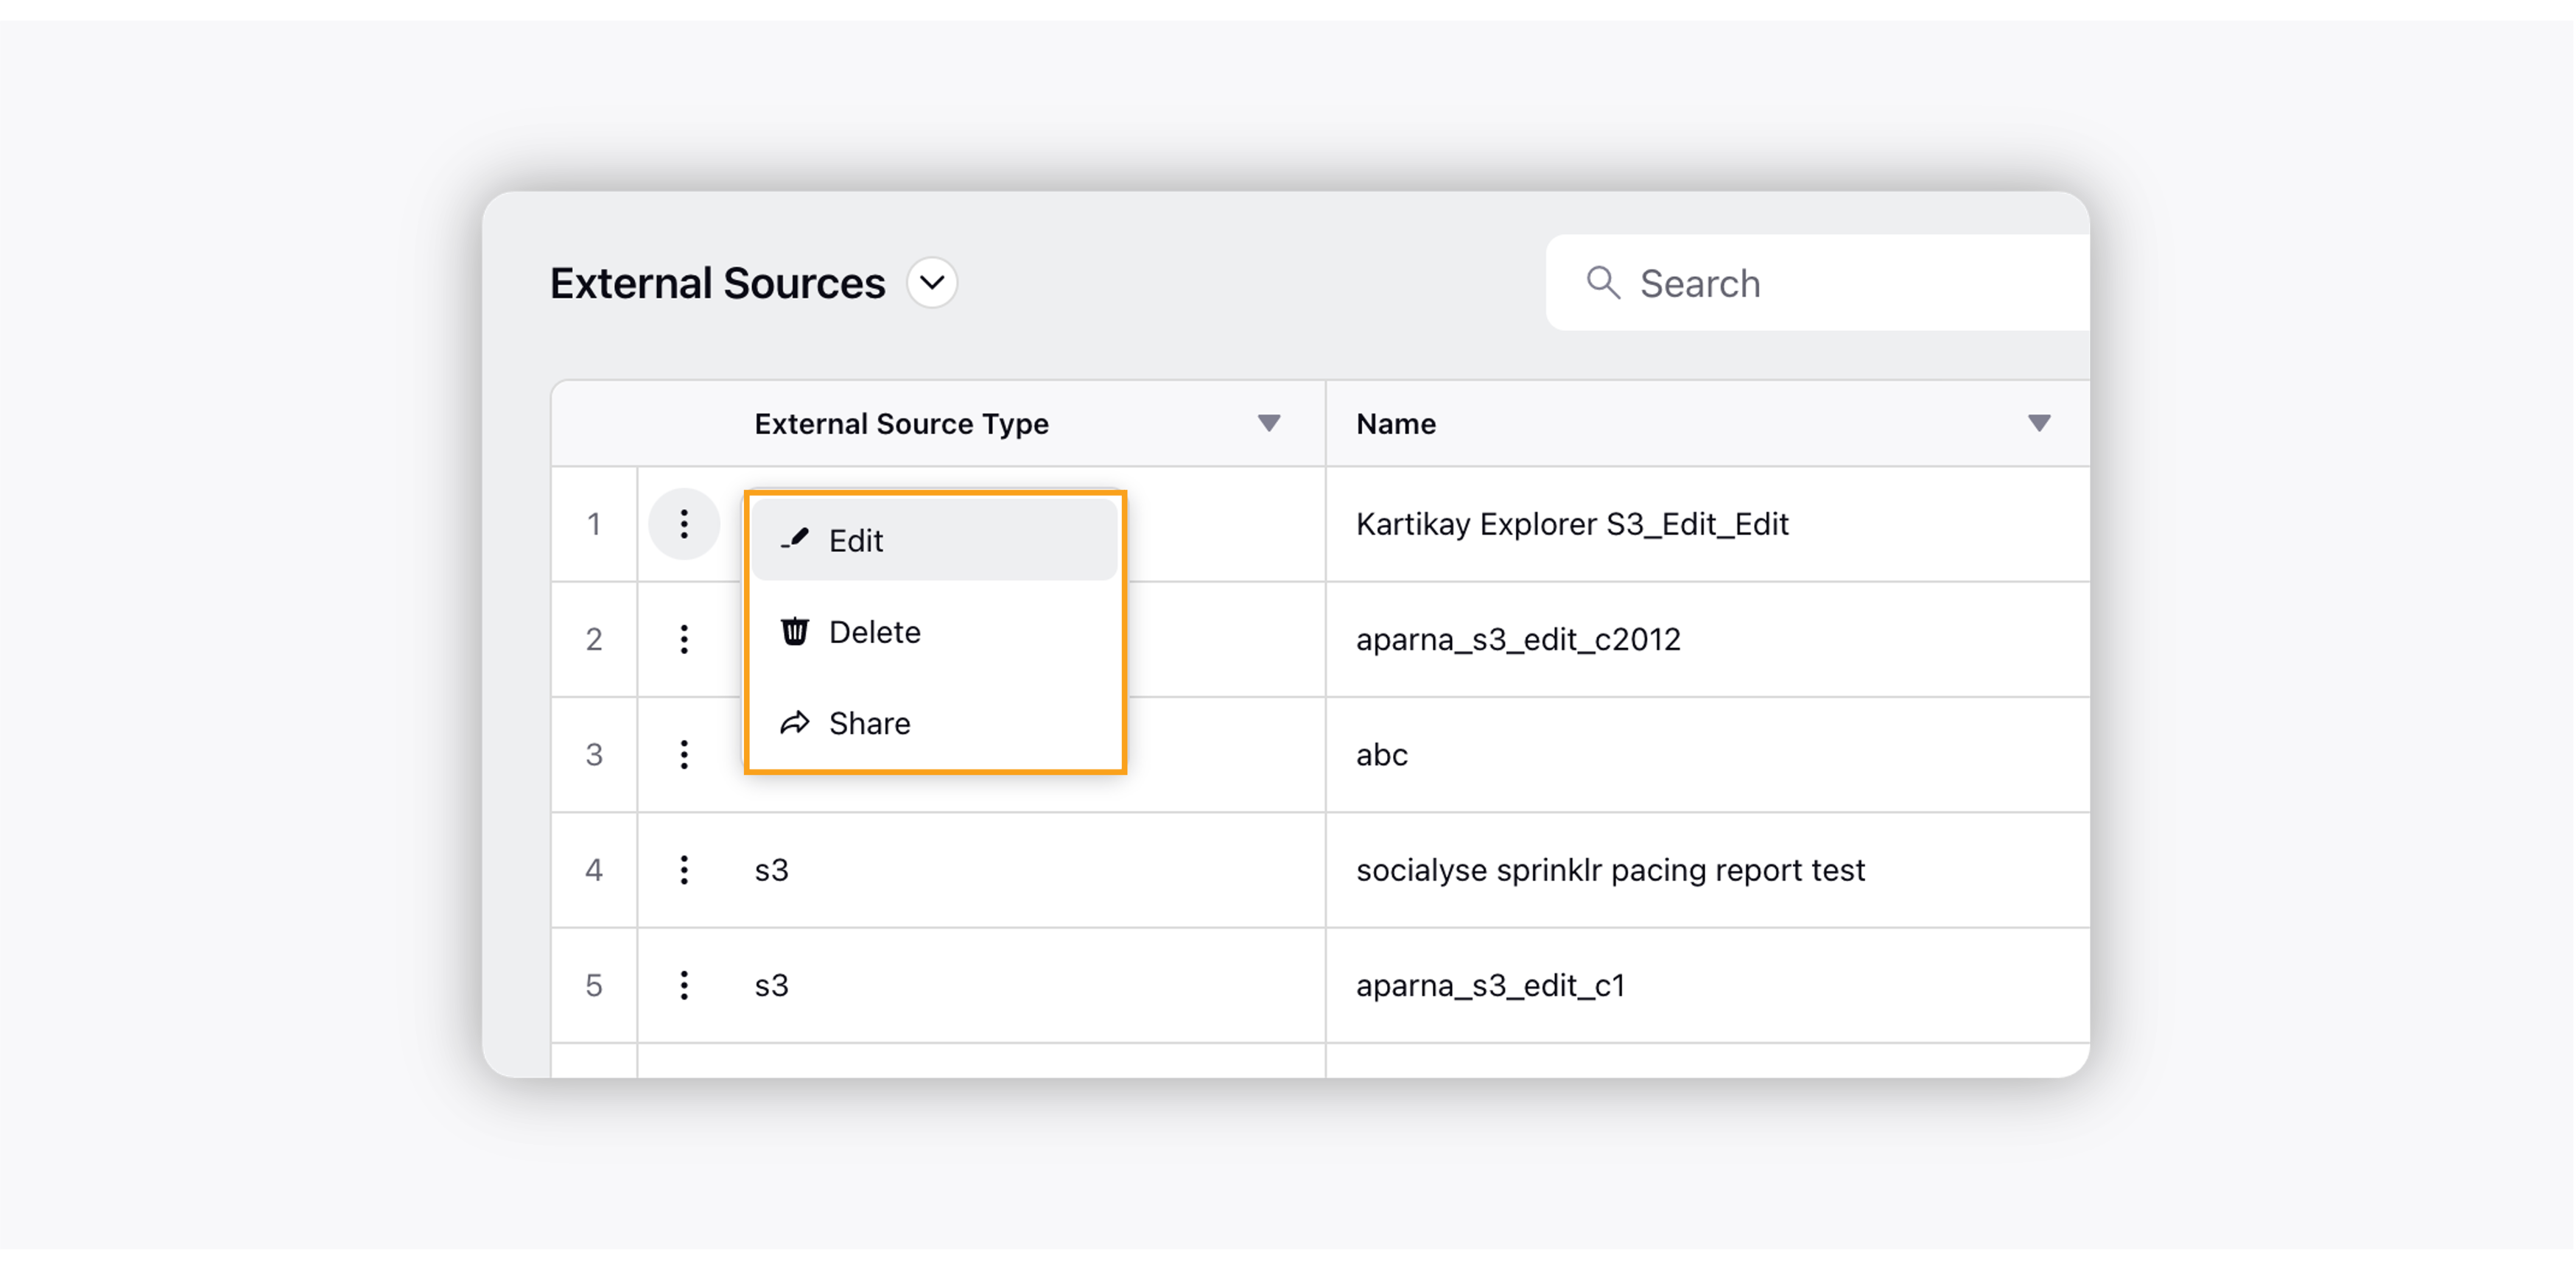
Edit: Clicking the edit option will open the External Source Setup popup window where you can make the changes to your external source.
Delete: Clicking the delete option will delete your external source.
Share: Clicking the share option will open the Share External Source popup window. For more information, refer to the Share External Source section.
Share External Source
You can share your external source(s) with other users by providing them the appropriate permission.
On the Share External Source window, first select the Workspace or Workspace Groups in which you want to make your external source visible. And then you can give Edit and/or View permissions, as needed.
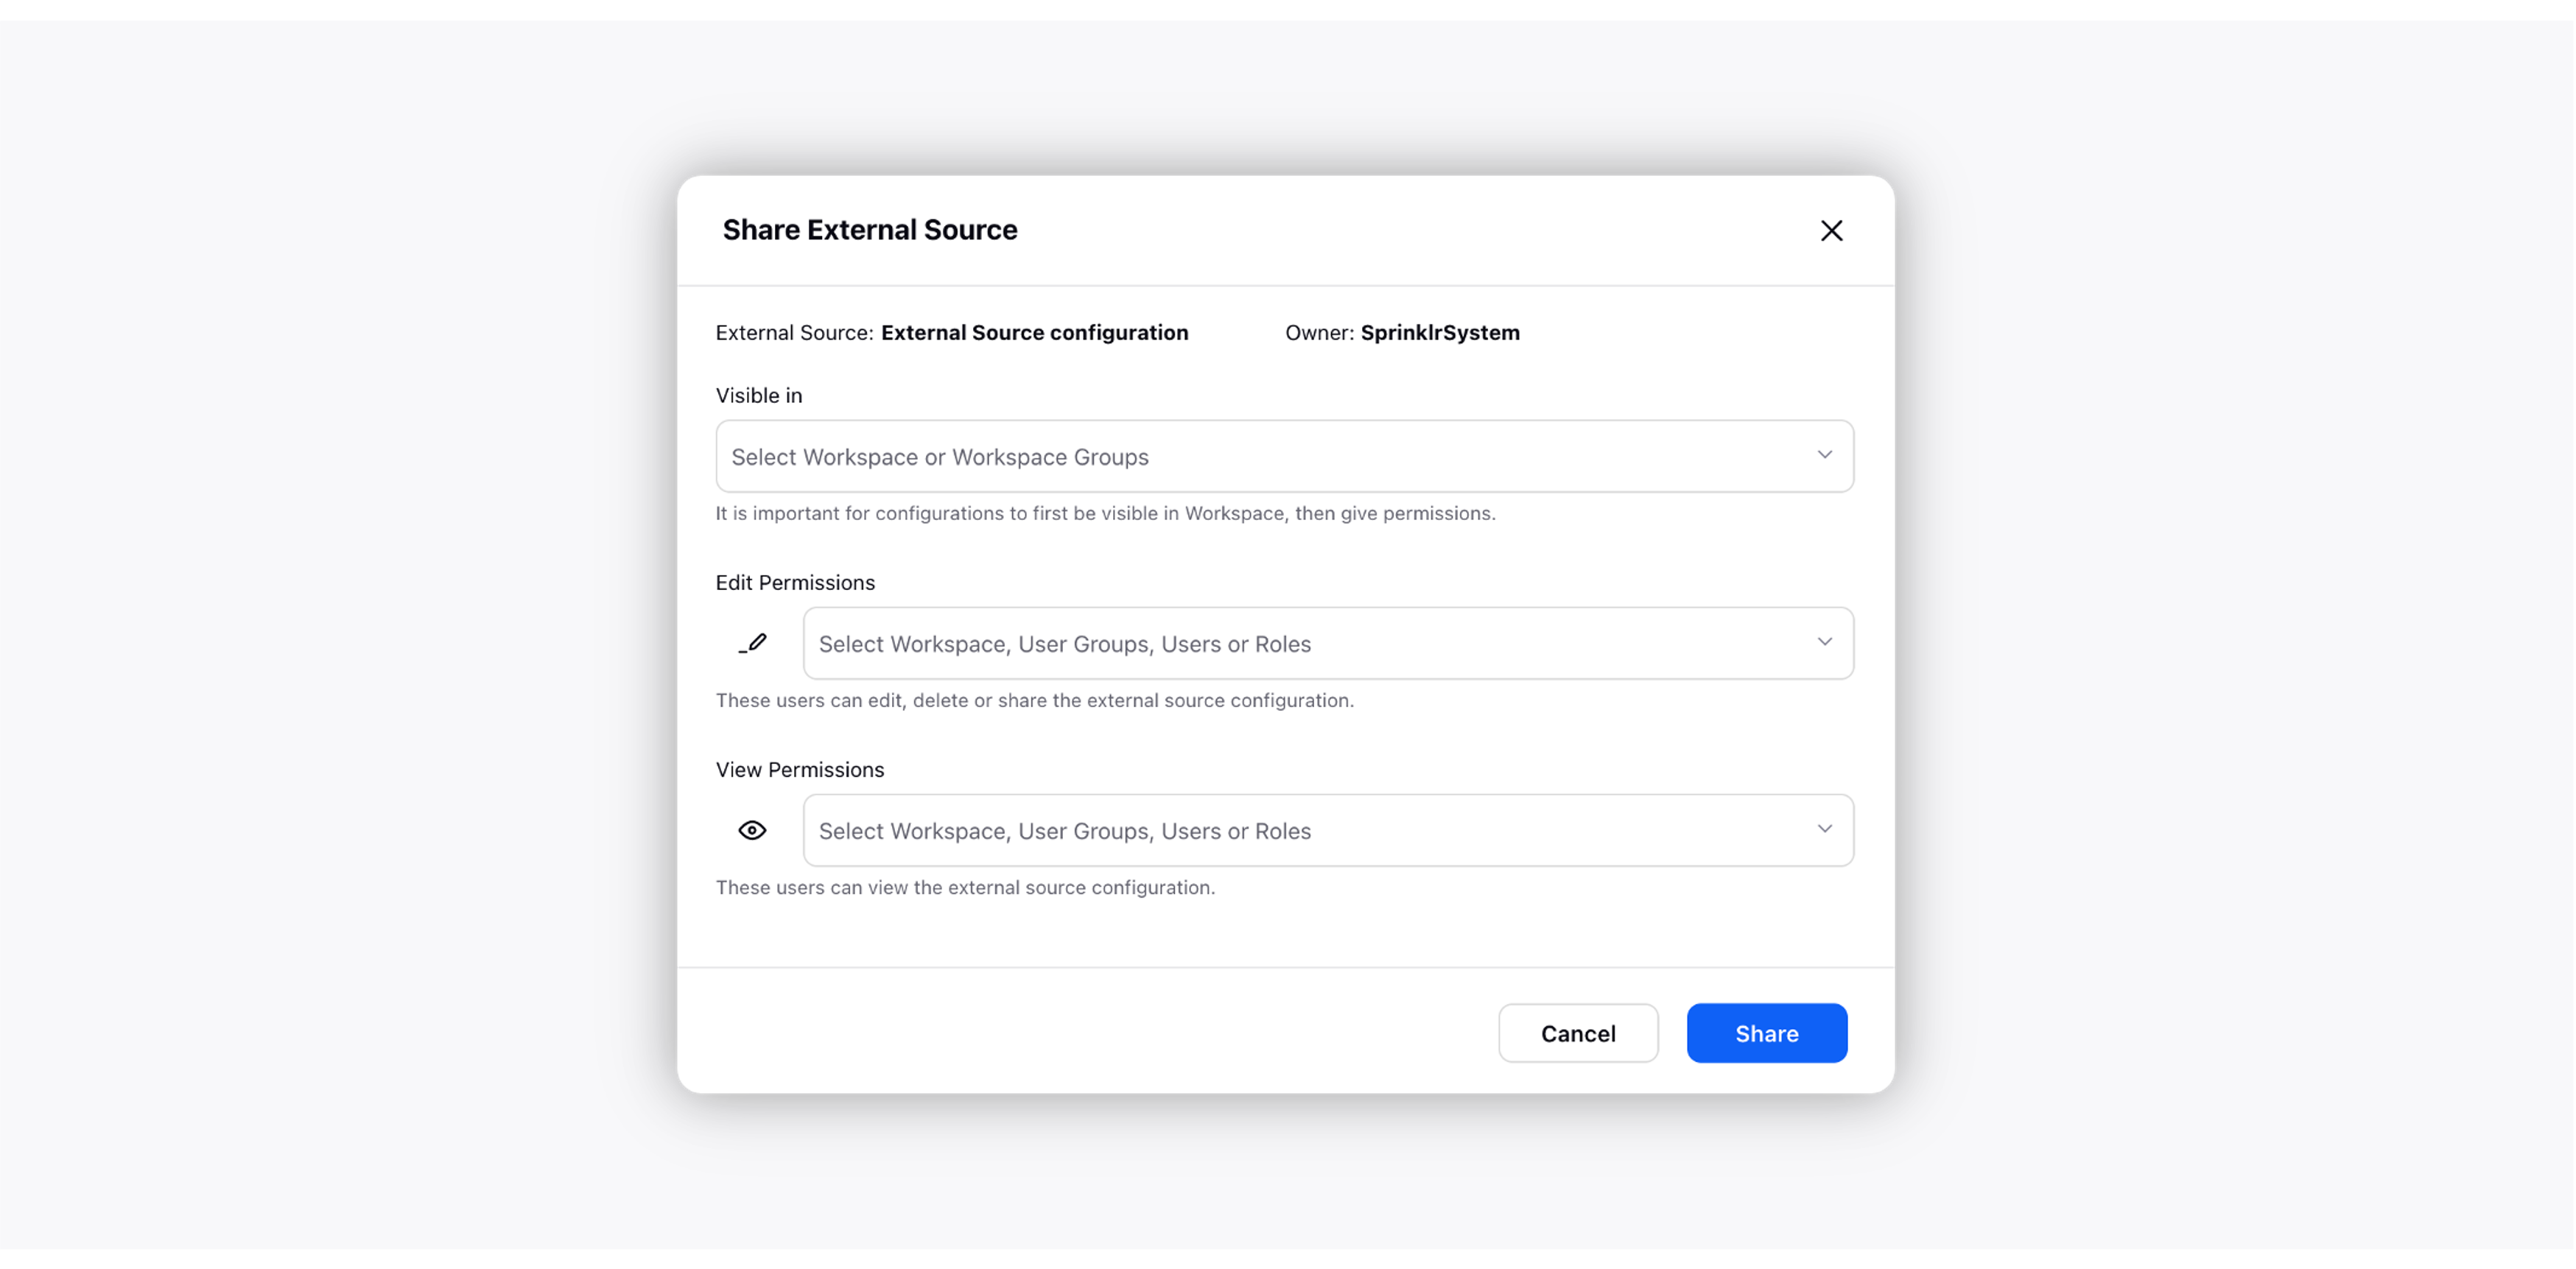
Select workspace, user groups, users, and/or roles you want to share the Edit or View permission with.
Edit: User(s) or user groups with the Edit permission will have all the permissions like editing, deleting, and sharing the external source.
View: User(s) or user group(s) with the View permission will see the external source being listed in their External Source record manager.
Click Share.
Note:
|
