Drive Engagement through Reaction Campaigns (Advocacy)
Updated
The Reaction Campaign in Sprinklr Advocacy empowers Advocates to automatically like brand posts using their connected social accounts. Admins initiate campaigns, prompting users to opt in, and opted-in users have brand posts automatically liked on their behalf.
Importance of Reaction Campaigns
Heightened Brand Visibility: Increased automatic likes amplify brand exposure on social media, expanding reach and therefore driving engagement for the brand posts.
Efficient Advocacy Impact: The Reaction Campaign enhances Advocate involvement and streamlines the process of interacting with brand content on social media.
Data-Driven Strategy: Detailed reporting facilitates data-driven decisions, optimizing content and targeting strategies for overall business success.
Roles and Permissions
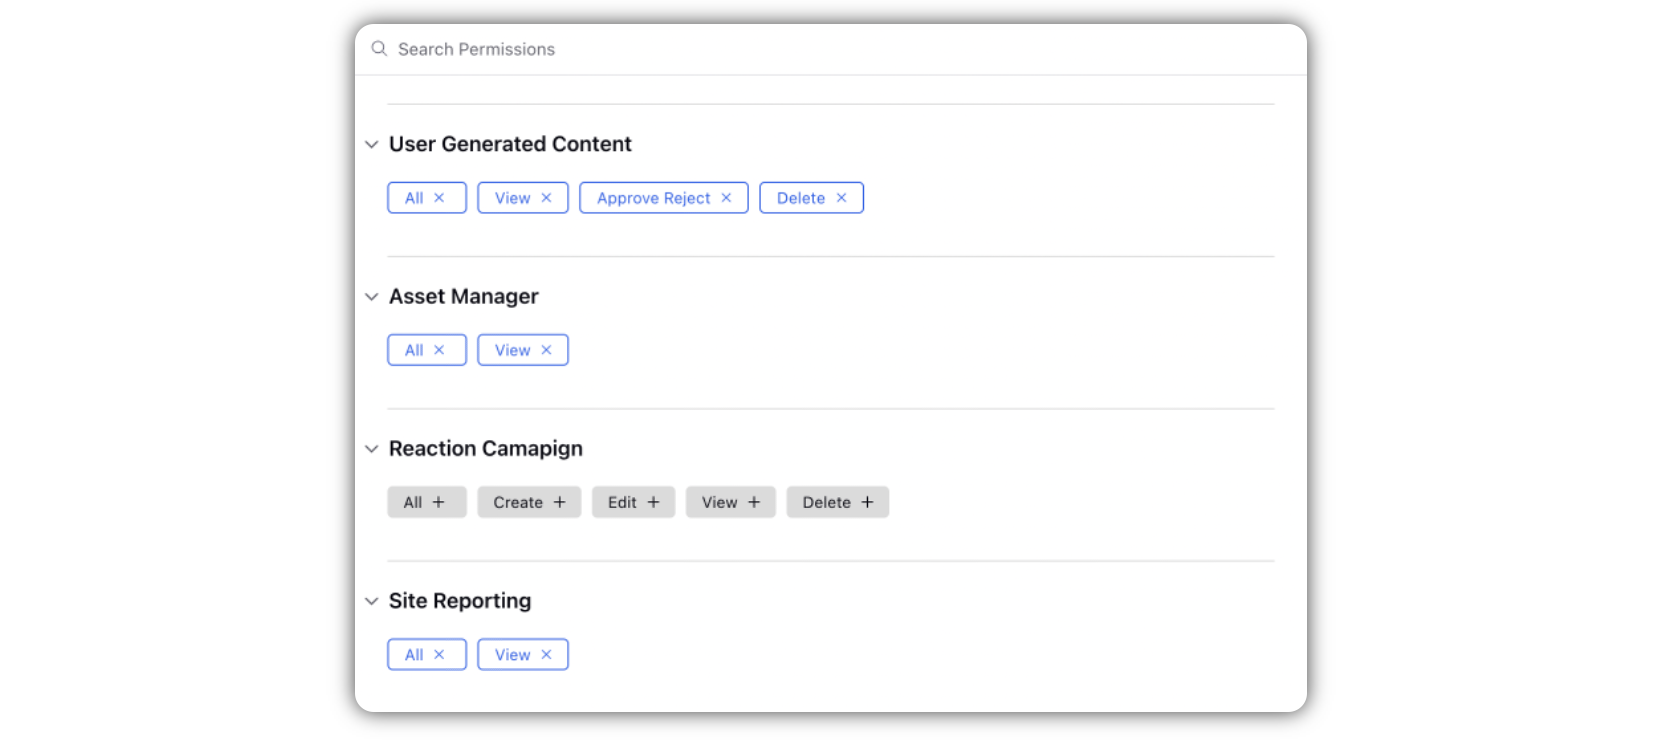
For admins to create and manage the reaction campaign, they should be given the required roles and permissions, which can be given from the Sprinklr Space environment.
Click Admin Console under Advocacy within Engage in the Sprinklr Social tab.
Hover over the Options icon beside Advocacy Community and click View Site.
Hover over Options icon beside Advocacy Site and click Select Roles and Permissions.
Click Create Role at the top right corner to create a new role.
Give a Role Name and select required permissions for i.e. Content Management and Reaction Campaigns roles
Assign Users to this role [Can select individual Users or Profile Lists].
Click Save.
Steps to Create a Reaction Campaign
Admins with required roles and permissions can create the reaction campaign in the Content Management section in the advocacy site:
Login to the Advocacy site.
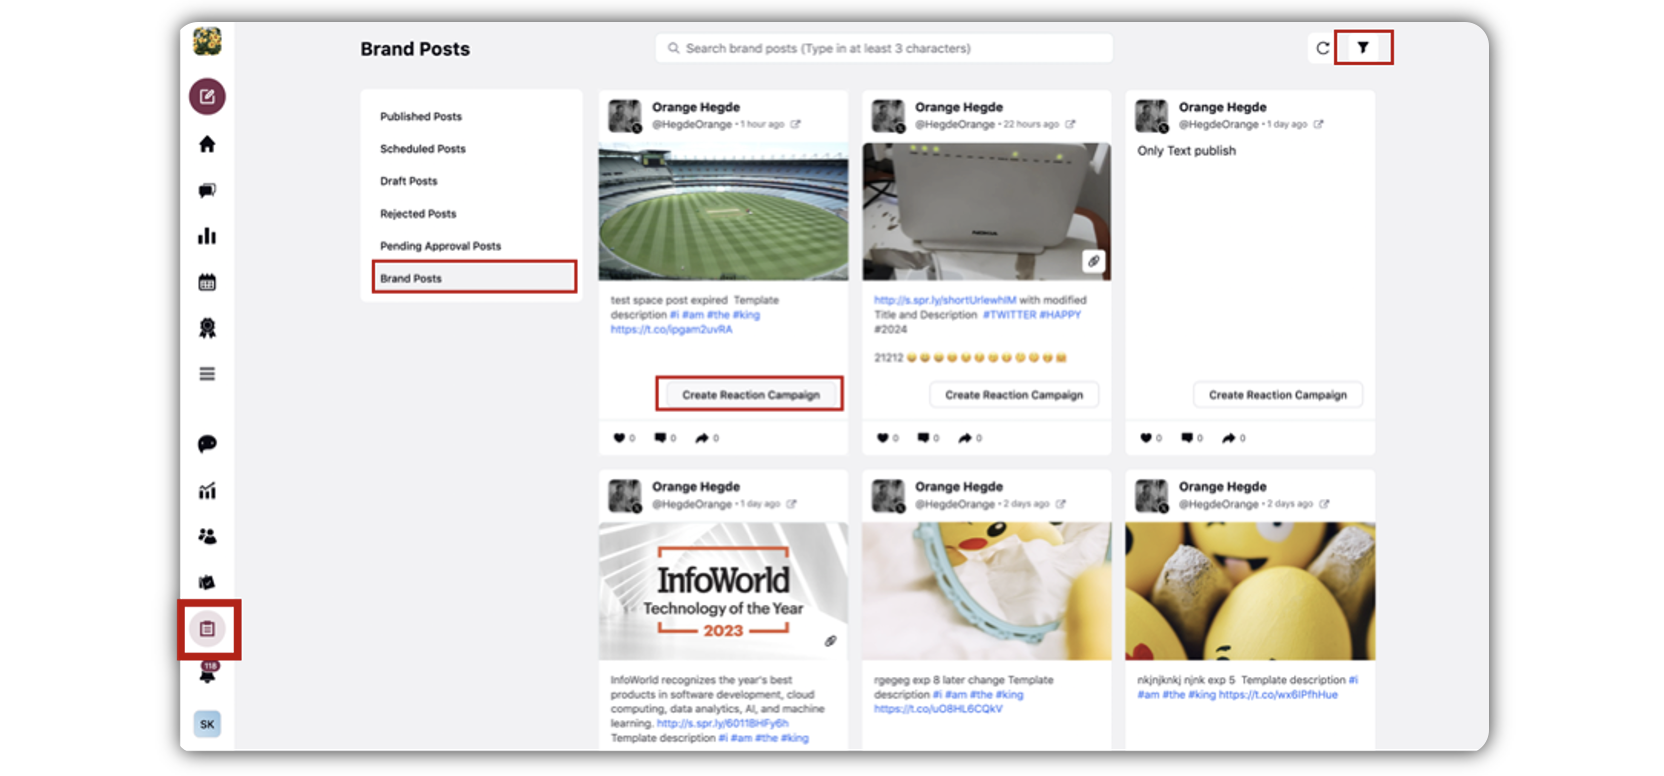
In the left bar click Content Management and navigate to the brand posts column.
Admin would be able to see all the brand posts in this section. You can use filter present on the top right to select the channels for which you want to see the brand posts.
Note: Admins will be able to create Reaction Campaigns for Twitter and LinkedIn posts only because only these channels support native likes.
To create a Reaction Campaign, click Create Reaction Campaign on the post card.
Enter the details such as Name and Description of the Reaction Campaign.
Choose the Target Audience from the dropdown menu for the Reaction campaign on the advertising site. Before making your selection, ensure that the Target Audience has been created in the Sprinklr Publisher space. If no Target Audience is set up there, it will not appear as an option in the dropdown.
Set the frequency of likes. Frequency determines the rate at which likes will be executed from ‘Subscribed’ accounts ONLY. For example, if you set frequency as 50 likes per hour and 100 people have subscribed to future Reaction Campaigns then it will take 2 hours for all likes to execute. Non-subscribed users will receive a normal notification. This is done to avoid the likes being perceived as bot activity.
Enter the Start Date and Time, to start the reaction campaign at that time. Once the reaction campaign starts at the mentioned date and time it will by default end after 5 hours. To change this duration, contact your Success Manager.
Enter the Gamification Multiplier, to award multiple points to the user who likes through Reaction Campaign, to increase the usability of the feature.
Add additional message if required.
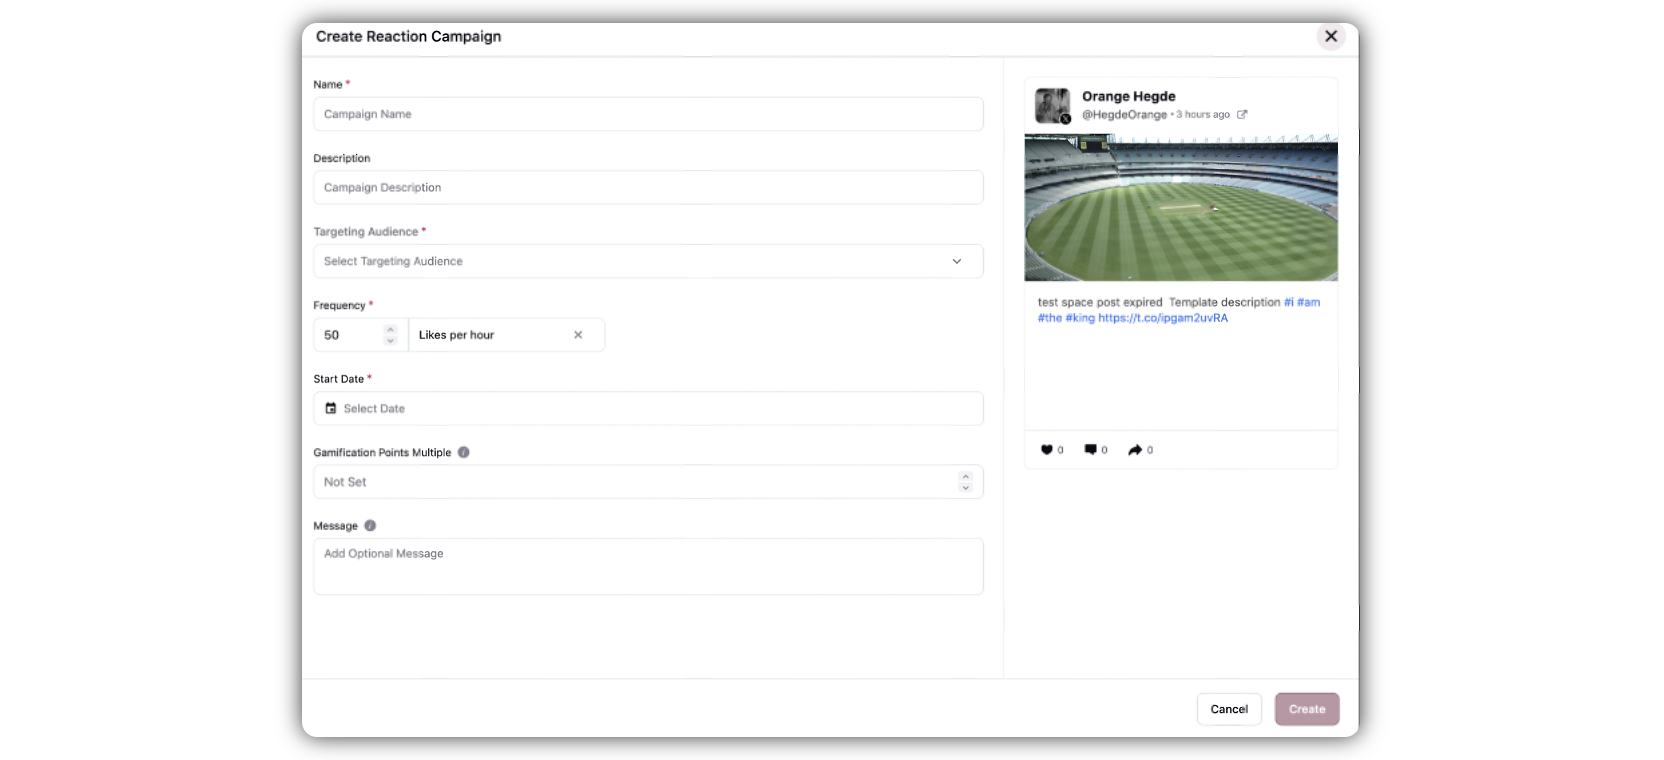
Click Create to schedule the reaction campaign.
As soon as the Reaction Campaign hits the start time advocates will be notified about it, and they will be able to like and subscribe/ or just like to it from there.
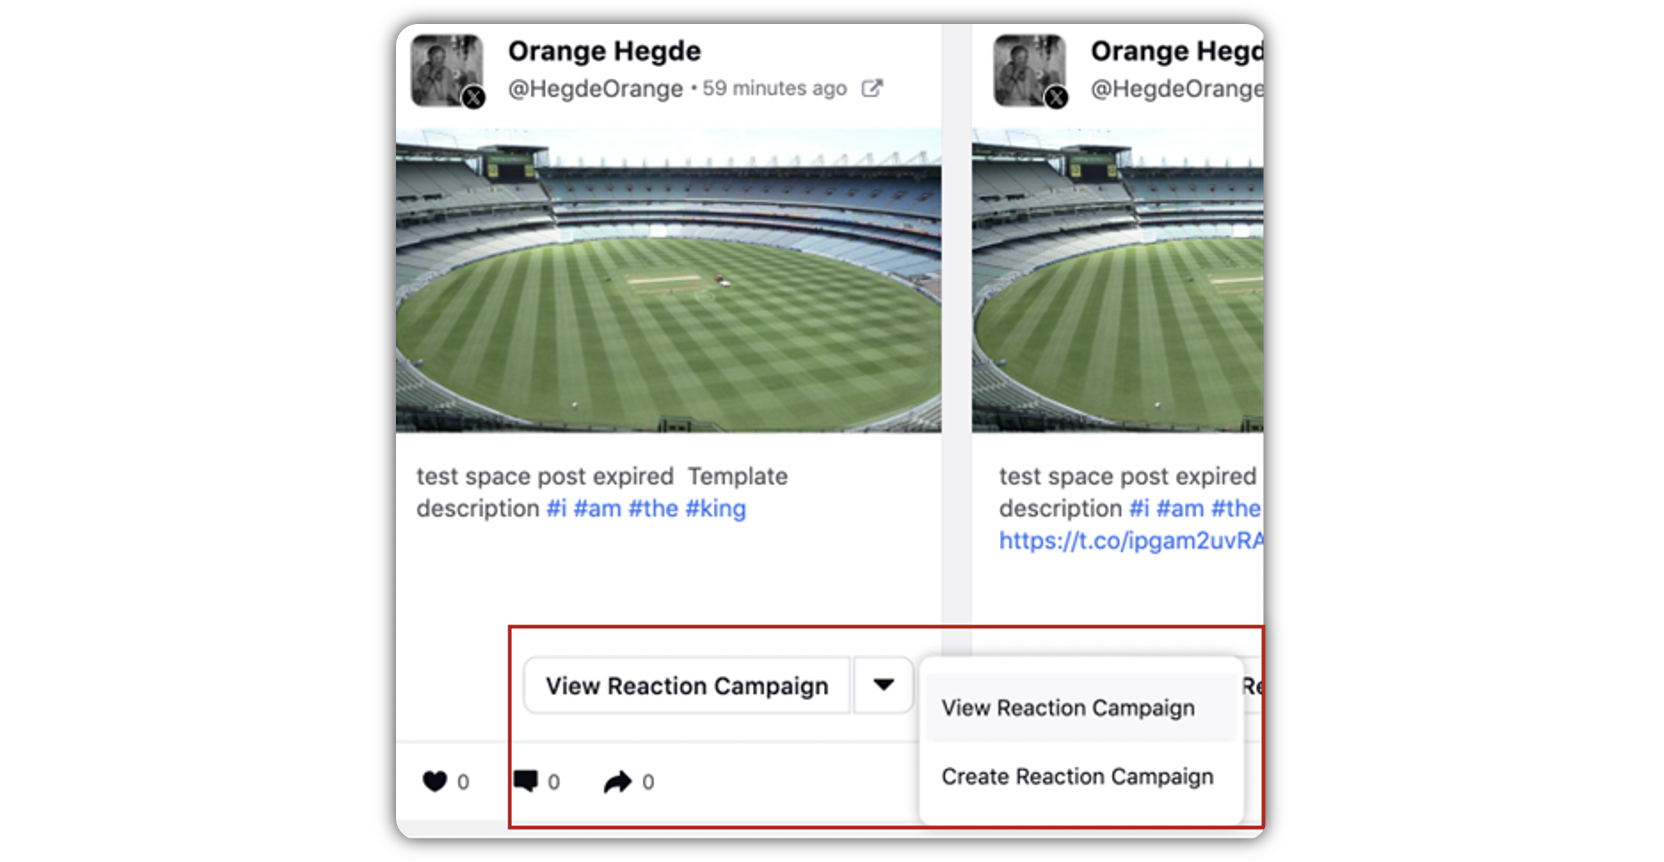
Admins can view the created reaction campaign and edit it. Even more they can create multiple reaction campaigns for the same post from the drop-down present on the brand post-card.
Steps to View and Edit a Reaction Campaign
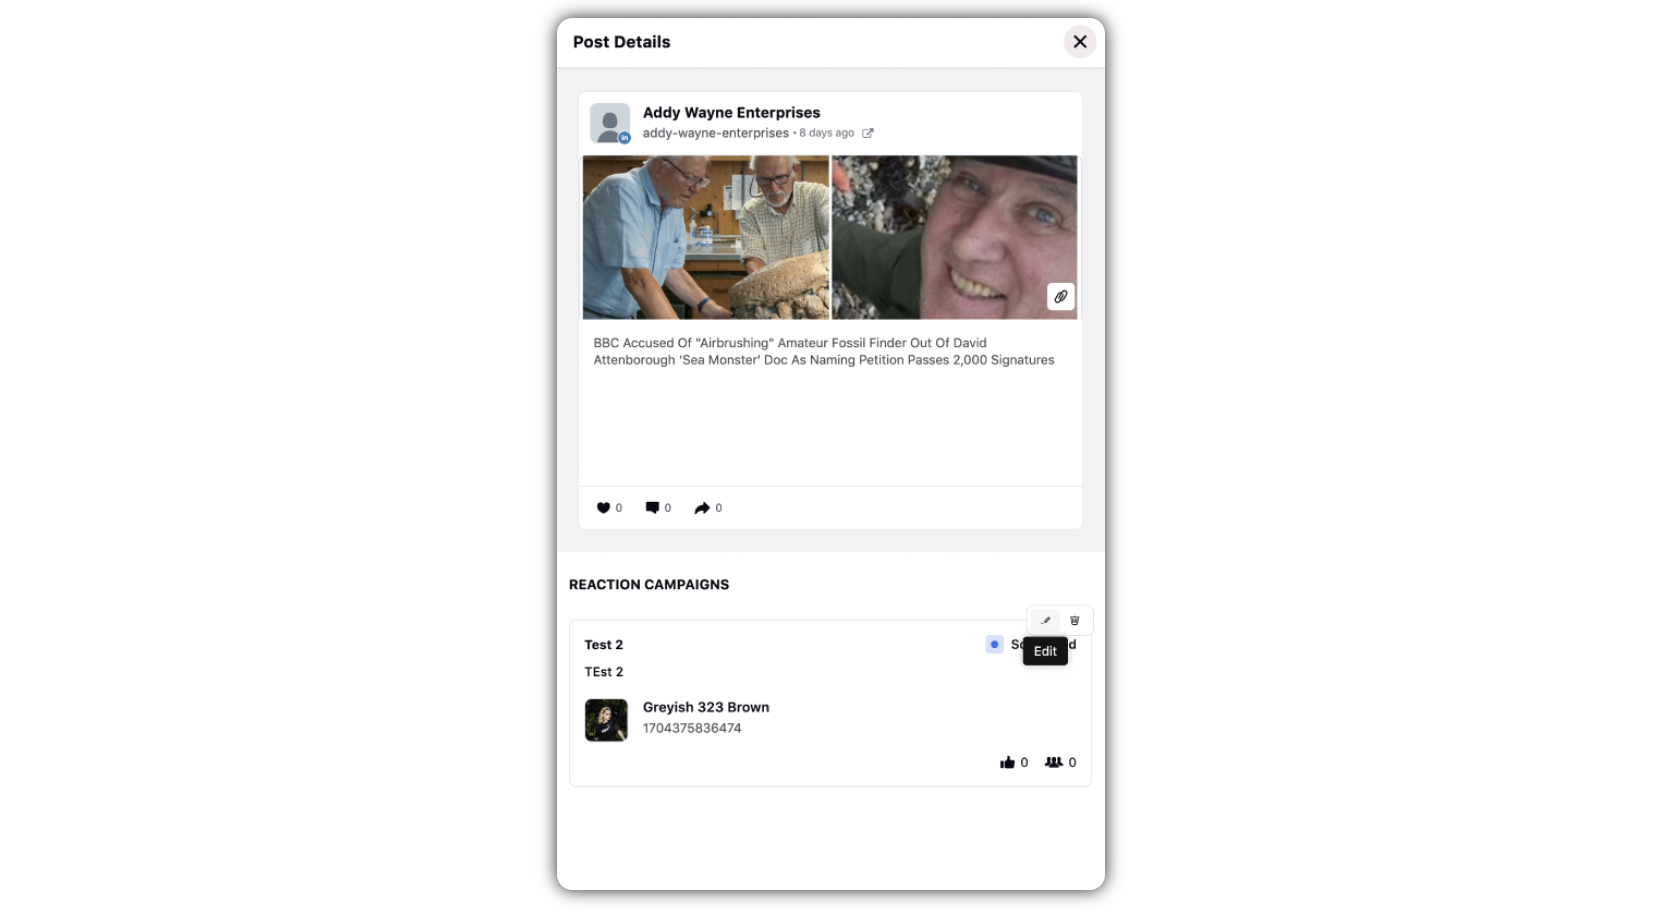
Click View Reaction Campaigns. A third pane opens where you will be able to see the brand post and all the reaction campaigns created for that post.
You can hover over the scheduled reaction campaign and edit it if required.
Steps to Manage Reaction Campaign
Admins with appropriate permissions can manage the created reaction campaigns.
In the left bar click Reaction Campaign to find all the created campaigns in one page.
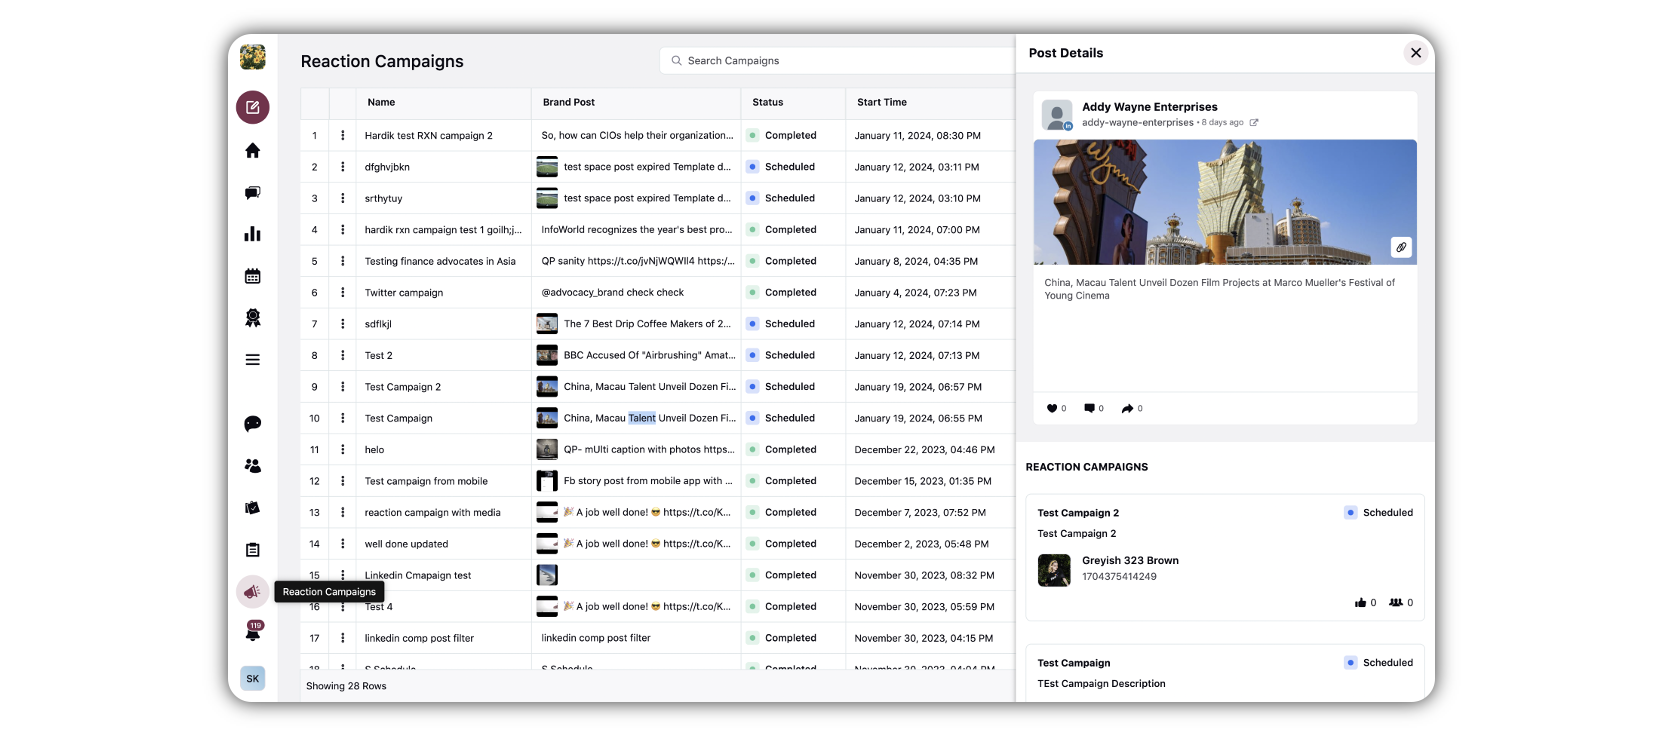
Here all the details of the Reaction campaign are available. Double-click on the Brand post or click the Options icon and navigate to View Brand Post to open the brand post in the third pane.

Here you can edit the scheduled reaction campaign, check the number of likes gathered and the targeted users for the reaction campaign.
Filter the campaigns based on Channel, Author the one who created the Reaction campaign, and Status i.e. Scheduled and Completed.
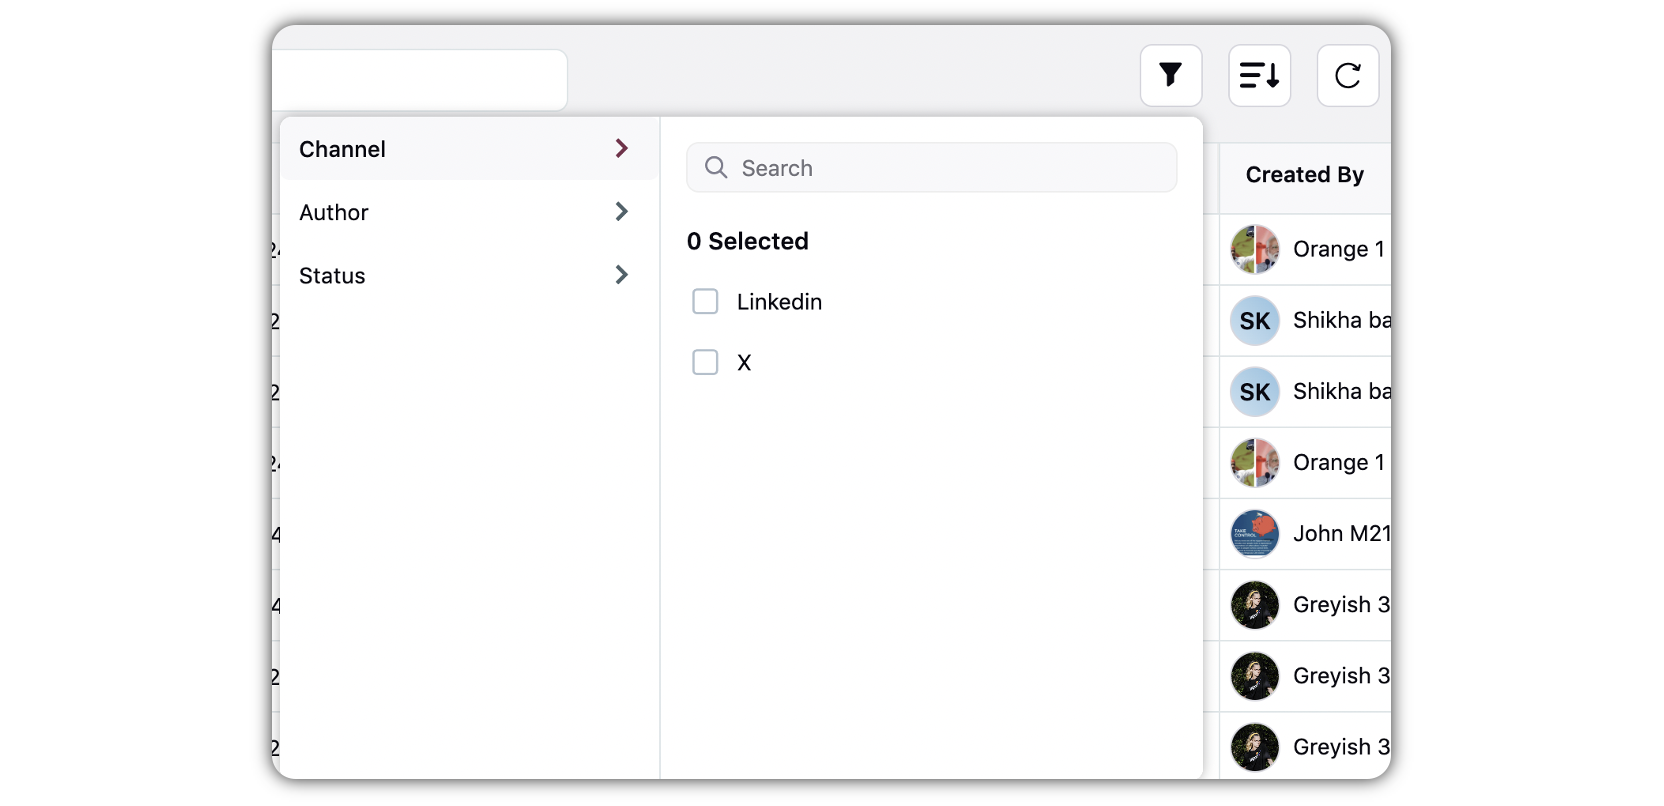
You can sort the Reaction campaign based on Start Date and End date.
You also have the capability to manage the columns, i.e. which columns you want to see and in what order.
You can delete the Reaction Campaigns, if required.
Reporting on Reaction Campaigns
Admins can plot different metrics and dimensions within the reporting dashboard to know the success of the reaction campaign. Reporting gives them a way to know how many likes were executed from reaction campaign and hence it helps in knowing how much engagement was driven by reaction campaigns.
To learn about user flow of Reaction Campaign, see Reaction Campaigns User Flow.