Configure Deployments
Updated
This guide provides an overview of configuring Deployments for various use cases in AI+ Studio using Pipelines.
In the "Deploy Your Use Cases" section, you can manage and monitor the deployment of all AI-driven use cases across Sprinklr. This centralized hub enables you to configure, test, and optimize AI workflows tailored to your specific requirements.
Pipelines is an intuitive, free-flowing canvas designed for creating and managing AI workflows. It supports both simple single-step tasks and complex multi-step processes, offering the flexibility and efficiency needed for seamless workflow design.
Prerequisites
Ensure that the appropriate permissions are configured before attempting to access or modify any deployment.
Access to modules within each product suite is determined by specific permissions granted for each module. Below are the permissions and their corresponding actions:
Permission Name | Granted | Not Granted |
View | Can view the deployments for all use cases in the module. Cannot create, edit, or delete deployments. This permission enables the module to be visible on the Launchpad. | Cannot view the module on the Launchpad. |
Edit | Can view, create, and edit deployments. Visibility of global CTAs for creating and editing custom deployments is enabled by this permission. | Can only view deployments for all use cases but cannot create, edit, or modify them. |
Delete | Can delete deployments. Visibility of delete actions for custom deployments is enabled by this permission. | Cannot delete deployments. |
Access Deployments
Follow these steps to access the Deployments in AI+ Studio:
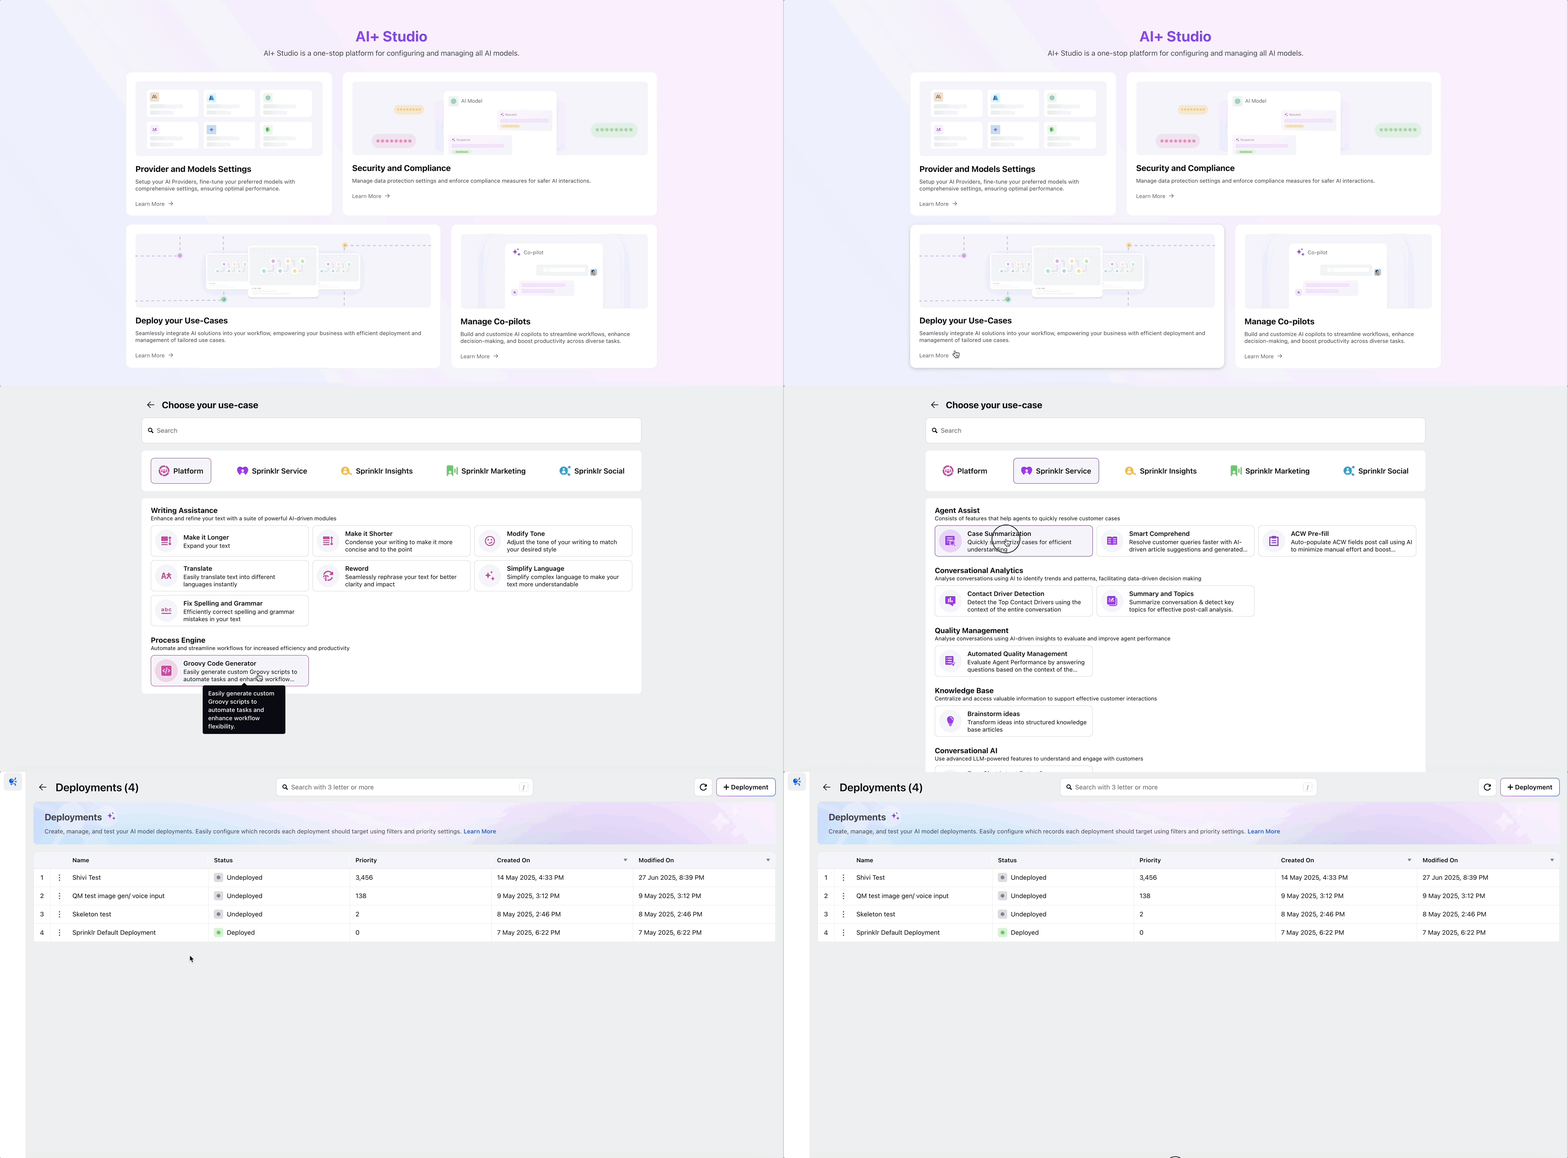
Open the AI+ Studio module in the Sprinklr Launchpad.
Select the 'Deploy Your Use-Case' card. Refer to Supported List of Use Cases for more details.
Choose the use case for which you want to create a deployment.
Note: For each AI use case, Sprinklr provides a default deployment that you can use as-is. Alternatively, if you require personalized settings for your use case, you have the option to configure a Custom Deployment tailored to your specific needs.
Create Custom Deployment
Click the + Add Deployment button in the top-right corner to create custom deployment. Enter the details in the Basic Details window about your deployment.
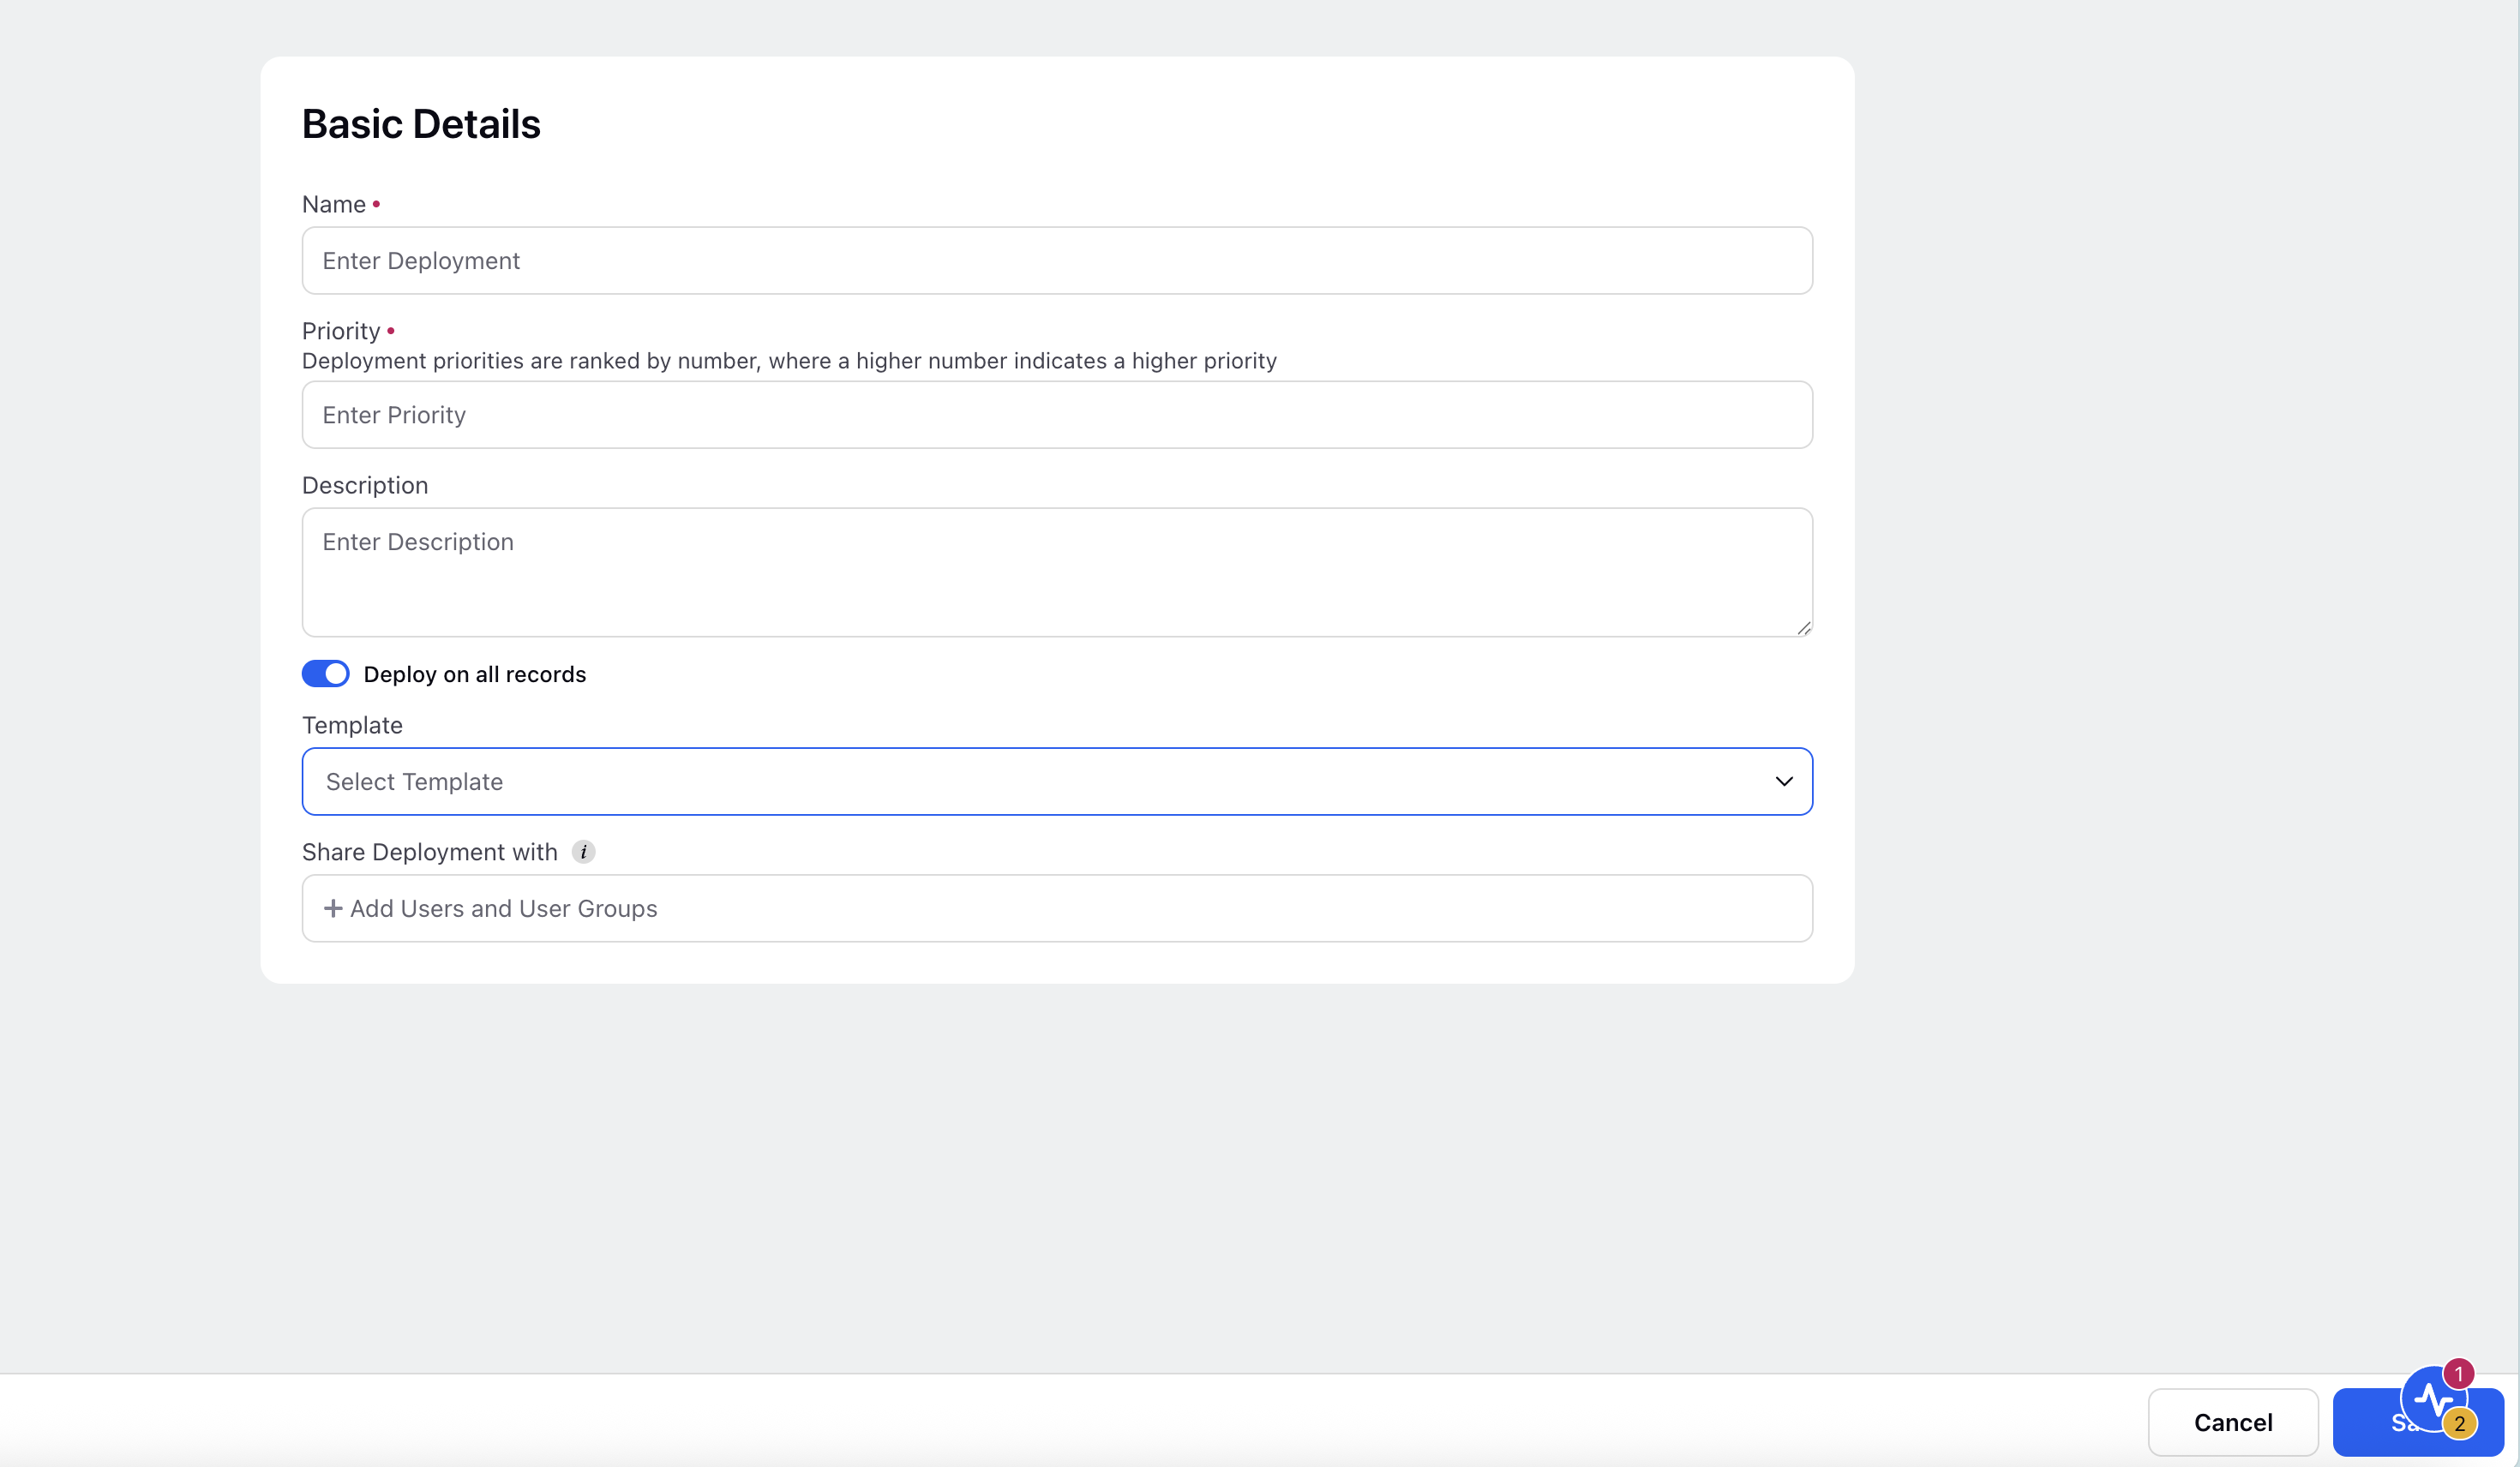
The following table describes the input fields of Basic Details screen:
Input Field | Description |
Name (Required) | Assign a clear and meaningful name to your deployment to ensure it is easily identifiable. |
Priority (Required) | Specify the priority level for this deployment. If multiple deployments are applicable to the same record, the deployment with the highest priority will take precedence. |
Description (Optional) | Include a detailed description outlining the purpose and intended persona for this deployment. |
Deploy on all Records | Switch the toggle to deploy it on all records. |
Template (Optional) | Select a preconfigured template for your deployment. |
Share Deployment with (Optional) | Specify which users or user groups can access and use this deployment. This setting enables collaboration and centralized governance. |
Click the Save button to save the basic details. This action will navigate you to the Pipelines screen, where you can configure your AI workflow using the available nodes.
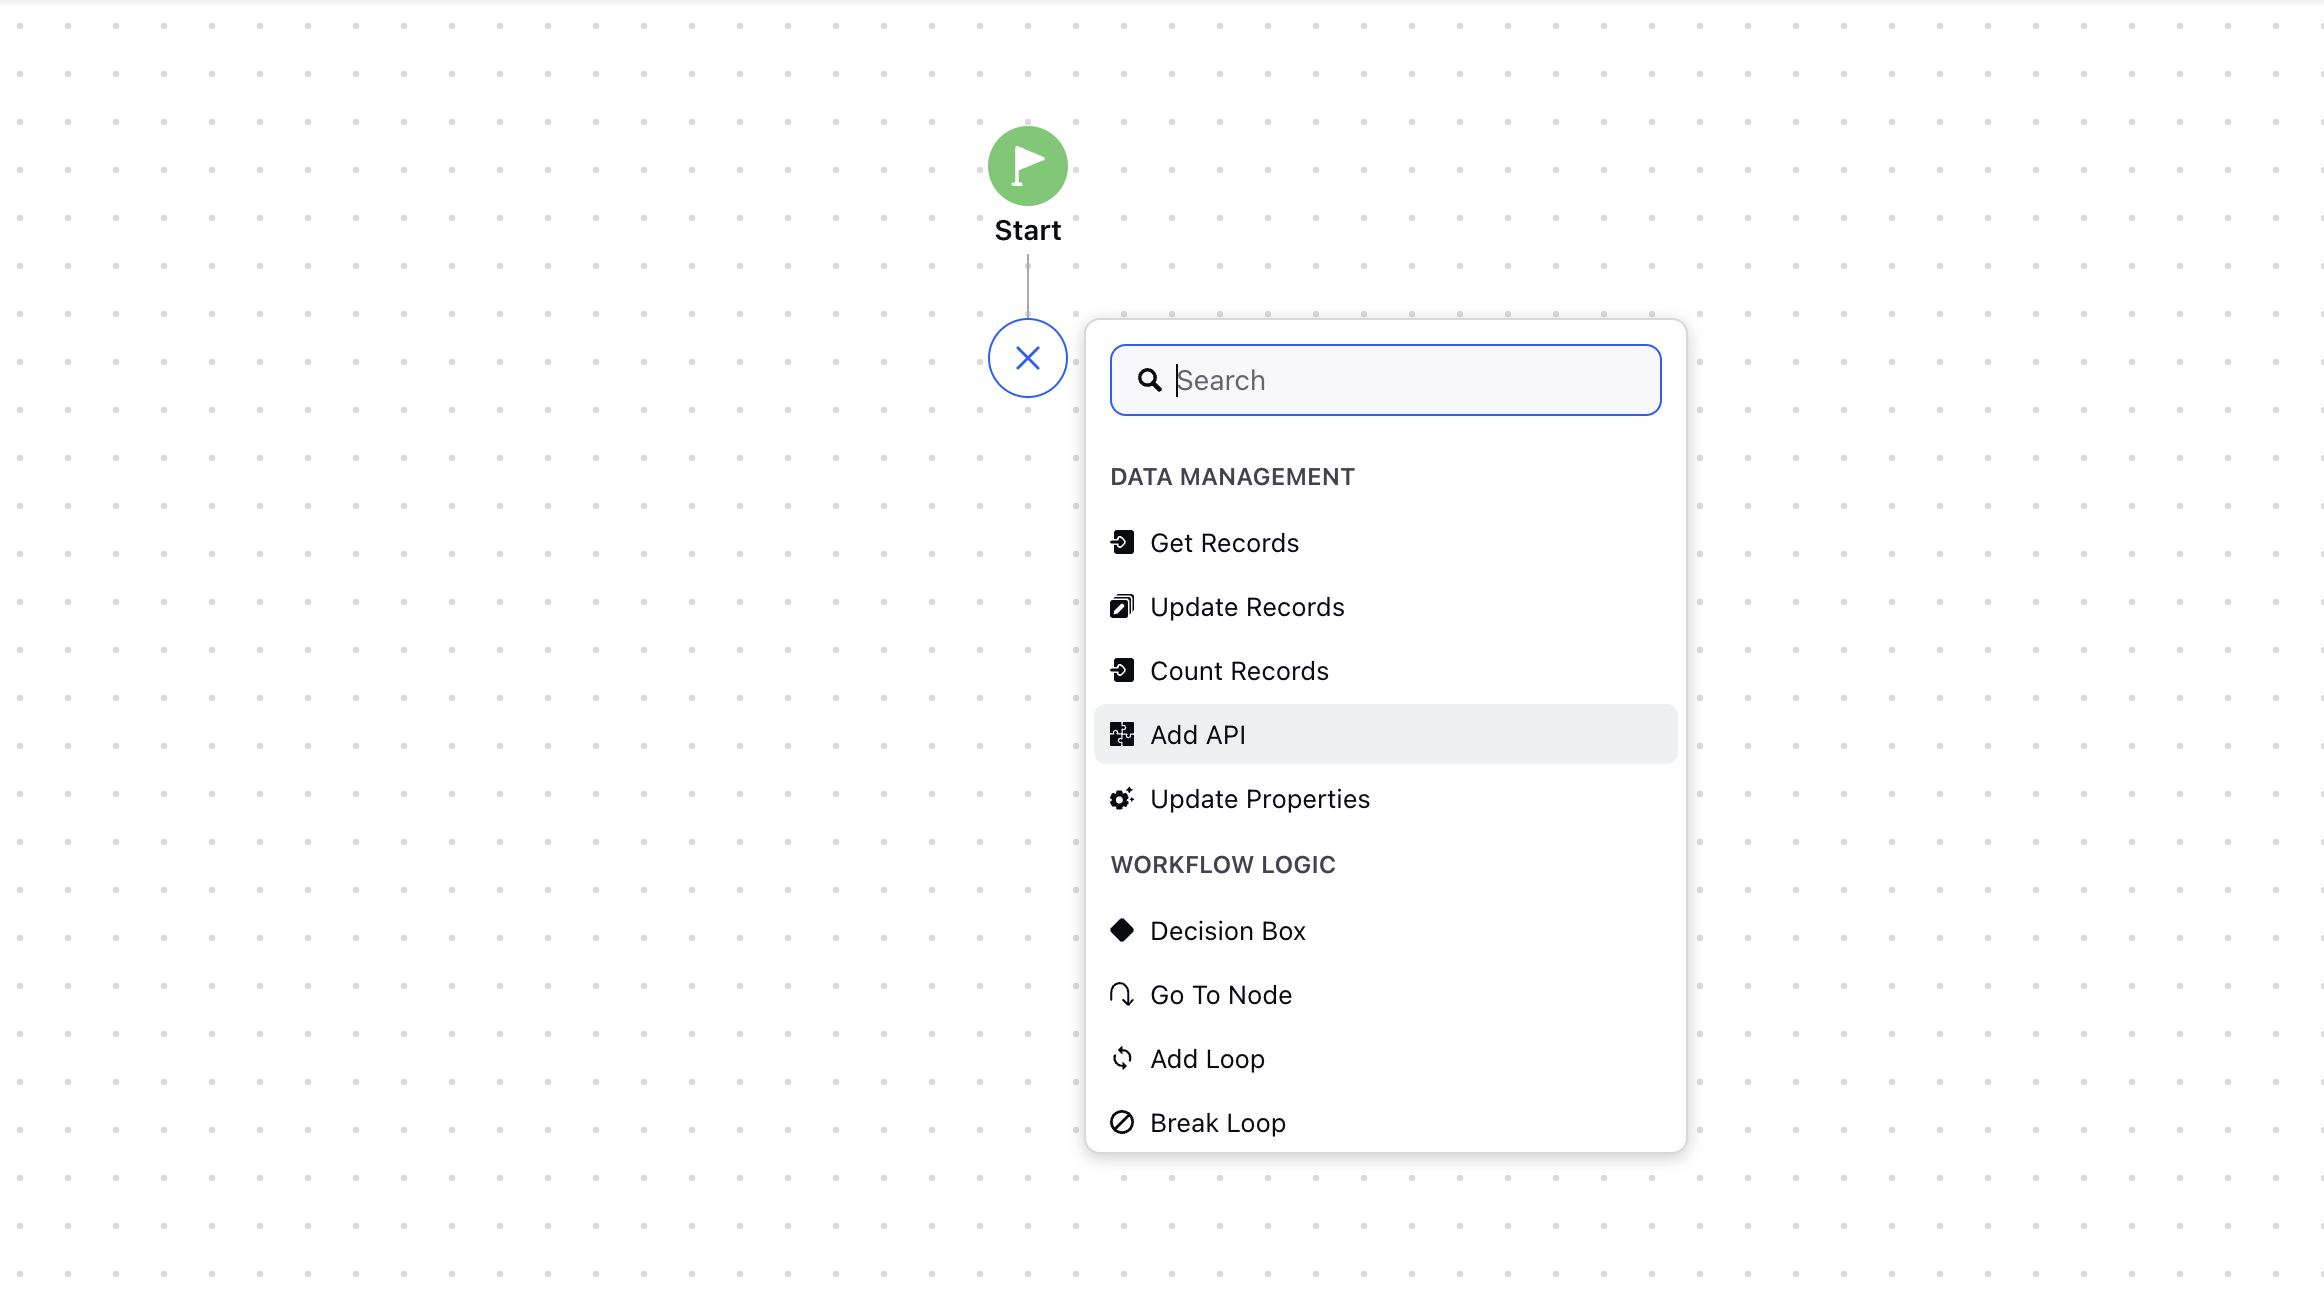
Available Nodes in Pipelines
The following nodes are available in the Pipelines to configure your AI workflows.
Data Management Nodes | |
Get Records | Retrieves data from Sprinklr’s database by applying filters and saves the results into a variable. |
Update Records | Updates one or more entries for a specific entity type by specifying conditions. Refer to managing records through guided workflows for more details. |
Count Records | Counts the records of a specific entity type by applying filters. |
Add API | Connects with external systems to fetch data or perform actions on those systems. Refer to making external API calls through guided workflows for more details. |
Update Properties | Defines variables to store information, which can be manipulated using Groovy scripts. |
Workflow Logic Nodes | |
Decision Box | Creates if-then logic within guided workflows. |
Go To Node | Enables navigation to specific parts of the workflow. |
Add Loop | Creates a loop structure for iterative operations. |
Break Loop | Stops the current loop execution. |
Sprinklr AI Nodes | |
Prompt | Configures AI prompts for processing specific inputs. |
Flow Actions Nodes | |
Final Output | Marks the end of the process flow and specifies the variable used to pass the final output of the deployment. |
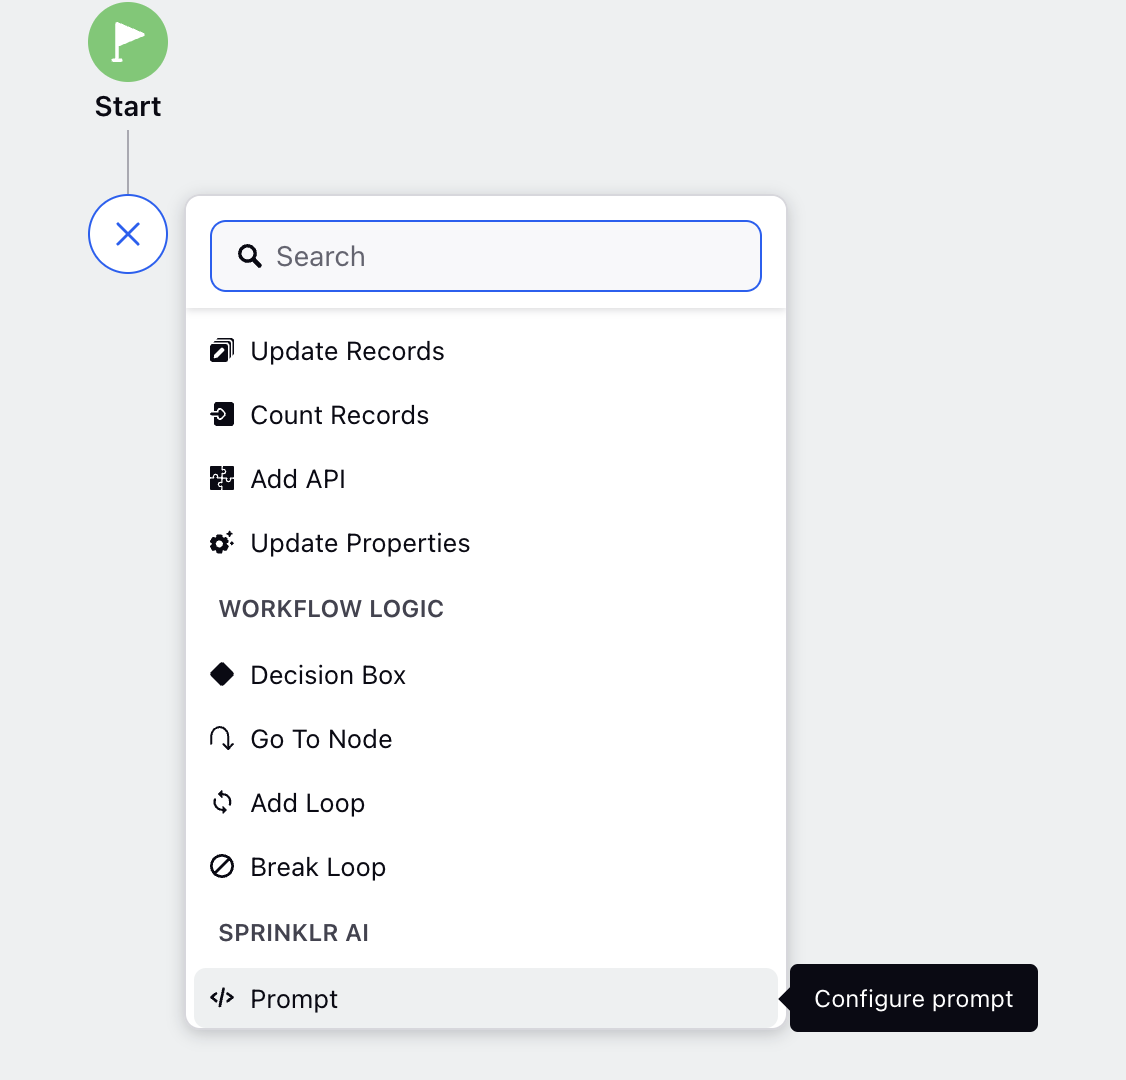
Configure a Prompt Using the Prompt Node
Follow these steps to configure a prompt using the Prompt node in the Pipelines:
Step 1: Add the Prompt Node
Select Prompt from the node dropdown menu.
The Prompt Editor window will open. It is divided into three panes:
i) Settings: This pane allows you to configure the Provider, Model, and other related parameters required for the prompt.
ii) Input: In this pane, you can define the System Prompt and Base Prompt that serve as inputs for the prompt model. Additionally, you can test your input prompt using the Test button.
iii) Output: This pane displays the submitted Request and the corresponding Response from the prompt model, helping you review the results.

Step 2: Configure Hyperparameters
Under the Hyperparameters section, select the Provider and the Model.
Toggle the Additional Settings switch to configure additional hyper-parameters. The following additional parameters can be configured using this option:
Field Name | Description |
Temperature | Temperature controls the randomness or creativity of the AI model's responses. A higher temperature (e.g., 0.8) makes the model more creative and diverse in its outputs, while a lower temperature (e.g., 0.2) makes the responses more focused and deterministic. |
Frequency Penalty | Frequency penalty reduces the likelihood of the AI repeating words or phrases. It discourages repetition by assigning a penalty to tokens that have already appeared in the output. |
Stop Sequence | Stop sequence is a predefined token or set of tokens that signal the AI model to stop generating text. When the model encounters this sequence, it ceases further output. |
Top P | Top P (or nucleus sampling) is a method that restricts the model's token selection to the smallest set of tokens whose cumulative probability exceeds a specified threshold (e.g., 0.9). The model then samples from this subset, rather than the entire vocabulary, to ensure both diversity and coherence in its output. Use this parameter to balance randomness and reliability in generated outputs. A lower Top P (e.g., 0.5) will make responses more focused, while a higher Top P will increase diversity. |
Top K | Top K limits the model's choices to the top K most probable tokens at each generation step. For example, if K=10, the model will consider only the 10 most likely next tokens and discard the rest. Use this parameter to control output quality and coherence. A smaller K value restricts the model to safer, more deterministic choices, while a larger K increases randomness. |
Presence Penalty | Presence penalty reduces the likelihood of the AI model generating words or phrases that have already appeared in the output. Unlike frequency penalty, which focuses on how often a token appears, presence penalty applies even if the token has appeared only once. Use this parameter to encourage variety and creativity in the model's responses by discouraging repetition of previously used tokens. |
Note: The additional settings parameters varies for each AI Provider.
Select a PII masking template from the dropdown if you want to to hide sensitive details. For more details refer to PII Masking in AI+ Studio.
Add one or more Guardrails from the dropdown if you want to enforce responsible AI usage by restricting the generation or processing of harmful, inappropriate, or policy-violating content. For more details, refer to Configure Guardrails in AI+ Studio.
Set the Output Variable, where the prompt output will be saved.
Step 3: Define Input Pane
Set the System Prompt which establishes the overarching behavior, tone, or rules for the AI throughout a session.
Set the Base Prompt which represents the fundamental instructions provided by the user or application to achieve specific outcomes.
You can also attach media inputs—such as audio, images, or documents—to the base prompt by selecting the Attach Media button. This button is visible only if the selected AI model supports multimodal input.
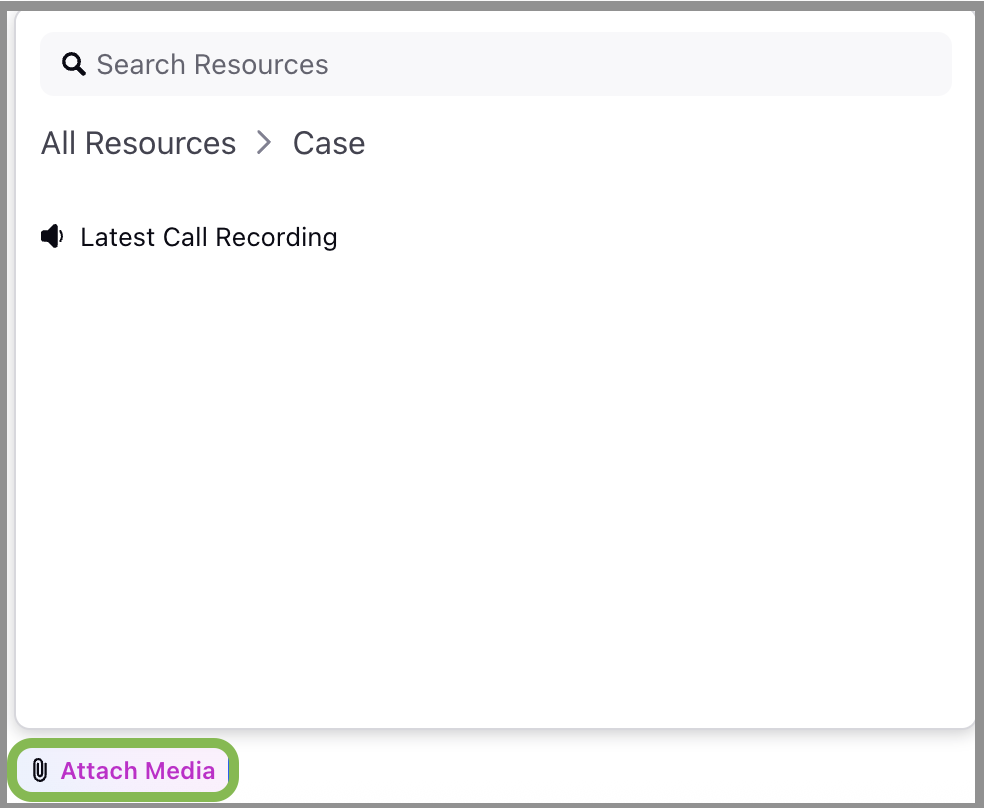
Use placeholders ("@") to add variables. This will open the Manage Resources popup containing all available variables:
- Asset Class Variables: Variables received from the context of the use case.
- Custom Variables: Variables added through Update Properties in the Pipelines before the current prompt node.
Step 4: Test the Prompt
Click the Test button located in the top-right corner of the Input pane to evaluate your prompts.
Upon clicking Test, a modal will appear, displaying fields corresponding to the use case in which you are deploying your prompt. Select your input from the dropdown for Placeholder parameters and write your input in the Input cell.
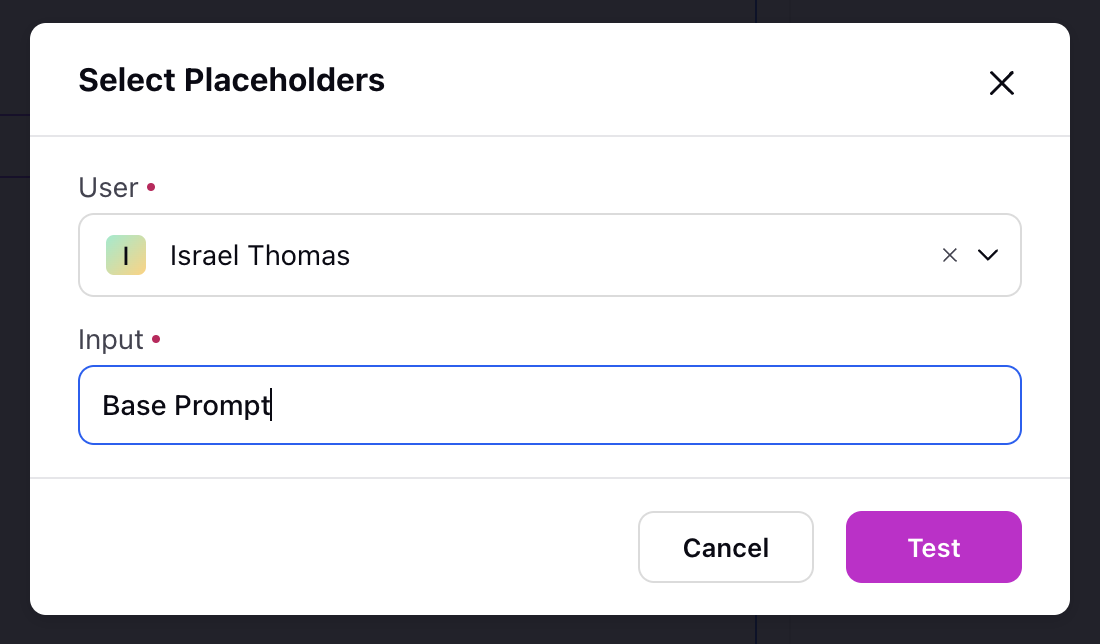
Note: Each deployment use case is linked to specific asset classes, which are automatically passed to the Pipelines. These asset classes are represented as placeholder variables and can be utilized within the test node to validate your prompts effectively.
Step 5: Save the Prompt Configuration
Click the Save button in the top-right corner to save your prompt configuration.
Adding a Final Output Node
After configuring the Prompt node:
Add the Final Output element to your workflow.
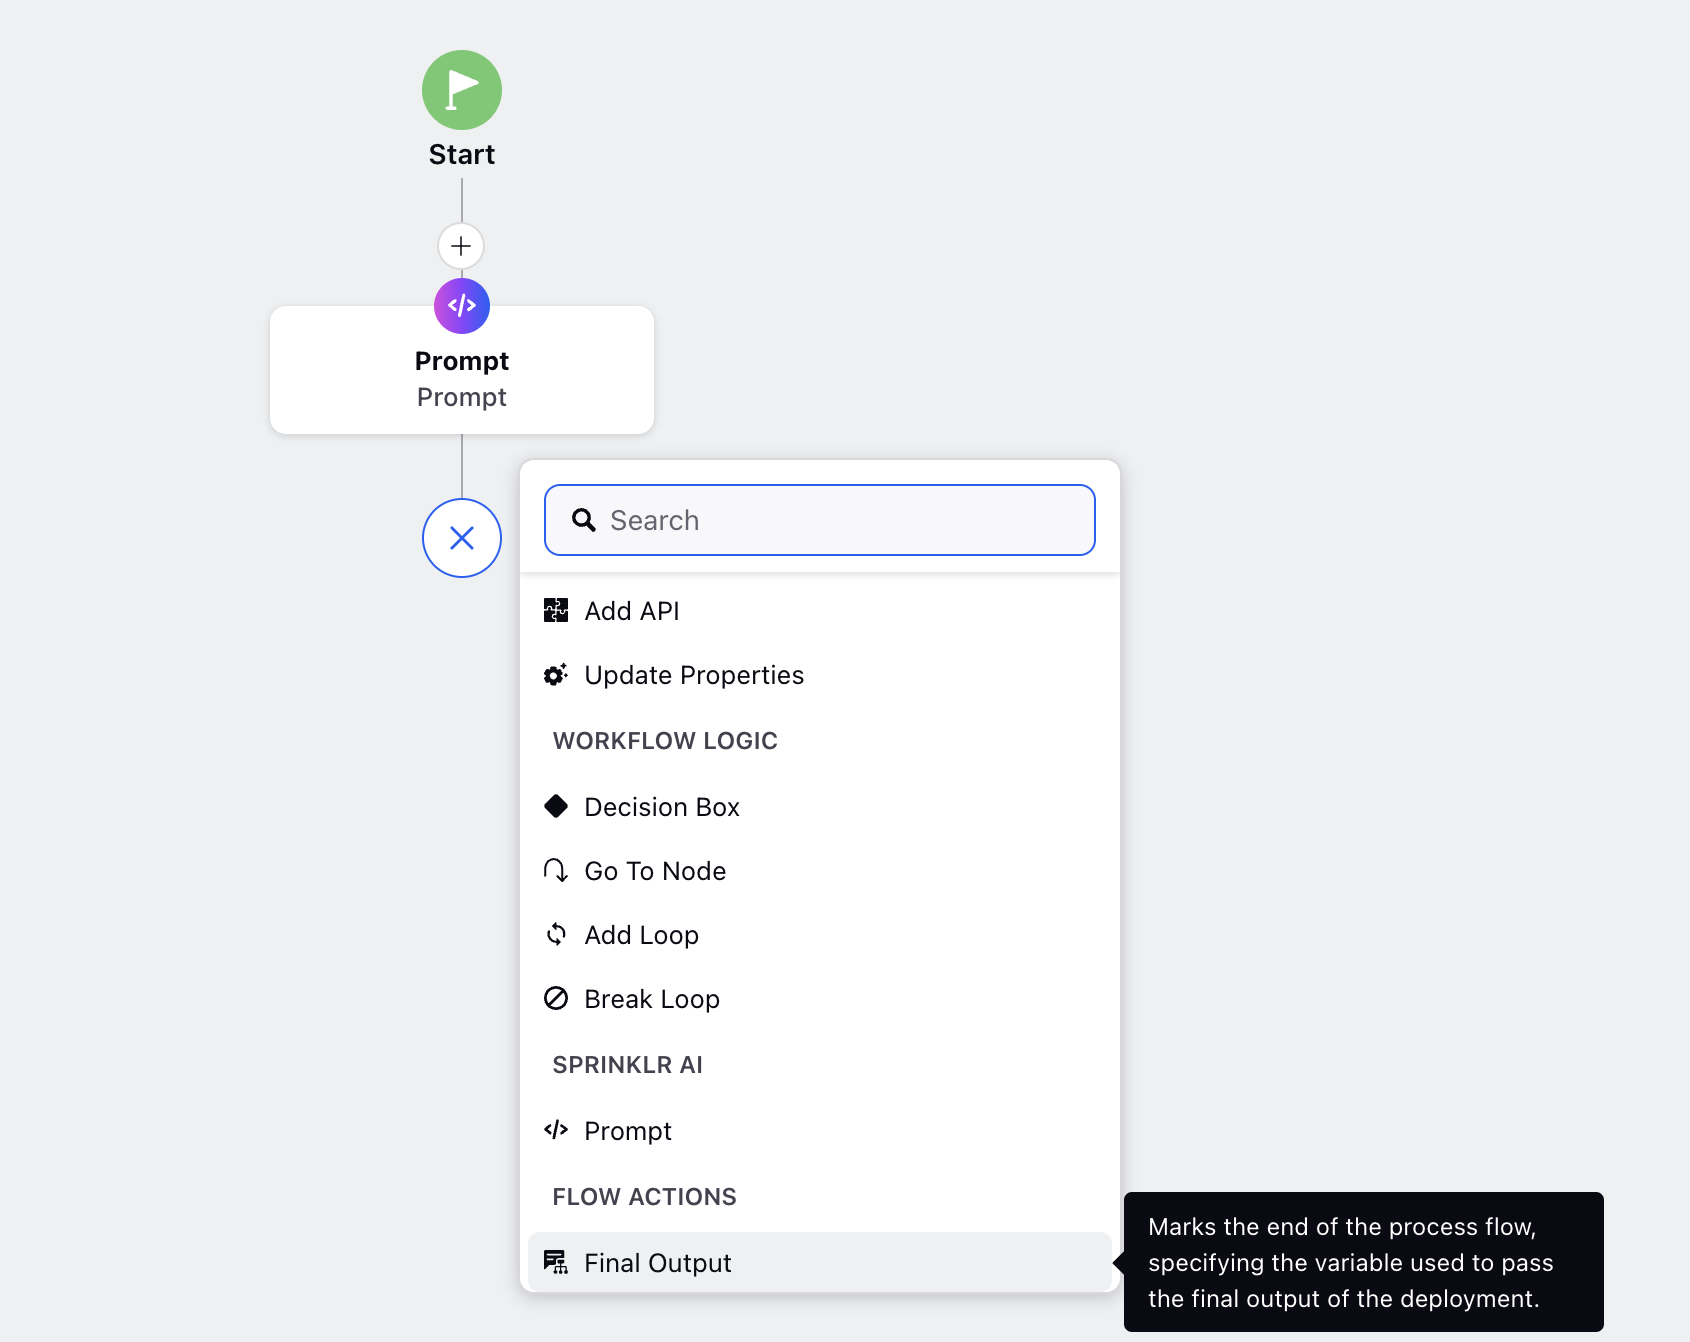
Select the output variable from the dropdown.
Click Save to save your final output configuration.
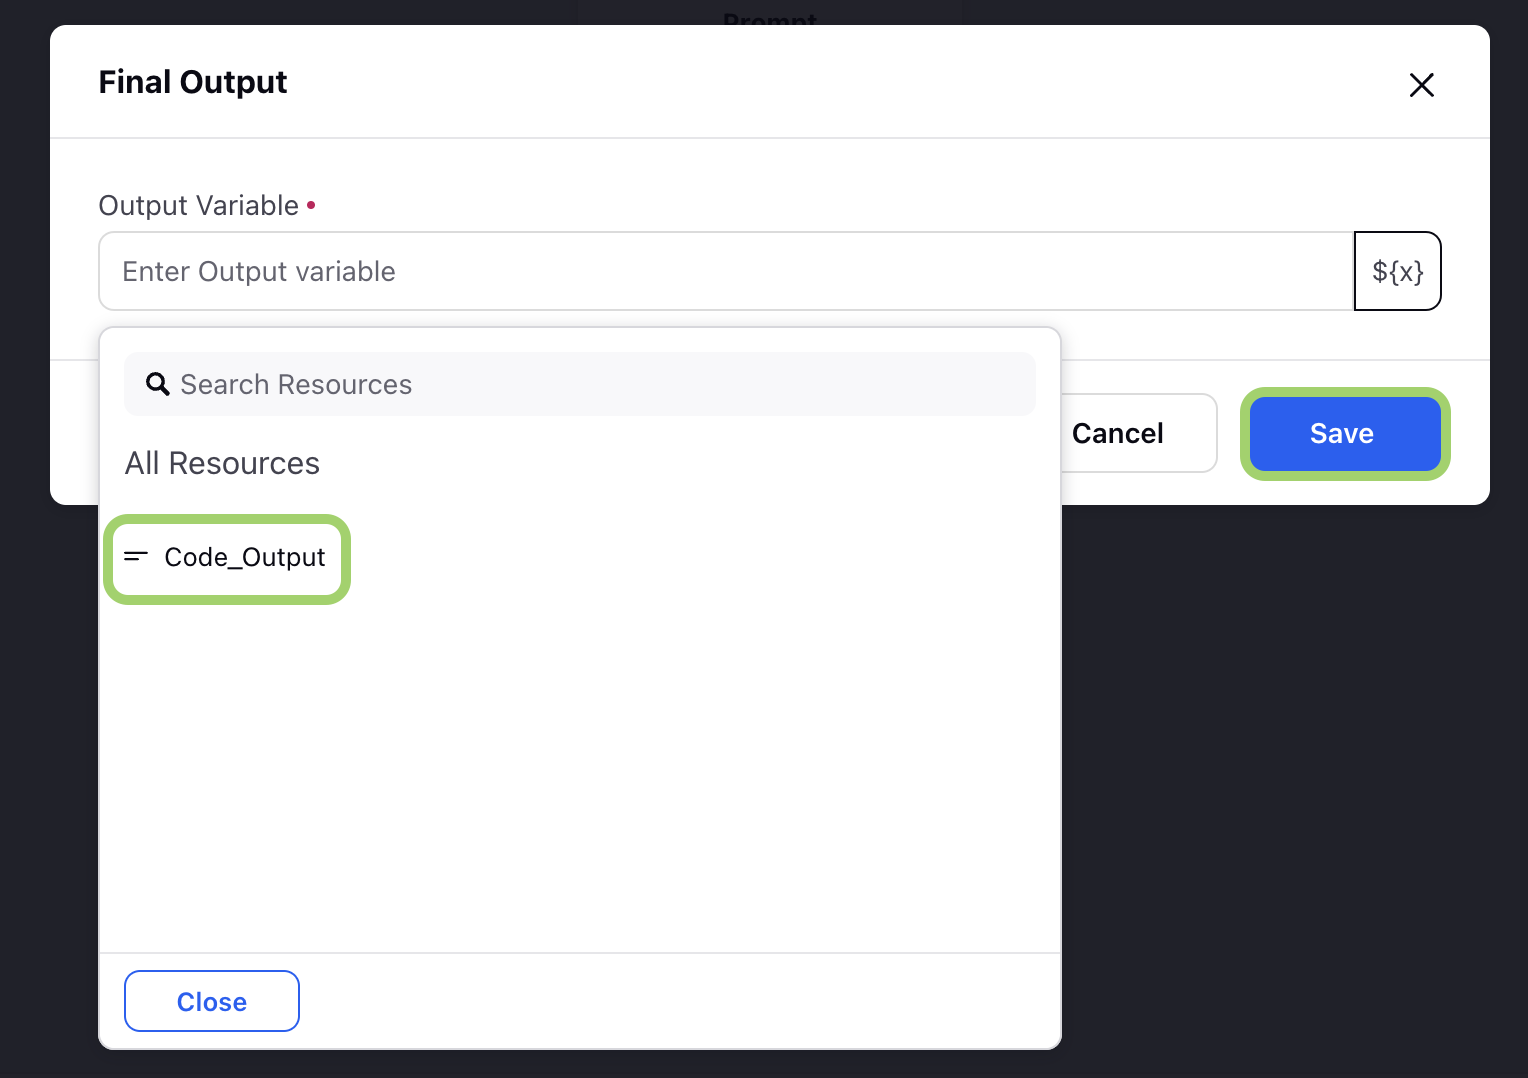
Note: Ensure that the Final Output node is positioned after the Prompt node in the workflow sequence.
Once the Final Output node is configured. Click ‘Save and Deploy’ button to deploy your use case.
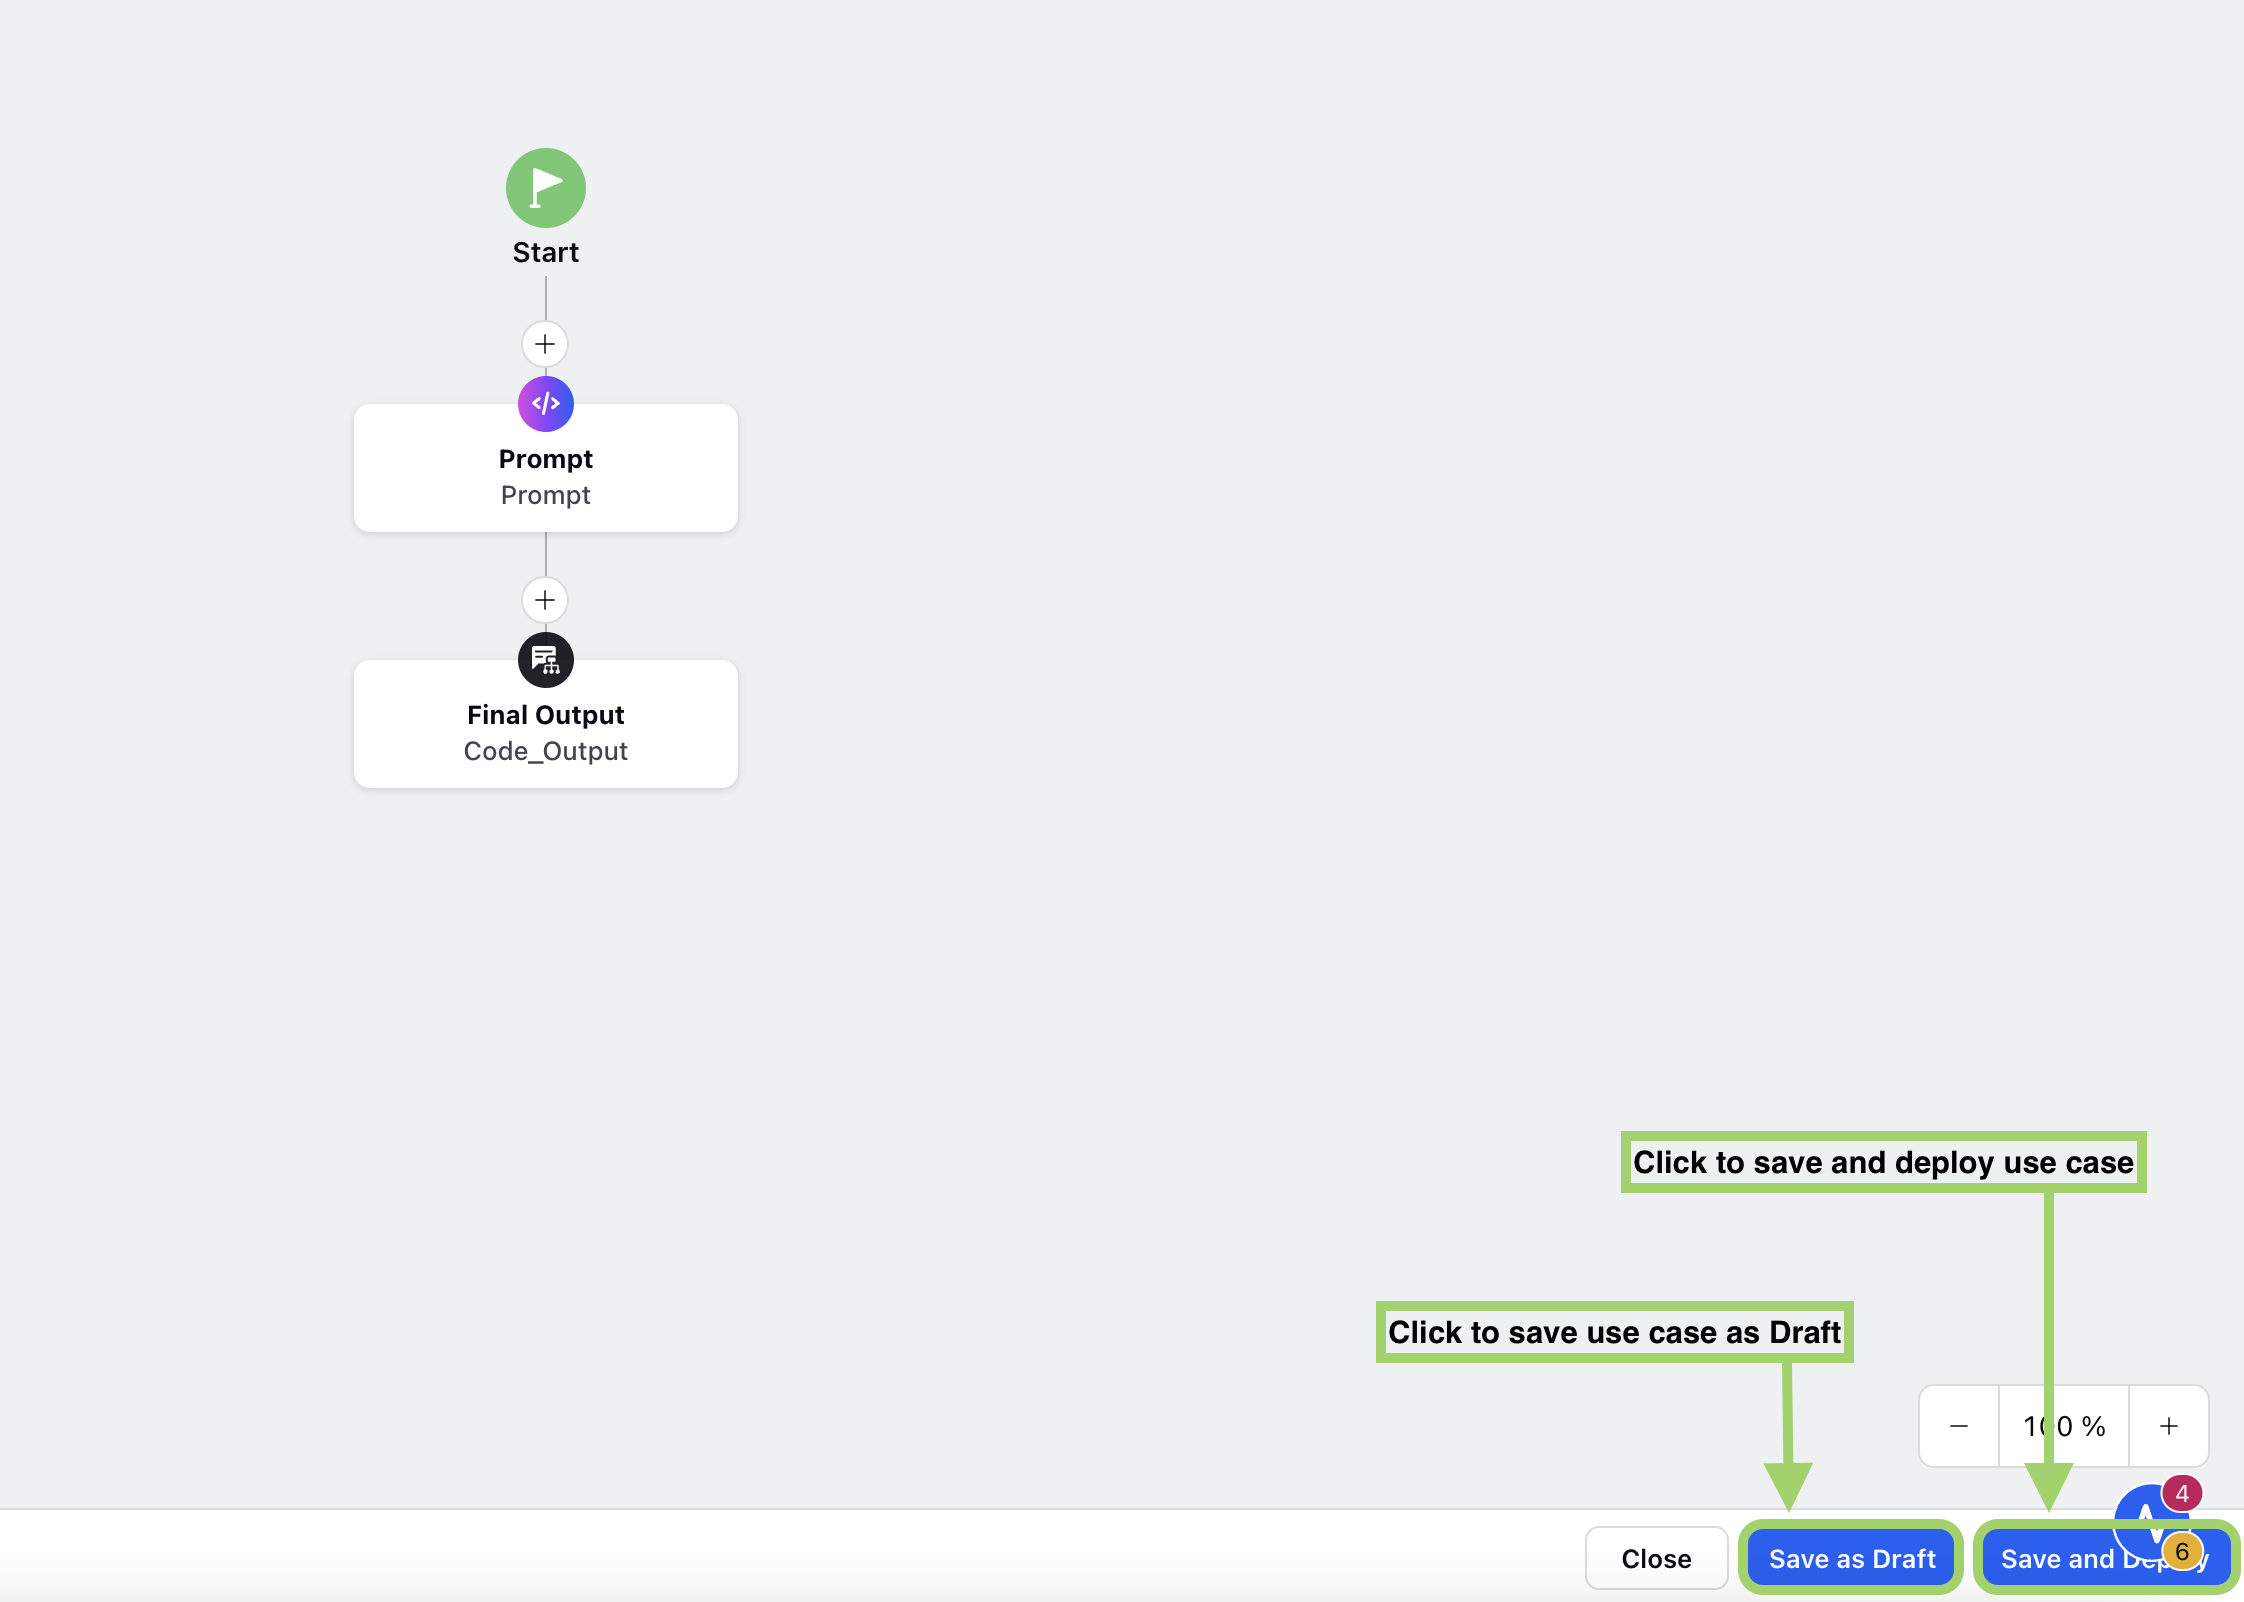
By following these steps, you can effectively build and deploy AI workflows using the Pipelines in AI+ Studio.
Configuring deployments in AI+ Studio using the Pipeline enables you to design and manage AI workflows tailored to a wide range of use cases. With features like customizable deployment settings, audit trails, and debugging capabilities, you can ensure that your AI pipelines are both efficient and transparent.
Refer to Manage Deployments for more details.