Provider and Models Settings in AI+ Studio
Updated
The Provider and Model Settings module in AI+ Studio allows you to manage all your AI Providers and their associated Models. You can choose from the following options:
Use Sprinklr-provided LLMs.
Bring your own keys for a supported provider.
Integrate custom models through an External API.
Sprinklr in-house LLMs.
These models can be used seamlessly across various AI features in Sprinklr to help you achieve your business goals.
Permission Governance
Permissions determine the level of access you have to manage providers and models in AI+ Studio.
Note: Ensure that you have access to the required permission to view, add, and edit AI providers.

The following table outlines the permissions available:
Permission | Yes | No |
View | You can view the providers configured for the partner and your corresponding models. The Provider and Models Settings tile becomes visible after this permission is granted. | You cannot access AI+ Studio. |
Edit | You can view, add, or edit your own providers. The Add Provider global action and Edit actions on existing providers become accessible after this permission is granted. | You can view providers and models but cannot add or edit your own keys or fine-tune models. |
Fine Tune Model | You can fine-tune models. The Fine-tune action becomes visible after this permission is granted. | You can view and edit models but cannot fine-tune them. |
Add Provider in AI+ Studio
Follow these steps to add a provider in AI+ Studio:
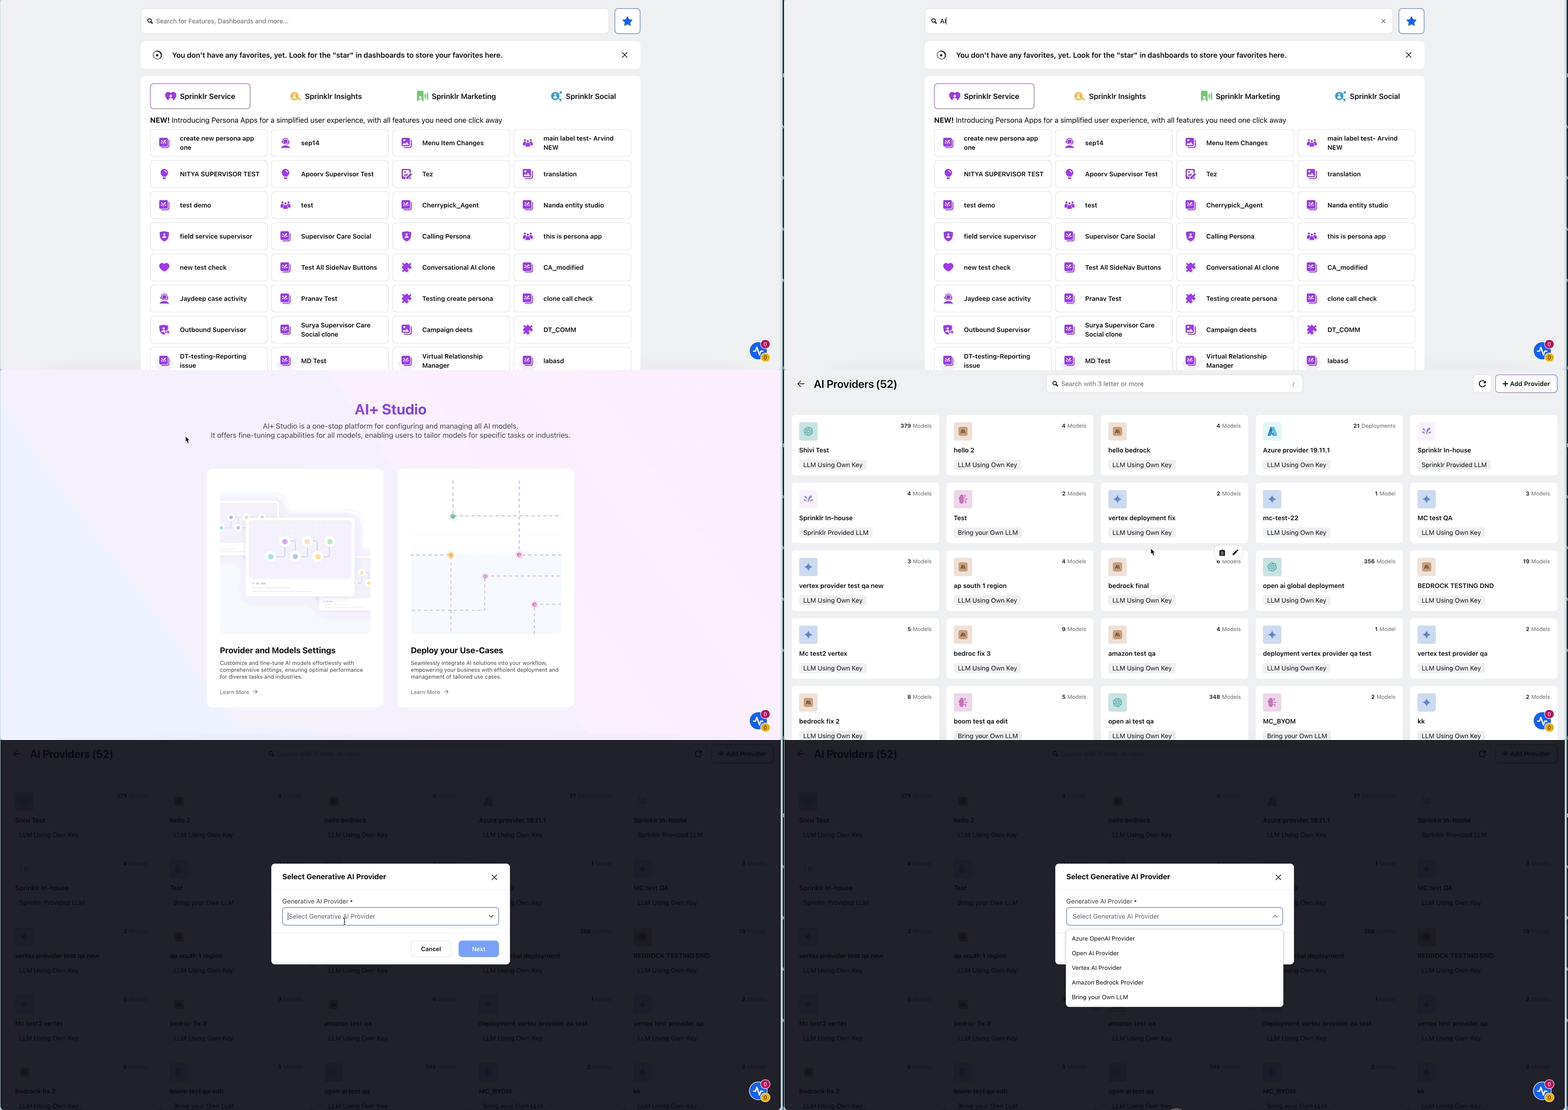
1. Navigate to AI+ Studio and select the Provider and Models Settings card.
2. Click + Provider in the top-right corner.
3. From the dropdown, select the Generative AI Provider you want to integrate.
4. Fill in the required fields for the selected provider and click Save.

Supported Integrations
AI+ Studio supports multiple integration options, allowing you to choose the best approach for your business needs.
Sprinklr Provided LLMs
Sprinklr provides flexible integration with leading LLMs, which are accessible using Sprinklr-managed keys. Each provider includes a set of default models.
Note: If you need access to models outside the default offerings, submit a request to the support team or your administrator.
The following LLMs are supported:
OpenAI
Azure OpenAI
Google Vertex
Amazon Bedrock
Sprinklr In-house LLM
For more details, refer to supported models and default model configuration for Sprinklr Provided LLMs.
Bring Your Own Key (BYOK)
You can use your own keys for the following providers to maintain flexibility and manage costs:
OpenAI
Azure OpenAI
Google Vertex
Amazon Bedrock
Anthropic
xAI
Bring Your Own Model
AI+ Studio also supports custom model integrations through the External API module in Sprinklr. This allows you to seamlessly integrate your own models into the Sprinklr platform, ensuring complete customization and control over your AI solutions.
Sprinklr In-House Large Language Models (LLMs)
The Sprinklr In-House Large Language Models (LLMs) are integrated into AI+ Studio to provide advanced AI capabilities.
Note: Access to this feature is controlled by a dynamic property. Kindly reach out to your Success Manager to enable this feature in your environment. Alternatively, you can submit a request at tickets@sprinklr.com.
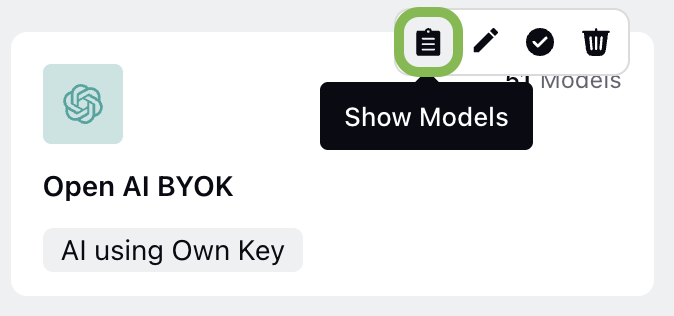
Within the AI+ Studio interface, you can locate the Sprinklr In-House provider card. When you hover over this card, a View Models button appears. Clicking this button allows you to access and manage the available models.
This integration enables businesses to use Sprinklr’s proprietary AI models for various tasks, such as analyzing sentiment or generating content. The models are fully integrated with AI+ Studio, ensuring a simple and efficient setup and management experience.
Multi-Modal AI Models in AI+ Studio
AI+ Studio supports various AI model types, enabling capabilities such as image generation, audio interpretation, and text processing. These models are provided by multiple AI providers, ensuring flexibility and performance across different use cases.
Supported AI Models
The following AI Model types are supported:
1. Image Processing
Image as Input: Models such as GPT-4o can process and analyze images as input.
Image Generation: Models such as DALL·E 2 and DALL·E 3 can generate images from text inputs.
2. Audio Interpretation
AI+ Studio integrates with supported models capable of processing and interpreting audio inputs.
3. Text Processing
Various AI providers supply text-based models, enabling natural language understanding, generation, and other text-based tasks.
Note: Image Processing and Audio Interpretation are now supported for all providers, except Amazon Bedrock and Anthropic Claude.
View Supported Models
Follow these steps to view available models:
Navigate to AI+ Studio.
Select the desired AI Provider card.

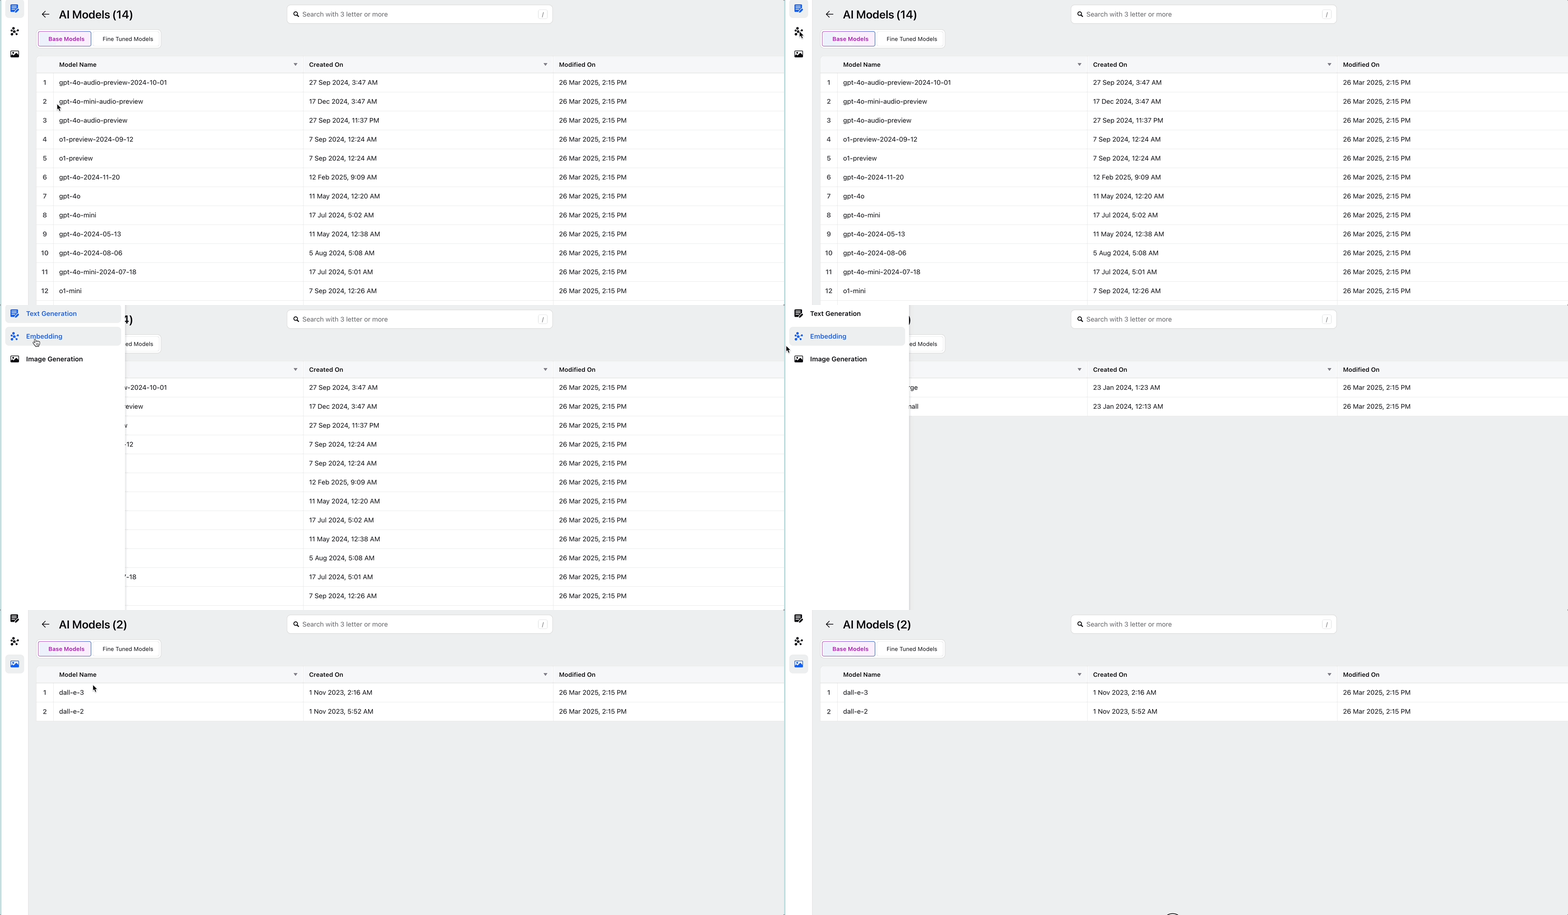
Click on the Show Models button to access the supported model types. Once you click the button, the AI Models Record Manager will open. You can use the left-side navigation bar to switch between tabs and explore different model categories.

This guide provides an overview of the Provider and Model Settings in AI+ Studio. Use this feature to customize and optimize your AI configurations according to your business requirements.