Create an Apple Pay request template
Updated
With Apple Pay, you can allow your customers to pay for products and services quickly and securely without leaving the conversation. A payment request looks like a normal chat bubble but displays the familiar Apple Pay payment sheet when selected by the customer. After the customer authorizes payment, the payment request chat bubble reflects that the payment is complete.
A payment request starts when a customer service agent with the business asks you to send a payment request to a customer. You should create a Data Dictionary to collect and store information about the payment request.
To create an Apple Pay/Payment Request template
Follow steps 1-3 of Date/Time Picker template.
Under Asset Specific, select Payment from the Template Type dropdown and Apple Messages for Business from the Channel dropdown.
Under Received Message, click the Upload Image icon and add the desired image. Enter Title, Subtitle and preferred Style in the respective fields. Style is the size of the icon inside the template. You can select the desired size from the dropdown.
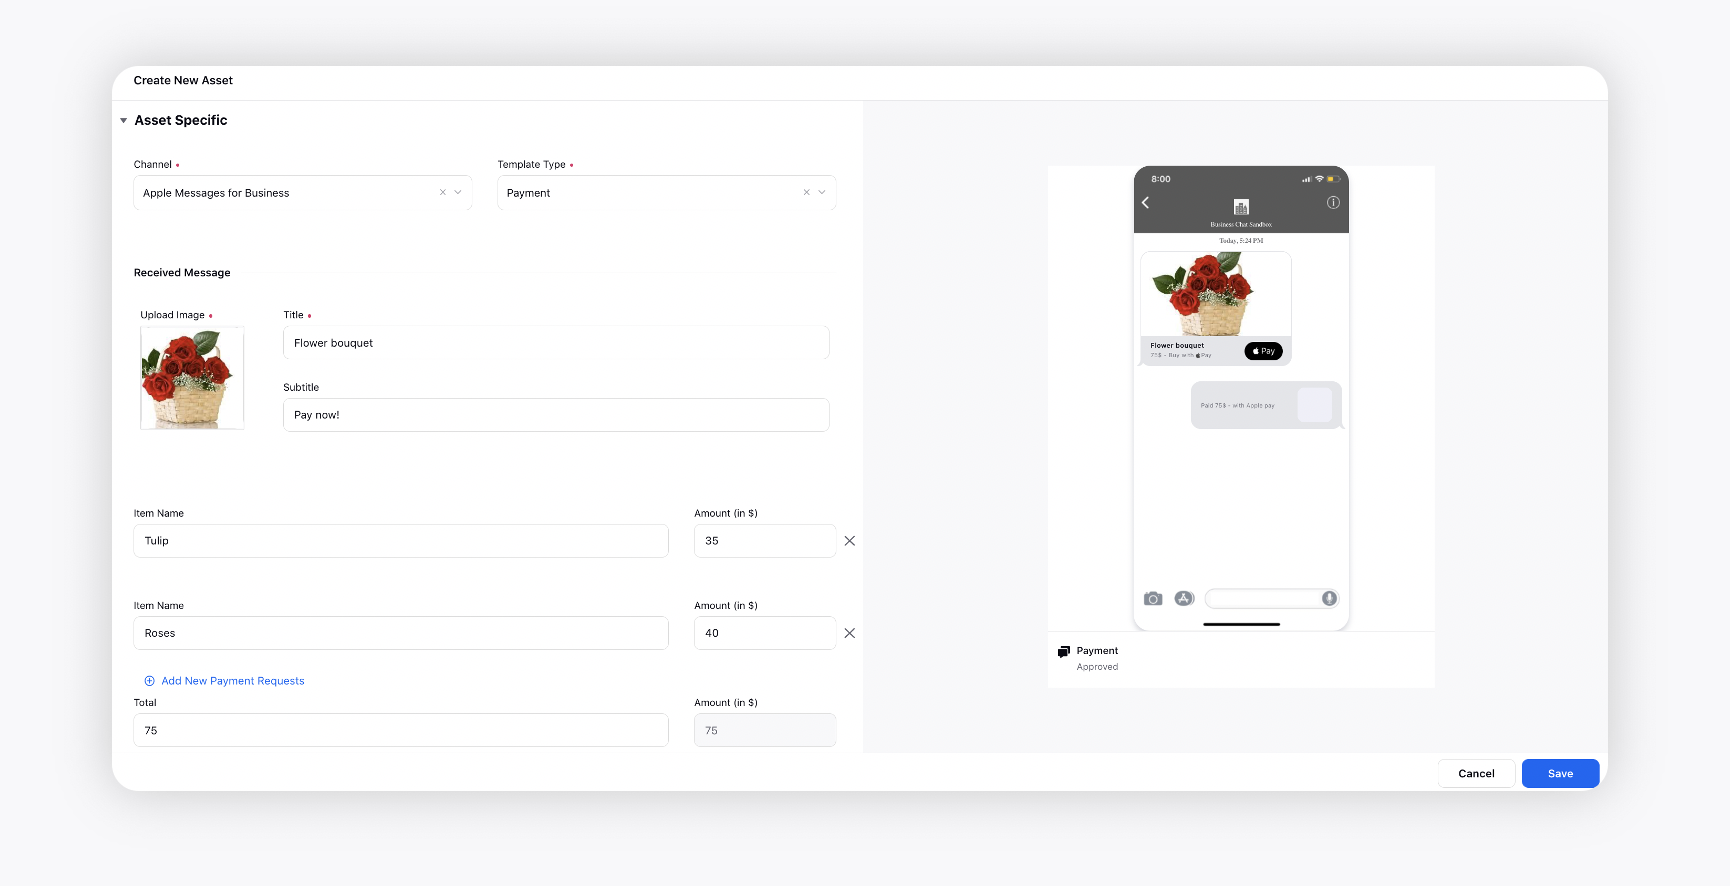
Next, specify the name of the item that is being purchased and the amount it costs. You can add multiple items in your template. After entering the number of items you want to pay for, the total amount (non-editable) will be updated automatically.
Under Shipping Methods, enter shipping Title, Amount and Address details.
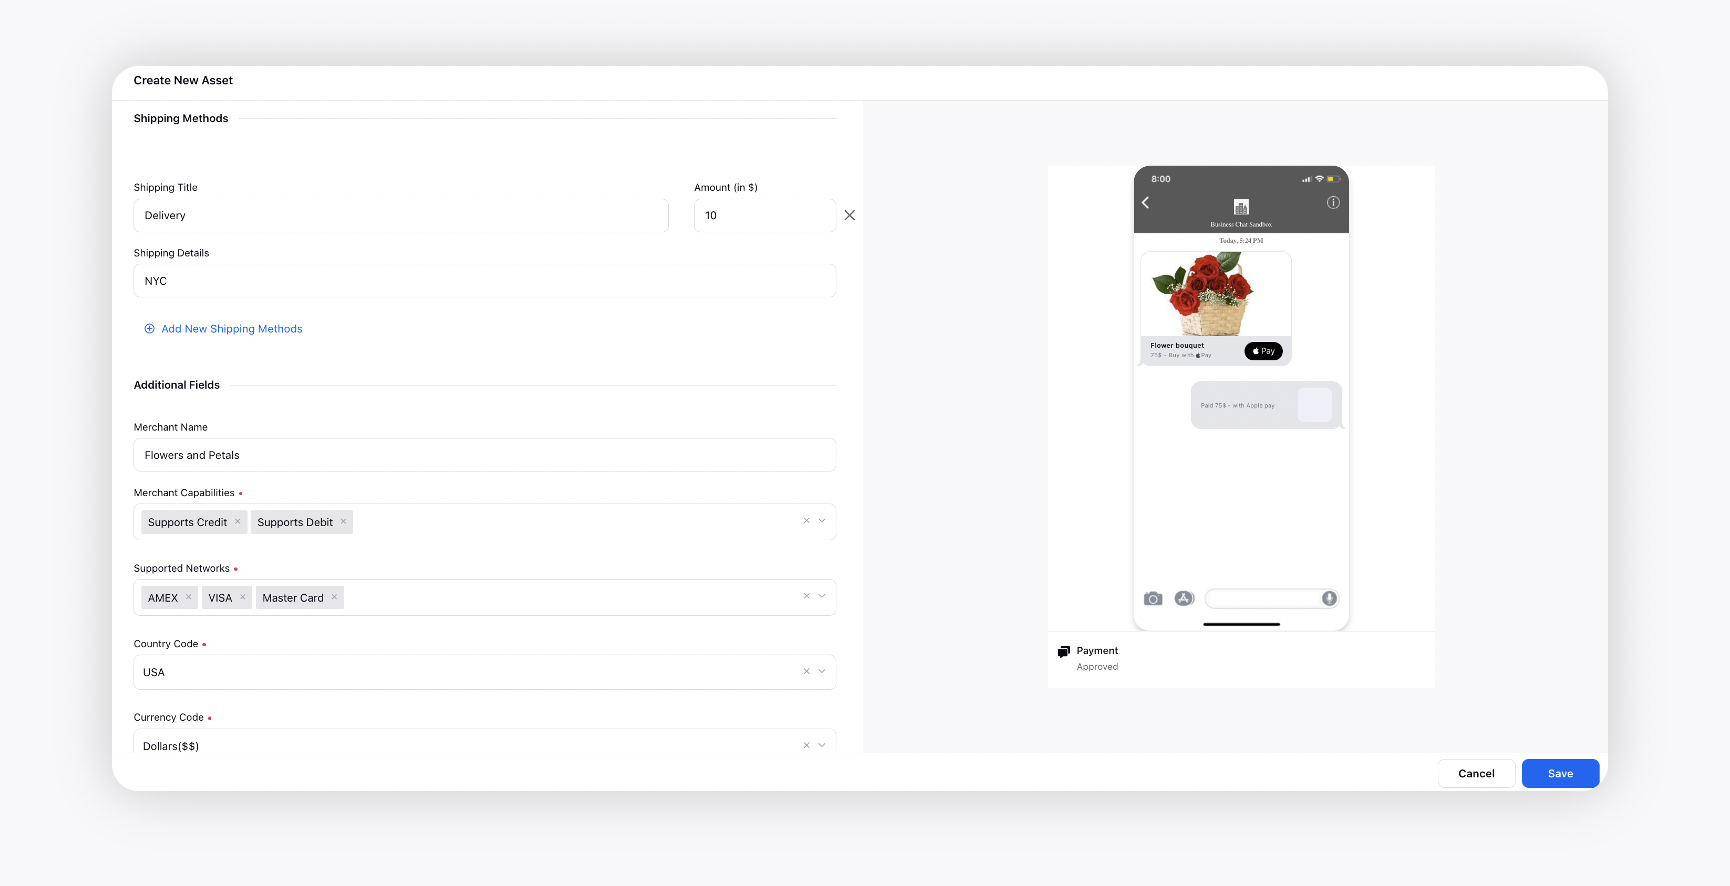
Under Additional Fields, fill in the details that include Merchant Name, Merchant Capabilities, Supported Networks, Country Code, Currency Code, Billing Contact Details, Shipping Contact details, and Payment Account.
Under Reply Message, click the Upload Image icon and add the desired image. Enter Title, Subtitle and preferred Style in the respective fields.
Under Asset Details, enter the asset details like Campaigns, Status, Available From, Visible From, Expires on, etc.
Under Asset Sharing, select the Workspaces and Users/Users Groups you want to share your asset with. Check the Visible in all workspaces box to make it visible in all workspaces.
Next, apply the desired Properties to the asset.
Click Save in the bottom right corner to create the template.