Approve/Reject posts
Updated
Approval processes and workflows help to automate simple, repeatable tasks so that you can focus on the work that matters most. An approver has the option of modifying content sent for approval. Being able to make changes as an approver, the user can make quick alterations to messages that may require edits without requiring you to reject the message and re-compose it.
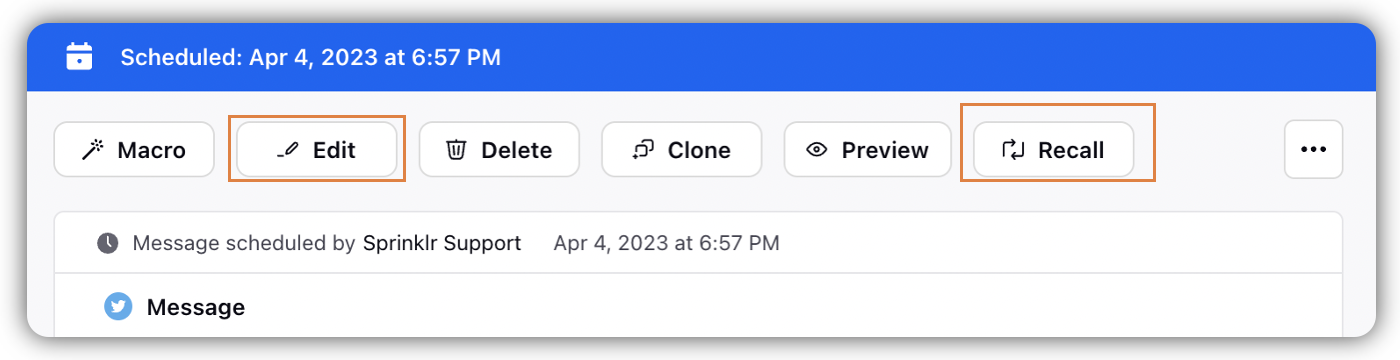
![]() Note: You can edit or recall the posts in approval status is you have the publishing access for the account used during its creation. This enables you to manage and plan your content requirements timely even if you are not the author or approver for that post.
Note: You can edit or recall the posts in approval status is you have the publishing access for the account used during its creation. This enables you to manage and plan your content requirements timely even if you are not the author or approver for that post.
To learn more about getting this capability enabled in your environment, work with your Success Manager.
Approval Queue dashboard
You can set up an approval queue dashboard to facilitate approval processes for posts. Please refer to the below-mentioned steps to create an approval queue:
Click the New Tab icon➕. Under the Sprinklr Social tab, click Engagement Dashboards within Engage.
Search and select the desired engagement dashboard. Within Engagement Home, you can access all personal and shared Folders and Dashboards.
In the desired Engagement Dashboard, click Add Column in either the top right corner of the dashboard or in the middle of the dashboard.
In the Add New Column window, search and select Outbound as a Source from the available column category icons for your new column.
Next, select the Approval Queue or Approval Required as a Column Type.
After selecting the type of column you want to create, enter the Basic Information for your column. A column preview will render on the right side of the window.

Enter Workflow Properties, Custom Properties, and Channel Custom Properties as per user requirement.

After providing all the details for your column, click Create Column in the bottom right corner to create the new column. Upon creation, your column will be available in the current dashboard.
Edit & Approve a Post
For approvers to see the option to Edit & Approve, they must have publishing permission.
Once you’ve created an Approval Queue, hover over a message requiring approval and select Edit & Approve.

The message will open in the Edit & Approve window, where you can make any changes needed.
While the approver can modify nearly all details of an approval-pending message, the Accounts from which the message is published cannot be changed. Other capabilities that approvers can leverage:
Approver can change the Message Content by selecting the content field and altering the message, removing or adding assets as desired.
Approver can apply a new Campaign in the message's campaign field.
Approver can add, edit, or remove Tags and Custom Fields.
If the message has been scheduled, you'll find the scheduled date and time in the bottom left corner of the Edit & Approve window. Click the ❌ icon alongside the scheduled date and time to remove scheduling (without scheduling, the message will publish when it is approved). Additionally, the approver can edit the existing scheduling or apply new scheduling to the message.


When satisfied with the edits you've made to the message, select Approve in the bottom right corner of the Edit & Approve window to publish the post. Your changes to the content, properties, and schedule will be applied to the message.
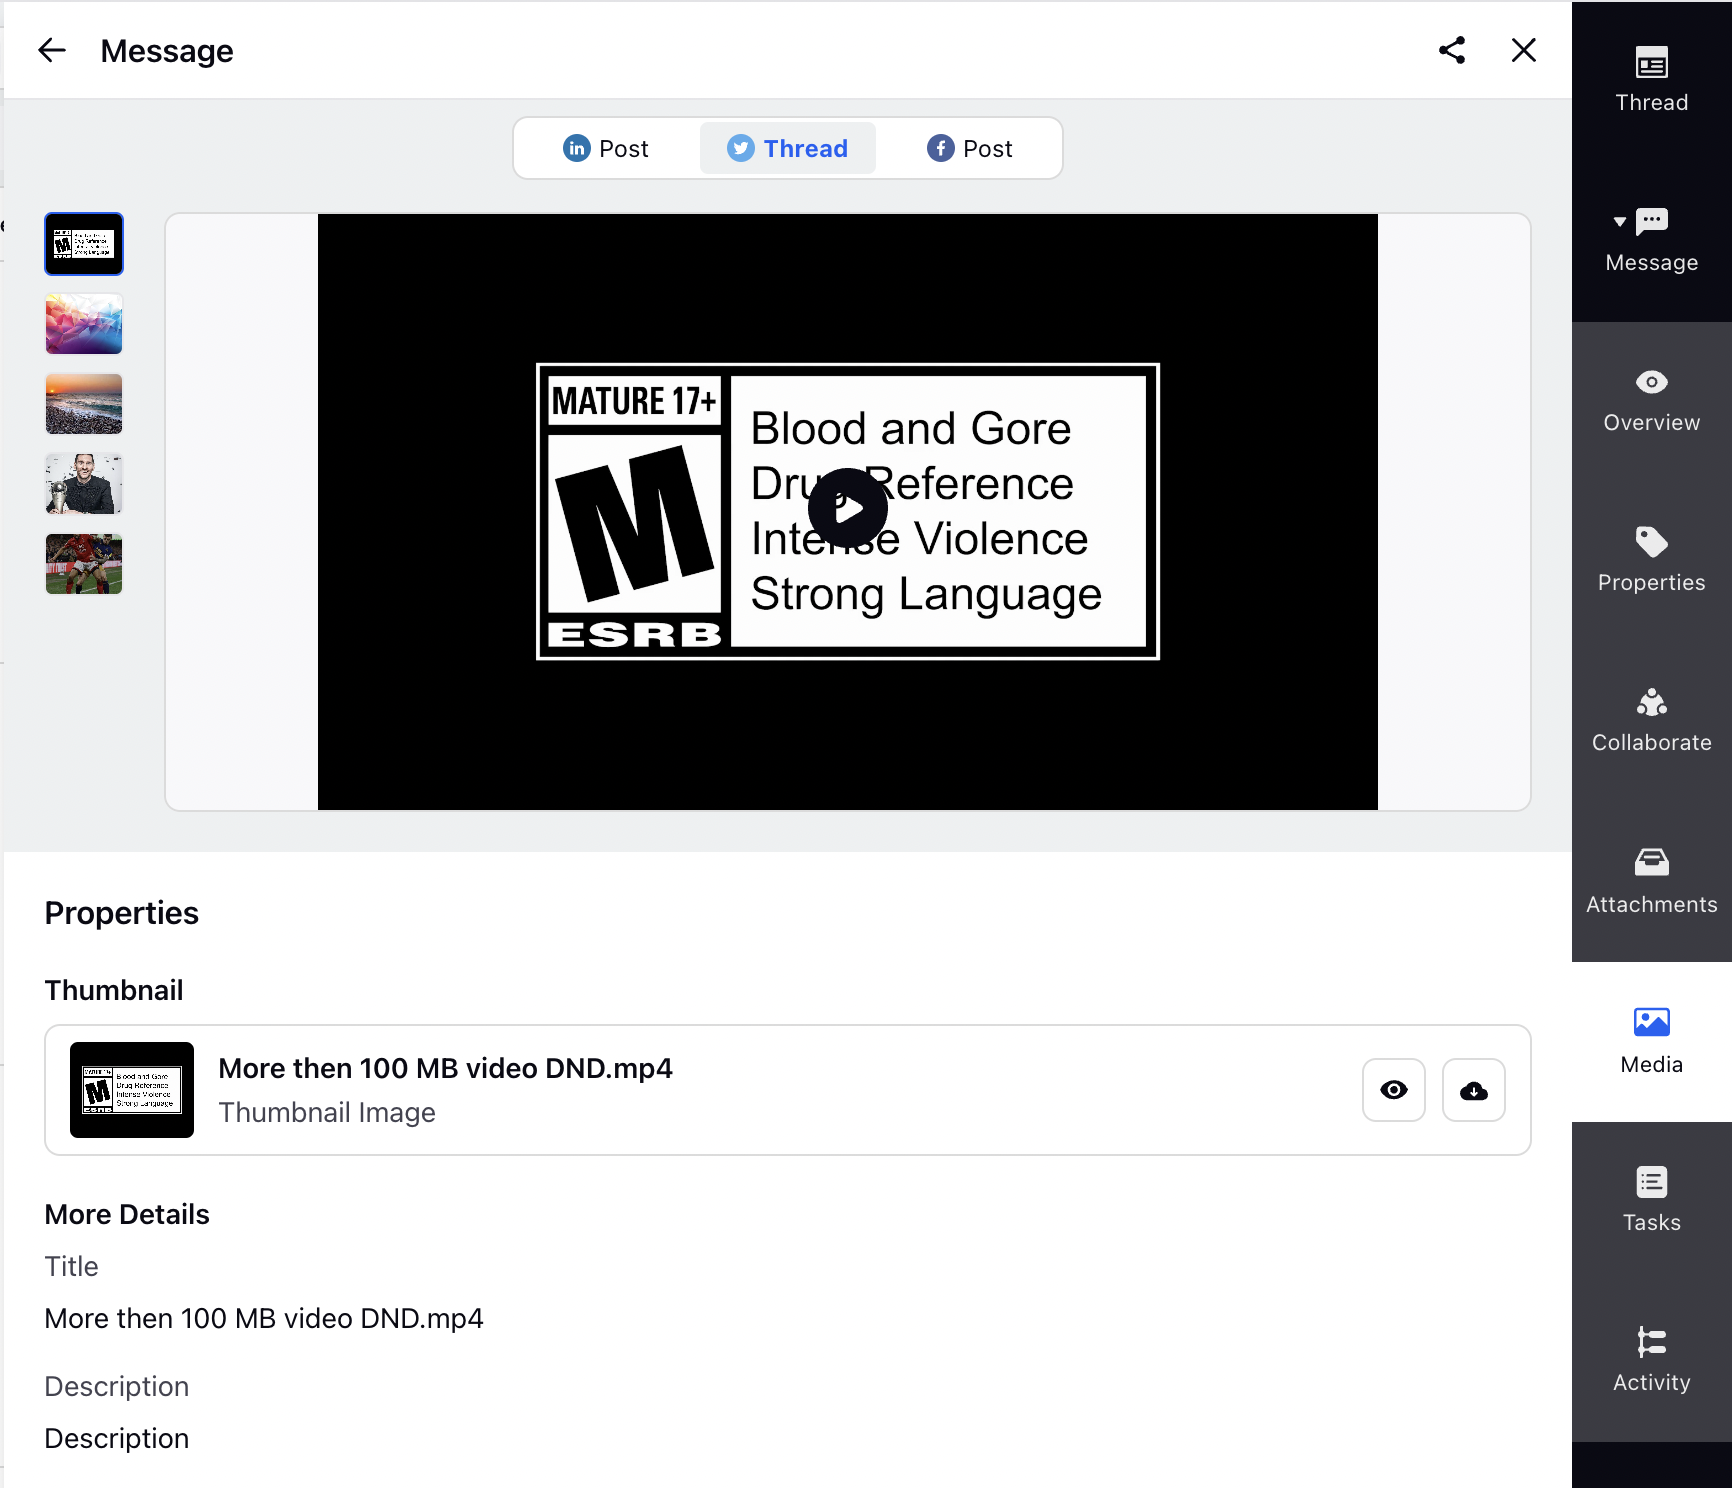
New Media Tab in Third Pane
Now get a wholistic view of all the media (Images and Videos) added to the post, to veiw all media properties like thumbnails, closed captions, title, description, alt text etc. You can find the media tab below attachments tab in right bar of the third pane.
Approve/Reject a Post via Email
Approvals for an Outbound post can help ensure that your campaigns meet the required guidelines and restrictions before they are published. With review from an approver, you have greater control over the quality of the content that is being published. Going forward, you can approve or reject content before it is published via email.
Once an outbound post is created, an email will be sent to the external approvers.
If the approval follows a tiered approval path, then the email notification will follow the same order as the tiered approval flow. For example, Approver users belonging to tier 2 will receive the email only after the approval user(s) of tier 1 have responded.
If any change is made to the post when it’s in the approval state, and resent for approval, another email notification will be sent in the same email thread about the latest changes. The Approver can approve or reject the older or latest version, and the latest version will be considered for approval/rejection.
The Email will have the content to be approved along with the approval actions that the approver can take. In other words, the email will have CTA buttons with allowable approval actions - namely, Approve and Reject.
Upon clicking one of the approval CTA buttons, it will open the email composer with the sender and current approver in the email loop. The approver is allowed to add comments on the content - in the email.
Going forward, upon sending an approval response via email:
An email notification will be sent to the Author, all the Approvers, and to the users who are provisioned for Approval Notifications.
In-platform notifications will be sent to the assigned users in Sprinklr.
Additionally, the Outbound post status will reflect as approved or rejected accordingly, and the email comments will be reflected in the Approval Notes.