How to Set the Approval Workflows While Publishing
Updated
In this article, you will learn about how users can set the approval path while publishing any post through the Quick Publisher window or using Outbound Rules.
Steps to Set Approval Workflows While Publishing
Click the Publishing Options icon in the top right corner of the Navigation Bar. Select the Create Post option from the available dropdown.
By default, the Quick Publisher window will open for quick access. To open the maximized view of the Quick Publisher, in the Create Post window, select the Maximize icon in the top right corner to open the expanded Create Post window.
In the Publishing window, create a new post.
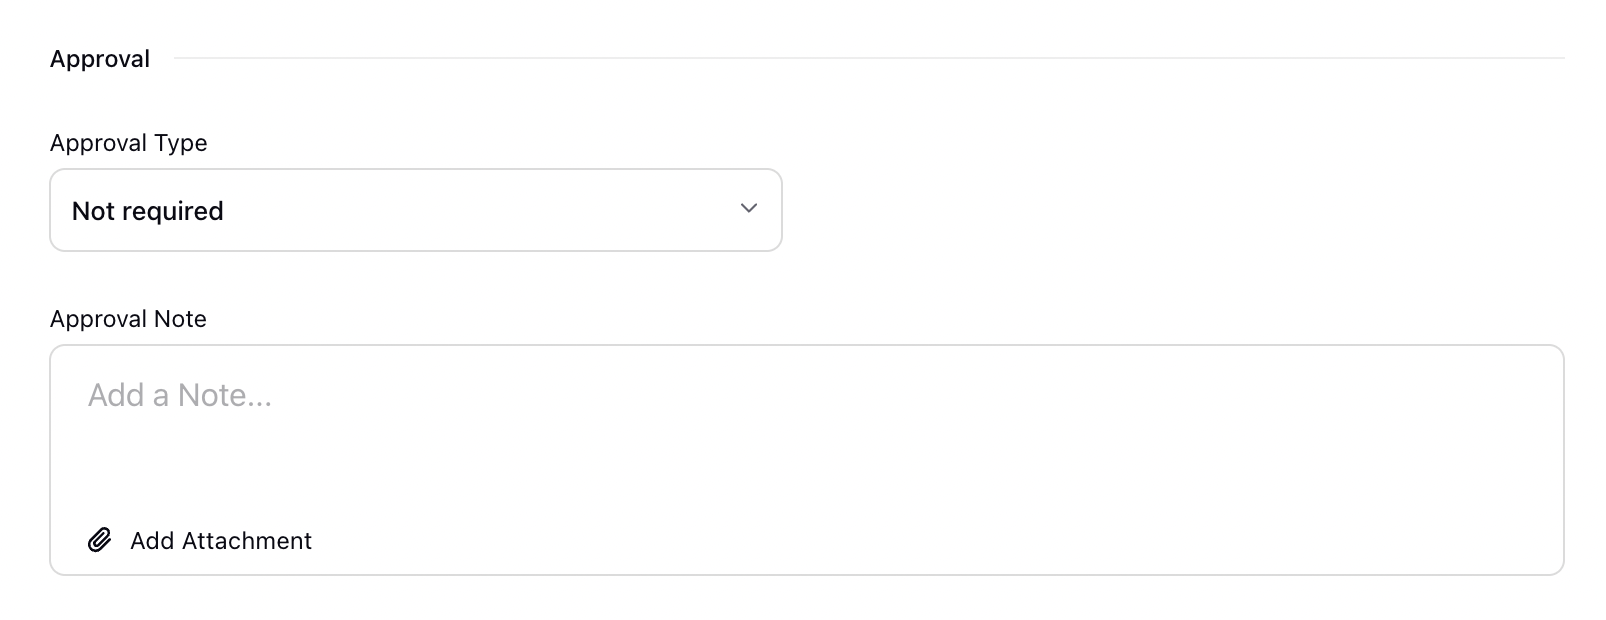
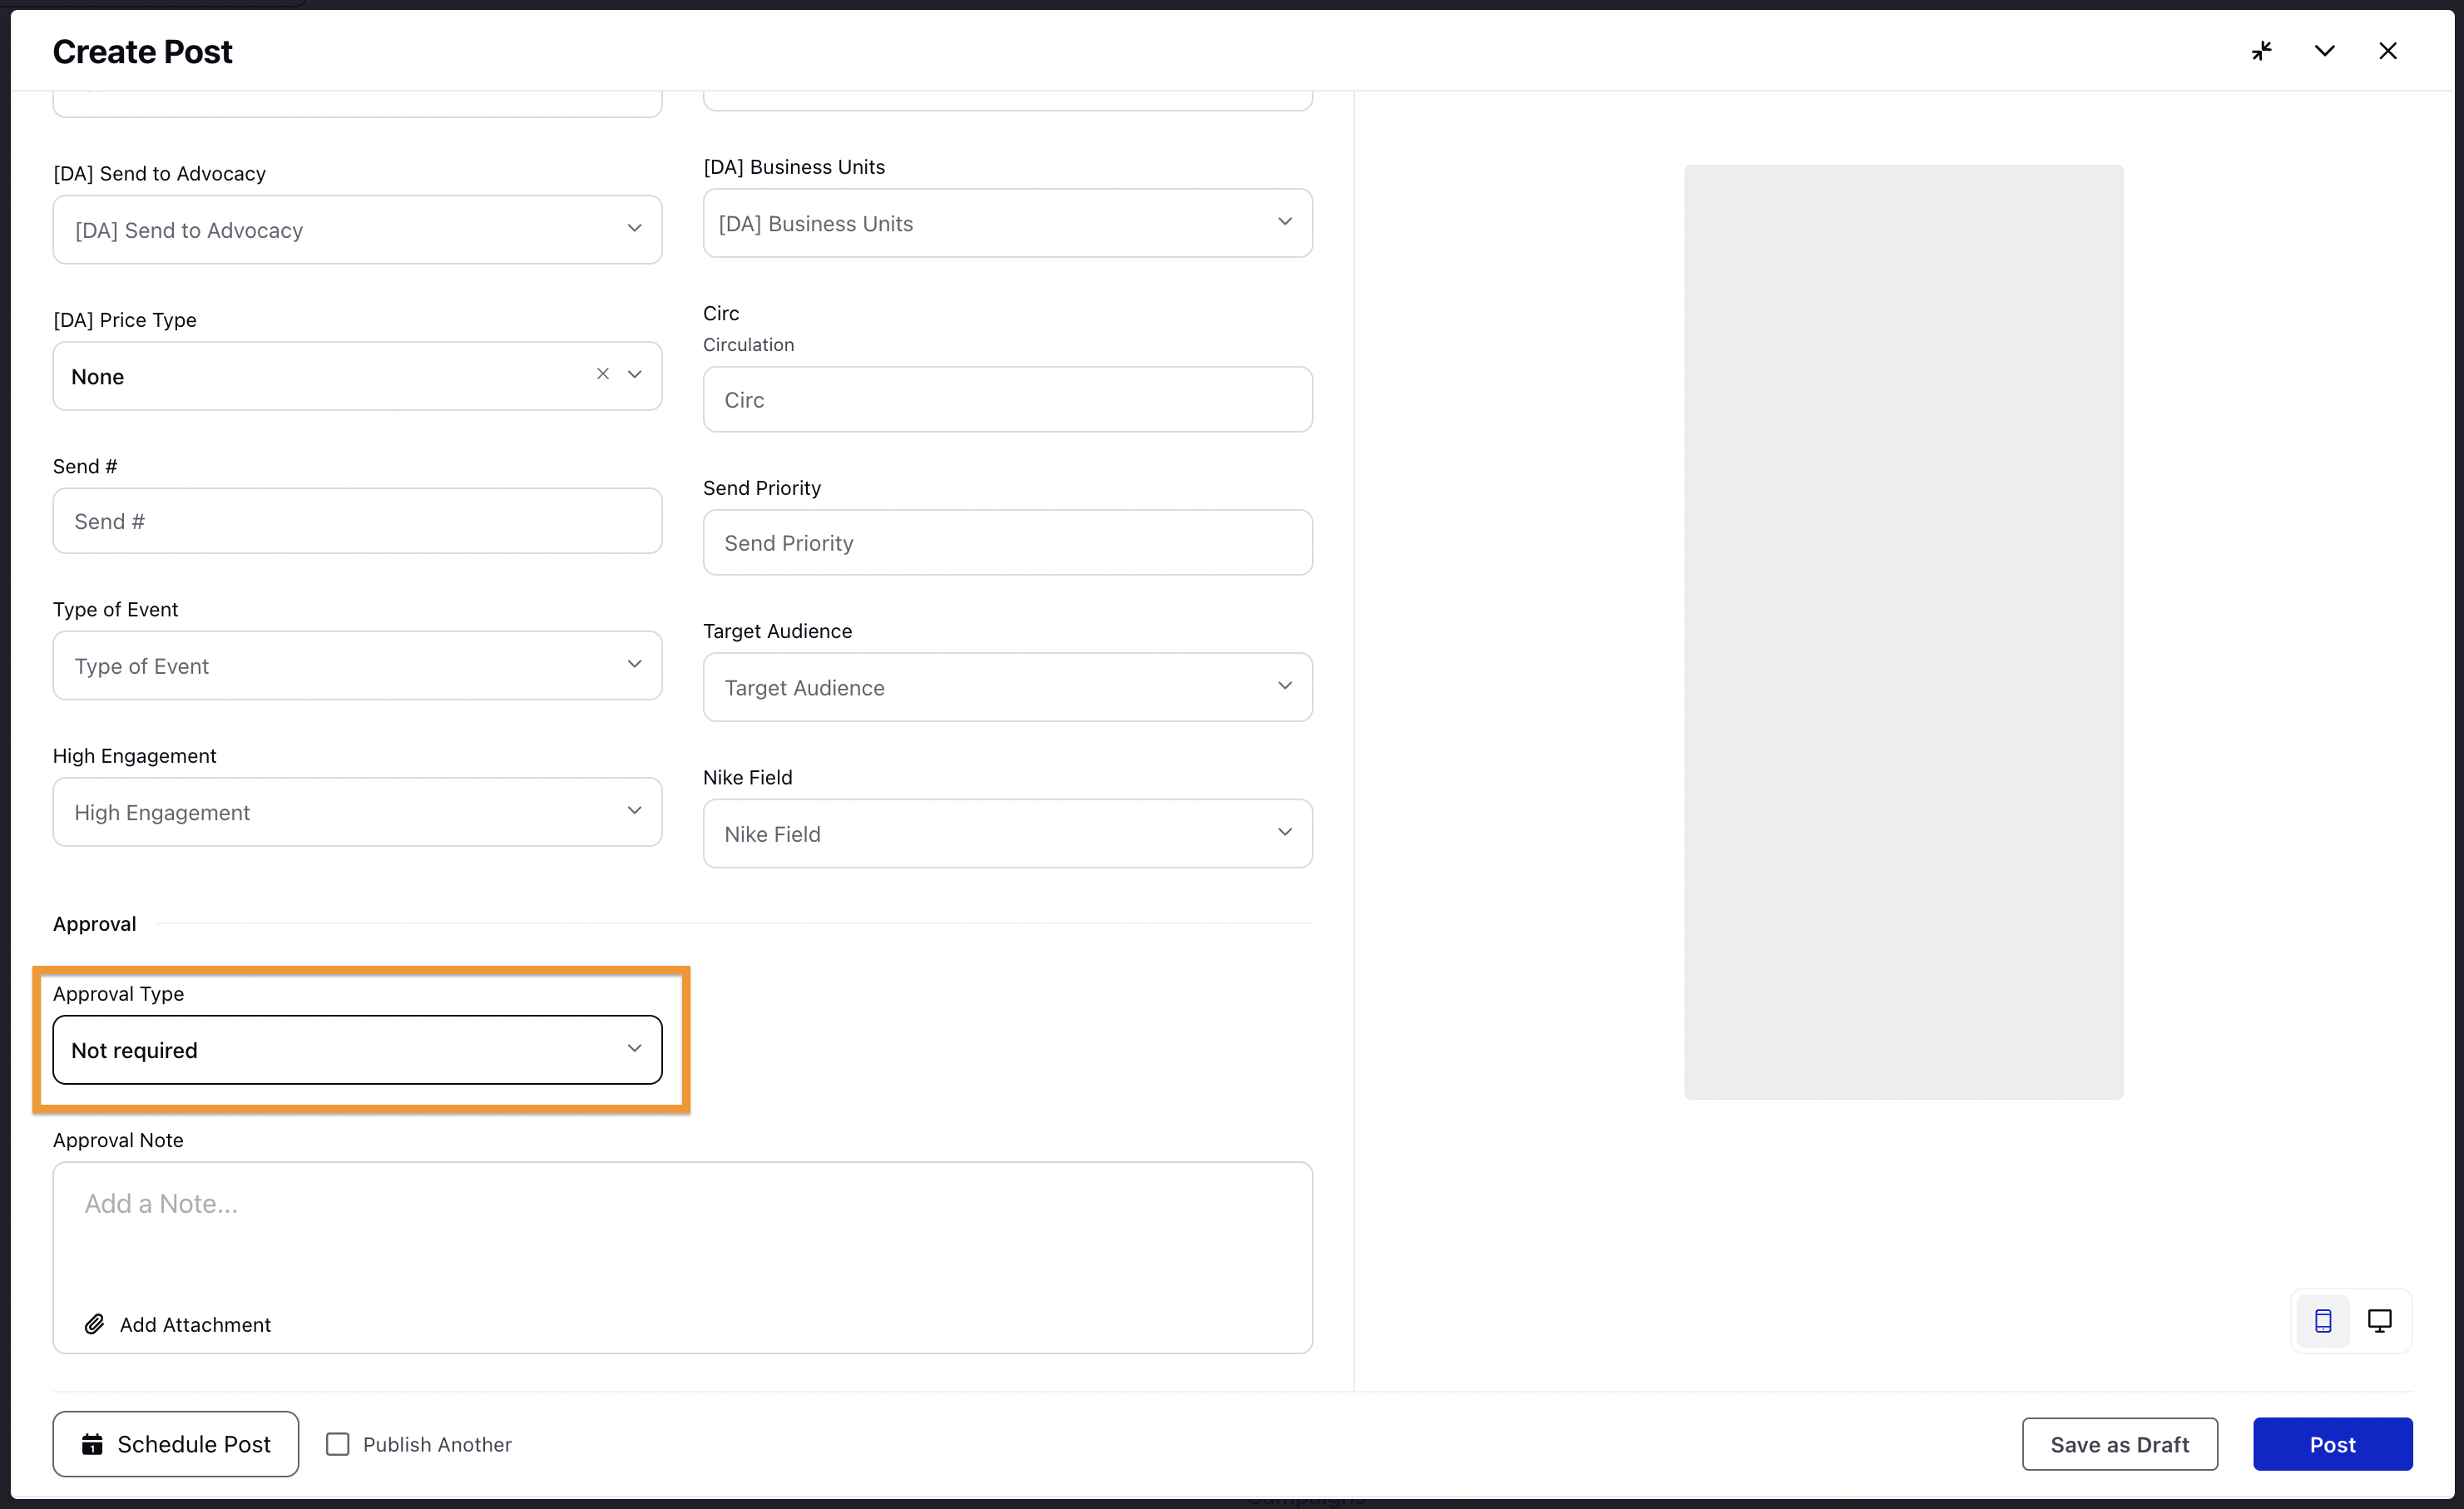
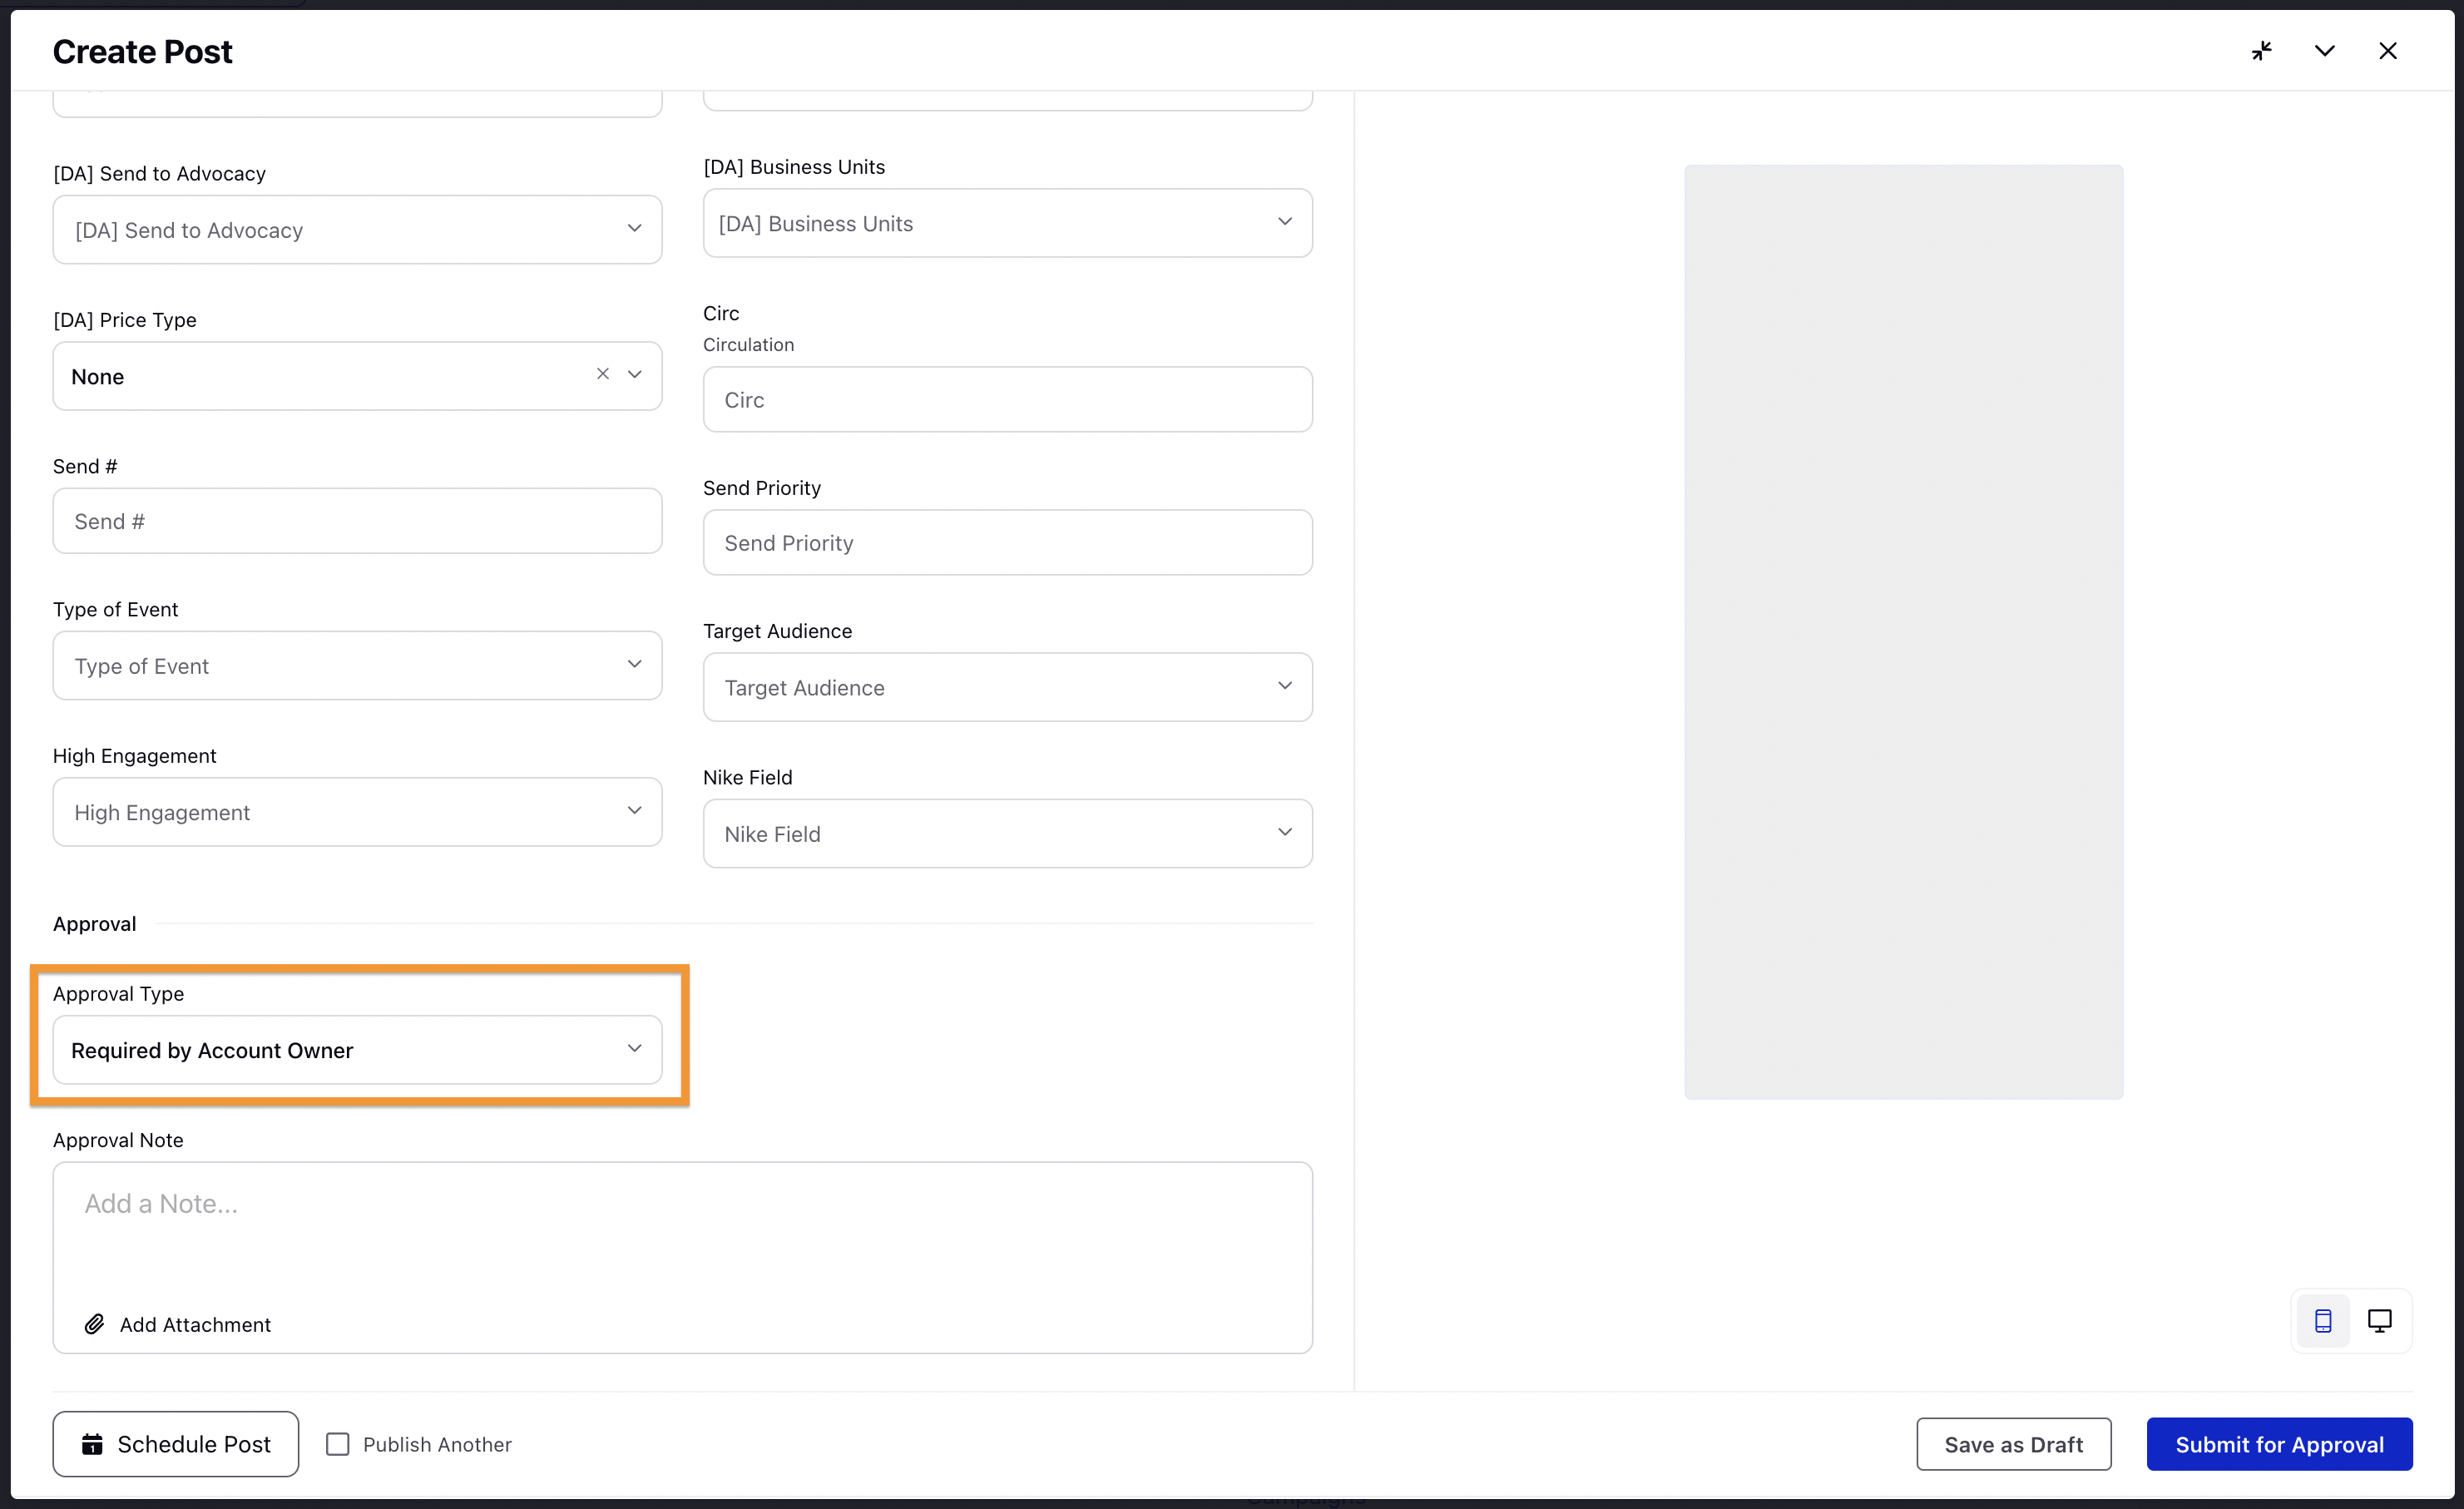
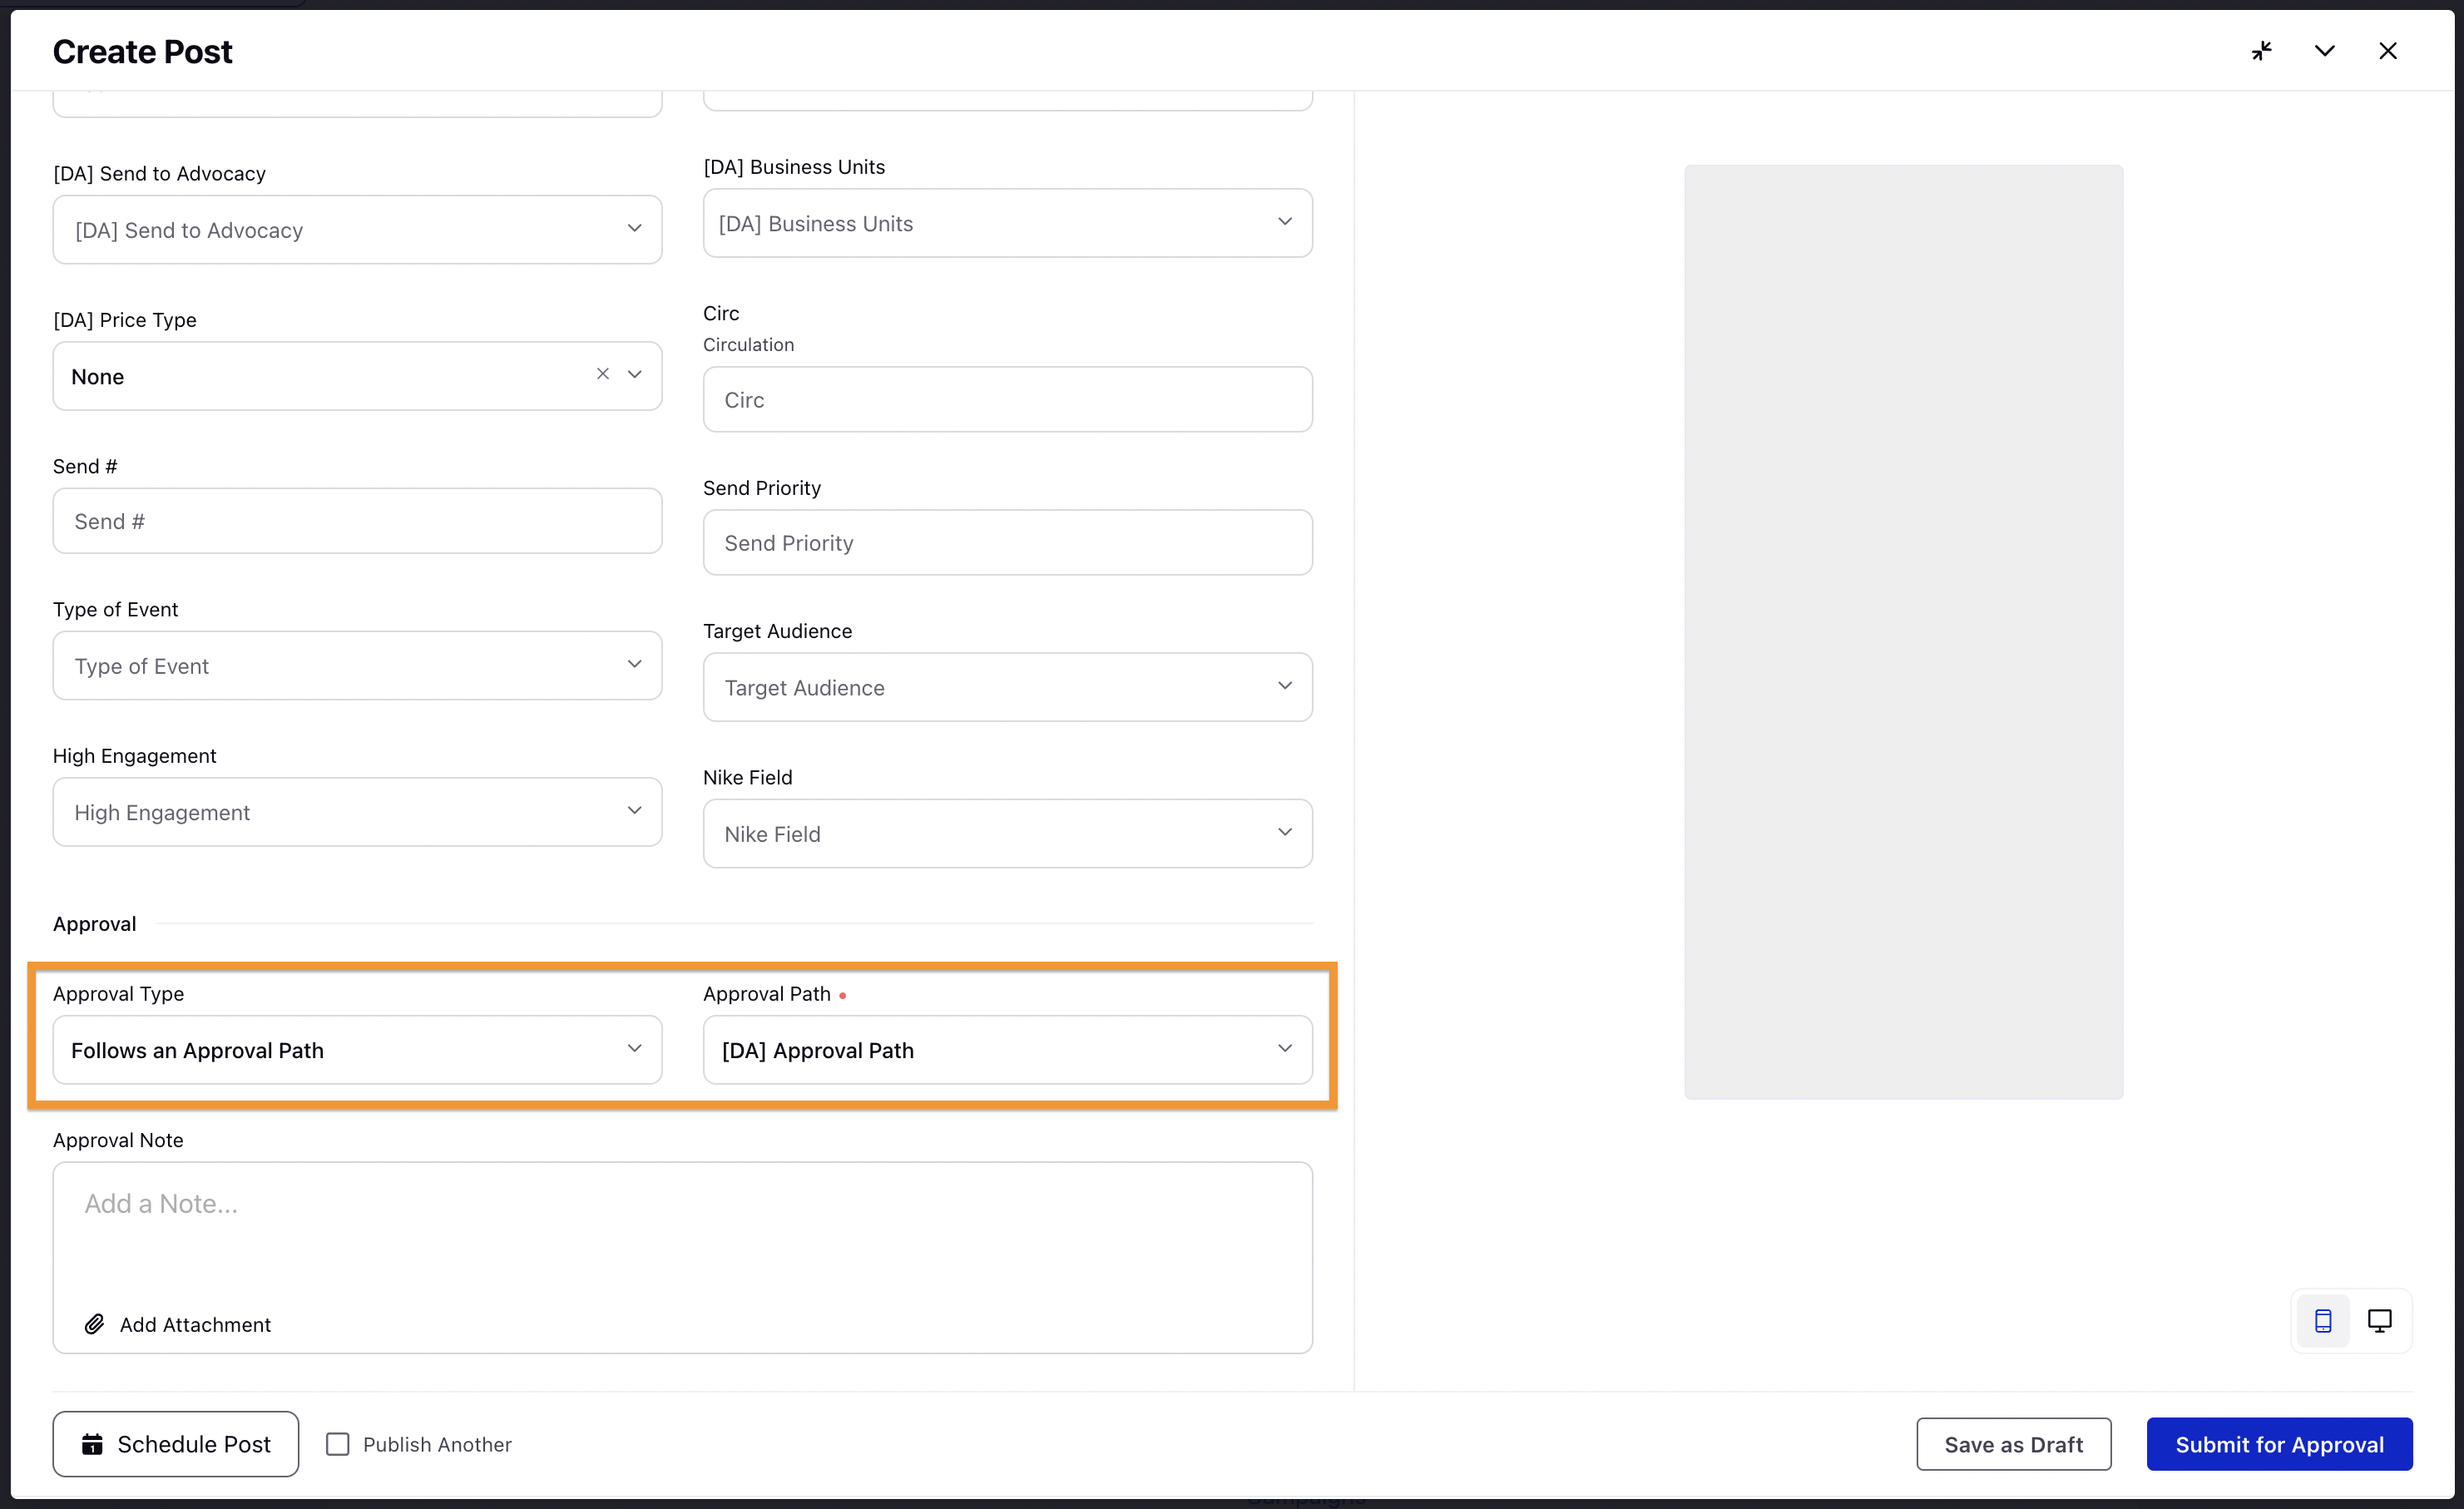
After providing all the necessary information for the post, we can select Approval Type in the Approval section.
Three options are available in the publishing window for approval while publishing posts through the Sprinklr platform. Details are covered in the following section.
Add the Approval Note for providing any further details to the approvers. You can also attach media files and documents to the approval note.
Click Submit after selecting the approval path.
The post will be published on the social media channel only after it is approved.
Approval Types
Not Required: The default option for approval is set to not required.
Required By Account Owner: The second option for approval is required by the account owner.
Follow an approval Path: The third option for approval is to follow an approval path. In the platform, users can create complex approval workflows using tiered and parallel approval.
During post creation, users progress through the publishing steps and select an available approval workflow in the Approval step. Once selected, a summary view of the workflow is displayed. Previously, only a partial or abbreviated view of the approval chain was visible inline to keep the interface uncluttered.
With this enhancement, users can now view the complete approval path by clicking the newly introduced View icon in the approval section. This opens an extended, read-only preview displaying the full list of approvers, the sequence in which approvals occur, and any grouped or hierarchical approval levels. The approval preview becomes available only after a workflow is selected, remains hidden if no workflow is chosen, and automatically updates when the selected workflow changes, ensuring users always have clear visibility into the exact approval structure applied before submitting the post.
Note: You can remove the approval section from the quick publisher, to refrain user from adding any approvals while creating a post in Quick publisher. To know more about removing the approval section from the quick publisher, please reach out to your success manager. |
Steps to Set Approval Workflows using Outbound Rules
Automatically add approval paths to posts based on the conditions like Channel, Account, Message type etc using Outbound rules in Sprinklr. This will add approval path to the post before is scheduled/published. Below are the steps to set up this up:
Click the New Tab icon. Under the Platform Modules, click Rule Engine within Collaborate.
In the top right corner of the Rule Engine window, click Create New Rule. To get the detailed steps for creating a rule, check out Create a Rule.
In the Rule Engine Builder, add Rule Conditions to set up specific scenarios that must be met for subsequent actions to execute. You can chain multiple conditions together to refine the scenarios that must be met before an action executes in a Rule. To know more about Outbound rule conditions, check out Conditions applicable with outbound rules.
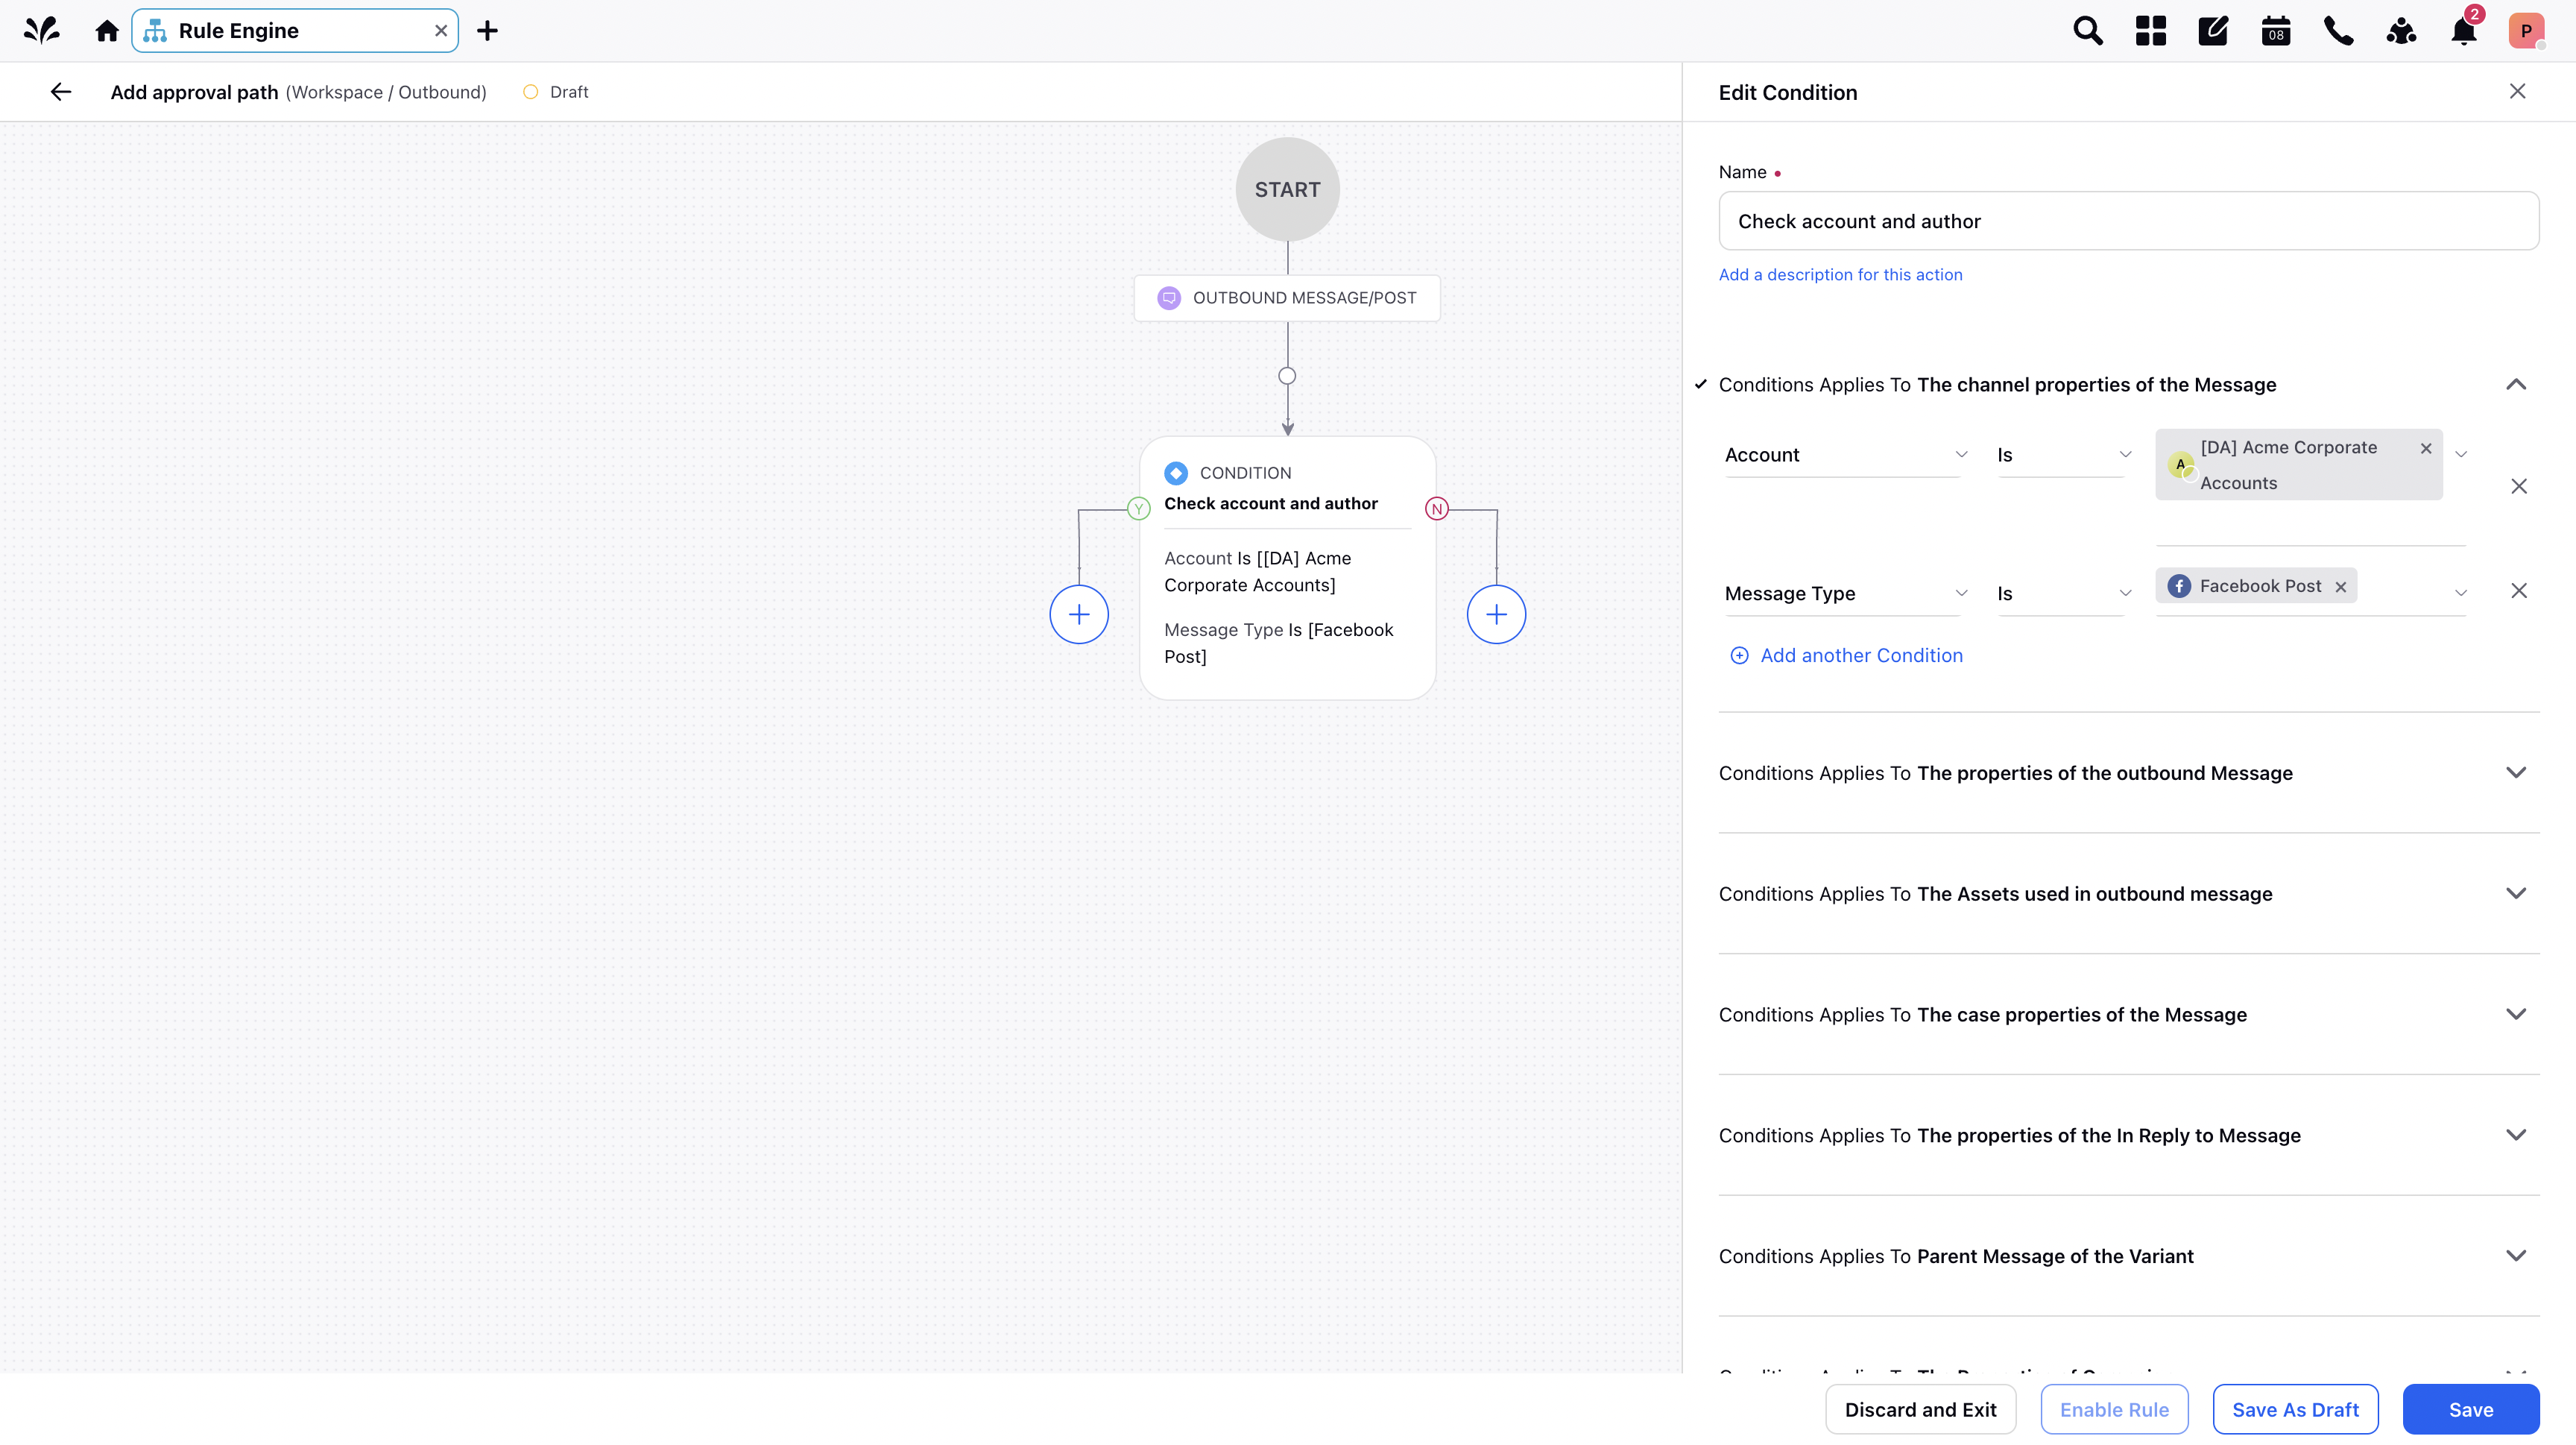
Configure Rule Actions that will execute on Rules when the conditions are or are not met by selecting Action on a Yes or No branch of Conditions.
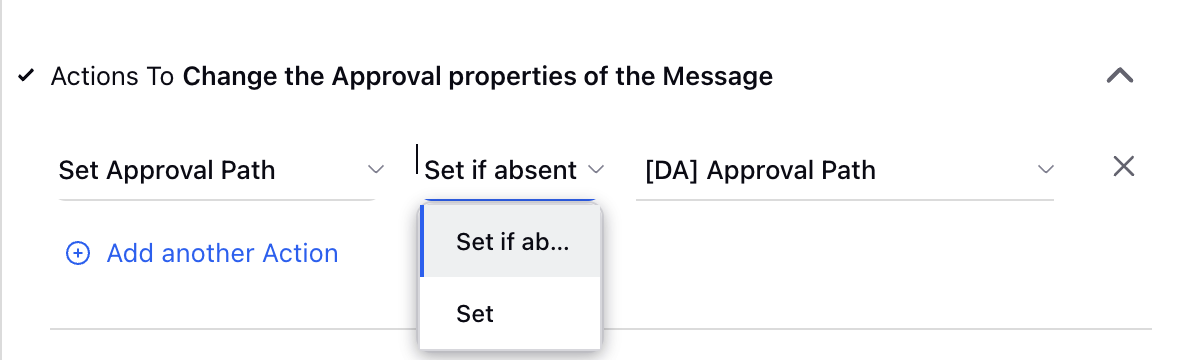
Under Actions To Change the Approval properties of the Message select among the following approval types as per your usecase -
Set User Approval - Select a user as the approver for the post from the drop down.
Set Approval Path - Select a pre-created approval path from the drop down.
Save the rule and click on Enable to activate it.
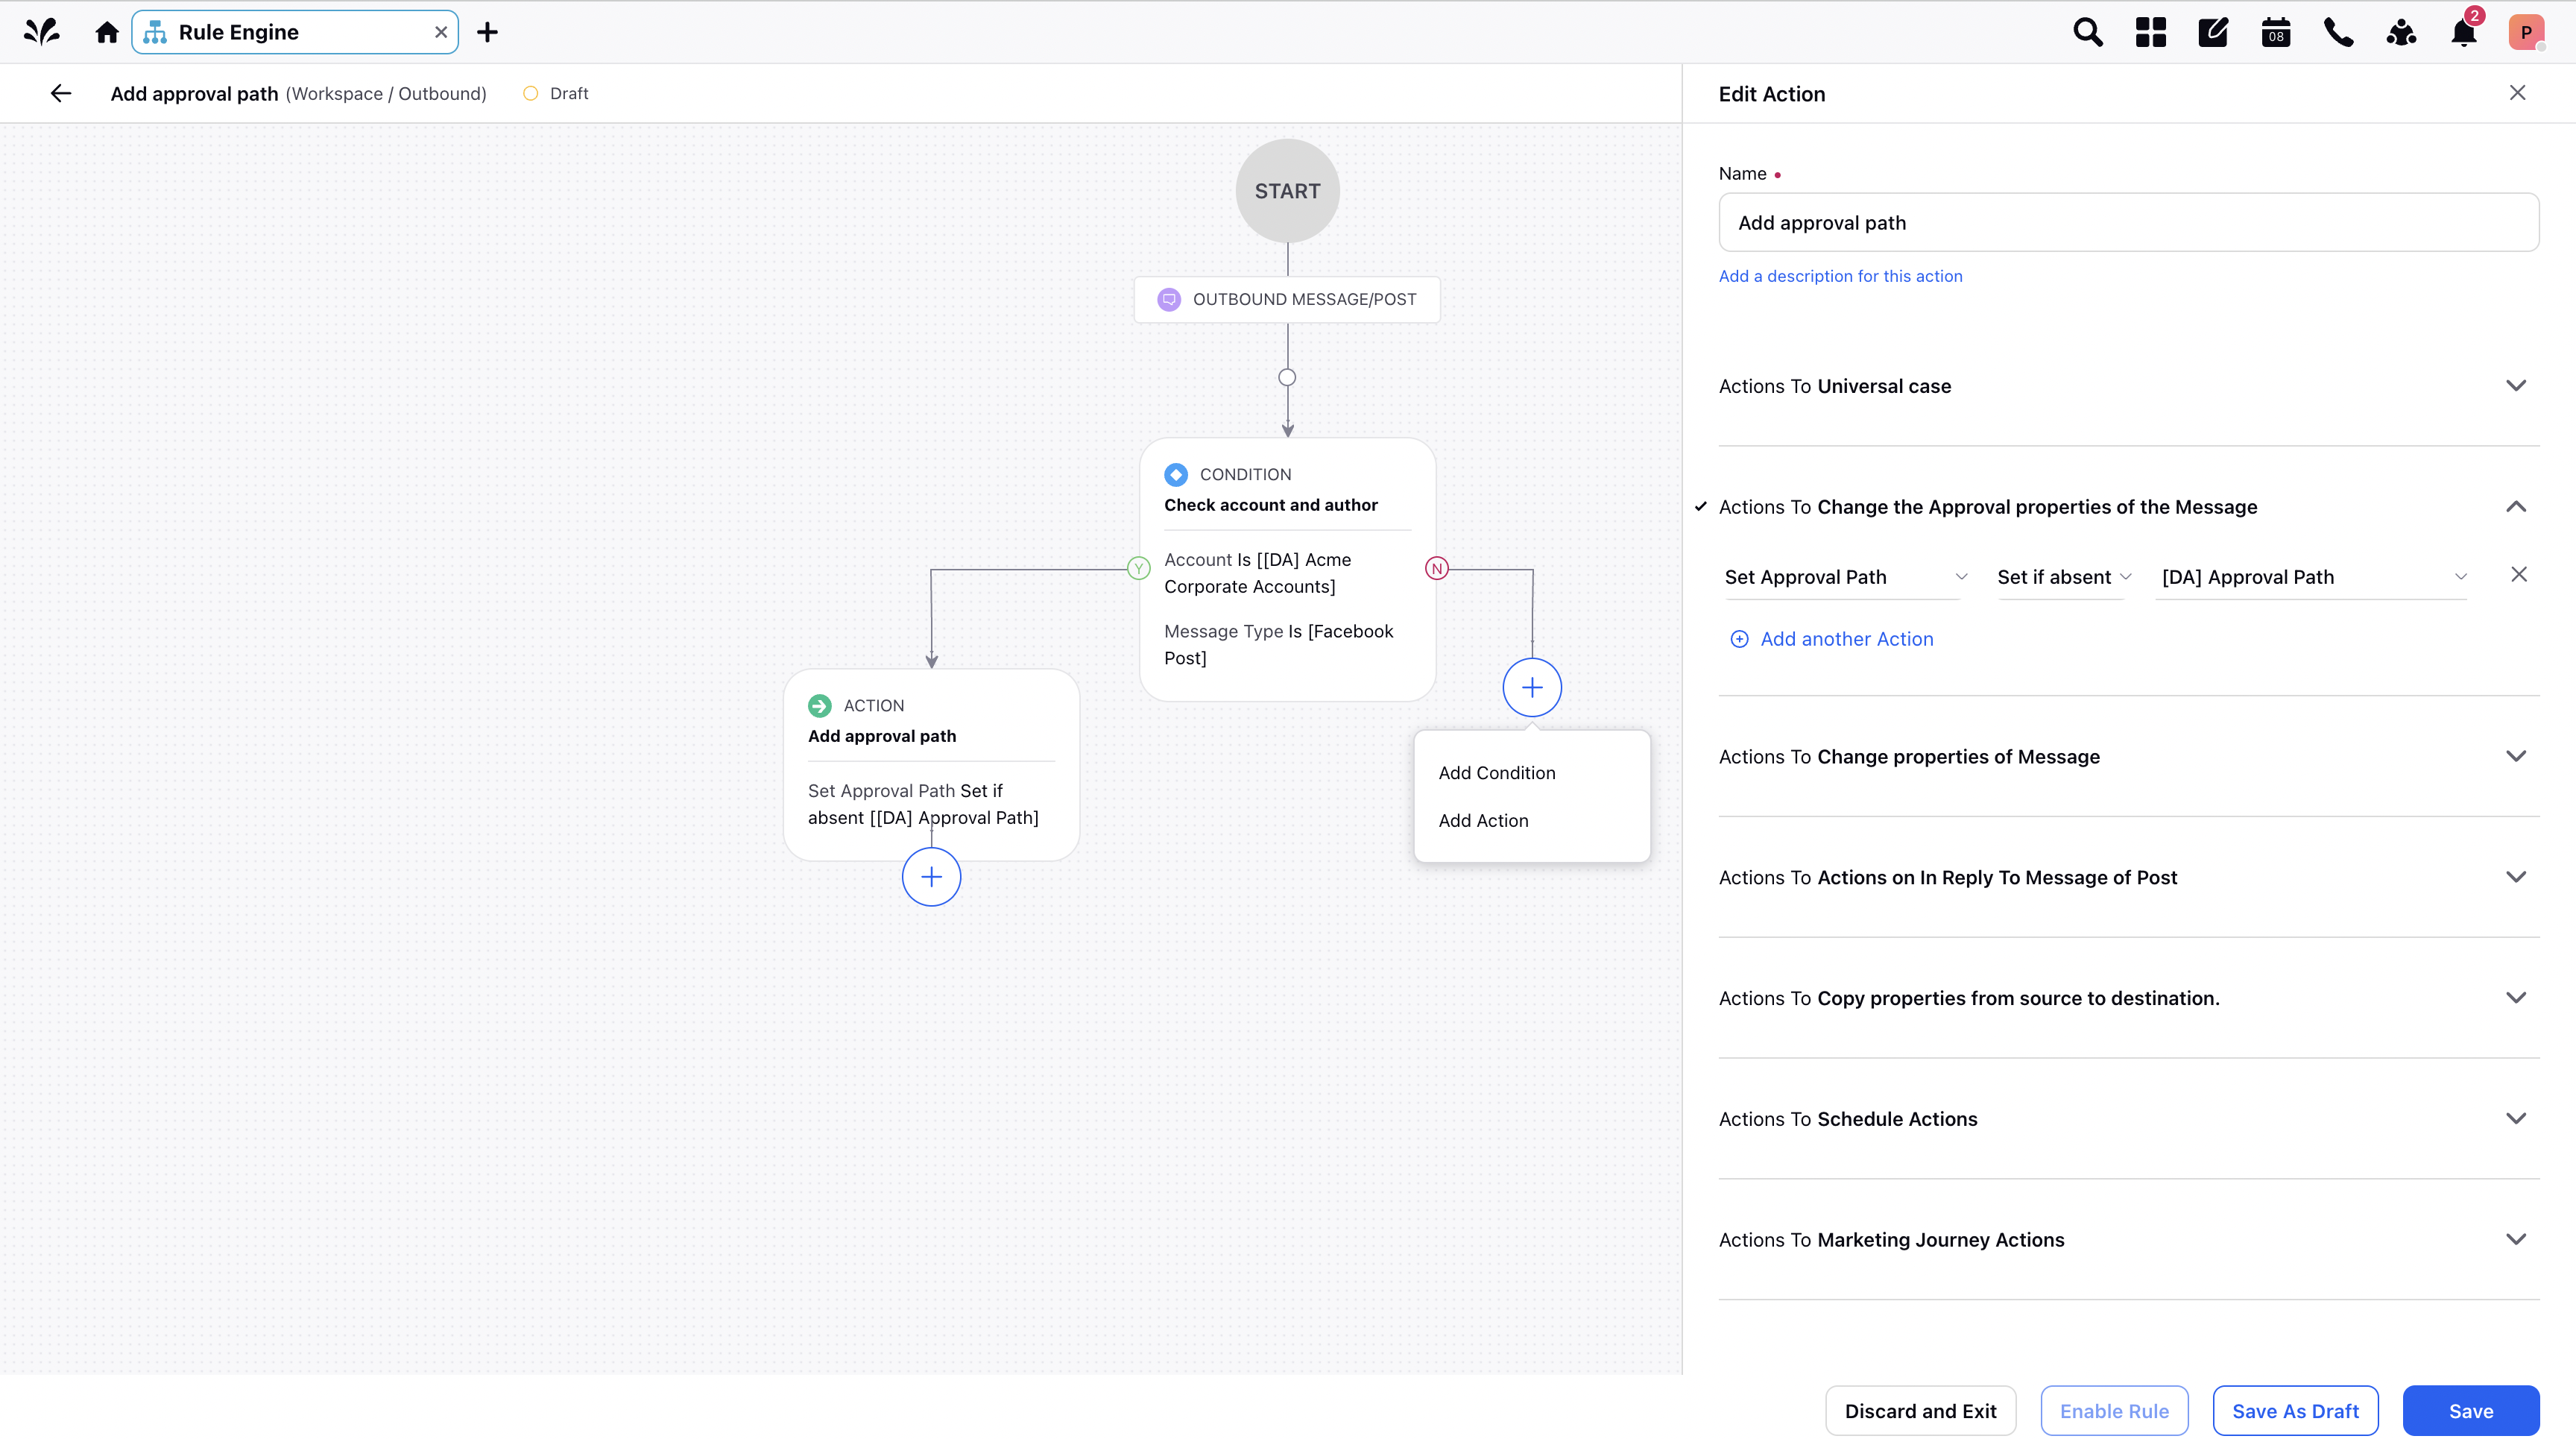
Note: You can also add approval to the post only if it is absent, by selecting Set if absent operator while setting up the action. This will check if author has added approval to the post, if not, then the rule will set the selected approval type for the post. |