Autofill Message fields using Autofill Rules
Updated
Autofill Rules are utilized to automatically fill fields related to an entity based on some conditions using the properties for its Author, Channel, Target Audience, etc.
Example Use case shown below: This rule is to ensure that the User Department is getting copied over from the user properties to the Outbound Message.
How to set up
Click the New Tab icon. Under Governance, click Manage Rules within Platform Setup.
In the top right corner of the Rule Engine window, click Create New Rule. To learn more about how to create a rule, see Create New Rule.
On the Create New Rule window, give your rule a name and an optional description. From the Context drop-down menu, select the rule context as Autofill.
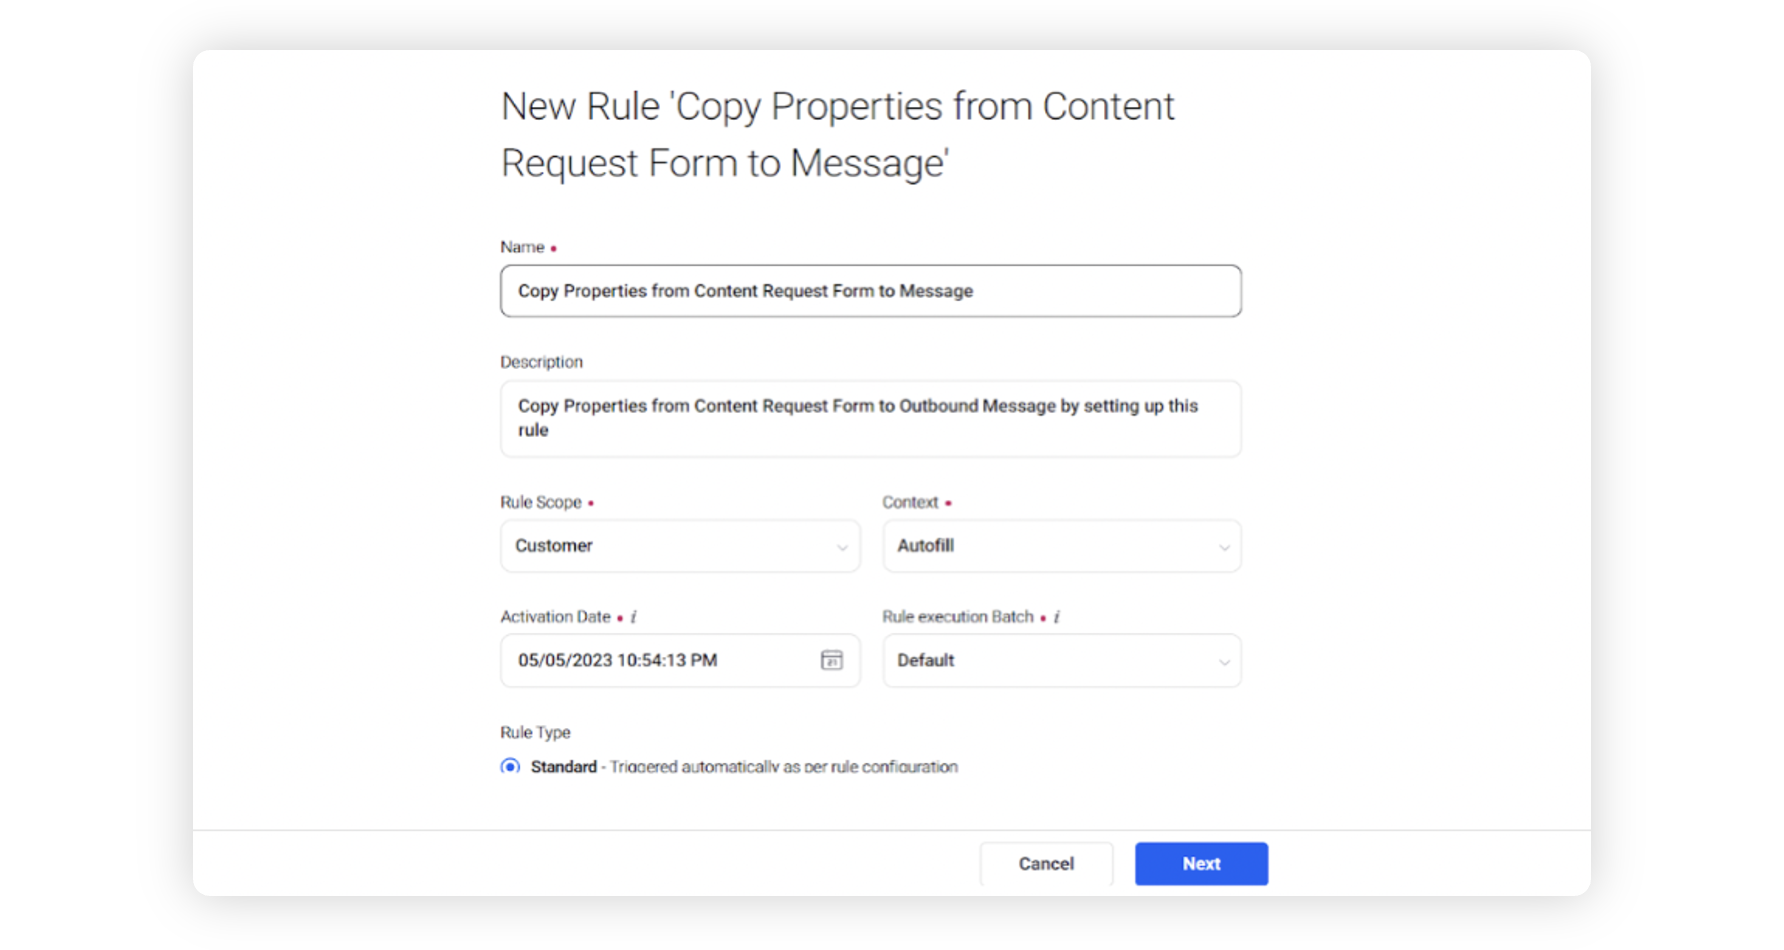
Modify the values for Activation Date, Rule Execution Batch, Rule Type, and Custom Fields. To proceed with the default values, click Next in the bottom right corner.
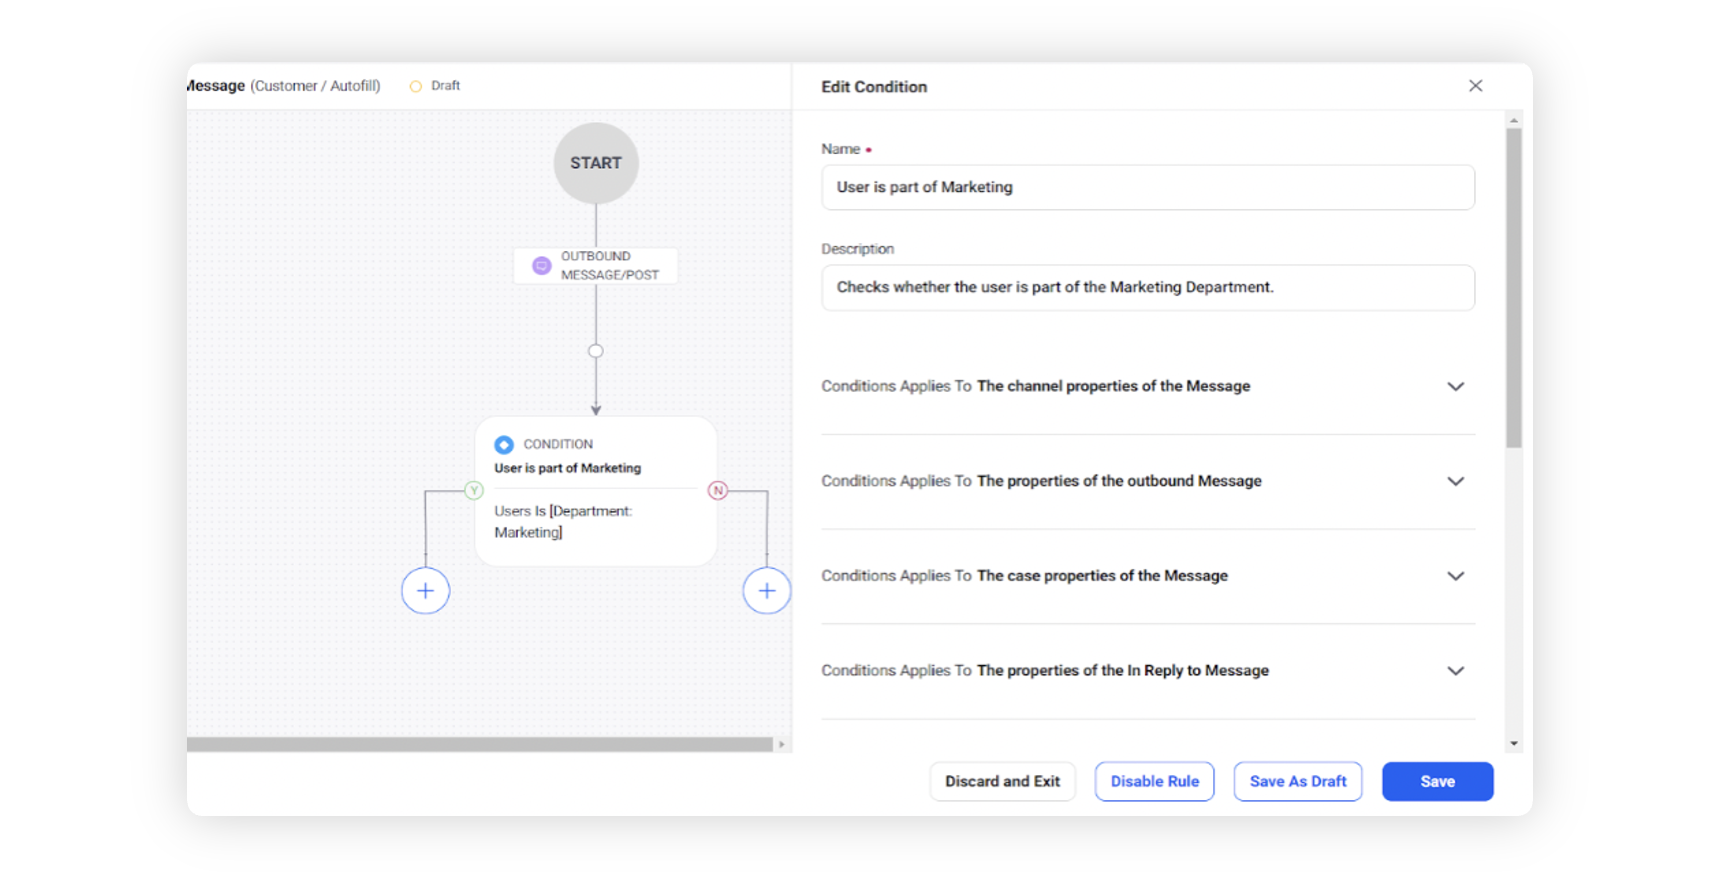
On the Rule Builder window, select Add Condition to set up specific scenarios that must be met for subsequent actions to execute. You can also chain multiple conditions together to refine the scenarios.
In this example, we are using Users = Department: Marketing under The conditions apply to the profile of the Message Author, if we are autofilling Department custom fields from the user properties onto the message.
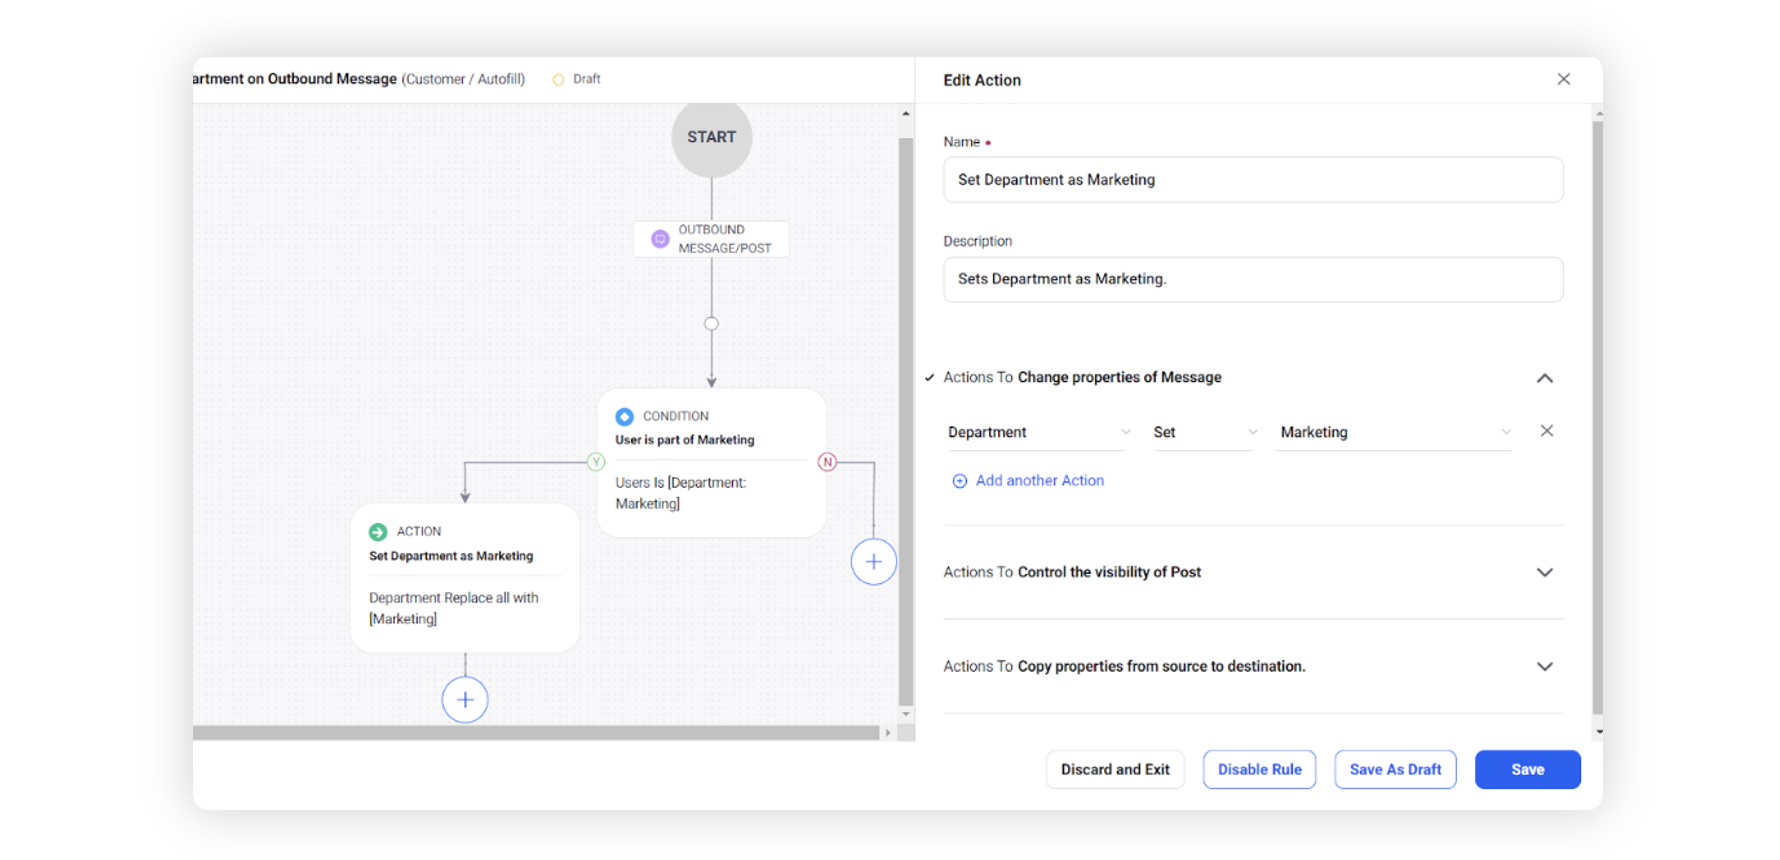
To configure actions in a rule, select Add Action on a Yes or a No branch of a condition depending on when you want the action to be executed.
Here, under the actions to change properties of Message, you can set the field 'Department’ field value based on the outcome of the conditions. Chain multiple conditions and actions together to map values between the user department and the field value.
Click Save in the bottom right corner to finalize the creation of your new rule, or Save as Draft to create a draft version of your rule.