Sampling and Assignment Policy Builder
Updated
The Sampling and Assignment Policy feature enables users to create sampling and assignment policies from templates through the QM persona. They can easily customize sampling conditions, can use new random sampling techniques, and trigger assignment policies through macros, significantly reducing configuration time.
Creating Sampling Policy
On the launchpad, click on the Quality Management tab, the Governance screen is displayed.
On the Governance screen, click on the Sampling Policy. The Sampling Policies screen is displayed.
On the Sampling Policies screen, click on the +Sample Policy tab.
Three screens are displayed:
Basic Details
Sampling Distribution
Post Sampling Actions
Entering Basic Details
Perform the followings steps to enter the basic information to initiate sampling process:
Enter Sampling Policy Name.
Under the Filter Cases section, select the field from the Where drop down menu, select the operator from the Operator drop down menu and select the value from the Value drop down menu.
Select the Sampling Start Date and Time from the drop down menu.
Under the Sample Cases every section, select the Interval and Duration for the time drop down menu.
Select the user or user group from the Share Sampling Policy With drop down menu.
Click Next.
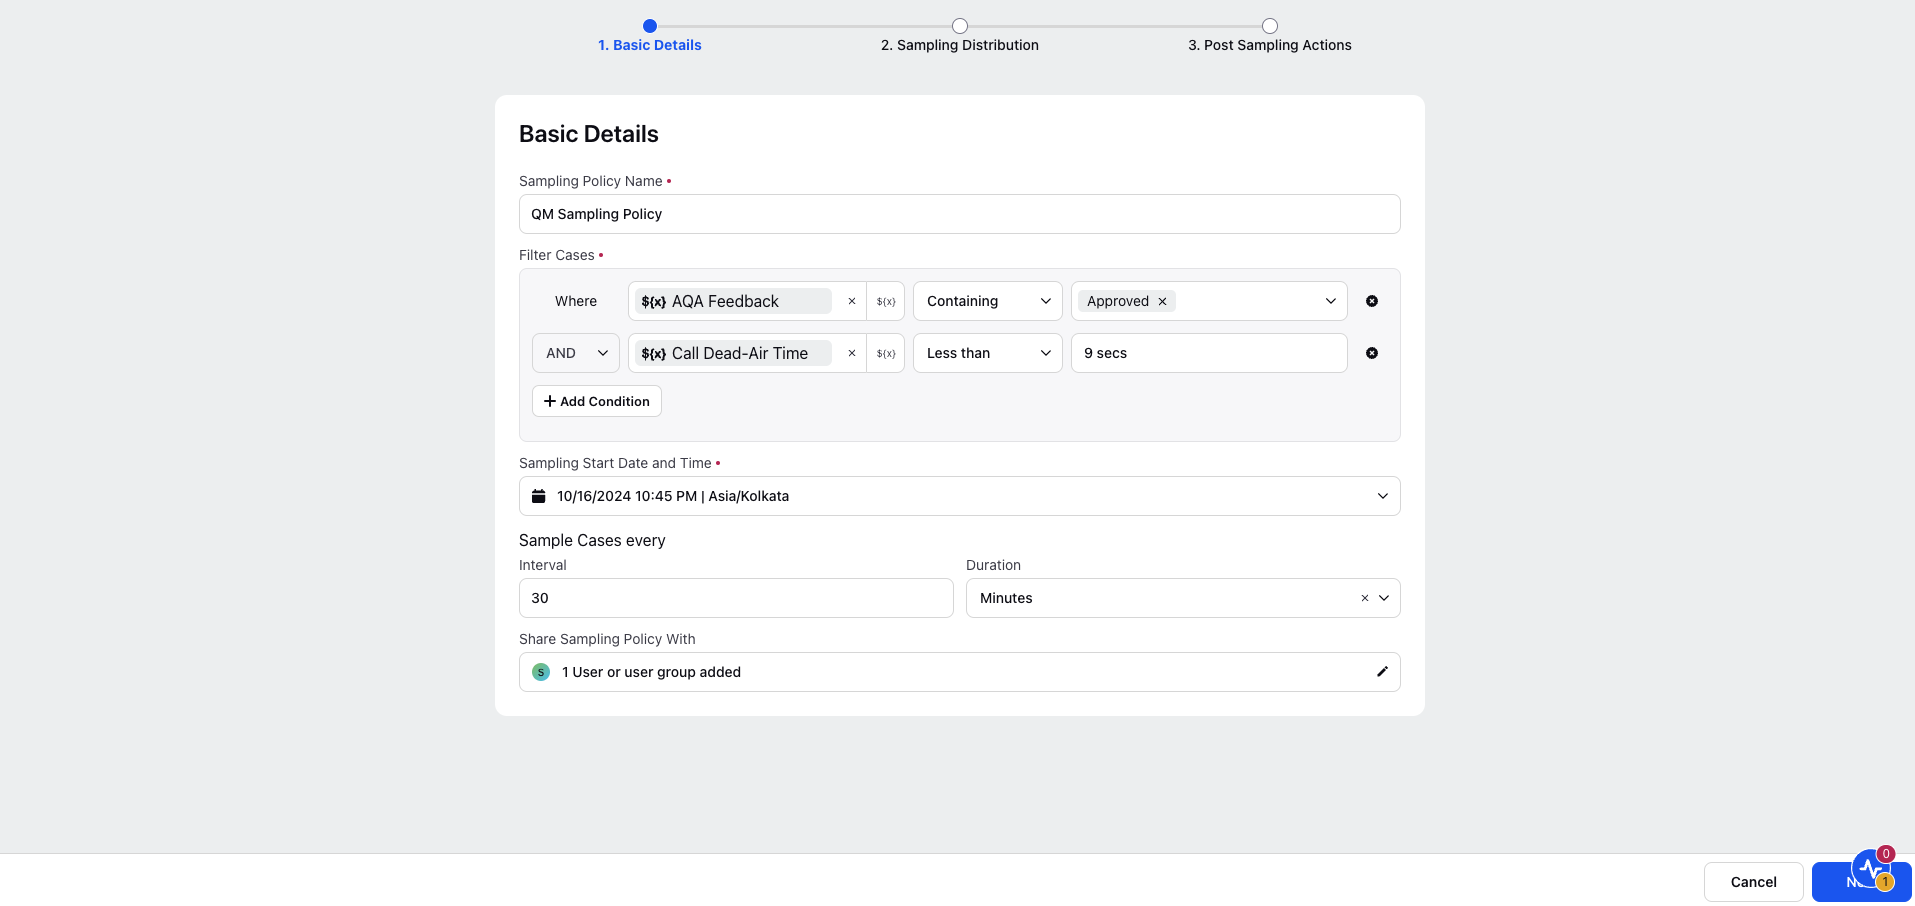
Parameters Description for Basic Details Screen
Parameter Name | Description |
Sampling Policy Name | Name of the sampling policy. |
Filter Cases | Cases are filtered based on: Case, Case Interaction and Case evaluation properties. |
Sampling Start Date and Time | The start date and time as to when the sampling should begin. |
Sample Cases every | The time duration after which the cases gets sampled, this interval is selected in minutes. |
Share Sampling Policy With | Sampling policy permissions for View, Edit and Delete are governed by this field. |
Creating Sampling Distribution
Perform the following tasks to create the distribution of your sampling data:
Enter the No. of cases to sample.
Select the Sampling from the Sampling based on drop down menu.
Select the distribution type from the How do you want to distribute drop down menu.
a. If Distribute Equally is clicked:
i) Select the distribution from the Distribute based on drop down menu.
b. If Set Priority is clicked:
i) Under the Set Priority section, select the Field, Operator and Value from the Where drop down menu.
ii) Click + Add Condition if you want to add another user group.
Click Next.
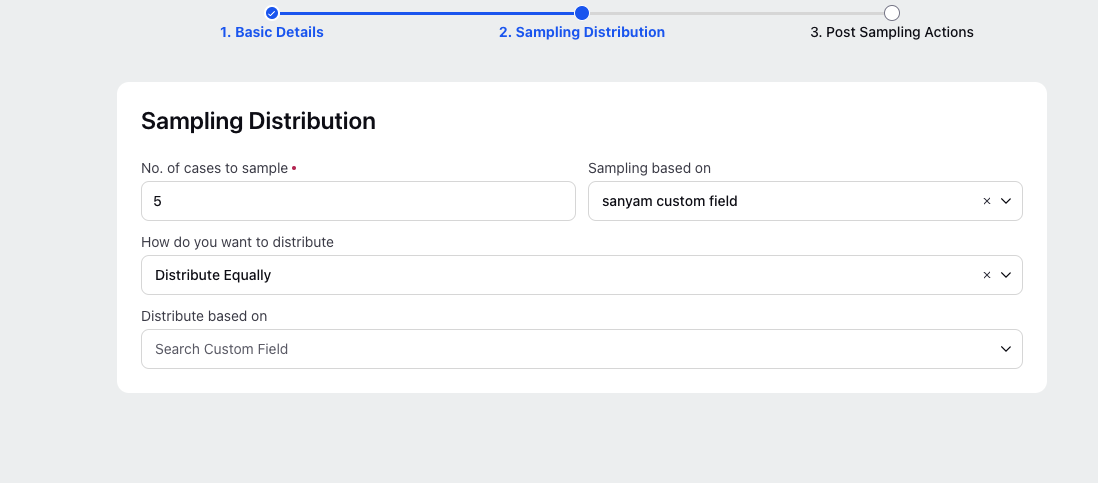
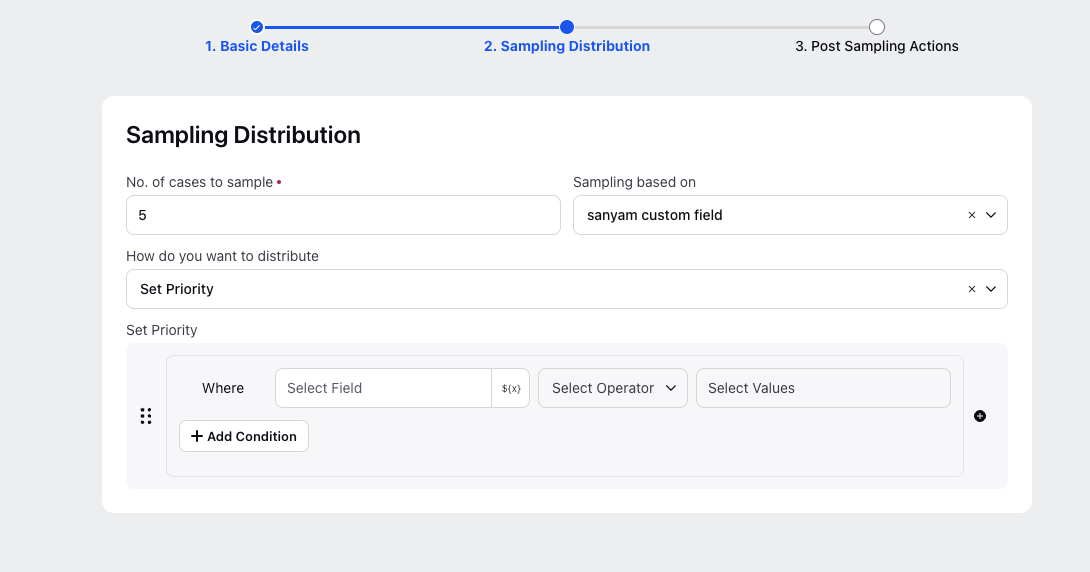
Parameters Description for Sampling Distribution screen:
Parameter Name | Description |
No. of cases to sample | Total number of cases to be sampled. |
Sampling based on | Picklist custom field. For each value of a custom field the number of cases defined, Sampling will be based on each value of custom field. |
How do you want to distribute? | Non madantory field, decides on which value user wants to sample the data based on the cases distributed or prioritise how the cases should be picked. |
Distribute based on | Based on picklist custom field, distributes cases equally based on the selected custom field. |
Set Priority | Cases are prioritized based on Case, Case Interaction and Case Evaluation properties. |
Creating Post Sampling Actions
Perform the following steps to ensure seemless data exchange between various platforms:
Select the Assignment Policy from the Assign using Assignment Policy drop down menu.
Under the Sampled Case Actions field, select the Field, Operator and Value from the respective drop down menus.
Under the Non-Sampled Case Actions section, select the Field, Operator and Value from the respective drop down menus.
Click Next.
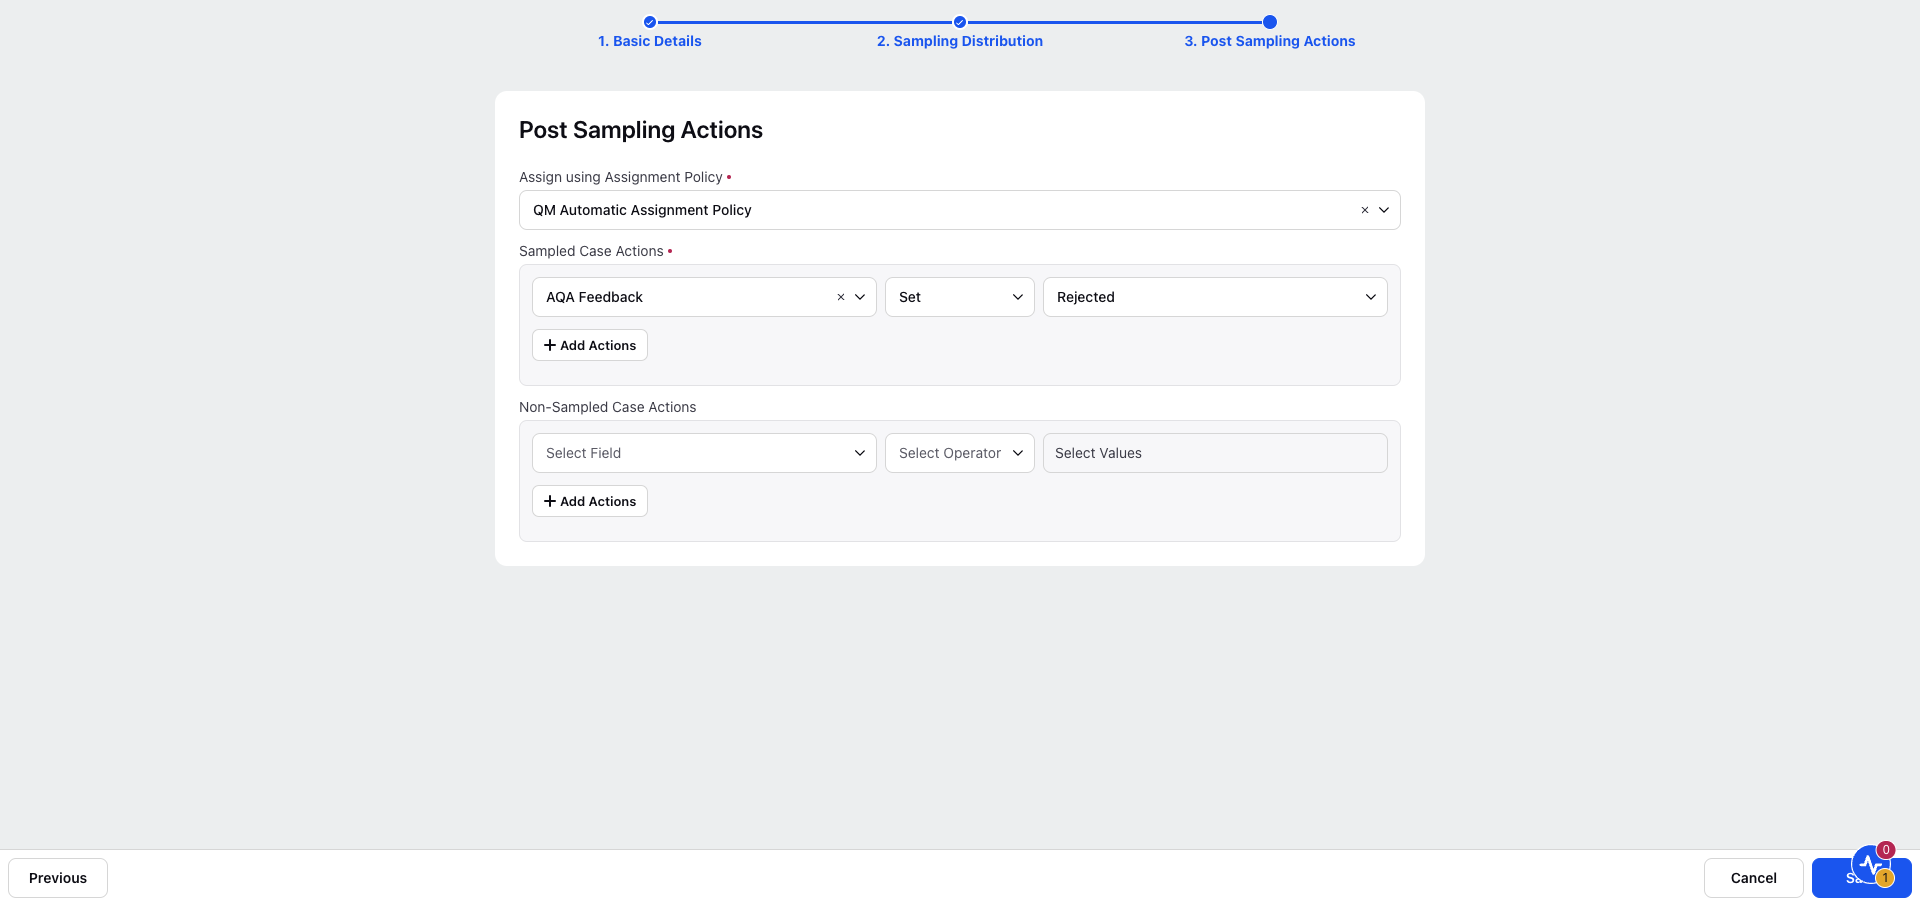
Parameters Description for Post Sampling Actions screen:
Parameter Name | Description |
Assign using Assignment Policy | The sampling policy that needs to be selected to assign the cases to be sampled. |
Case Actions | Change the case level properties of the sampled and the non sampled cases. User gets three parameters to do so, field, operator and value. |
Creating Assignment Policy
On the launchpad, click on the Quality Management tab, the Governance screen is displayed.
On the Governance screen, click on the assignment policy. The Assignment Policy screen is displayed.
On the Assignment Policy screen, click on the +Assignment Policy.
Two screens are displayed:
Basic Details
Assignment Details
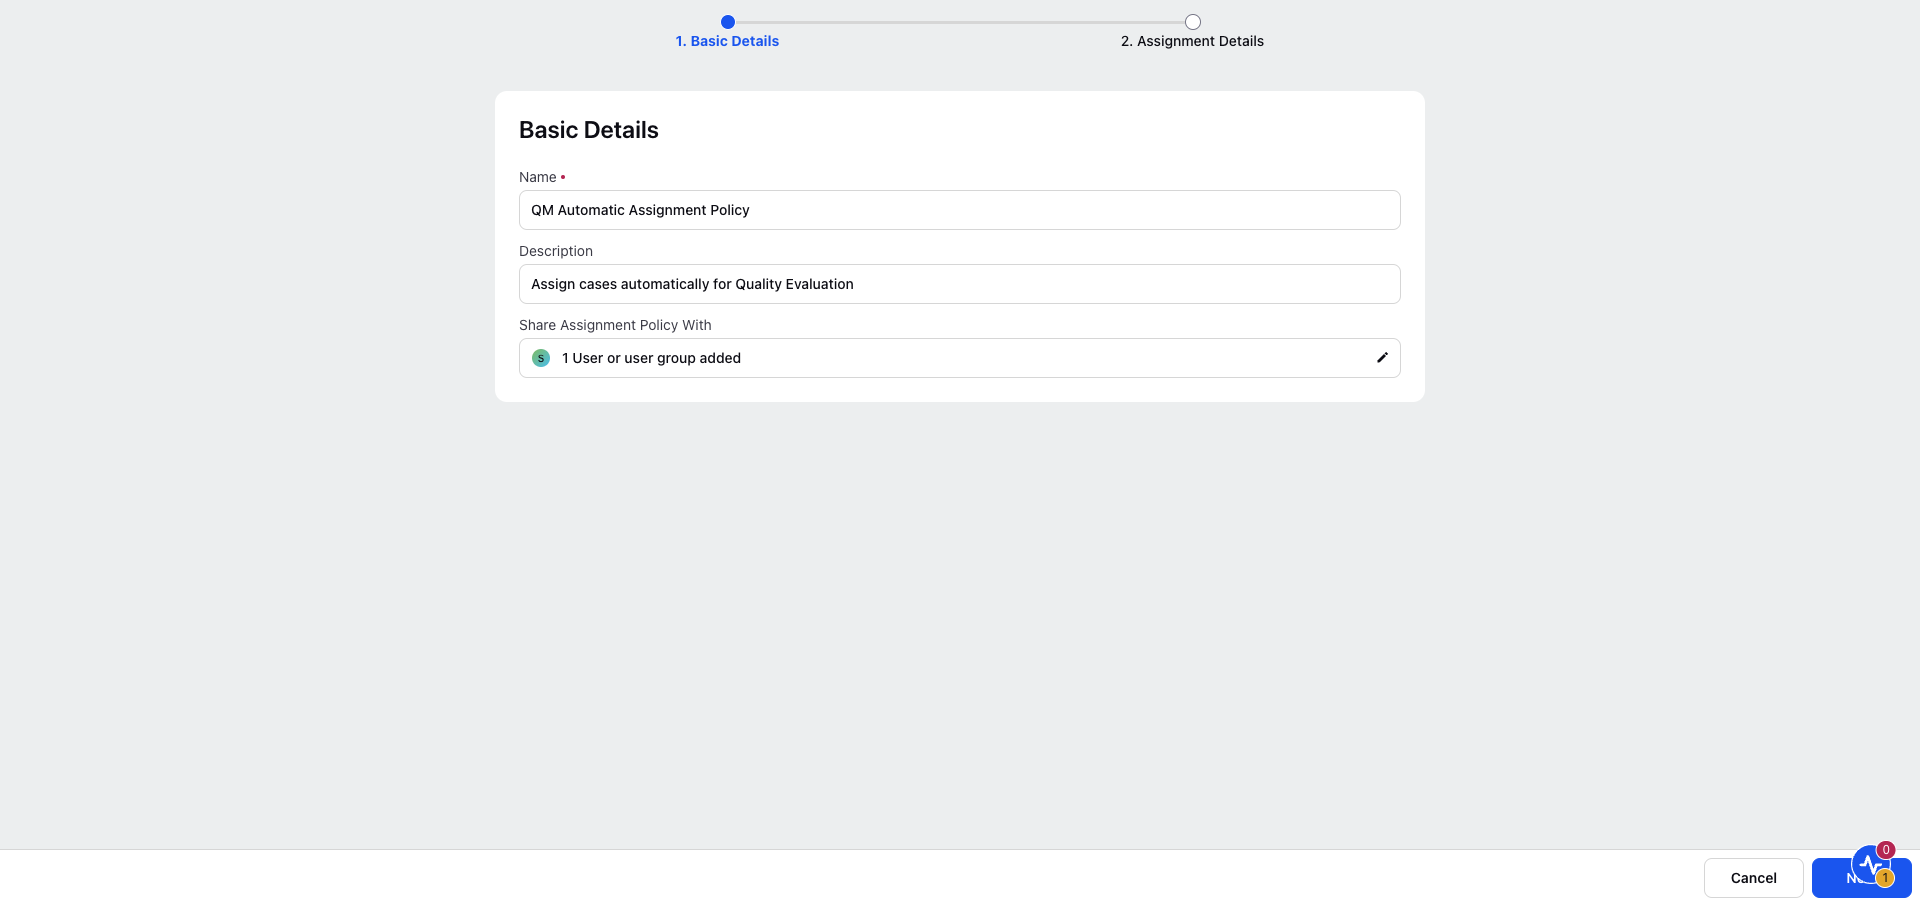
Entering Basic Details
Perform the following steps to enter the basic details of the groups and where it needs to be displayed:
Enter the Name.
Enter the Description.
Select the users or user groups from the Share Assignment Policy With drop down menu.
Click Next.
Creating Assignment Details
Perform the following tasks to create the assignment details:
Click the Work Queue or User or User Groups radio button.
Select the work queue from the Work Queue drop down menu.
Select the audit checklist from the Checklist drop down menu.
Select the evaluation type from the Evaluation Type drop down menu.
Select the agent to evaluate from the Agent to evaluate drop down menu.
Under the interaction section, select the Interaction, Operator and Value from the Where drop down menus.
Select the work channel from the Work Channel drop down menu.
Select the unassign time duration from the Unassign if not Evaluated after drop down menu.
Click Save.
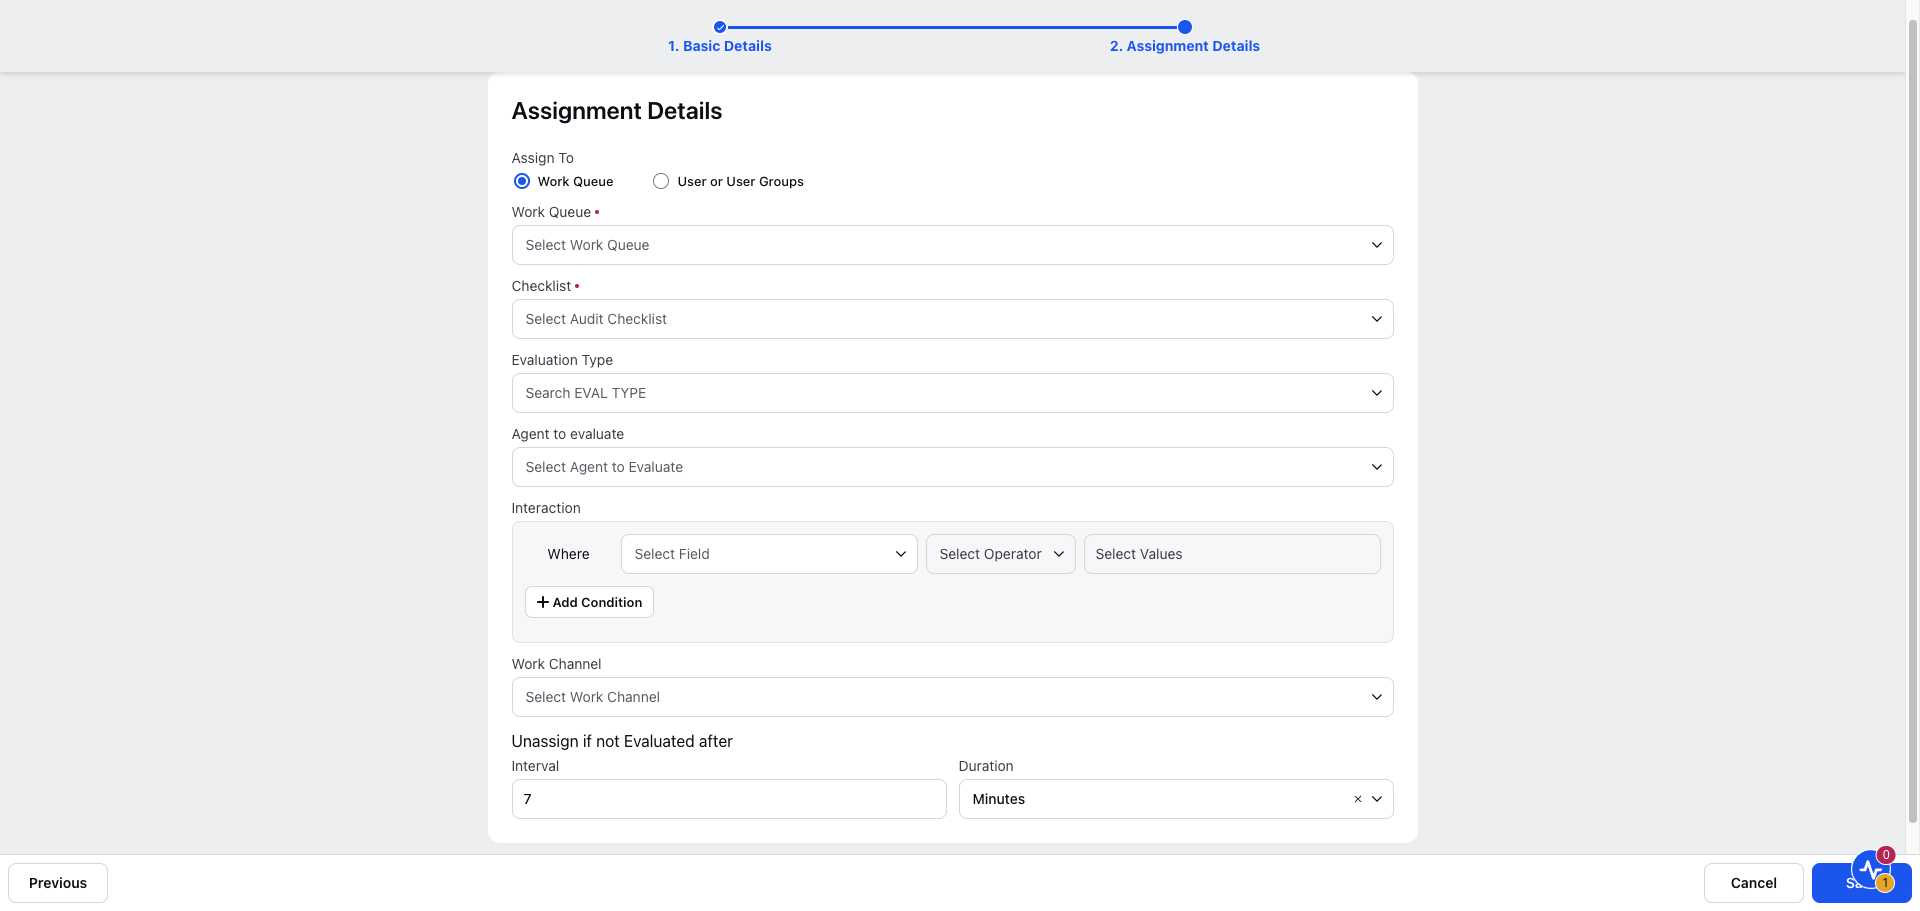
Parameters Description for Assignment Details screen:
Parameter Name | Description |
Assign to | The assignment policy that needs to be selected to assign the cases. |
Work Queue | Select the Work Queue for the assignment. |
User(s) | Select amongst the users, user groups or QM Dynamic Assignee Fields(this is case level user type customer field). |
Checklist | The default checklist on which the evaluation starts. |
Evaluation Type | The evaluation on which the calibration is performed. This is selected only when calibrations are to be performed and is not required for normal evaluations. |
Agent to evaluate | Select the user on which the evaluation is assigned such as Last Agent, First Agent, Most Engaged Agent and Multi-picklist Case level user Custom field. The audit evaluations are assigned only on agents
|
Interaction | Select the conversation that are assigned for evaluation. Select from the Where drop down displayed under this field. |
Work Channel | List of various work channels or work network of the conversation. |
Unassign if not Evaluated after | Unassign the audits after a specified time period, eliminating the need for Quality Managers to manually unassign overdue audits. |
Assignment Policy can also be triggered manually through macros. The following image shows bulk assignment of QM evaluation with the help of macros. On executing the macro with the execute assignment policy action the cases get assigned based on the assignment policy configuration.

