Custom Fields Support in Briefs and Brief Templates
Updated
Overview
You can now add Custom Fields in Brief Templates or Briefs. Custom Fields help simplify Brief usage and allow you to manage your entire campaign or content strategy from a single place. When using or modifying Campaign or Content Briefs, you can update the Custom Fields from within the Brief tab itself.
Note: You cannot edit the values of Custom Fields when creating Brief Templates. Values of Custom Fields can only be edited in the Brief Tab.
Using Custom Fields
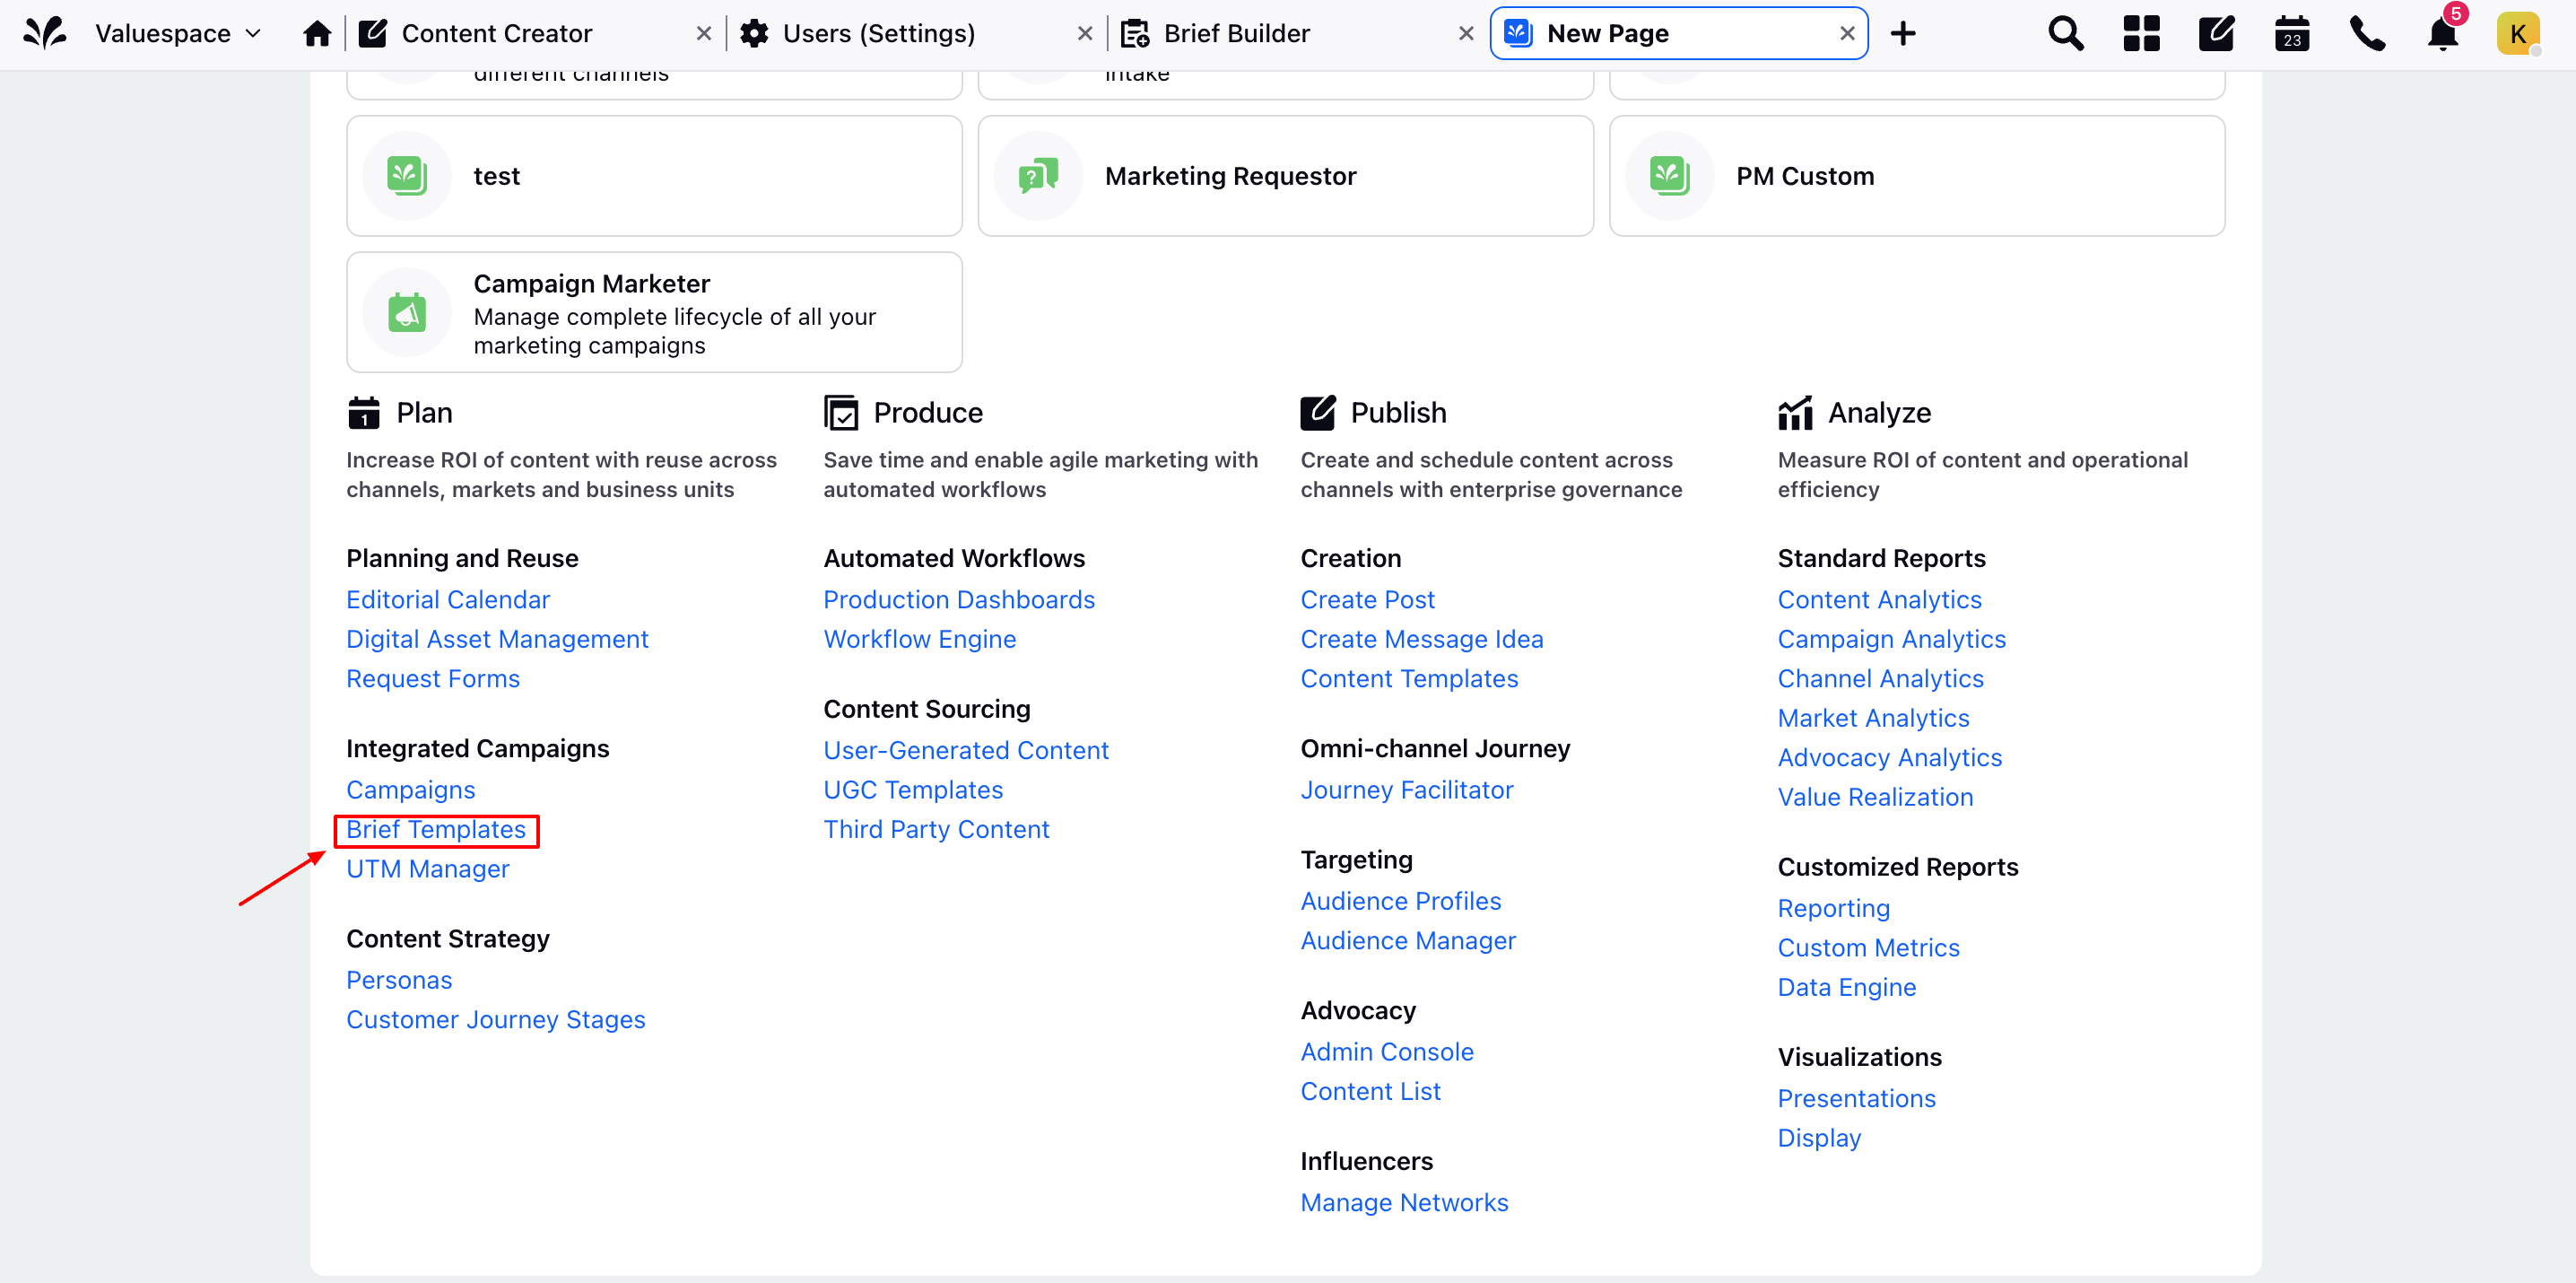
1. Click the New Tab icon. Under the Sprinklr Marketing tab, select Brief Templates.

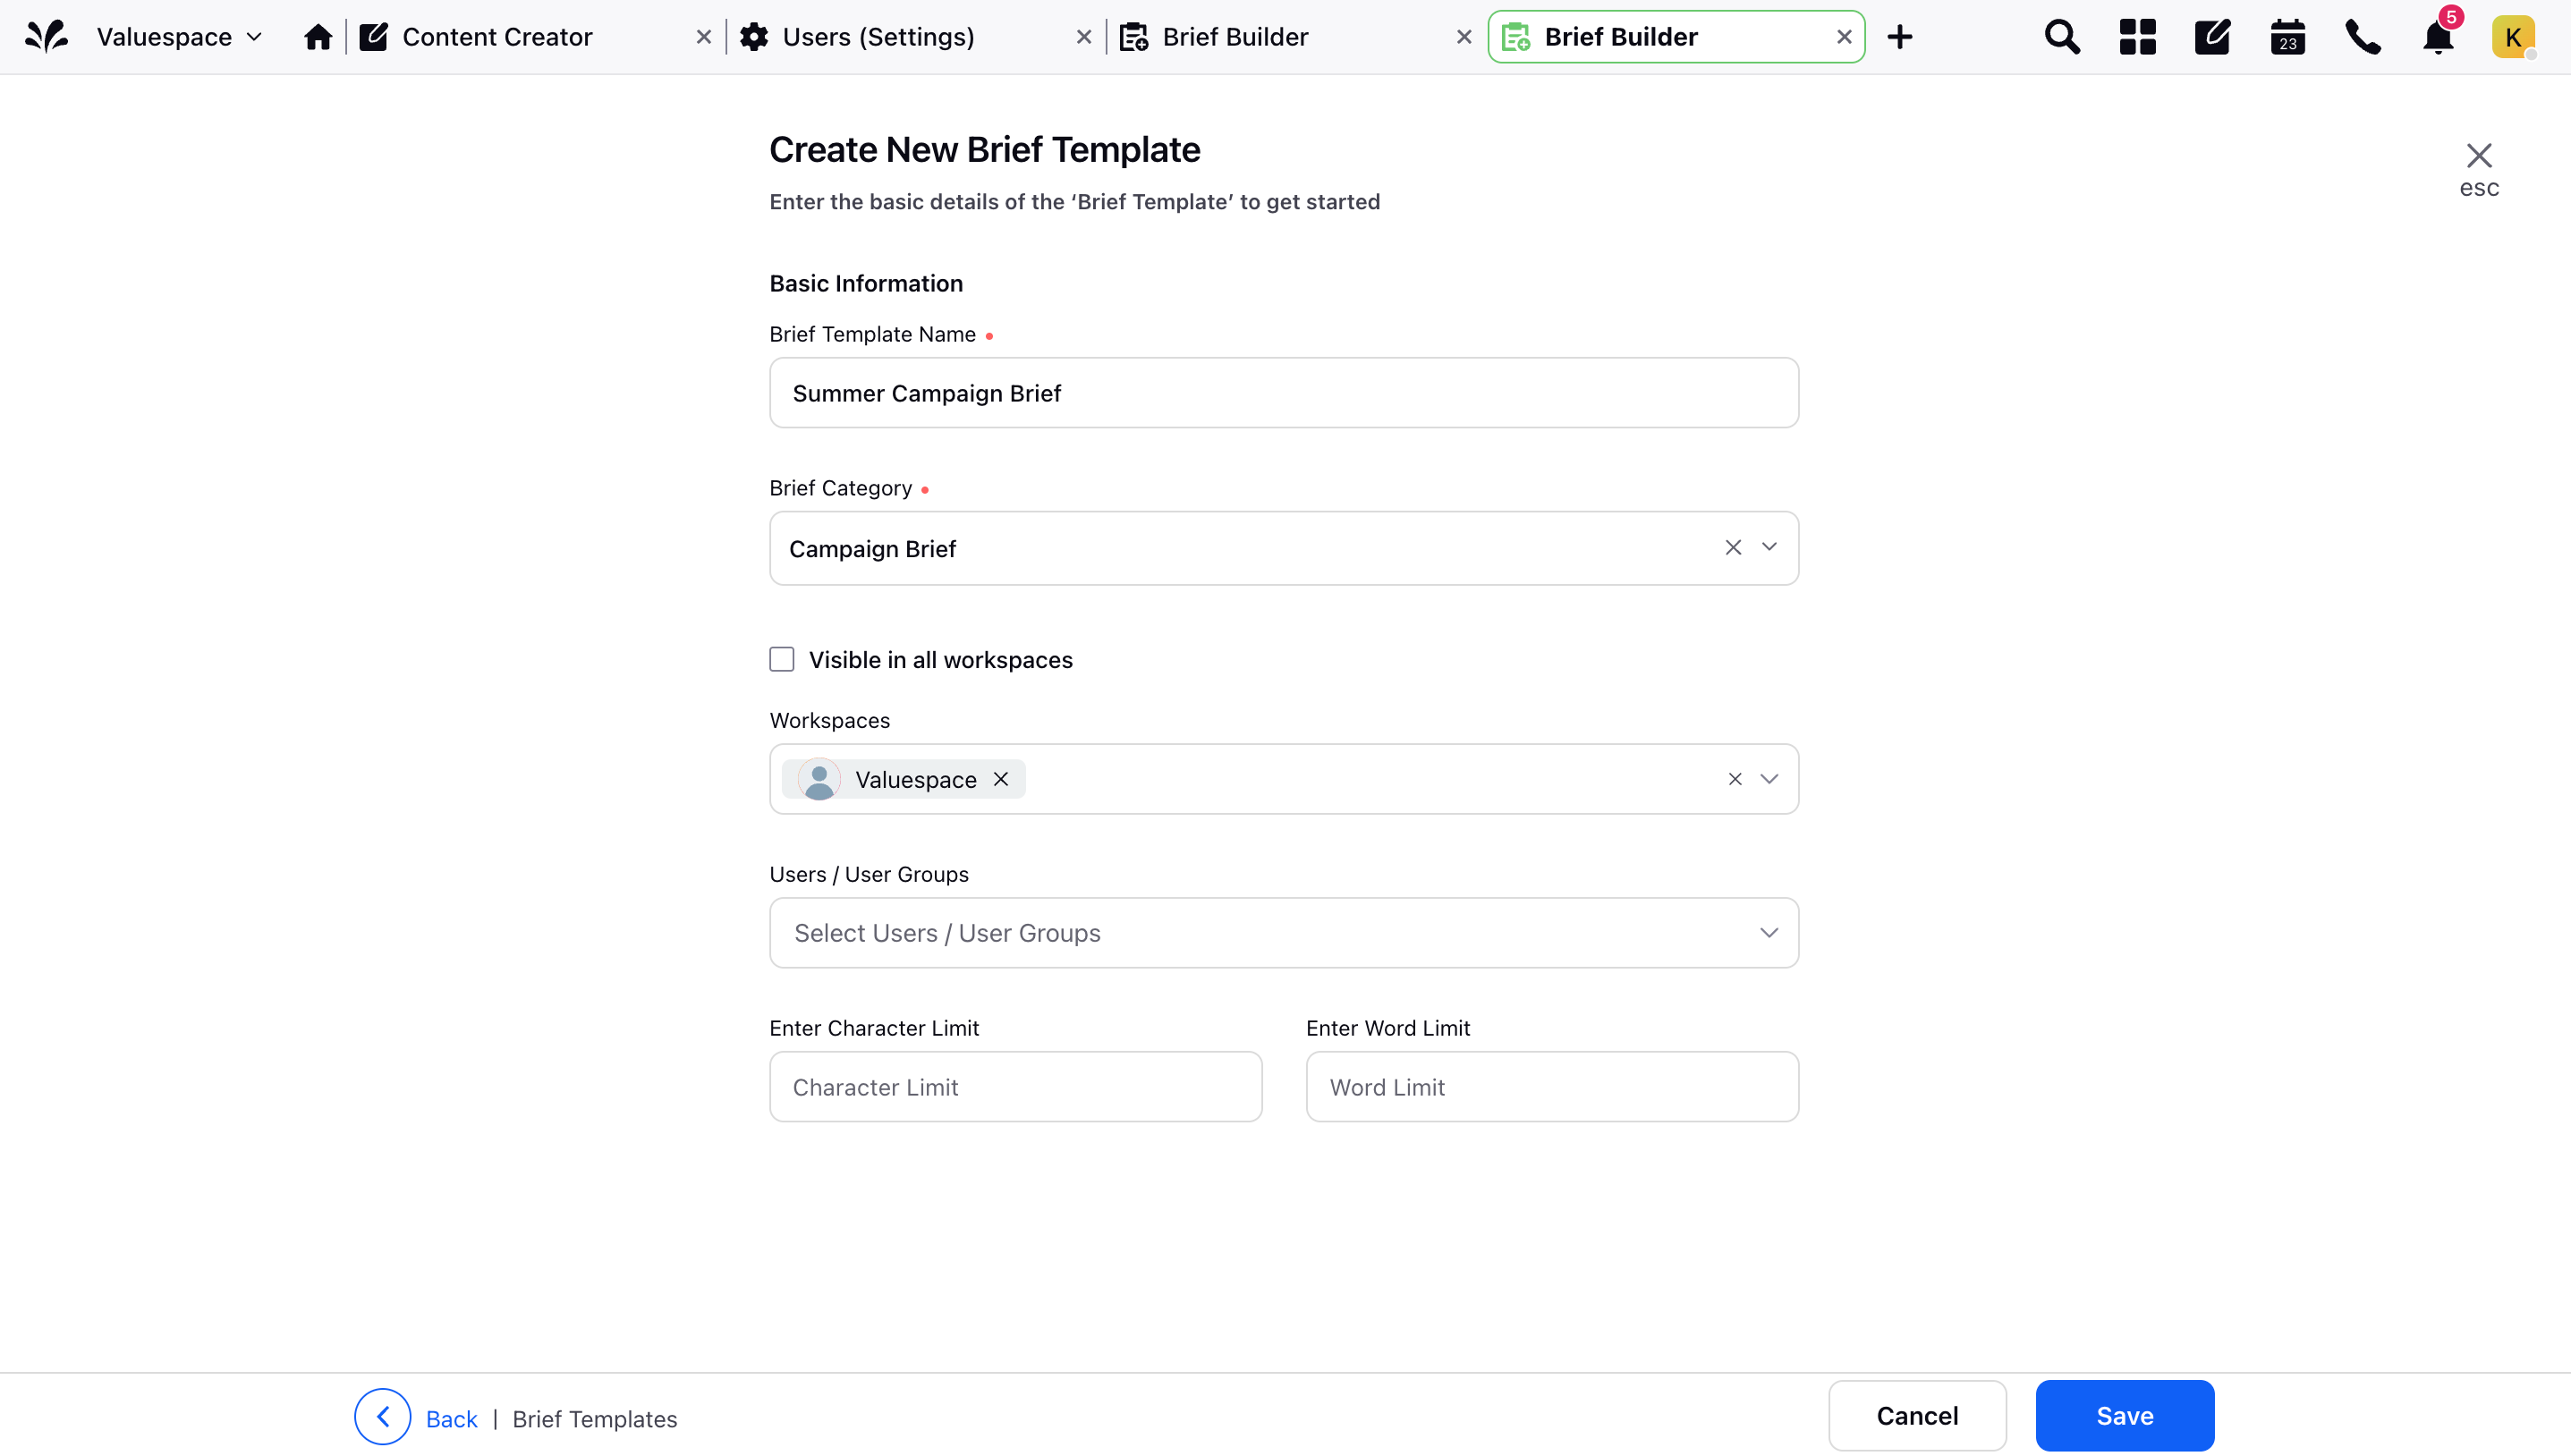
2. Click the New Brief Template button on the top right corner of the window.
3. In the window that appears, you can give your Brief or Brief Template a name, designate a category for it, manage its visibility across Workspaces and User Groups, and more.

4. In the Brief Builder window, click the Plus (+) icon. Hover over the Tag icon and select Custom Properties.

5. From the drop-down list, select the Custom Fields relevant to your Brief and then click Apply.
6. A section with the selected fields will be added to the Brief. Hover over this section to reveal options for editing, deleting, copying, or locking the Custom Fields.

7. Locking the Custom Fields ensures that no one can make any further changes to this section. Only the users with access permission to lock/unlock the Campaign (or other entity selected) can lock/unlock the section.
8. You can click the Plus (+) icon to add another set of fields to your Brief.
9. Click on Save to save your Brief or Brief Template.