Quick Filters in the Editorial Calendar
Updated
Quick Filters allow you to quickly filter your Editorial Calendar without having to manually apply filters by easily accessing saved filter views. Below, you will find out how to create, edit, delete, and apply Quick Filters.
To Create a Quick Filter
Navigate to the Editorial Calendar.
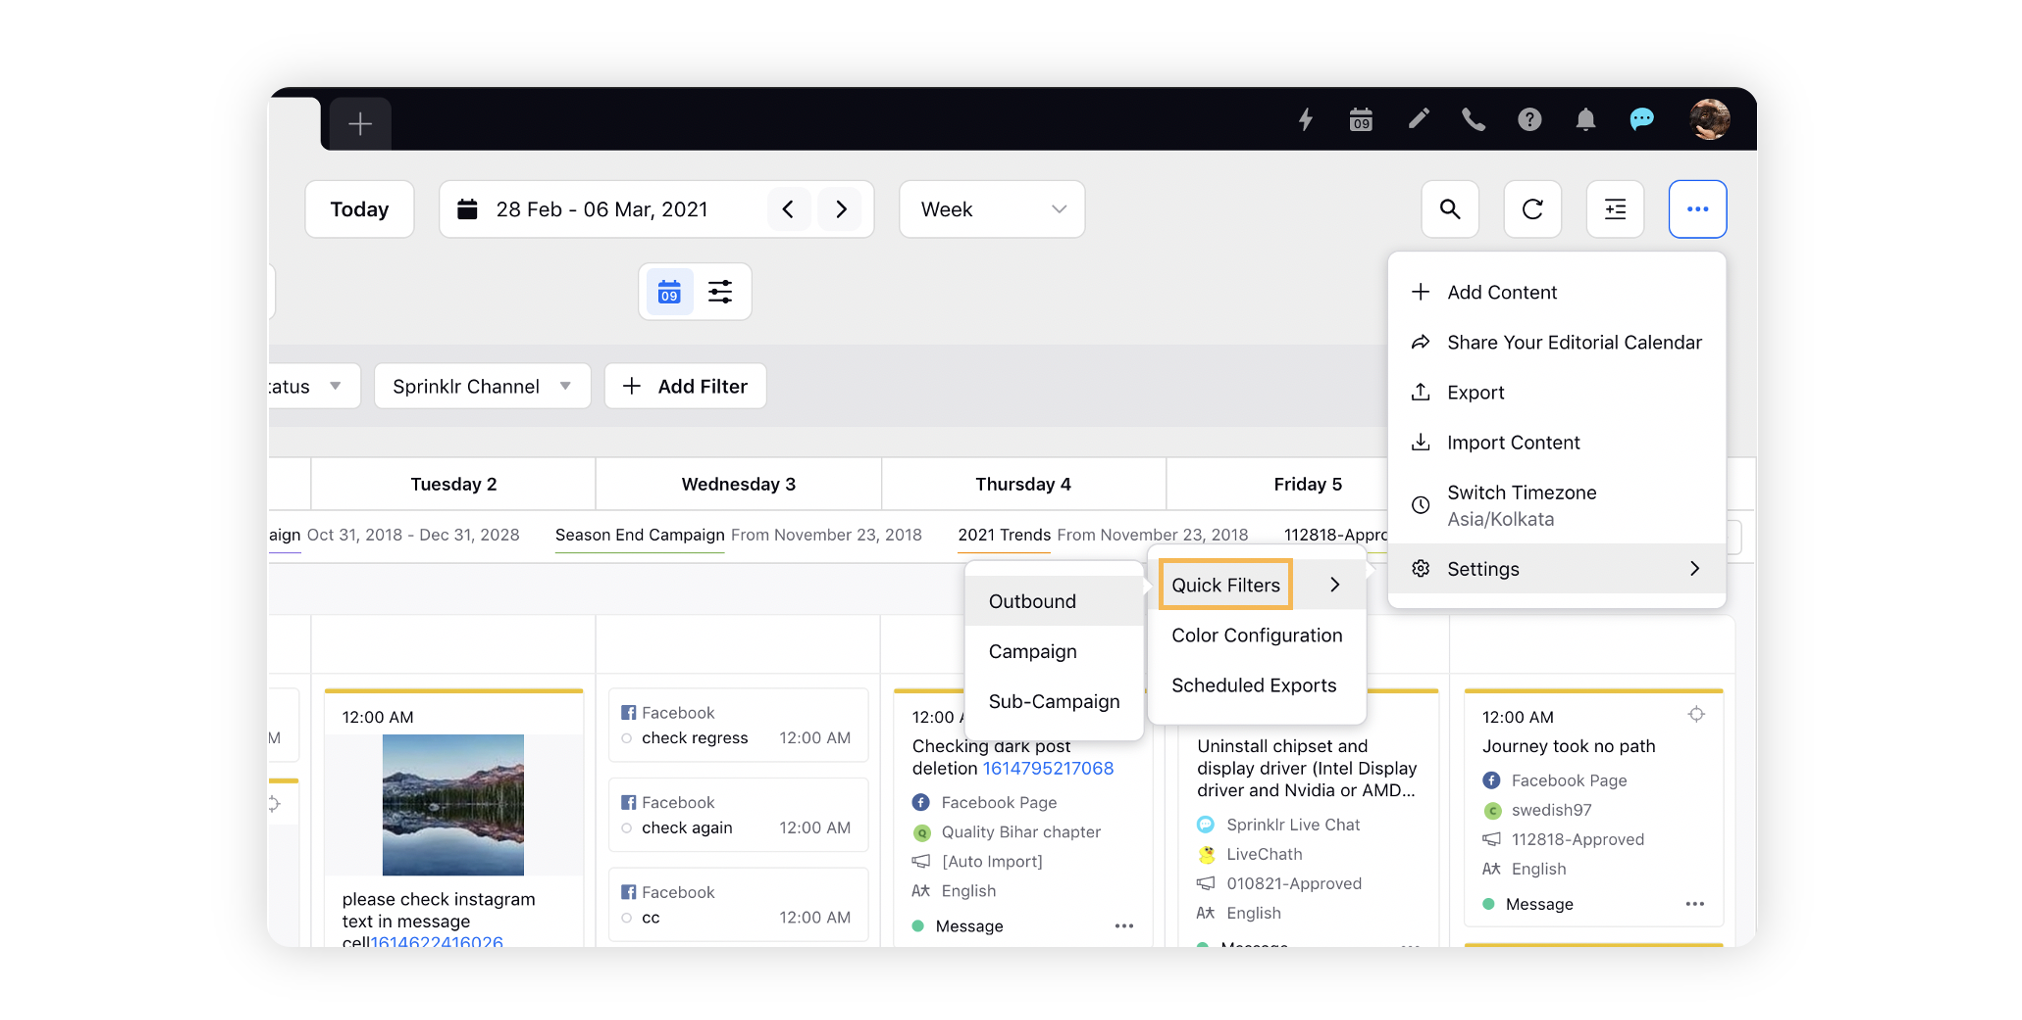
In the top right corner of the Editorial Calendar window, click the Options icon and select Settings > Quick Filters.
Select either Outbound [Message], Campaigns, or Sub-Campaigns to specify the Quick Filter type.
In the top right corner of the Quick Filters Configuration window, click Create Quick Filter to start creating a new Quick Filter.
On the Create Quick Filter window, fill in the required details. Enter a Name and a Description of your Quick Filter.
Select your Visibility preferences. Selecting Visible in all Workspaces will allow visibility for all users, globally. Selecting Workspace(s) will allow visibility for all users within the specified Workspace(s). Selecting User(s)/User Group(s) will allow visibility for only the specified user(s) or user group(s).
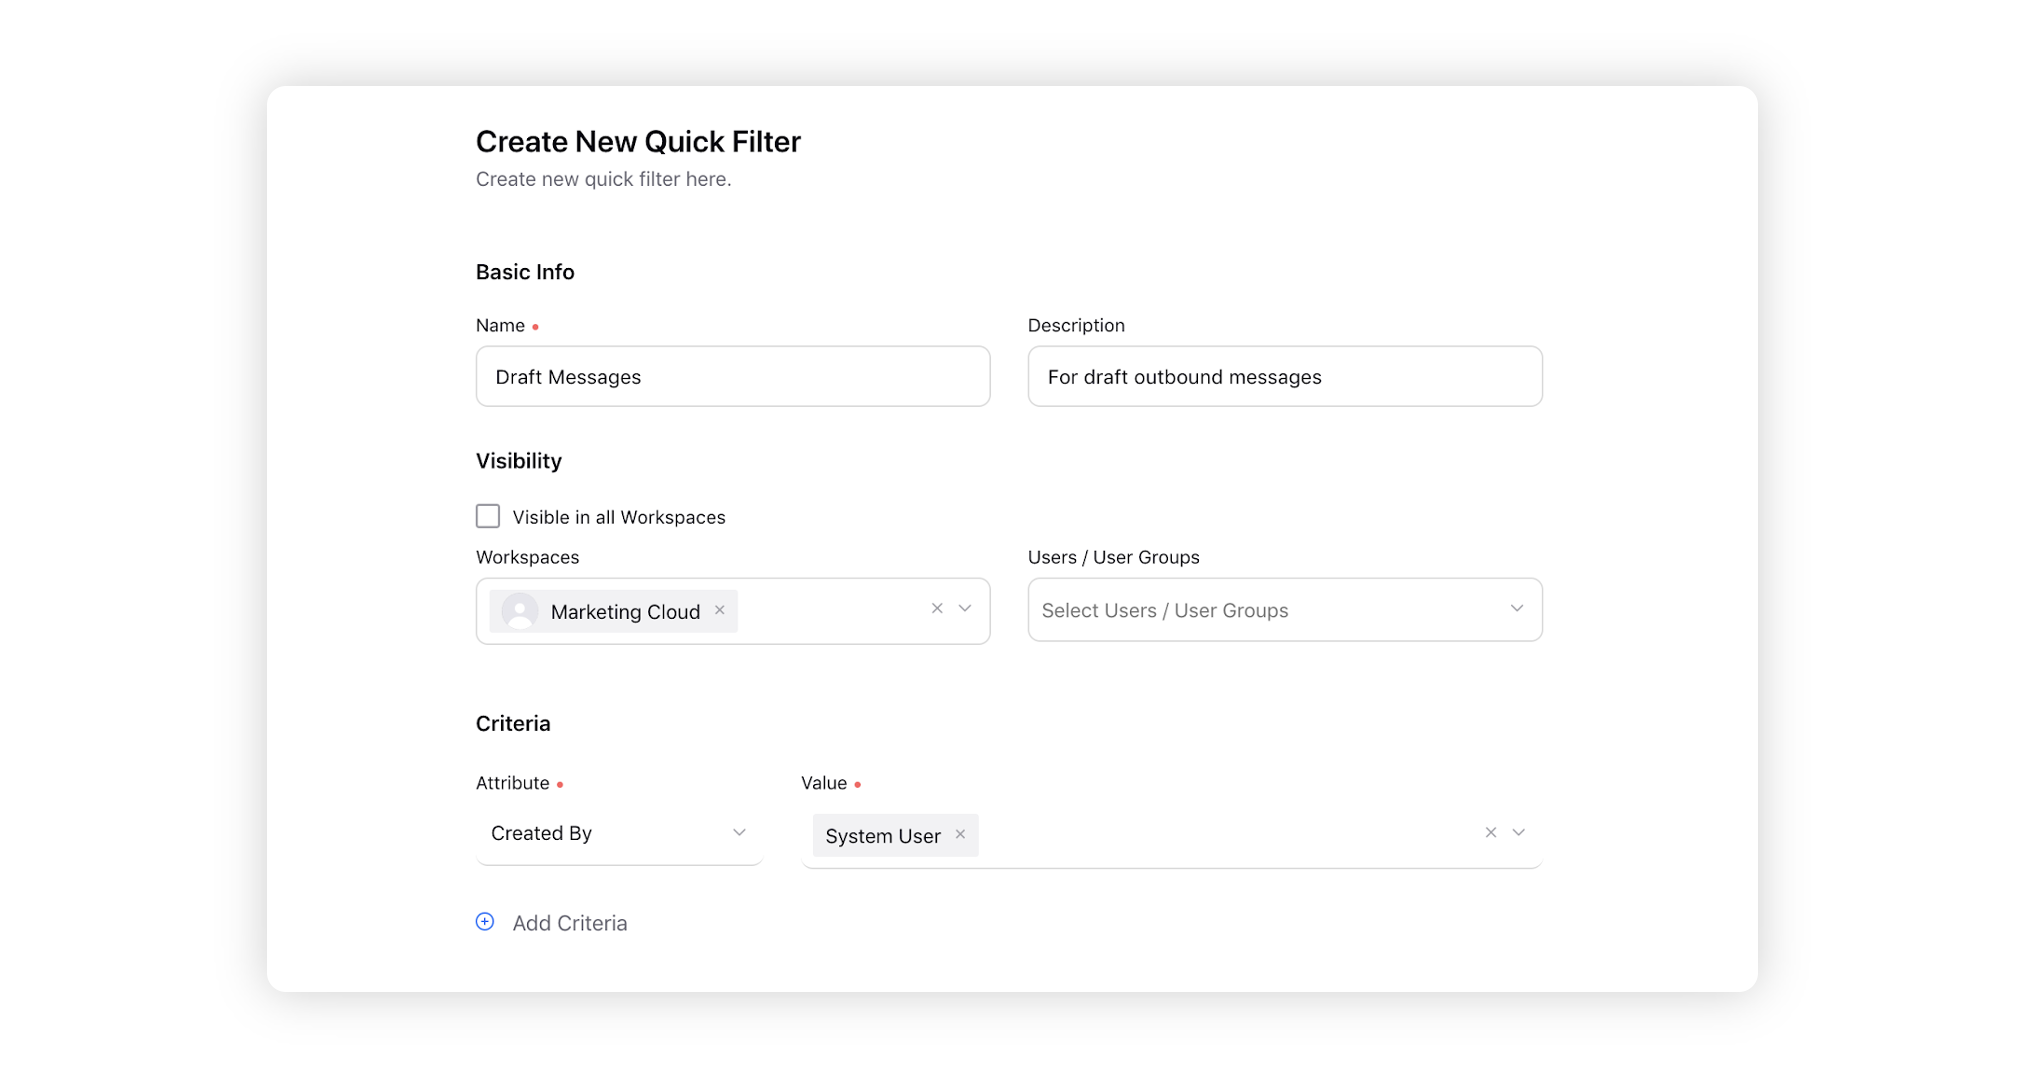
Under the Criteria section, select Attribute and Value. You may add multiple attributes and select multiple values within each attribute.
Click Save in the bottom right corner to save the changes. You will be redirected to the Quick Filters Configuration window where you can see the created quick filter.
To Edit a Quick Filter
Navigate to the Quick Filters Configuration window.
On the Quick Filters Configuration window, hover over the Options icon alongside the desired filter and select Edit.
On the Edit window, make the desired changes and click Save in the bottom right corner.
To Delete a Quick Filter
Navigate to the Quick Filters Configuration window.
On the Quick Filters Configuration window, hover over the Options icon alongside the desired filter and select Delete.
On the Delete Quick Filter pop-up window, click Delete.