Bulk Publishing - Organic Posts
Updated
Importing content in the Editorial Calendar is a great way to efficiently add a large volume of Messages, Campaigns, Sub-Campaigns, or Events. In this article, you will learn how to import content in bulk by uploading a CSV or Excel file to the Editorial Calendar.
To import data into your calendar
Click the New Tab icon. Under the Sprinklr Marketing tab, select the Marketing section, then click Editorial Calendar within Plan.
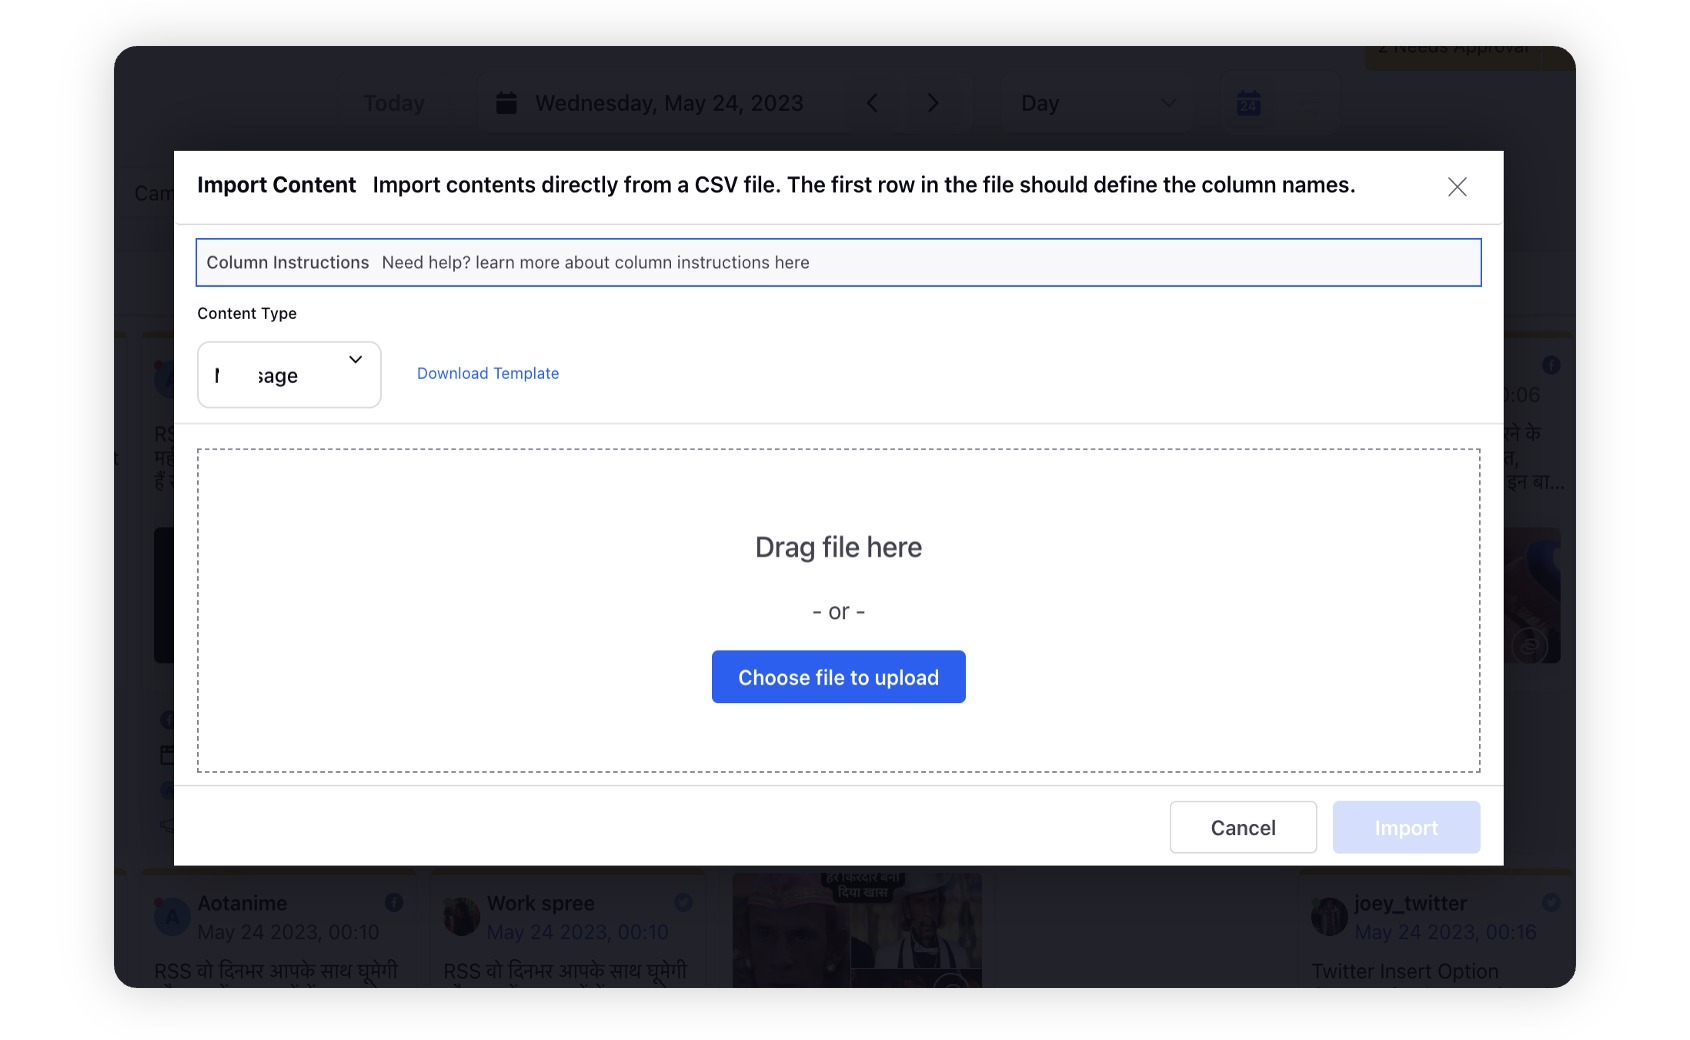
In the top right corner of the Editorial Calendar window, click the Options icon and select Import Content.
On the Import Content window, select the Content Type you want to import - Message, Event, Campaign, or Sub-Campaign.
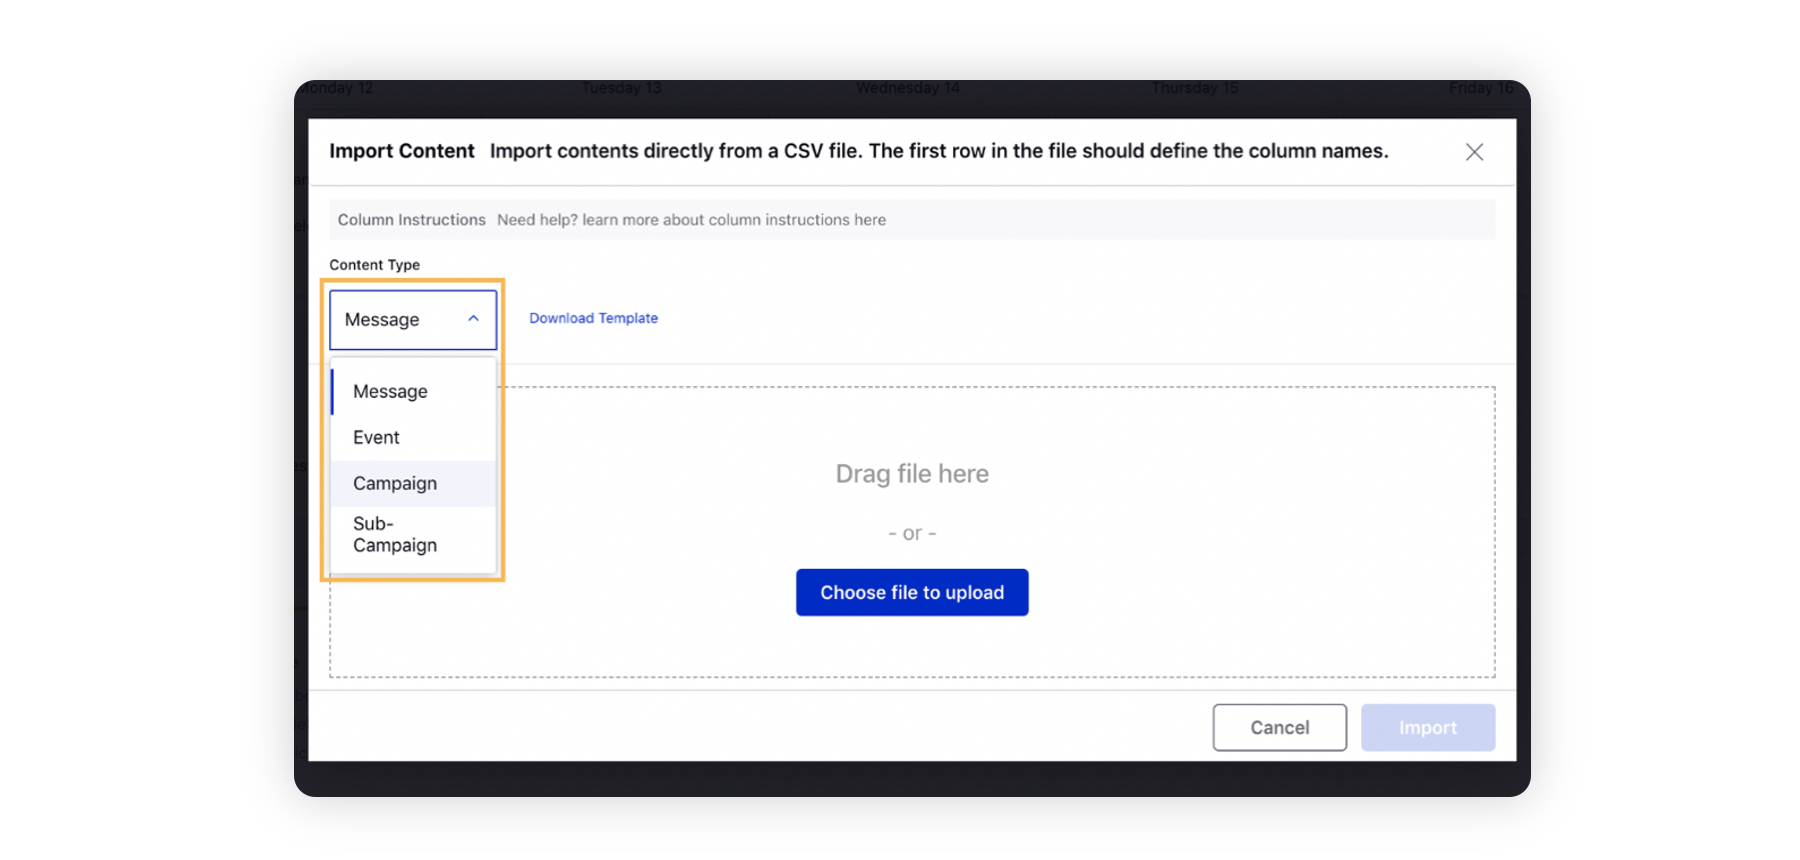
Click Download Template to download the sample template for the selected content type. The system will initiate a download.
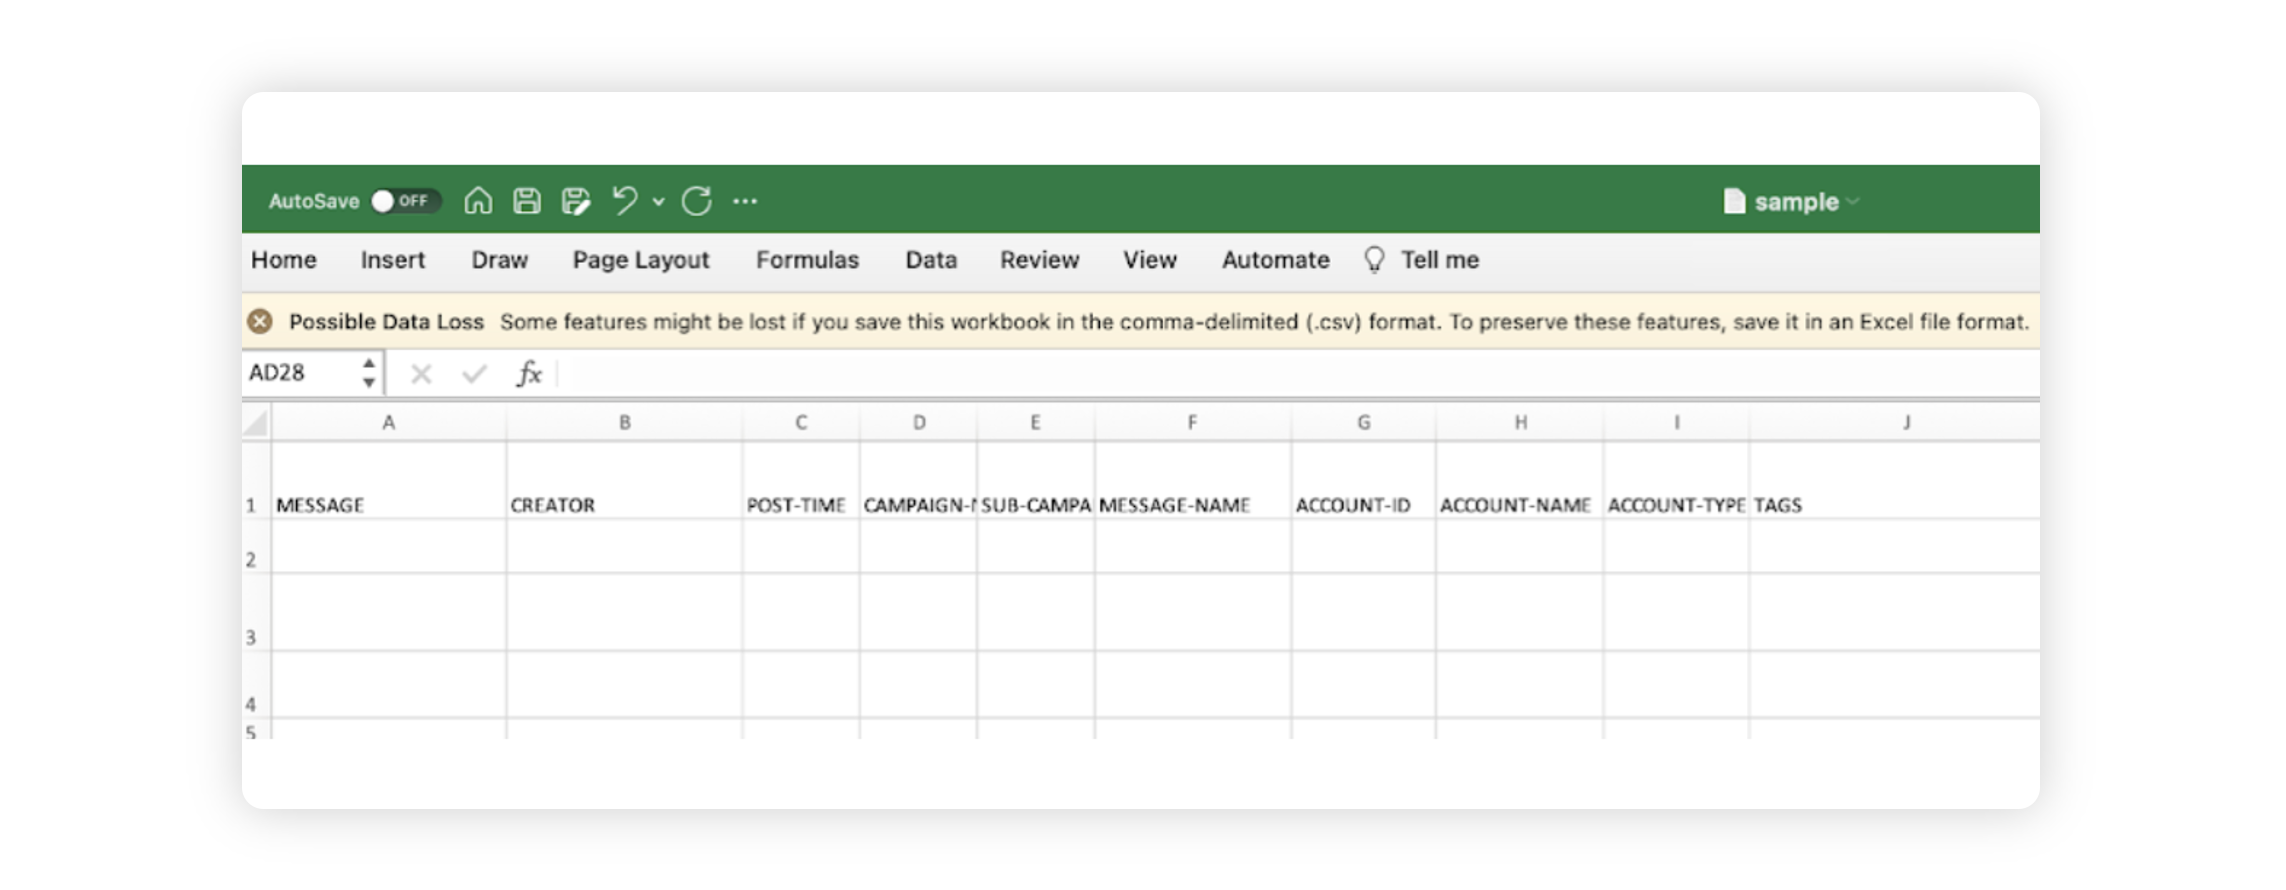
Fill in the template and save it for further use.
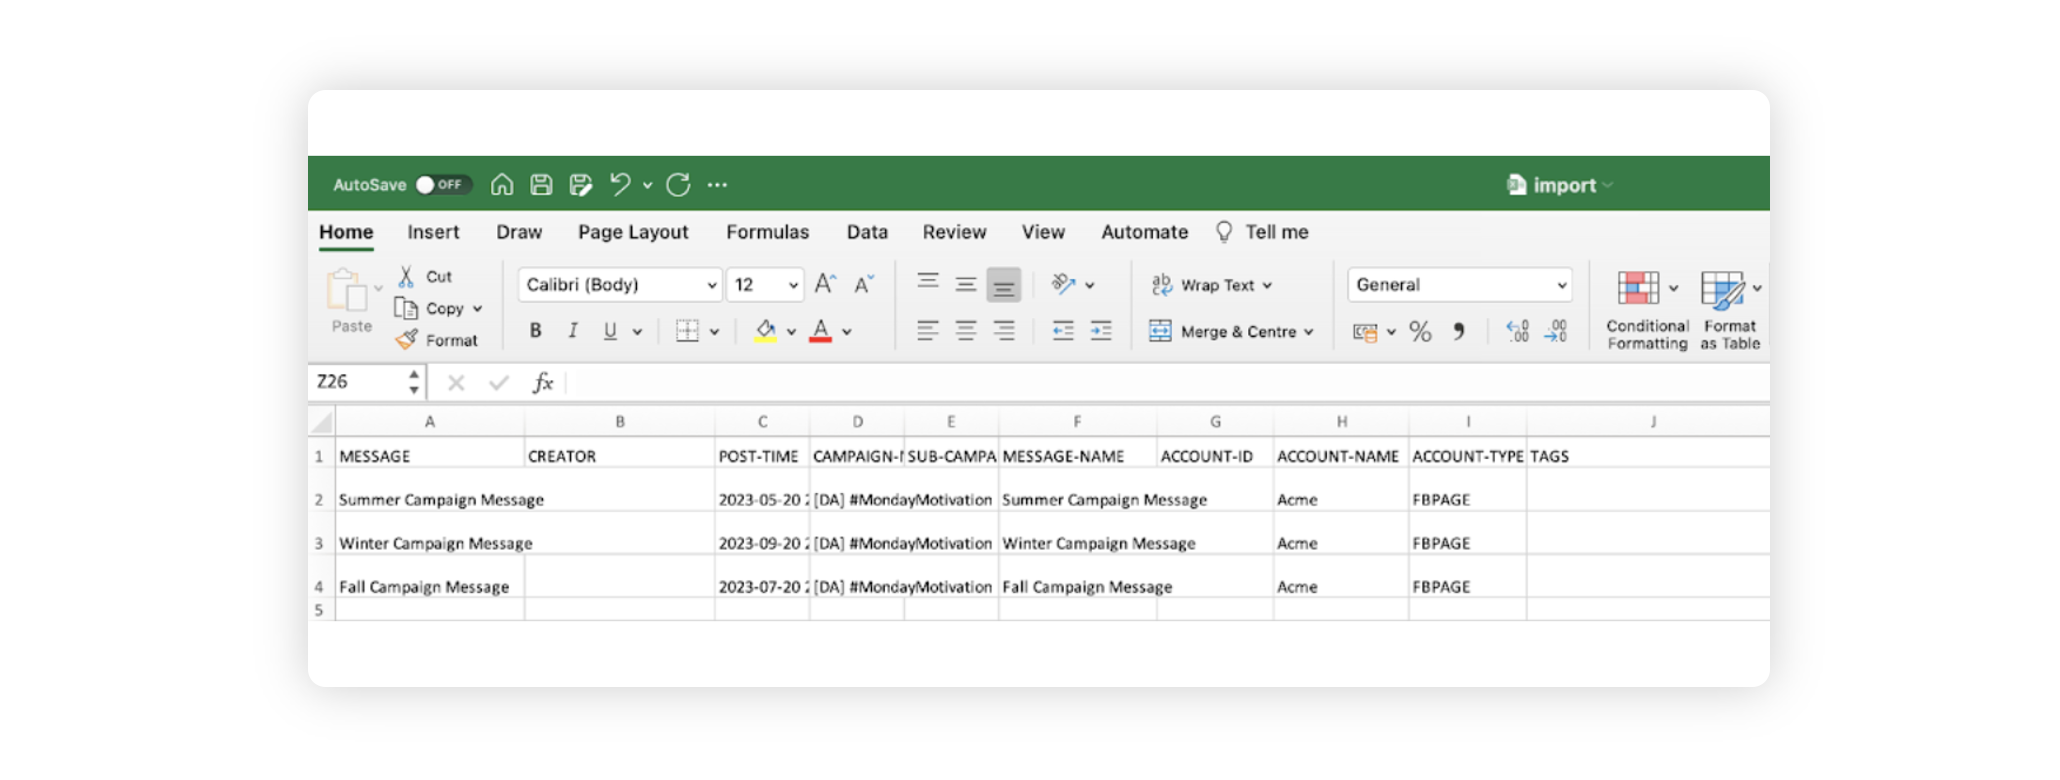
For more information on what to fill for the Message content type, please see Message Template — Field Descriptions. While importing Messages from scratch, you have to fill in the following mandatory fields: Message Name, Post time, Campaign Name, Account ID, or Account Type and Name.
For more information on what to fill in for the Event content type, please see Event Template — Field Descriptions. While importing Events from scratch, you have to fill in the following mandatory fields: Title, Start Date, End Date
For more information on what to fill for the Campaign content type, please see Campaign Template — Field Descriptions. While importing Campaigns from scratch, you have to fill the following mandatory fields: Title, Status
For more information on what to fill for the Campaign content type, please see Sub-Campaign Template — Field Descriptions. While importing Sub-Campaigns from scratch, you have to fill the following mandatory fields: Title, Status and Parent Campaign.
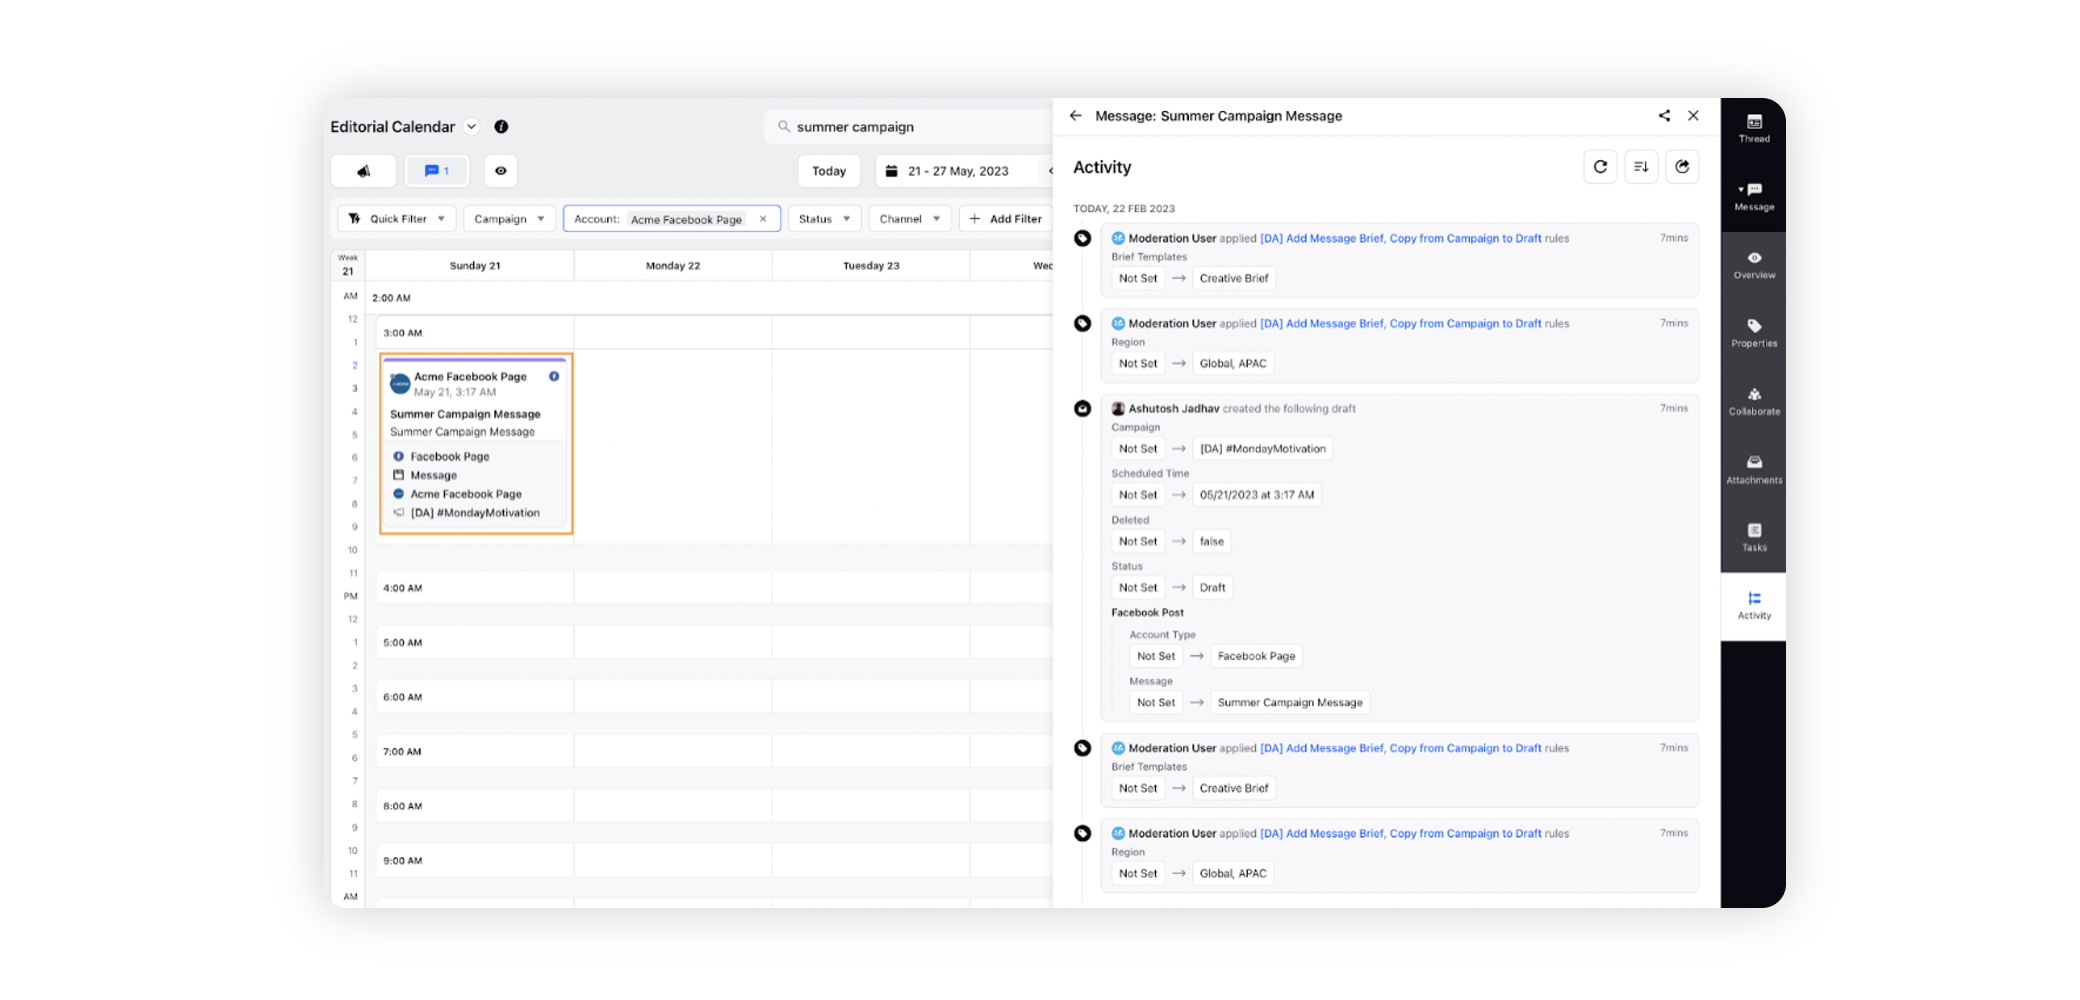
Click Choose file to upload and select the file or drag and drop the file you saved from your device to the Import Content window. Once successful you will see the overview of the import.
Click Import in the bottom right corner of the window. The excel import of the above-mentioned entities will have the custom field name as the header of the column.
You can view the message in the editorial calendar and in the third pane of the message you can view the activity regarding its import.
Message Template — Field Descriptions
On bulk importing messages, you can add sub-campaigns and tag messages. The sub-campaign names are visible as a standard column in the import template of messages. Apart from this, you can verify the campaign and sub-campaign mapping while importing the messages.
Term | Description |
Message | The message entity comprises a list of all outbound messages which are imported as a part of the Global Editorial Calendar. |
Creator | The person concerned with the creation of the respective message. It is defined as 'name@domain.com'. (This field will defaults to the importing user if not provided). |
Post-Time | Schedule a particular post as per the requirements of the user. The scheduled time for the post is in the format: MM/dd/yyyy hh:mm:ss a z. e.g. 04 /25/2015 10:25:00 am GMT-08:00. |
Campaign-Name | Provide the name of the associated Campaign which concerns a respective message. |
Sub-Cmapaign Name | Provide the name of the associated Sub-Campaign which concerns a respective message. |
Account-ID | The ID of the account from which the message should be published (the Account ID can be obtained from Account Settings by hovering over the Account name). |
Account Name | The name of the account from which the message should be published. (Account name is referred to as the designated screen name of any social channel. While importing file from Global Editorial Calendar, users must make sure that they use the actual screen name present on the social channel). |
Account Type | The channel of the publishing Account. |
Tags | Enter message tags separated by semi-colons ( ; ). |
Direct | If set to TRUE, Sprinklr will skip importing as drafts and instead directly schedule or post the message. |
Approver | The email address of the Approver. If this is present the message will go into the approval workflow. Enter 'owner' if you want the respective account owner to approve this message. |
Approver Notes | Notes provided to be read by the Approver. |
Short-URL | The domain name of the custom short url e.g. spr.ly. |
Ignore | To skip importing a specific message row. |
Approval-Path-Name | The name of the Approval Path. If both approver and approval path name are present, then Approval Path will be chosen. |
Event Template — Field Descriptions
When importing Events, list individual events on separate rows in your .CSV file.
Campaign Template — Field Descriptions
Term | Description |
Title | Provide a name for your imported Campaign. |
Description | Give an optional description, if desired. |
Start Date | Set the start date for your Campaign(format: 02/23/2015 8:30:00 PM GMT-05:30). |
End Date | Set the end date for your Campaign (format : 02/23/2015 8:30:00 PM GMT-05:30). |
Tags | Enter Campaign Tags separated by semi-colons ( ; ). |
Color | Provide an associated color (using the color hex code) if desired. |
Sub-Campaign Template — Field Descriptions
Term | Description |
Title | Provide a name for your imported Sub-Campaign. |
Description | Give an optional description. |
Parent Campaign | Enter the name of the parent campaign. |
Start Date | Set the start date for your Sub-Campaign. (format: 02/23/2015 8:30:00 PM GMT-05:30) |
End Date | Set the end date for your Sub-Campaign. (format : 02/23/2015 8:30:00 PM GMT-05:30) |
Tags | Enter Sub-Campaign tags separated by semi-colons ( ; ). |
Color | Provide an associated color (using the color hex code) if desired. |
Status | Enter the status of the Sub-Campaign. |
*Required field
** Either ACCOUNT_ID or a combination of ACCOUNT-NAME and ACCOUNT-TYPE is required
Bulk Import Messages as Draft for Past Dates
You can bulk import messages as draft posts for past dates within the Editorial Calendar. If the value for column DIRECT is FALSE then you can add past date and time as values under the POST-TIME column. This capability allows you to efficiently populate the calendar with content for previous dates, facilitating better planning and organization of past messaging activities.
Bulk Update Outbound Posts Tags & Custom Fields
Using the import capability in Editorial Calendar, you can bulk update Tags / Custom Fields. Users can also update the campaign tagged to the outbound message via import. This capability will save time and housekeeping effort by updating tags and custom fields for your outbound posts in bulk.
Note that bulk updates can be done by referencing the Entity ID of scheduled and published posts and adding “update” as the value for OPERATION-TYPE in import excel file.
Only OPERATION-TYPE, ENTITY-ID and custom field(s) name are the columns required for updating the custom fields. Only OPERATION-TYPE, ENTITY-ID and TAGS are the columns required for updating tags. Entity ID is the Post-ID of the outbound post, which can be accessed in the properties section of the third pane. Use “;” separator, to include multiple values for the same custom field while importing content.

The screenshot above shows Region and Team as the custom fields, with EMEA, South Asia, Product, and Marketing as their corresponding values. Users should ensure that both the custom fields and their values are already created in the environment.