Configuration Steps for Callback Monitoring
Updated
Callback functionality is available by default for Supervisors. The Scheduled Callbacks dashboard can be filtered, sorted or modified as required.
Filters
Supervisors can use the various filters to segregate callbacks according to their requirements.

The following table describes the available filters on the Scheduled Callbacks dashboard:
Fields | Description |
Campaign | Using this filter, a supervisor can see the list of all callbacks for a particular campaign. |
Assigned To | Using this filter, a supervisor can see the list of all callbacks for a particular agent. |
Assignee Type | Using this filter, a supervisor can see the list of all callbacks for a particular agent queue. |
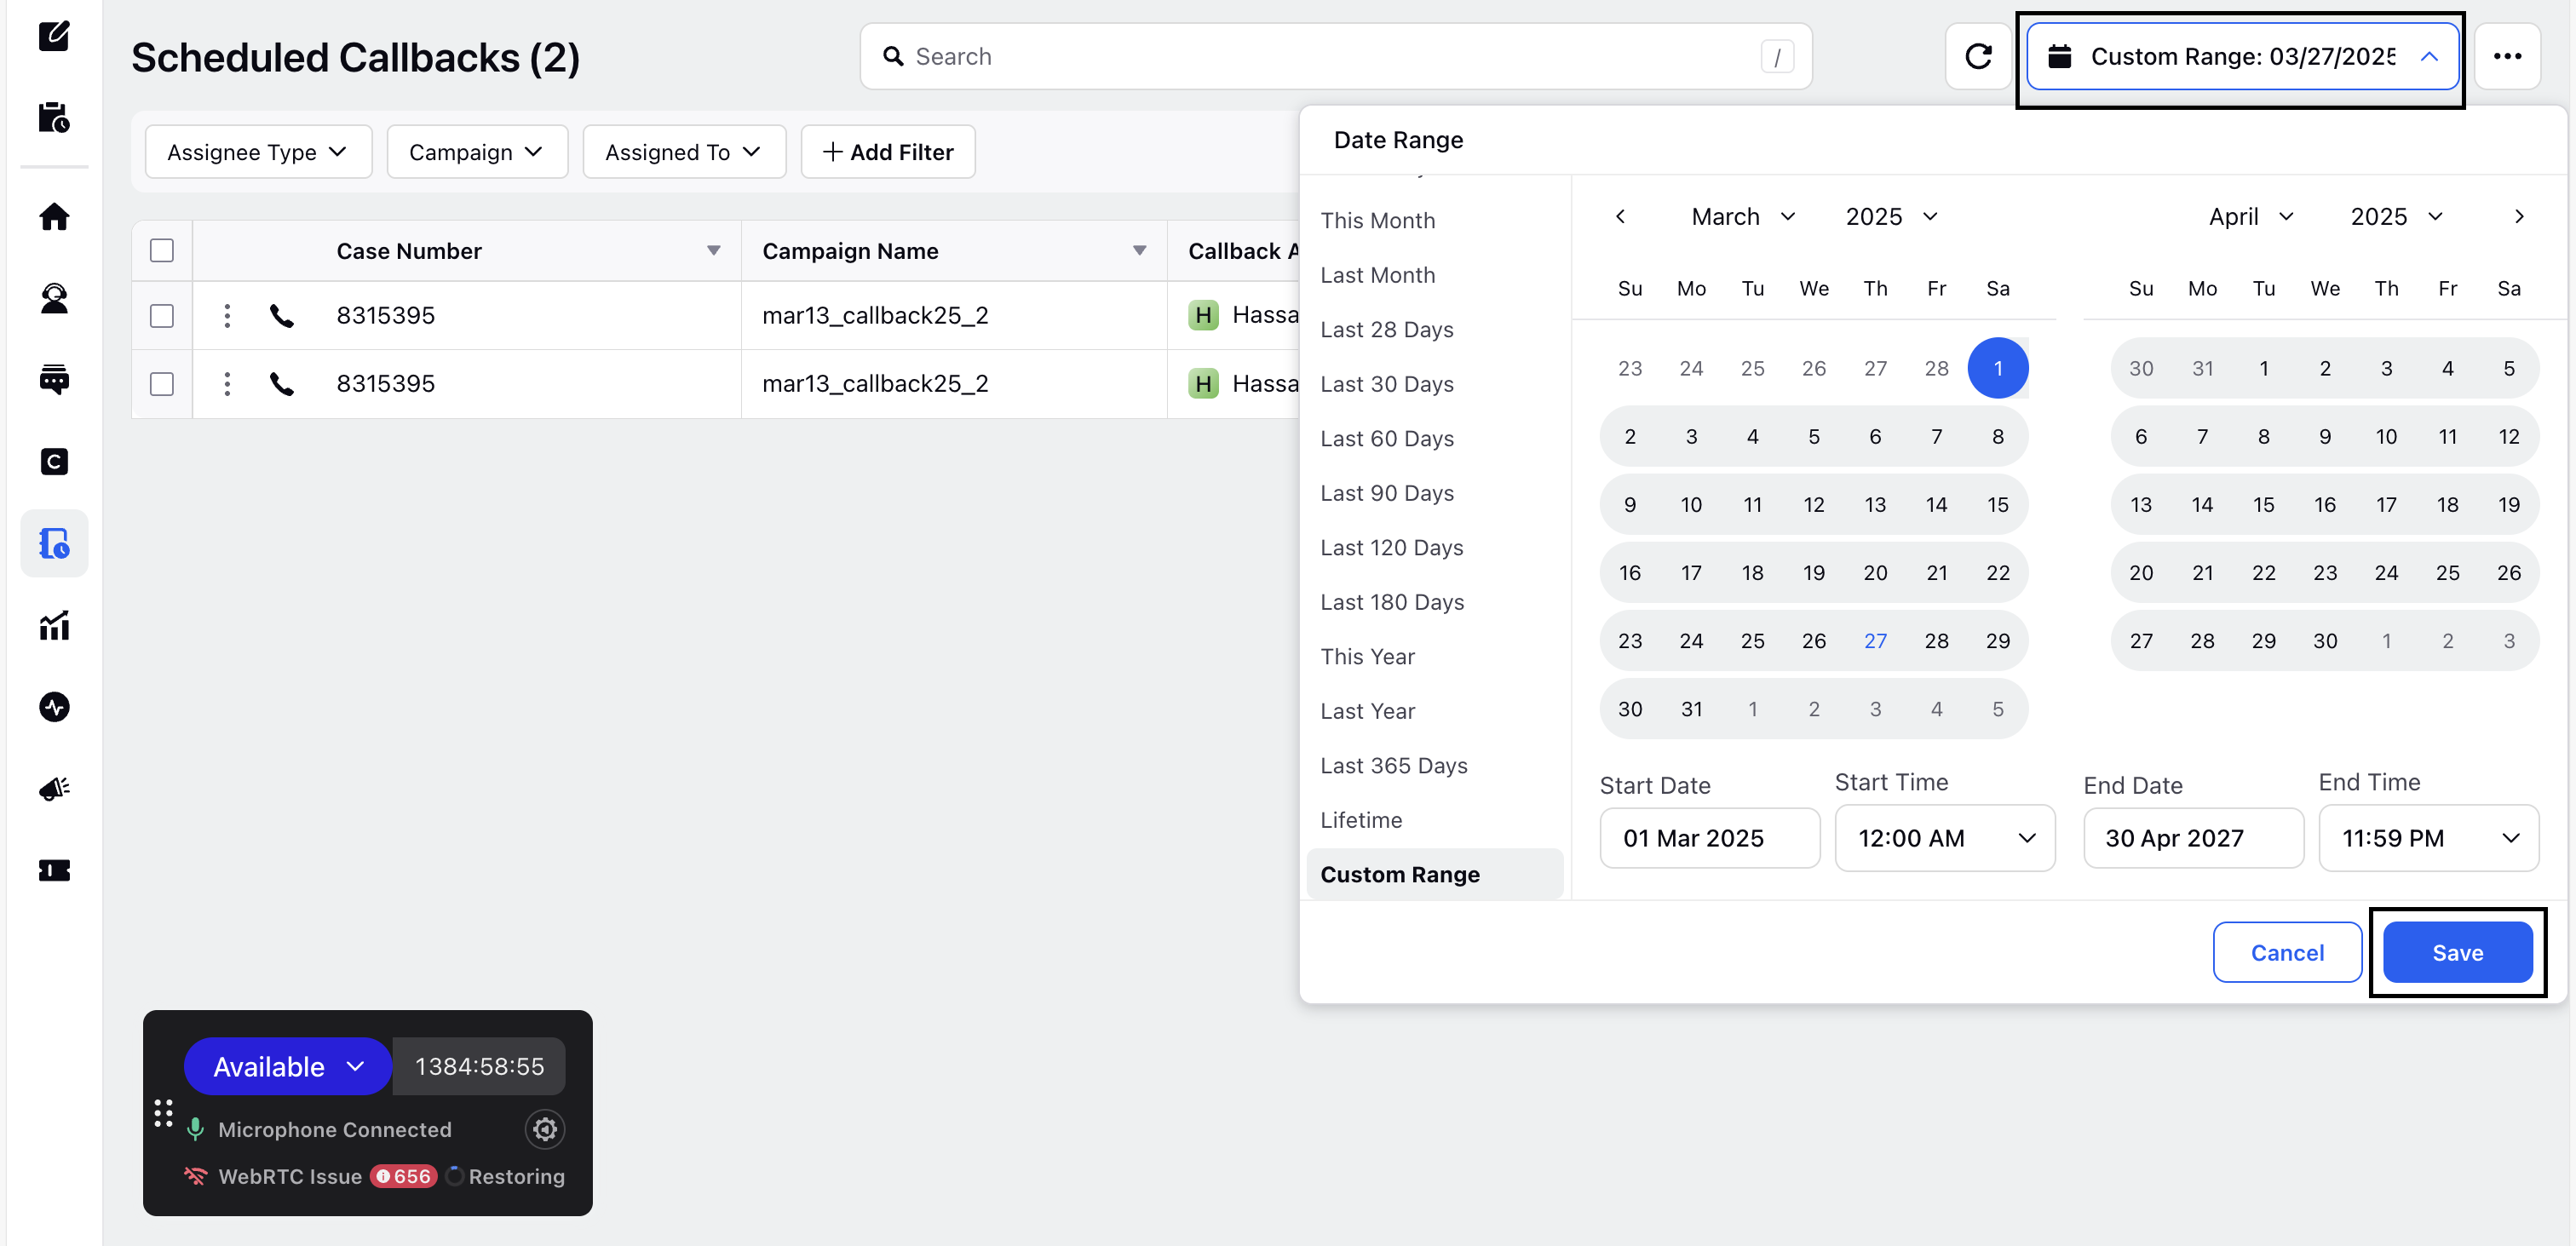
Date Range | Using this filter, a supervisor can view all callbacks within a specified date range. Supervisors can choose from pre-defined date ranges such as Today, Last 30 Minutes, This Week, and more. Additionally, they can define a custom date range using the Custom Range option. For long-term planning, supervisors can also view callbacks scheduled up to the next three years. To select a custom date range, follow these steps: 1. In the Schedule Callbacks dashboard, click the calendar icon in the top-right corner to open the date picker.
2. In the left pane of the date picker, click Custom Range. Next, select the desired date range and click Save.
The Scheduled Callbacks dashboard displays a list of callbacks scheduled within the selected date range. |

Quick Filters
Supervisors can create quick filters using filtering criteria based on their requirements and save them for reuse. Quick filters help reduce repetitive manual filtering and enable supervisors to focus on callbacks that require immediate attention, improving follow-up efficiency.

Sort By
Use the Sort By option to sort the list of Scheduled Callbacks by desired dimensions such as created time, completed time, due time, etc.

Refresh
Click the Refresh icon at the top to update all schedule callback columns.
Manage Columns
You can manage the Callback columns by enabling or disbaling any column using the Manage Column option.
