Schedule a callback when waiting on IVR
Updated
Sprinklr IVR provides you the ability to take inputs from customers and cater to their queries when they reach out to your brands on voice as a medium. In this article, you will learn how admins can configure IVR to schedule a callback when customers wait to connect to an agent.
Schedule a callback from IVR
When customers reach out to IVR, they often choose to connect with an agent to report or seek help from them. During this journey, there can be two scenarios:
Agents are available to take calls - Customers then connect with an agent
Agents are busy on other calls - Customer waits in the queue on IVR
In the second scenario, brands want to provide an option to schedule a callback as the customer waits and trigger the callback as soon as any agent becomes available to take calls. Sprinklr IVR can be configured in a way that asks customers for confirmation to schedule a callback when they are waiting in the queue for more than the timeout period set in the Assign to Agent node. You can configure the IVR as
Assign To Agent node - Set timeout duration and work queue.
Work Queue Properties node - Get work queue-related properties from this node.
Decision Box node - Add decision in the timeout path of the assign to agent node.
Schedule Callback node - Set the work queue and time for the callback.
Use Assign To Agent node
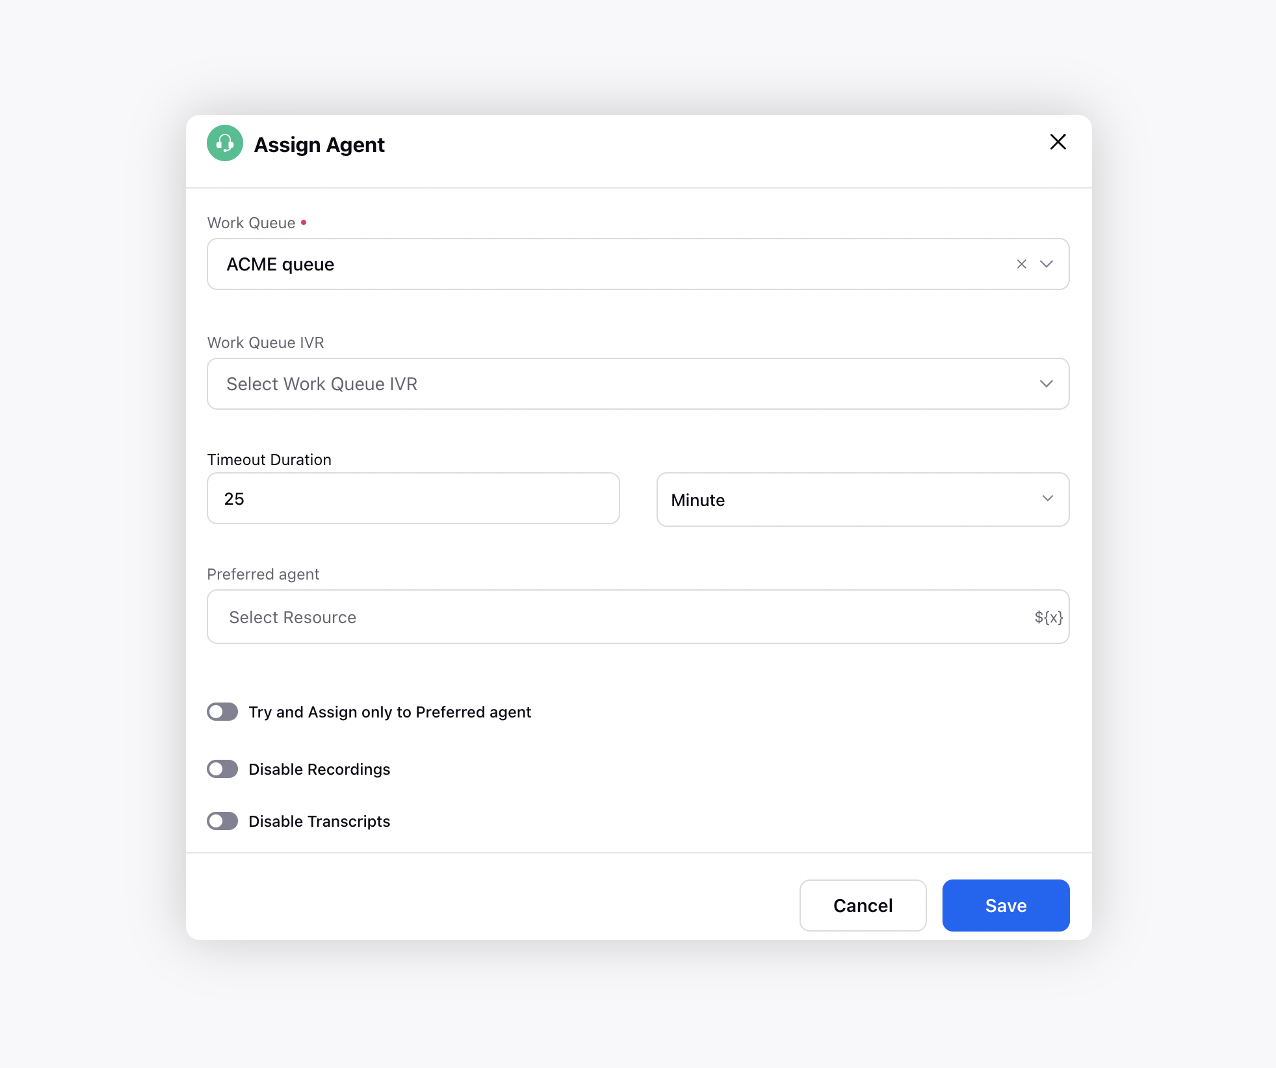
You need to configure the Assign to Agent node in the IVR. To know more about this node, visit manage customer inflow nodes. Here, you need to specify
Work Queue - Select the work queue from the dropdown to which you want the calls to be assigned.
Timeout Duration - It is the maximum time the user will wait till the call is successfully transferred and received by an agent. As soon as this time is exceeded, the user will be removed from the queue and moved to the timeout leg. For example, if the timeout duration is 25 sec, then the customer will be moved to the timeout leg if they have not been assigned to an agent within 25 sec.
Use Work Queue Properties node
In the timeout path of Assign to Agent node, you need to fetch work queue properties to get queue wait time. To know more about this node, visit system action nodes of IVR. Here, you need to specify
Work Queue - Select the work queue from the dropdown.
Work Queue Properties - Define a variable for a particular work queue which the IVR can use later for handling or decision-making.

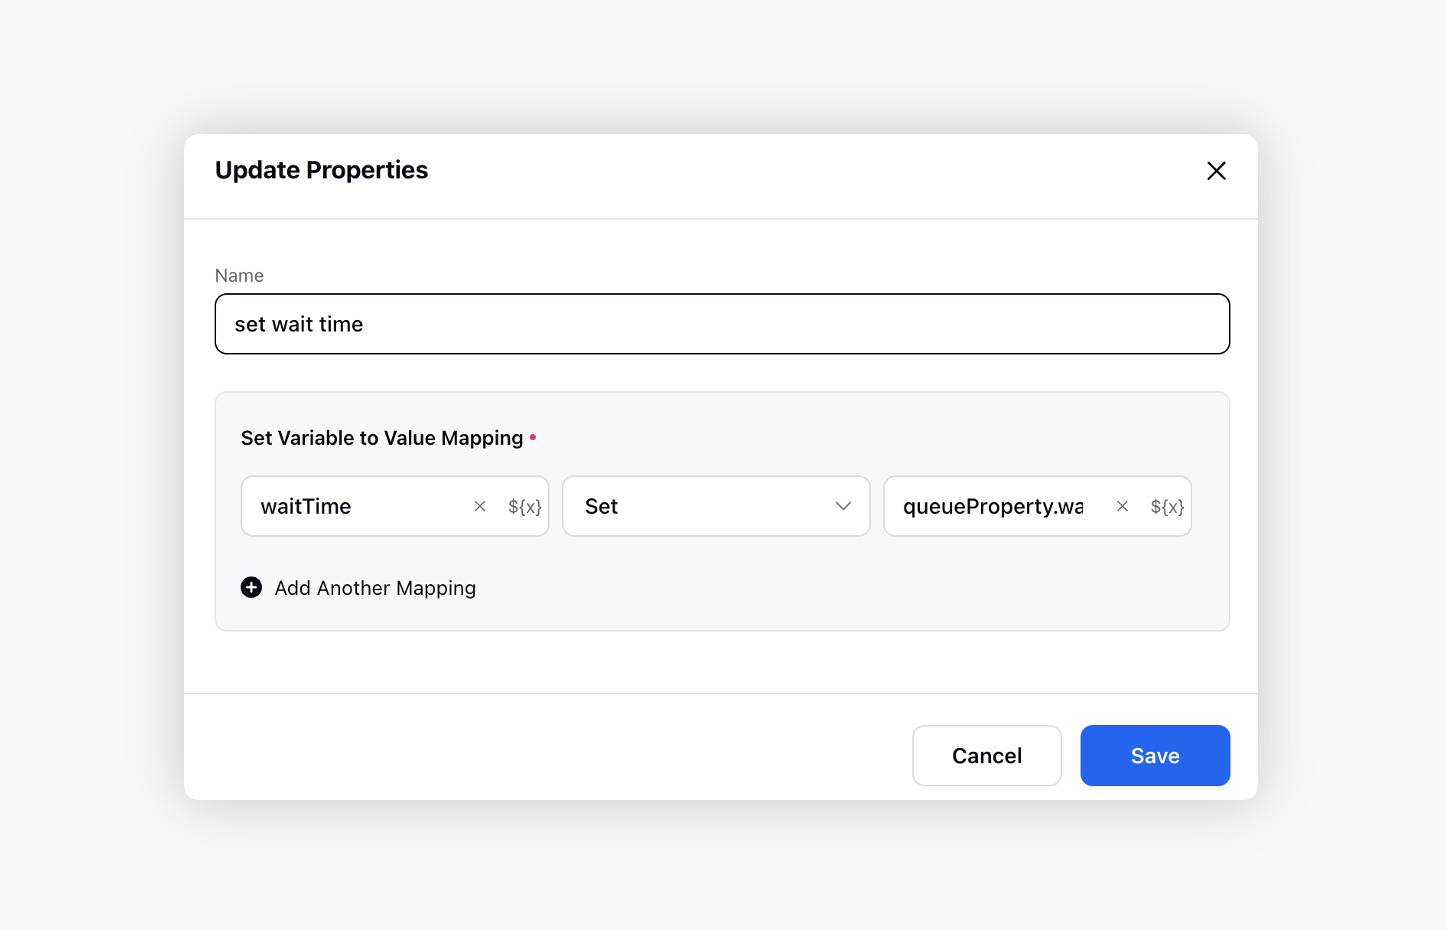
After this node, open the Set Properties node, and set waitTime equal to
workQueueProp.waitTimeForWorkQueue / Integer.valueOf(60000)
Here, waitTimeForWorkQueue is returned in milliseconds, hence we divide it with 6000 to return the waitTime in minutes.
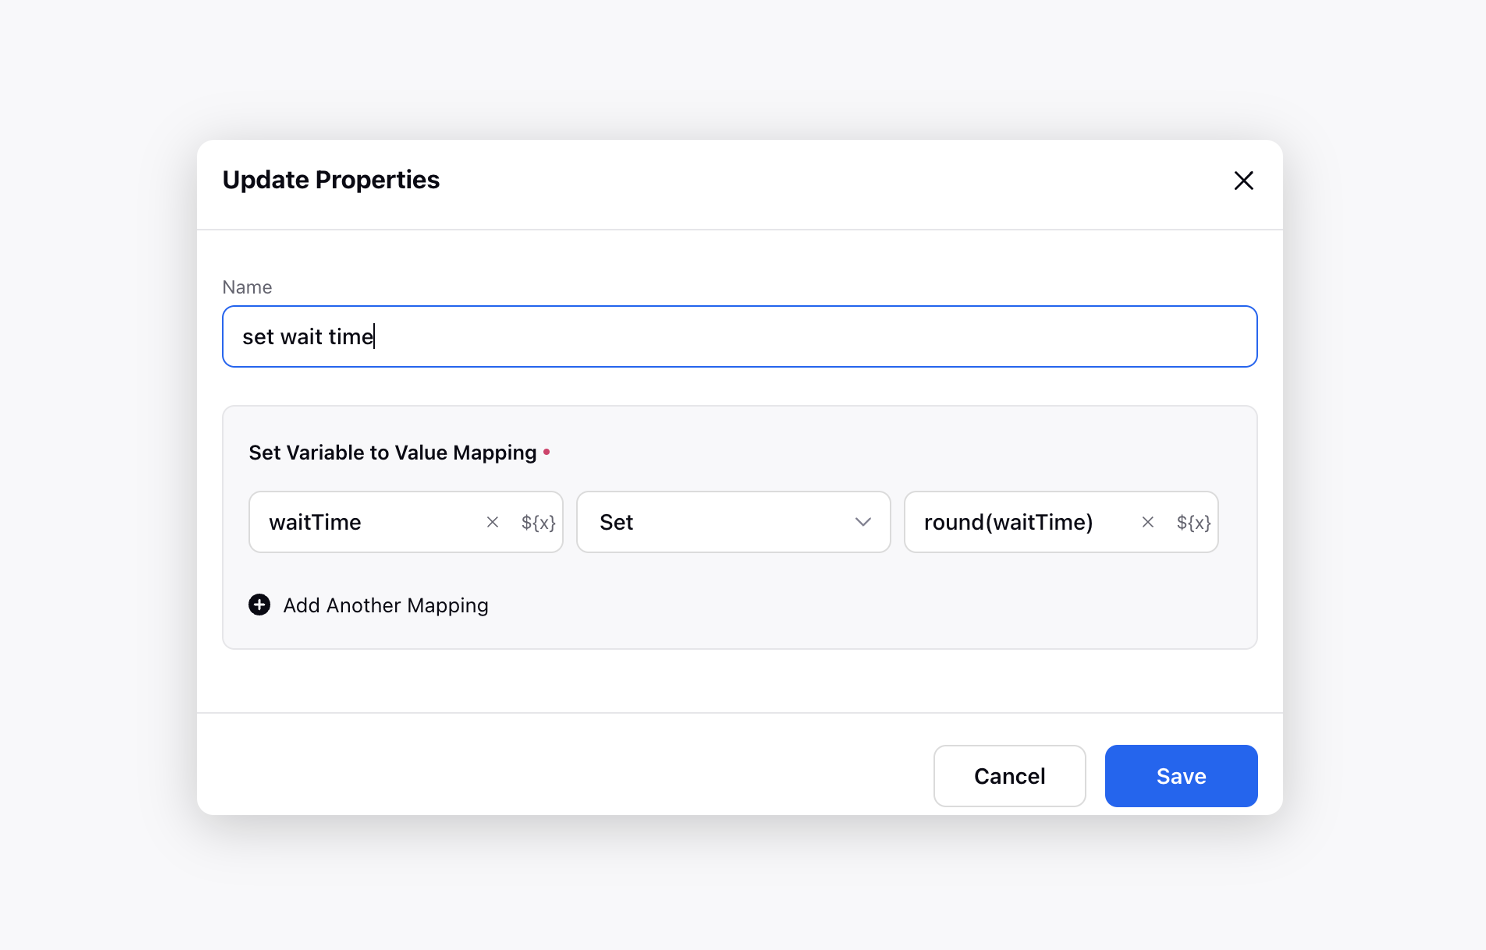
After this node, you need to use one more Set Properties node to round off the waitTime. For example, waitTime = 2.7 will be rounded off to 3 mins.
Use Decision Box
Brands may want to enable the schedule callback option only when the queue wait time is greater than ‘x’ minutes. In this case, you can use the IVR decision box node to add handling of ‘x’ minutes. You can use the waitTime variable from the above steps in the decision box.
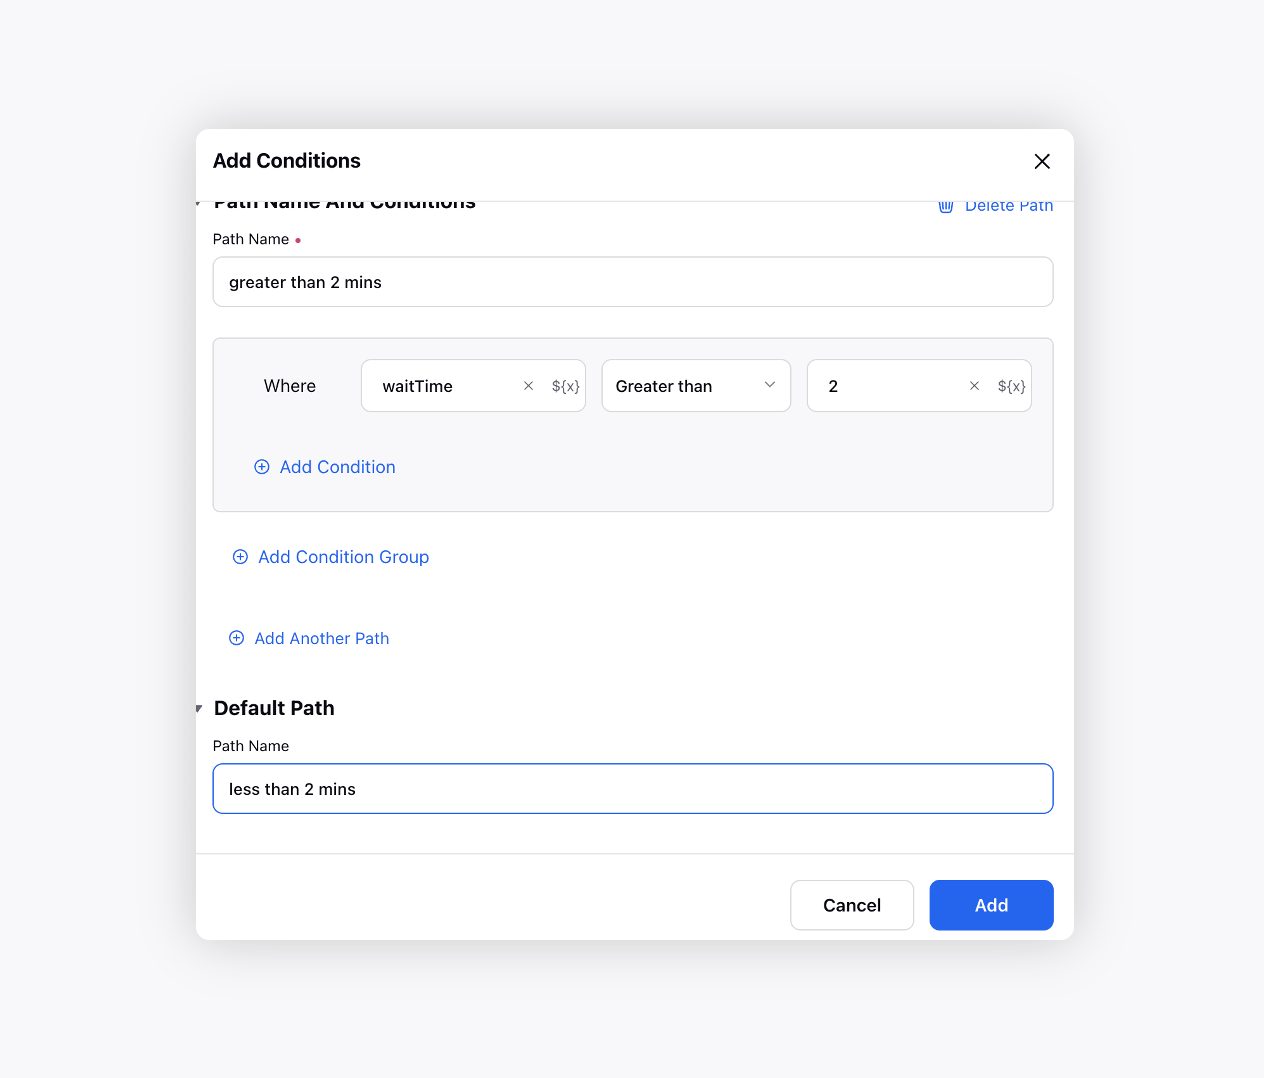
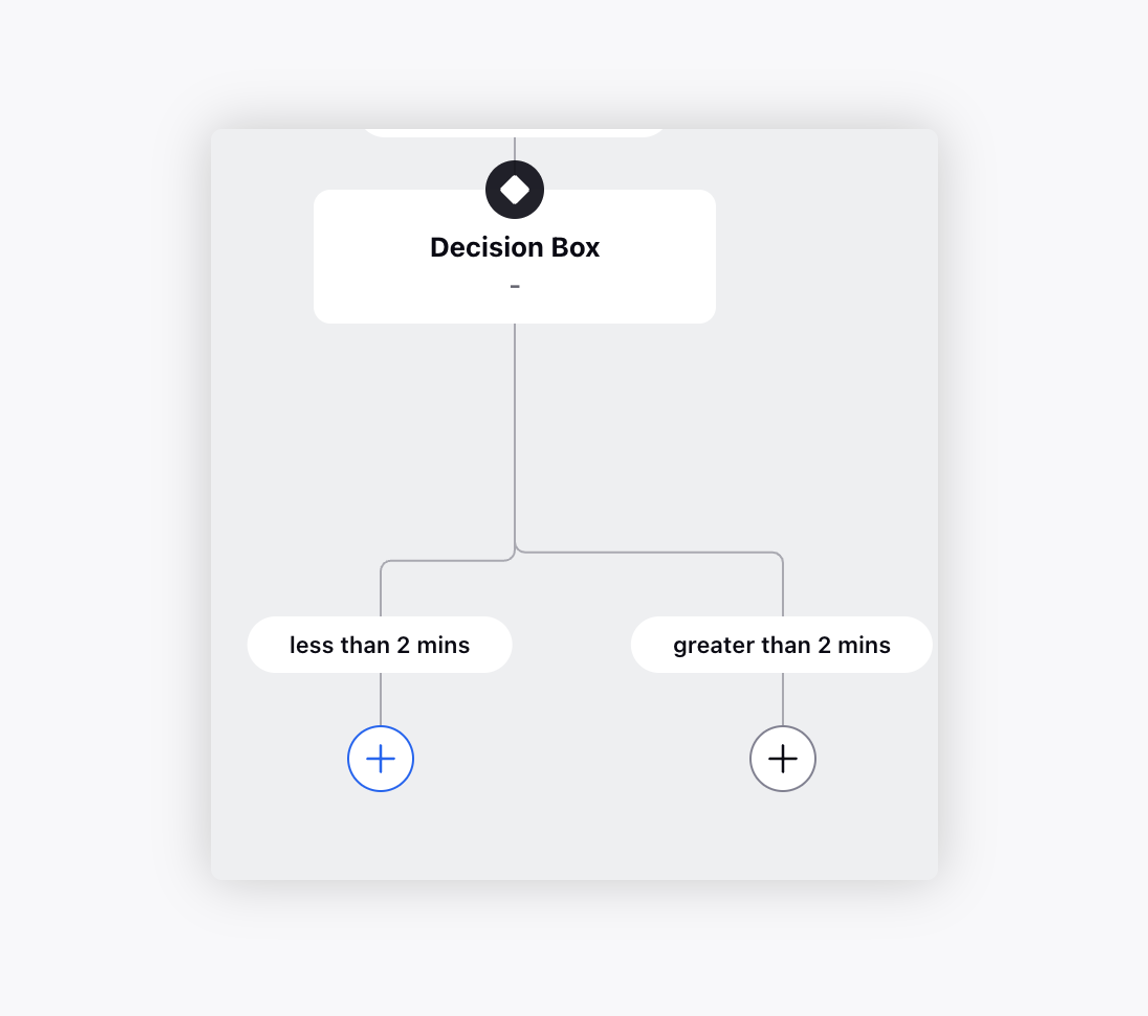
Open Decision Box node in IVR
Set 2 paths
Greater than ‘x’ mins
Less than ‘x’ mins
Now drag the less than 2 mins path again to Assign To Agent node.
Add the Gather Customer Response node to get confirmation from customer to schedule a callback.
Add Schedule Callback node.

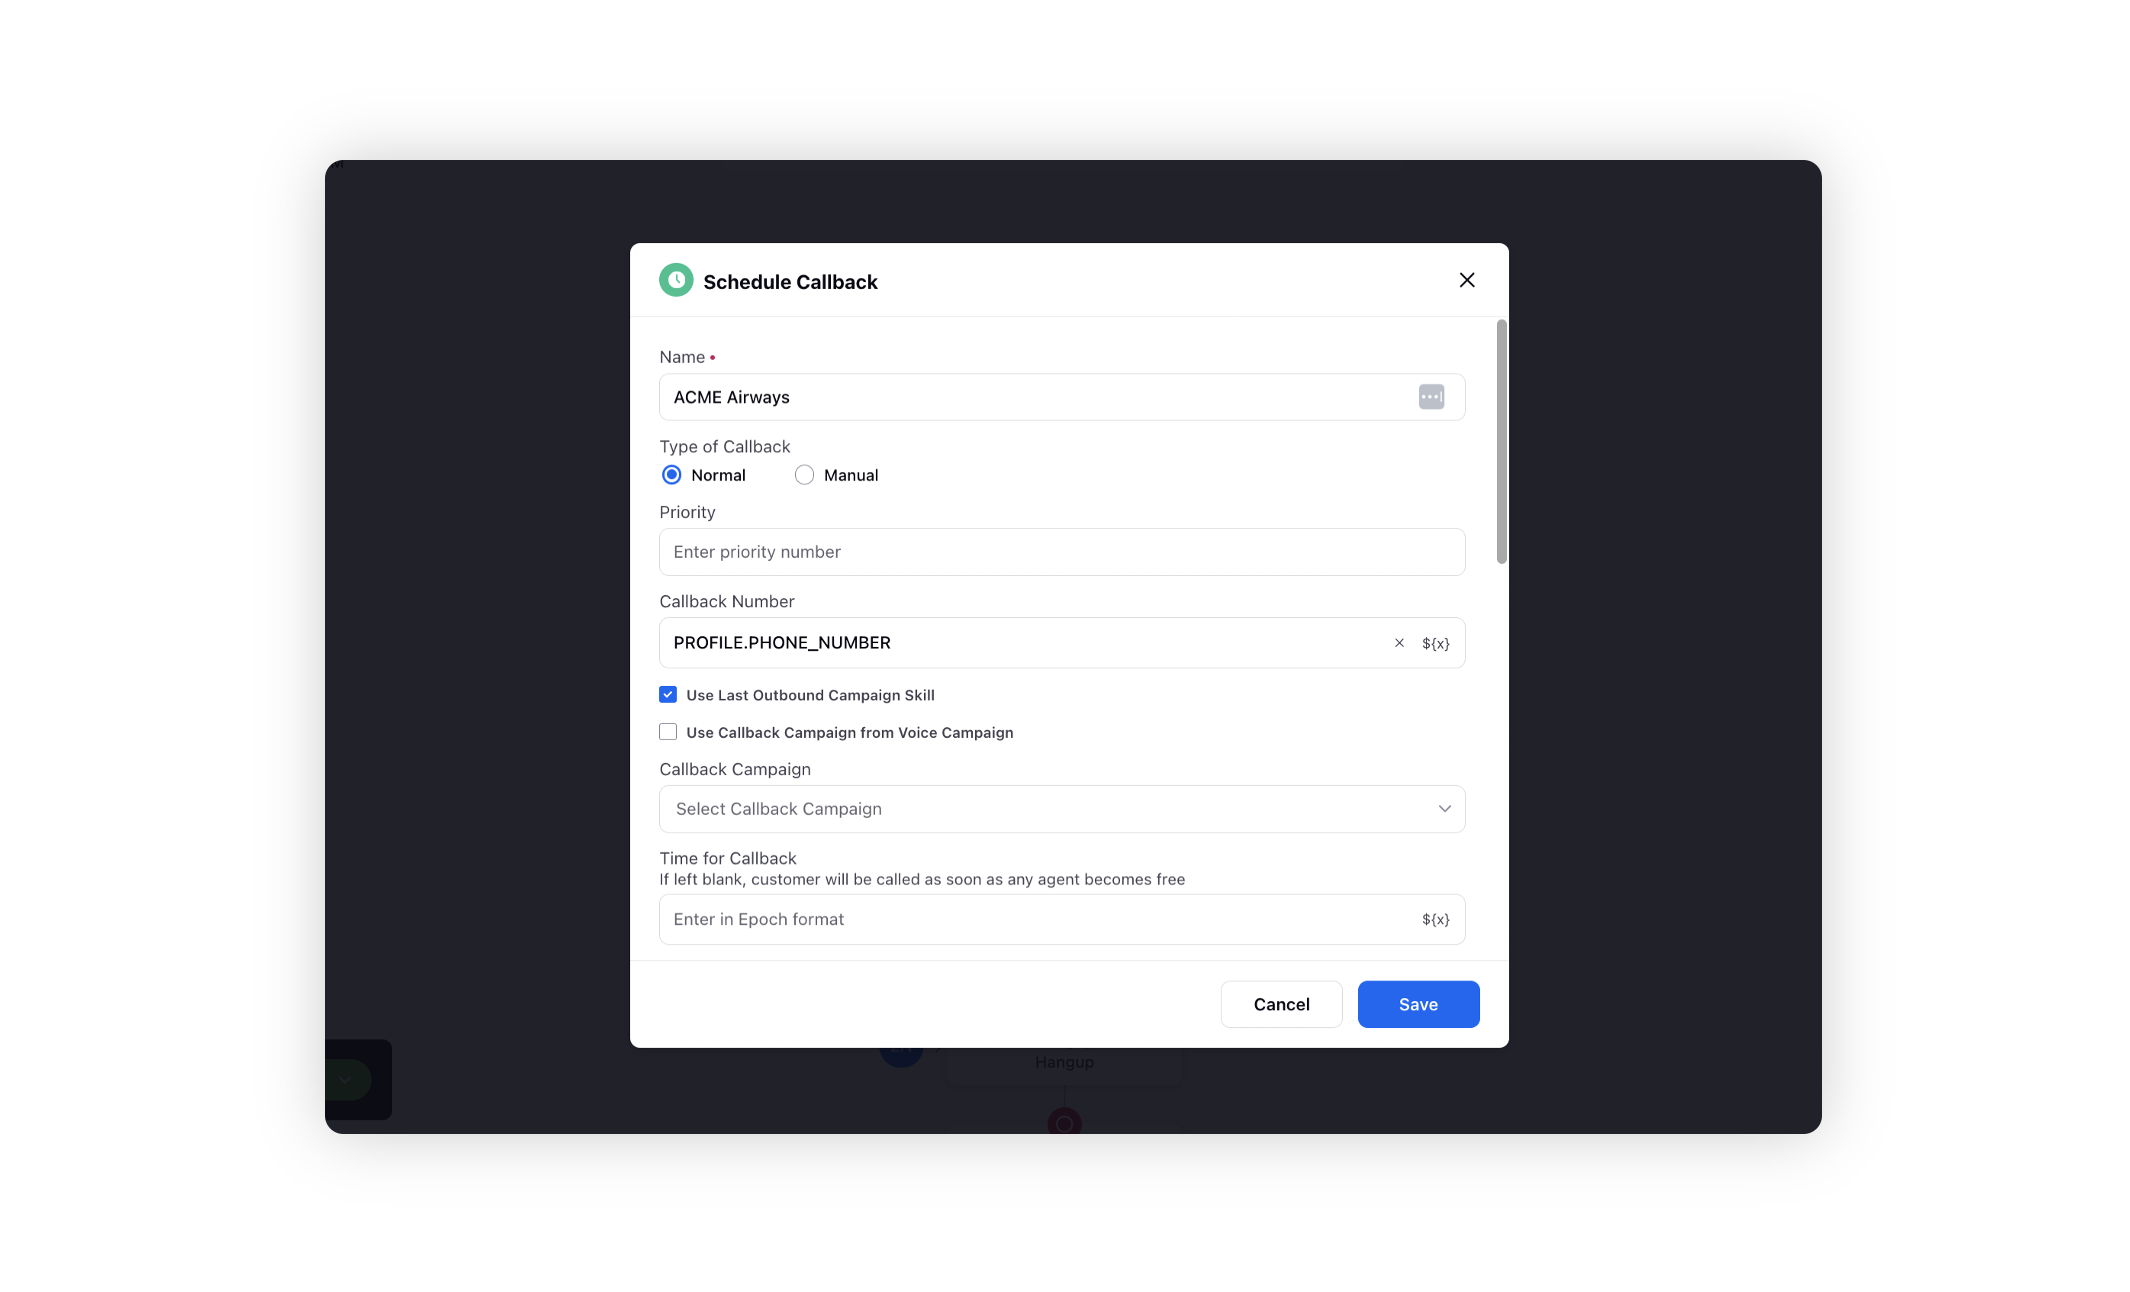
Use Schedule Callback node
Specify the following things in the schedule callback node of IVR.
Callback Number: Assuming you want the call to be routed to the same number from which it came, you can use VOICE_CONVERSATION.FROM via resource selector.
Use Last Outbound Campaign Skill: When this option is selected, the system will automatically map the same skill to the callback that was used when the last outbound campaign call was placed to the user.
Callback Campaign: Select the appropriate callback campaign.
Time for Callback: Can be specific epoch value or can be fetched dynamically from resource selector. If left blank, customer will be called as soon as any agent becomes free.
Note: Add a note, e.g., “This is a scheduled callback”. This note will be visible on the call popup of the agent.
Assign To: Work Queue, Agent: Select work queue or you can specify the agent user ID.
After the Schedule Callback node, you can use the IVR hangup and end connection node to end the call.