Reporting
Updated
In Care reporting, the self-monitoring agent dashboard provides the activity report of the user logged in to the care/agent console.
To configure a reporting widget
1. Click the New Tab icon. Under the Sprinklr Service tab, click Care Reporting within Analyze.
2. On the Reporting Home window, select the desired dashboard within the Dashboards section.
3. On the selected Reporting Dashboard window, click Add Widget in the top right corner.
4. On the Create Custom Widget window, enter a Name for the widget, and select the Data Source as Social Analytics.
5. Select a Visualization for your widget from the available visualization types.
6. Next, within the What would you like to plot on your widget section, select the desired dimensions and metrics for which you want to view the reporting.
7. Click Add to Dashboard in the bottom right corner to add your widget to the dashboard.
Sharing a Reporting Dashboard with Care Agent Persona
1. Under the Sprinklr Service tab, click Care Reporting within Analyze.

2. Choose the desired Reporting Dashboard that you want to share or create a new dashboard. Click the Options icon and select "Share".

3. Select the desired Workspaces, Users/User Groups and Persona as Care Agent.

4. After sharing the Report, go to the persona and search for the desired report from the dropdown menu on top.

5. The dashboard is now visible to the agent.

Common use cases
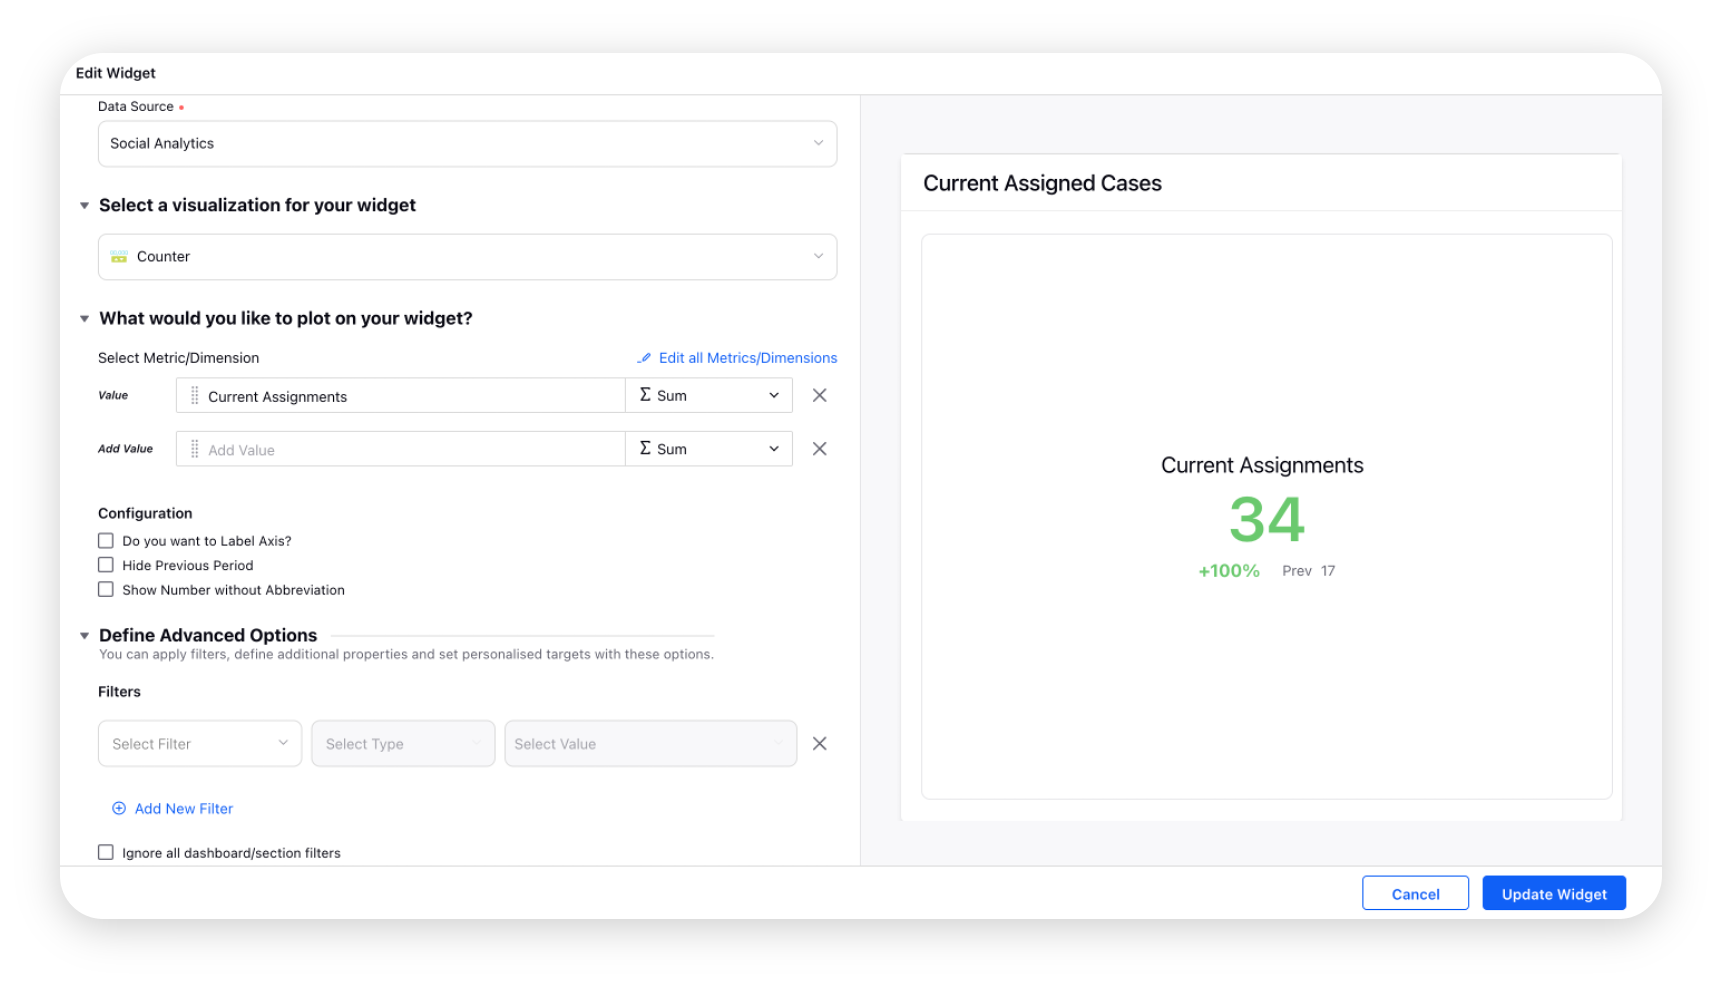
Current Assignments
- Total number of cases currently assigned to the Agent.
How to create -
Create a Counter widget and select the Current Assignments metric.
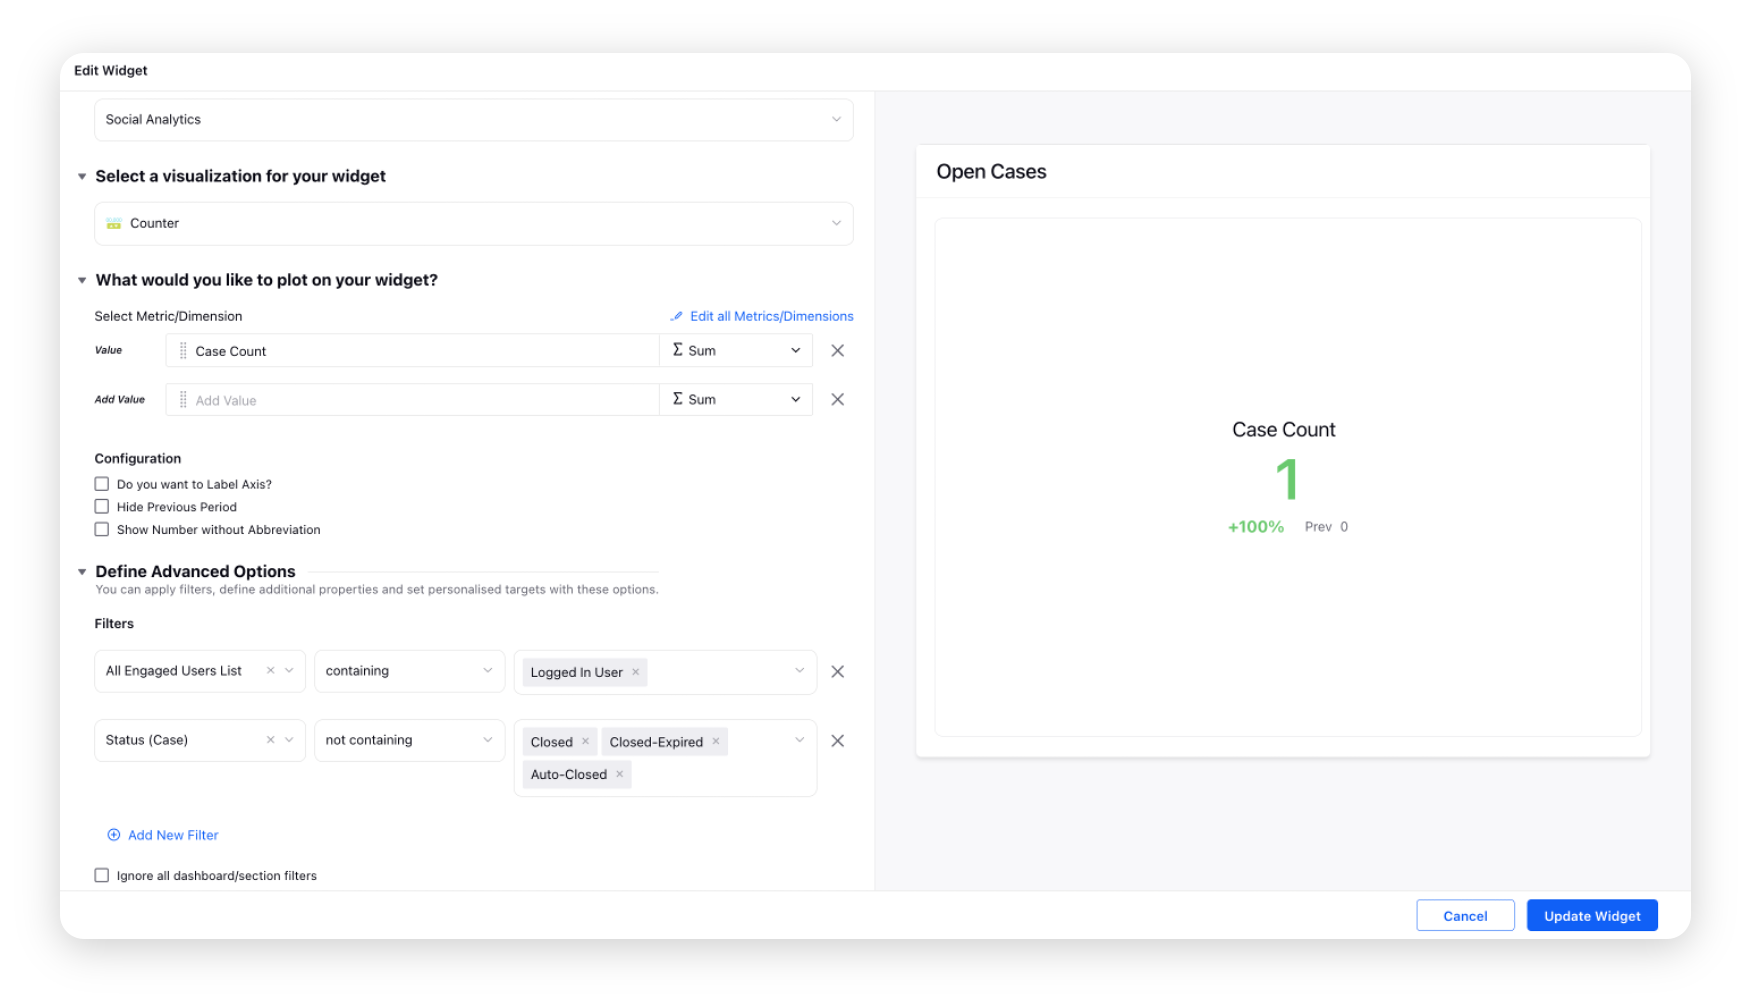
Open Cases
Number of cases that are still to be worked on by the Agent (excludes Closed, Auto-Closed and Expired cases).
How To Create -
Create a Counter widget and select the Case Count metric and add the All Engaged Users List filter as Logged In User and Status (Case) filter as not containing Closed, etc.
![]() Note
Note
Agent / User / Brand response by user' fields should be filtered for 'Logged-in user'. This ensures that the user logged-in to the system can view only their data for the selected time range.
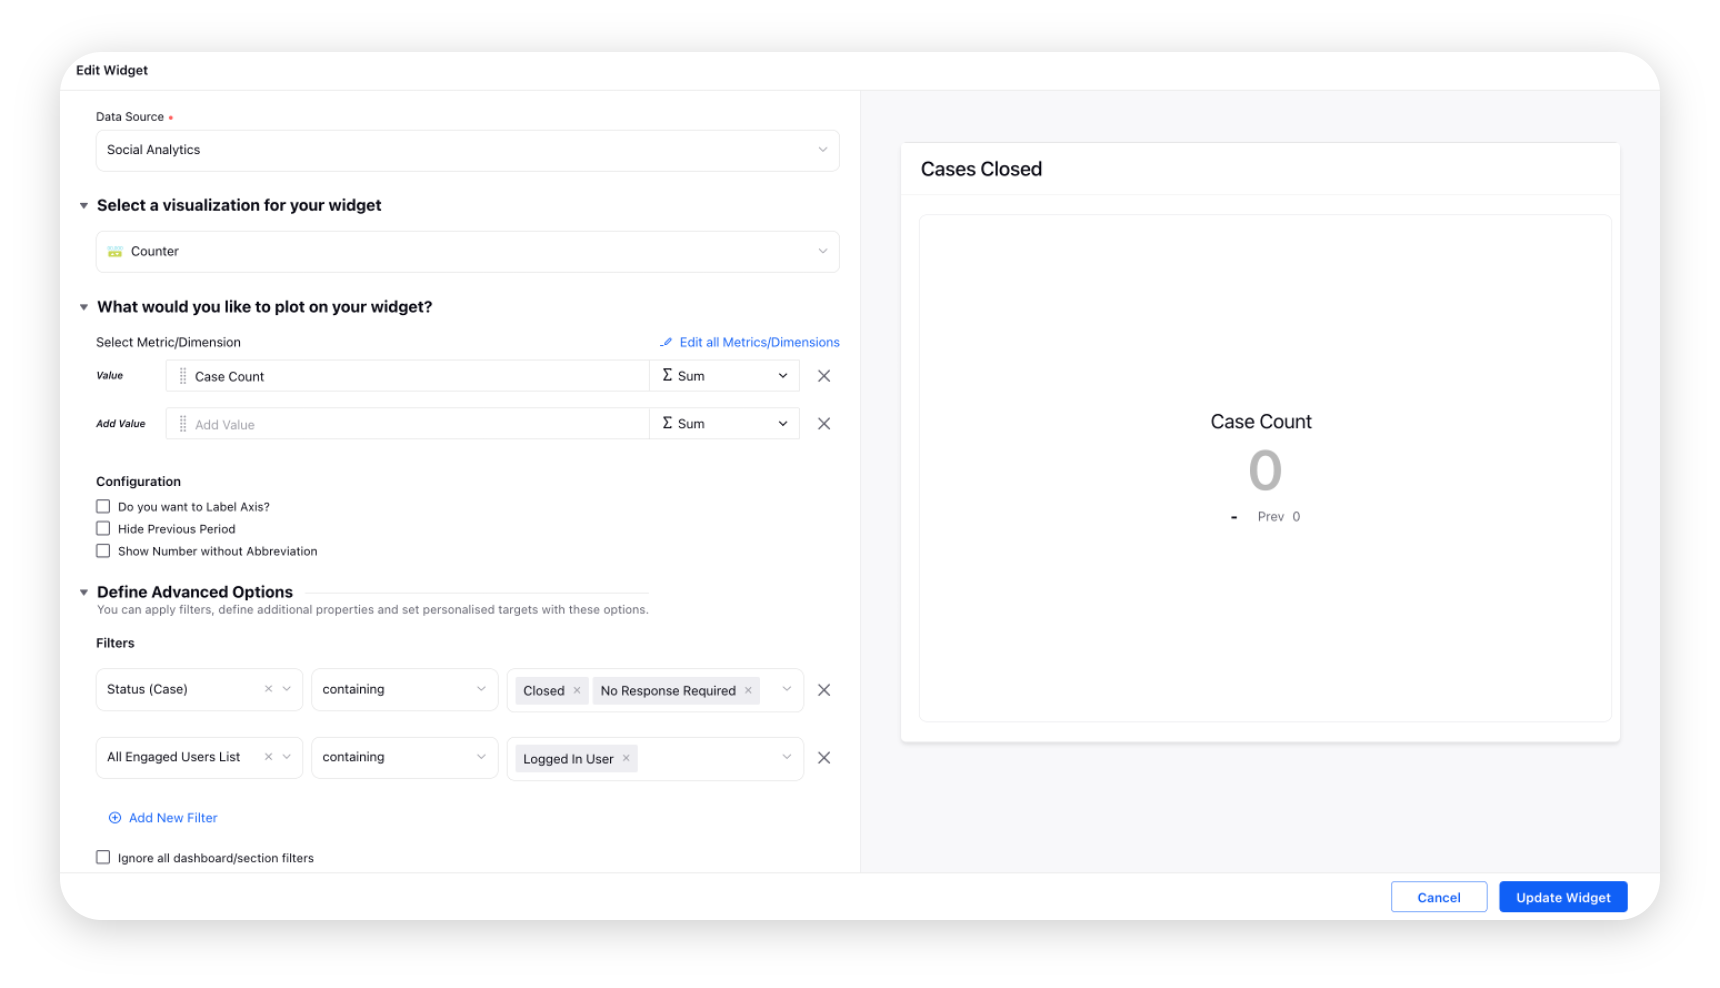
Closed Cases
Number of cases that are either 'Closed' or 'Needs No Response'.
How To Create -
Create a Counter widget. Select the Case Count metric and add the All Engaged Users List filter as Logged In User and Status (Case) filter as Closed, etc.
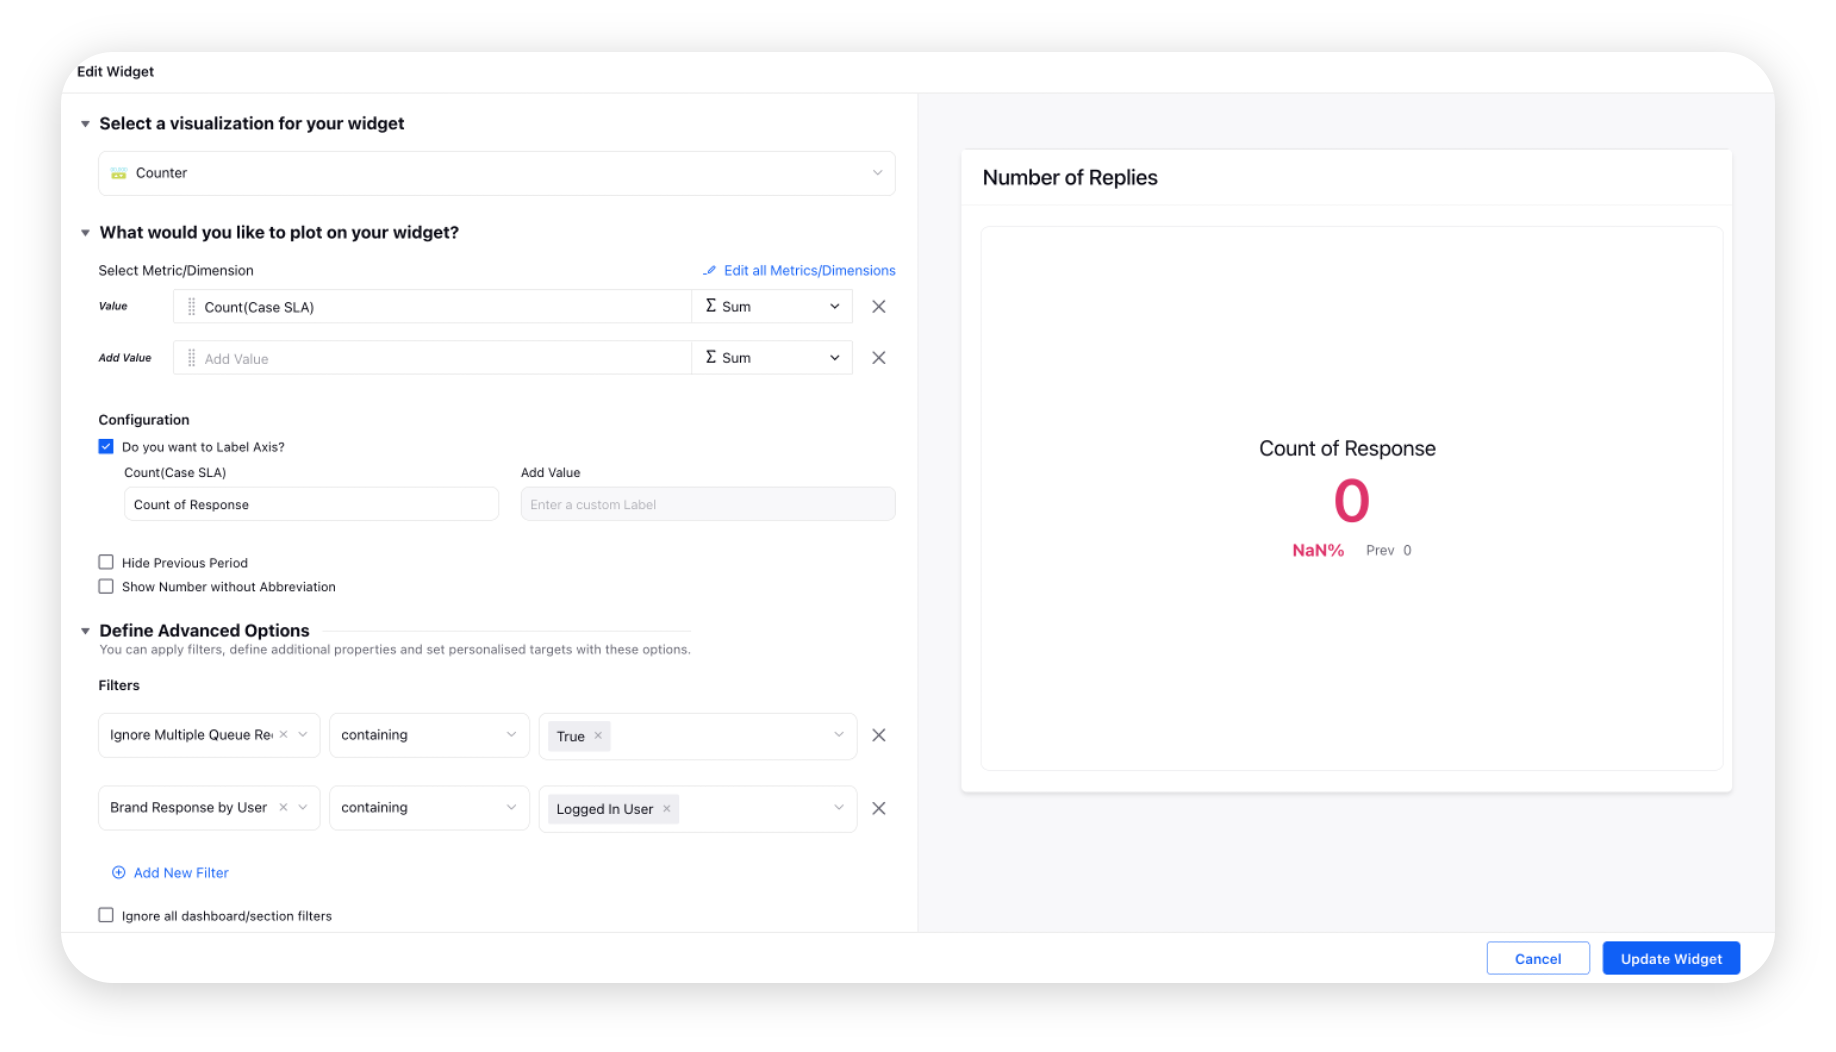
Number of Replies
Count(Case SLA) provides the number of response messages sent by the agent in overall.
How To Create -
Create a Counter widget. Select the Count(Case SLA) metric and add the Ignore Multiple Queue Records filter as True and Brand Response By User filter as Logged In User.
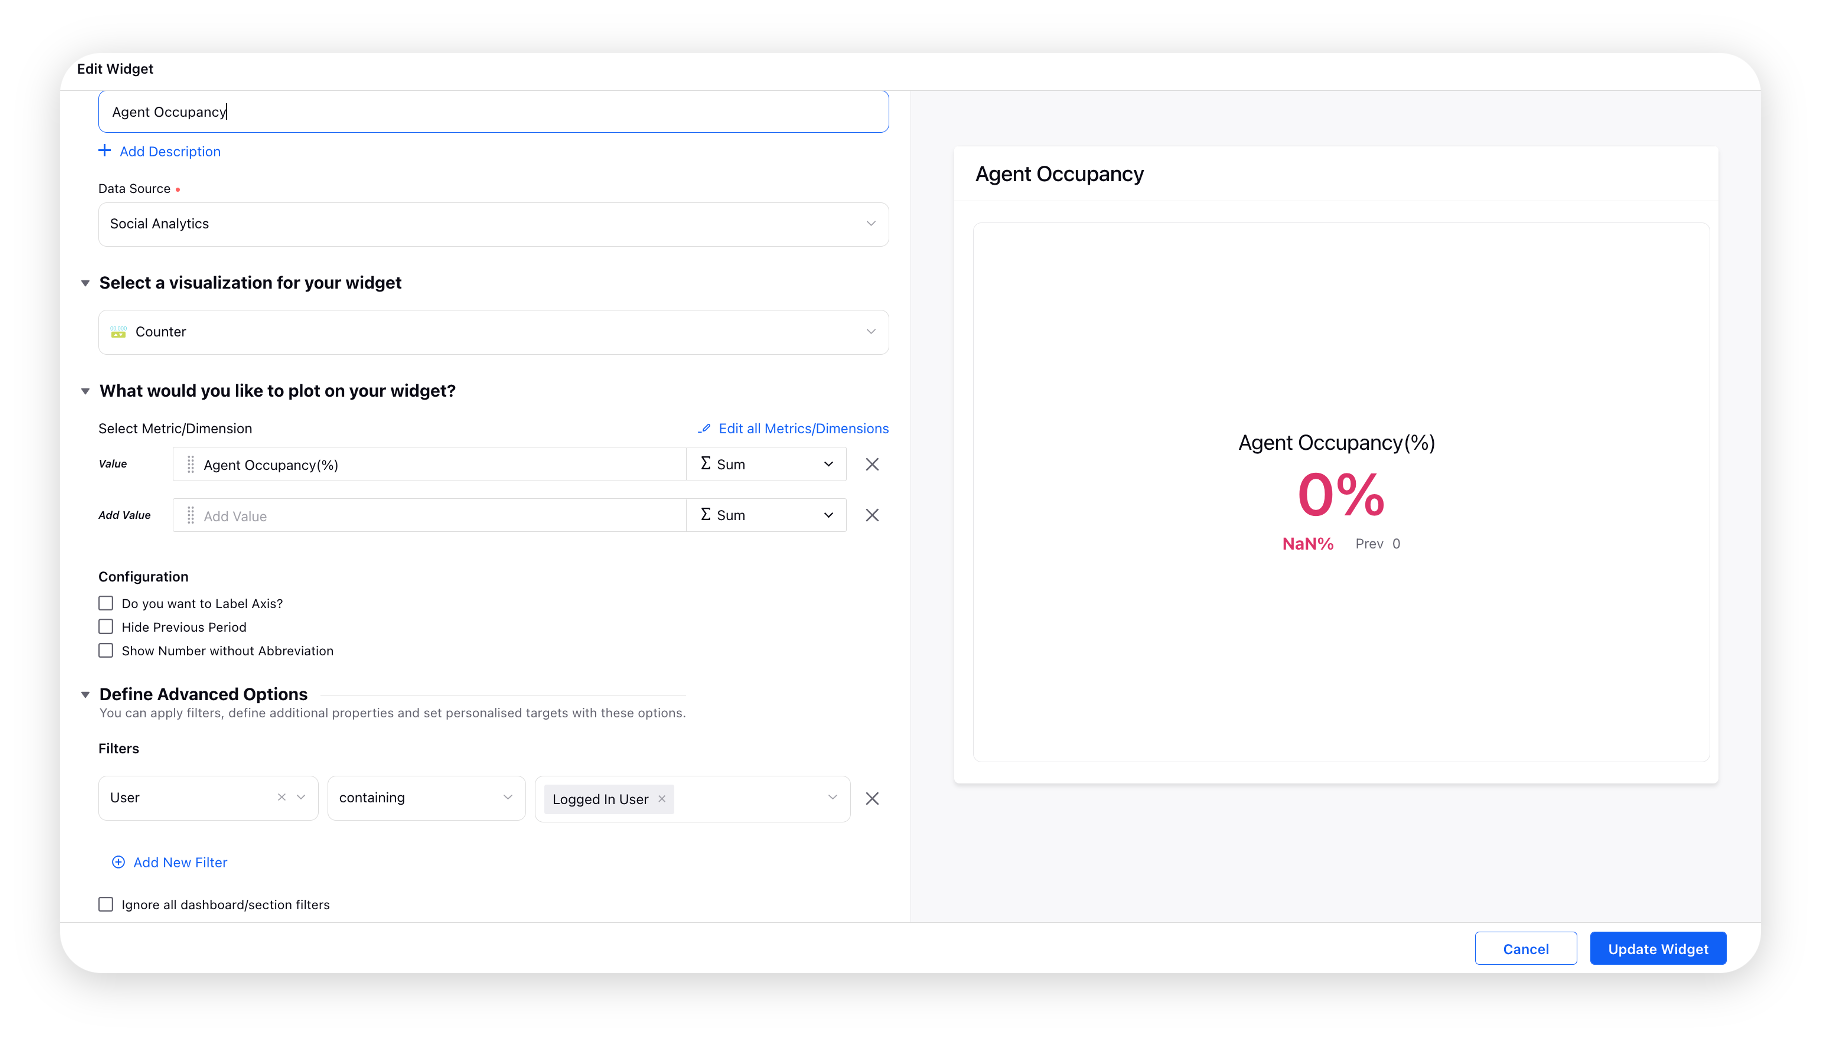
Agent Occupancy (%)
Time spent in Available Status with any Case assigned/ Time spent in Availability Status.
How To Create -
Create a Counter widget. Select the Agent Occupancy(%) metric and add the User filter as Logged In User.
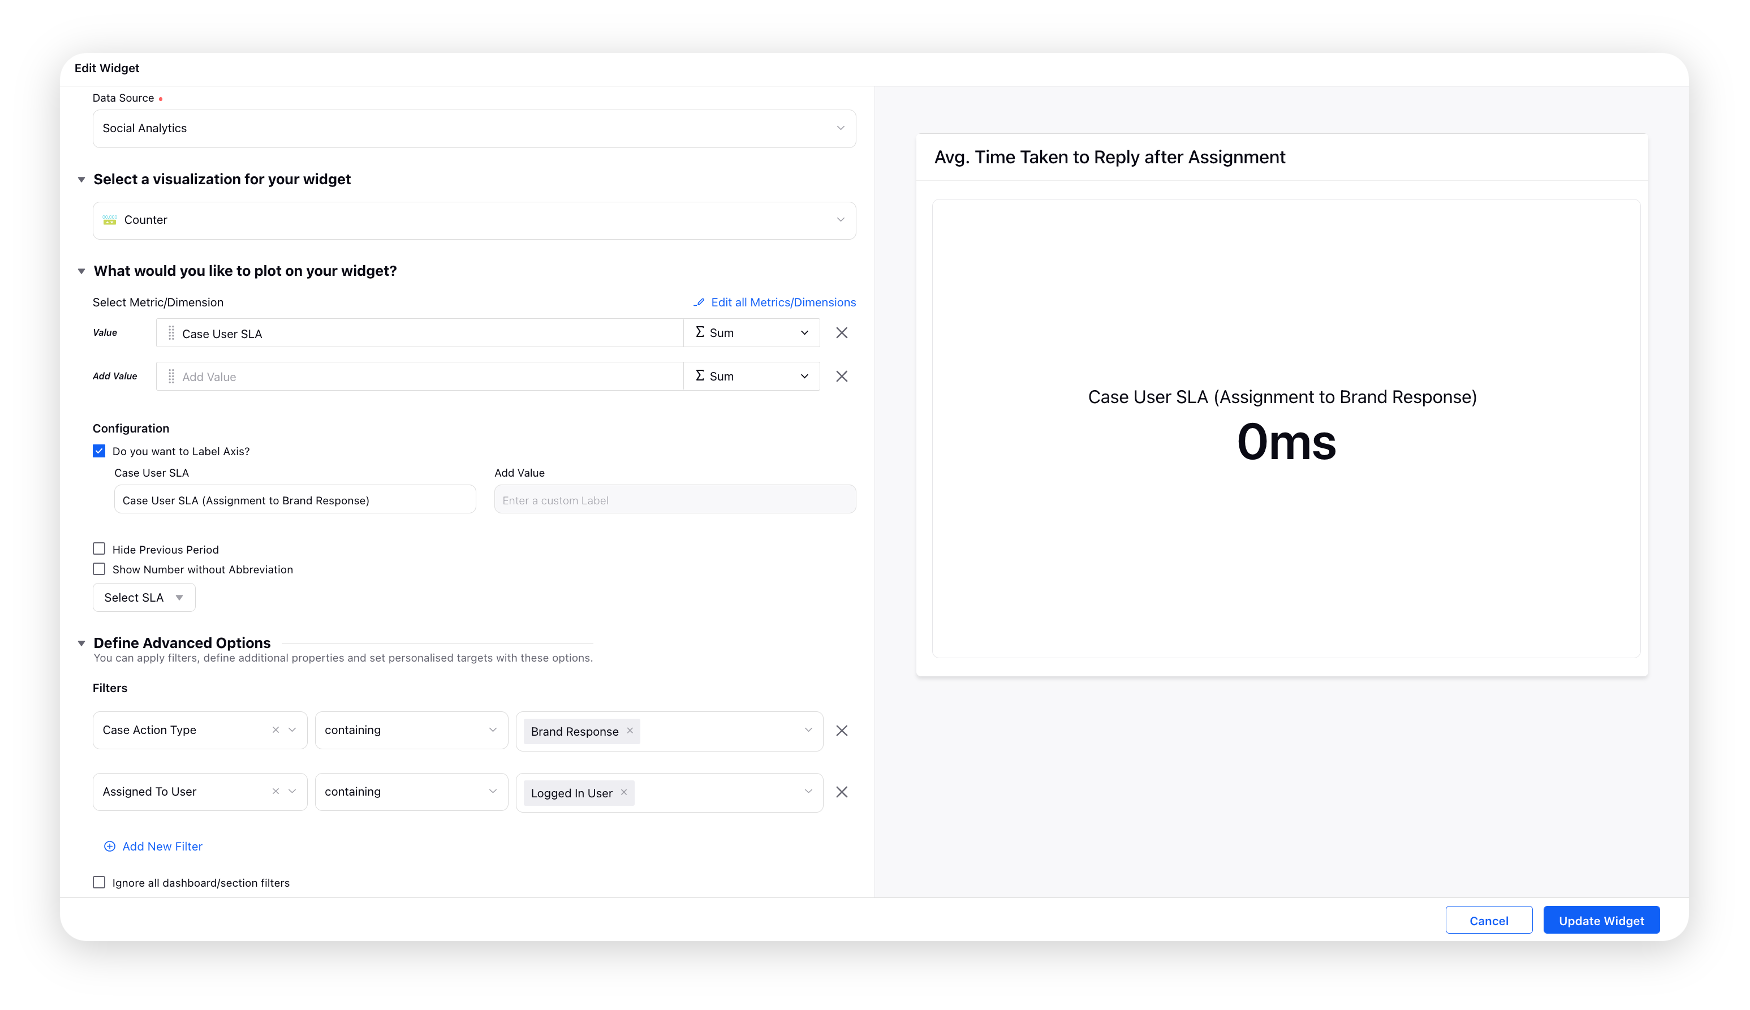
Average Time Taken to Reply after Assignment
Average time taken for all the responses provided by the Agent post Case Assignment.
How To Create -
Create a Counter widget. Select the Case User SLA metric and add the desired Case Action Type as Brand Response and Assigned To User filter as Logged In User.
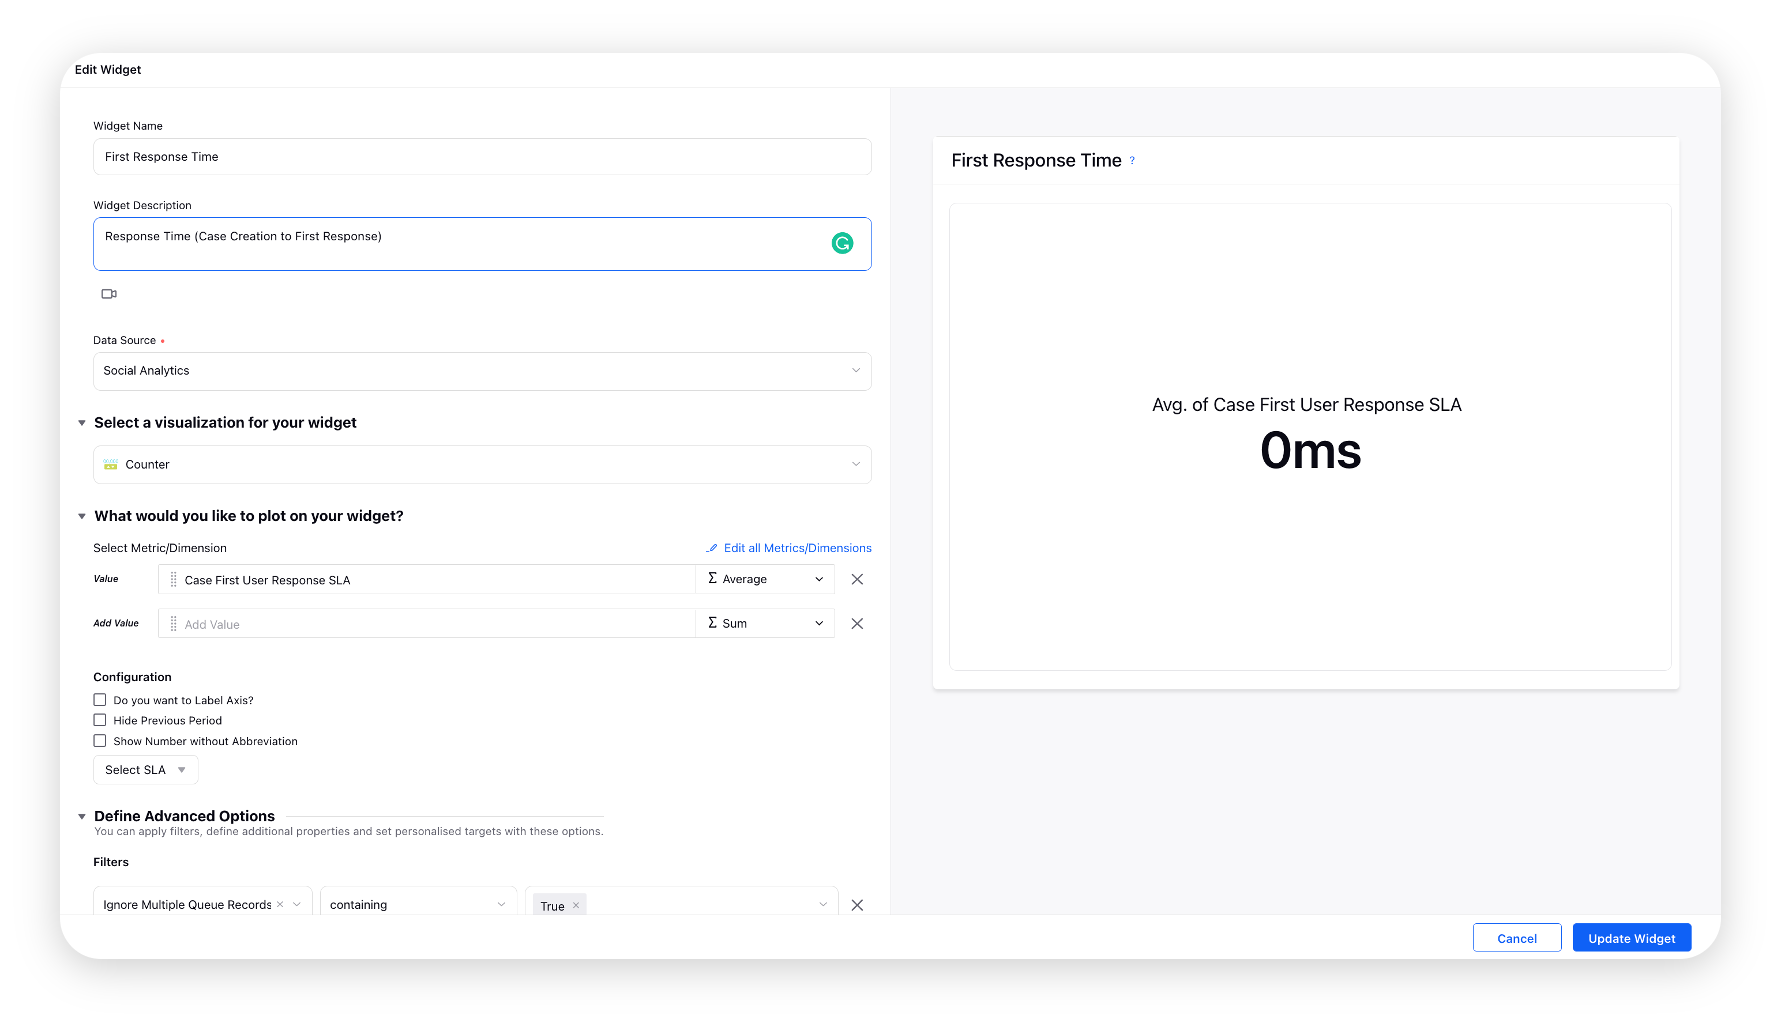
First Resposne Time
Average time taken for the 1st response provided by the Agent for all the cases post Case Assignment.
How To Create -
Create a Counter widget. Select the Case First User Response SLA metric and add the Ignore Multiple Queue Records filter as True.
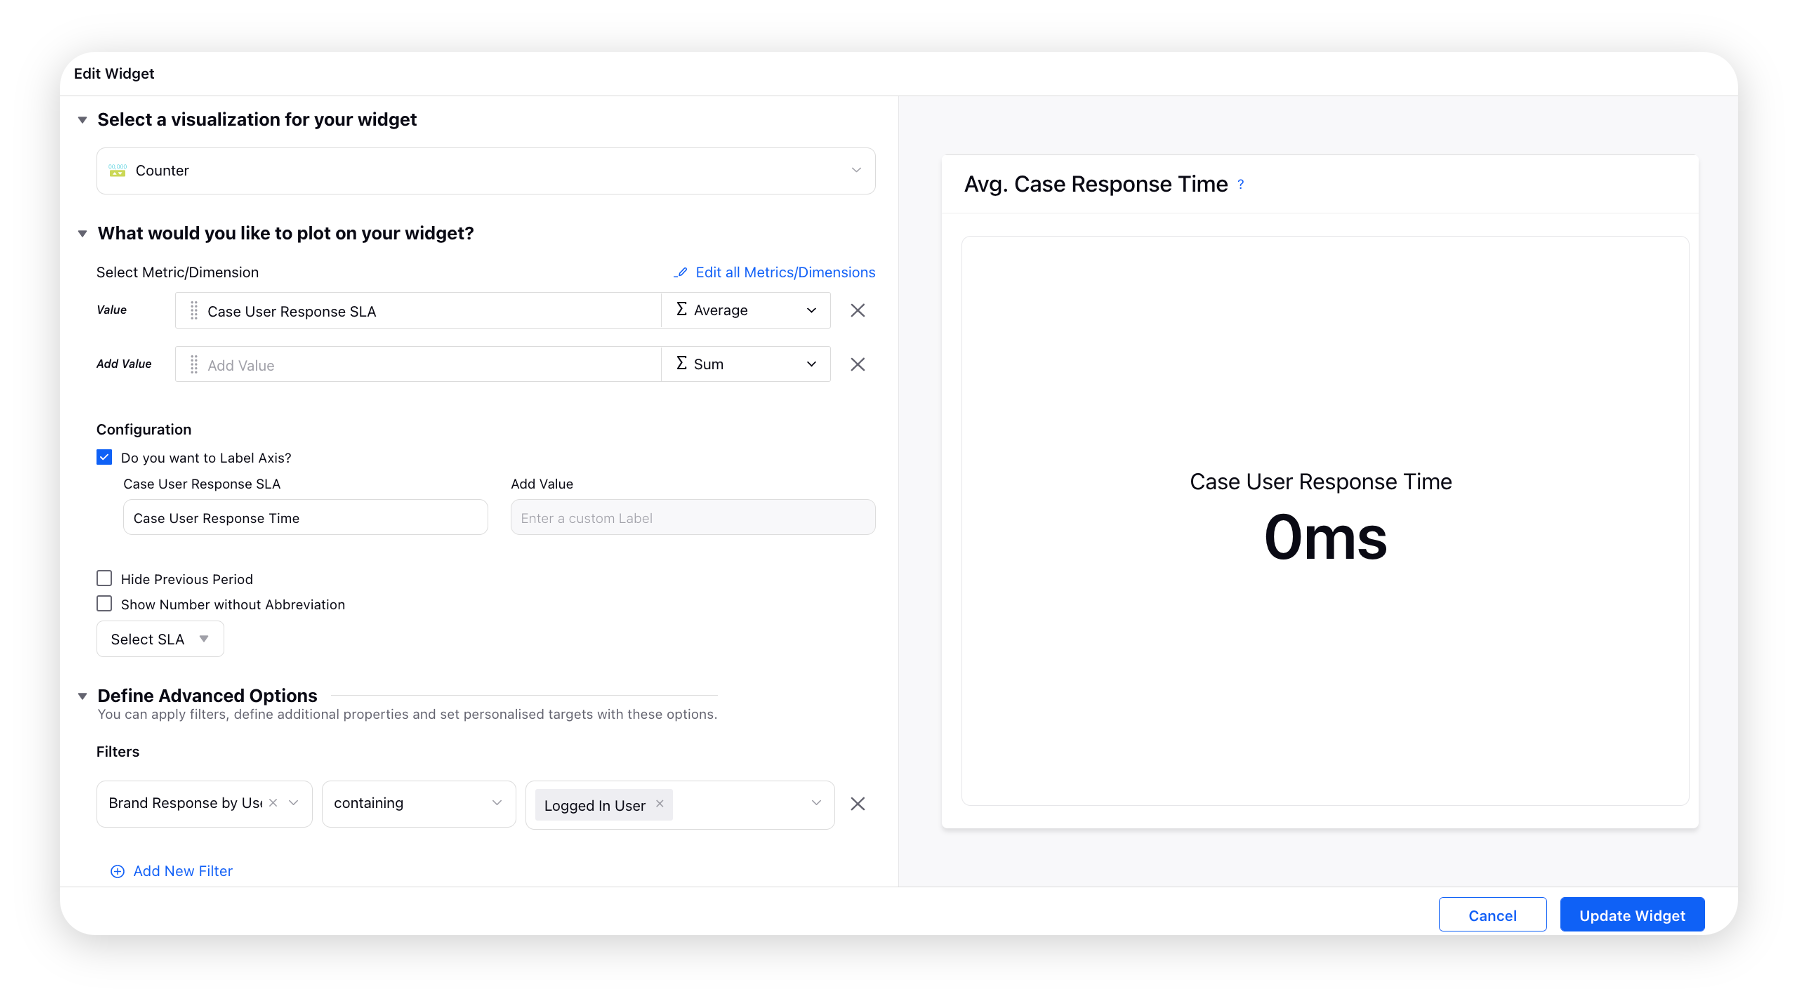
Average Case Response Time
Average time taken for all the responses provided by the Agent from the 1st Fan/Customer message recorded.
How To Create -
Create a Counter widget. Select the Case User Response SLA metric and add the Brand Response By User filter as Logged In User.
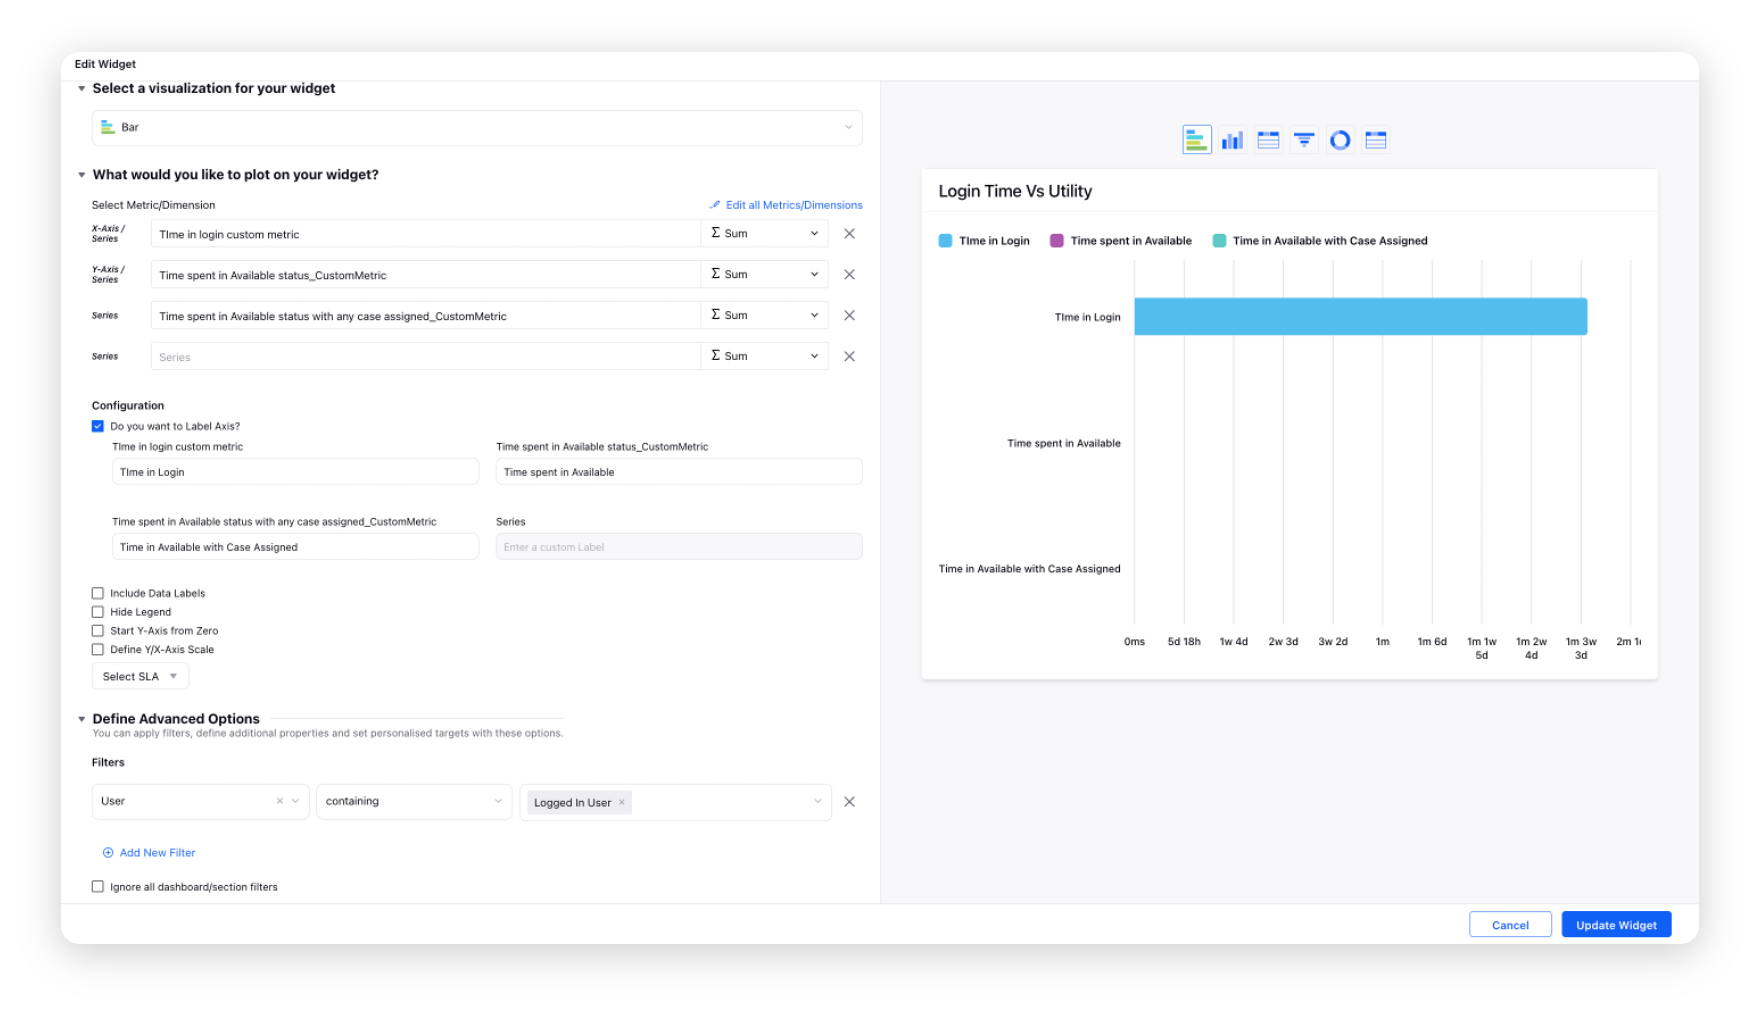
Login Time vs Utility
Time in Login Status: Provides the time spent in Login status (in that particular slot). [Custom Metric]
Time spent in Available Status: Total time spent in 'Available' status. [Custom Metric]
Time spent in Available Status with any Case assigned: Total time spent in 'Available' status with cases assigned/ handling. [Custom Metric].
Create a Bar widget. Select the Time in Login Status, Time spent in Availability Status, and Time spent in available Status with any Case assigned custom metrics and add the User filter as Logged In User.
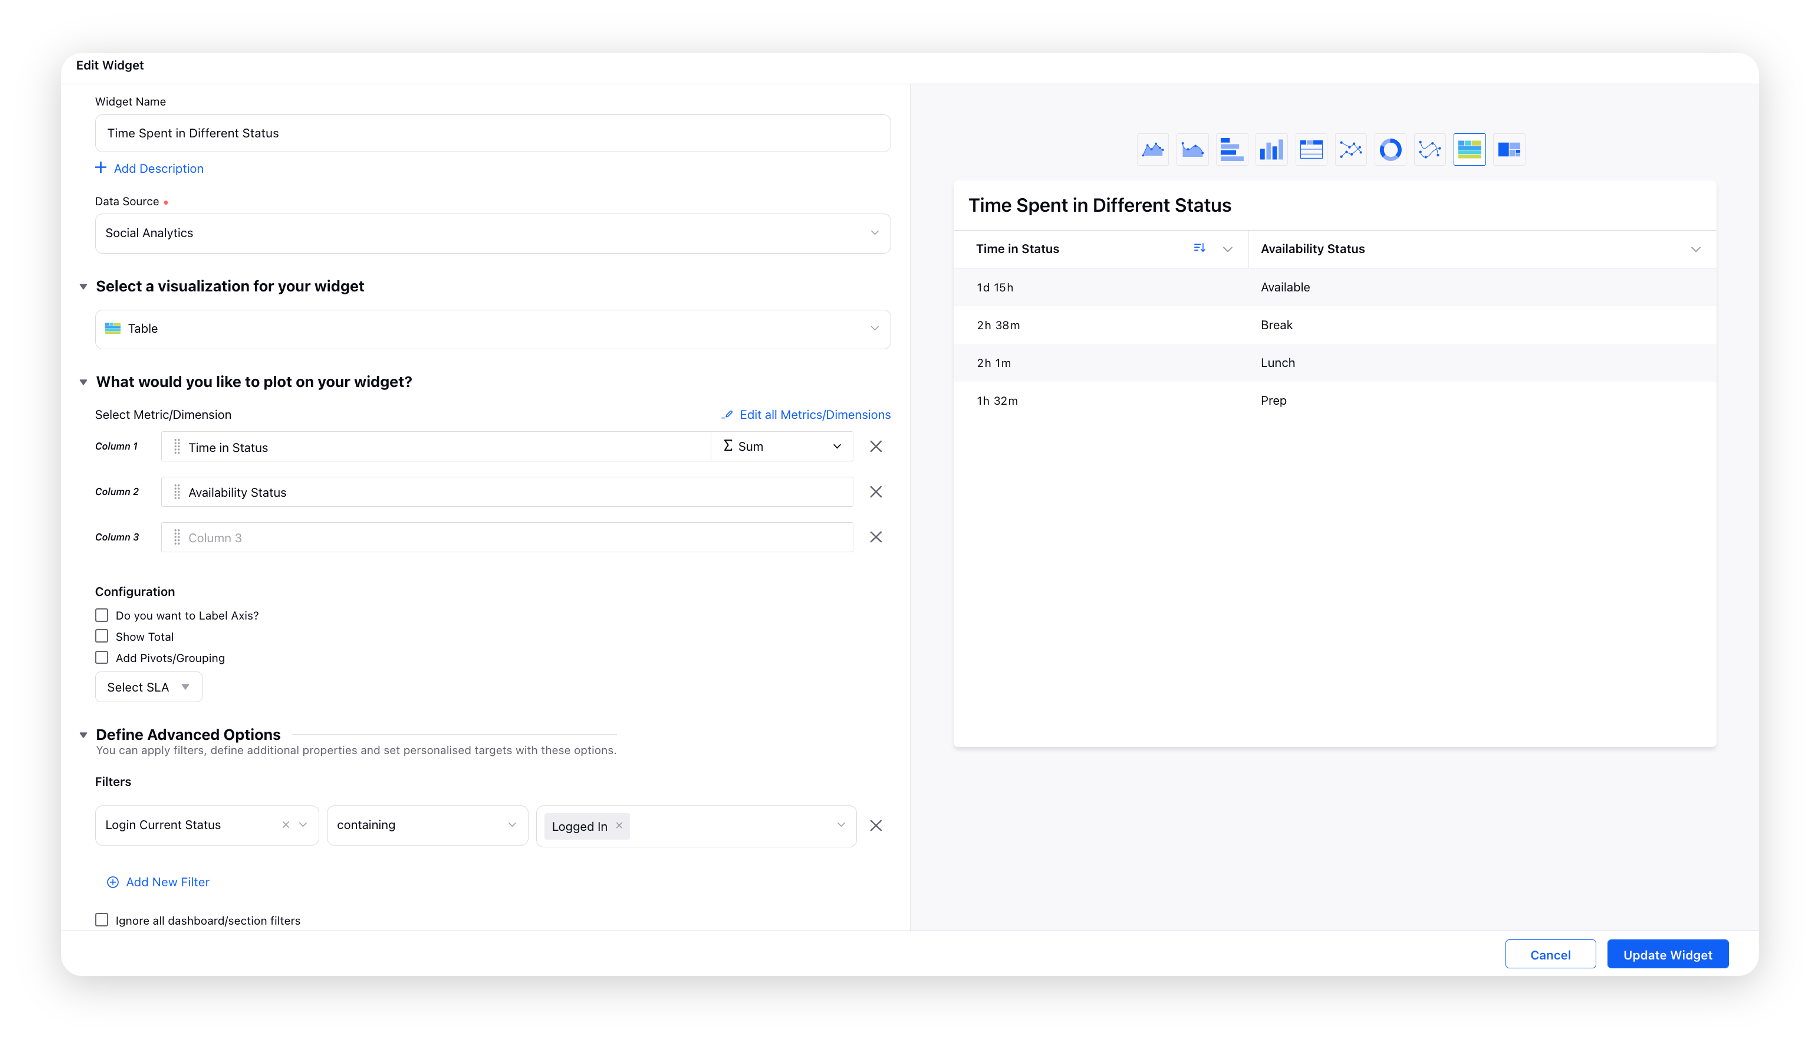
Time Spent in Different Status
Time in status: Provides the time spent in a particular status (in that slot).
Availability status: States the Agent's status (available/ unavailable/ manual/ ready/ busy/ aux time) that is marked into the console.
Create a Table widget. Select the Time in Satus and Available Status metrics and add the desired Login Current Satus filter.
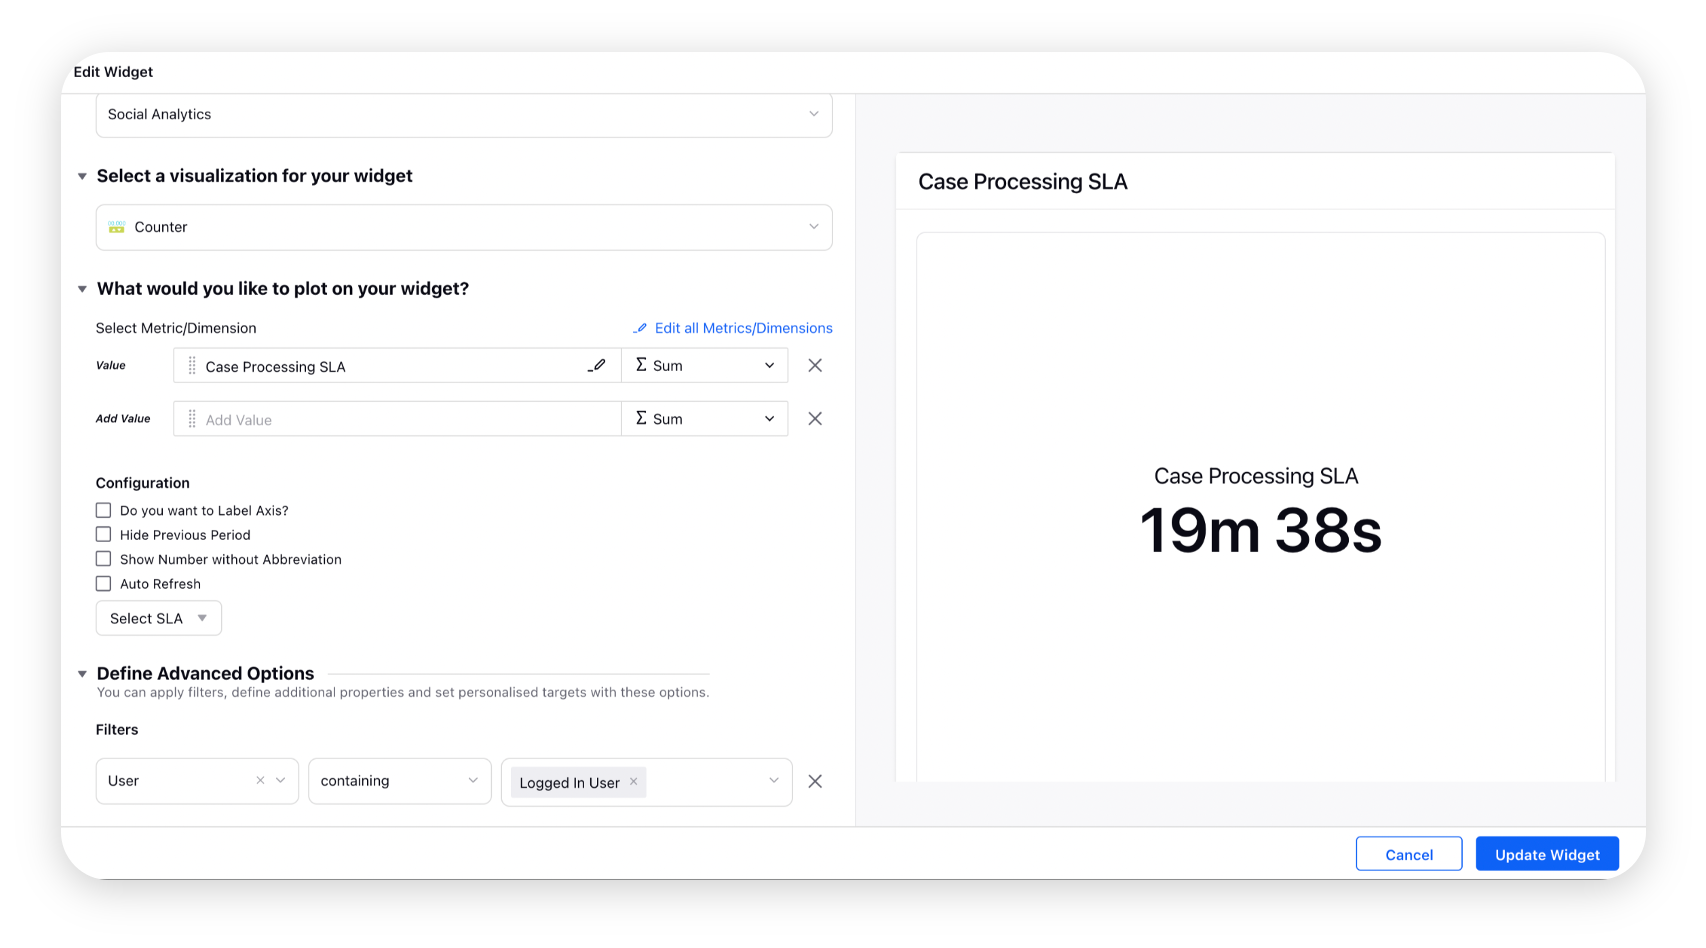
Cases Processing SLA
Case Processing SLA: The amount of time the processing clock is open for a Case. The processing clock is turned on when a Case is opened in the Agent/Care Console.
Create a Table widget. Select the Case Processing SLA metric and add the User filter as Logged In User.
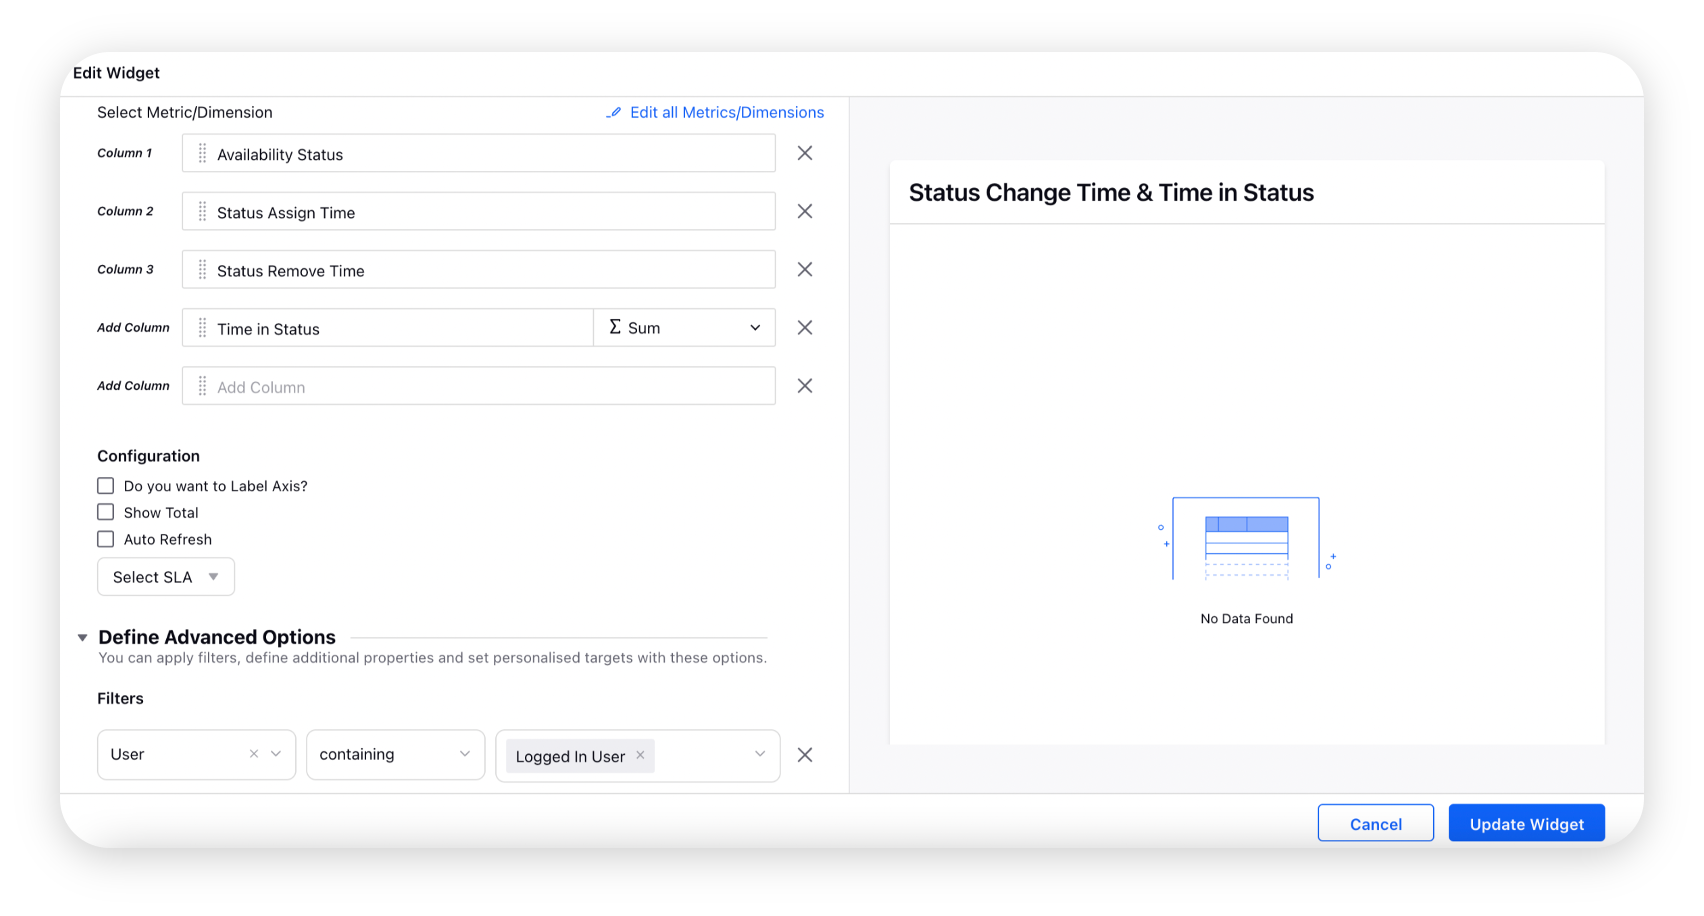
Status Change Time & Time in Status
Availability Status: States the Agent's status (available/ unavailable/ manual/ ready/ busy/ aux time) that is marked into the console.
Status Assign Time: Provides the particular status assignment time.
Time in Status: Provides the time spent in a particular status (in that slot).
Status Remove Time: Provides the particular status removal timestamp.
Create a Table widget. Select the Availability Status, Status Assign Time, Time in Status, and Status Remove Time metrics and add the User filter as Logged In User.
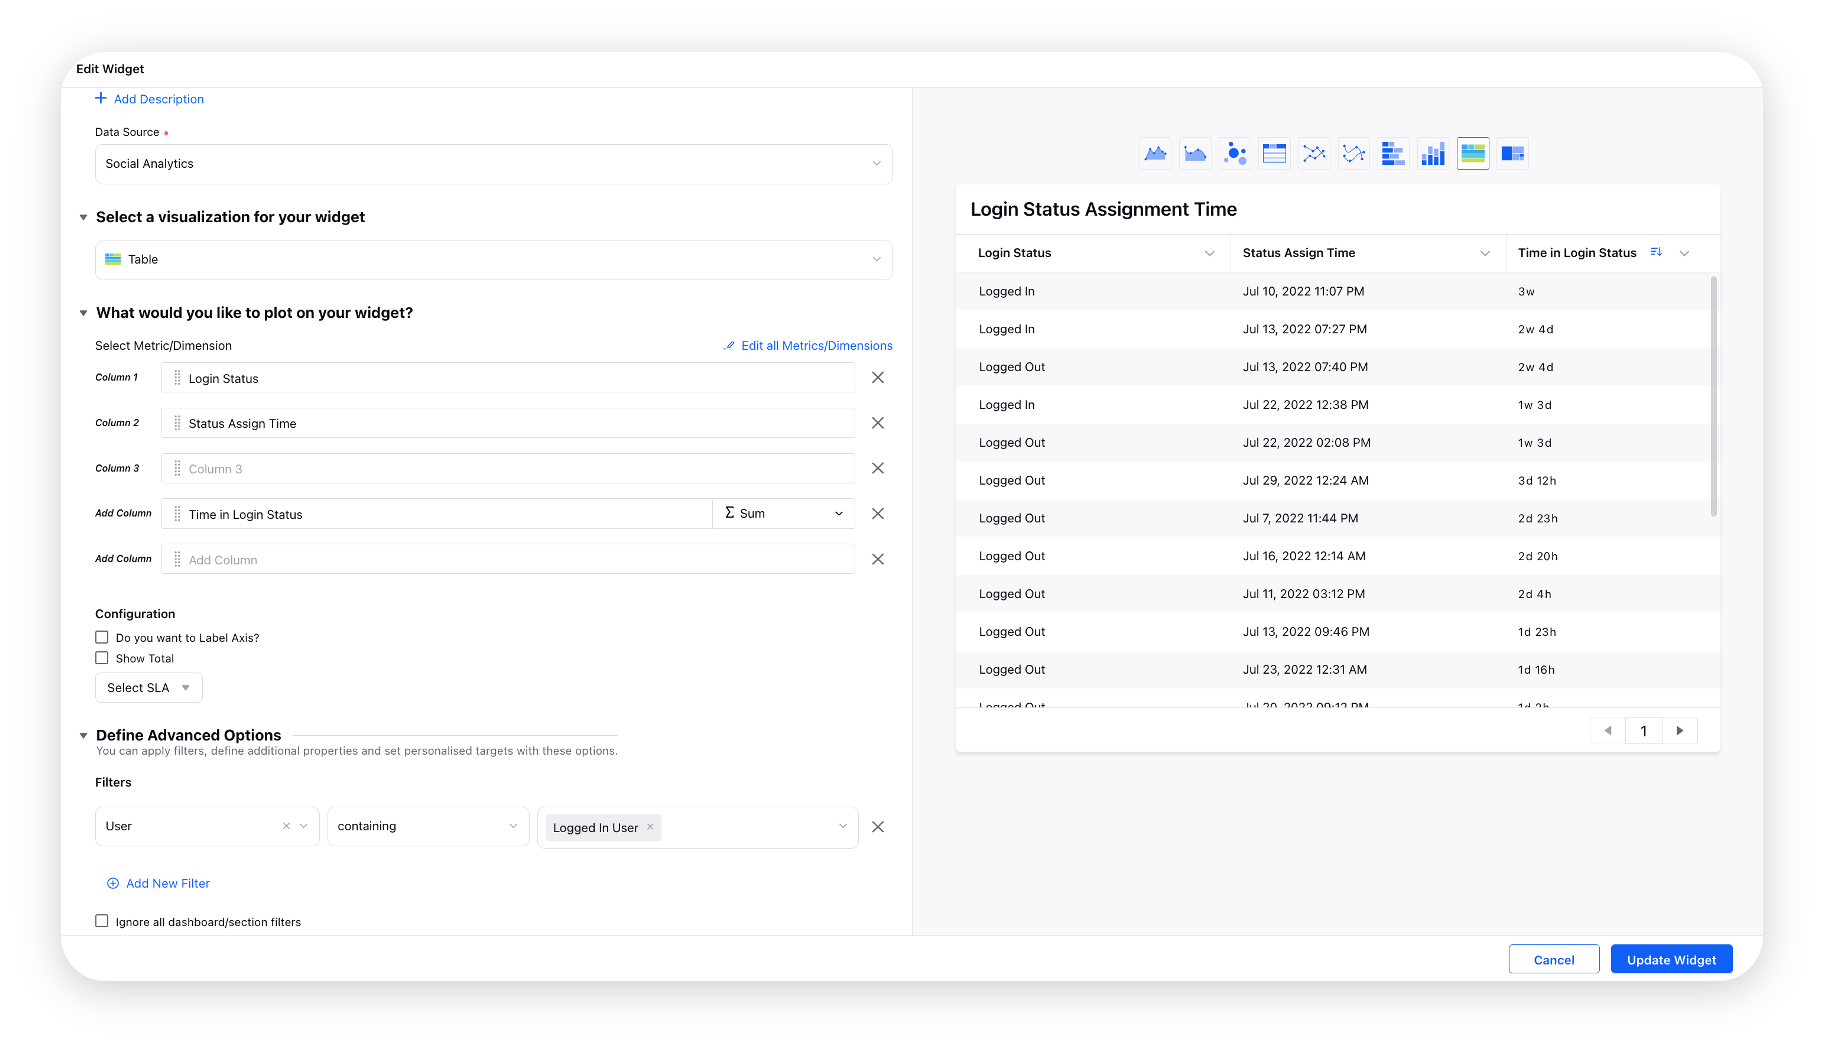
Login Status Assignment Time
Login Status: States if the Agent has Logged In or Logged Out of the Console.
Status Assign Time: Provides the Login/Logout status marked time.
Time in Login Status: Provides the time spent in the Login status (in that particular slot).
Create a Table widget. Select the Login Status, Status Assign Time, and Time in Login Status metrics and add the User filter as Logged In User.