New Third Pane
Updated
Overview
The third pane in Sprinklr is designed to help teams quickly and easily access the information they need to provide effective engagement and customer support. By providing additional context and information about each message or post, teams can better understand customer needs and respond in a timely and relevant manner.
How to Access the Case Third Pane?
Third Pane can be accessed in the care console by clicking on the view details button available generally on the top right of your screen. Case third pane can also be opened if you click on the results of a universal search of double click a case button on the platform such as the engagement dashboards.
New Third Pane v/s Old Third Pane
The new case third pane is specially designed to enhance the experience of brand agents with easier navigation and improved collaboration.In the new message/case and profile third pane allow's sidebar navigation, allowing agents to quickly access case/message details and perform actions in a single click.
Agents can perform quicker actions through the new third pane and initiate the next step faster thus helping in decreasing the Case Resolution Time, Cost Per Conversation, and SLA and enhancing the user experience
How New Third Pane Is Helpful for Agents
Provides additional context: The third pane provides additional context and information about the post or message that is currently selected in the main pane on the left. This can help contact center supervisors understand the customer's issue or feedback more completely, and respond to it more effectively.
Saves time: By providing a centralized location for important customer information, the third pane can save time for contact center supervisors. Instead of having to search for information in multiple locations, they can access all relevant information in one place.
Improves customer satisfaction: The third pane can help contact center supervisors respond to customer inquiries or issues more quickly and effectively, which can improve overall customer satisfaction.
Enables better decision-making: The third pane's sentiment analysis and other features can provide insights into customer sentiment, preferences, and opinions. This can help contact center supervisors make better-informed decisions about how to respond to customer feedback and improve the customer experience.
When you open a case in the third pane, the information will be displayed in various tabs. Below, we will take a look at each tab and the information you will find within the conversation.
# | Term | Description |
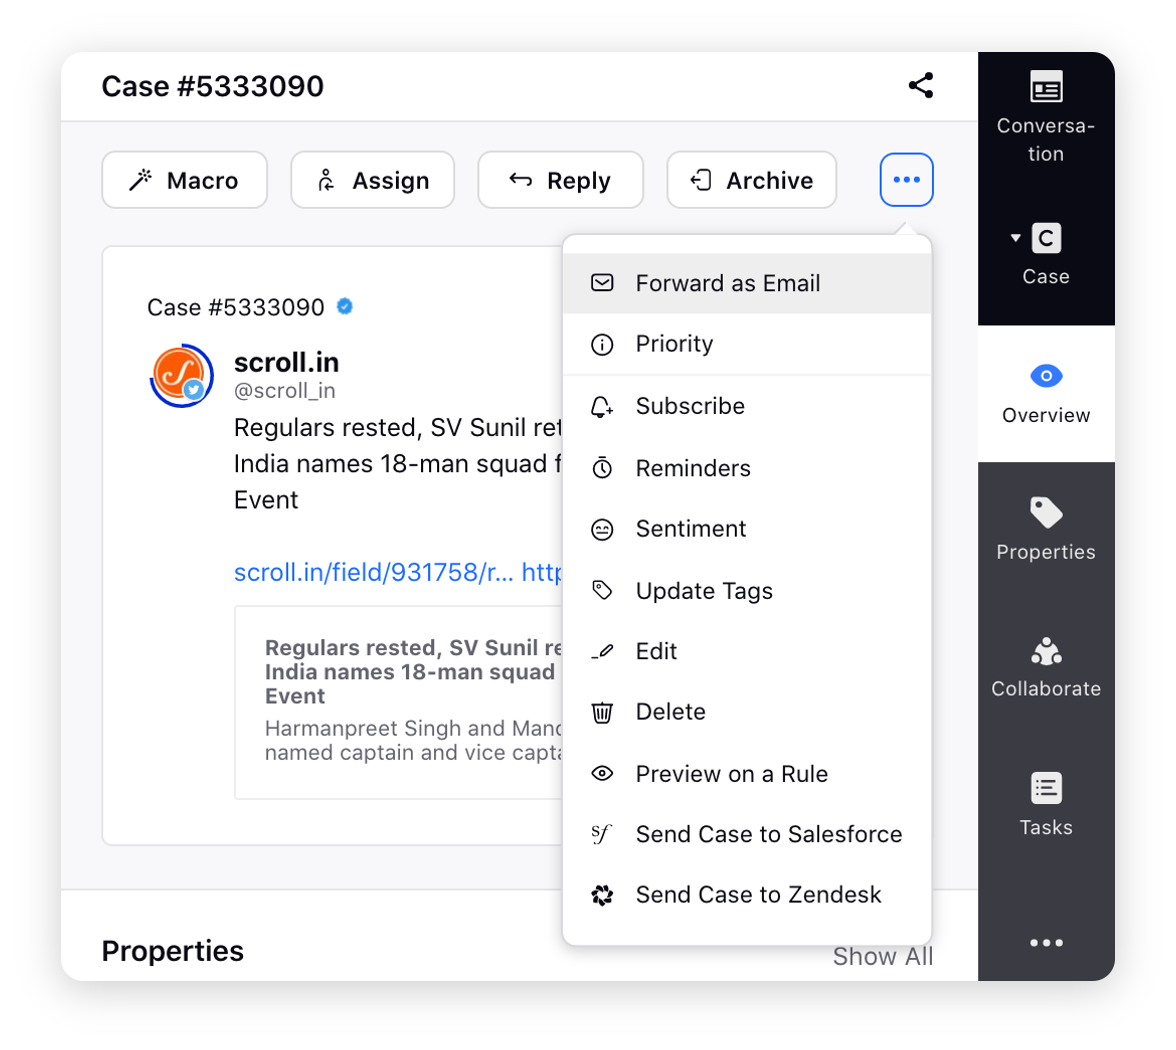
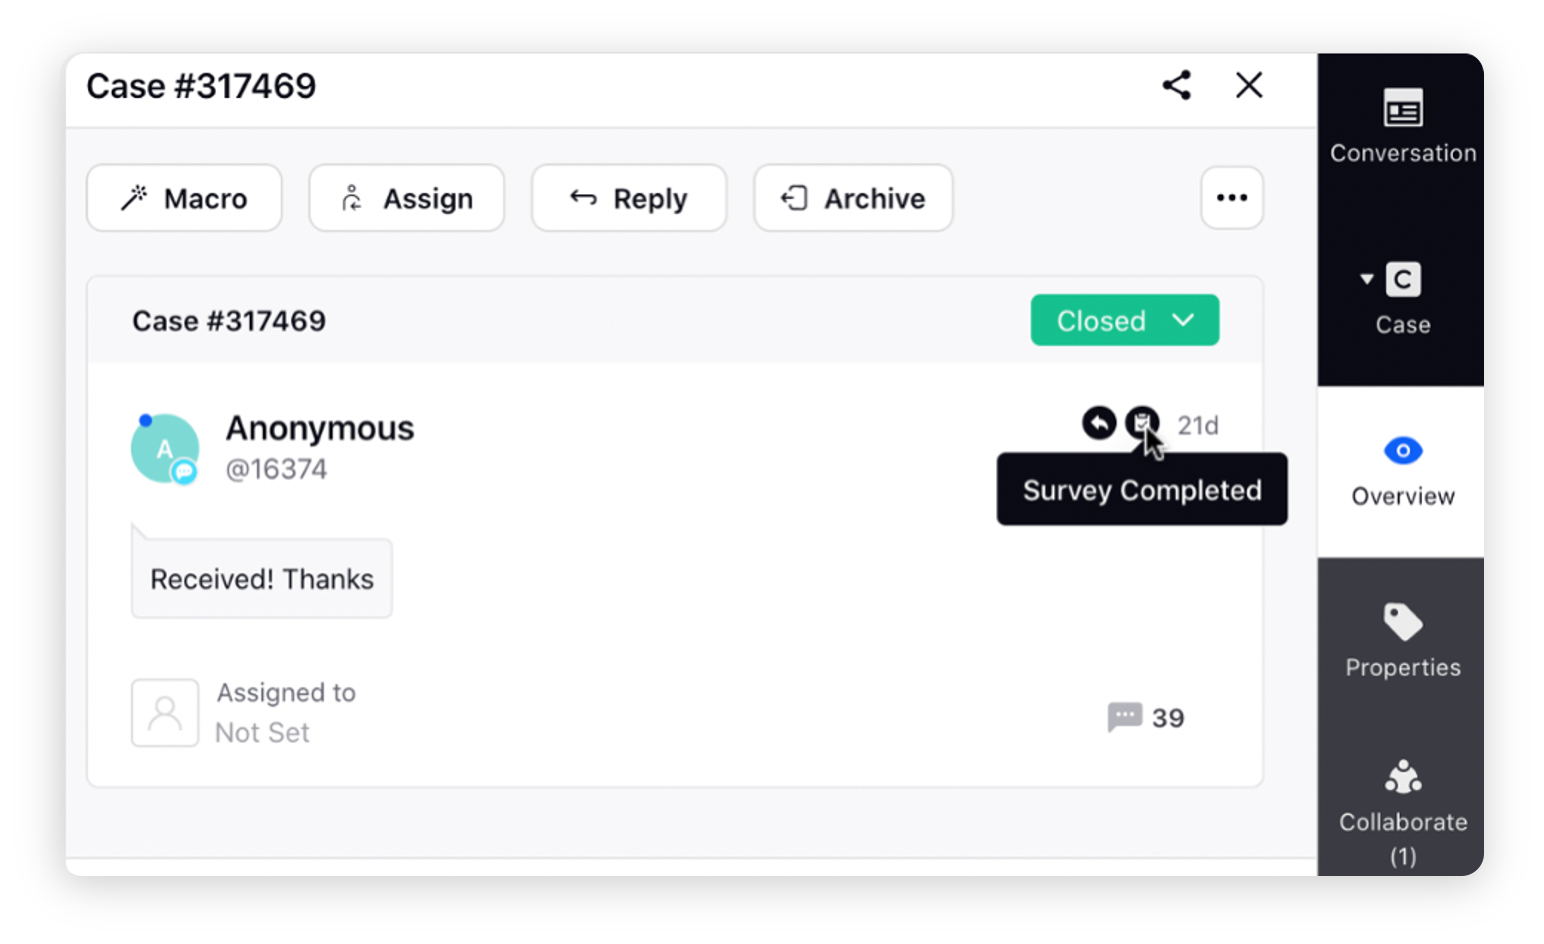
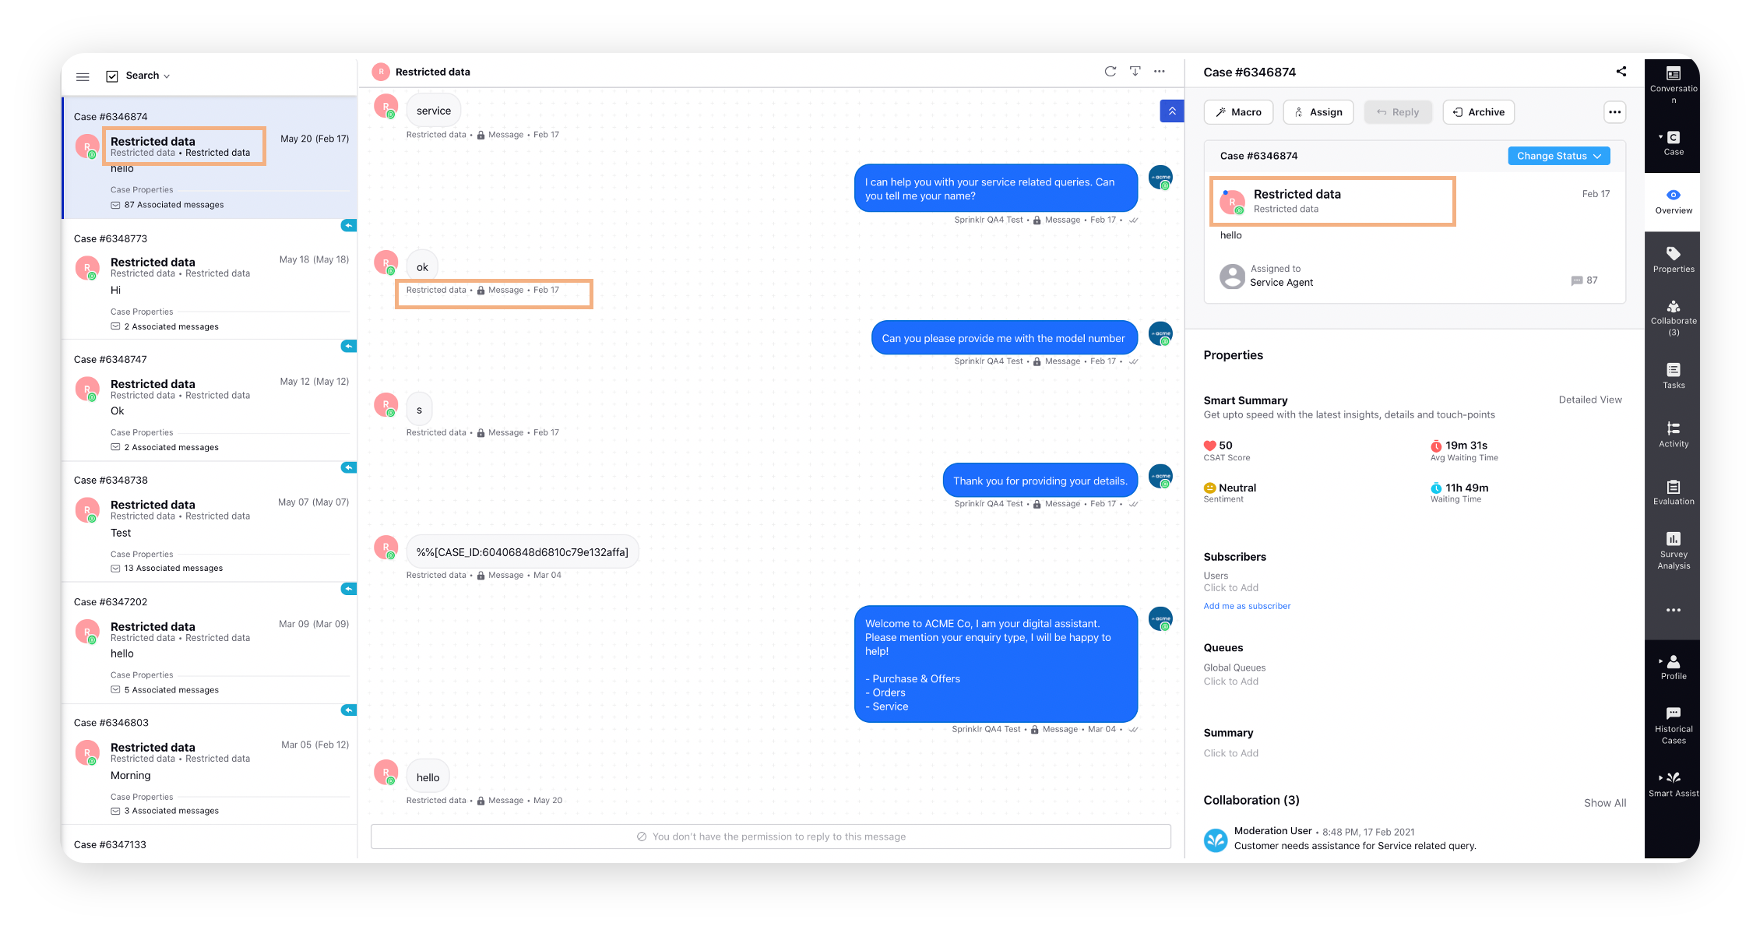
1 | Conversation | Shows the brand and fan messages associated with the case, as shown in the middle pane. You can also send a reply from here. Also, take various actions such as applying a macro, assigning the message, archiving the message, setting the reminder and sentiment, etcYou can also translate all the messages in the language set up for the UI of the logged-in user. Click the Options icon in the top right corner and select Translate All Messages. This translation will be shown only to the logged-in user. |

Case Details | |||
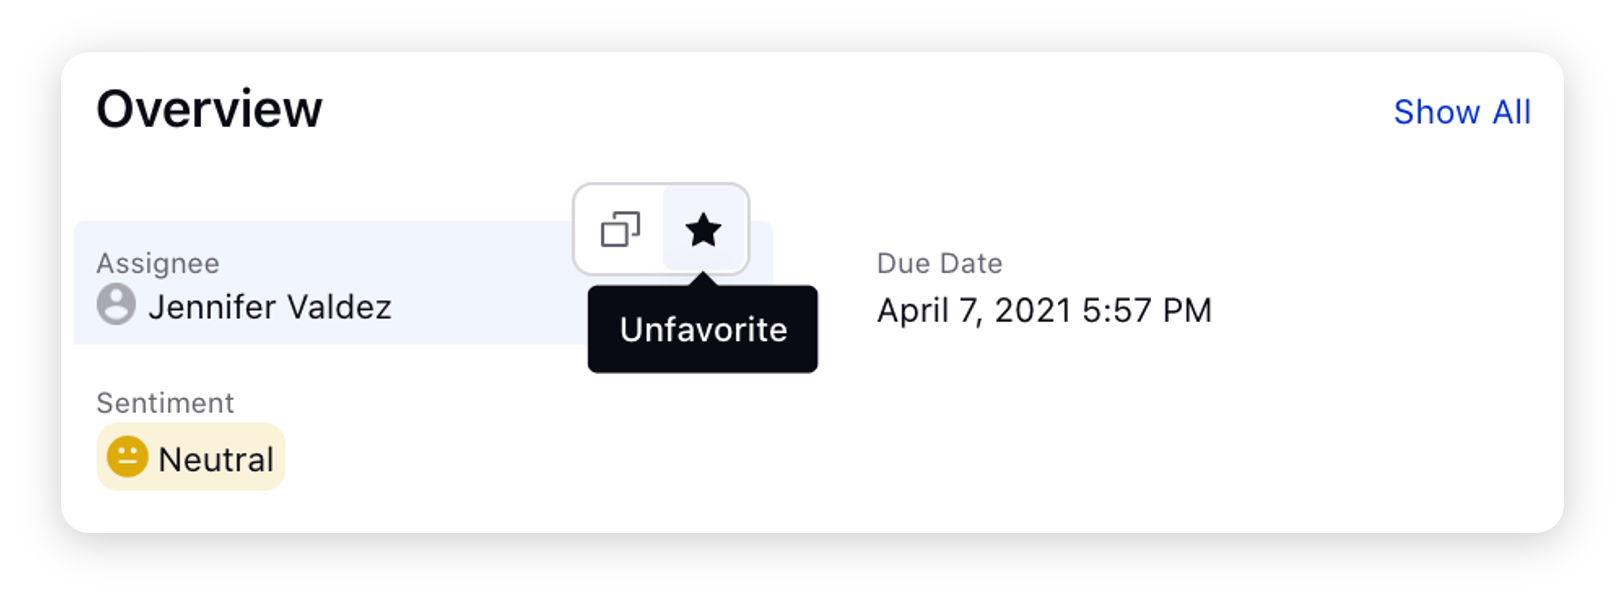
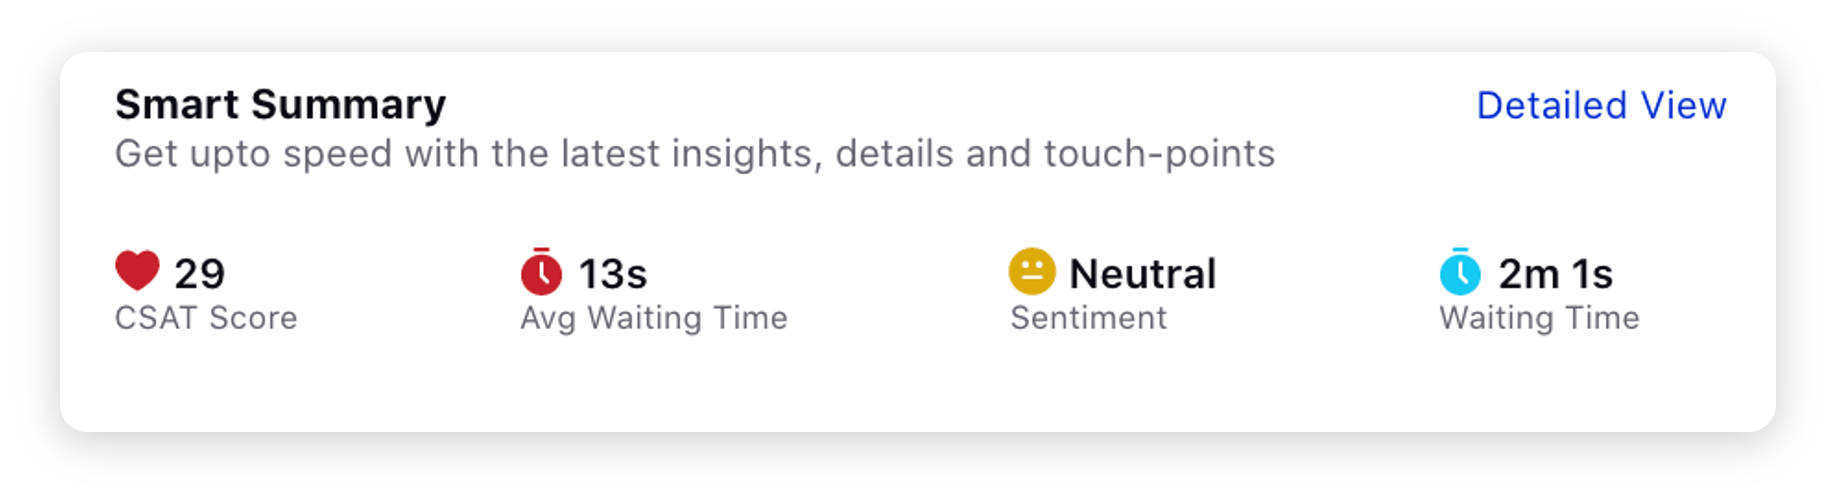
1 | Overview | Specially designed to enhance the experience of brand agents by giving a detailed overview of the case in a single window Key capabilities:
| |
2 | Properties | Update each custom field independently and perform actions such as copy custom properties values in one click and star your favorite custom fields. The help text is also visible on hovering over the tooltip, if set while creating a custom field. | |
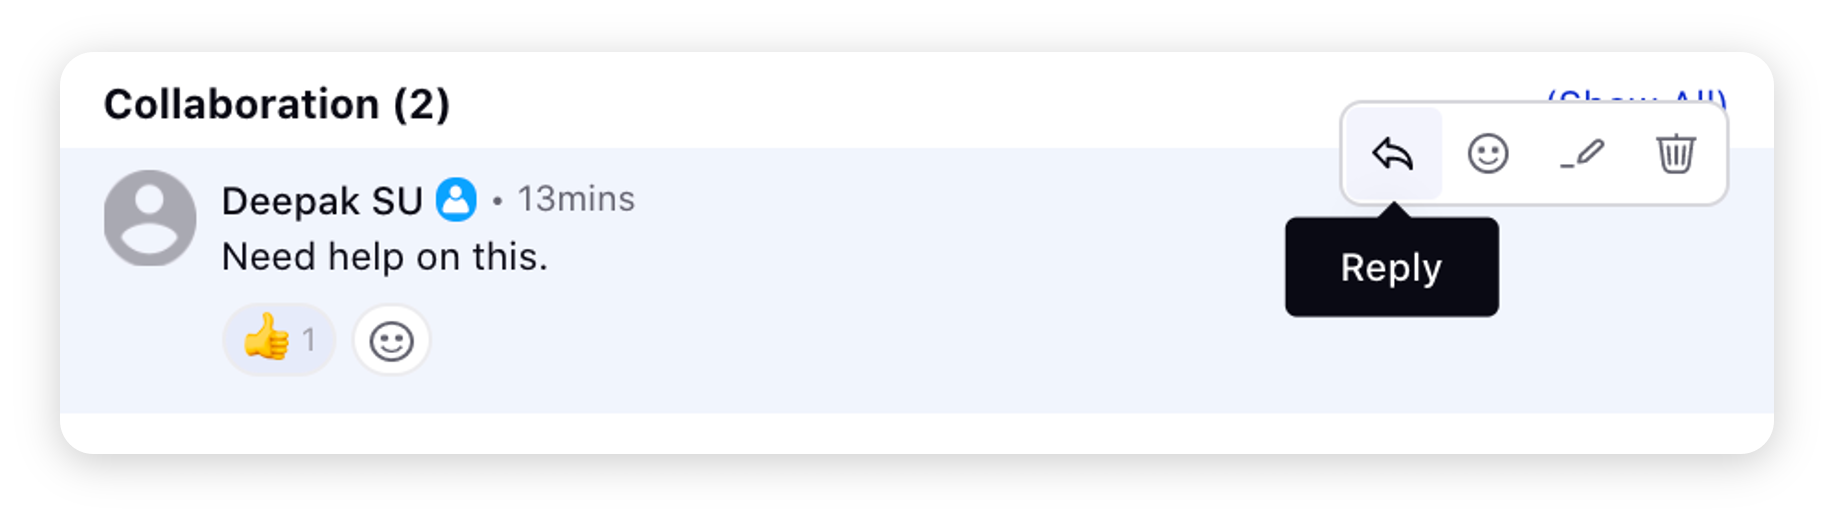
3 | Collaborate | Collaborate with your team members via messaging. You can send a new message in rich text format and view all the messages sent by other agents on the respective case to collaborate with your team. Based on the permission given, you can take various actions, such as replying to any comment, reacting to any comment, editing or deleting your own comment or exporting the messages in a CSV file. You can also search for a specific comment by typing the keyword in the search bar at the top. Additionally, you can control the visibility of your comment to make it visible to either everyone or to the current client. Notes in the reply box will be retained on case/tab switch.
| |
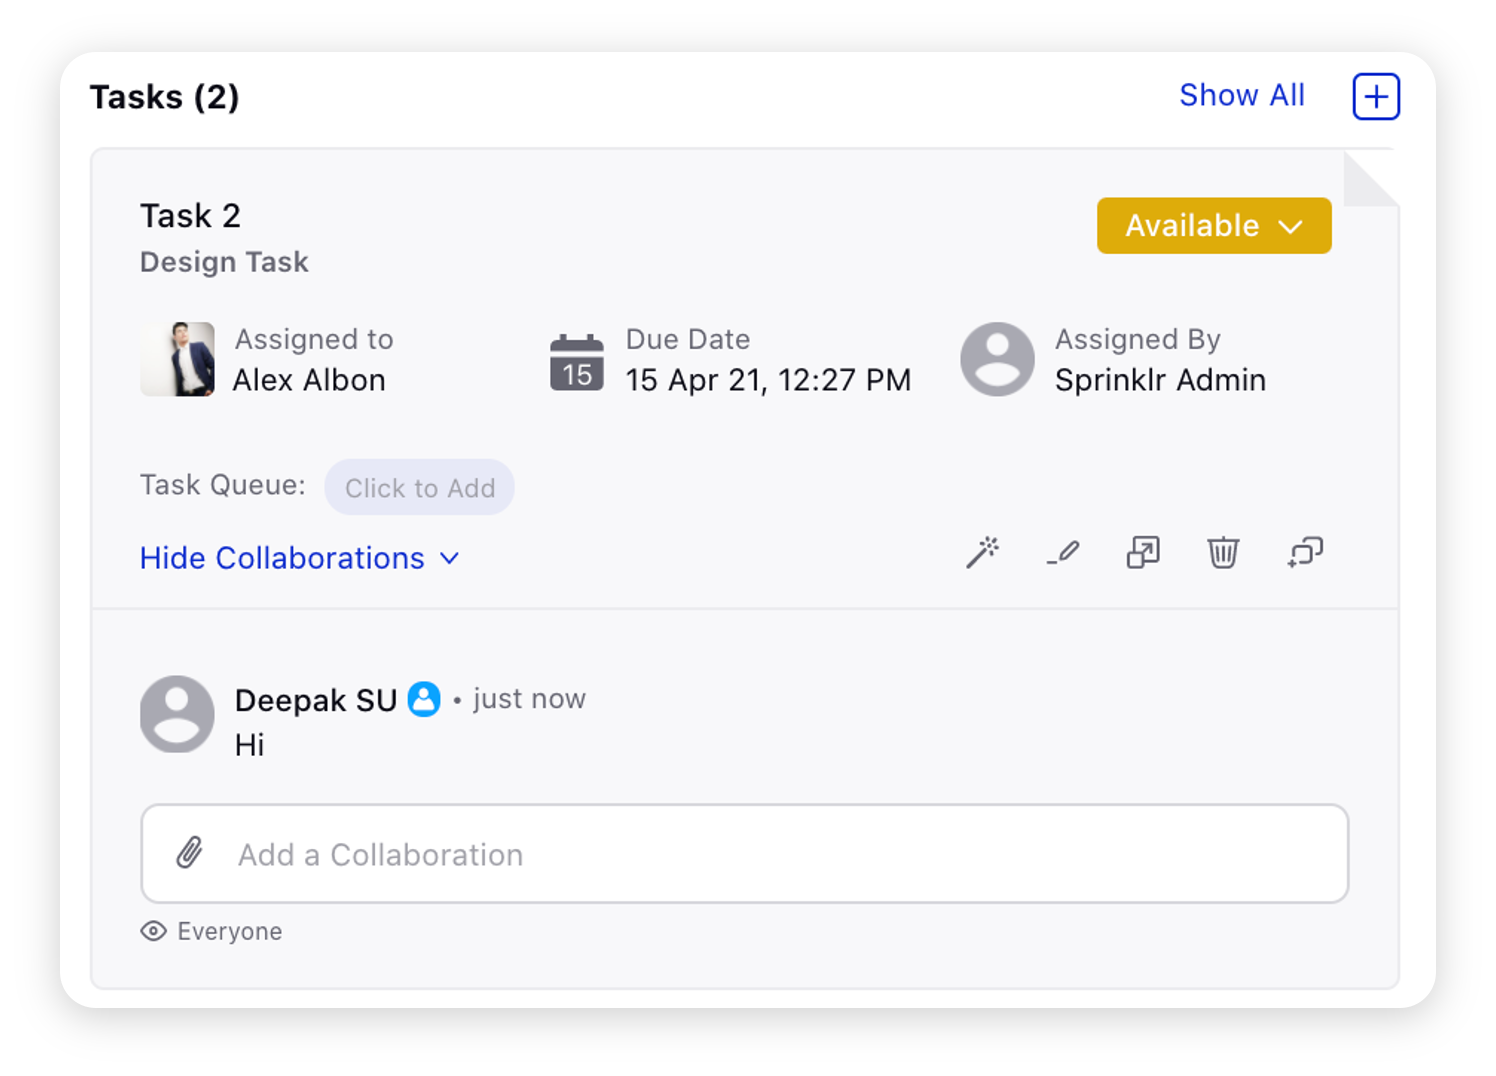
4 | Tasks | A record of tasks created to organize to-dos required on a case to provide your team with clear, efficient workflows. With Case Tasks, you can outline and assign action items and track the progress toward completion, all from the Tasks tab. From this tab, you can
| |
5 | Activity | View the record of various activities performed by agents on a respective case. For example - Updating the Case, Applying Macros, Rule Executions, etc. You can easily sort activities in ascending/descending order and also export the activities. You can also filter out moderation, system, or manual activities. Filtering can be done on basis of time duration and macro, CF, queue and user level changes. This will help supervisors, admins, and analysts to filter and debug any issue faster and more effectively. | |
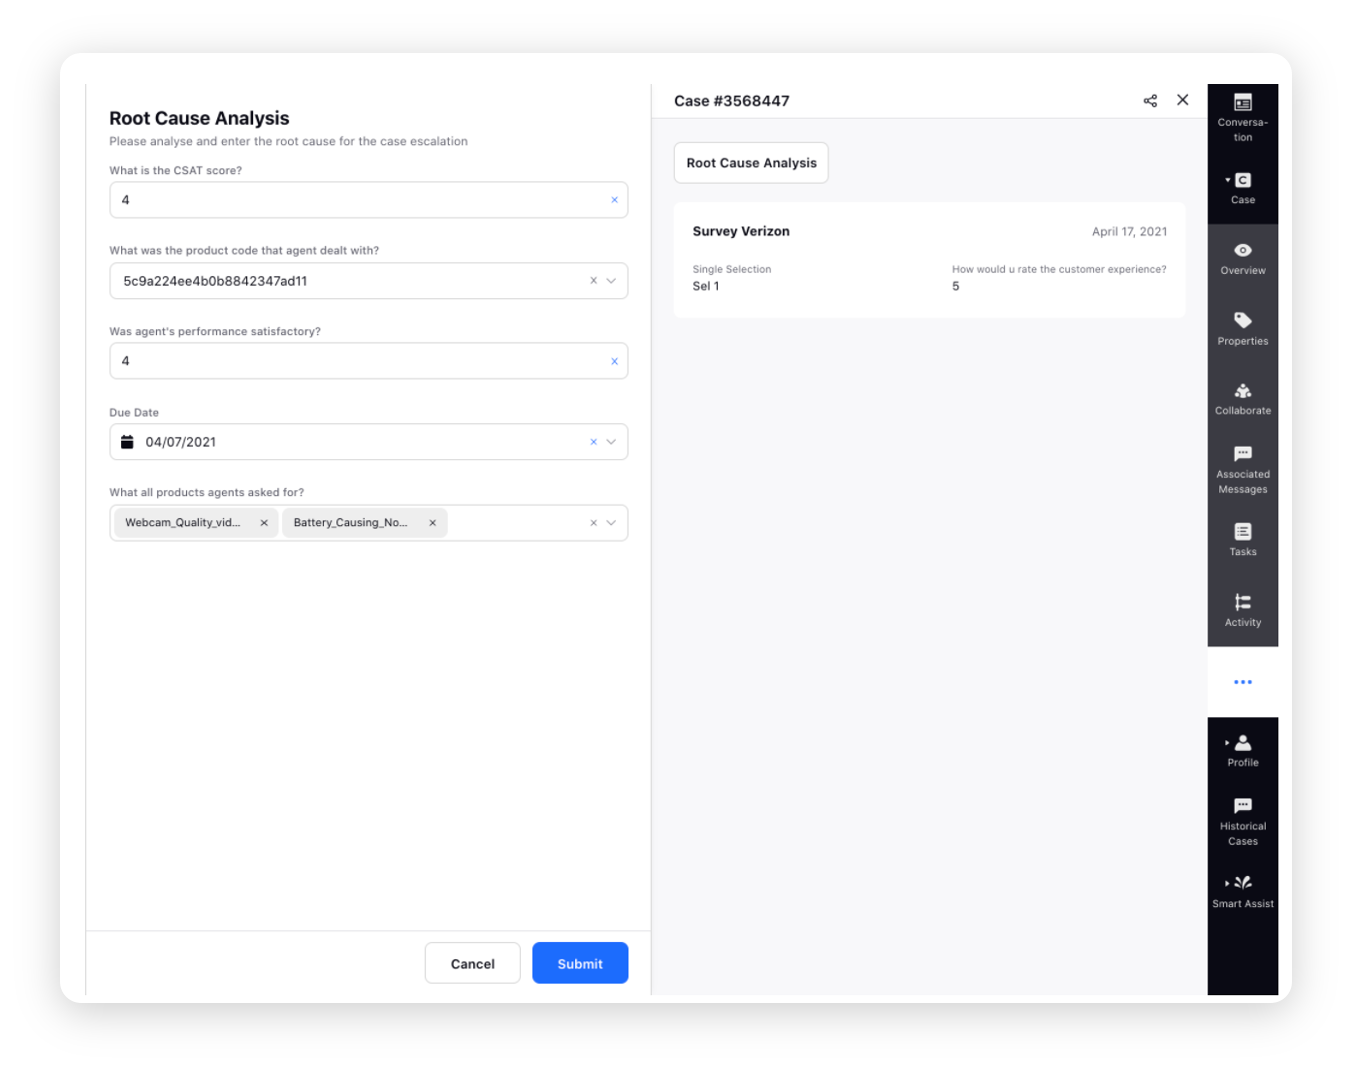
6 | Root Cause Analysis | Root cause analysis (RCA) is done on survey results to identify the root causes of problems faced by the customers. When it comes to customer experience and customer service, you should consider conducting a root cause analysis as it helps management address customer concerns, negative reviews, and recurring problems. It ultimately improves the customer experience. | |
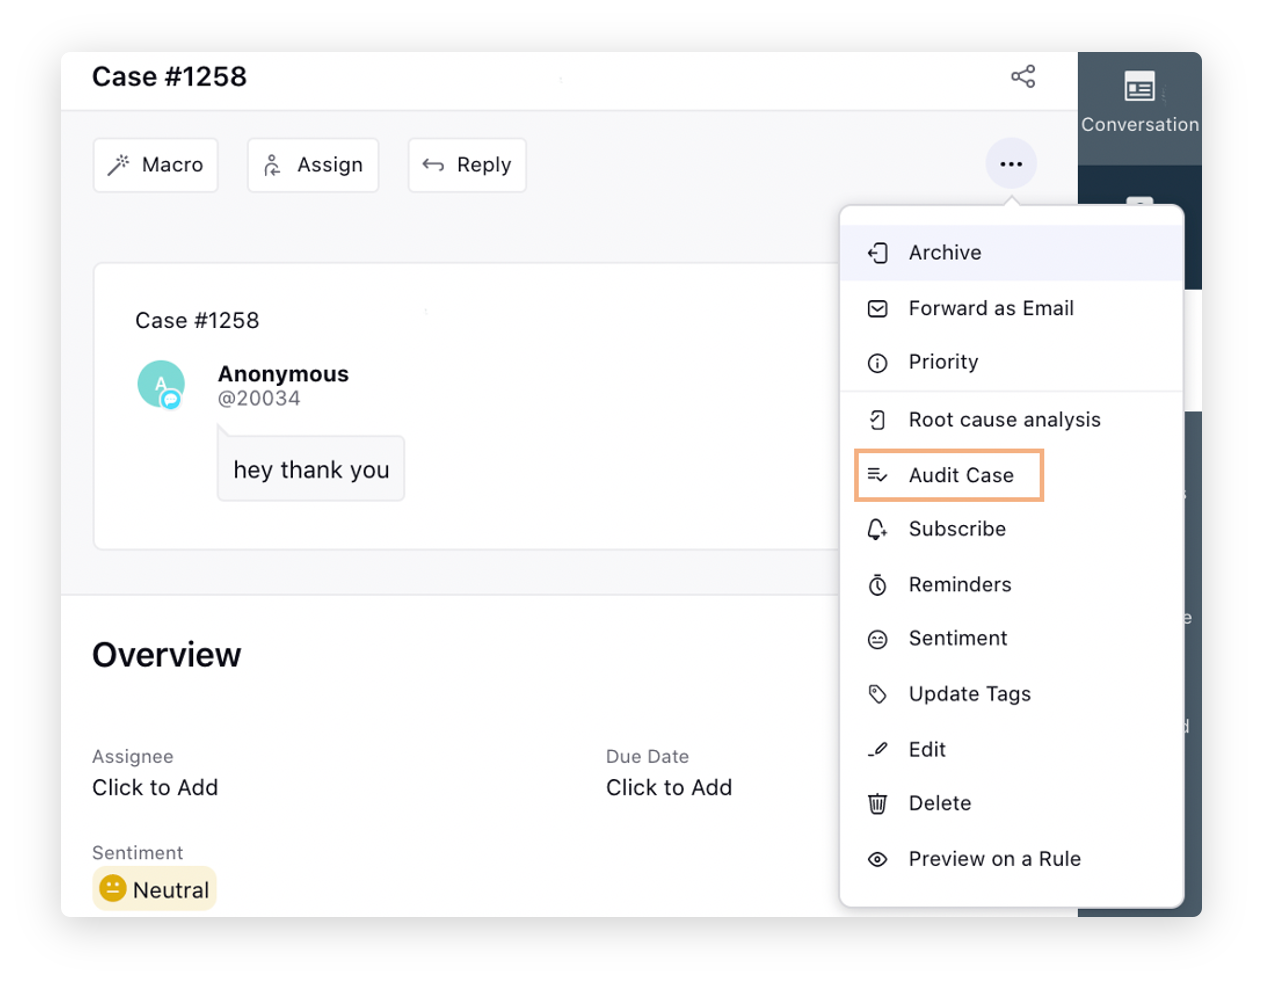
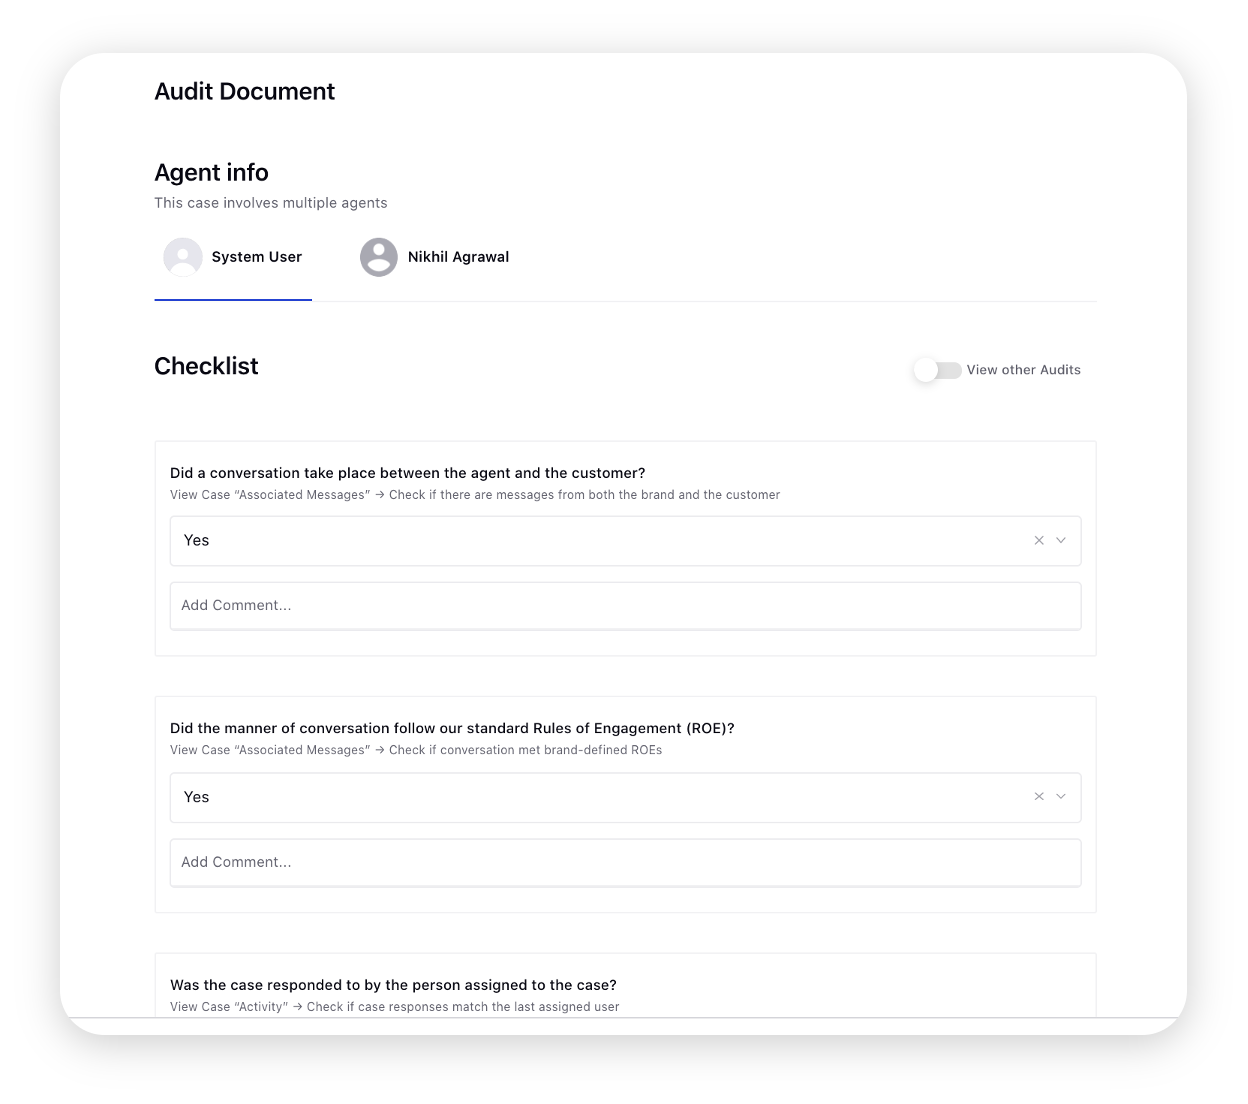
7 | Audit Results | You can create audit checklists to perform an audit of agents' performance. A checklist is created to ensure that all the criteria in the checklist are considered while performing the audit. In the top right corner of the Case Overview tab, hover over the Options icon and select Audit Case. On the Audit Document window, enter the auditing details in a pre-configured audit checklist form. The message/case can be audited for different agents who have worked on it by selecting the agent name. You can also add comments against each checklist item in the AddComment fields. Slide the toggle icon alongside View other Audits to view audit responses of other auditors. Click Save in the bottom right corner. Now, within the Audit Results tab, you can view the audit results against the assigned users by selecting the user from the Agent Info drop-down at the top. Within the Audit History section, all the audits performed by different auditors can be seen | |
8 | Salesforce/Zendesk/Oracle | View/edit external case details of third-party CRMs. Clicking on the case number, you will be redirected to the native website. | |


Profile Details | |||
1 | Overview | View all details related to the Profile.
Key capabilities:
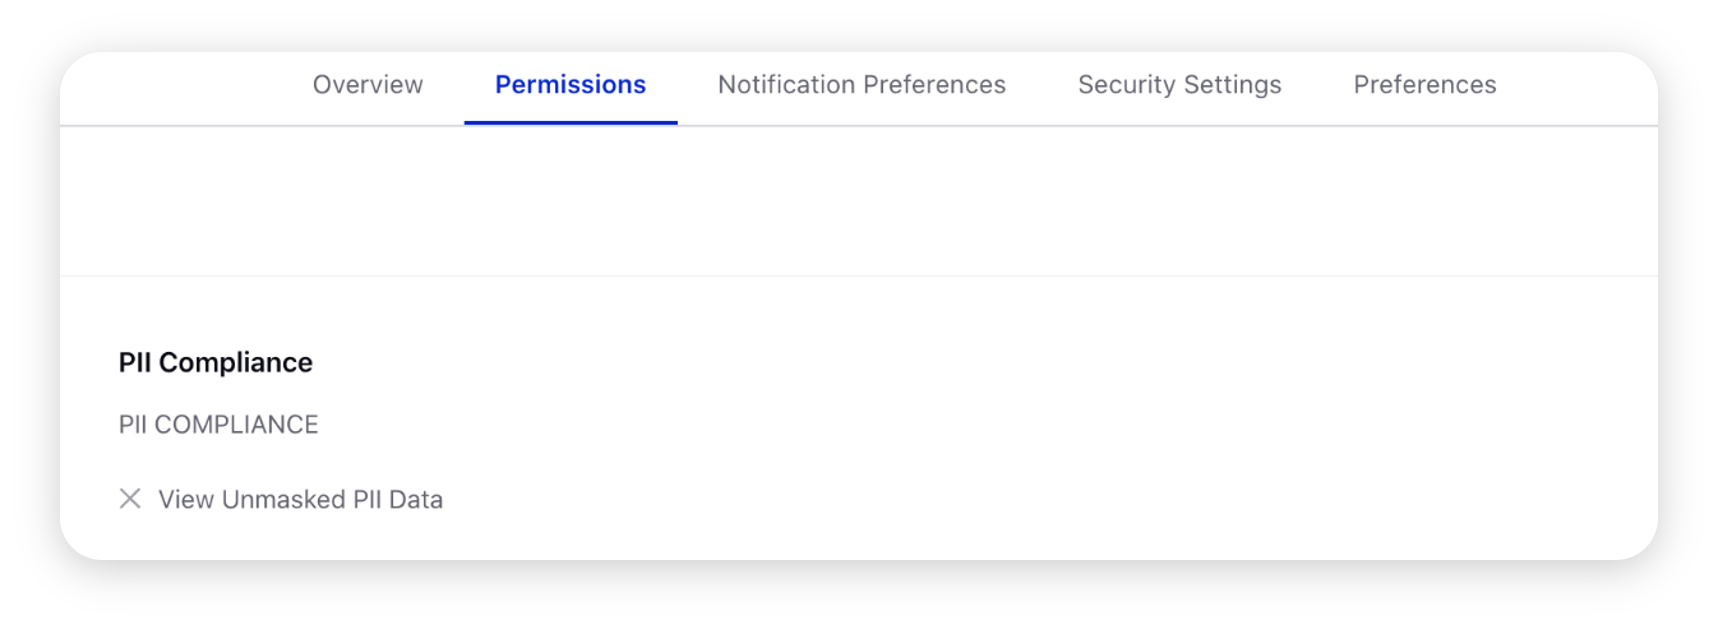
Note: 1. For Twitter, the profile refresh will happen automatically in 12 hours, and if required earlier, click the Refresh button. 2. You can hide the contact details of customers from the Profile Overview and Properties tabs by reaching out to your Success Manager. Next, provide the View Contact Info permission under Audience Profile to the specific users who require access. This action will ensure that the contact details remains hidden for other agents. 3. You can mask the profile details of users in the stream, conversation pane, and third pane. You can hide any sensitive profile information (PII) of the users stored in Sprinklr such as name, social ID, email, phone, address, etc. from the agents. In order to view masked profile details, the View Unmasked PII Data permission has to be provided by the admin to the agents. In order to view masked profile details, the View Unmasked PII Data permission has to be provided by the admin to the agents.
| |
2 | Properties | View and update profile custom fields and contact details and perform actions such as copy custom properties values in one click and star your favorite custom fields. The help text is also visible on hovering over the tooltip, if set while creating a custom field. | |
3 | Cases | View all the cases associated with the Profile. You can
| |
4 | Activity | View the record of various activities performed by agents on the respective profile, for example, applying a macro, etc. You can easily sort activities in ascending/descending order and also export the activities. | |
Historical Cases | |||
1 | Historical Cases | View all the historical cases along with the messages and attachments associated with that particular conversation on the native channel. You can collapse each case section by clicking the top case bar.
| |


Smart Assist | |||
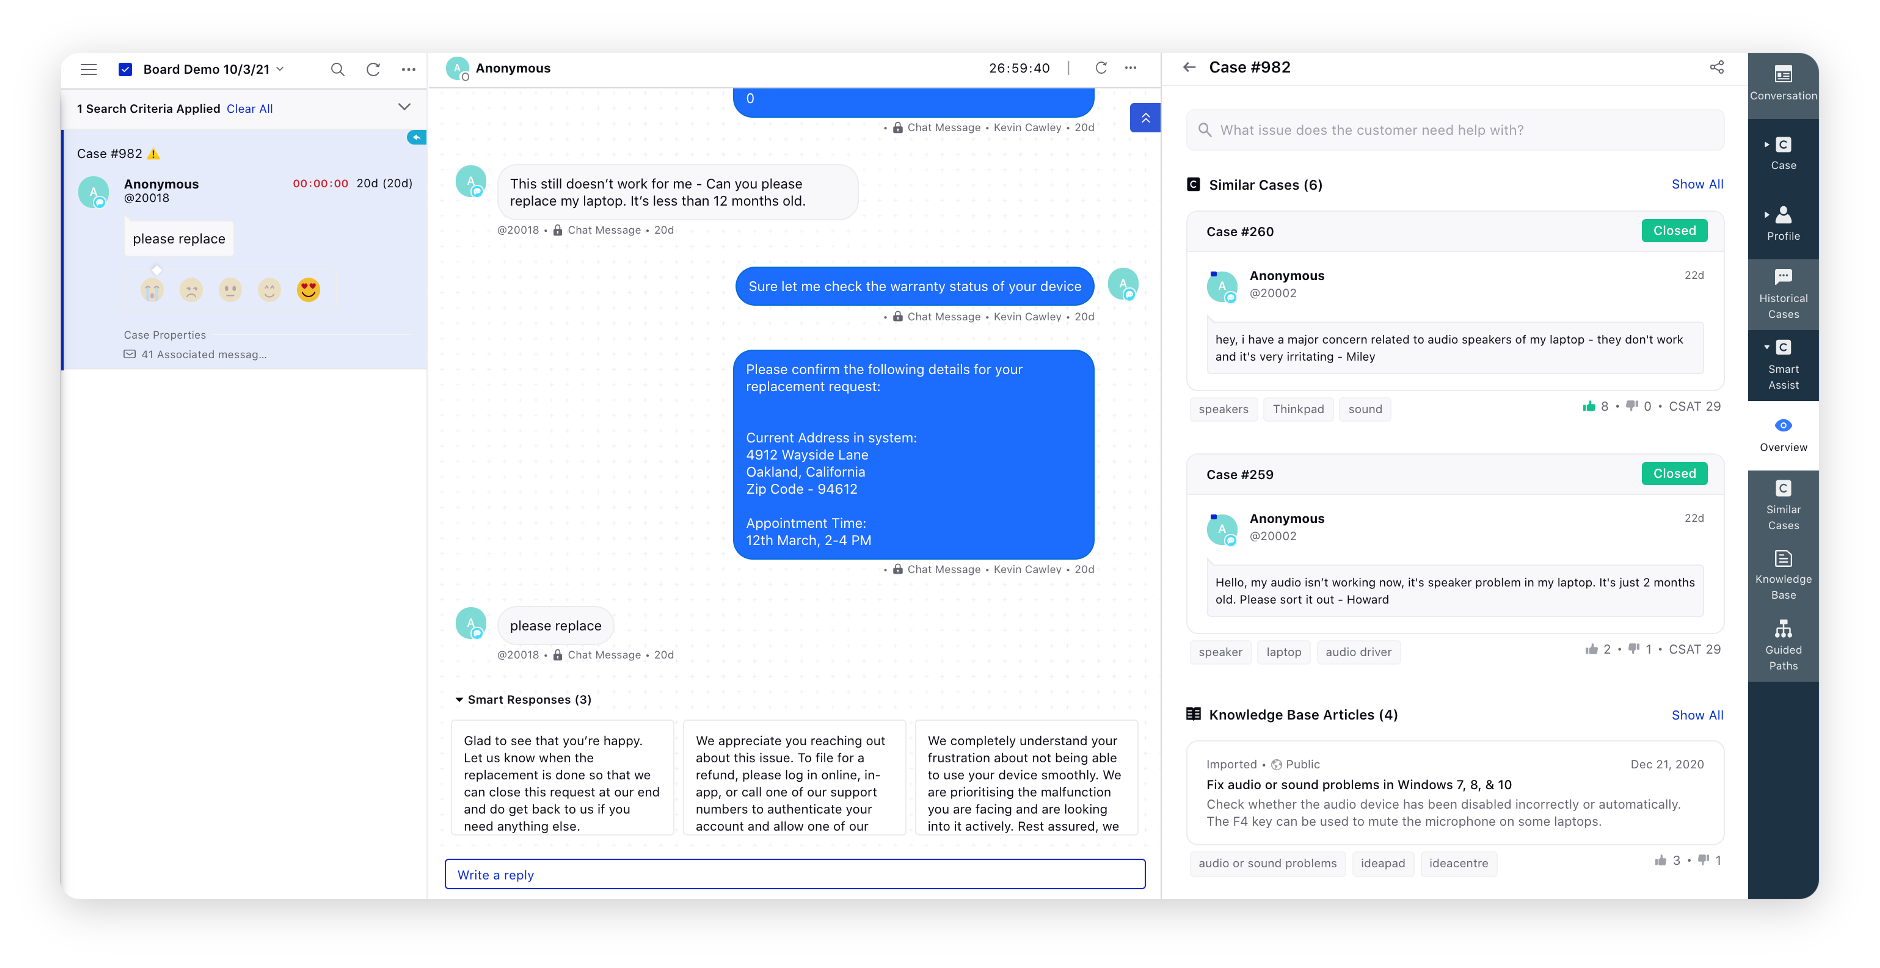
1 | Overview | Smart Assist driven by AI recommends Similar Cases resolved in the past and Knowledge Base Articles for agents to quickly refer to solve customers' queries
| |
2 | Similar Cases | Depending upon the intent of the conversation, agents will be provided with AI-generated recommendations of similar resolved cases handled in the past. | |
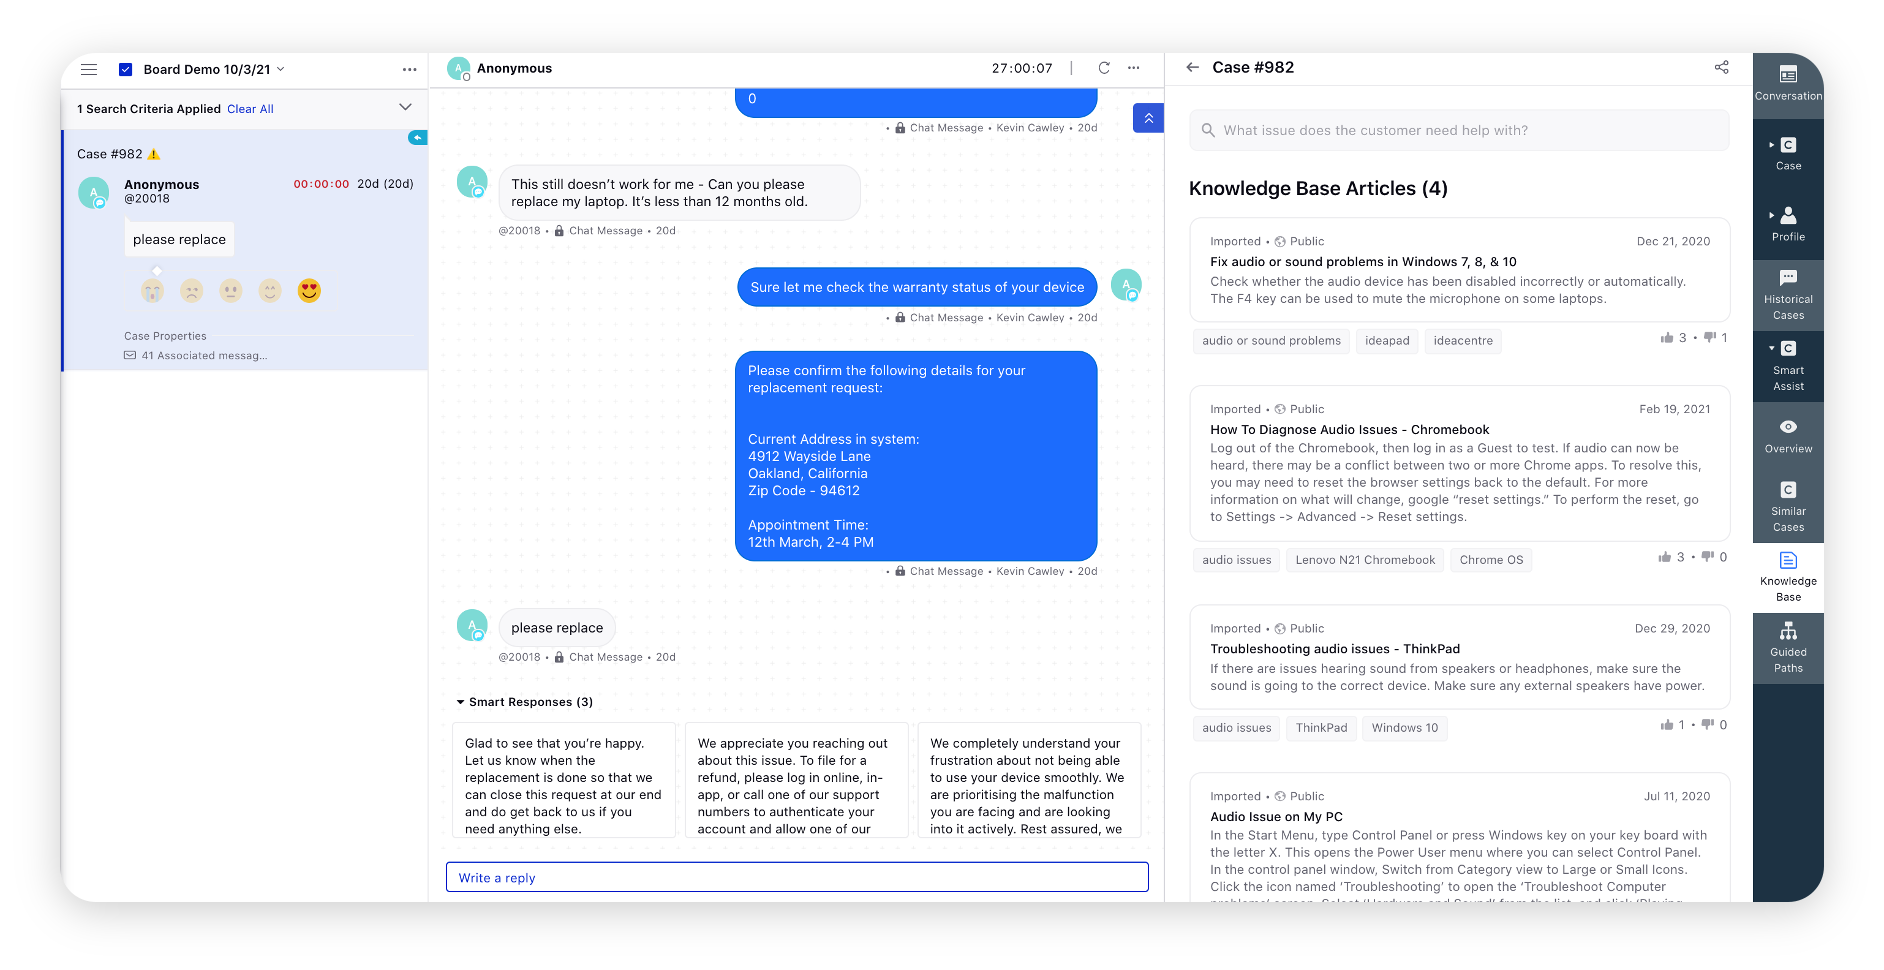
3 | Knowledge Base | Smart Comprehend driven by Sprinklr AI comprehends the case conversation and suggests the most relevant information extracted from an article. Agents can quickly refer to the information extracted from the articles and also share the URLs with the customers. | |
4 | Guided Workflows | Guided Workflows provide agents with relevant questions to ask customers, take inputs from them and navigate them to the next action to be performed accordingly. These are easy to configure and save significant agent training and re-training time as well as cost. You can also enable AI-generated recommendations of guided workflows depending upon the ongoing conversation. Agents can click Show All to view all the Guided Workflows. You can also filter the Guided Workflows on the basis of tags.
| |