Blacklist Audience Lead Records Via Data Pipeline
Updated
Maintaining a Do Not Call (DNC) list in an outbound call center is crucial for legal compliance, safeguarding a company's reputation, and ensuring operational efficiency while respecting customer privacy and preferences. It represents a best practice that should be integral to any responsible outbound calling operation.
Traditionally, when a phone number is identified on the DNC list, it is blacklisted, and no calls are made to that number for the specified duration set on the suppression list. However, these contact opt-outs and ins frequently change, necessitating manual editing of the suppression list to remove leads for renewed calling permissions. This manual process can be cumbersome.
Using data pipelines, you can effectively blacklist leads from the dialing process by simply adding an additional column to your spreadsheet and mapping it to the Blacklist Contact sink element. This feature enhances the control and management of lead lists, allowing for seamless exclusion of specific leads during outbound calling campaigns.
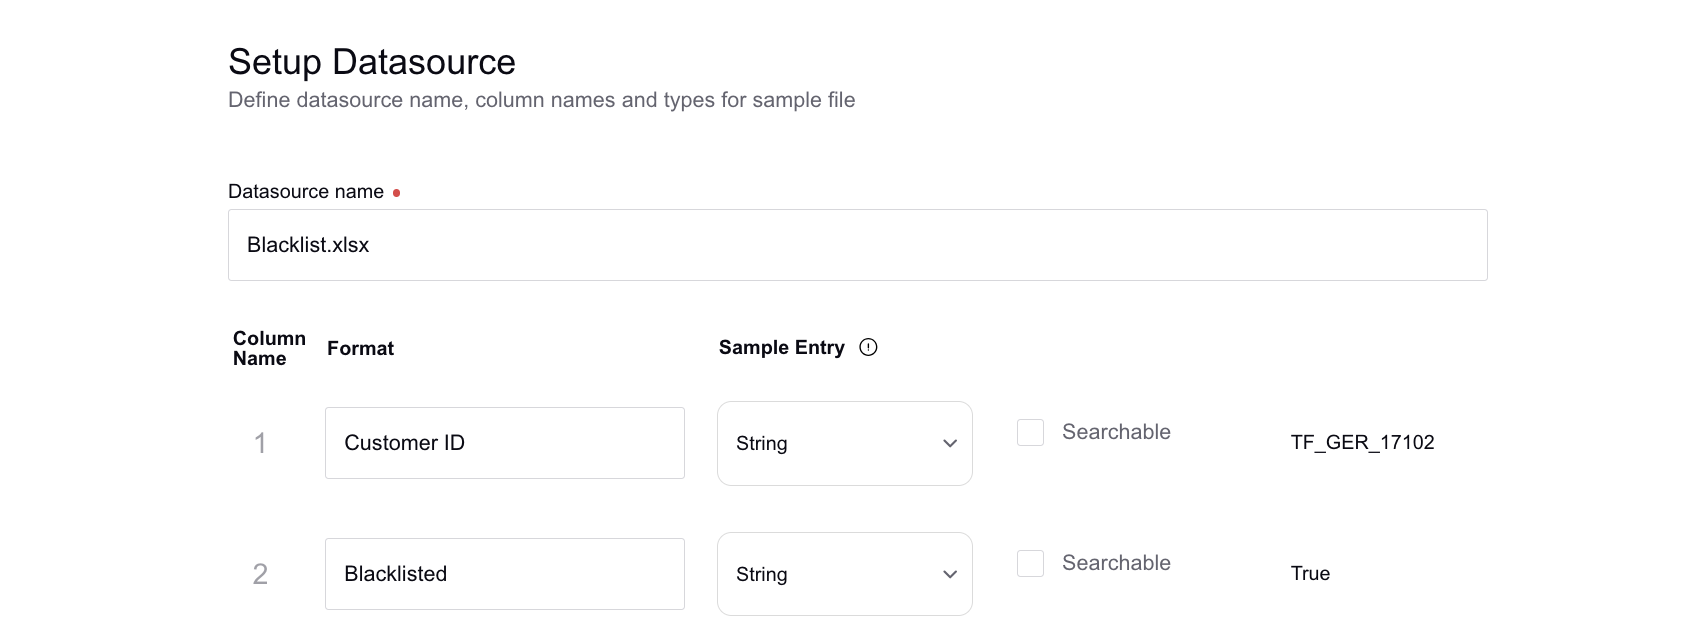
When blacklisting contact numbers, assign the value 'True' to the designated column. As a result, calls will not be dialed to the blacklisted leads. Conversely, if you wish to remove a contact from the blacklist for another campaign, you can achieve this by uploading a new file with the value 'False' assigned to the corresponding column. This dynamic approach ensures efficient lead management, allowing for easy inclusion or exclusion based on campaign-specific requirements.
To Blacklist Leads via Data Pipeline
Click the New Tab icon. Under Platform Modules, select Manage Pipelines within Listen.
In the top-right corner of the Data Flow window, click Create Normal Pipeline.

Click Add Datasource and select From File.

Upload the file. Add column names and types for sample file. Click Save and Proceed.
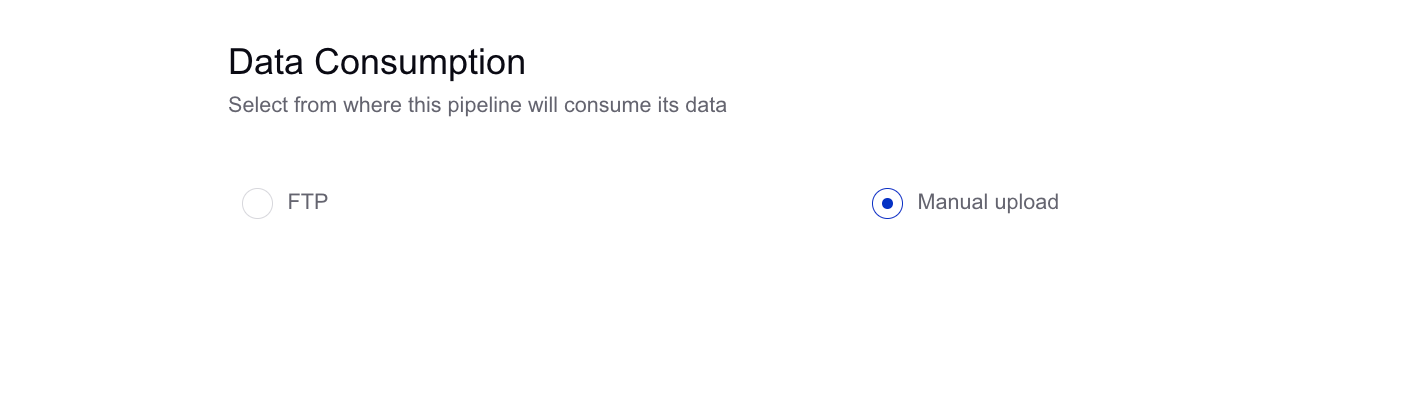
Next, select Data Consumption as Manual Upload and click Save.
On the Pipeline window, hover over the Addition icon linked to the data source and click Generic Sink.

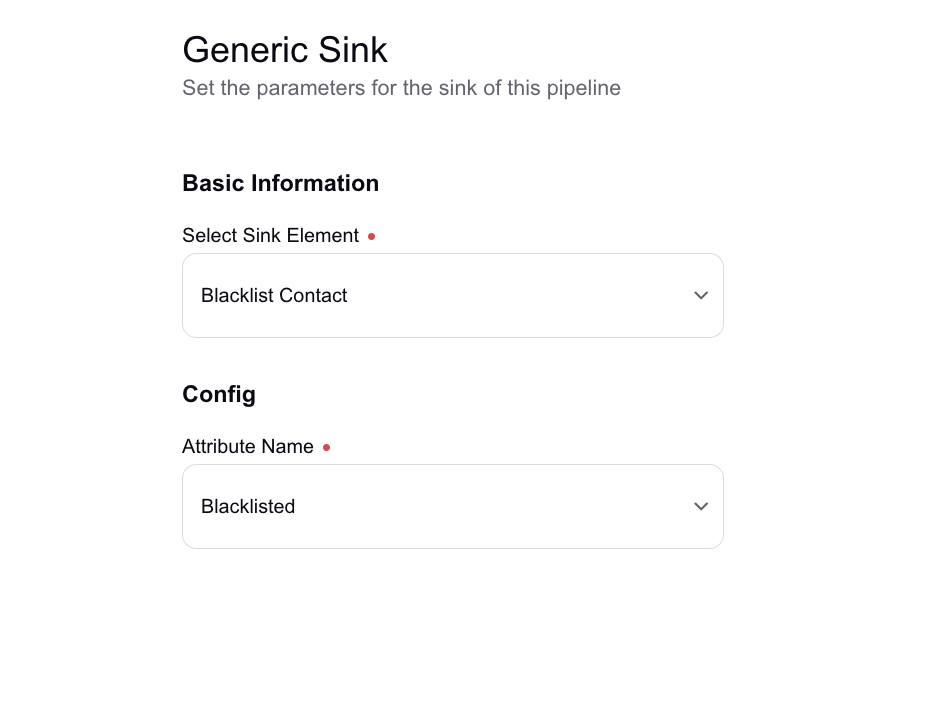
On the Generic Sink window, select the Blacklist Contact parameter from the Select Sink Element dropdown for the sink of this pipeline. Click Next.
Next, map the pipeline columns to match the sink report. The Customer ID field in the sink element is mandatory for you to map to sink the Blacklist Contact element. You have the flexibility to map it to any unique ID associated with the lead, ensuring a seamless and accurate integration.

Click Save at the bottom to save the changes.
In the top-right corner of the Pipeline window, enable the Pipeline status toggle to activate your pipeline.

Once the pipeline is activated, click Manual Run in the bottom right corner and upload the file. Click Run.

In this setup, each time a new lead list is uploaded, a blacklist is dynamically created based on the values specified in the blacklist field. For instance, if today Lead X and their associated phone number are marked as "True" in the blacklist field, calls will be restricted from going to Lead X. However, if next time, a subsequent lead list is uploaded into Sprinklr with details of Lead X and the blacklist field is set to "False," calls will be automatically dialed out to Lead X without requiring any manual intervention.