Suppression Lists
Updated
A suppression list is a list of phone numbers that should not be contacted for various reasons. This list could include numbers of individuals who have requested to be placed on the "do not call" list, those who have previously asked to be removed from the calling list, or those who are considered ineligible for certain types of calls (e.g., for regulatory or compliance reasons).
WHY ARE THEY IMPORTANT?
Maintaining a suppression list is crucial for complying with regulations and avoiding any legal or ethical issues related to unsolicited calls. It is the responsibility of the contact center to ensure that the suppression list is regularly updated and that the agents are aware of the numbers that should not be contacted. In addition, automated dialing systems used in the contact center should be programmed to skip the numbers on the suppression list to avoid any accidental calls.
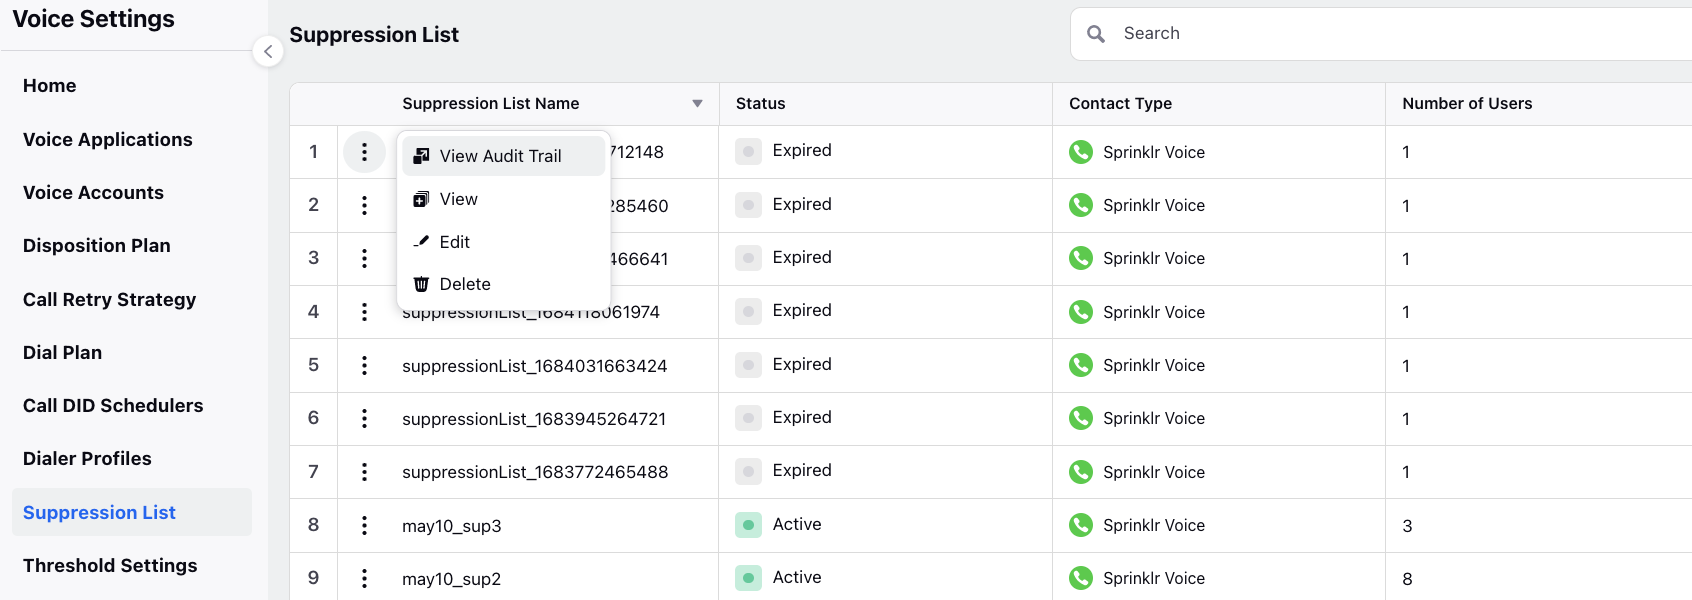
SUPPRESSION LISTS IN SPRINKLR
To set up Suppression lists in Sprinklr, Campaign managers can click on Voice Care in the Launchpad. Clicking on Suppression list under Voice settings you will see a list of all available suppression lists and their associated details

Metric Name | Description |
Suppression list name | Name of the Suppression list |
Status | Indicates if the suppression list is active or inactive. (Lead status can change based on client interactions or campaign changes.) |
Contact Type | Indicates the channel (voice, SMS, or Email) that the suppression lists applies to. |
Number of users | Number of leads in the list |
List Type | It can be standard or custom |
Description | Additional info for the list |
Expiry time | Indicates the length of time that the suppression list remains active. |
Created time | Time at which the list was created |
Modified time | Time at which the list was last modified |
CREATING A SUPPRESSION LIST
As seen in the picture above on the top right-hand side of the screen, click on “Create Suppression List”:

Enter the Name for the suppression list.
Any additional notes or information about the leads in the Description.
Campaign managers can specify the time till they want the list to be active in the Expiry time.
Suppression list without an expiry time is created for an endless time period.
Suppression List with expiry time would expire on the expiry date.
The list of leads opting out of communication can be acquired from agent interactions and compiled & uploaded in the form of a CSV/excel file, or lead details (contact number, name, expiration date) can be added manually to the list. There is no limit for adding leads to a suppression list.
![]() Note: Selecting a workspace automatically adds the suppression list everytime you create a campaign in that workspace.
Note: Selecting a workspace automatically adds the suppression list everytime you create a campaign in that workspace.

Click on "Save” once the file has been uploaded or contacts are added manually.
There are a few iterations that can be performed when it comes to the expiration dates of the suppression list and the individual lead/contact.
Suppression List Expiry permutations:
Suppression list never expires, Individual contact can expire on its own time: In this case once all contact expires, suppression list will be empty (suppression list has no expiry time but contacts have an expiration date)
Suppression list expires, but there is no expiry on individual contact: In this case on suppression list expiry, all contacts are deleted (suppression list has a expiry time but contacts have no expiration date)
Suppression list expires along with contact can also expire: Contact will be removed on its expiry. When suppression list expires even unexpired contact are deleted(suppression list and contacts both have expiration date)
Permanent List: Neither suppression list nor contact is expiring(both suppression list expiry time and contacts expirate date are blank), nothing is deleted.
EDITING A SUPPRESSION LIST
To edit a Suppression list, go back to the list view of all Suppression lists, hover the mouse over the 3 vertical dots on the left of the suppression list to be updated and click on Edit.

The window that opens is same as the create suppression list window. Campaign managers can use this feature to change expiry dates, add new leads to the list manually or upload a new file.
VIEW AUDIT TRAIL OF A SUPPRESSION LIST
The activity pane of a suppression list will show a record of any changes made to the fields, including the file name, total number of records, created records, updated records, successful file URL, failed records, and failed file URL.
VIEW A SUPPRESSION LIST

Clicking on the View button in the same pop up as Edit, Campaign managers can view the leads inside these lists and make changes by hovering the mouse over the three vertical dots next to the leads and perform activities like:
Deleting leads from the list,
Changing expiry dates,
Changing contact numbers.

New contacts can be added to the list by clicking on the “Add Contact” button. This can be done manually or uploading an Excel/CSV file.

DELETE A SUPPRESSION LIST
To delete a suppression list, hover on the three vertical dots next to the list desired to be delete and click on the last option I.e., “Delete.” The list will leave the Suppression list view and the leads in that list would leave the DND status, and back into the calling lists of agents.

ADDING SUPPRESSION LIST TO A CAMPAIGN
Campaign managers can add a suppression list to a campaign by editing/creating a new campaign and adding the Suppression list name from all lists created on the platform. Multiple suppression lists can be added to a single campaign.

This Suppression List already contains all the automatic additions that were earlier configured at the time of creating suppression list by selecting the workspace and you can also inline create it.