Boost LinkedIn Event Posts from Sprinklr

Updated 

LinkedIn events and posts created on the native platform sync automatically with Sprinklr, allowing you to boost them directly from Sprinklr. This article explains how to boost event posts created natively on your company page using the Sprinklr Editorial Calendar.

To Create Event and Post Natively on the Company Page

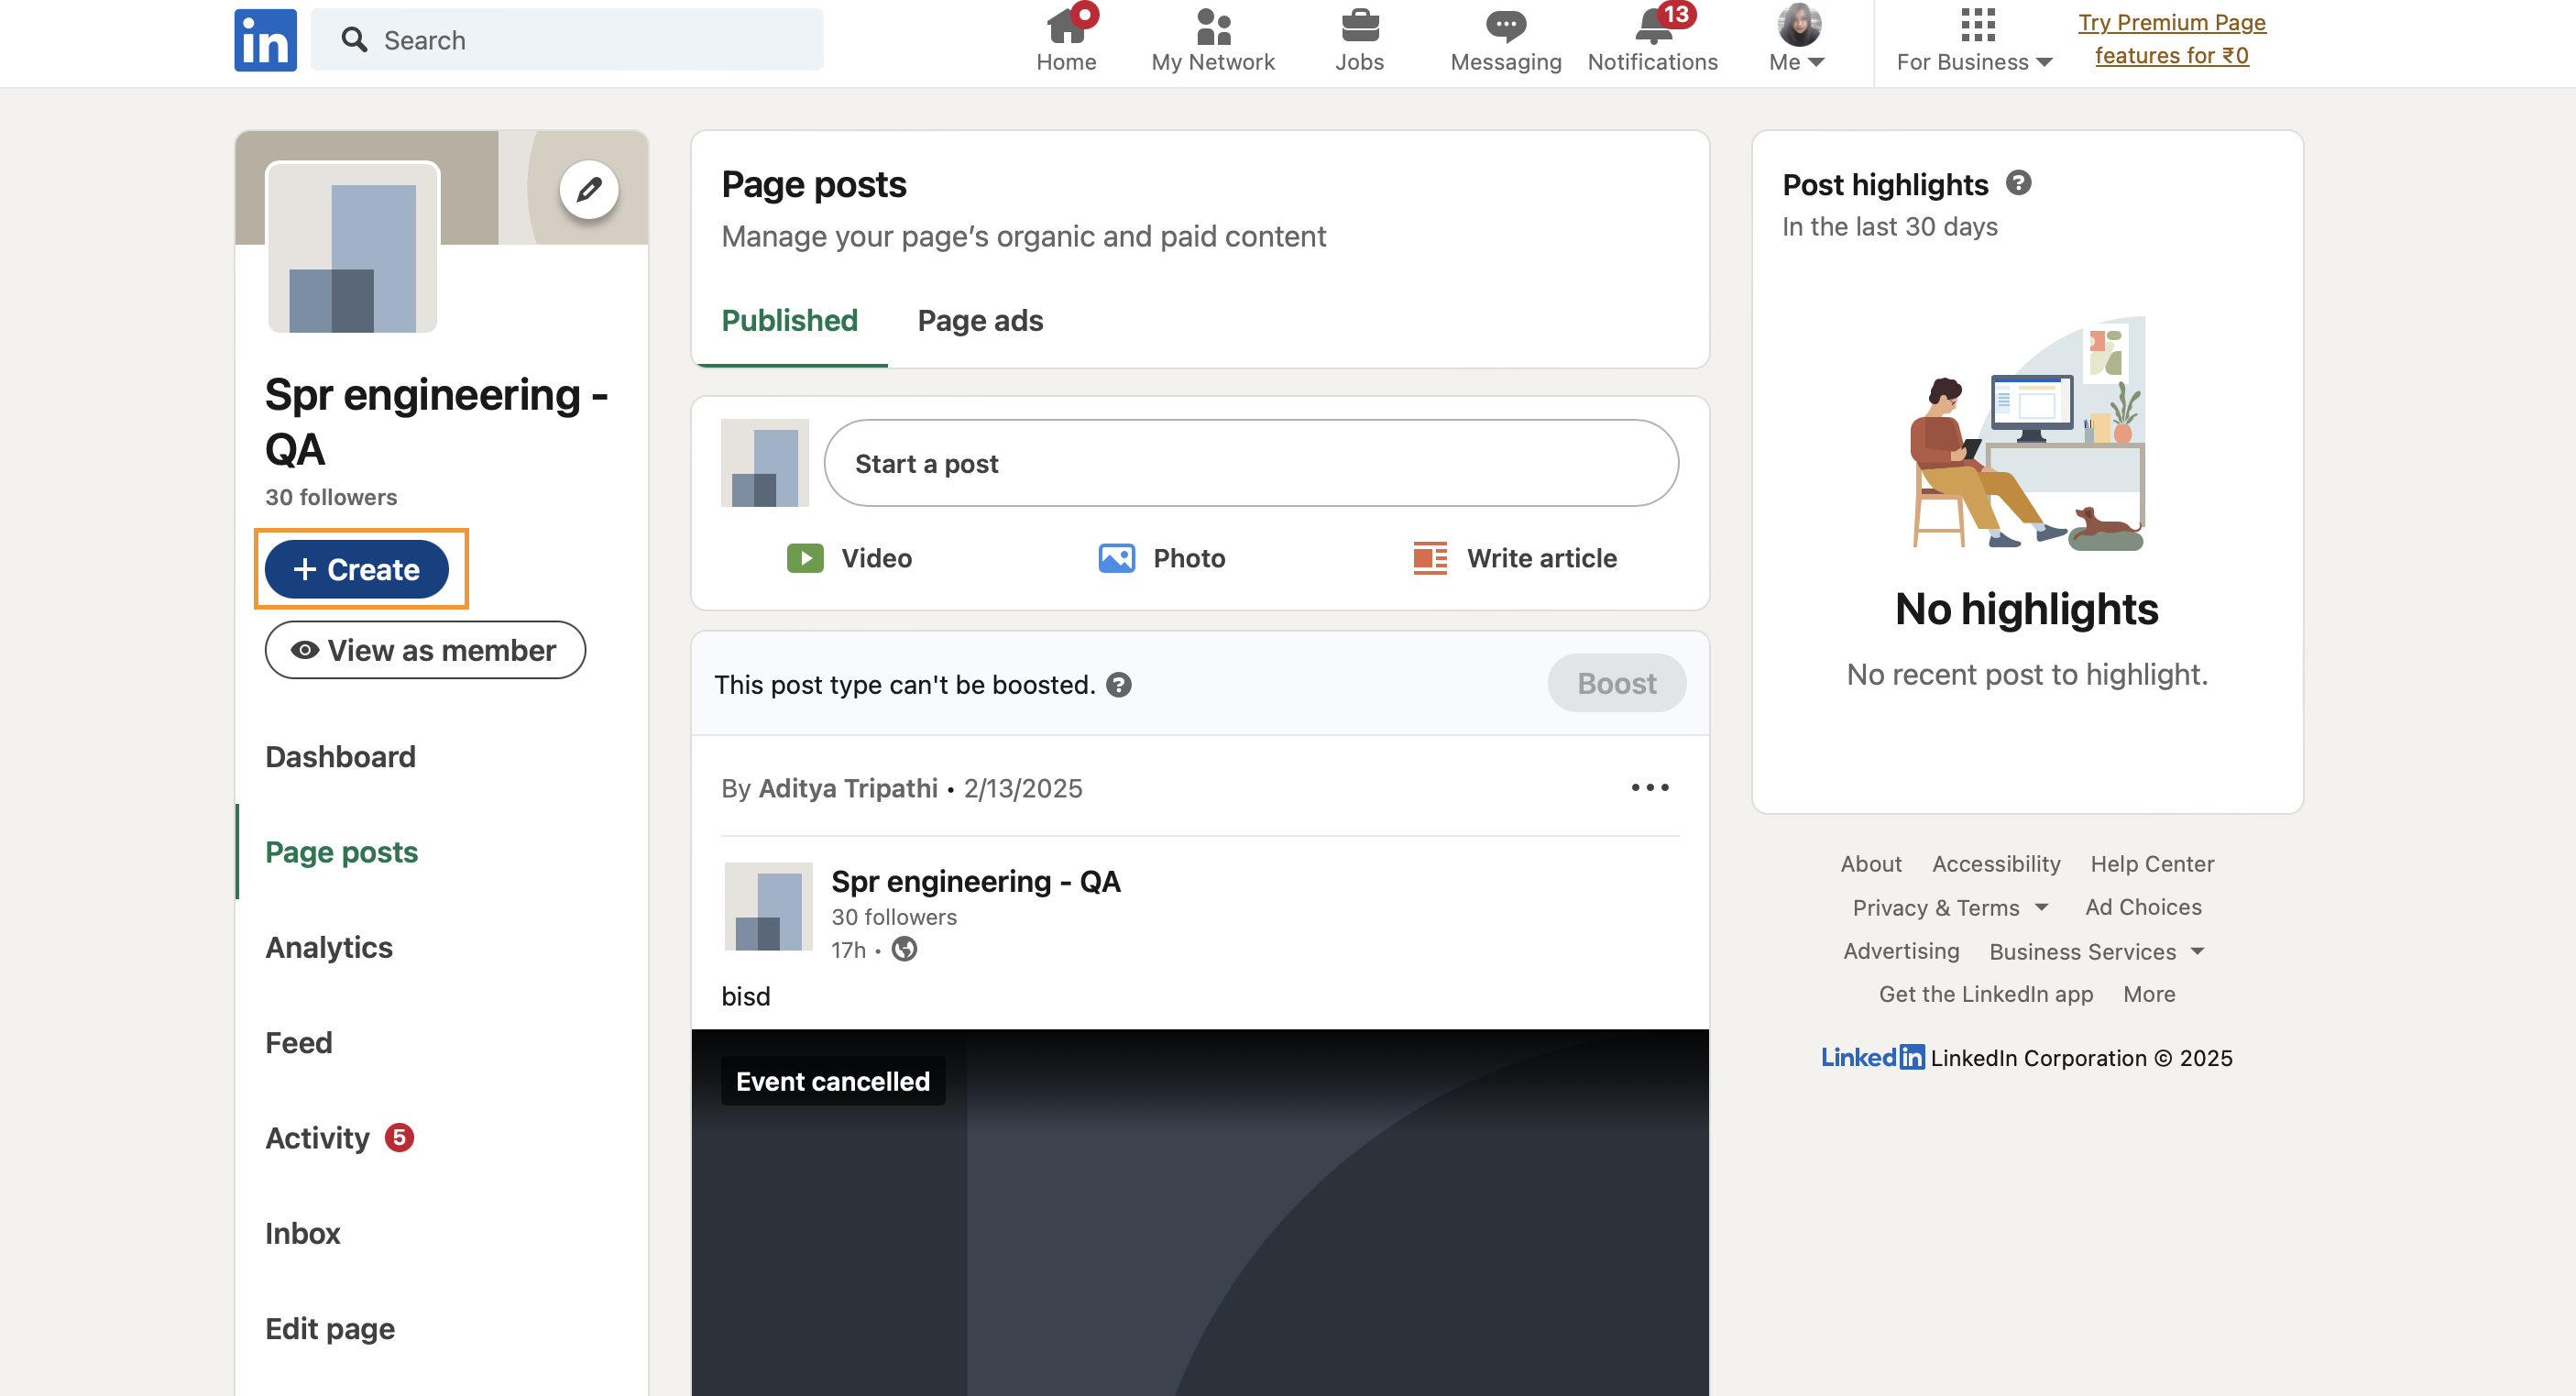
  1. Go to your Page super or content admin view.

  2. Click  +Create.

  3. Click Create an event.

  4. Select the event type and enter a name for your event.
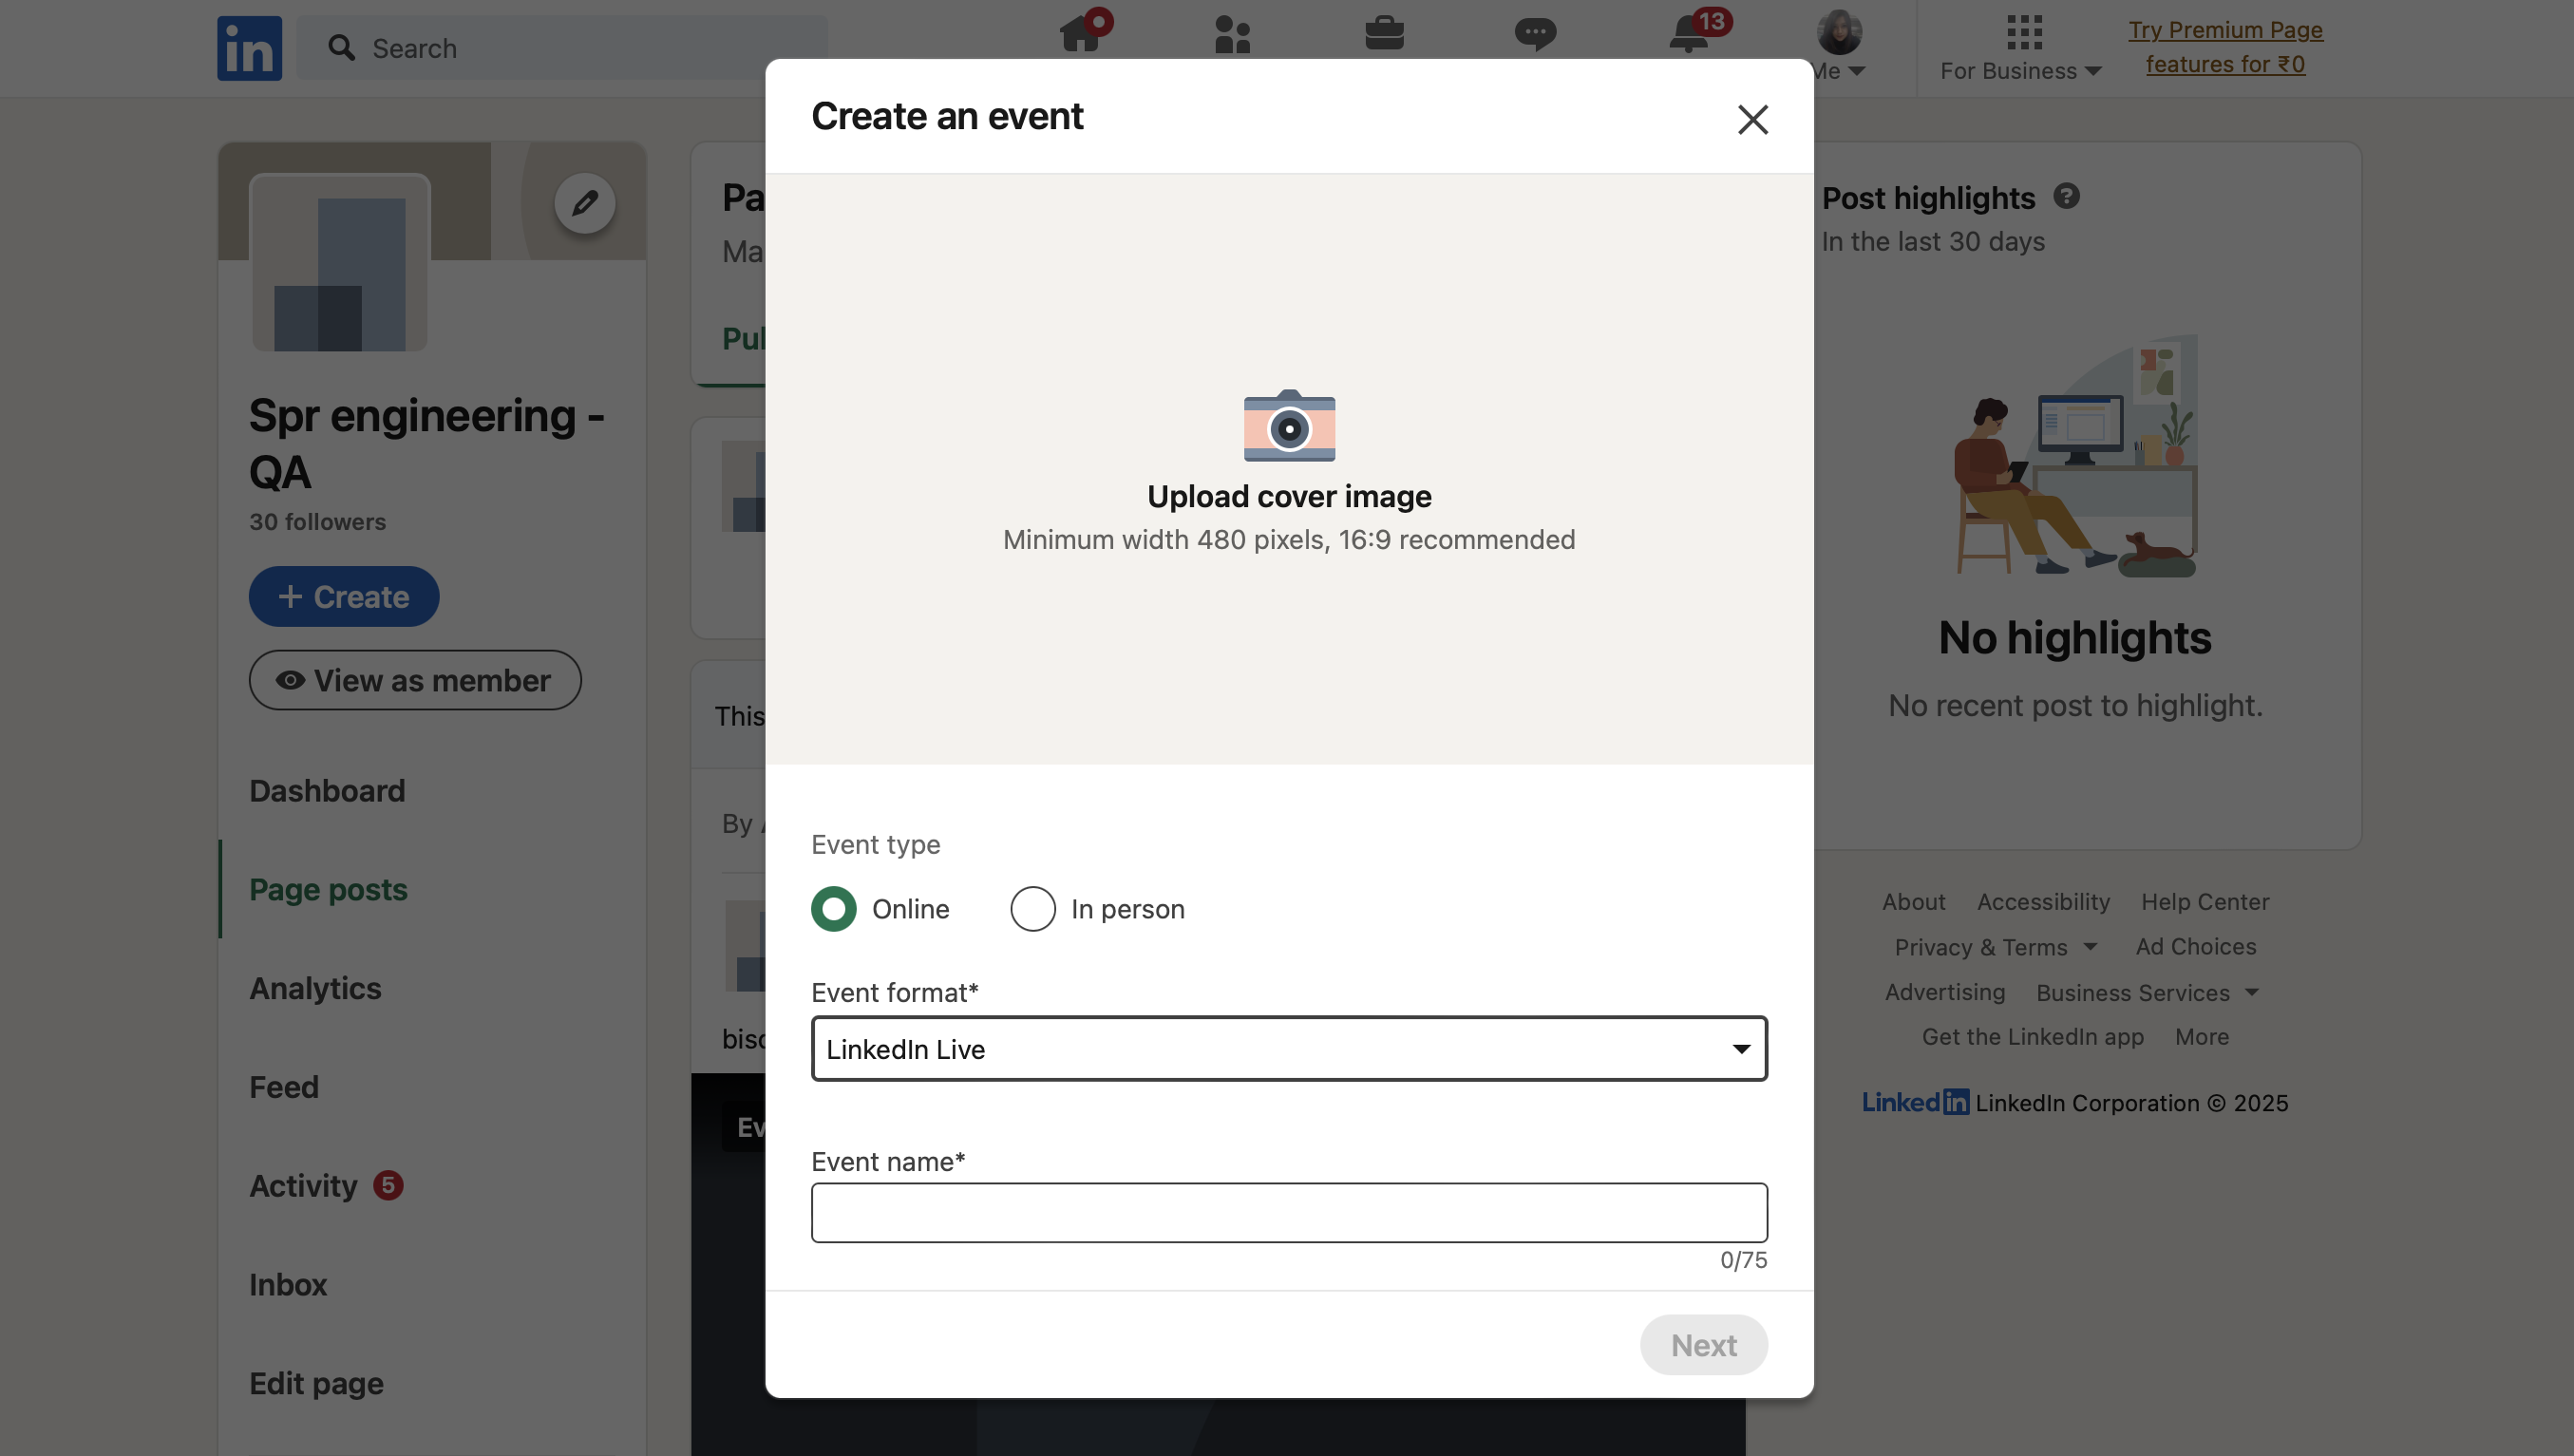
  5. Fill out the remaining event details, including the time zone, start and end date, event link, description, and speakers.

  6. Click Next.

  7. Add any introductory text to your event post.
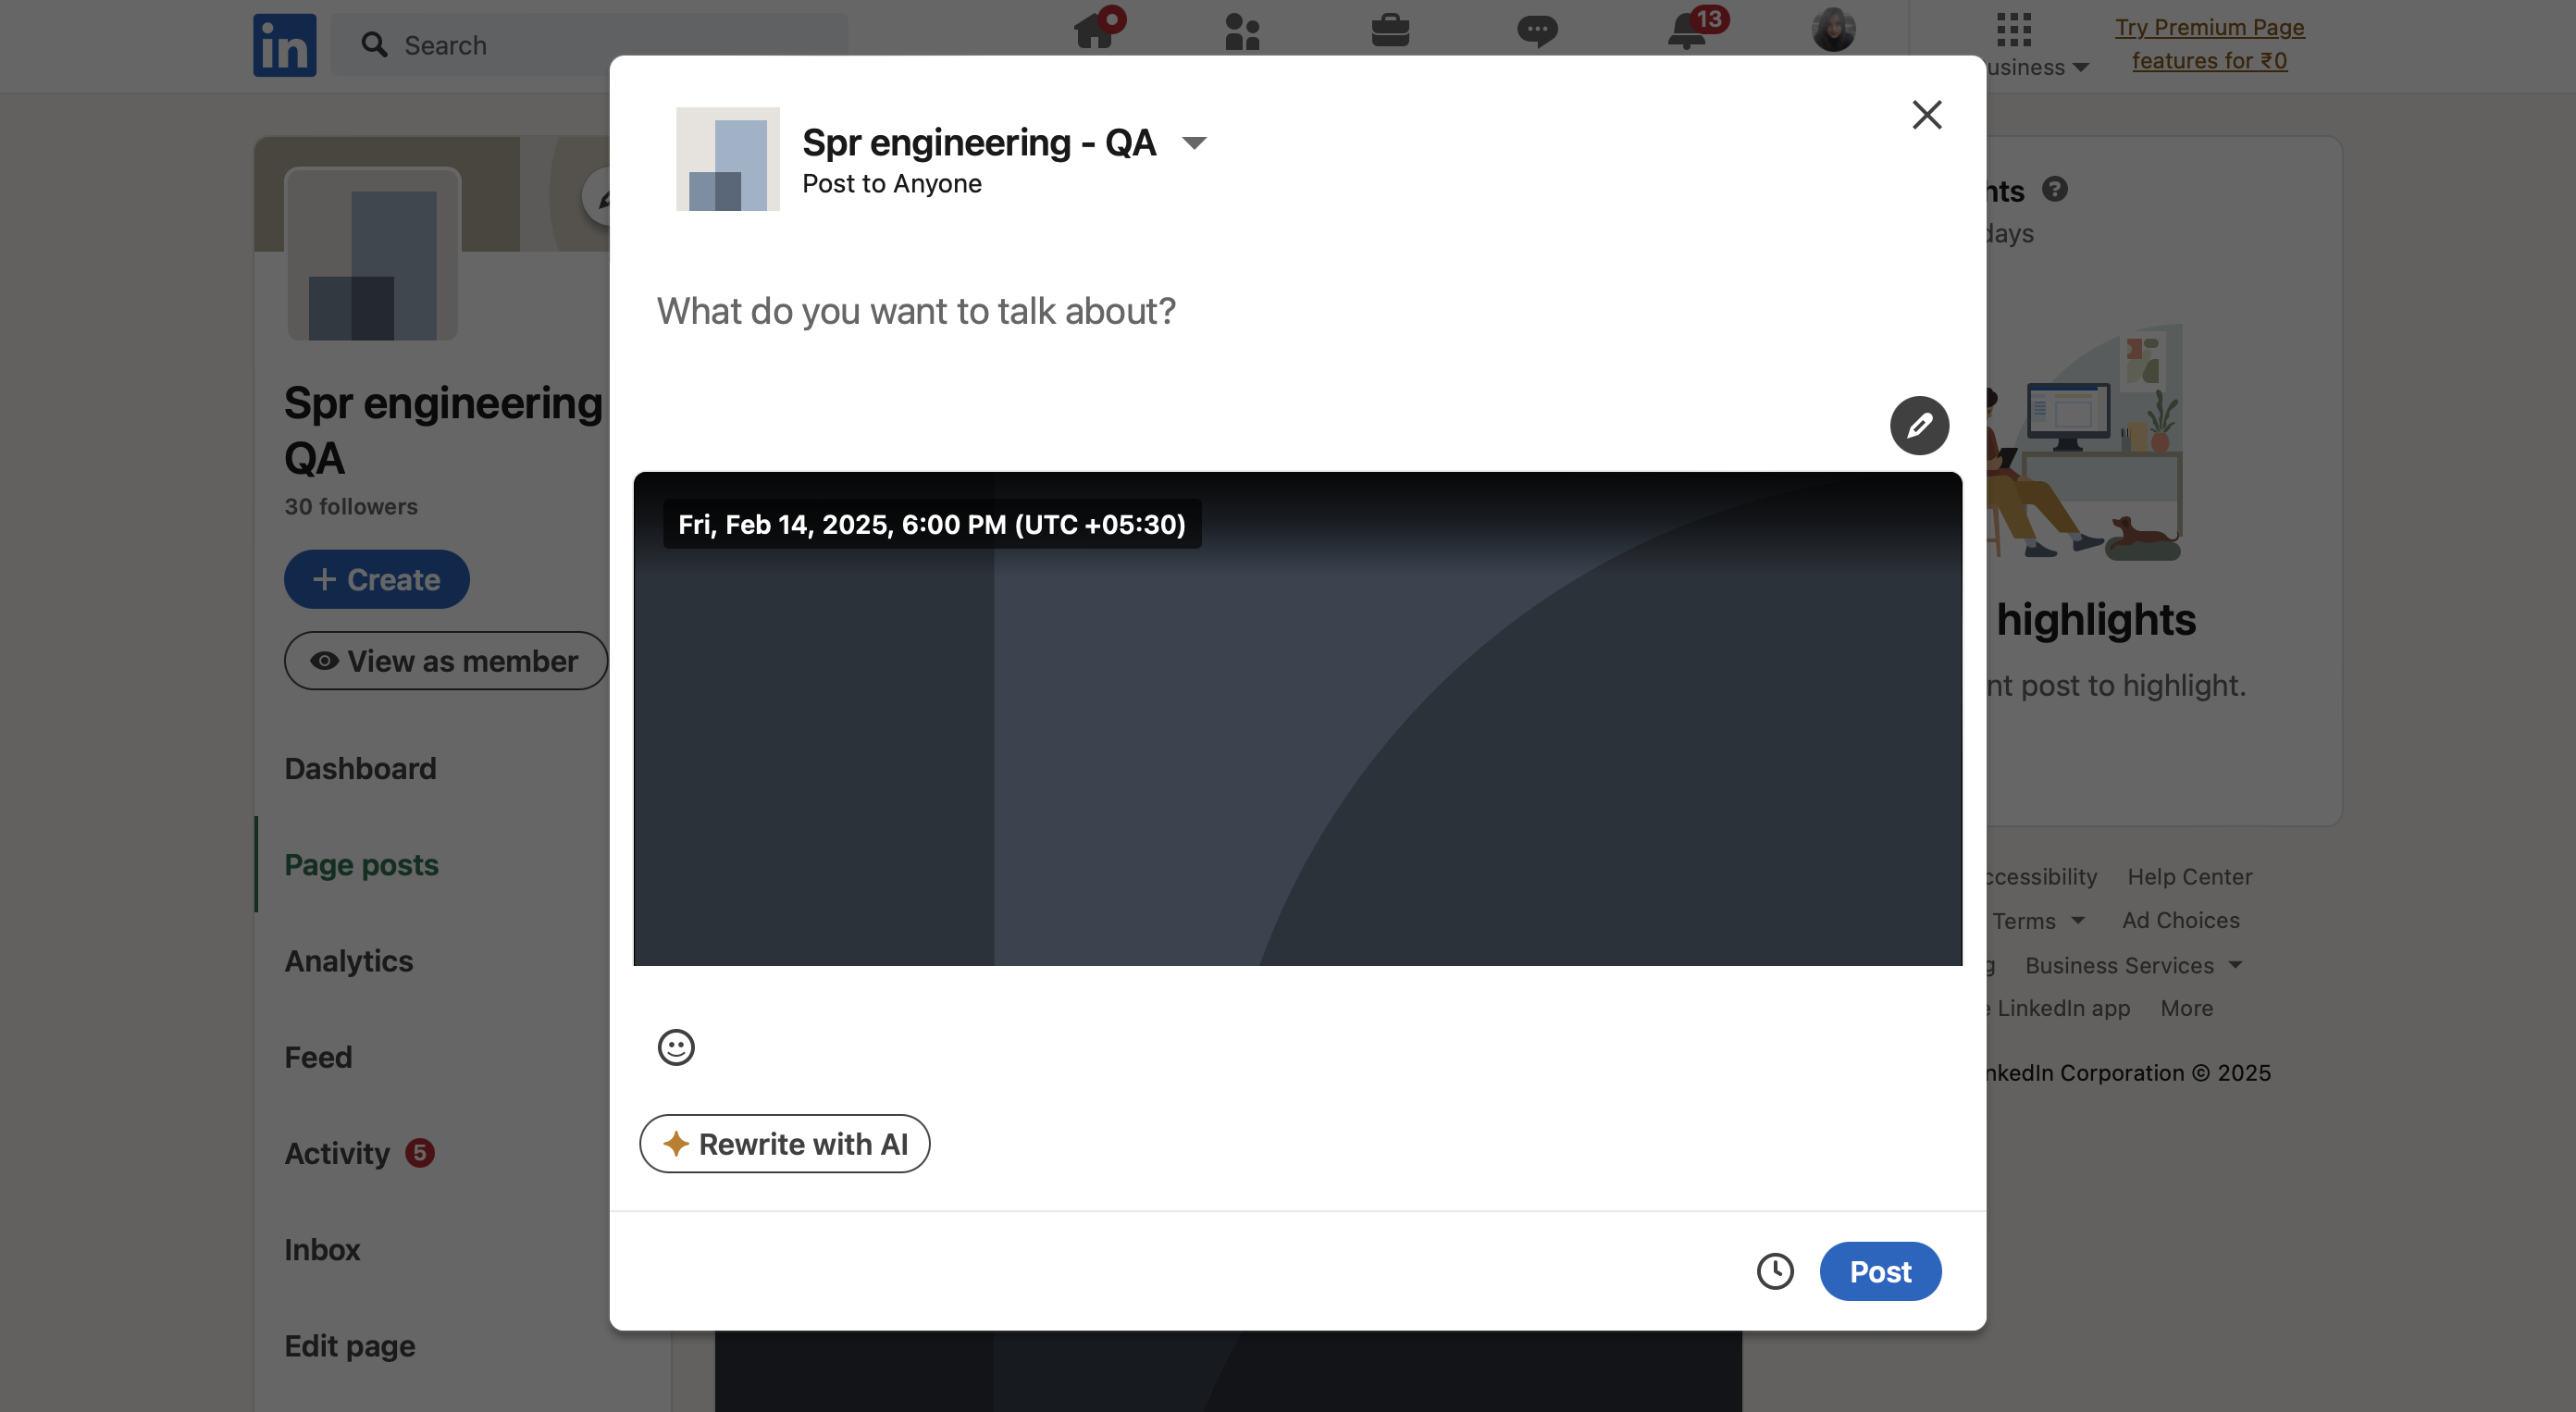
  8. Click Post.

To Boost an Event or Post from the Editorial Calendar

  1. Open a new tab and go to Sprinklr Marketing > Marketing > Editorial Calendar.

  2. Filter your view in the Editorial Calendar by applying the account and channel filters to see all events and posts from your LinkedIn company page.
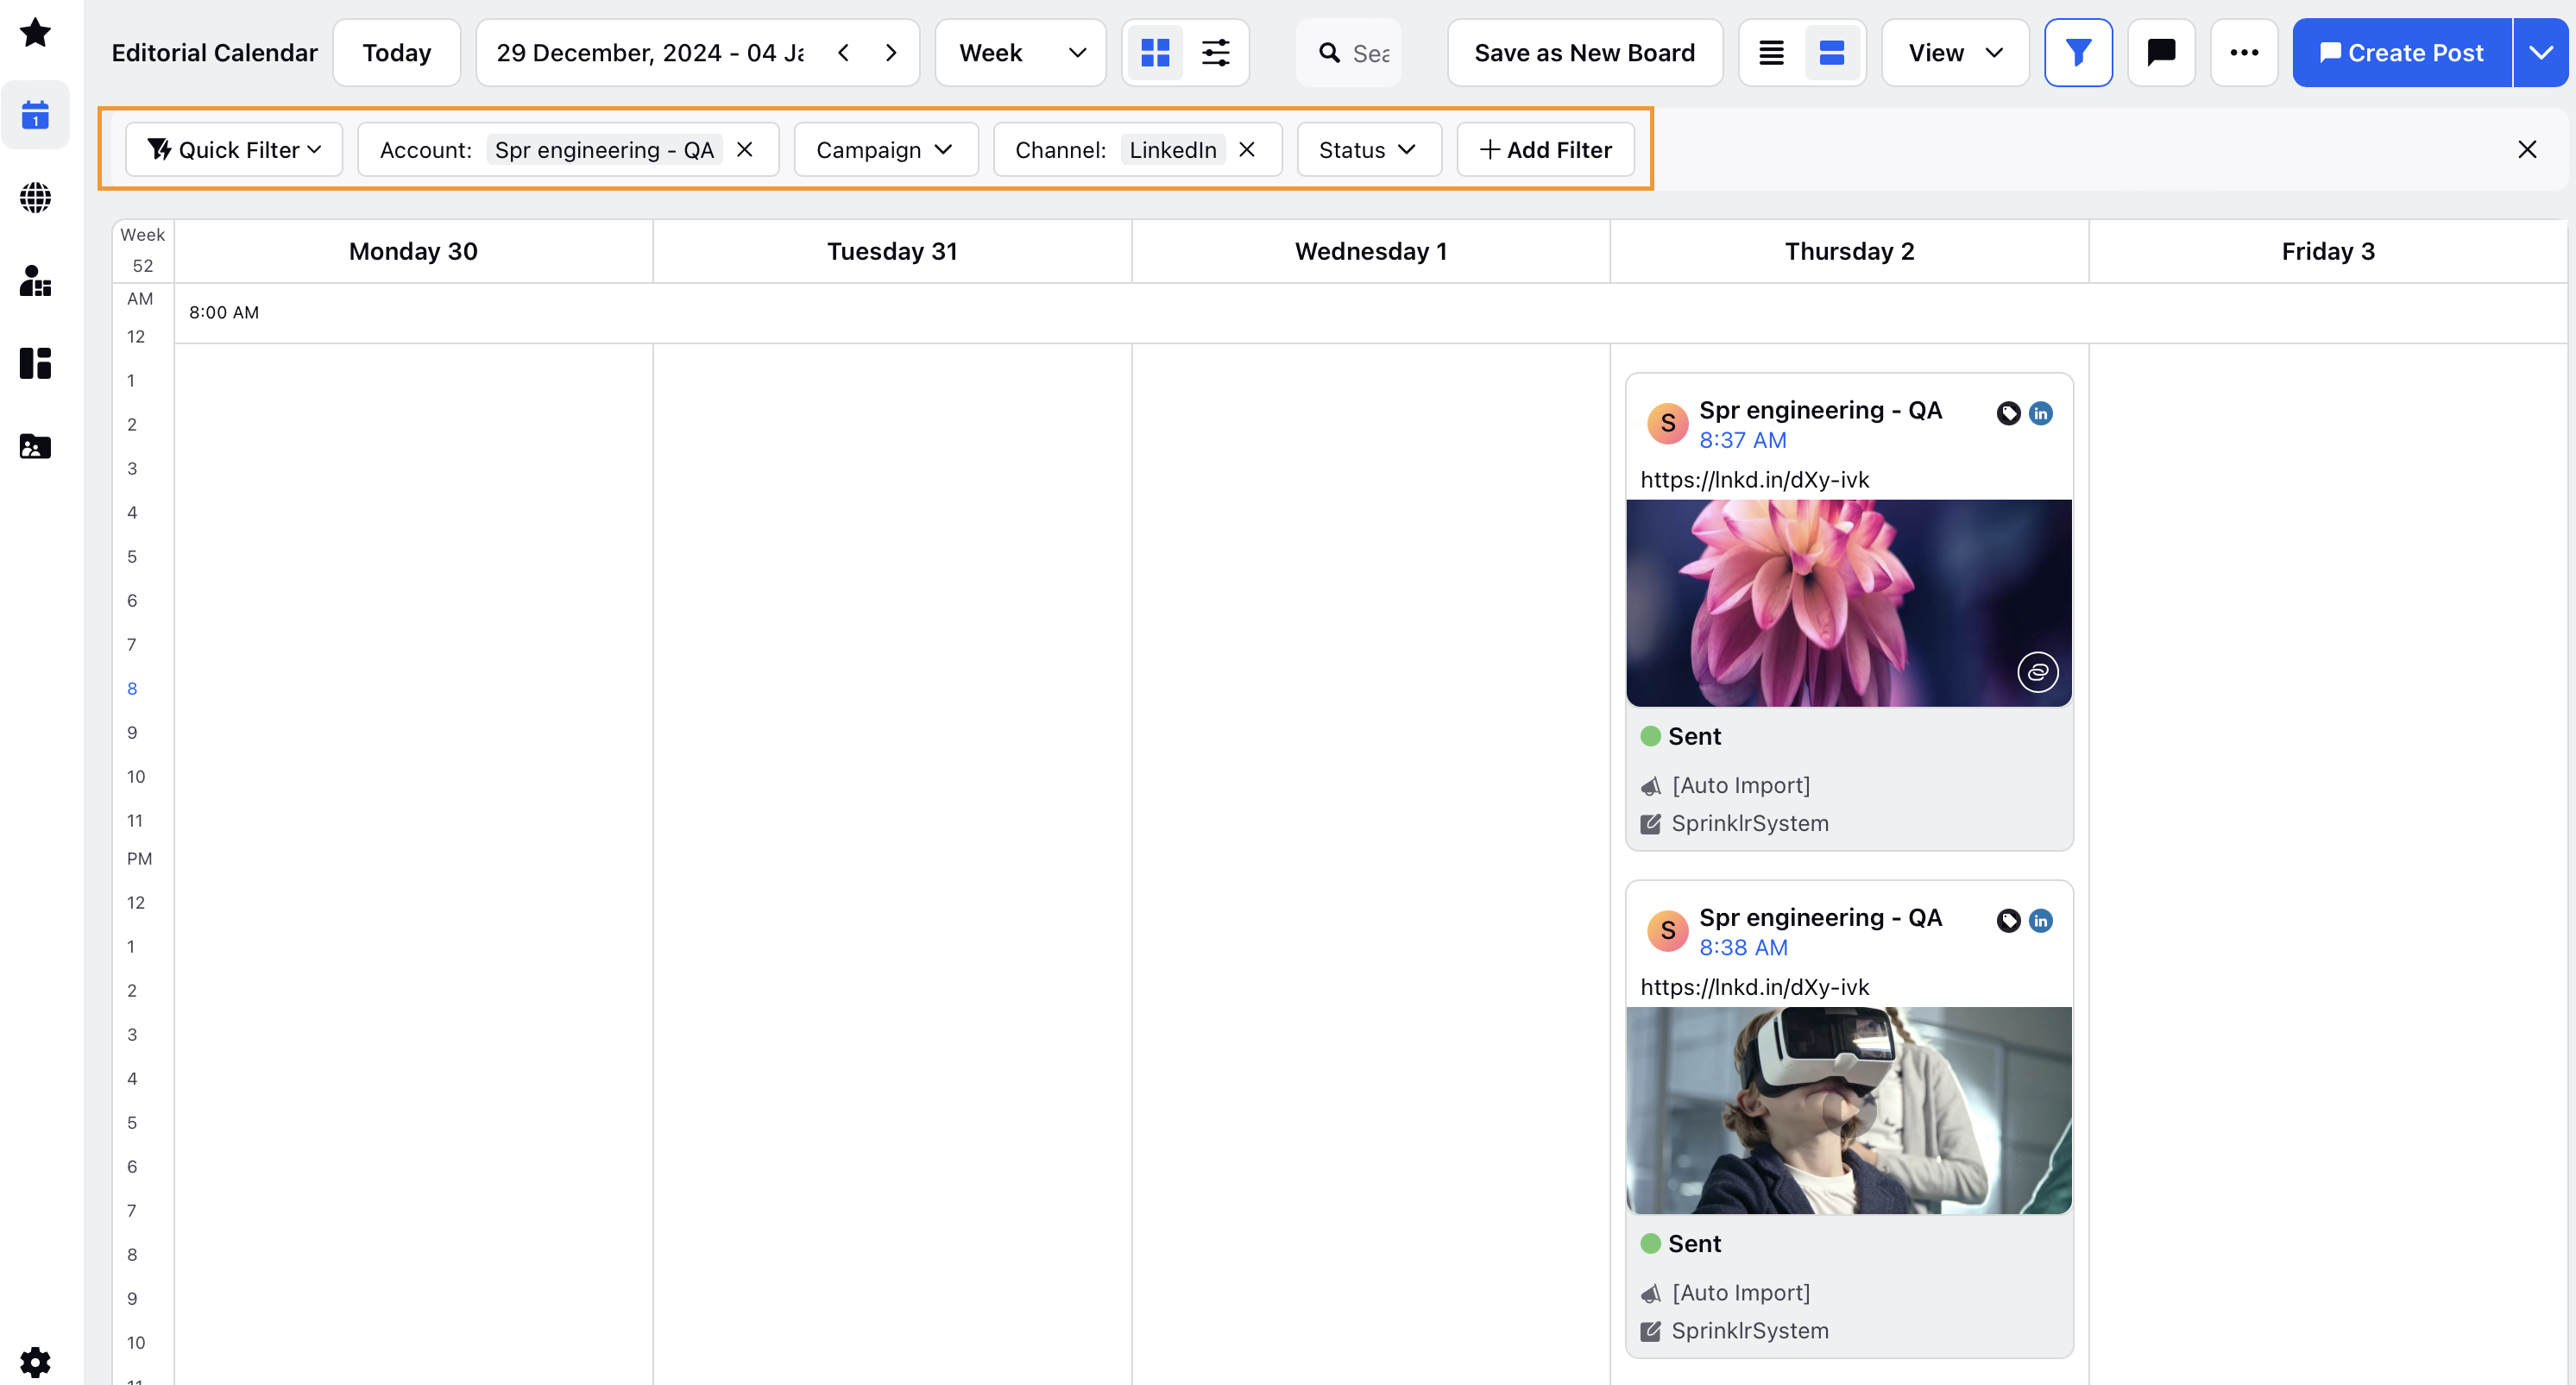
  3. Find the post or event you want to boost and double-click to open the third pane.

  4. Click the ellipsis (...) in the top right corner of the third pane.

  5. Select Boost Post from the dropdown menu.
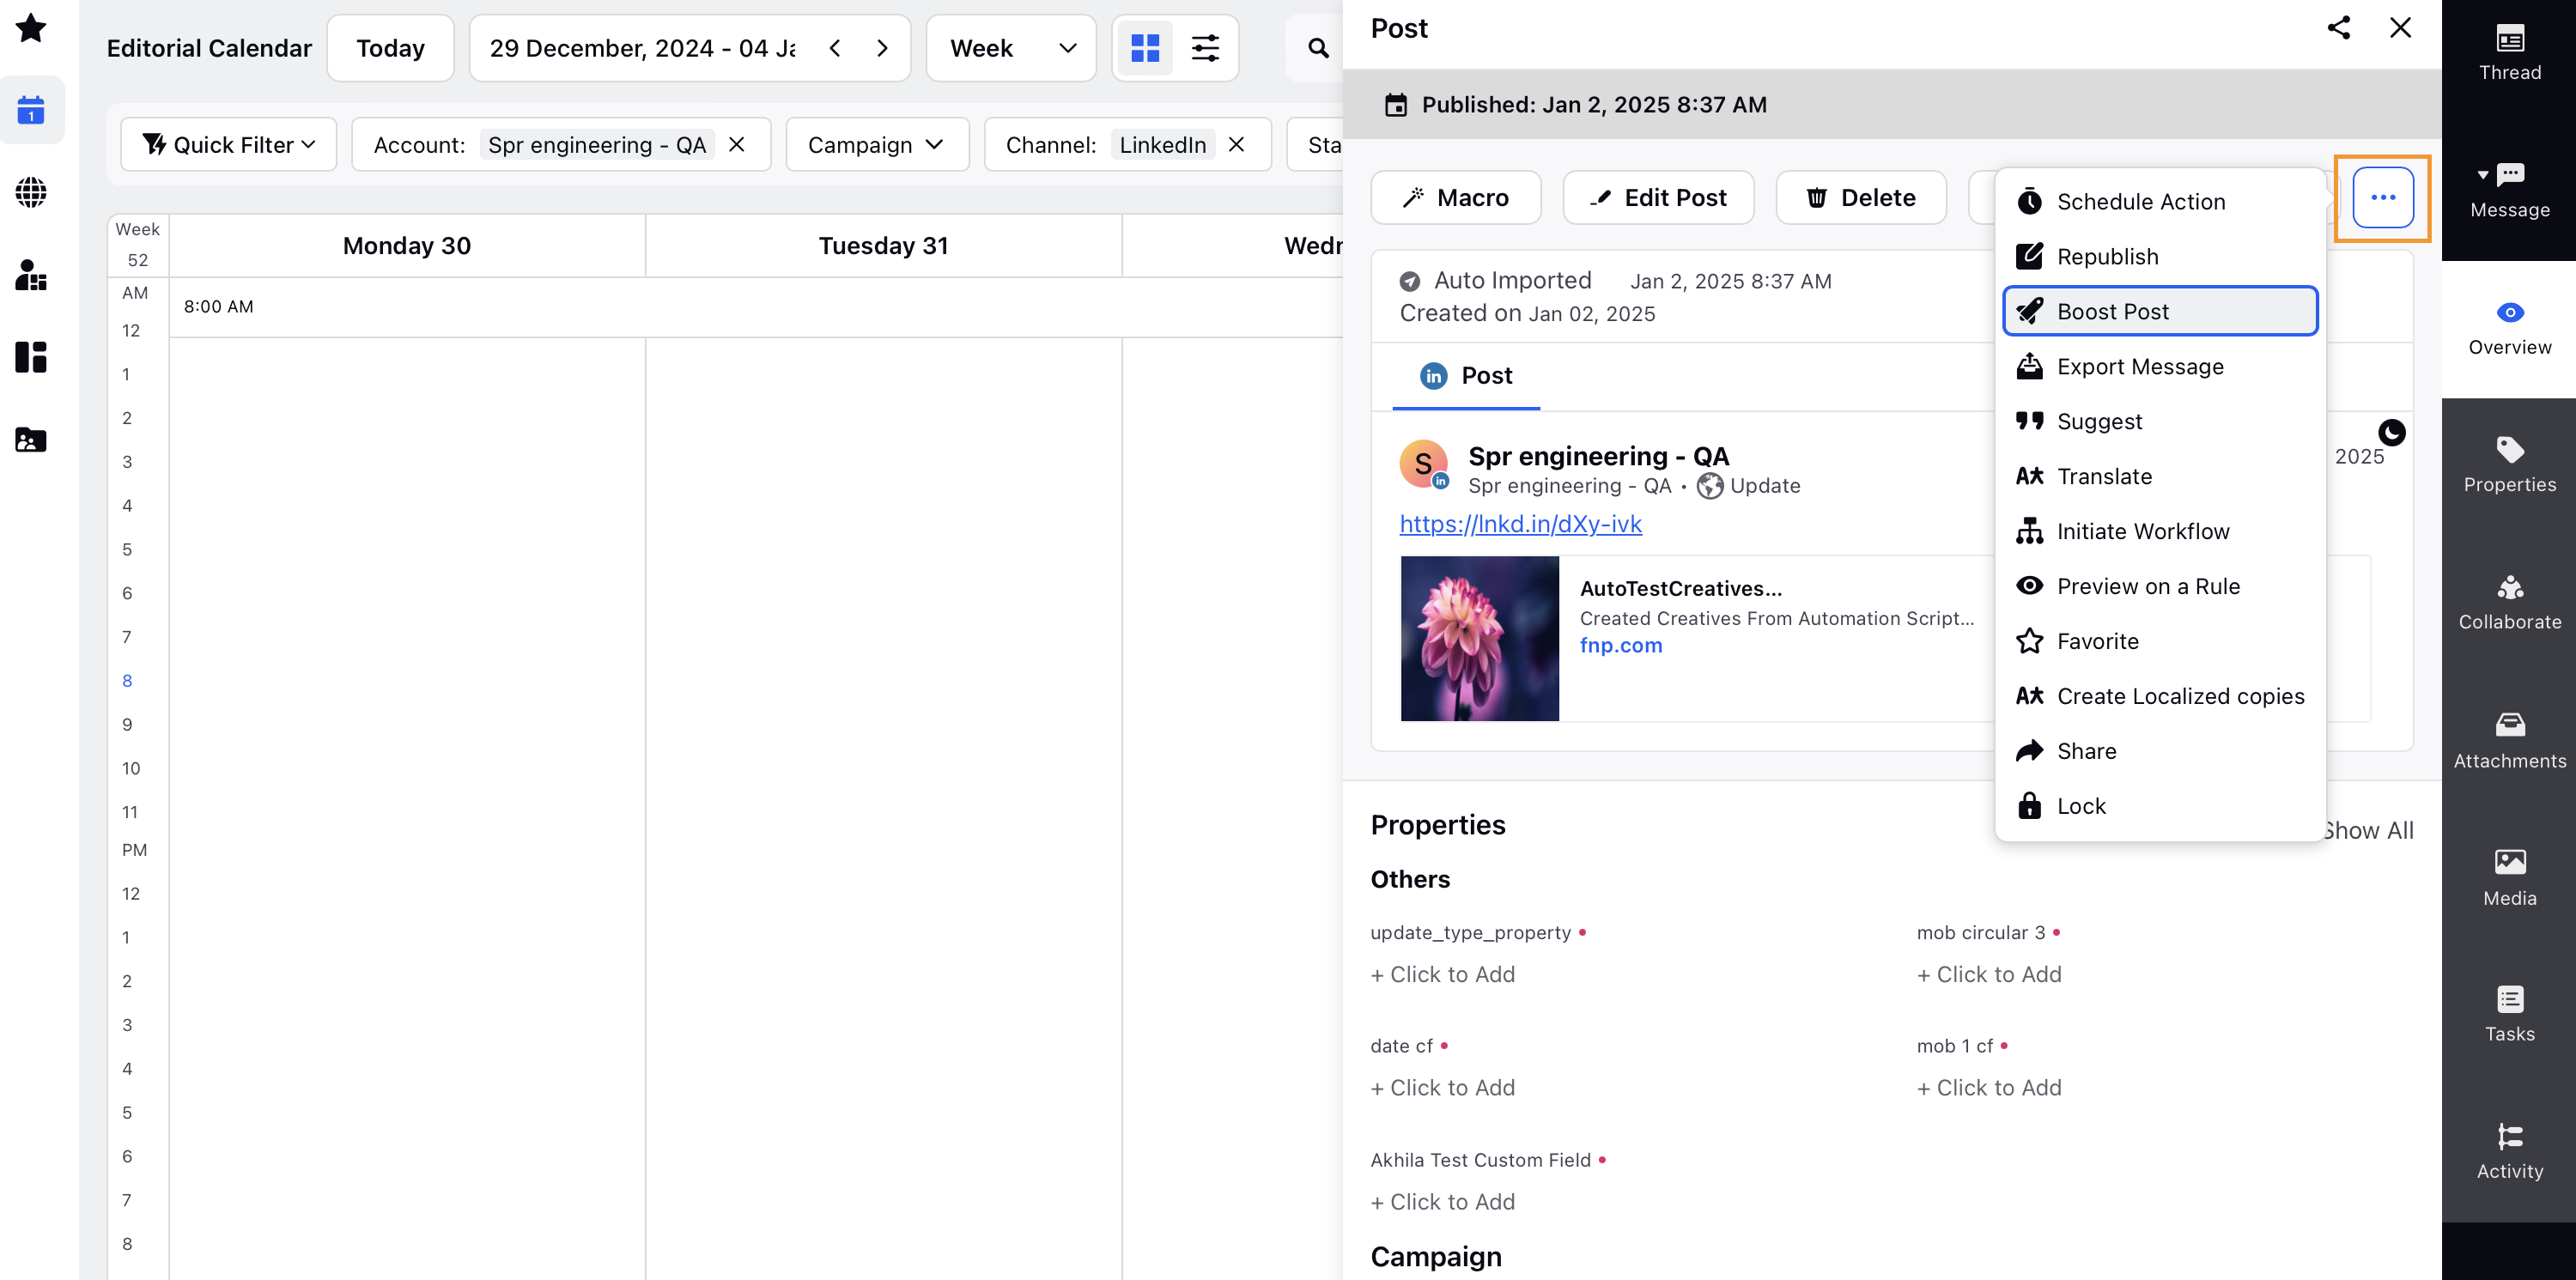
  6. Boost the post or event in one of two ways:

    • Using the Boost Post window, or

    • Use Quick Ad Publish option

  1. In the Boost Post window, select the boost type -

    • Ceate New: Select this option to create and add a paid initiative, target audience, budget and other necessary details.

    • Using one click ad buy: Select this option to boost the post using pre-configured values from One Click Ad Buy.

  2. Fill in all required fields for your ad accroding to the field descriptions below -

    Field

    Description

    Select Ad Account

    Select the Ad account from which you want to boost the post. This is selected by default.

    Create New

    Enter the name for a new Paid Initiative to which the post should belong.

    Select Existing Paid Initiative

    Choose from the existing Paid Initiatives in the drop-down menu.

    Audience

    Select Audience you want to target

    Select the desired audience options from the drop-down menu:

    Target this post to an audience

    Click to define a target audience according to your audience filter criteria.

    Budget & Duration

    Total Budget

    Set a maximum amount you are willing to spend on your promotion. Once the amount is reached, your ad stops running.

    Select Budget Source

    Select a budget source for the initiative.

    Select the desired Strategy Group(s) from the drop-down menu.

    You can also create a new strategy group by clicking Create New.

    Auto Bidding

    Set it to get the most post engagements for your budget.

    Manual Bidding

    Enter the Bid Amount to get the post engagements within that amount.

    Start promoting from

    Set a start date for the promotion to run from.

    End promotions on

    Set an end date for the promotion to end on.

  3. Click Boost in the bottom-right corner of the Boost Post window to initiate the process.

To further configure the boosting (advanced boost), click Use Quick Ad Publish in the bottom-left corner of the Boost Post window.


The Quick Ad Publish window will open for you to provide further information such as the Objective, Strategy Groups, Bidding details and more. Refer to field descriptions in the table below to fill up the necessary fields -

Term

Description

Set up your Campaign

Ad Account

Select an account from which you want to publish your ad.

Objective

Select the objective from the drop-down menu.

Create New Paid Initiative

Select to create a new paid initiative.

Use Existing Paid Initiative

Select to choose an existing paid initiative.

Paid Initiative Name

Enter the name of your paid initiative.

Agency Margin

Select the desired agency margin from the drop-down list.

Client Spend Cap

Set a spend cap on the budget for your campaign.

Budget Source

Assign a budget source for your campaign.

Naming Convention

Select the naming convention from the drop-down menu.

Define Custom Properties

Click to open the custom property options and add the custom field details.

Define your Ad Set

Ad Set Name

Enter the Ad Set name

Tracking Pixel

Select the tracking pixel for your ad set.

Select Objective for your Ad Set

Select the objective for your event ad.

Note: Event Ads are supported only for Brand Awareness, Website Visits and Engagement objectives.

Ad Format Options

Select Event Ads as the Ad Format option.

Select Audience you want to target

Choose from -

  • Targeting from Audience Manager: Select this option and click +Target this post to an audience to select an existing audience.

  • People you choose to target: Select this option to create a target audience from scratch.

Lifetime Budget

Set a lifetime budget for your LinkedIn campaign.

Daily Budget

Set a daily budget for your LinkedIn campaign.

Set up your Ad Set Runtime

Select a start date and an end date for your campaign.

Optimize For

Select the appropriate optimization from the drop-down menu.

Bidding Strategy

Select a bidding strategy.

Note: Accelerated delivery is currently not supported in Quick Ad Publish.

Ad Rotation

Select either Optimize for Performance (Recommended) or Allow Ads to Enter Auction Evenly.

Define Custom Properties

Click to open the custom property options and add the custom field details.

Ad Details

Creative Name

Enter a unique name for your creative.

Specify your Ad Creative

Select an existing creative or create a new creative.

On clicking Advanced Post Selection, you can add filters to search for existing creative assets quickly and also sort them by the given metrics/dimensions.

Define Custom Properties

Click to open the custom property options and add the custom field details.

Click Boost at the bottom once you have completed the configuration.