How to Create and Use Ads Naming Conventions

Updated 

Naming conventions are an essential aspect of advertising, especially when it comes to organizing, tracking, and reporting campaigns.

Using consistent naming conventions, advertisers can easily identify and sort through their campaigns, ad groups, and ads. This article provides a step-by-step guide on how to create naming conventions in various platform areas of the advertising module. By following the steps outlined in the article, advertisers can create a clear and organized system for naming their campaigns and tracking the performance of their ads more efficiently.

How to Create Naming Conventions

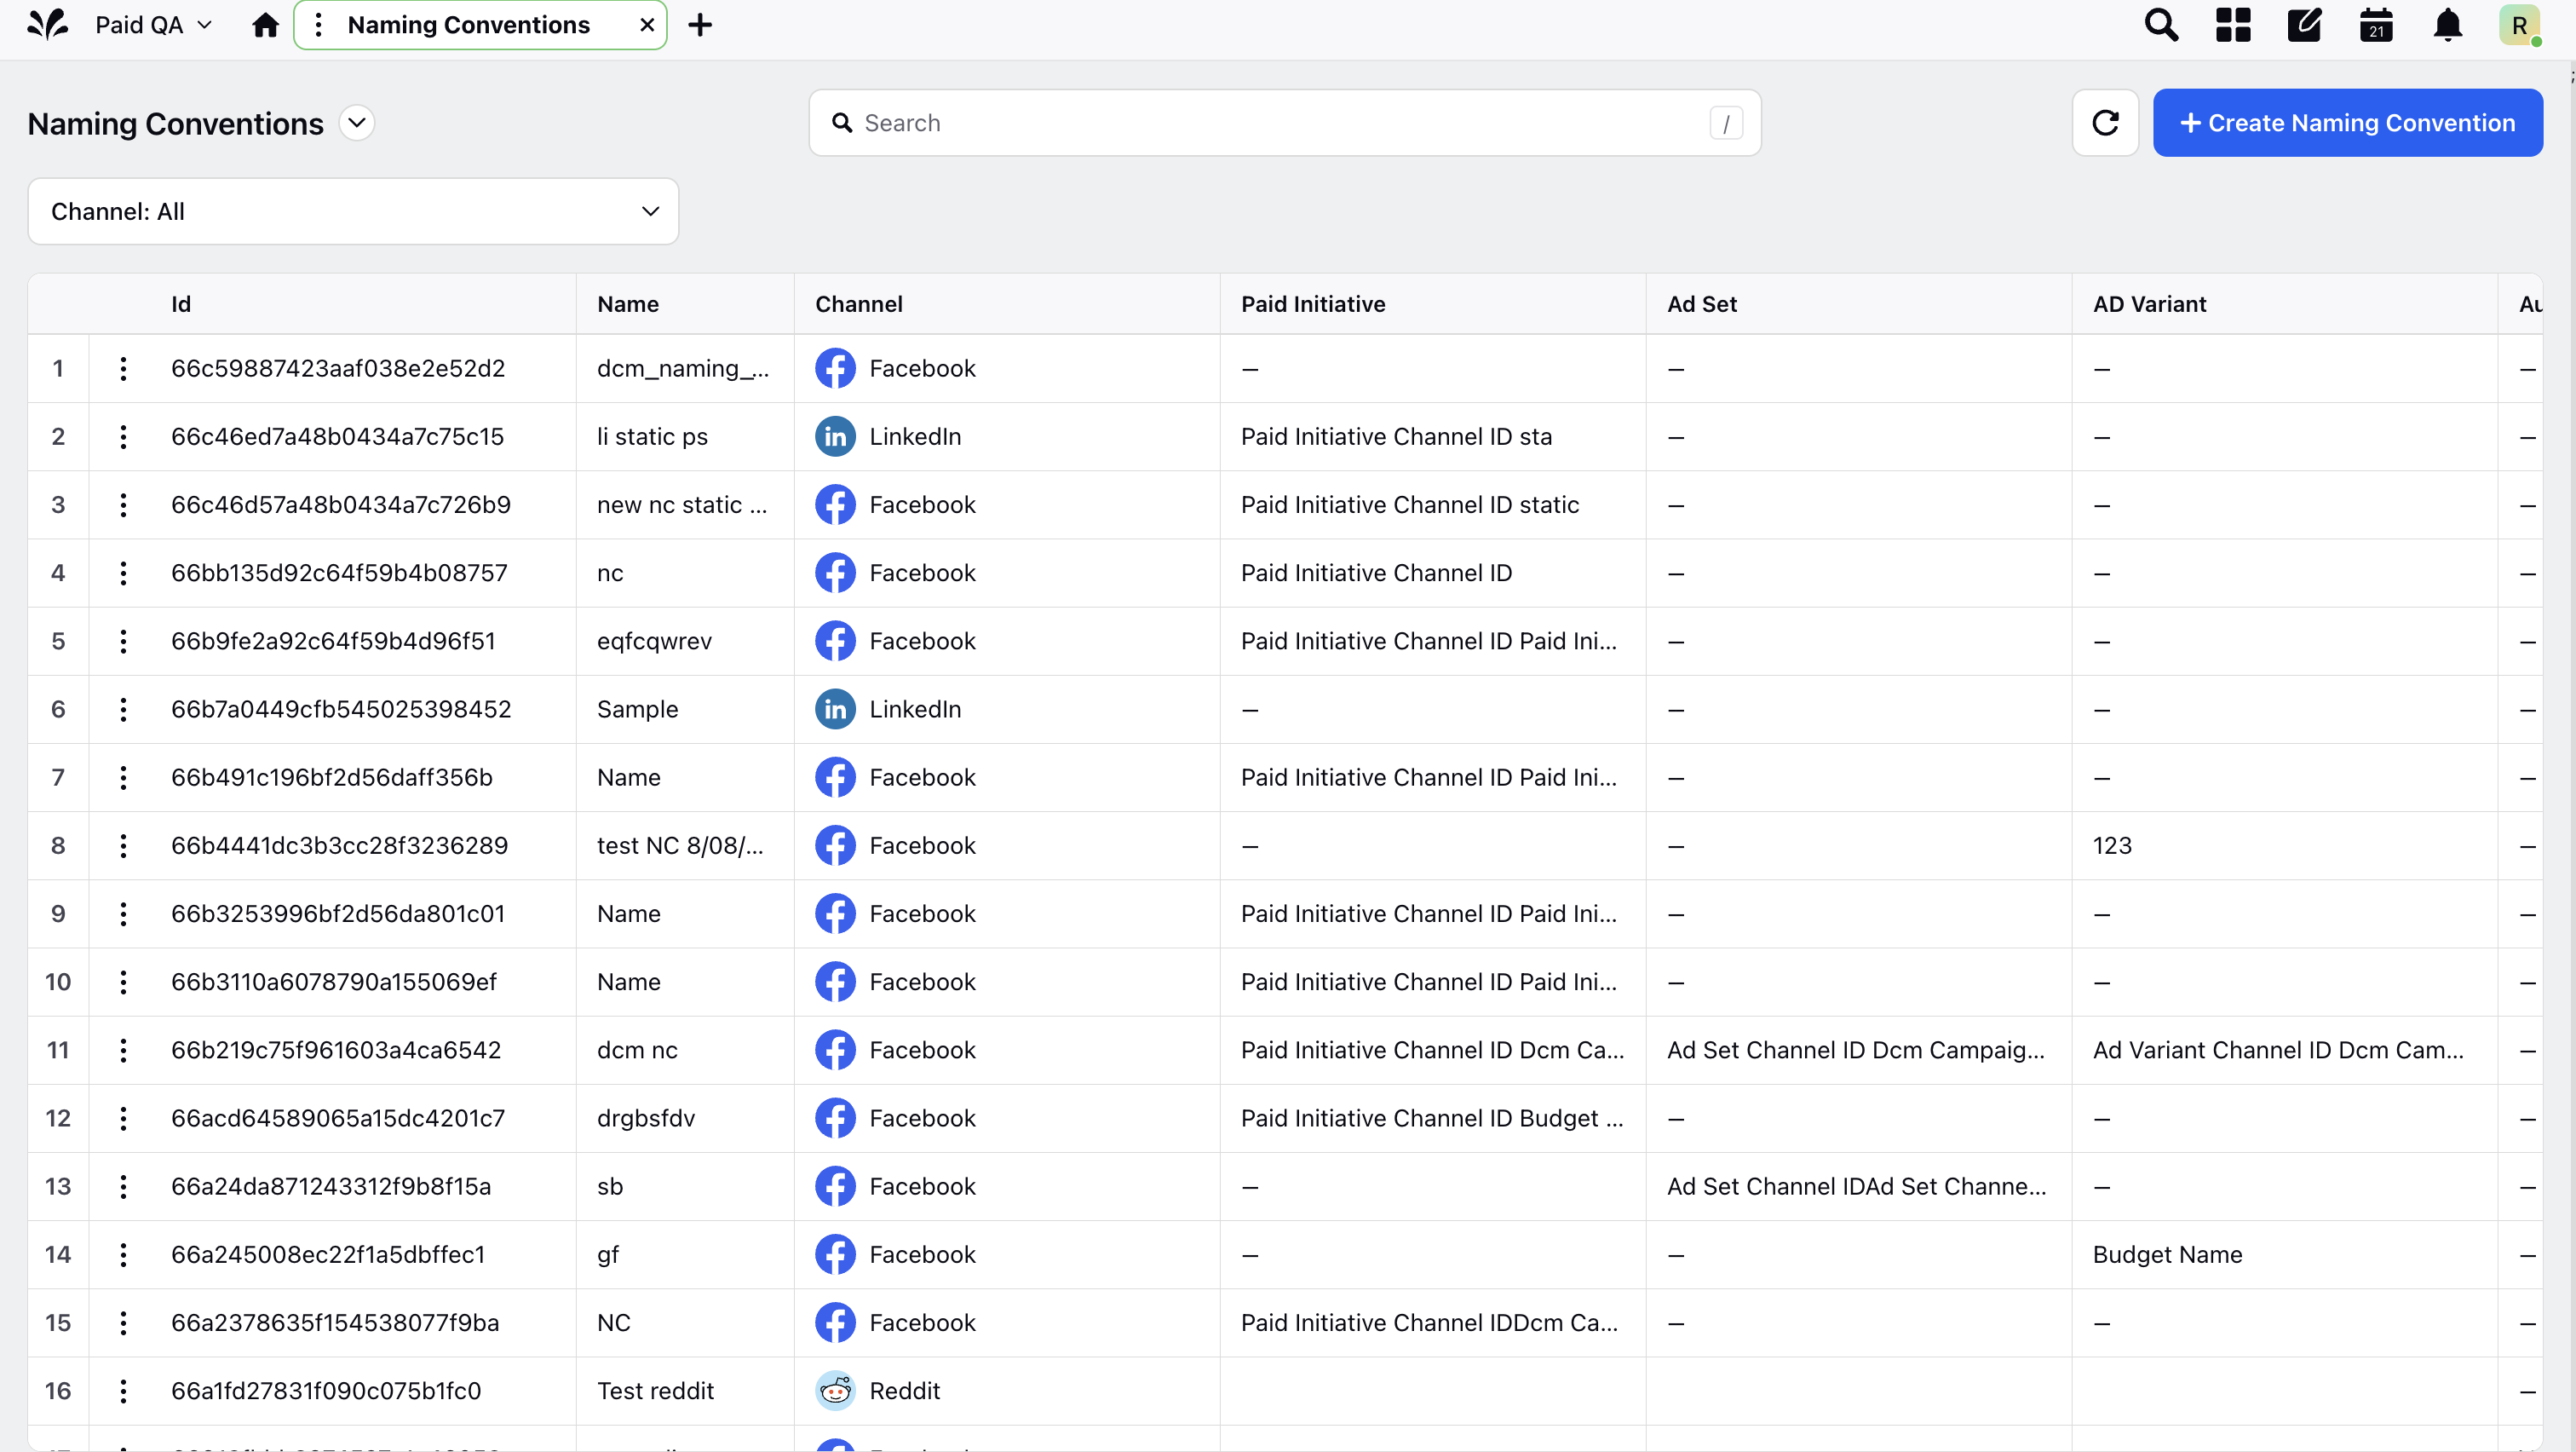
  1. Click the New Tab icon. Under the Sprinklr Marketing (Ads) tab, click Naming Conventions within Plan.

  2. Click Create Naming Convention in the top right corner of the Naming Conventions window.
  3. Enter the details in the Create New Naming Convention window. For more information, see Naming Convention Field Descriptions.

  4. Click the Save button in the bottom right to save your changes.

Note

You can Edit, Clone, and Delete the Naming Convention once it is created and also Share it across Workspaces and Users & User Groups.

How to Use Naming Conventions

  1. Click the New Tab icon. Under the Sprinklr Marketing (Ads) tab, click Ads Composer within Execute.

  2. On the Create an Ad Campaign window, select an ad account.

  3. In the Campaign Details section, choose your campaign Objective from Select Objective for your Campaign.

  4. Under Campaign Name, select Use a Naming Convention to use a predefined campaign name.

  5. Select a naming convention from the Select Naming Convention drop-down menu.

  6. Enter the other campaign details and click Next.

  7. In the Target Audience section, click Create new Audience and select Use a Naming Convention to choose a naming convention for your target audience.

  8. Save your target audience and proceed to the Creatives section.

  9. Click Create new creative to build your ad creative. Under Creative Name, select Use a Naming Convention and choose a naming convention from the drop-down menu.
    Choose a naming convention while creating a new creative in Ads Composer

  10. Proceed to create and publish your campaign.

  1. Click the New Tab icon. Under the Sprinklr Marketing (Ads) tab, click Ads Manager within Analyze.

  2. Click the View and Edit icon alongside the desired Campaign.

  3. In the View and Edit pane to the right, navigate to the Edit window if you are not on the same from the Navigation pane to the far right.

Follow the steps below to apply Naming Conventions in the respective areas.

Note

  • Once a Naming Convention is applied, it will automatically be updated if you make any changes to dependent fields (custom fields, channel fields, etc.). However, changes made in the native platform will not auto-update the name.

  • You can manually update the ad entity names at levels where a Naming Convention is not applied. For example, if a naming convention is applied at the Paid Initiative level, then you will be able to update the Ad Set and Ad level names manually.

1. In the Campaign and Details section from the middle pane, click Apply Naming Convention from the top right corner of the Campaign Name field.
Apply ad entity naming convention from the Ads Manager

2. On the Apply Naming Convention pop-up window, select a naming convention from the drop-down menu.

Tip

You can also bulk apply Naming Conventions to your ad entities by selecting the Campaigns in bulk. However, you can not perform this action across multiple social channels.

Note

The Apply Naming Convention option will be disabled if you make changes to any other field in the Edit pane. To apply a naming convention, you will need to either save or discard other changes made in the campaign.

Select Naming Convention for Ad Entity

3. Click Apply. This will dynamically generate the names for different ad entities based on the provided placeholders.

Note

  • The name cannot be edited once a naming convention is applied at the campaign level. To manually edit the name, you must remove the naming convention. This will apply even when you are creating a New Ad Set or Ad from the Edit pane.

  • Application of the Naming Convention via the above flow will be registered in Sprinklr Marketing (Ads) VRD under PBUC 13 for tracking purposes.

  • If you want to use another naming convention, click Change below the Campaign Name field.

  • If you want to manually make changes to the name, click Create Name Manually in the right corner of the Campaign Name field. Selecting this option will disable the selected naming convention and allow you to update the name outside of the naming convention parameters.

Create Name Manually or Change the applied Naming Convention

4. From the bottom-right corner of the Edit window, click Review Changes to review your changes.

5. On the Review Changes window, click Apply Changes in the bottom right corner.

  1. Navigate to the Ad Set level from the far left pane of the Edit window.

  2. In the Audience section from the middle pane, select the Use a Naming Convention radio button above the Targeting Name field.
    Select Audience Naming Convention

  3. Select a naming convention from the Targeting Name drop-down menu.

    Note

    • You can edit the audience name applied for both draft and published Ad Sets.

    • Updating the name for an existing audience will reflect in the Audience Manager and other Ad Sets where the same Audience ID is leveraged.

  4. From the bottom-right corner of the Edit window, click Review Changes to review your changes.

  5. On the Review Changes window, click Apply Changes in the bottom right corner.

  1. Navigate to the Ad Variant level from the far left pane of the Edit window.

  2. In the Creative section from the middle pane, scroll down to Creative Details.

  3. Select the Use a Naming Convention radio button above the Creative Name field.

    Note

    • You can edit the creative name applied for both draft and published Creatives.

    • Updating the name for a published creative will reflect in the Creative Library (DAM) and other ad variants where the same Creative ID is leveraged.

    Select Creative Naming Convention

  4. Select a naming convention from the Creative Name drop-down menu.

  5. From the bottom-right corner of the Edit window, click Review Changes to review your changes.

  6. On the Review Changes window, click Apply Changes in the bottom right corner.

  1. Click the New Tab icon. Under the Sprinklr Marketing (Ads) tab, click Ads Manager within Analyze.

  2. Follow the steps outlined in To Create a New Macro.

  3. On the Macro window for building a new macro, select Naming Convention from the Select Field drop-down menu and set a naming convention for your macro.
    Applying Naming Convention using Macros in Ads Manager

  4. Click Apply in the bottom right corner to apply the macro.

  1. Click the New Tab icon. Under the Sprinklr Social tab, click Engagement Dashboards within Engage.

  2. In the Engagement dashboard, find the post you would like to publish as an ad for a particular channel.

  3. Hover over the Options icon in the bottom right corner of the selected message.

  4. Select Boost Post from the options list to open the Boost Post window in the bottom right corner of the dashboard.

  5. In the bottom left corner of the Boost Post window, click Use Quick Ad Publish.

  6. Select a naming convention from the Naming Convention dropdown menu in the Campaign Details section while filling out the details.
    Advertising_AdsManager_QuickAdPublish_UseNamingConvention.png

  7. Proceed to publish the campaign by following the prompted steps.

  1. Click the New Tab icon. Under the Sprinklr Marketing (Ads) tab, click Audience Manager within Plan.

  2. Follow the steps outlined in Audience Manager Overview to create an audience.

  3. While providing the Audience Name, select Use a Naming Convention and choose a naming convention from the drop-down menu.

    Note

    Naming Conventions are only applicable for Paid Audience Type.

    Use Naming Convention for your Audience Name in Audience Manager

  1. Click the New Tab icon. Under the Sprinklr Marketing (Ads) tab, click Creative Library within Plan.

  2. Follow the steps outlined in Add a Creative in Creative Library to add a creative.

  3. While providing the Creative Name, select Use a Naming Convention and choose a naming convention from the drop-down menu.

    Note

    Supported Channels to use Naming Convention in Creative Library are Facebook, Twitter, LinkedIn, and Pinterest.

Use Naming Convention to name your ad creative in Creative Library

  1. Follow the steps outlined in Add a Custom Field to create a custom field with keyword values common to the campaign name.

  2. Follow the steps outlined in Social Advertising Rule Engine to create a rule.

  3. On the Rule Builder window, click theSpace_Icon_Plus_Circle_Gray.png icon and select Add Condition. Under Conditions Applies To 'Properties of the Paid Initiatives', select Paid Initiative Name from the Condition drop-down menu.

  4. Select an operator and enter the keyword based on which the campaigns will be grouped.

  5. Click Save in the bottom right corner of the Edit Condition pane.

  6. On the Rule Builder window, click theSpace_Icon_Plus_Circle_Gray.png icon and select Add Action. Under Action To 'Control properties of Paid Initiatives', select the custom field you have created from the Action drop-down menu and set its values to the keyword.
    Setting custom field value to auto-fill when the rule triggers based on the condition in Paid Rule Engine

  7. Click Save in the bottom right corner of the Edit Action pane.

  1. Follow the steps outlined in Social Advertising Rule Engine to create a rule.

  2. On the Rule Builder window, click theSpace_Icon_Plus_Circle_Gray.png icon and select Add Condition. Under Conditions Applies To 'Properties of the Paid Initiatives', select the custom field from the Condition drop-down menu and set its value to the keyword which was auto-filled using Create a Custom Field and Auto-Fill with the Keyword rule.

  3. Click Save in the bottom right corner of the Edit Condition pane.

  4. On the Rule Builder window, click theSpace_Icon_Plus_Circle_Gray.png icon and select Add Action. Set the desired action for the campaigns grouped as per the condition. For example, you can increase the budget for all India campaigns by selecting Paid Initiative Lifetime Budget from the Action drop-down menu under Action To 'Control Properties of Paid Initiatives' and setting the desired value.
    Increasing the budget of a campaign when the rule triggers based on the set condition in Paid Rule Engine

  5. Click Save in the bottom right corner of the Edit Action pane.

FAQ

Click New Tab, go to Sprinklr Marketing (Ads) > Naming Conventions, click Create Naming Convention, enter details, and click Save.

Yes, one can apply naming conventions to multiple campaigns at once, but only within a single social channel.

Remove the naming convention first, then manually update the name.