How to Configure a Disposition Plan
Updated
![]() Pre-requisite for configuring the Disposition Plan: Sprinklr Voice should be enabled for the environment.
Pre-requisite for configuring the Disposition Plan: Sprinklr Voice should be enabled for the environment.
A disposition plan is a pre-configured form that is filled out by agents while disposing the call in ACW. These plans include specific fields and information that agents need to provide when disposing of a call. These disposition plans is then integrated into the ACW screen, which agents can access and fill out the required fields as instructed by the plan. The rest of the ACW workflow, including other elements and actions, can be configured separately by the admin in ACW. By utilizing disposition plans, admins can ensure standardized data collection and reporting, while agents can efficiently input relevant information while disposing calls
How to Open Disposition Plan Manager?
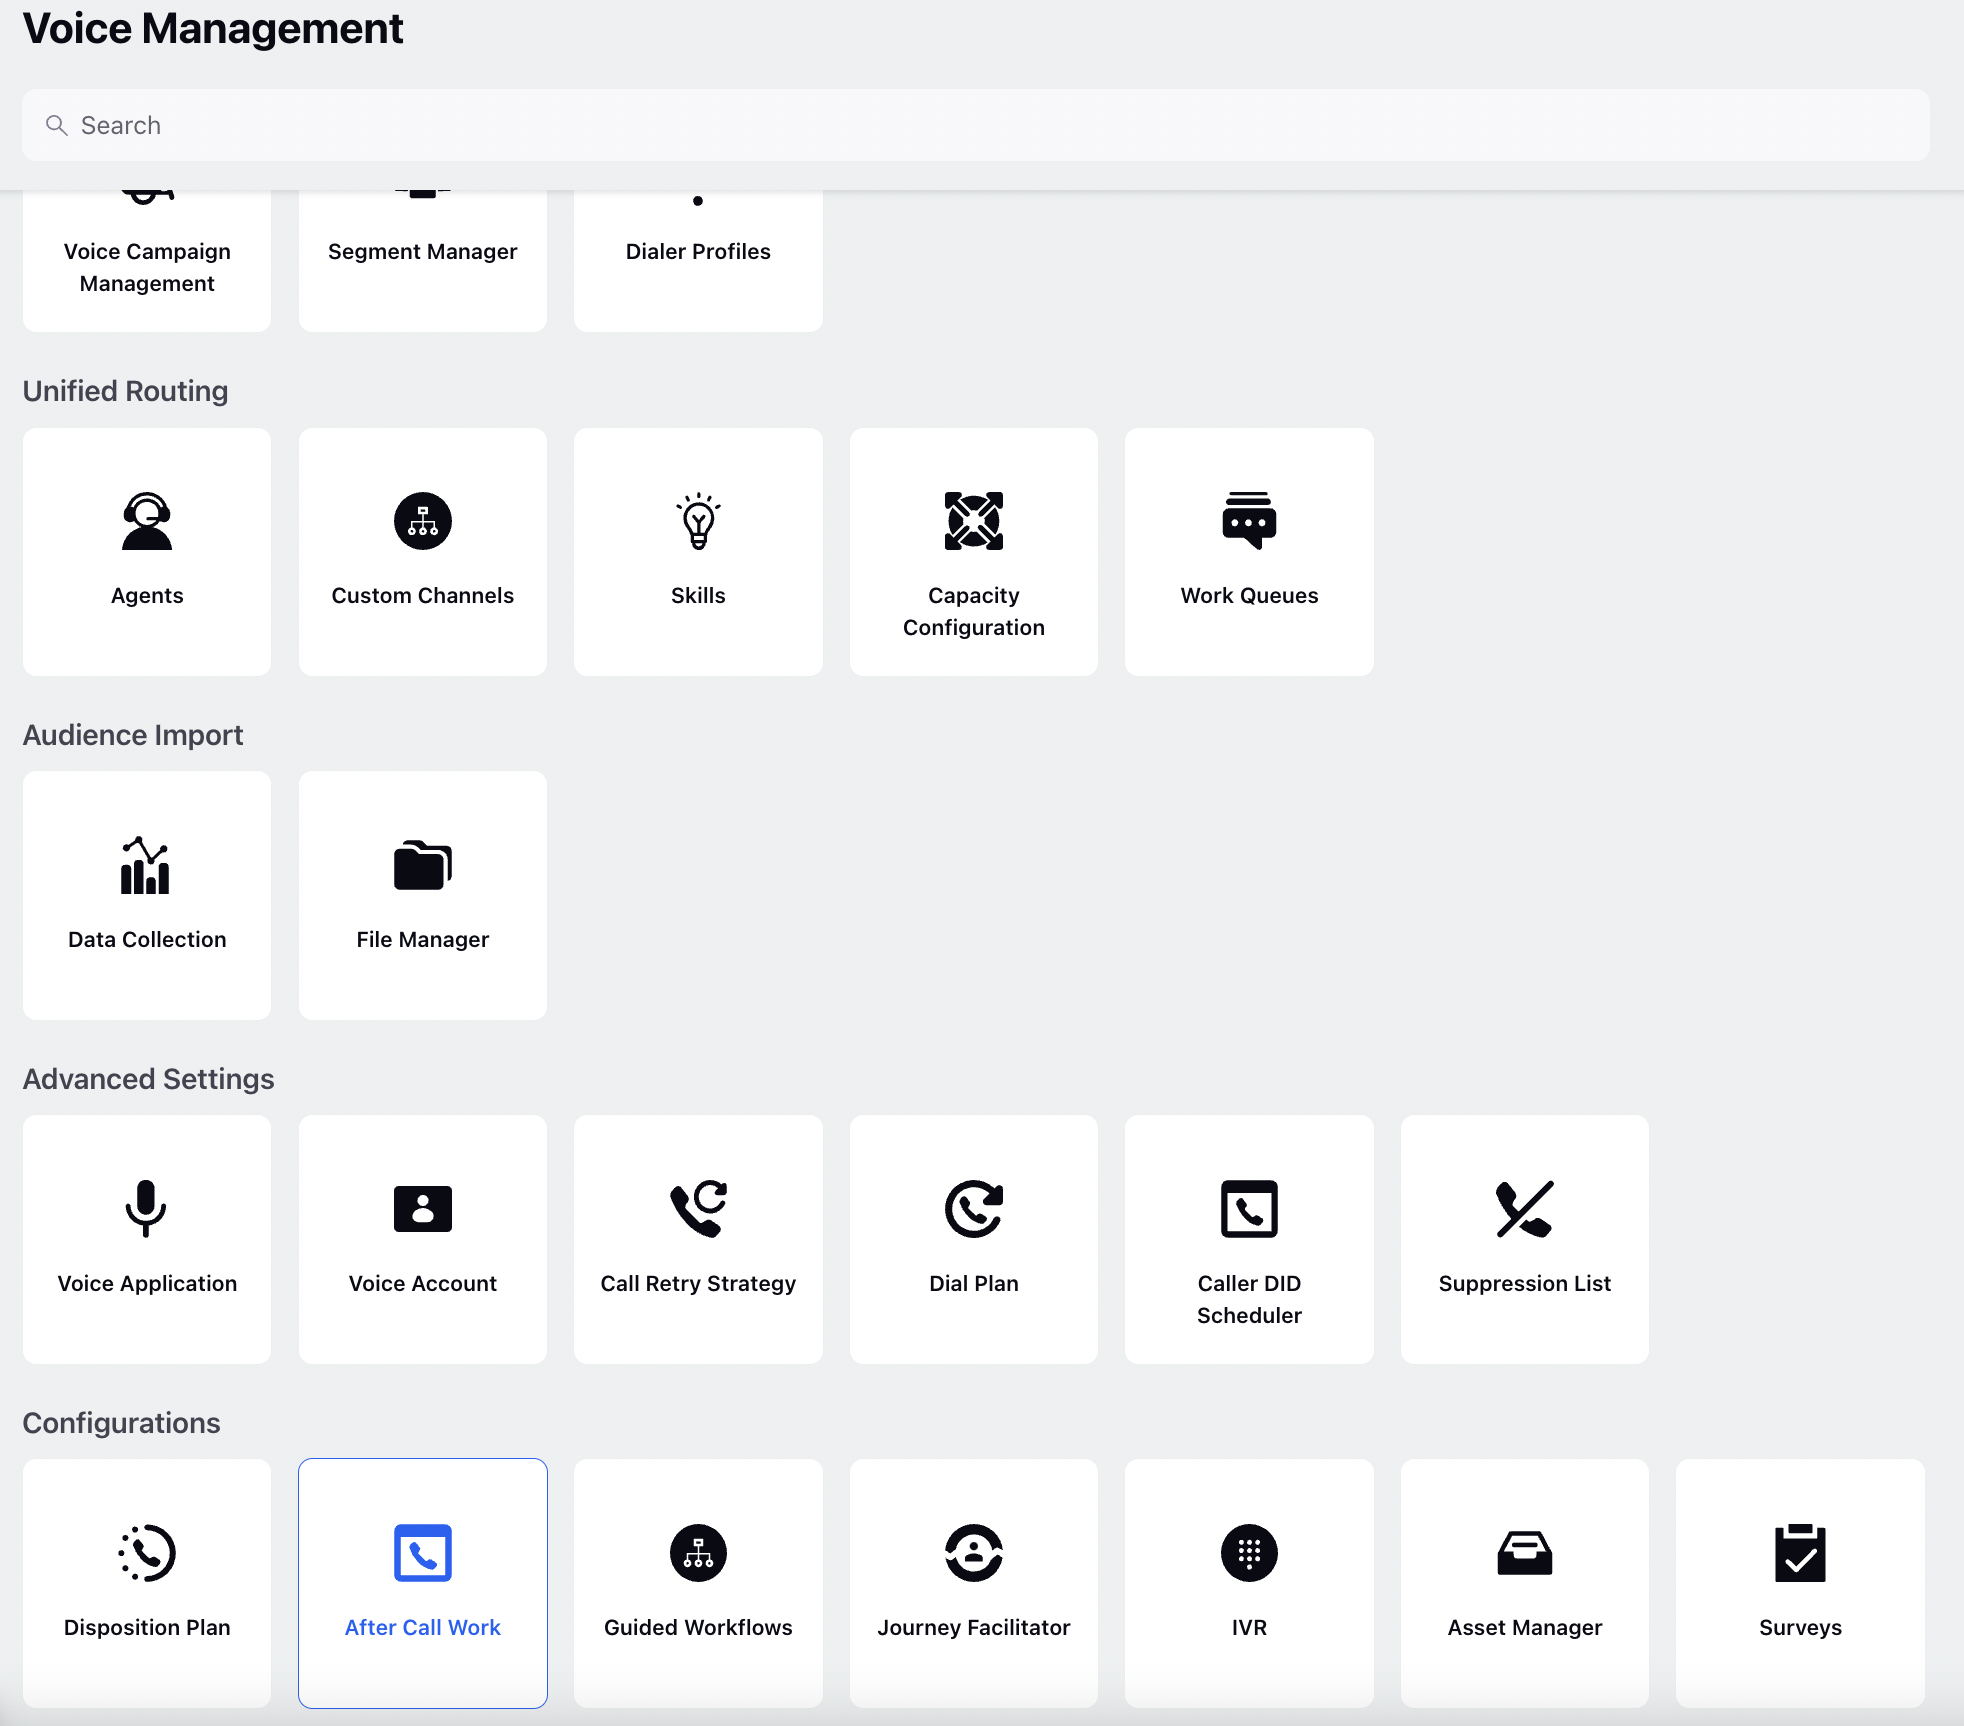
Once you have appropriate permissions, and you are using launchpad, you can see Voice Care in the launchpad under Sprinklr Service > Listen > Voice care. Post that open Disposition Plan from left navigation.
If you are using Voice Admin persona, you can see Disposition Plan inside Tools menu on left navigation under Tools > Configuration > Disposition Plan
You’ll land on the page shown below. This interface is used to create and manage multiple ACWs.
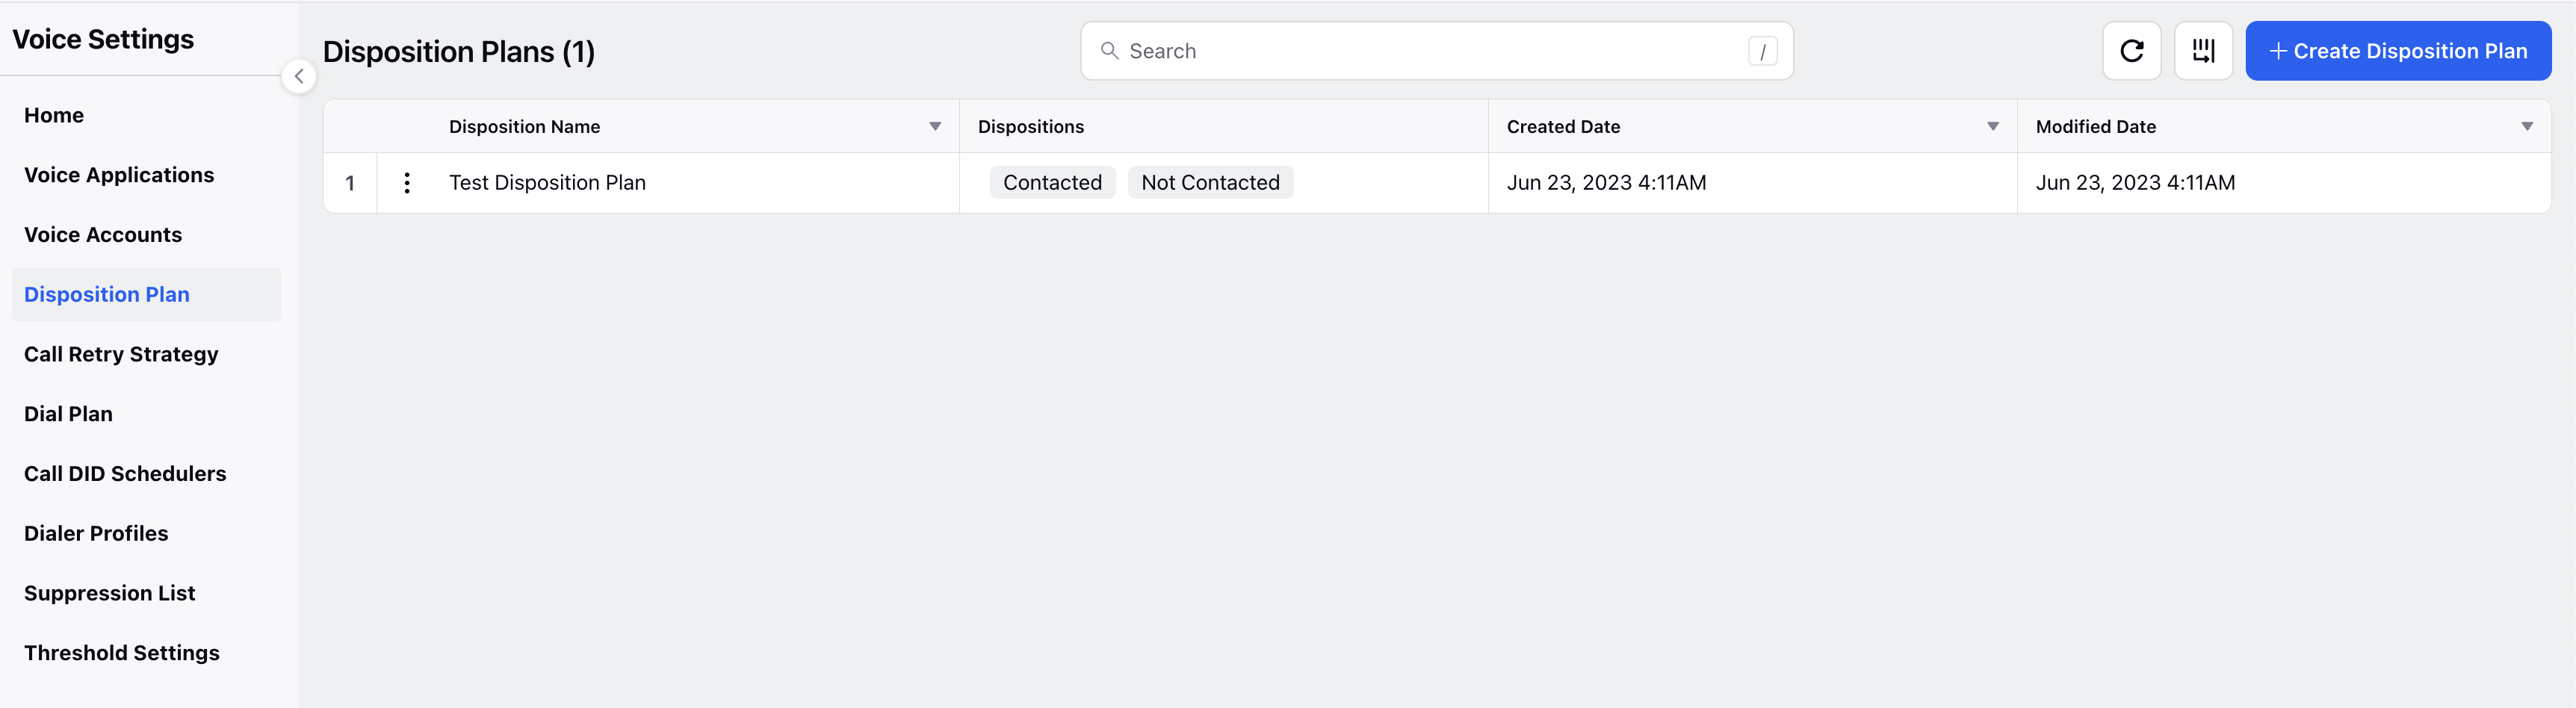
Disposition Plan Manager
Once you open Disposition Plan, you will see a list of all Disposition Plans already made. On this screen you can view, search, edit your previous disposition plan or create a new one.
Create New Disposition Plan
To create a new Displosition Plan, click "Create Disposition Plan" located on the top right of the page. Once you cick on Create Disposition Plan you enter into Disposition plan creation page. This is the place at which you can define the disposition plan.
Sample Disposition Plan configuration is in the screenshot below-

You can define Disposition Plan Name, Disposition Label, Multiple Disposition, Sub-Disposition Label, Sub-Disposition(s) for each disposition. For each disposition, you can set visibility conditions so that a disposition is only visible based on workflow properties, voice conversation attributes, and custom fields in addition to dispositions and sub-disposition values.
You can add multiple disposition groups with varying disposition plans and visibility conditions. Only the disposition groups that satisfy the visibility conditions will be visible.
For example, if you need to add a specific disposition for VIP customers called 'VIP Level' and whether a customer is a VIP or not is tagged in a case-level custom field, you can configure the disposition as follows:

The disposition 'VIP Level' will only be displayed to the user when the value of the case-level custom field 'is VIP' is 'Yes'.
Previously, users had to create multiple disposition plans to manage visibility. However, this feature allows for more streamlined control by adding visibility conditions directly within a single disposition plan.
![]() Note: A visibility condition, that was previously available only for Disposition values, is now available for Sub-Disposition values. If the Sub-Disposition Condition for a value is not met, then it is not displayed in the Sub-Disposition field.
Note: A visibility condition, that was previously available only for Disposition values, is now available for Sub-Disposition values. If the Sub-Disposition Condition for a value is not met, then it is not displayed in the Sub-Disposition field.
System Behavior
1. When All Dispositions Are Hidden
- Condition: All dispositions are hidden due to visibility conditions.
- Behavior: The fields will be displayed directly based on their visibility conditions. Dispositions and sub-dispositions will be hidden.
2. When All Fields and Dispositions Are Not Visible
- Condition: All fields and dispositions are hidden due to visibility conditions.
- Behavior: The screen will be blank, with a hover message stating, “You don’t have permission to view.”
3. When Disposition Visibility Changes
- Condition: A disposition is initially visible but becomes hidden due to a change in the custom field (CF) value.
- Behavior: The disposition will no longer be visible to the agent, maintaining the standard behavior seen on other platforms. There will be no hover state indicating the previous visibility.
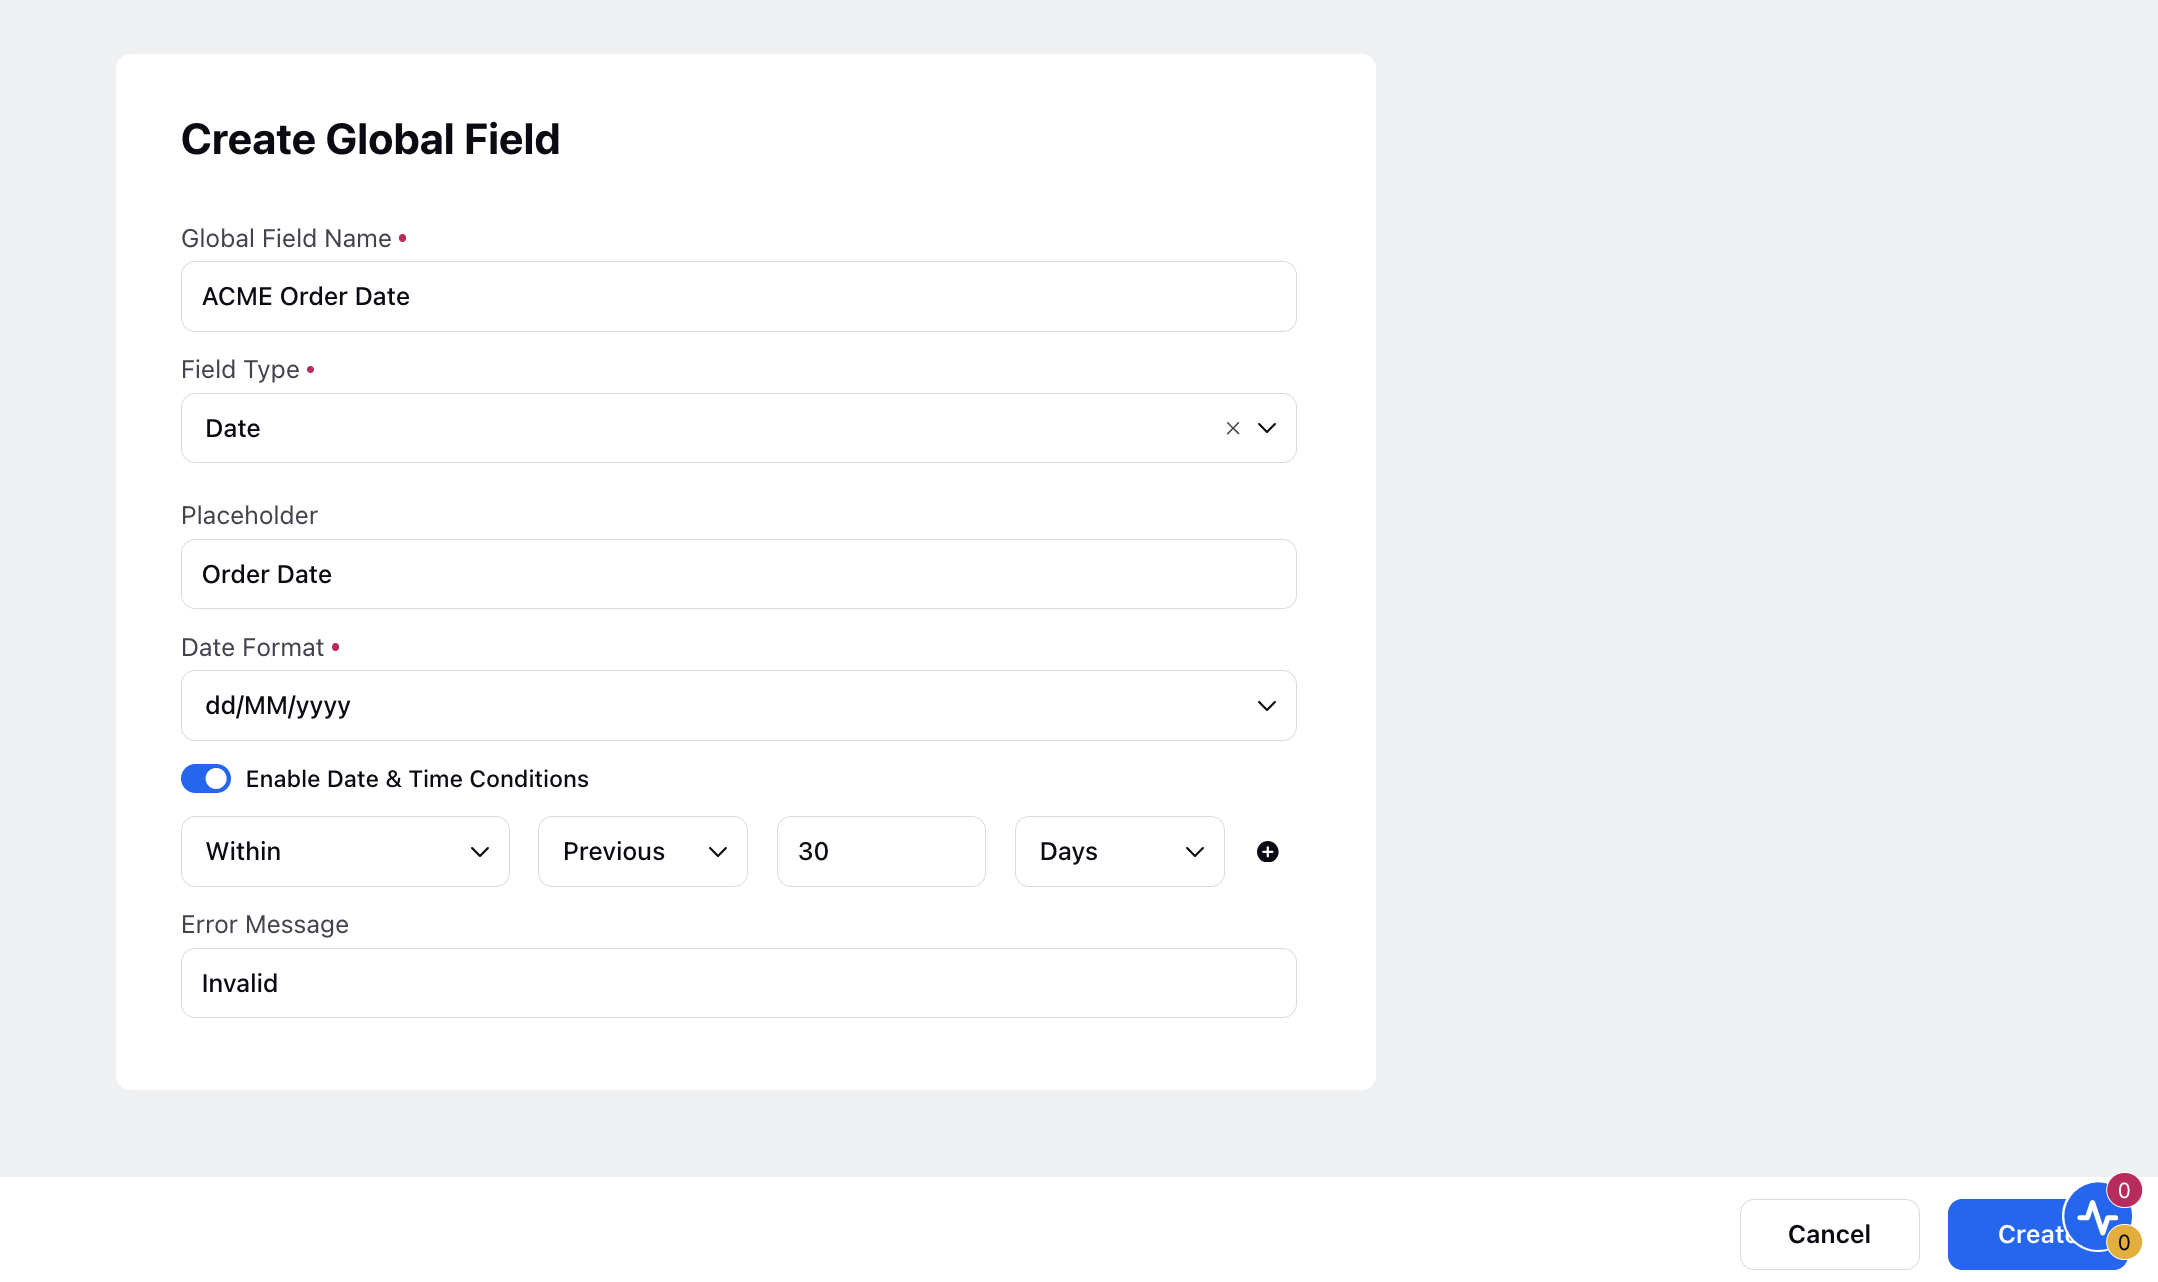
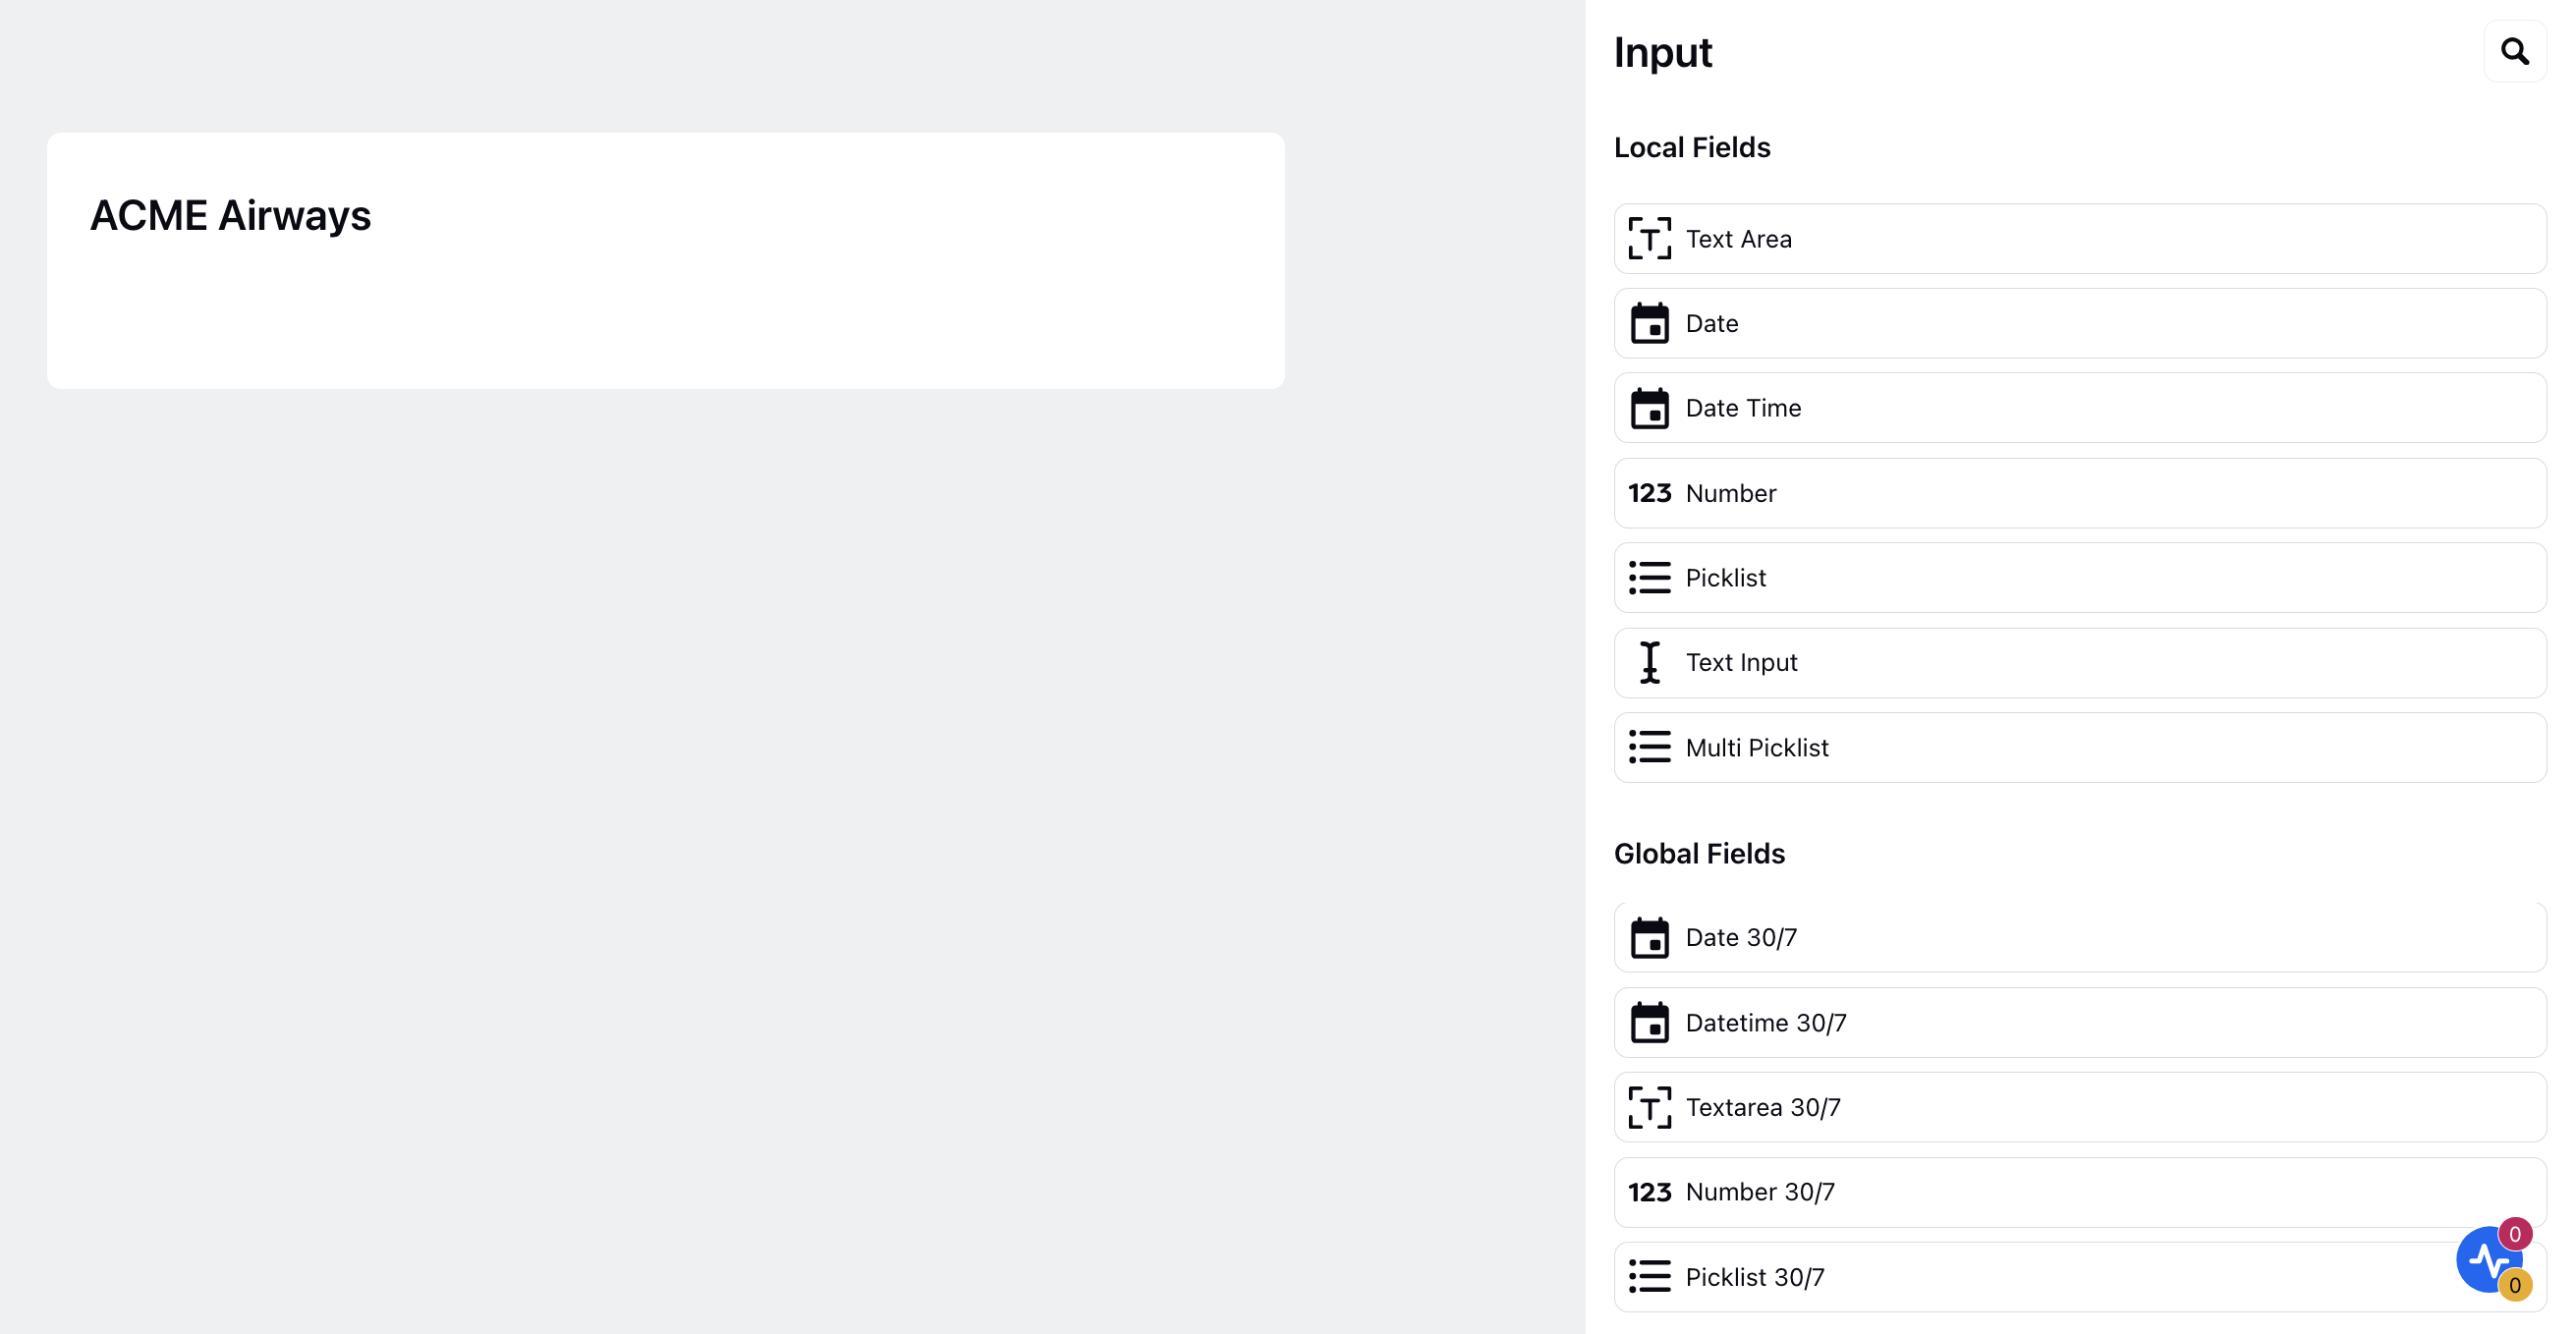
You can also define additional fields like Text, Text Area, Date, Picklist, Number Input are used to control the information that the agent can input into the disposition plan.
Disposition Plan Name: This is a mandatory field to enter the name of Disposition plan.
Disposition: This field can be used to store the primary outcome of the call. All the dispositions will be visible to the agent as a picklist
Disposition Label: This is used as a label for all dispositions for a particular disposition plan.
Sub-Disposition(s): This field can be used to store the reason for primary outcome of the call. Sub-Disposition(s) can have multiple inputs which will appear to the agent as a picklist. The visibility of the sub-disposition depends on the disposition selected by the agent.
Sub-Disposition Label: This is used as a label for all sub-dispositions for a particular disposition.
Add Disposition: By clicking on the “+ Add Disposition”, we can add multiple disposition to a disposition plan.
Add Field: By clicking on “+ Add Field” we can add multiple field for storing the values related to the call.
How to add additional Fields?
You can add fields by dragging the fields from the right pane and dropping them on the left.
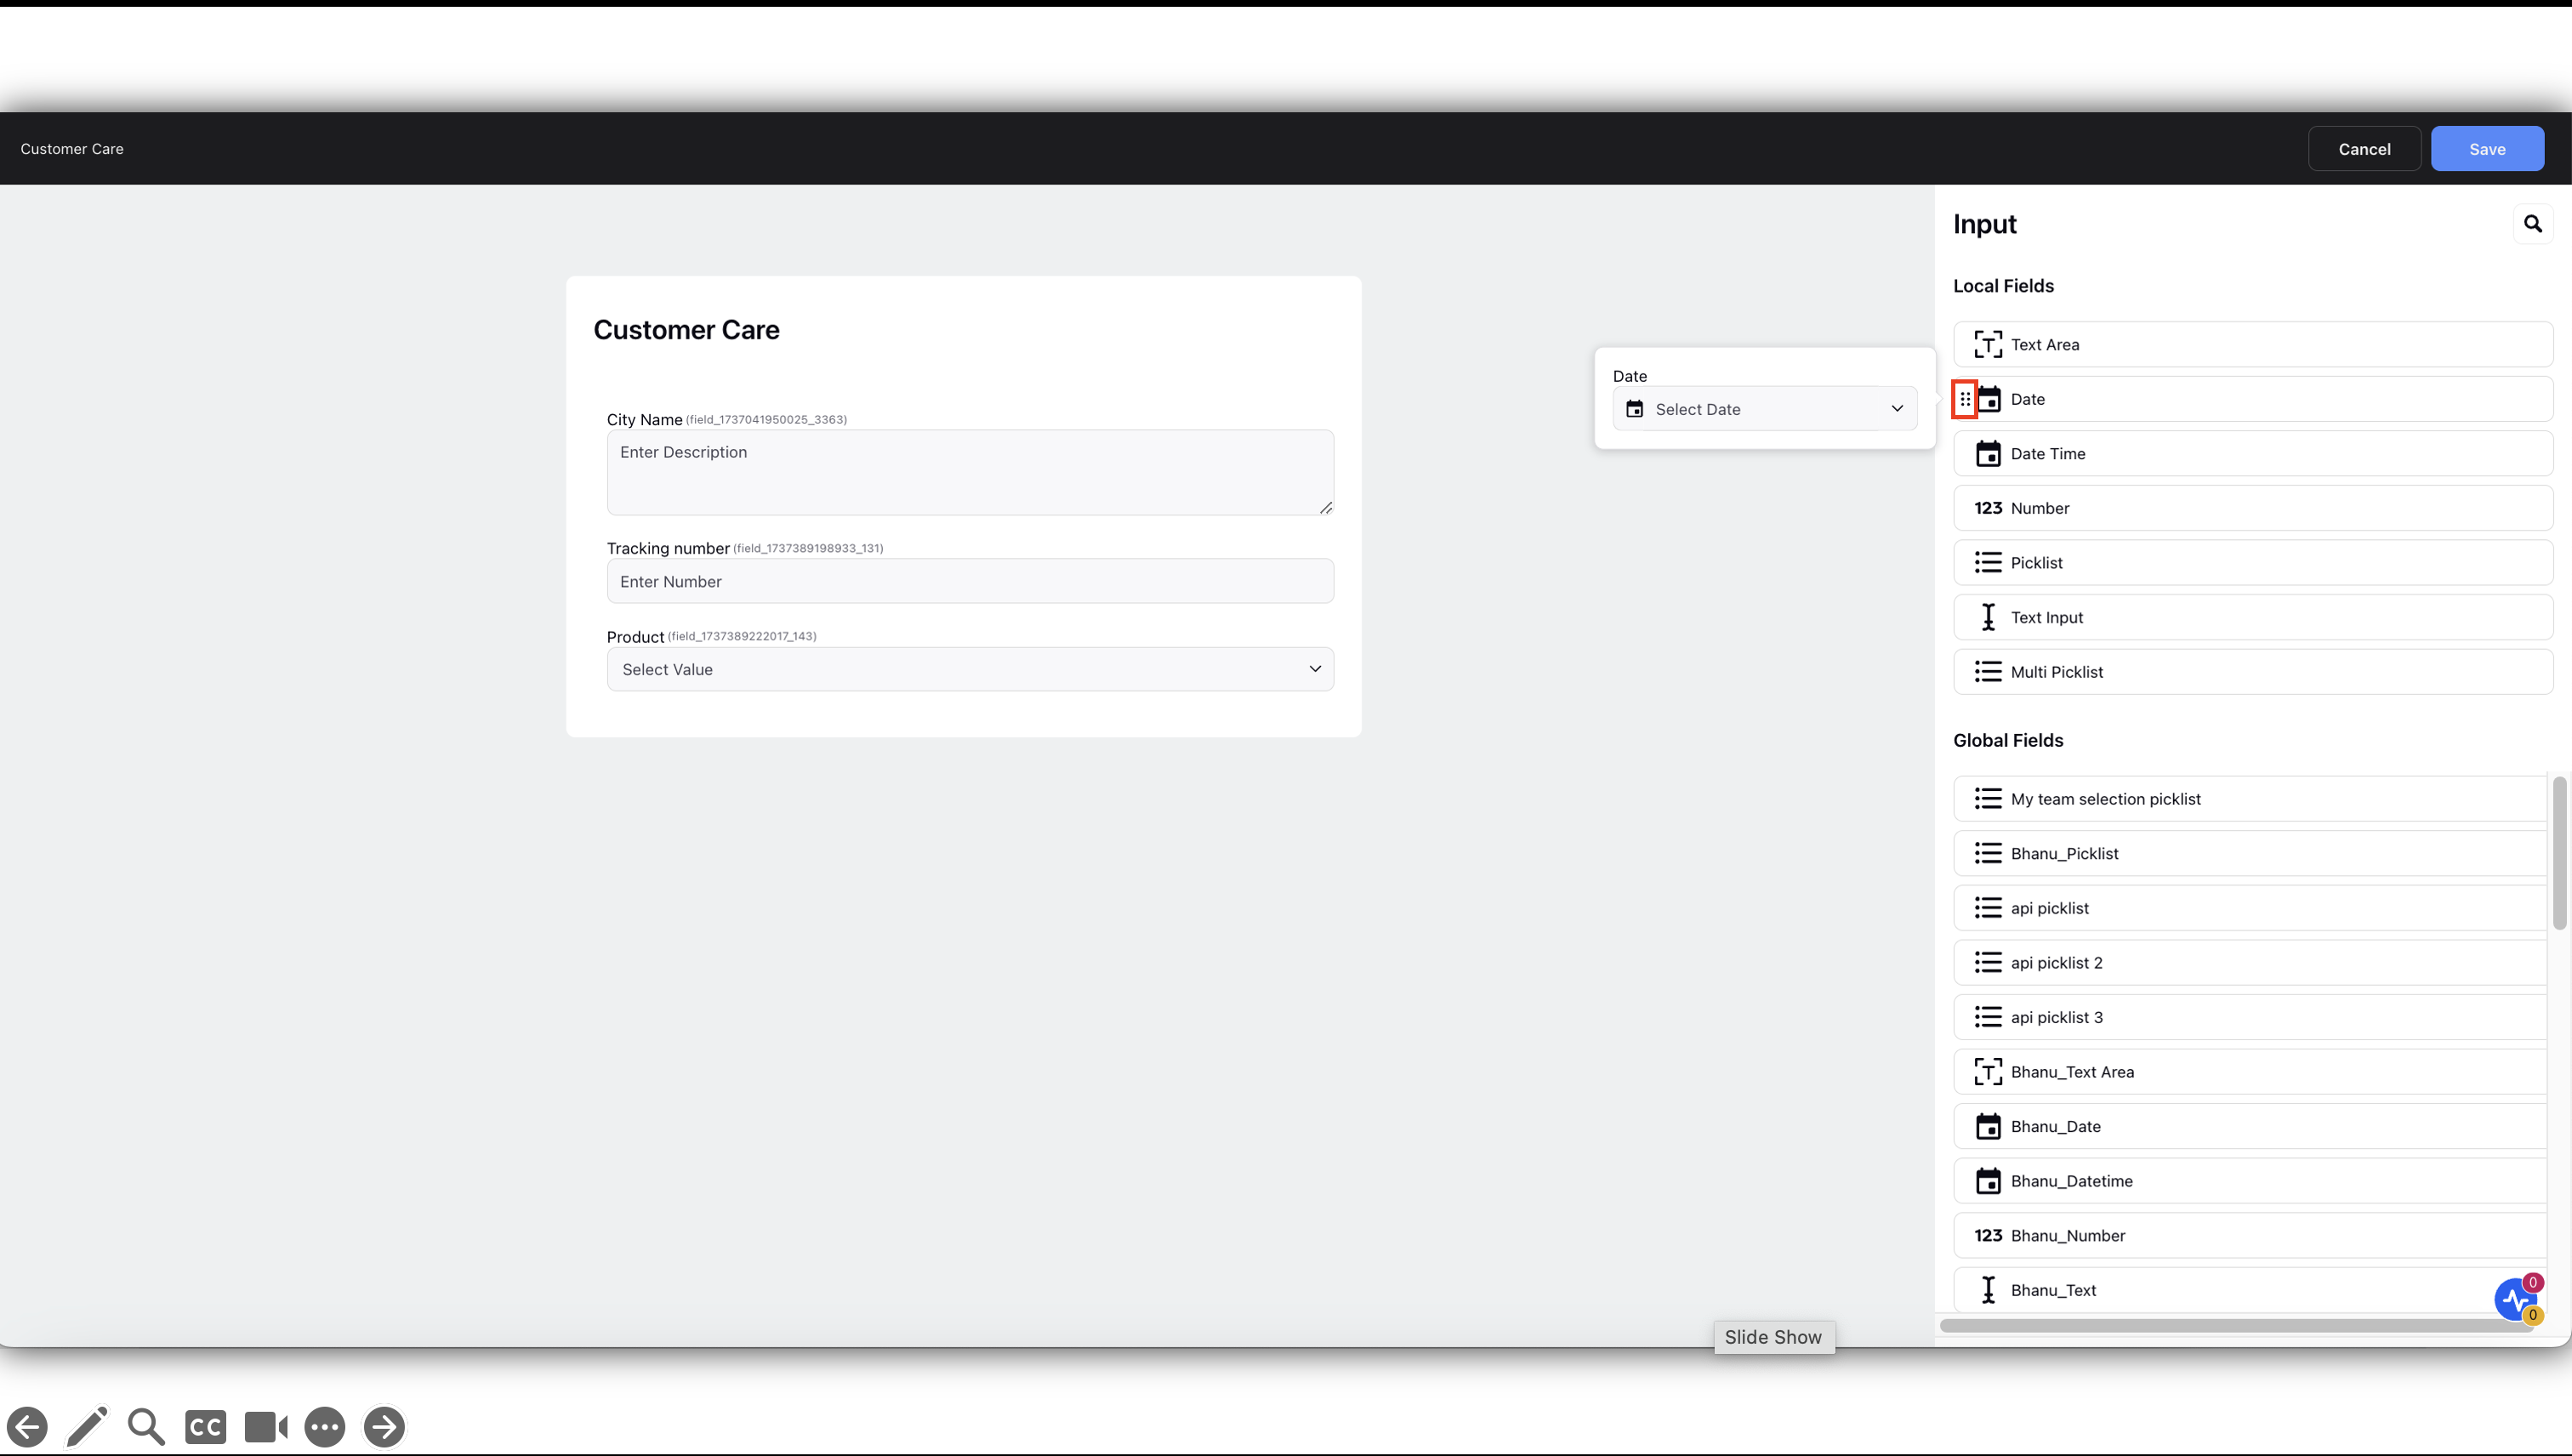
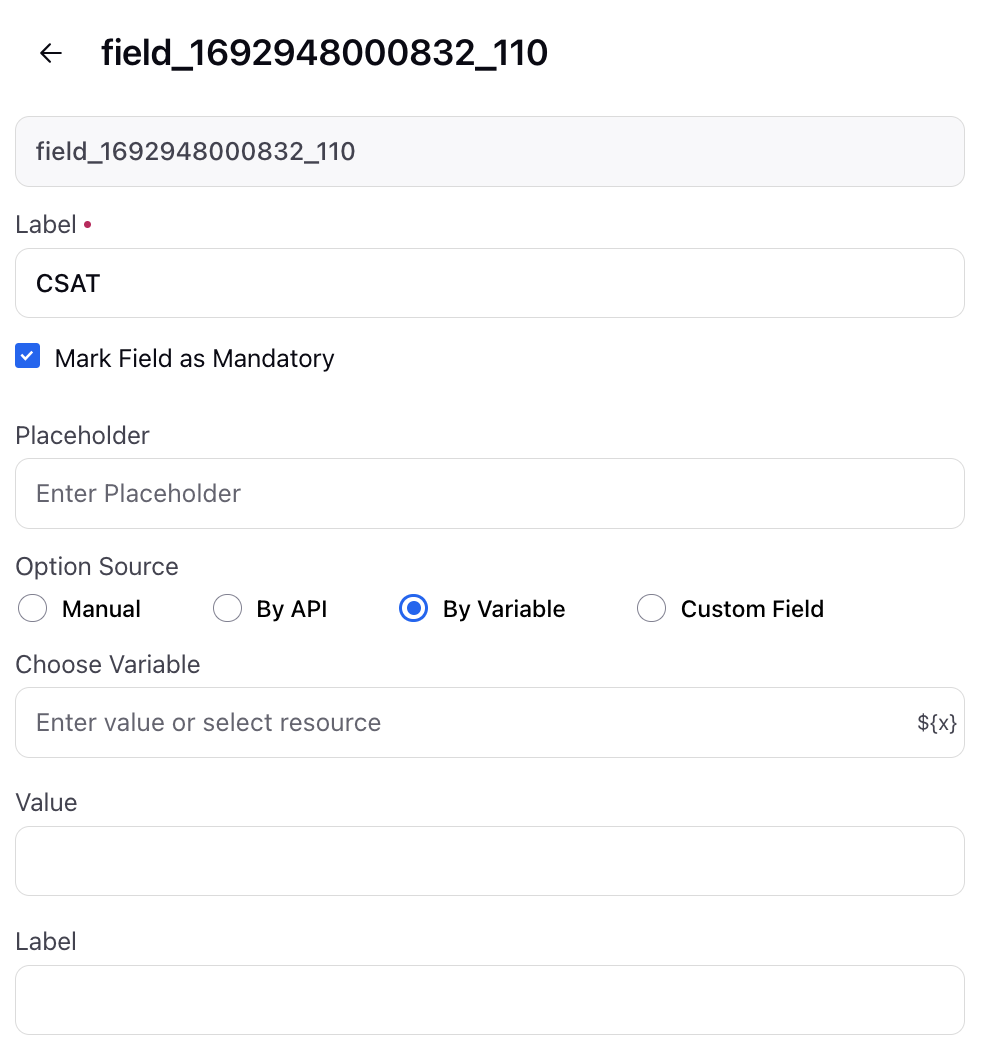
For each field, you can define following things-
Name: The name of the field.
Type: This defines type of the field. Following field types are available:
Date
Date Time
Number
Picklist
Text area
Text Input
Multi Picklist
Mark as required: If checked, the agent can’t submit the ACW without filling the field details.
Visibility conditions: These conditions are used to define the visibility for a field in ACW. The visibility conditions can be defined on the basis of follwing fields-
Disposition and Sub-Disposition
Previously created field
Source Default Value: it is used to prefill the value for the field. If the toggle is turned on, we get 3 options to define the default value for the field:
Static Value: By selecting this, we can manually enter the default value for the field.
Source Variable: By selecting this, we can enter the resource variable name to be used as default value for the field.
Source Custom field: By selecting this, we can enter the custom field to be used as default value for the field.
Select Type of Source Option - This field will be visible for Field type Picklist and Multipicklist. Using this you can define the options and source of options for picklist and multi-picklist. There are 4 different sources-
Static Value: By selecting this, we can manually enter the picklist/multi picklist options for the field.
Source Variable: By selecting this, we can enter the variable name which will be used to display the option for the field in ACW. This variable need to be an array of map. The fields that need to be defined are-
Variable Name which contains the map
Value Field Name: This will be the key of the map for the values of the picklist which will be stored in the backend
Label Field Name: This will be the key for the label of the picklist label, these are the value which will be shown to agent as the options.
 For example an array of map which contains the country name and country code
 [{"country": "United States","countryCode": "US"},{"country": "Canada","countryCode": "CA"},{"country": "United Kingdom","countryCode": "UK"}]If this map is in variable countryList, then the config for the options will be-
Variable Name: countryList
Value Field Name: countryCode
Label Field Name: country
Source Custom Field: By selecting this, we can enter the custom field to display options for the field. You can choose different case profile, user custom field. Using this the options defined in that custom field will be the options for this field.
Source API: You can fetch picklist options from any external API by using this, you have to define following things-
Service Name - Choose the desired the API, you need to choose the API extension name.
Adapt API response - Adapt the response of the API and make it into array of map using groovy.
Value Field Name: This will be the key of the map for the values of the picklist which will be stored in the backend
Label Field Name: This will be the key for the label of the picklist label, these are the value which will be shown to agent as the options.
API input parameters: Map all the input for the API, you can also map the resource variable in input
Controlling Fields: In this field you can define on which field this API call will be dependent, the fields selected in this will determine when this API call will execute and fetch values. Whenever these fields will change thie API call will be executed to fetch value.
Choose Controlling fields: This field will visible for Field type Picklist and Multipicklist and source options as static. This allows you to establish a relationship between different fields, where the options available in one dropdown are determined by the choice made in previous fields. Using this you can define the visibility of options on the basis of previous picklist.
The various fields in Disposition Plan fields are easily distinguishable. For example, the box of the Text Area is bigger in size than the Text Input area, Date field has a date icon, and a Picklist has a dropdown icon.
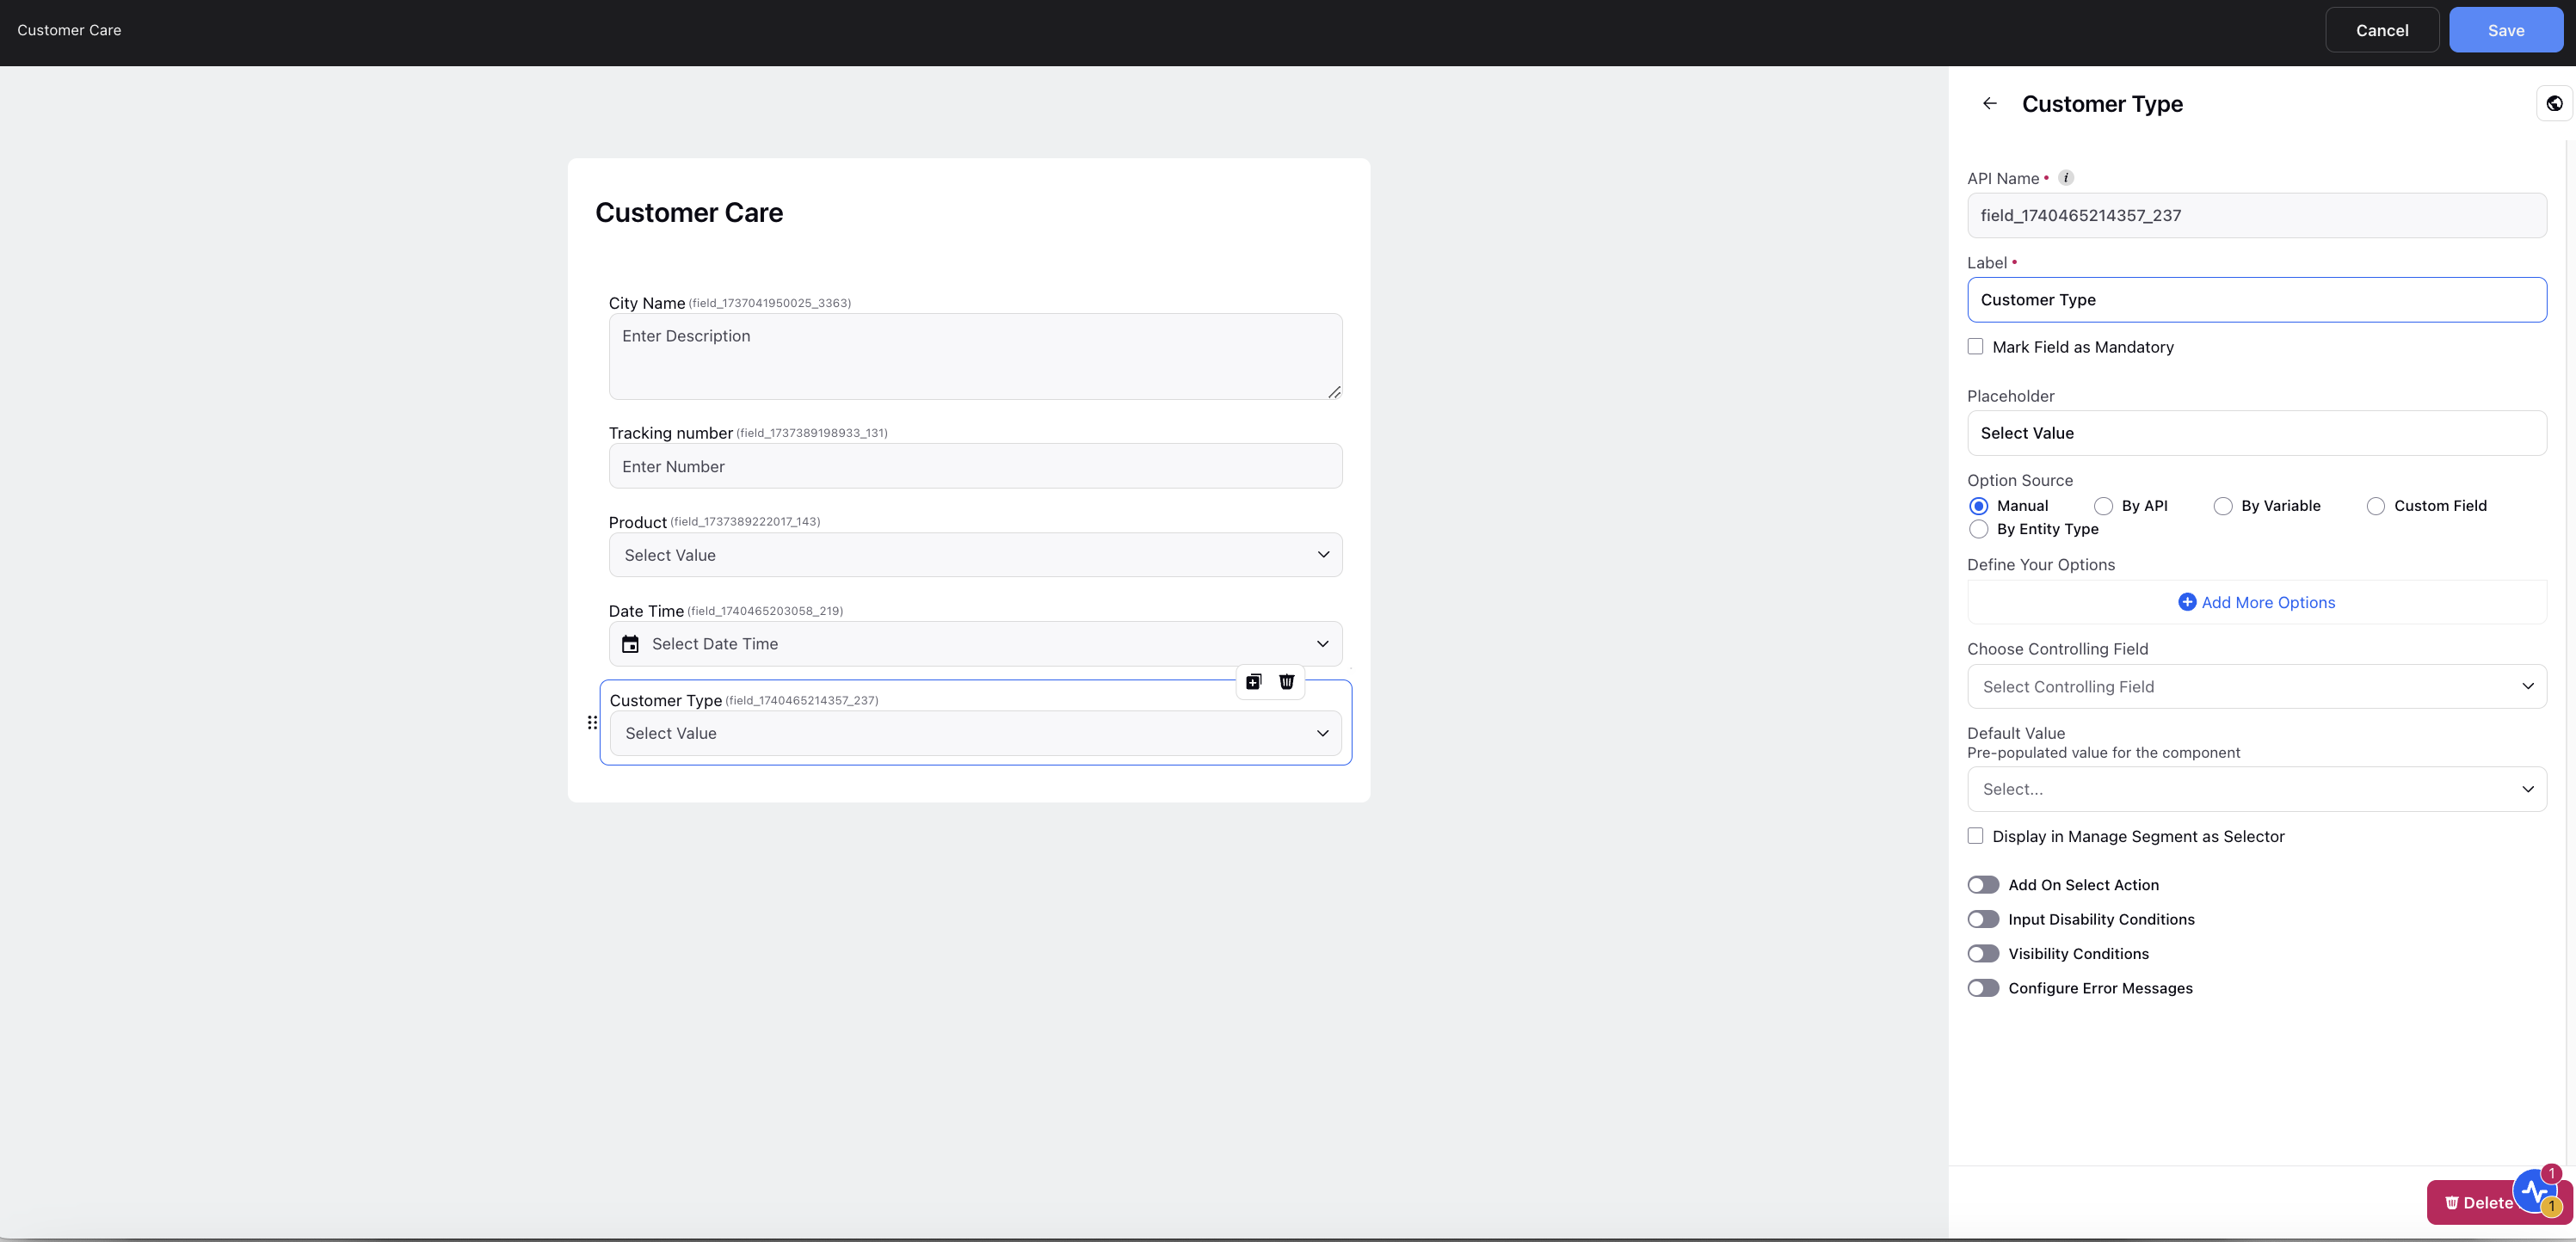
In addition to this, while editing the Disposition Plan fields, you can move the fields from one position to another using the drag handles (six dots)
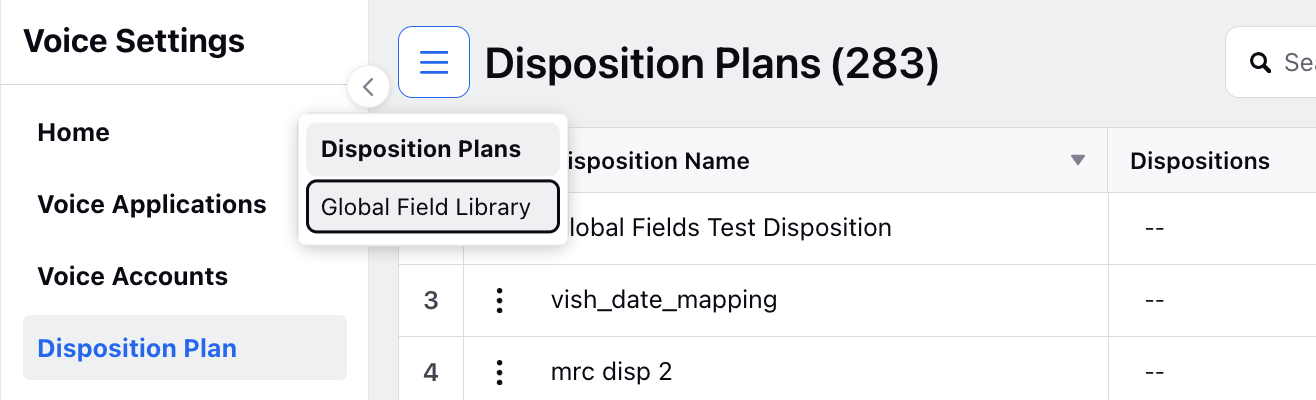
Global Field Library
The Global Field Library addresses the issue of duplicate fields being created for identical purposes across multiple disposition plans. This allows users to reuse fields across different disposition plans, ensuring consistency and efficiency.
Global Fields: Fields that can be reused across different disposition plans.
Local Fields: Fields that are unique to a specific disposition plan.
When configuring disposition plans, fields that are to be reused across plans will be marked as Global Fields.
Example Use Case:
If "schedule callback time" is a field used in multiple disposition plans:
Define "schedule callback time" as a Global Field.
Only one instance of "schedule callback time" will be created in the backend.
During reporting, there will be only one column for "schedule callback time," ensuring clear and consistent data representation.
To Create a Global Field
Click the Menu icon at the top left of the Disposition Plans window and select Global Field Library.
On the Global Field Library window, click Create Global Field in the top right corner.
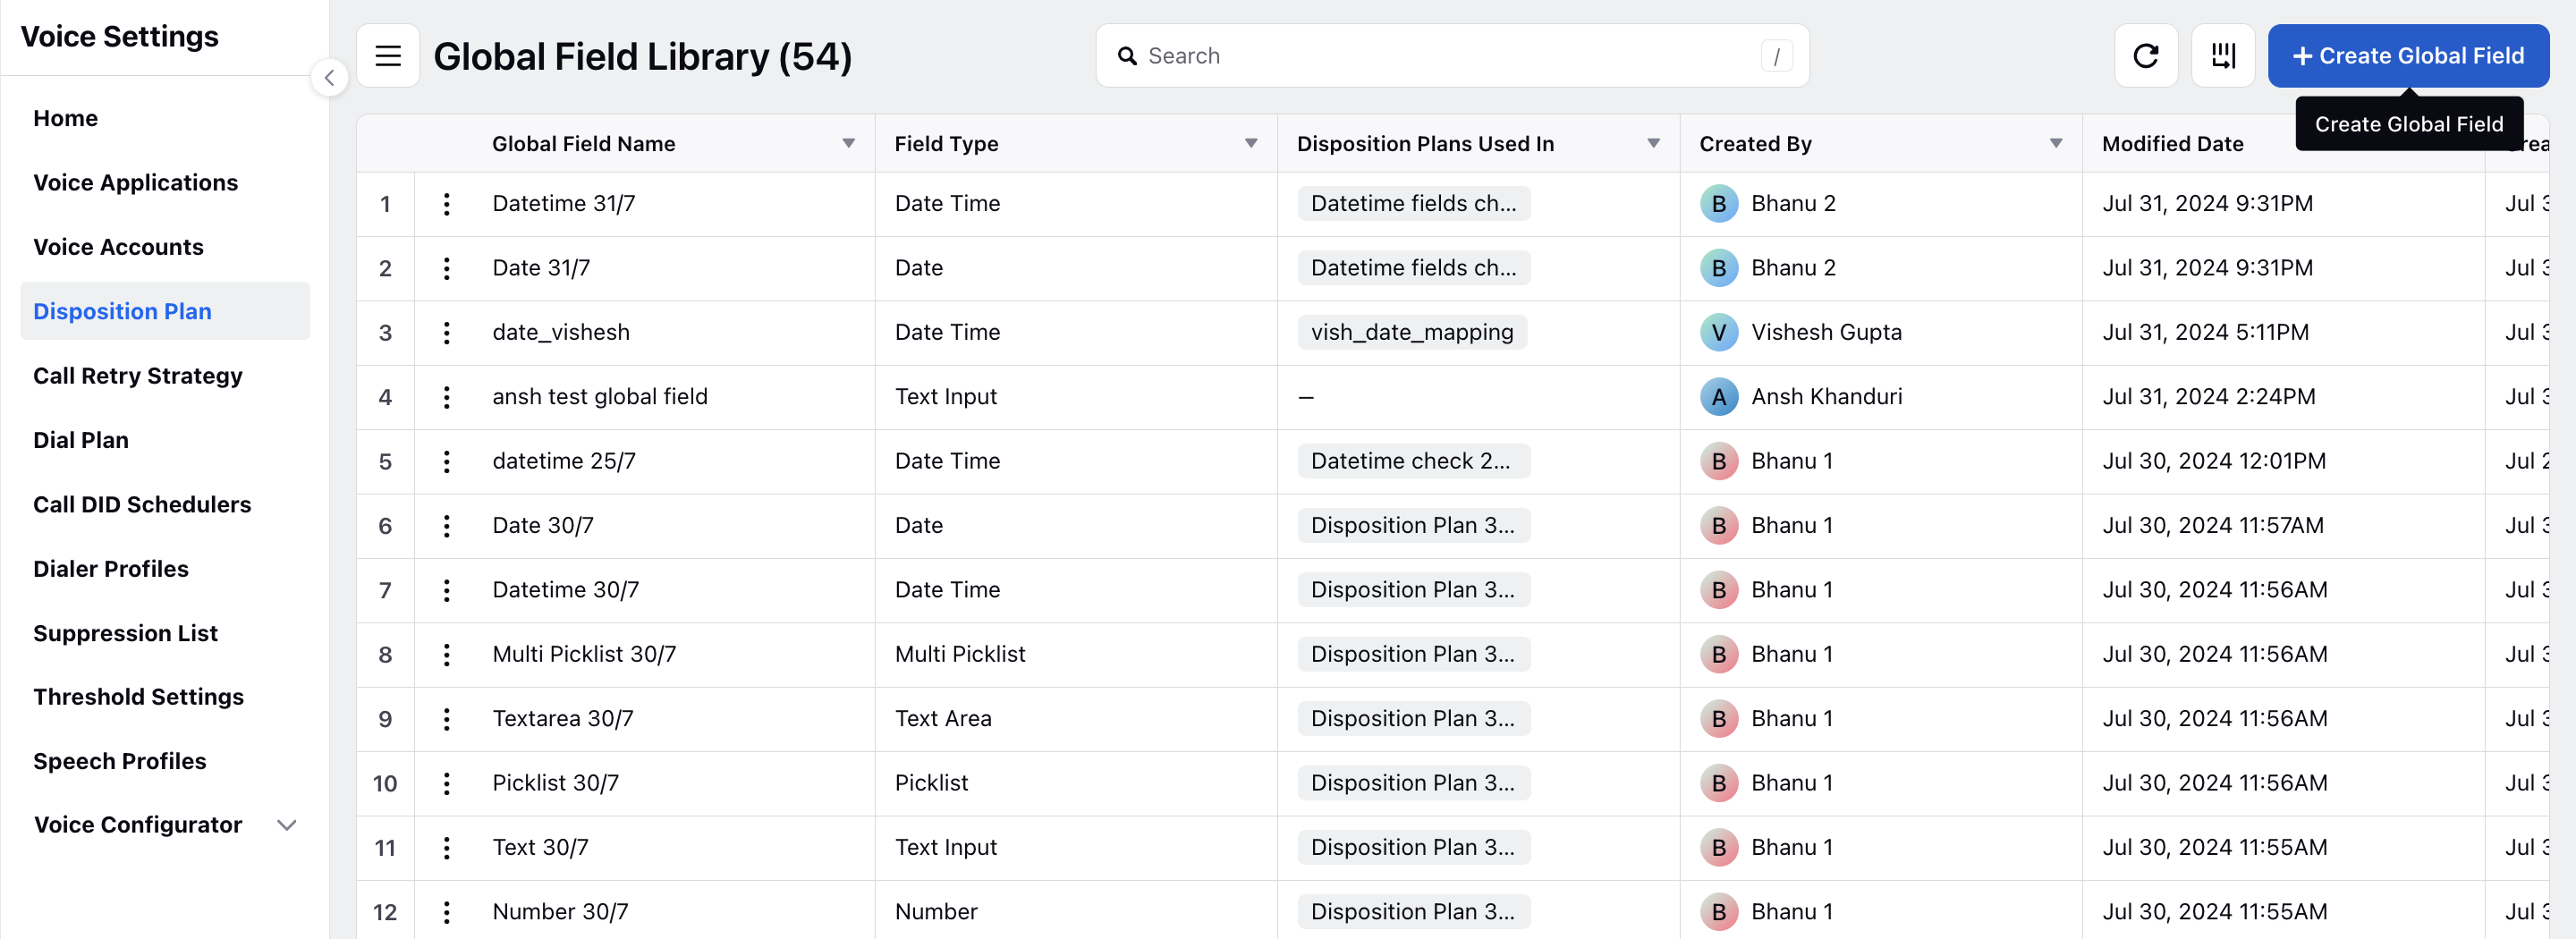
On the Create Global Field window, select the desired Field Type and add the necessary details. Click Create at the bottom.