Add an External Authentication Credential in Sprinklr
Updated
In this article, you will learn how to add an External Authentication Credential in Sprinklr.
Note:
Sprinklr supports all types of authentications.
For static authentication (Key based), you are not required to add any external authentication credential in Sprinklr.
You can add an External API in Sprinklr only if you are a Global Admin or a Global User.
If you are an administrator and wish to grant users permission to add an External Authentication Credential, create a role with the following permissions and assign it to the correct user or user group.

To Add an External Authentication Credential
Click the New Tab icon
. Under the Platform Module, click All Settings within Listen.
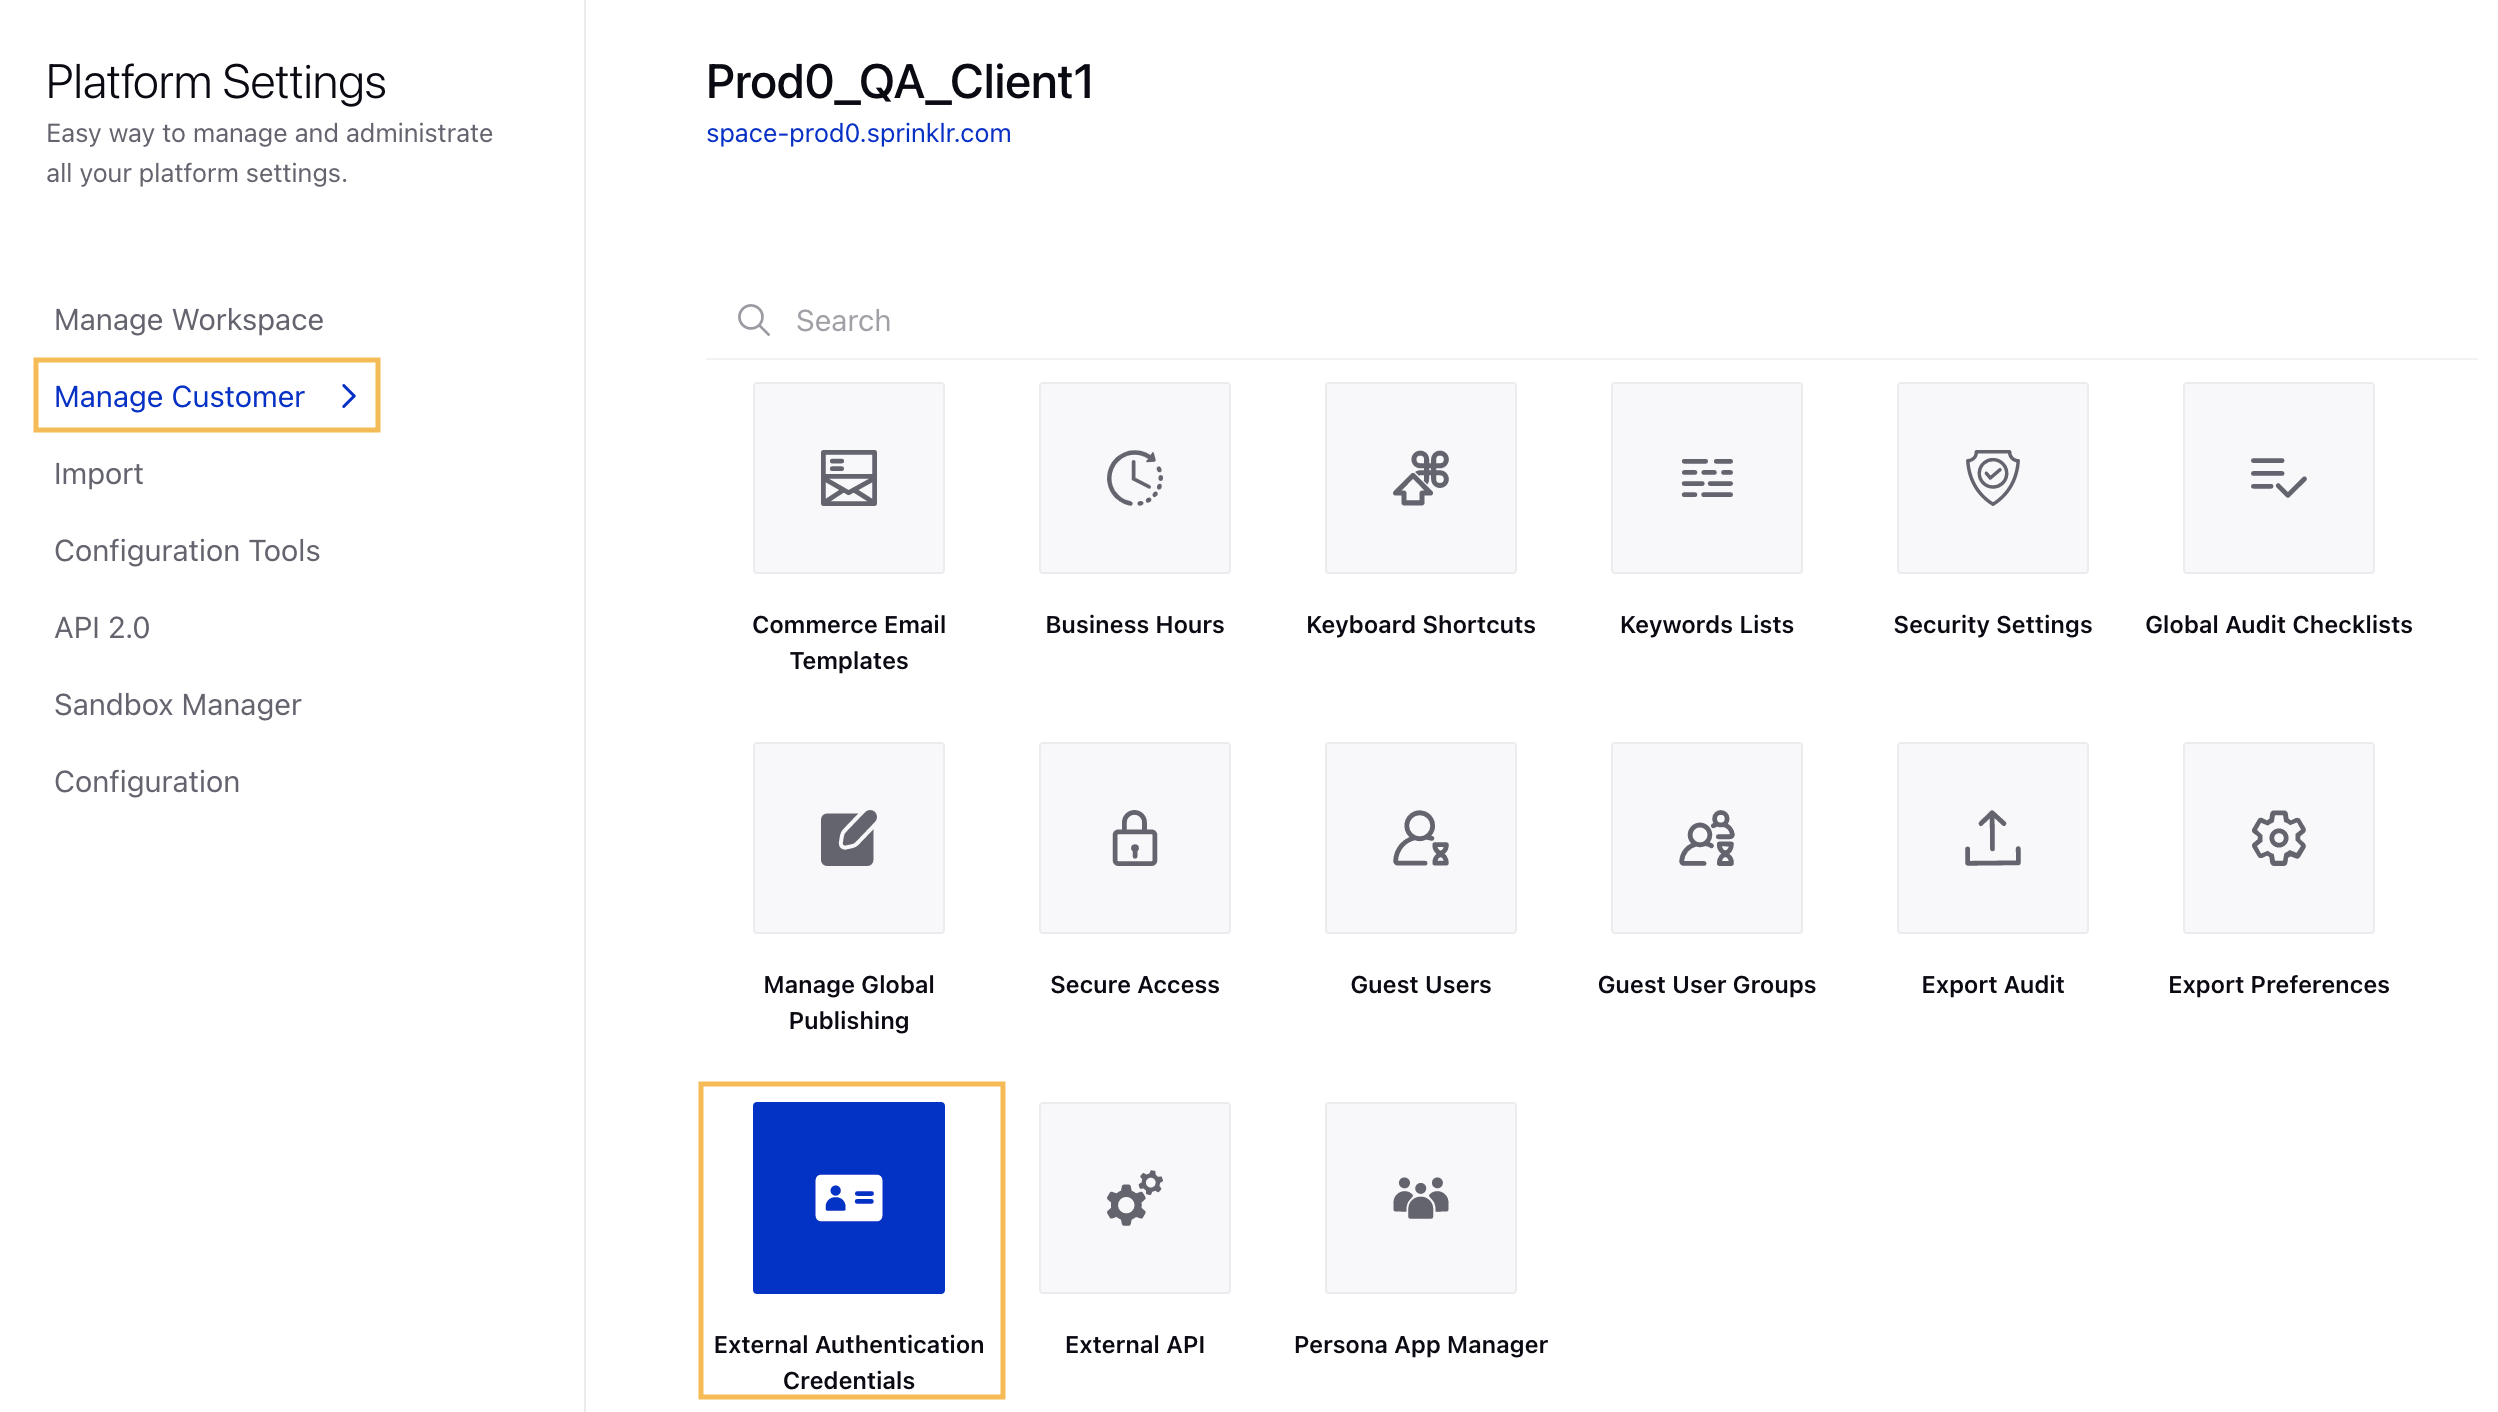
In the Platform Settings window, click Manage Customer and select External Authentication Credential from the list of options. You can also search for it in the search bar above.
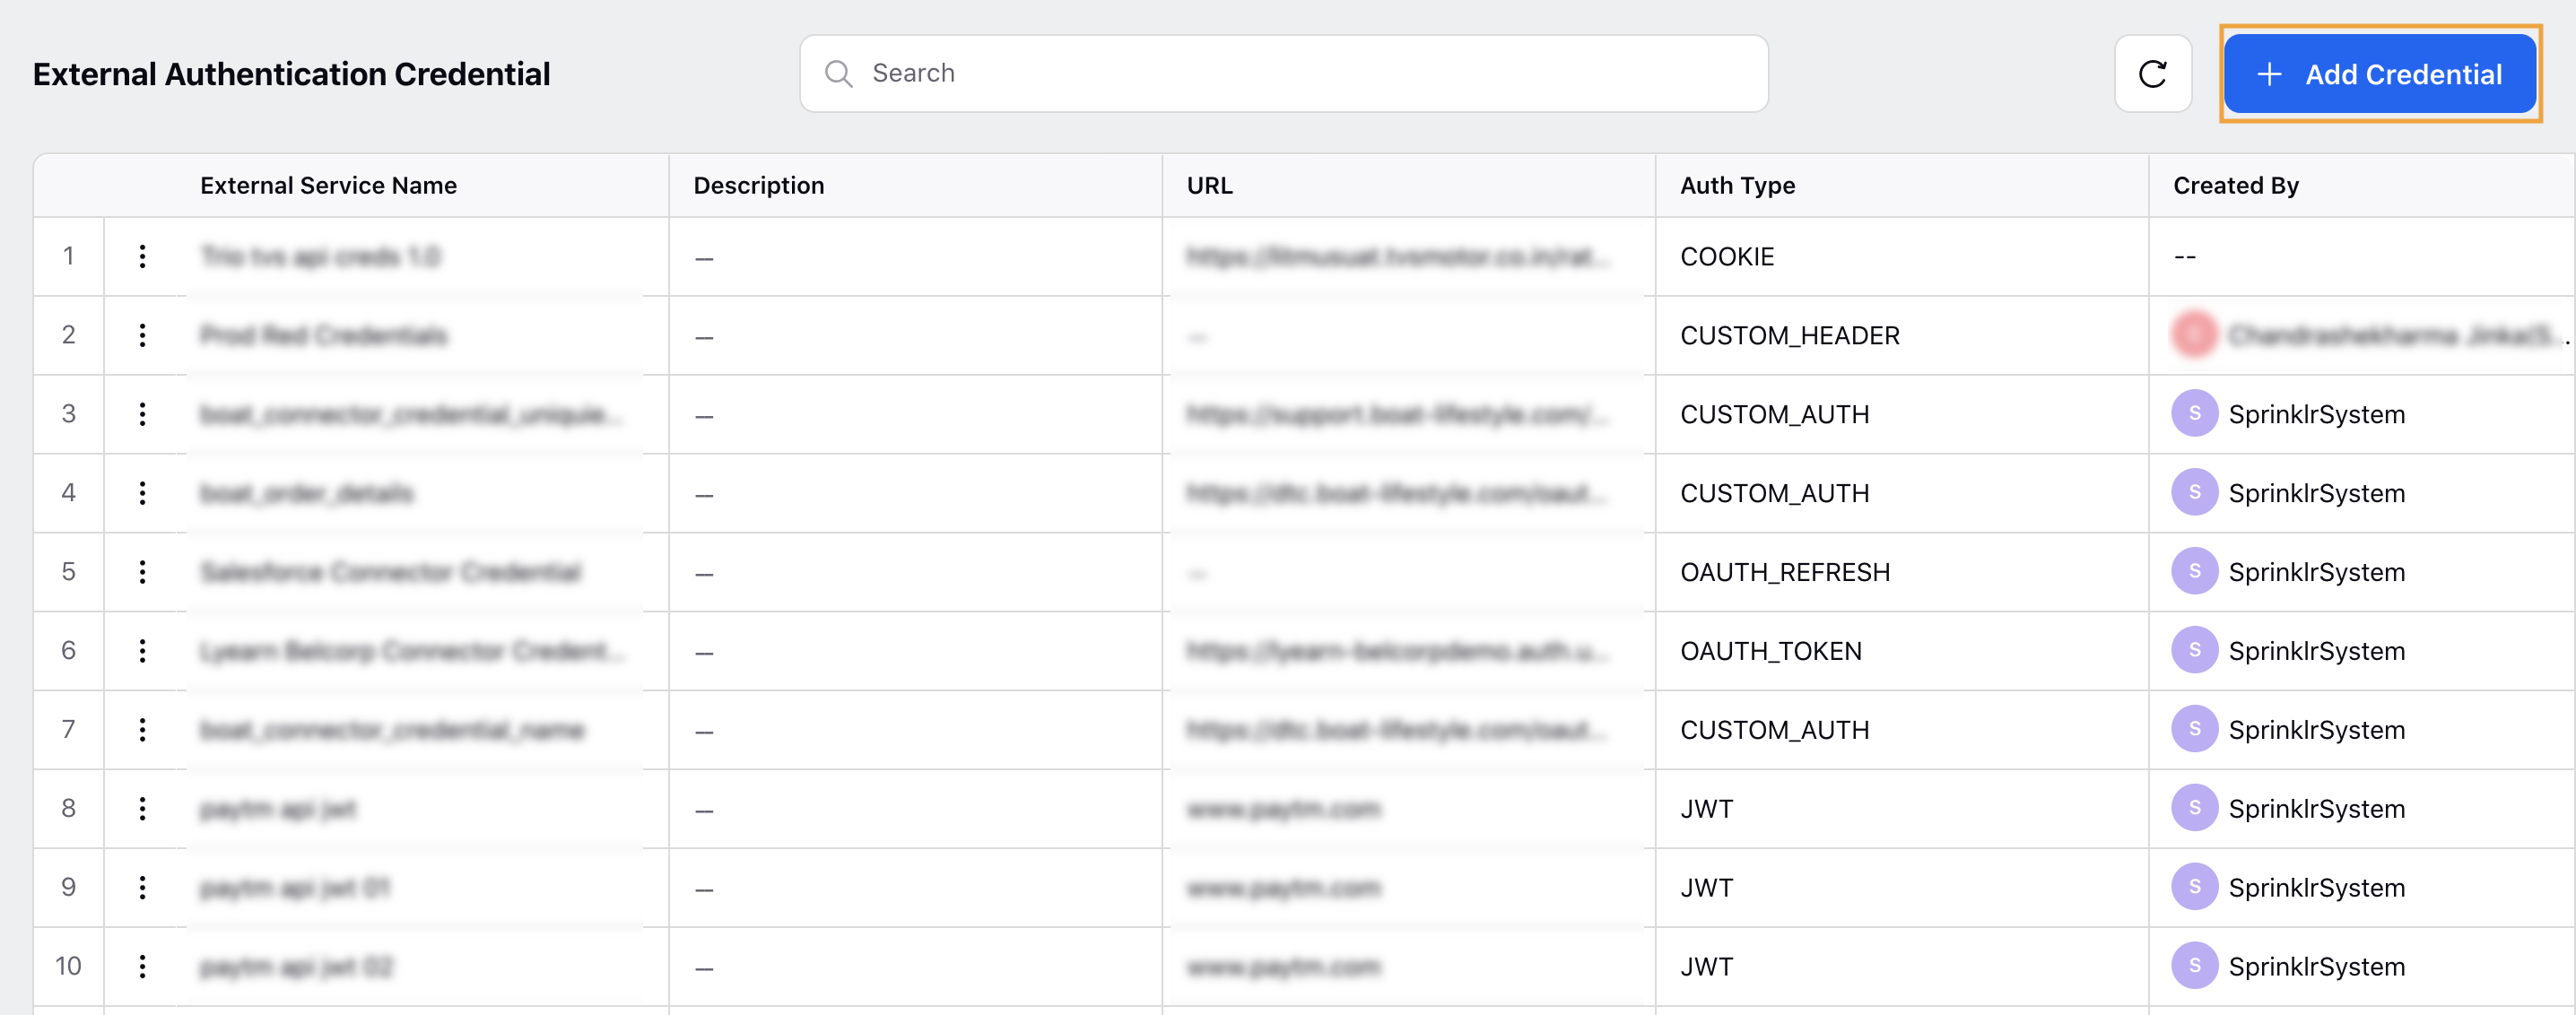
In the External Authentication Credential window, click Add Credential in the top right corner.
In the Add External Authentication Credential window, enter the External Credential Name.
Next, select the Authentication Type from the drop-down menu. The following options are available:
Authentication Name
Description
Basic Auth
Username and password based authentication, encoded in Base64 and passed in the Authorization header.
OAUTH 2.0 ROPC
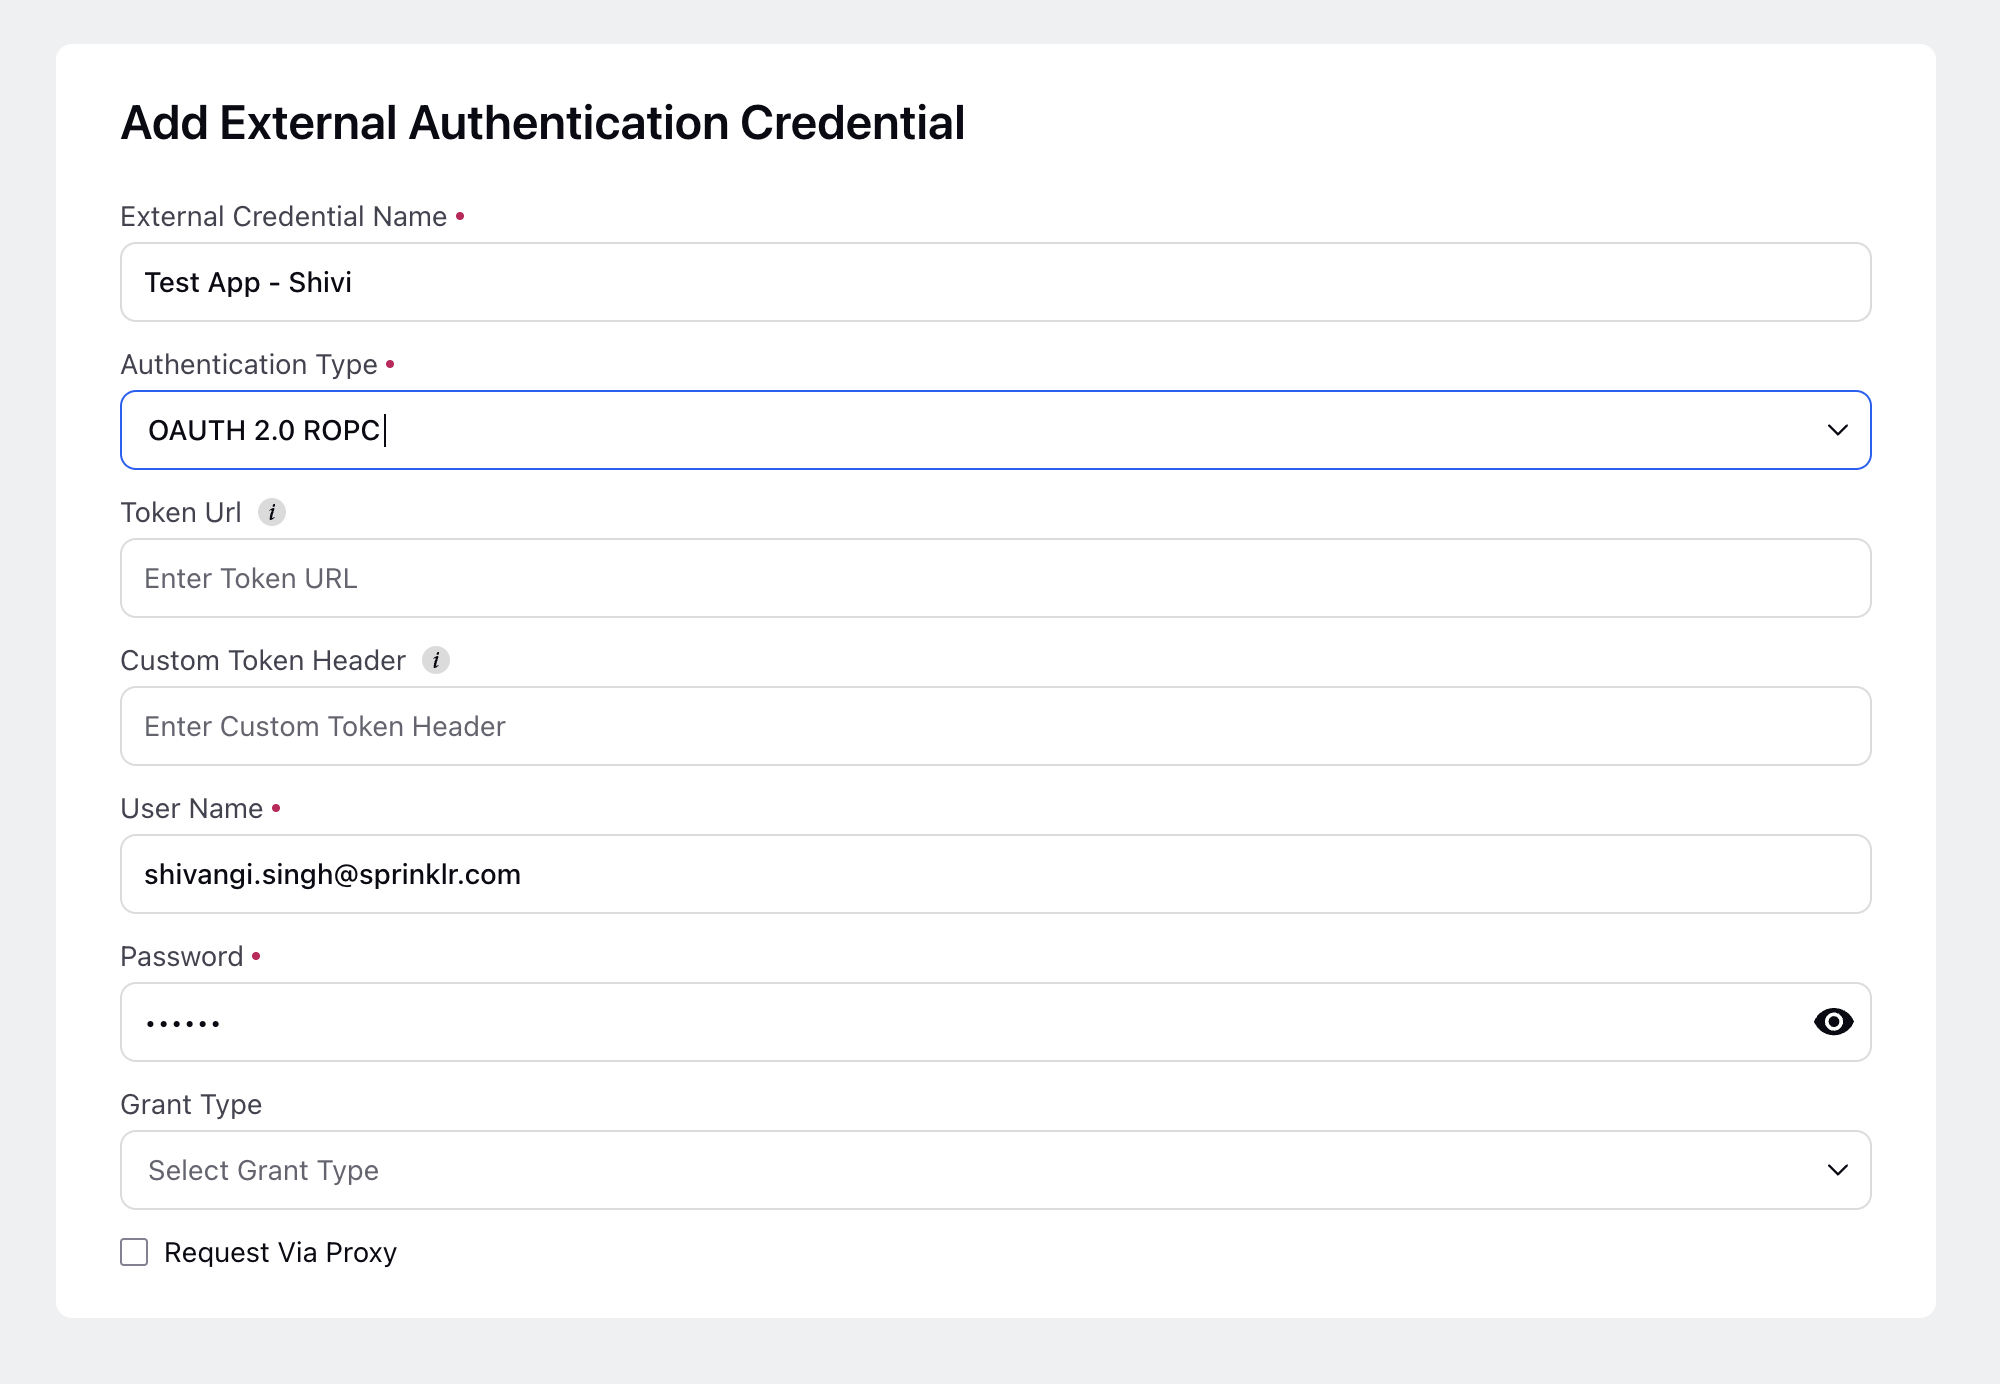
OAuth 2.0 Resource Owner Password Credentials flow that uses a Base64-encoded username and password as a Basic Auth header to obtain an access token from the Token URL.
OAuth Refresh Token
OAuth 2.0 authentication using a Client ID, Client Secret, Token URL, and Refresh Token to generate a new access token.
Password Auth
OAuth 2.0 authorization using the 'password' grant type with a username and password to generate an access token from the Token URL.
Client Credential Auth
OAuth 2.0 authorization using the 'client_credentials' grant type with a Client ID and Client Secret to obtain an access token from the Token URL.
OAuth 1.0
Authentication where each request is securely signed with a shared secret and token credentials.
JWT Auth
Authentication using a digitally signed JSON Web Token (JWT) to verify identity and grant API access.
Custom Auth
A custom authentication mechanism tailored to the specific needs of the application.
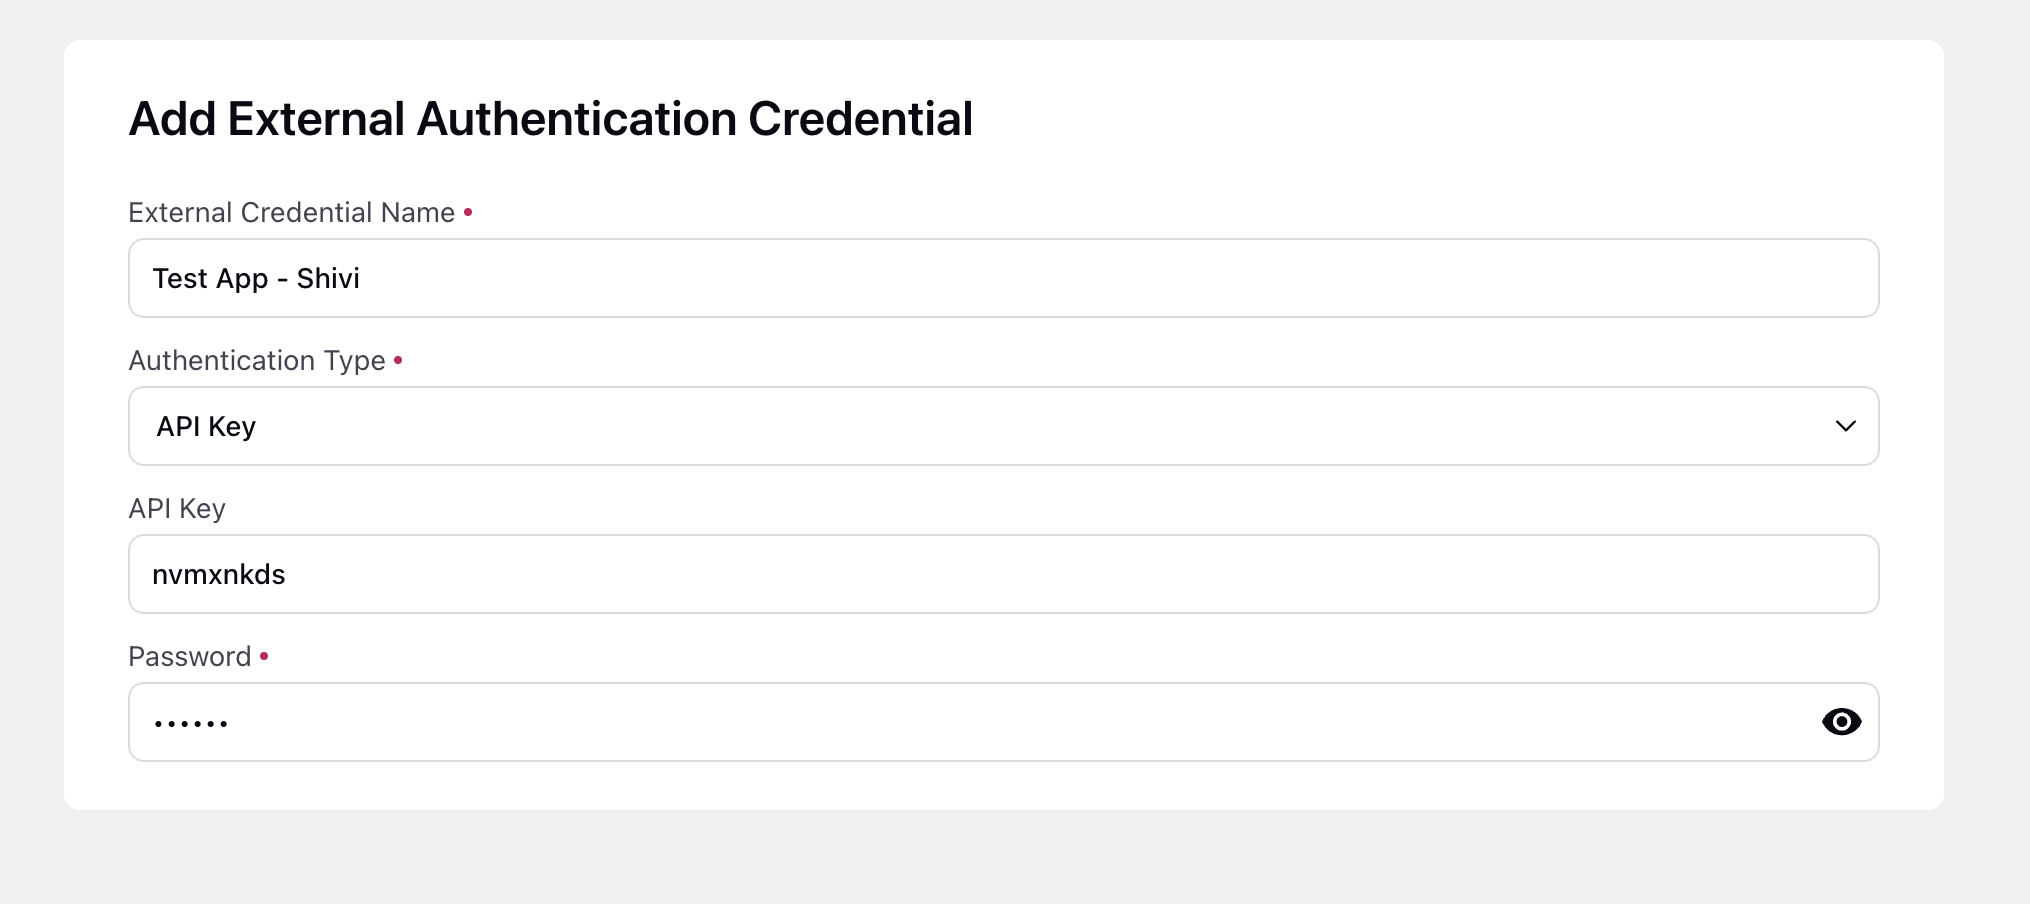
API Key
Uses an API Key and Password to authorize access.
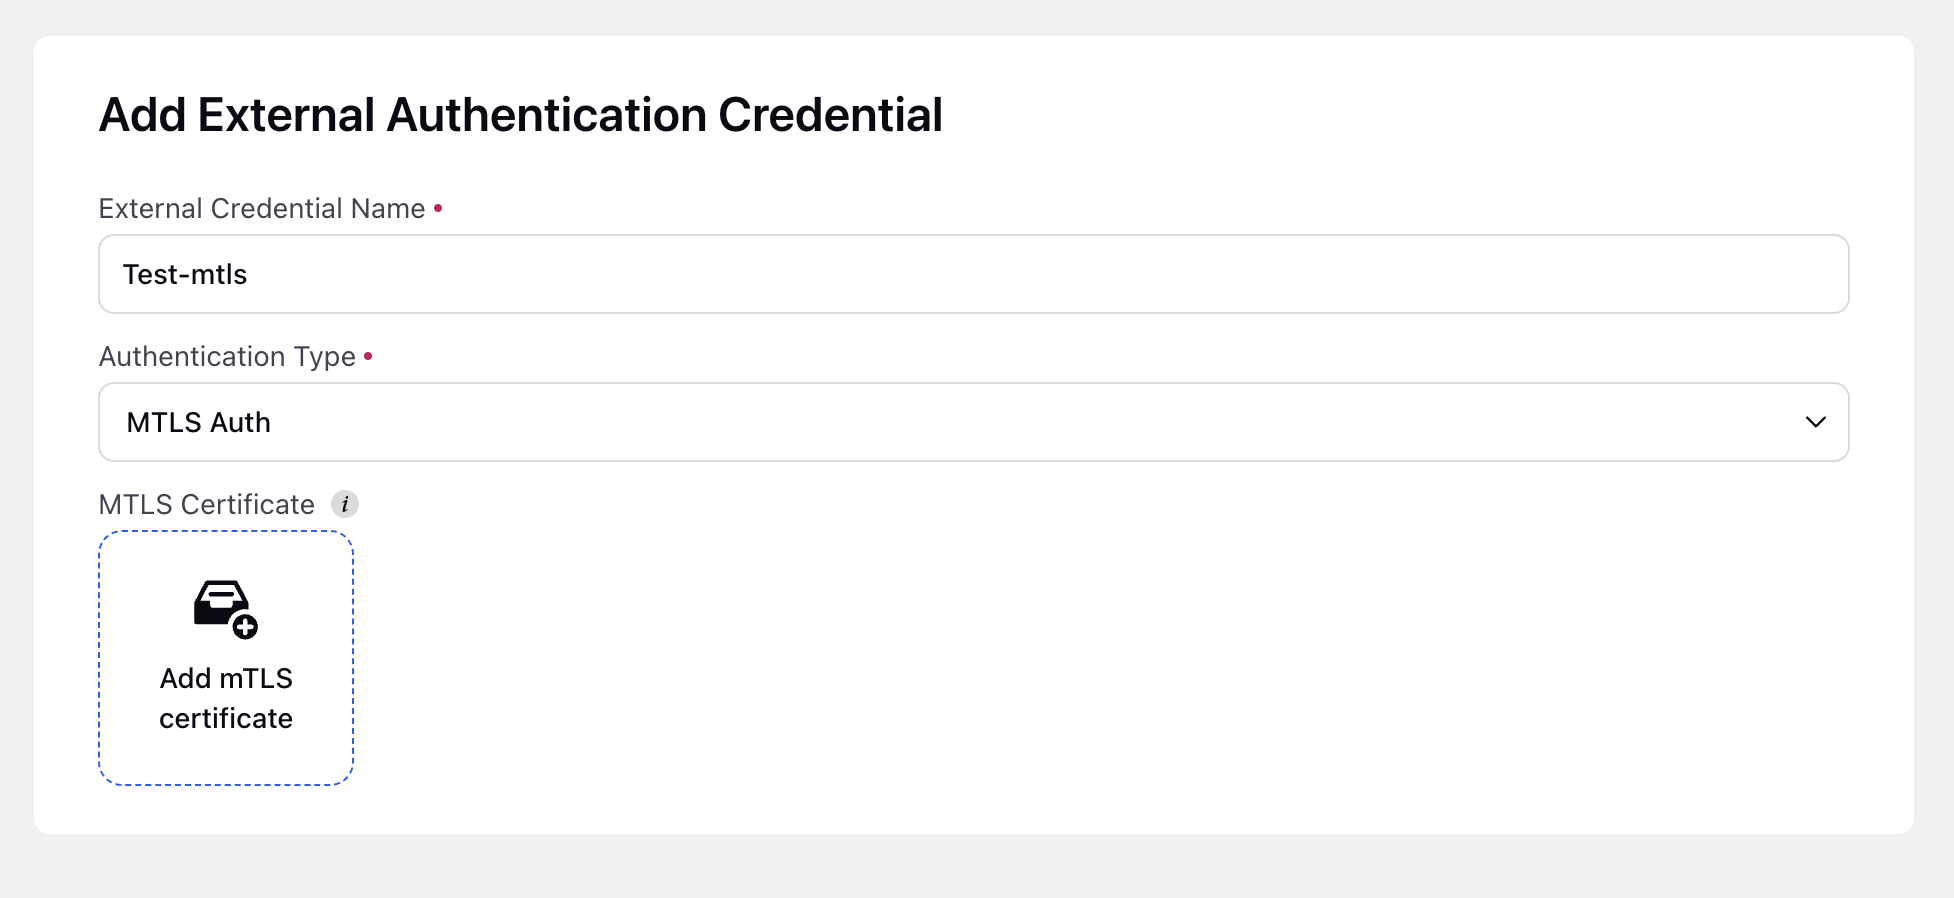
mTLS Auth
Mutual TLS (mTLS) is an authentication method that ensures both the client and server verify each other's identities using digital certificates during the TLS handshake.
Based upon the selected authentication type, different options are available.

Note
For static authentication (Key based), you are not required to add any external authentication credential in Sprinklr.
Click Save in the bottom right corner of the Add External Authentication Credential window.
Note: External Authentication Credentials can be used while configuring Webhooks in Sprinklr. Click here for more details.
Authentication Type — Field Descriptions
Field | Descriptions | ||||||||||||
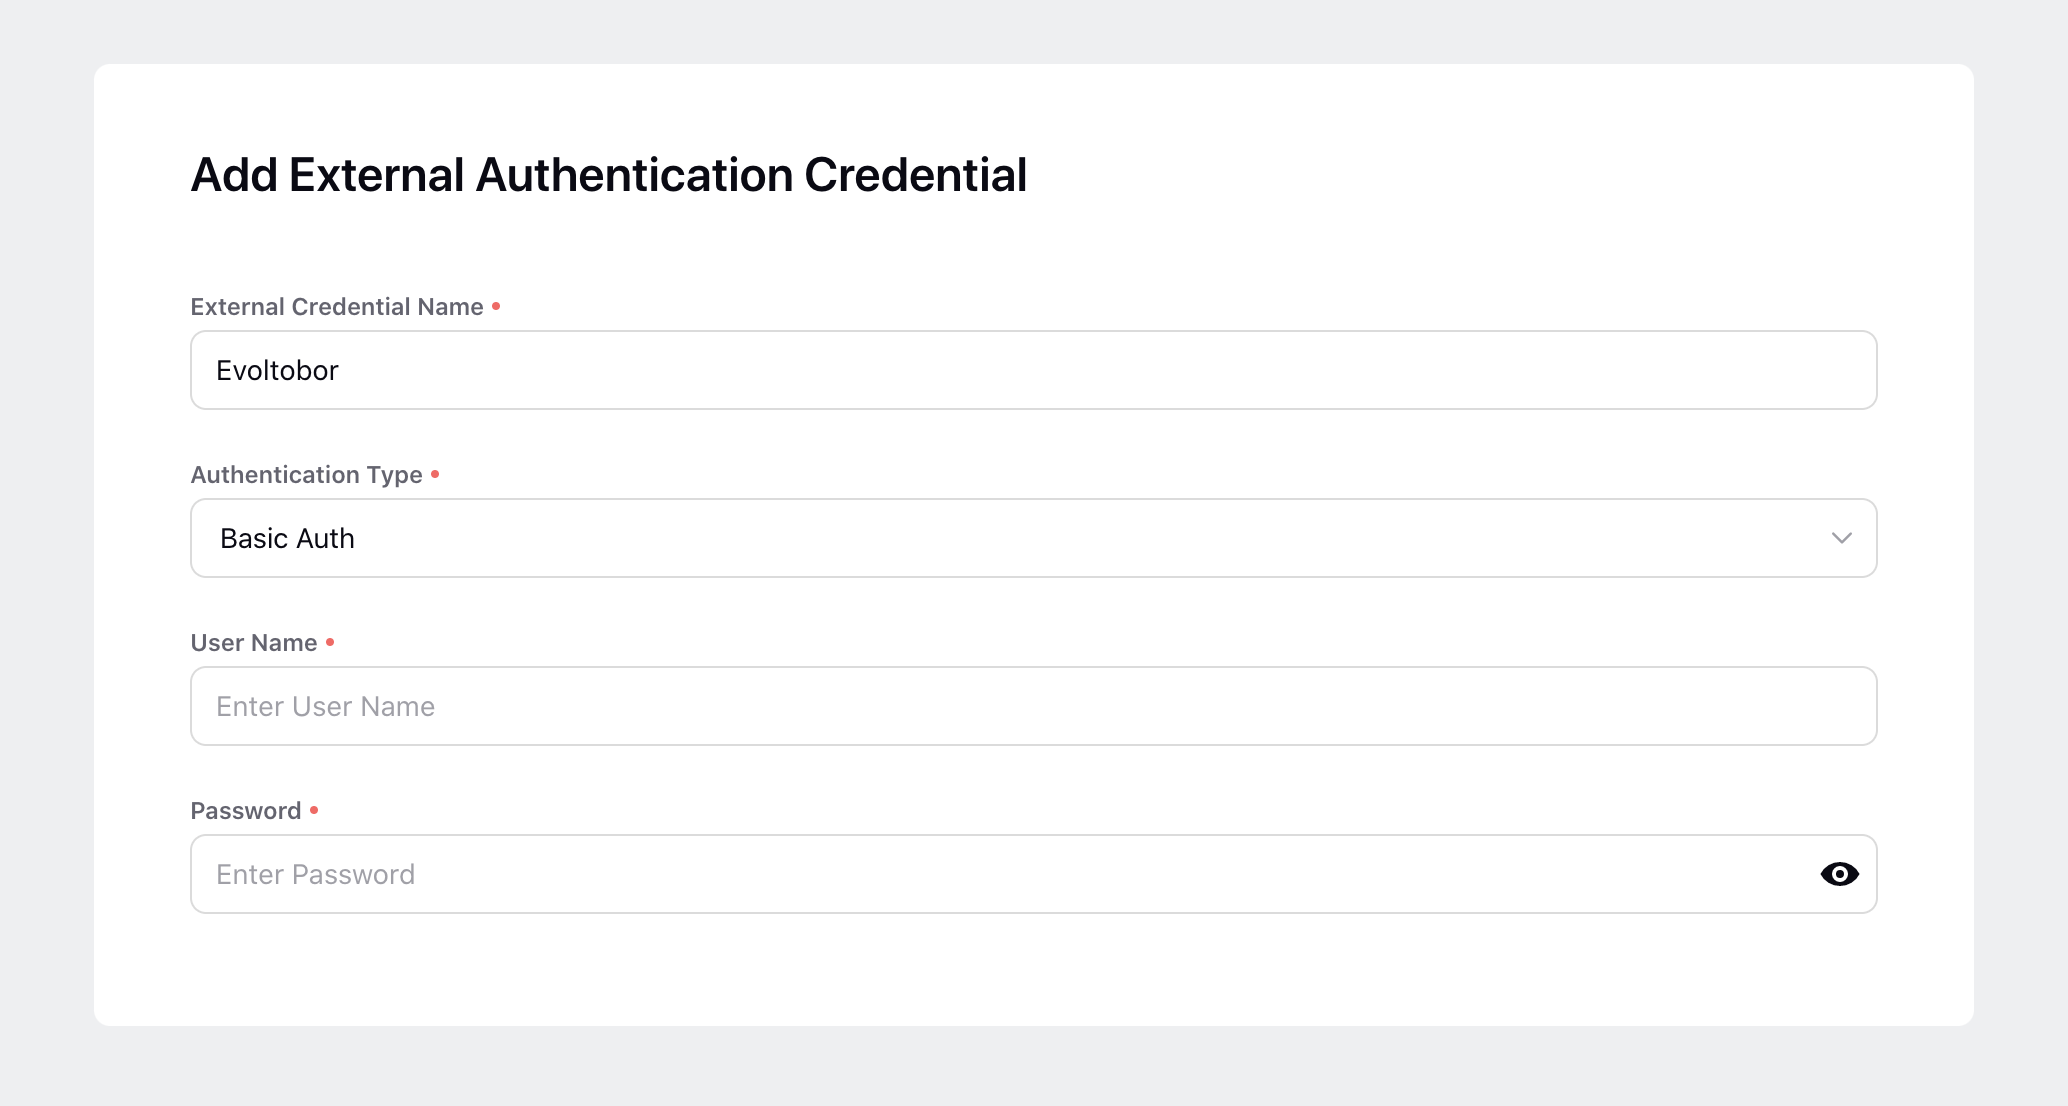
Basic Auth | |||||||||||||
| |||||||||||||
User Name | Enter the username for the authentication. | ||||||||||||
Password | Enter the password for the authentication. | ||||||||||||
OAuth2.0 ROPC | |||||||||||||
| |||||||||||||
| |||||||||||||
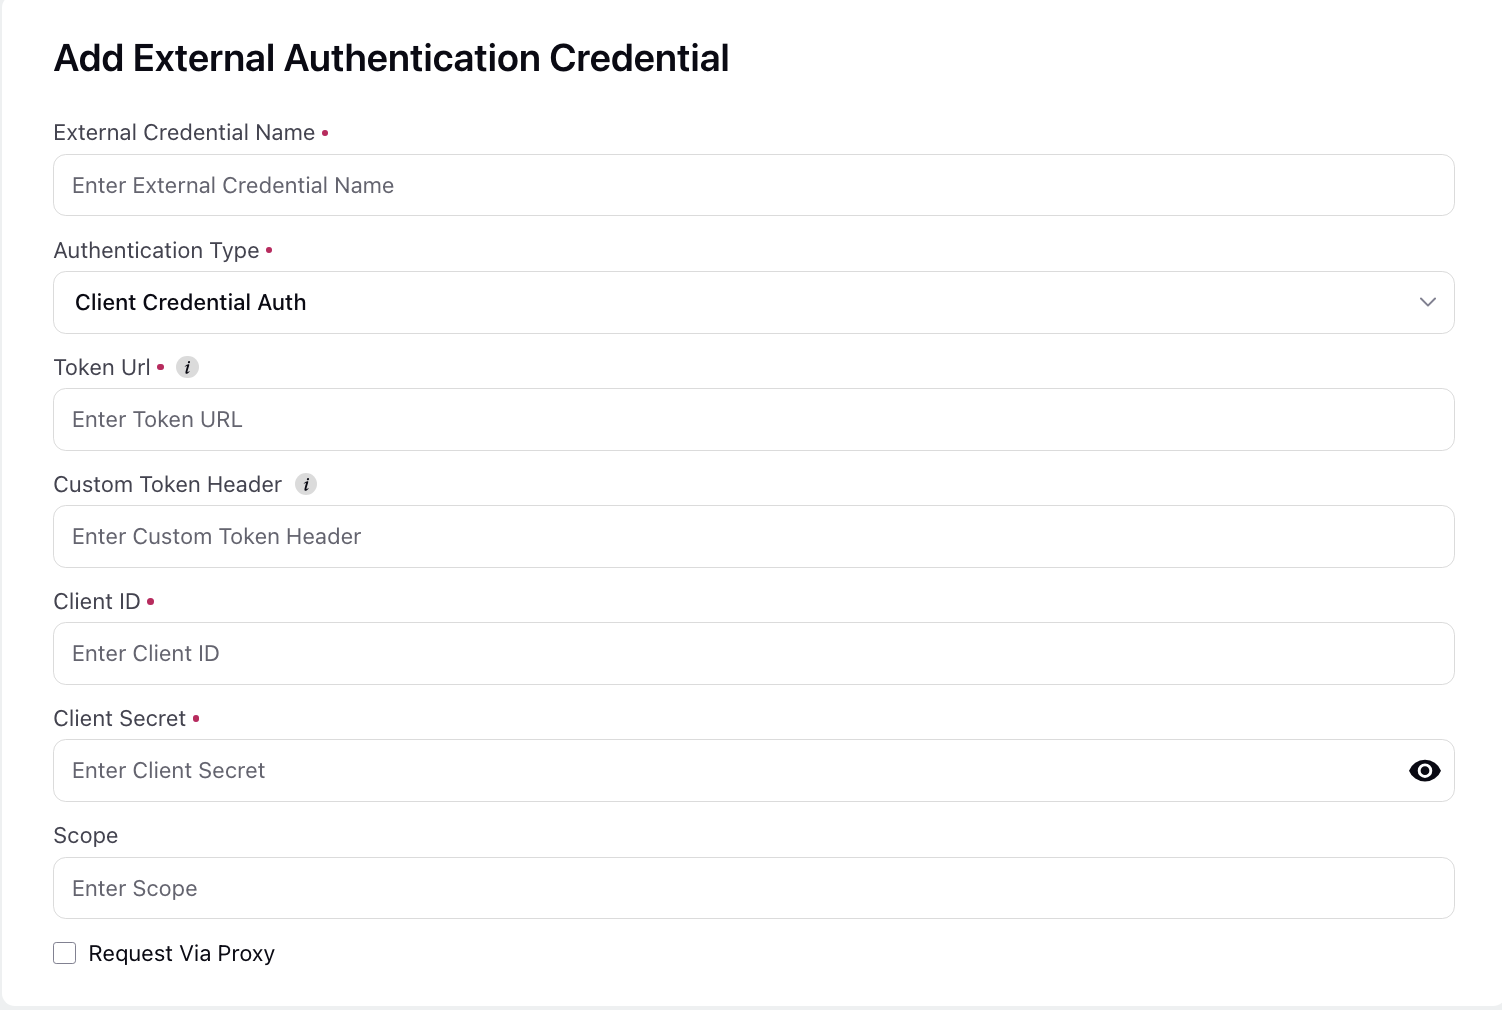
Client Credentials Auth | |||||||||||||
| |||||||||||||
Token Url | Enter the endpoint URL for token generation | ||||||||||||
Custom Token Header | Enter custom headers (if available). This will override the standard authorization headers | ||||||||||||
Client Id | Enter the Client ID required for token generation | ||||||||||||
Client Secret | Enter the client secret required for token generation | ||||||||||||
Scope | Enter the scope of the authorization process (if available) | ||||||||||||
Request Via Proxy | Toggle for enabling requesting the API through proxy | ||||||||||||
OAuth 1.0
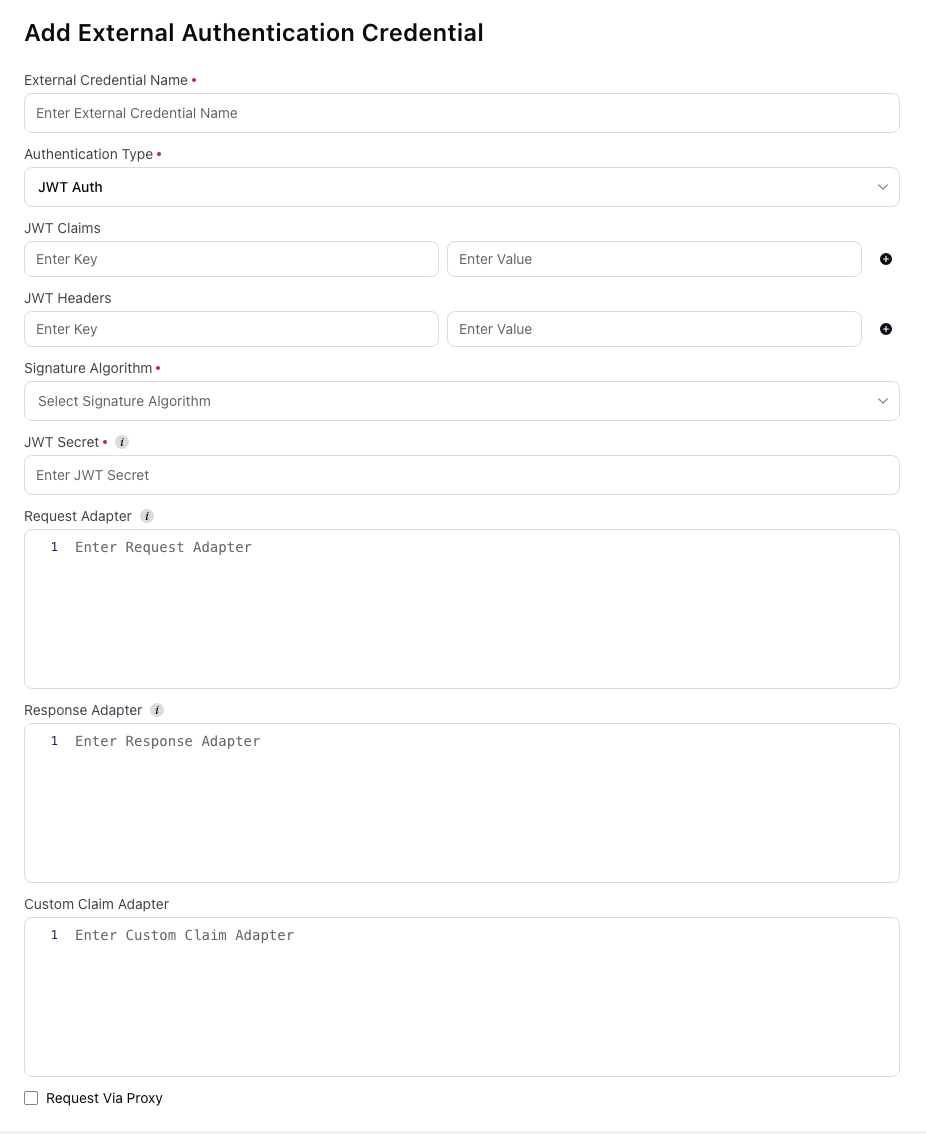
JWT Auth | |||||||||||||
| |||||||||||||
JWT Claims | Enter the JWT claims and the corresponding values. Please note that you can add multiple claims by clicking on the (+) button | ||||||||||||
JWT Headers | Enter the JWT headers and the corresponding values. Please note that you can add multiple headers by clicking on the (+) button | ||||||||||||
Signature Algorithm | Enter the signature algorithm for JWT token generation | ||||||||||||
JWT Secret | Enter the secret for JWT token generation | ||||||||||||
Request Adapter | Enter the request adapter for JWT token generation | ||||||||||||
Response Adapter | Enter the response adapter for JWT token generation | ||||||||||||
Custom Claim Adapter | Enter the custom claim adapter for JWT token generation | ||||||||||||
Request via Proxy | Toggle for enabling requesting the API through proxy | ||||||||||||
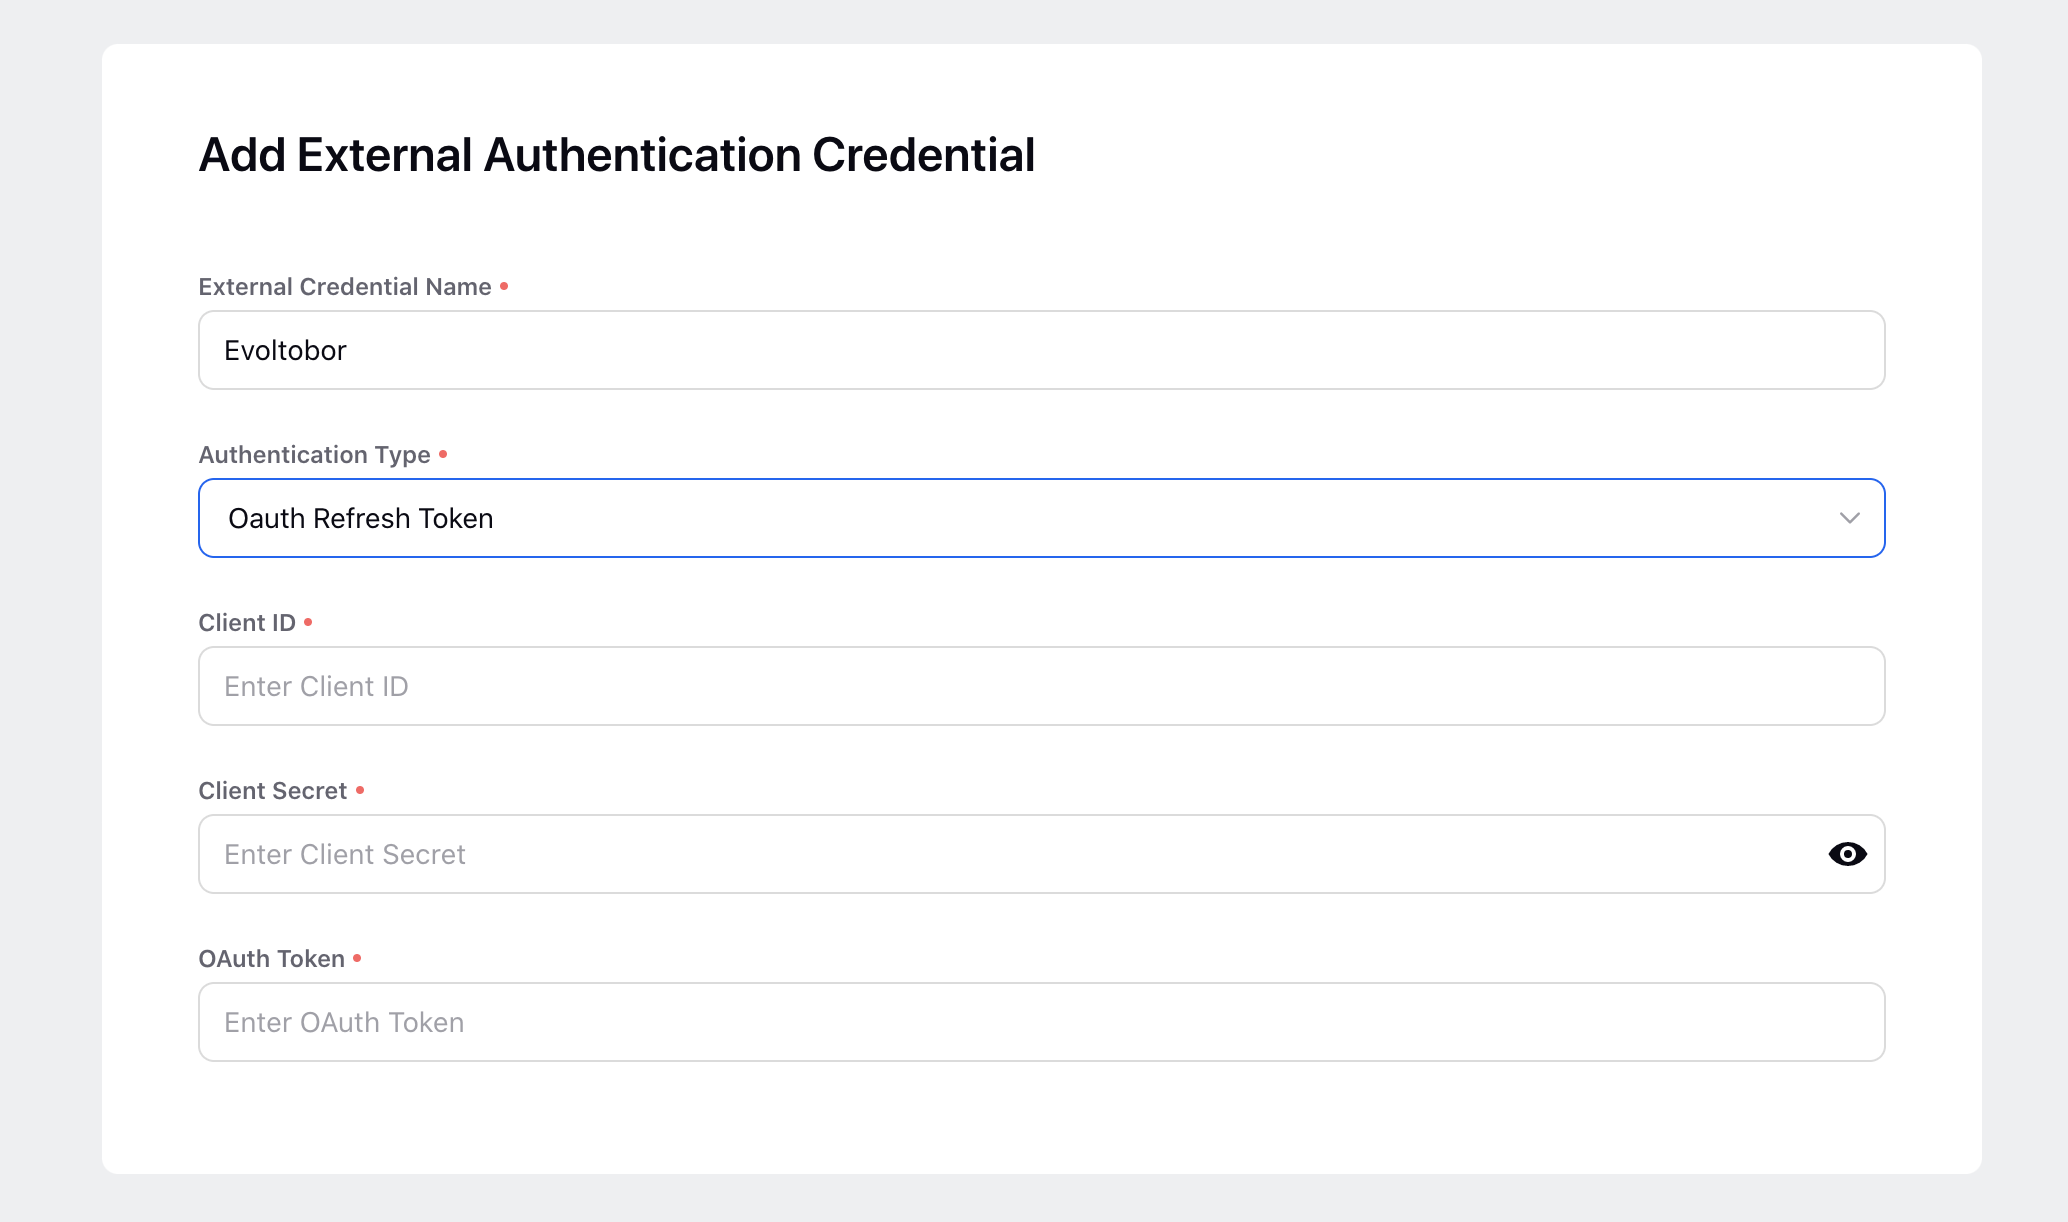
OAuth Refresh Token | |||||||||||||
| |||||||||||||
Client ID | Enter the Client ID for the authentication. | ||||||||||||
Client Secret | Enter the Client Secret Key for the authentication. | ||||||||||||
OAuth Token | Enter the OAuth Token for the authentication. | ||||||||||||
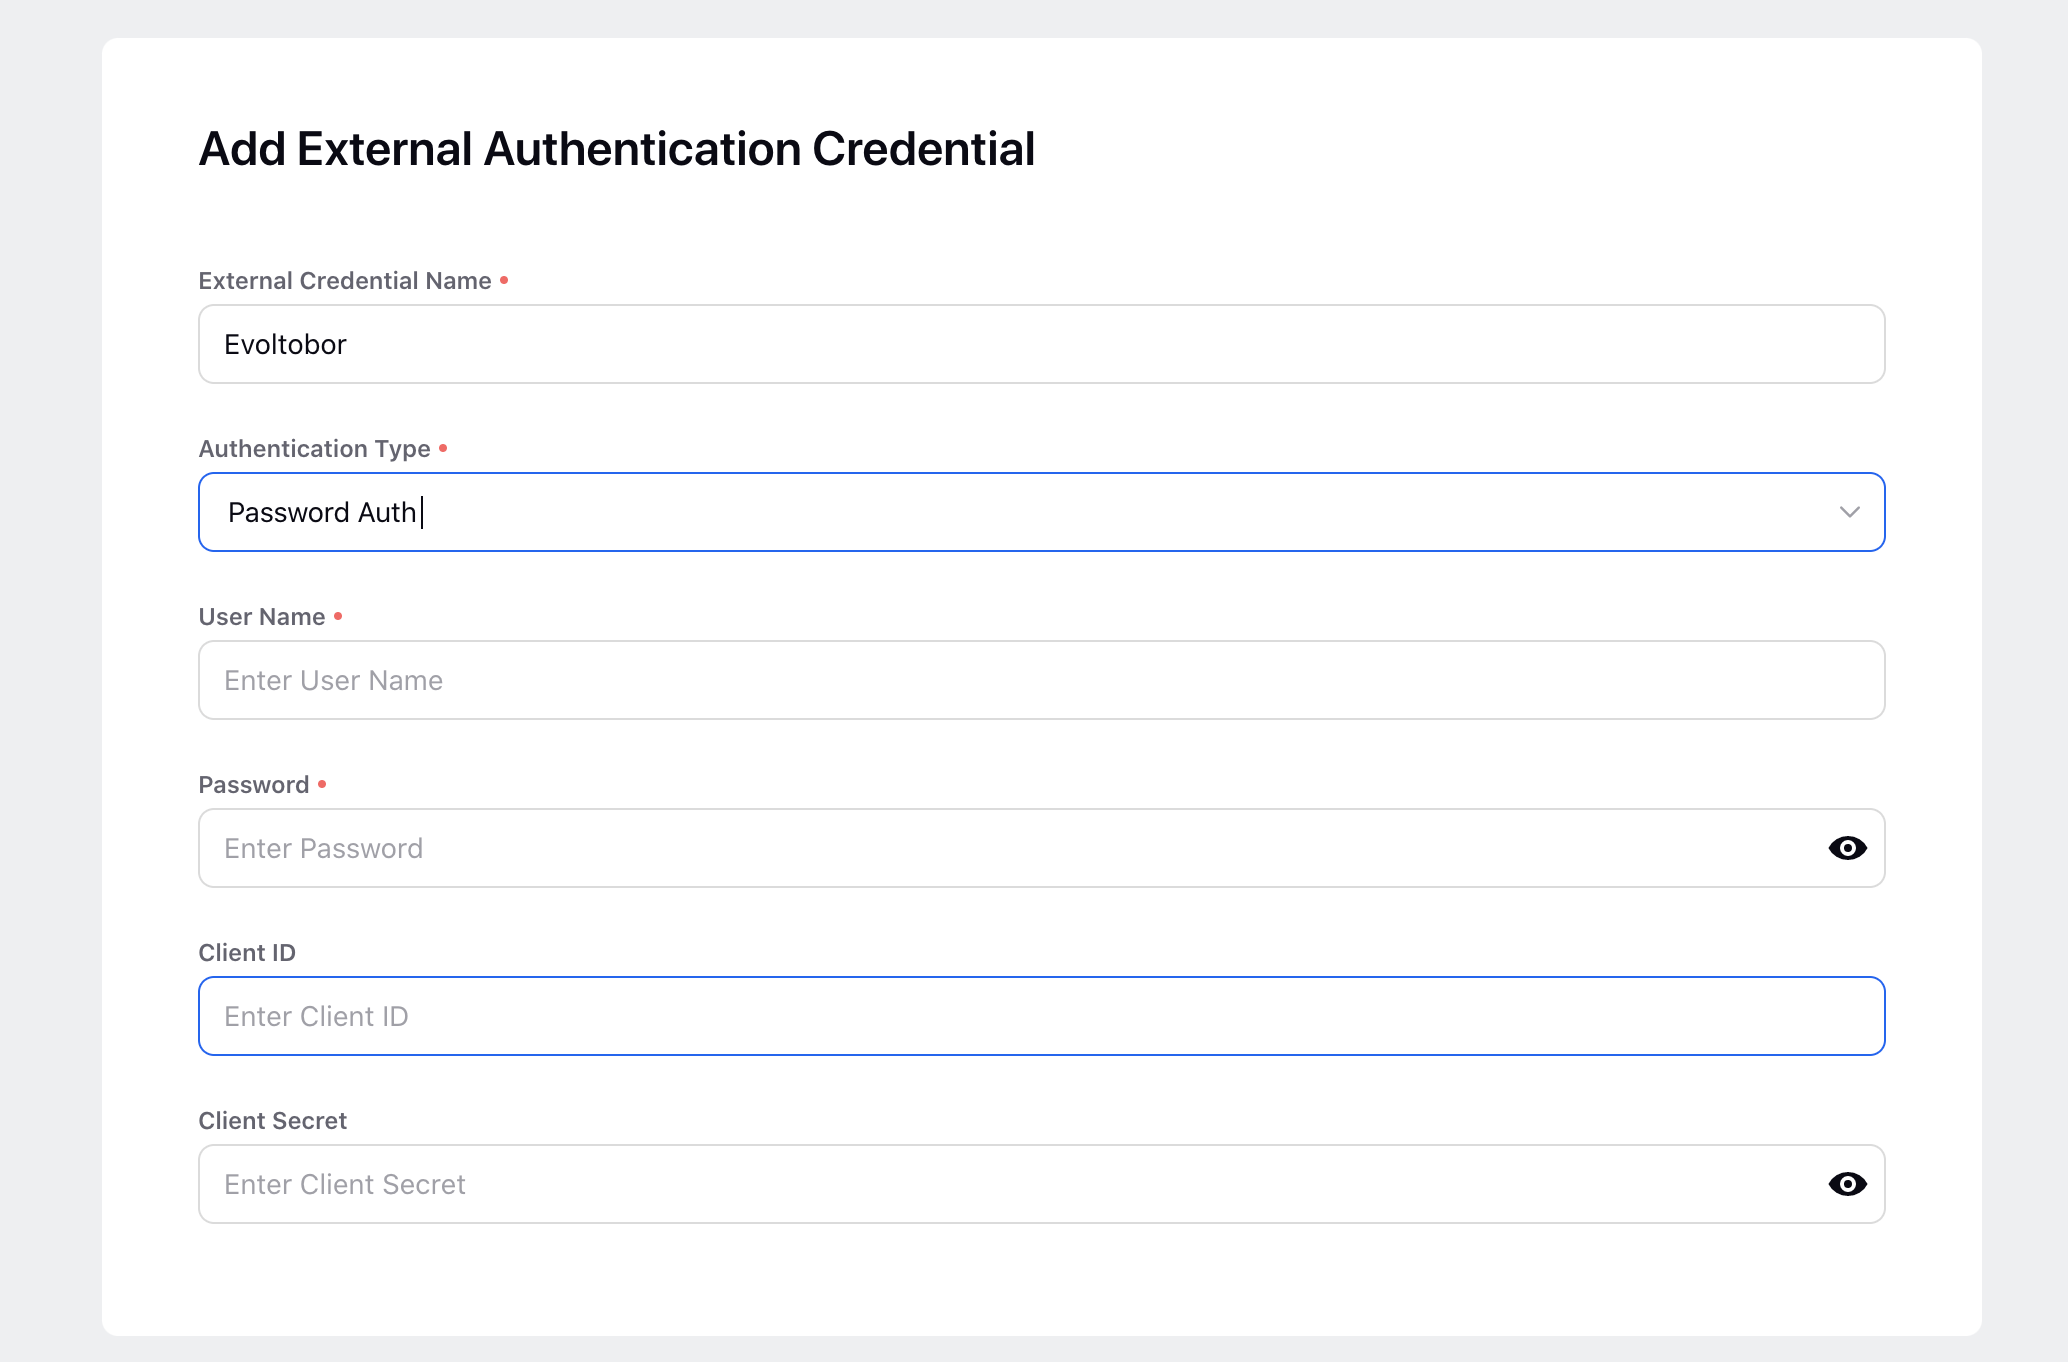
Password Auth | |||||||||||||
| |||||||||||||
User Name | Enter the username for the authentication. | ||||||||||||
Password | Enter the password for the authentication. | ||||||||||||
Client ID | Enter the Client ID for the authentication. | ||||||||||||
Client Secret | Enter the Client Secret Key for the authentication | ||||||||||||
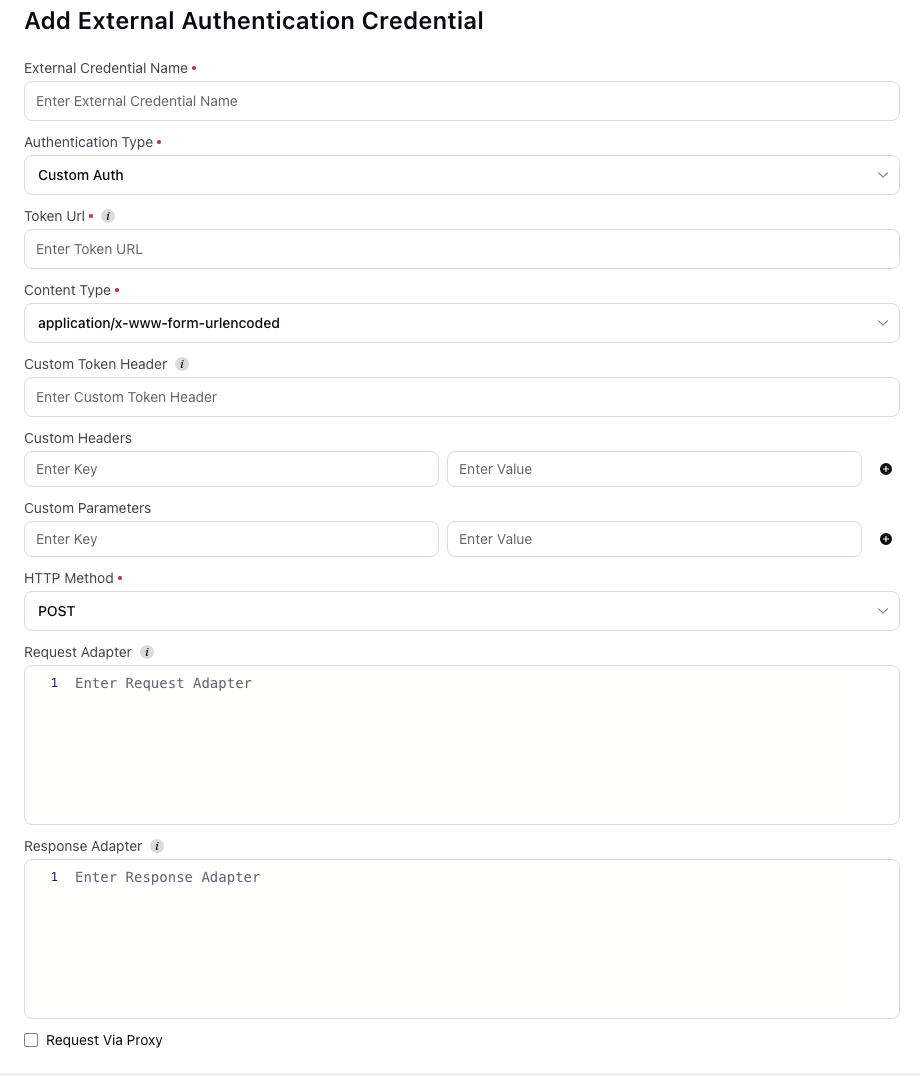
Custom Auth | |||||||||||||
| |||||||||||||
Token URL | Enter the endpoint URL for token generation | ||||||||||||
Content Type | Enter the valid content-type for token generation | ||||||||||||
Custom Token Header | Enter the custom headers required for token generation. This will override the standard authorization header | ||||||||||||
Custom Headers | Enter the custom headers required for token generation | ||||||||||||
Custom Parameters | Enter the custom parameters required for token generation. Please note that you can add multiple parameters by clicking on the (+) button | ||||||||||||
HTTP Method | Enter the HTTP method required to generate the token | ||||||||||||
Request Adapter | Enter the request adapter for token generation | ||||||||||||
Response Adapter | Enter the response adapter for token generation | ||||||||||||
Request Via Proxy | Toggle for enabling requesting the API through proxy | ||||||||||||
API Key | |||||||||||||
| |||||||||||||
mTLS Auth | |||||||||||||
| |||||||||||||
MTLS Certificate | Upload your mTLS certificate to enable mutual TLS authentication. A file upload window will appear—either drag and drop the certificate file or browse to select it from your local device.
| ||||||||||||
.png)
