Connect External SOAP API with Sprinklr
Updated
Sprinklr enables you to configure external SOAP APIs directly within its platform, removing the need for custom development. The External API module provides the flexibility to switch between SOAP and REST API protocols.
This guide will walk you through the process of connecting a SOAP External API in Sprinklr, along with detailed instructions on how to test, edit, and delete a SOAP API connection.
Add an External SOAP API
Follow these steps to set up a SOAP API under the External API module.
Step 1: Access External API Module
The steps to access the Extensions Library depend on whether your environment uses the old All Settings UI or the new All Settings UI.
Access External API in Old All Settings UI
Follow the steps below to access the External API in Old All Settings UI:

Navigate to All Settings from Sprinklr Launchpad.
In the Platform Settings window, select Manage Customer from left toolbar.
From the list of options, choose External API. You can also use the search bar at the top to quicky find it.
The External API Record Manager opens.
Access External API in New All Settings UI
Follow the steps below to access External API in new All Settings UI:

Navigate to All Settings from Sprinklr Launchpad.
Select APIs and Integrations from left navigation bar to open detailed record manager.
Click the External API option from left menu to access External API Record Manager.
![]() Note: If the 'External API' option is not visible, you may lack the necessary permissions. To resolve this, contact your Success Manager to enable the required permissions.
Note: If the 'External API' option is not visible, you may lack the necessary permissions. To resolve this, contact your Success Manager to enable the required permissions.
Step 2: Add a New SOAP API
Click the "+ Add External API" button located at the top right corner of the page to create a new SOAP API custom configuration.

Select the "Custom Configuration" card to add an External API from scratch and click the 'Next' button to go configuration page.

Step 3: Validate SOAP API Details
On the validation screen, configure the following API details.

API Type: Select the SOAP from the dropdown to add external SOAP API. Once the API type is configured, enter the input fields as decribed in the section below.
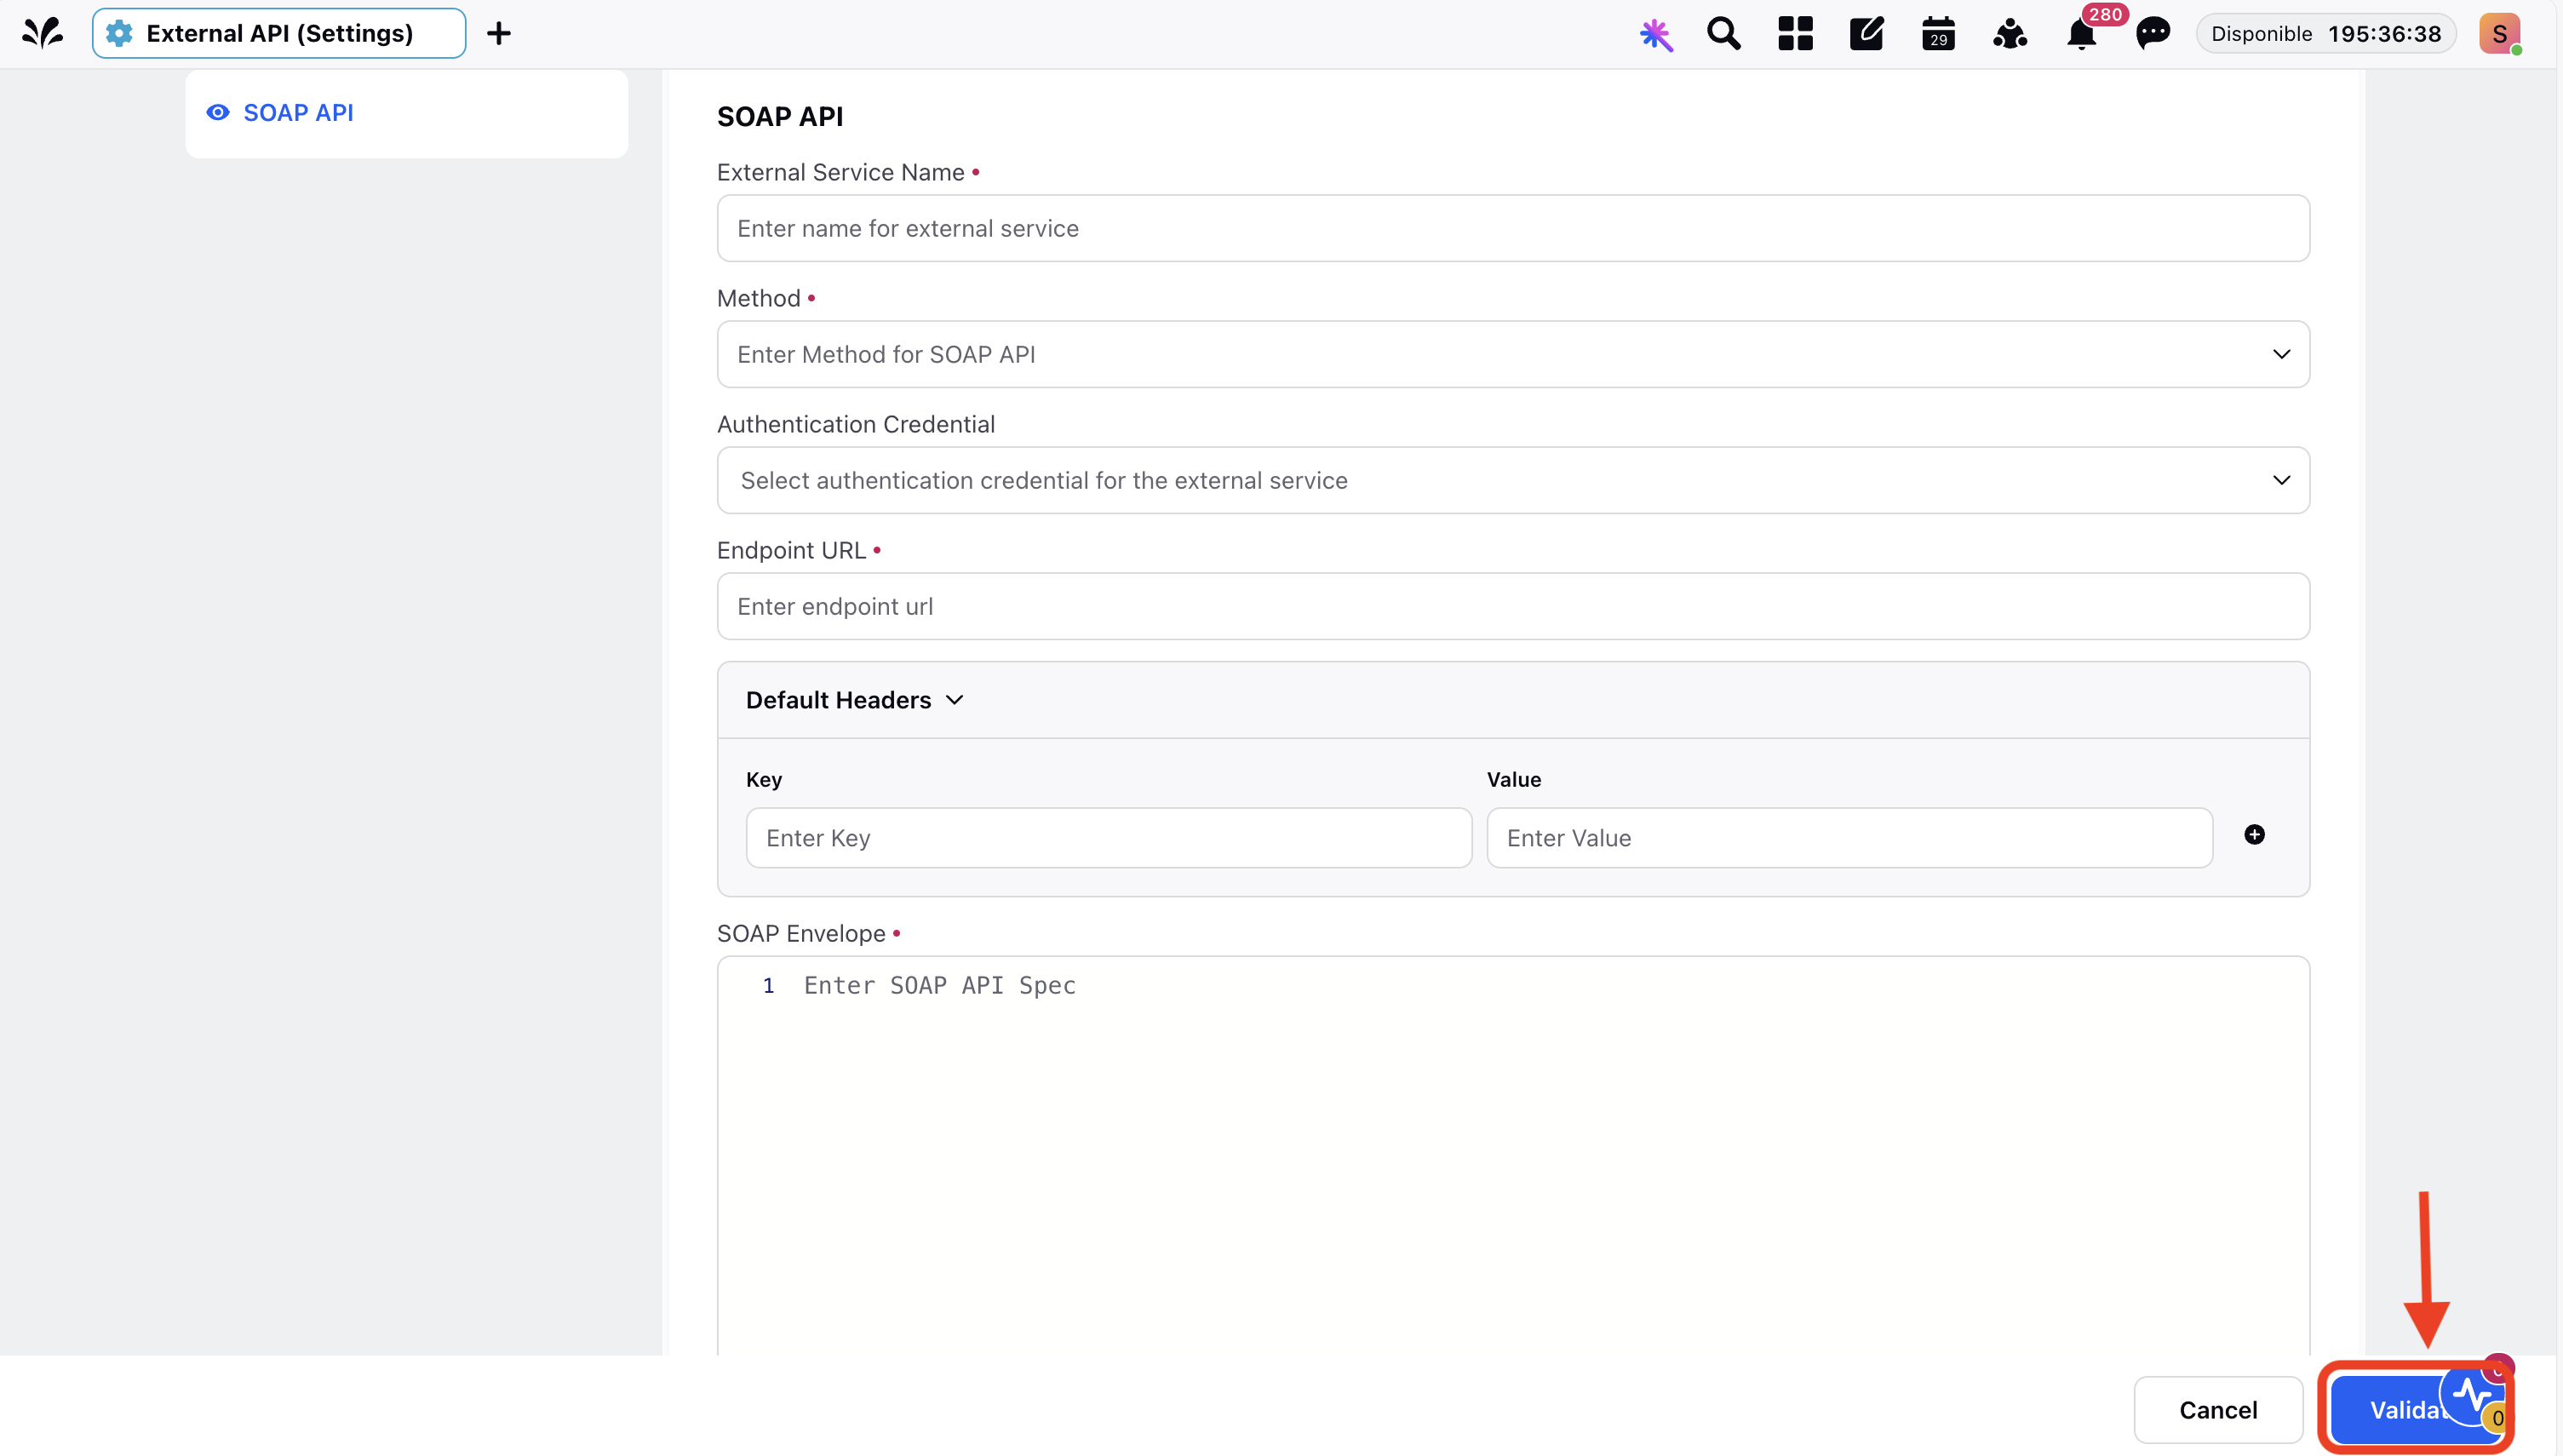
Below is the breakdown of the required fields:
Field | Required/Optional | Description |
External Service Name | Required | Enter the name of the SOAP API connection. It cannot be changed once submitted. It should not contain blank spaces. |
Method | Required | Select the method type of the API, either GET or POST. It cannot be changed once submitted. |
Authentication Credential | Optional | If you have an API that automates token generation for accessing the SOAP API, configure it within the "External Authentication" module and select its name from the drop-down menu. |
Default Headers | Required | Enter the key-value pairs of the headers for the SOAP API. |
Endpoint URL | Required | Enter the URL of the SOAP API endpoint. |
SOAP Envelope | Required | Provide the SOAP API specification details, which define the structure of the request. |
Click the "Validate" button after entering all the necessary information. This will validate the SOAP API specification to ensure everything is correctly configured.
Step 5: Add Additional Information of SOAP API
After successfully validating the SOAP API, the API name will appear in the left-hand menu. Click on the API connection name to open a detailed configuration screen where you can define additional elements for the SOAP API.
These UI elements provide flexibility, enabling you to tailor how you interact with the SOAP API, from sending requests to processing responses.
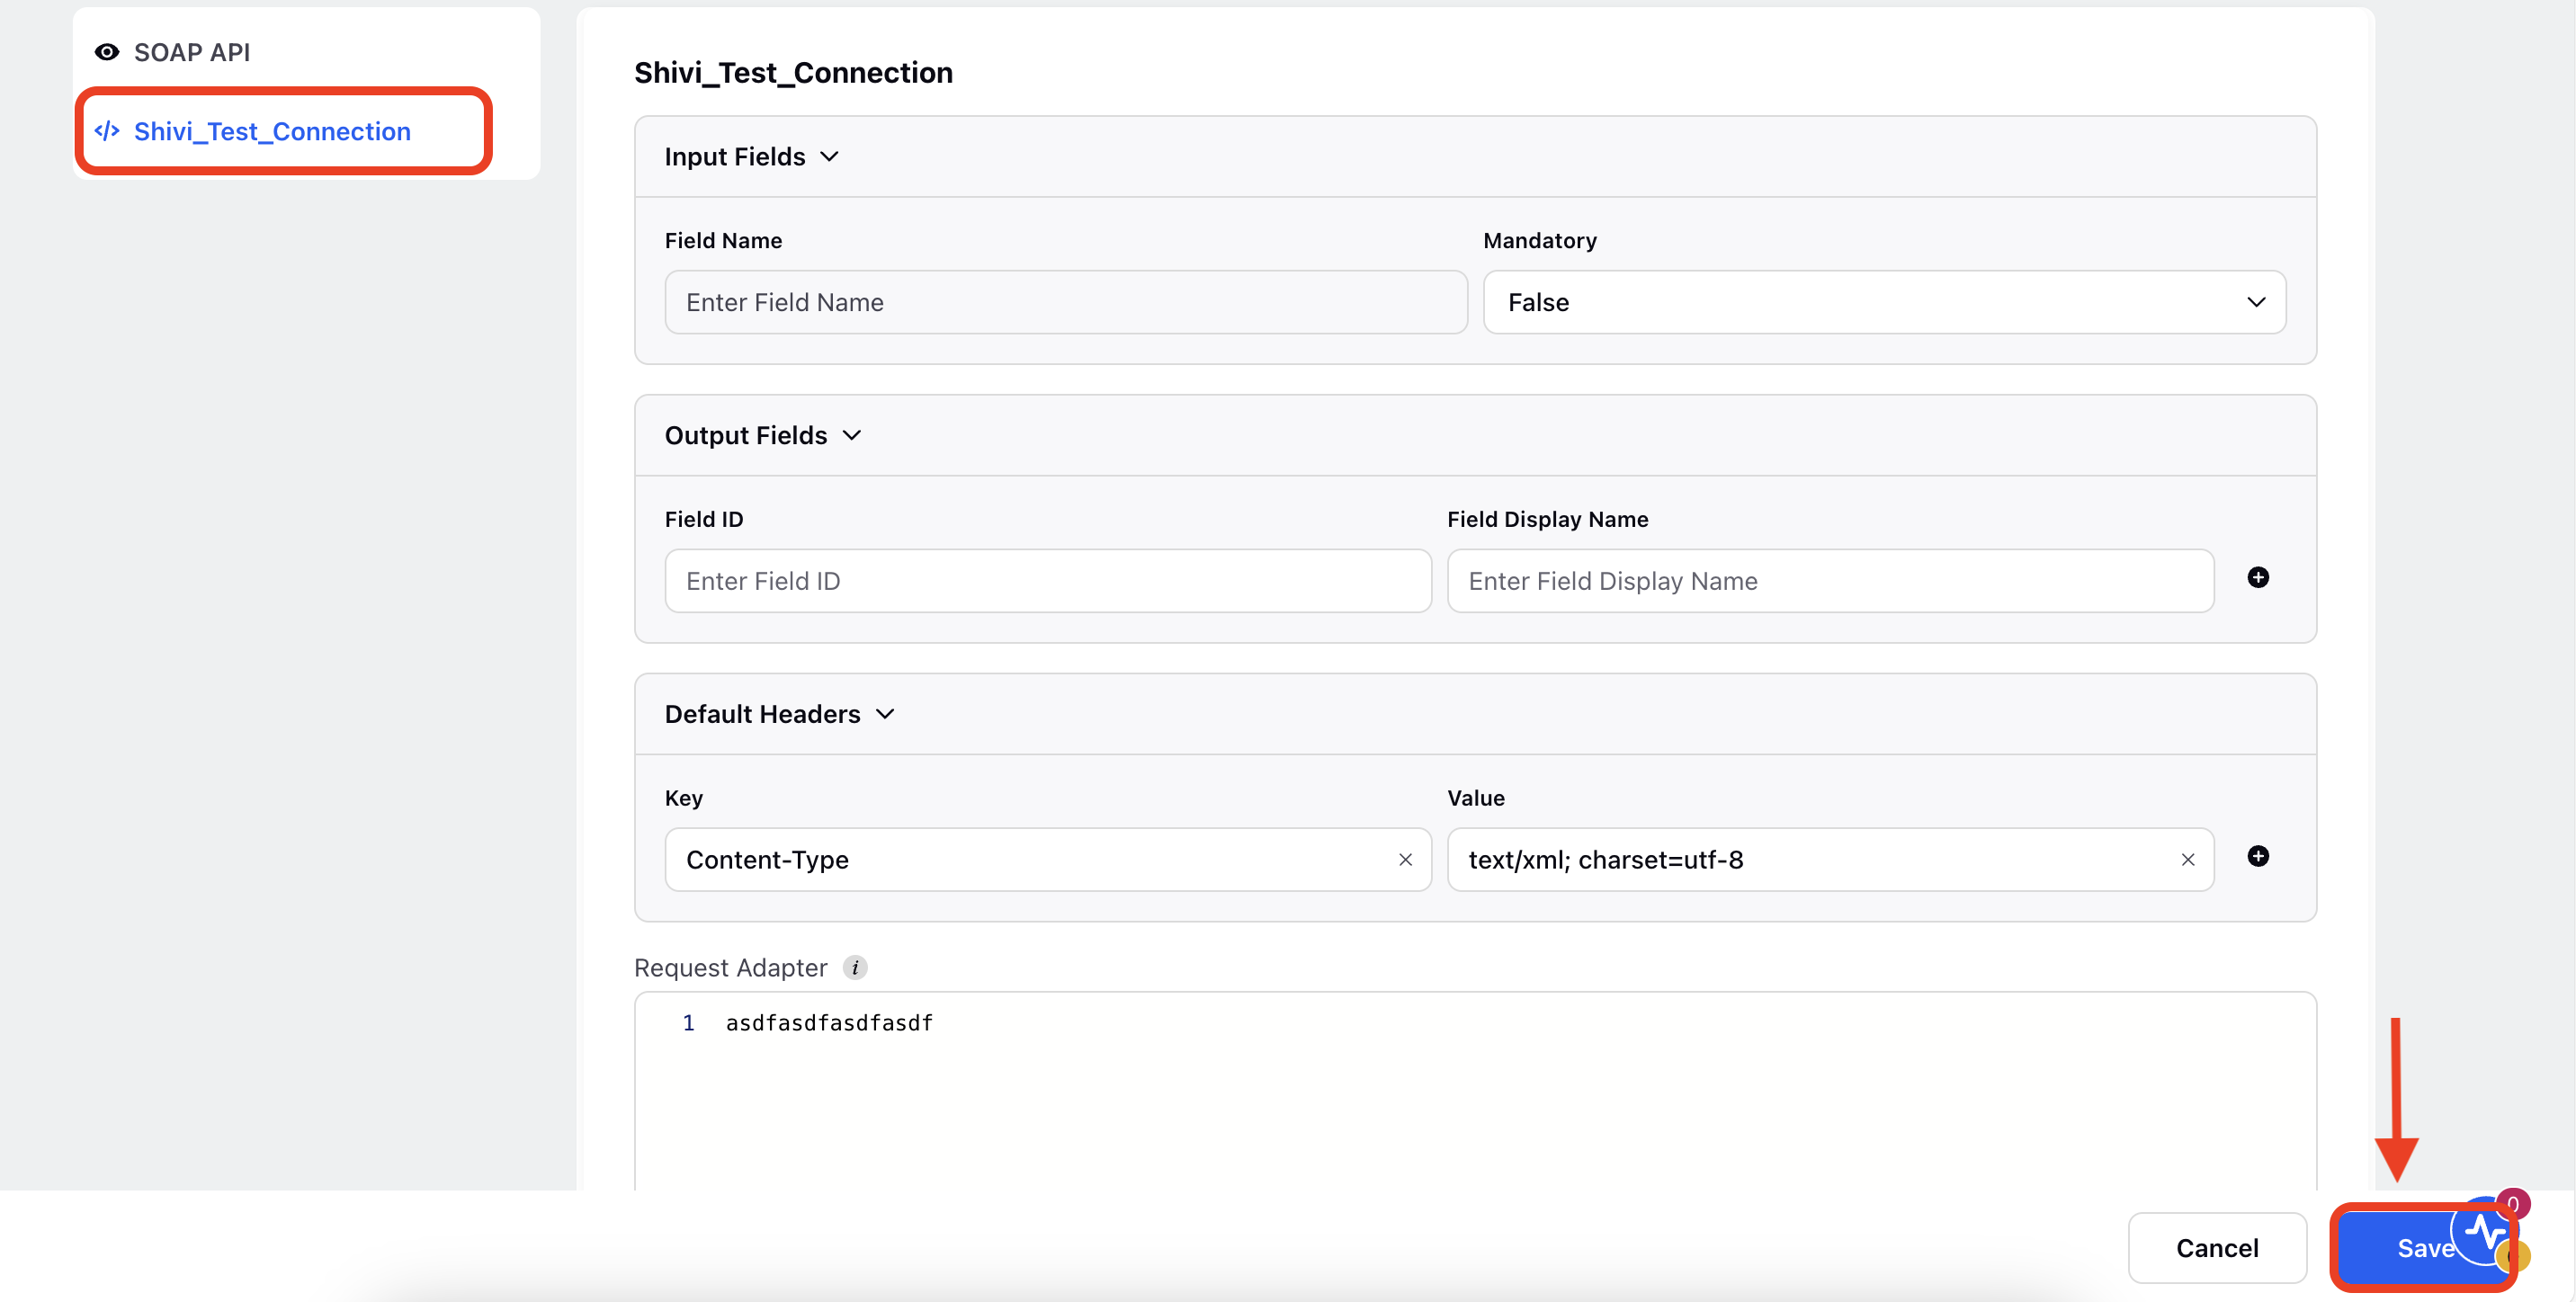
Detailed descriptions of the configurable UI element are given below:
Fields | Description |
Input Fields | This section displays the input fields required by the API, including fieldId and the mandatory status of each field. These fields are disabled, meaning they are automatically populated based on the results of the validation call and cannot be modified manually. |
Output Fields | This section allows you to define output fields, specifying the data you want to extract from the API response. You can configure these fields by specifying either the fieldId or fieldName to map the response data. Output fields are user configurable. |
Default Headers | Use this field to define API headers in a key-value pair format. The key represents the header name, while the value corresponds to the header’s content. The Default Headers variable stores headers that are either predefined or inherited from previous configurations. |
Timeout Settings |
You can configure custom timeout and retry parameters for External API extensions in the Timeout Settings input pane. These settings allow you to control the behavior of API calls based on your system’s reliability and performance requirements. Available Configuration Parameters
These configurable parameters offer improved control and fault tolerance—particularly useful in environments with high latency or intermittent connectivity. |
Request Adapter | This code editor allows you to write or modify the Request Body in Groovy script. The Request Body defines the data structure and content sent to the API endpoint. You can customize this script to suit your specific requirements. |
Response Adapter | This code editor is used to create or modify the logic for processing the API response in Groovy script. The Response Adapter handles the data received from the API, transforming it as needed before it is passed to the next stage in the workflow. |
Request via Proxy | If you need to expose the APIs through proxies, you can enable the Request via Proxy option by checking the corresponding box. Before doing so, ensure that the Sprinklr static IP addresses used for receiving API calls are whitelisted. When you check the Request via Proxy checkbox, you will also have the option to add the proxyHost and proxyPort fields, allowing you to specify the proxy server's host and port details. |

Click ‘Save’ after configuring all the elements with the required data. Your SOAP API connection has been successfully created.
Test SOAP API Connection
After establishing the connection, it’s important to test the API to ensure it works as expected.
Follow these steps to test the SOAP API connection:
1. Click the vertical ellipsis (⋮) located on the top left panel.
2. Select the 'Test API' option from the dropdown. This will open the test panel.
3. Click the TEST button.
A successful test will return a response in the Response section, which will include the status code, response header, and response body information.
Edit SOAP API Connection
You can update the API endpoint URL, SOAP envelope, and other relevant fields as needed to keep your SOAP API connection up to date.
Follow these steps to edit an existing SOAP API connection:
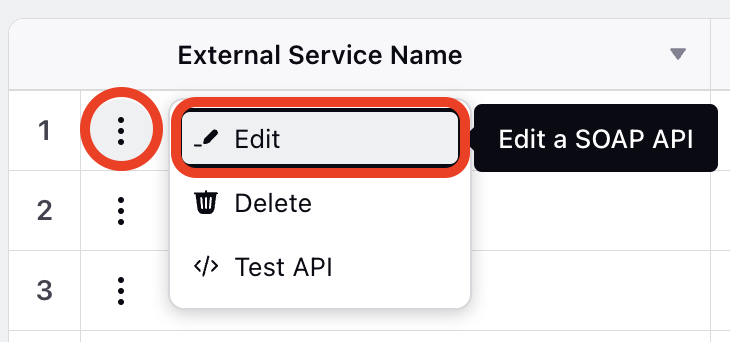
1. Click the vertical ellipsis (⋮) located on the top left panel of the SOAP API connection screen.
2. Select 'Edit' from the dropdown menu. This will open the API validation screen, where you can modify the desired fields, such as the endpoint URL, body envelope, and other configuration settings.
3. After making the necessary updates, click Save to apply the changes.
Your SOAP API connection has now been successfully updated with the new settings.
Delete an Existing SOAP API Connection
If a SOAP API connection is no longer needed, you have the option to delete it. This feature allows you to maintain a clean and organized list of active connections by removing outdated or unnecessary ones.
Follow these steps to edit an existing SOAP API connection:
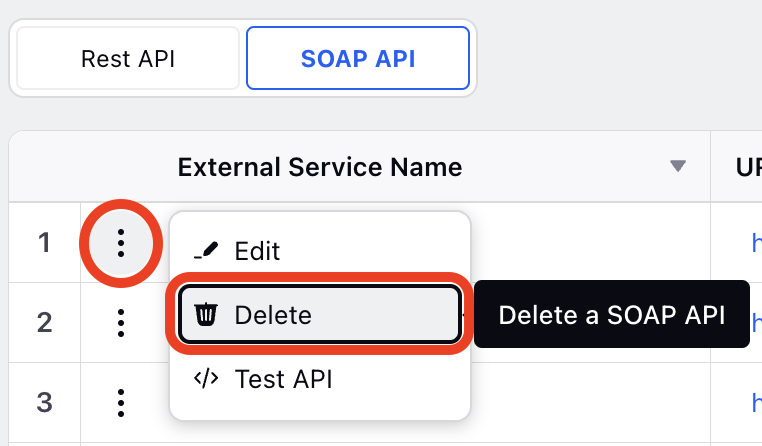
1. Click the vertical ellipsis (⋮) located on the top left panel of the SOAP API connection screen.
2. Select ‘Delete’ from the dropdown menu.
3. A dialog box will appear. Click ‘Delete’ to permanently remove the SOAP API connection from the External API module.
![]() Warning Note: Be cautious when using this feature, as deleting a connection cannot be undone. Ensure that the API connection is no longer in use before proceeding with deletion.
Warning Note: Be cautious when using this feature, as deleting a connection cannot be undone. Ensure that the API connection is no longer in use before proceeding with deletion.
This capability helps you manage and streamline your external API connections by ensuring only active and relevant APIs are retained.
View API Usages
The View Usage feature allows you to view where a specific External API is referenced across various components, such as Guided Workflow, Voice IVR, Dialouge Tree, and After Call Workflow. It provides visibility into dependencies, helping you assess the potential impact of changes and enabling efficient navigation to related workflows.

Click the vertical ellipses button (⋮) next to the record.
Select View Usages from the dropdown menu.
The Usages screen opens in the third pane, displaying all entities where the API is used.
To edit the workflow of a referenced entity:
Click View Workflow next to the entity.
The corresponding workflow opens for editing.
Additional UI Capabilities
The platform also provides the following UI capabilities to streamline your workflow:
Search: Utilize the search functionality to quickly locate specific API connections.
Refresh: Use this option to refresh the view and ensure all data is up to date.

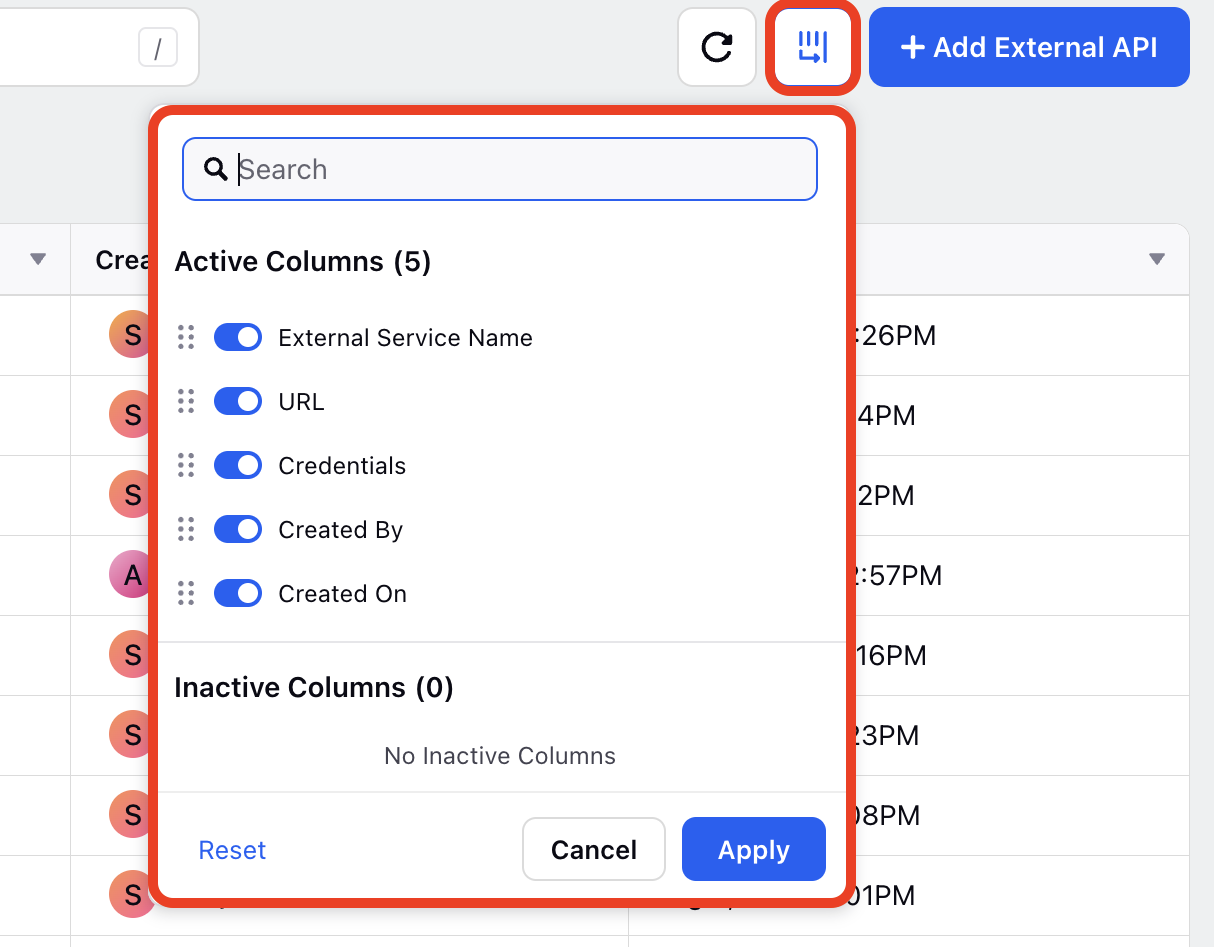
Manage Columns: Customize your view by selecting active and inactive columns.
Bulk Import SOAP API Endpoints
To import SOAP API endpoints in bulk, follow these steps:
In the record manager, click the + Import button at the top and select 'Import SOAP API' from the dropdown.

In the pop-up window, either drag and drop your file or click Browse to upload it from your local machine.
Supported file formats: .json, .jsonl

After uploading the file, click Submit.
A confirmation message will appear once the endpoints are successfully imported.
Bulk Export SOAP API Endpoints
To export SOAP API endpoints in bulk, follow these steps:
In the record manager, select the API endpoints you want to export by checking the box next to each API name.
To select all endpoints, use the checkbox at the top of the list.

Click the Export button located on the black action bar at the bottom of the screen.
A notification will confirm that your export request has been received.

Once the export is complete, you will receive a download link in your Sprinklr Notification Center.

The ability to configure External SOAP APIs directly from Sprinklr streamlines your workflow, reducing the need for custom developments. With Sprinklr's External API module, you can efficiently manage your API connections.