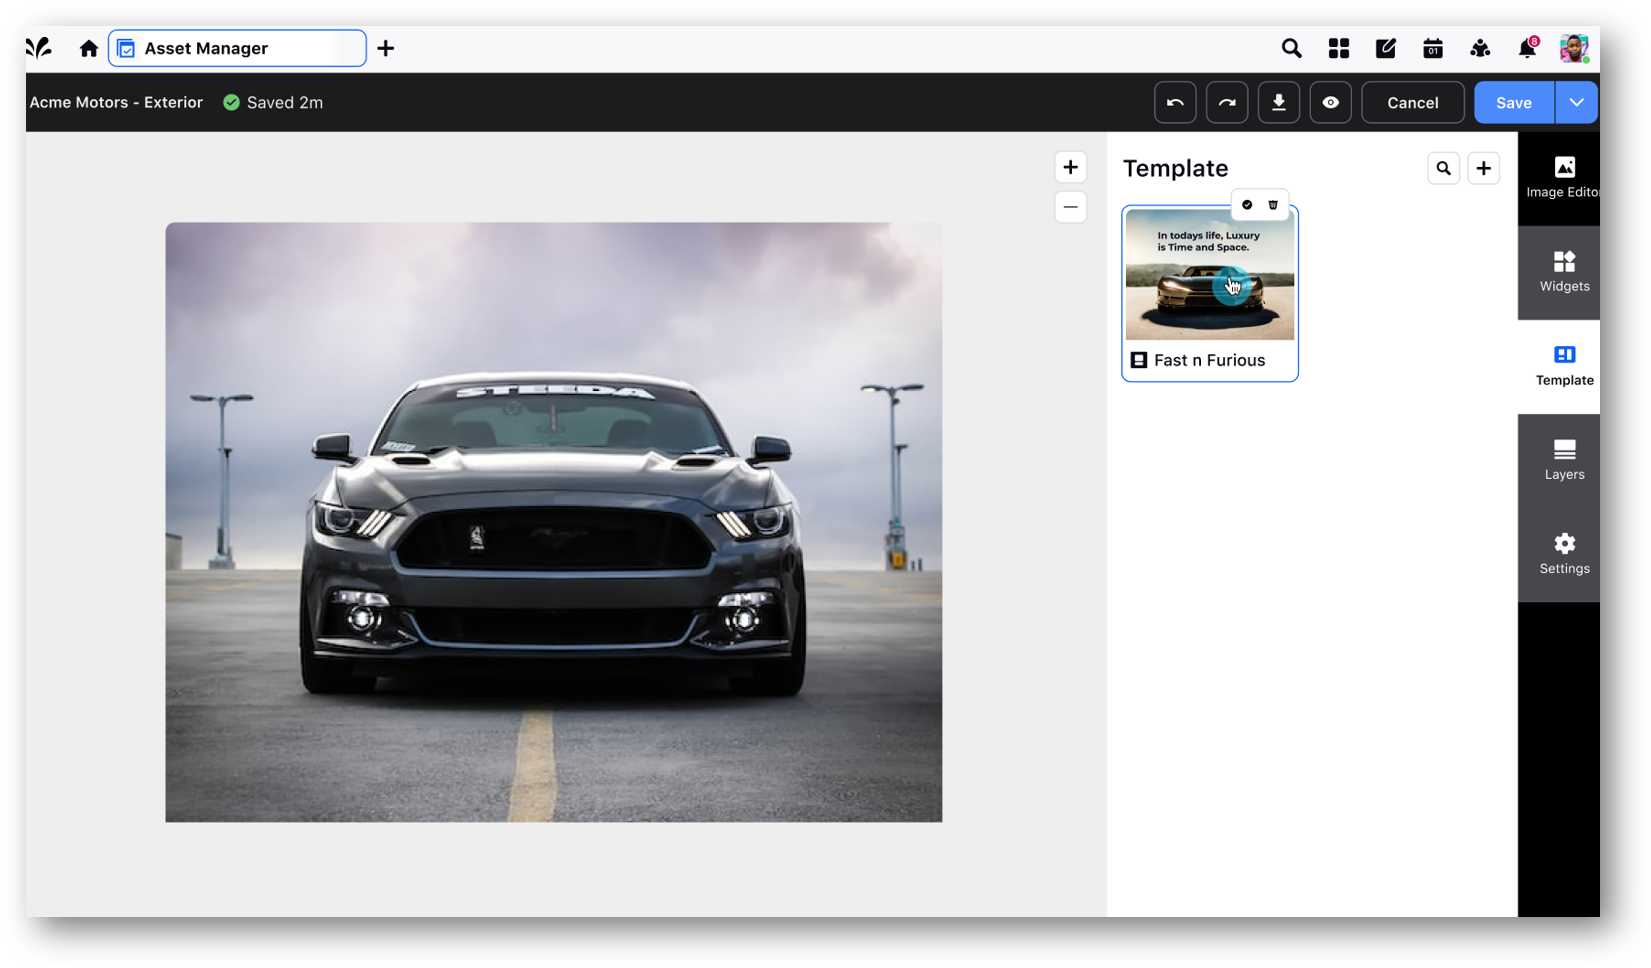
Image Editor - Manual Editing
Updated
Overview
While creating a Post on the Sprinklr Marketing platform, you can add images and edit them to meet your requirements. The Image Editor can be used to create You can manually crop your image, add effects and filters, overlay images, shapes, and text, and tune the image according to your needs.
Manual Image Editing - Overview
1. Click New Page and go to Sprinklr Marketing > Marketing tab > Planning and Reuse > Digital Asset Management.
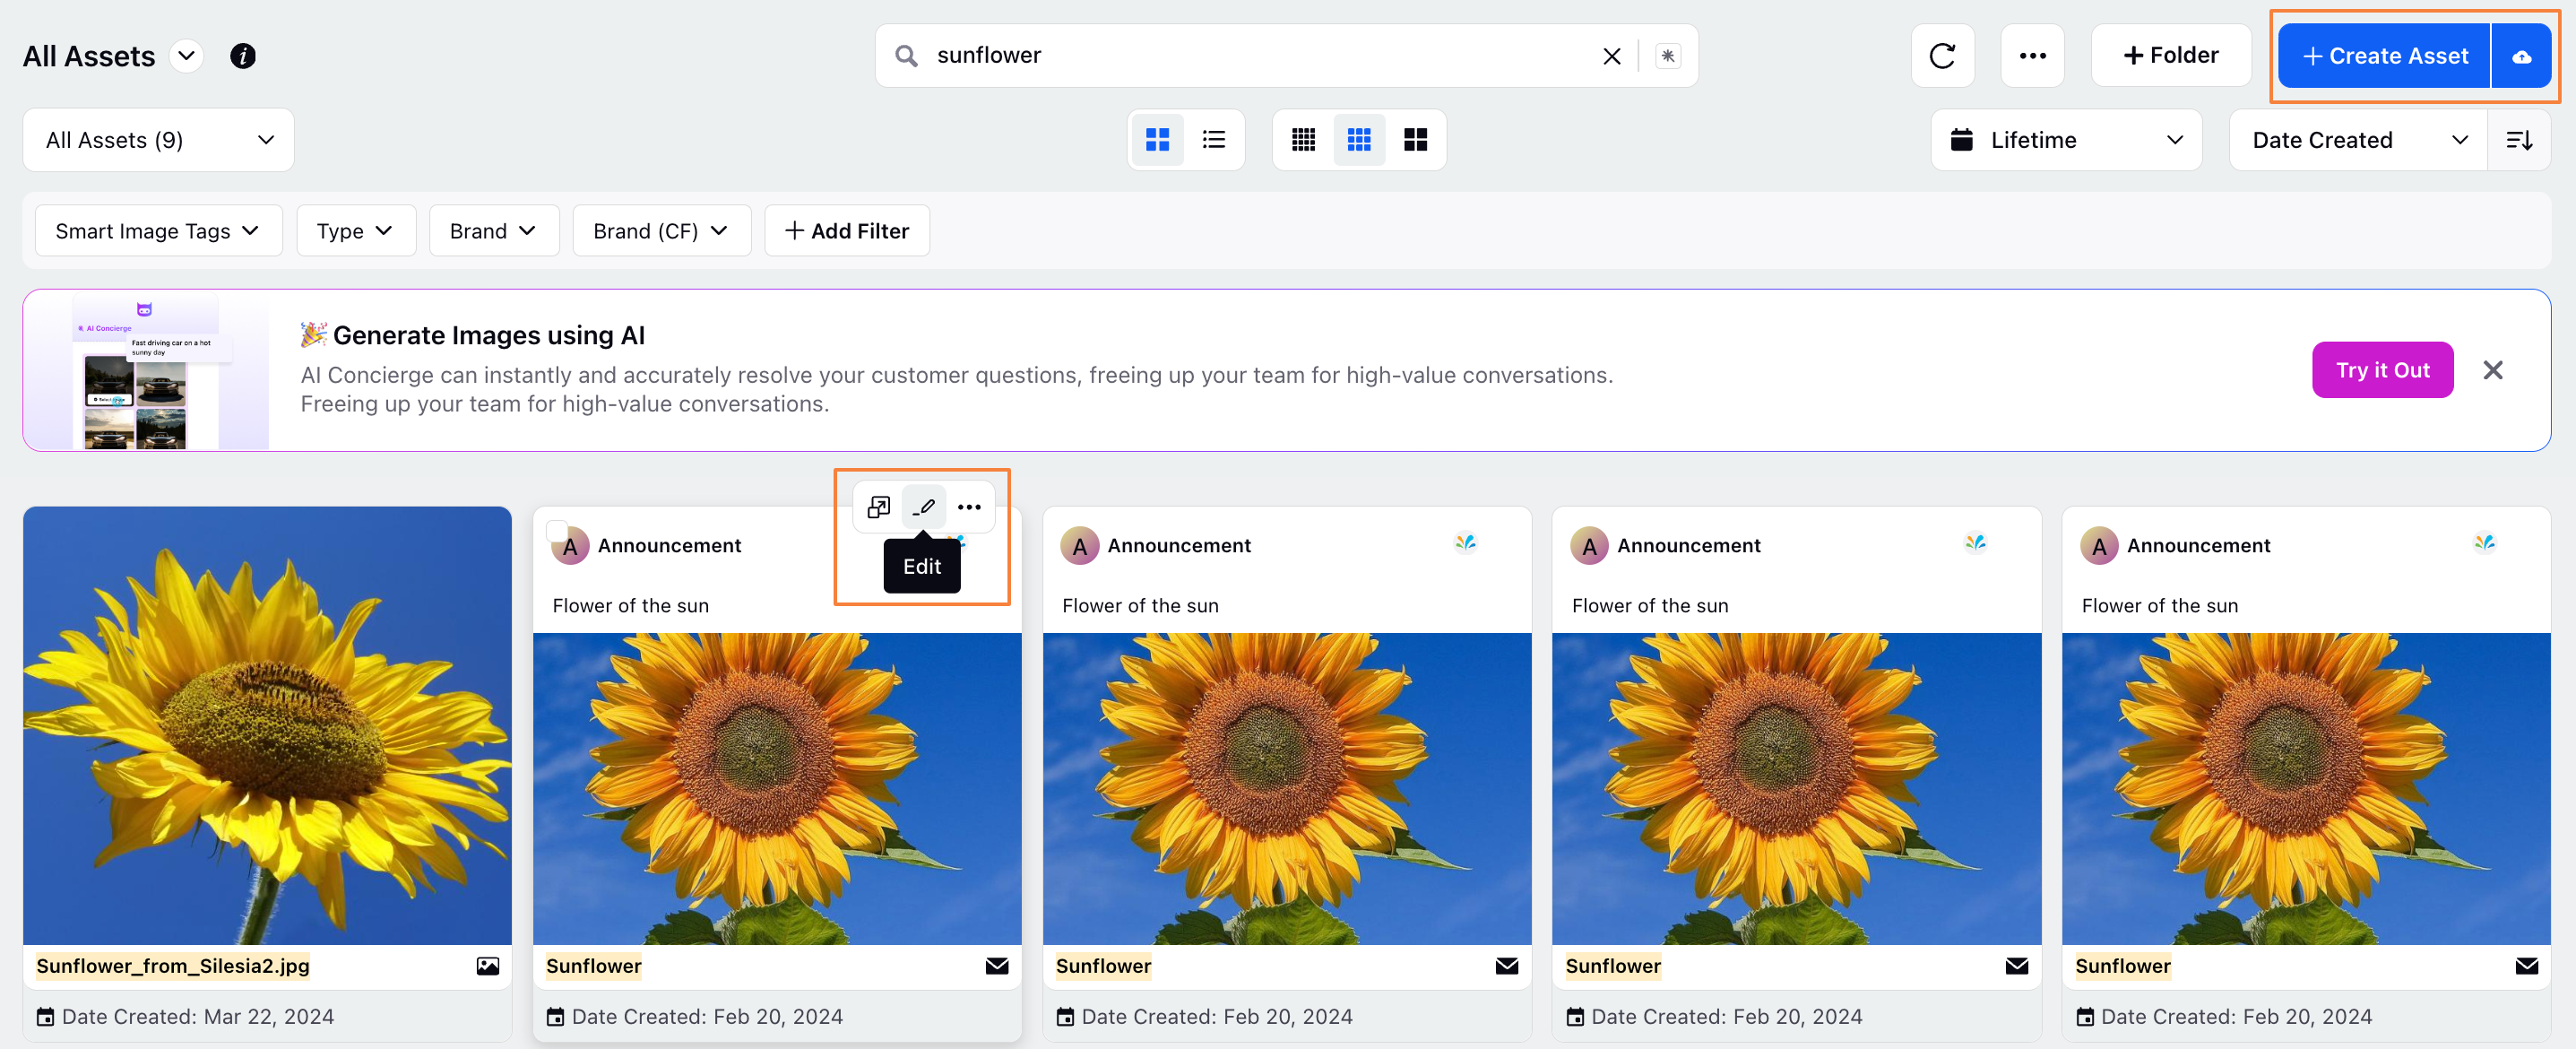
2. Hover over an existing asset and click the Edit icon or click the Create Asset button and select Photo to upload an image or generate a new image through Sprinklr AI+
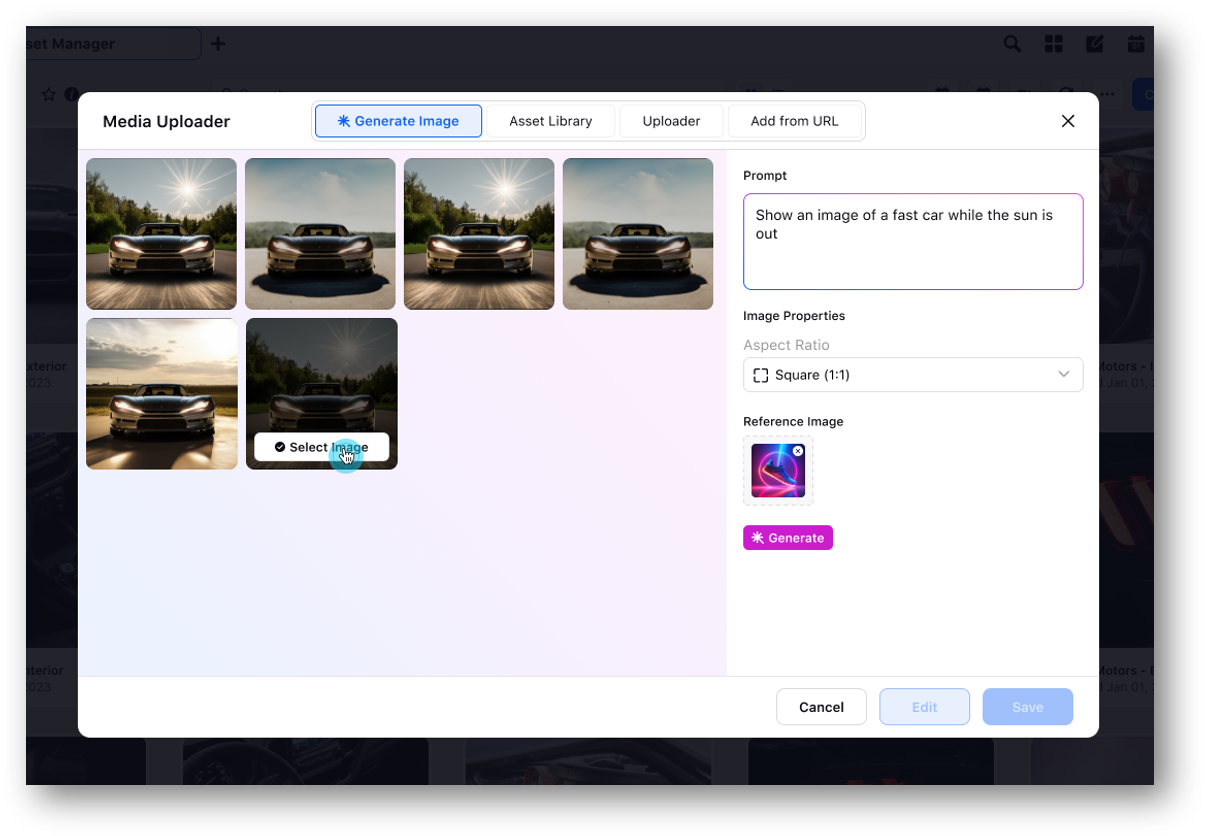
3. To generate an image through the AI Concierge, you'll have to enter a text prompt or a reference image. The AI will generate a few options and you can select the image most suitable for your needs or request more image variants.
4. From the image asset window, hover over the image and select Edit to open the Image Editor.
.png)
5. The left side of the Image Editor window allows you to preview your image and the right side has options for editing your image.
5. Crop your image to a particular aspect ratio to meet brand requirements, or use the free crop mechanism to crop according to your needs.
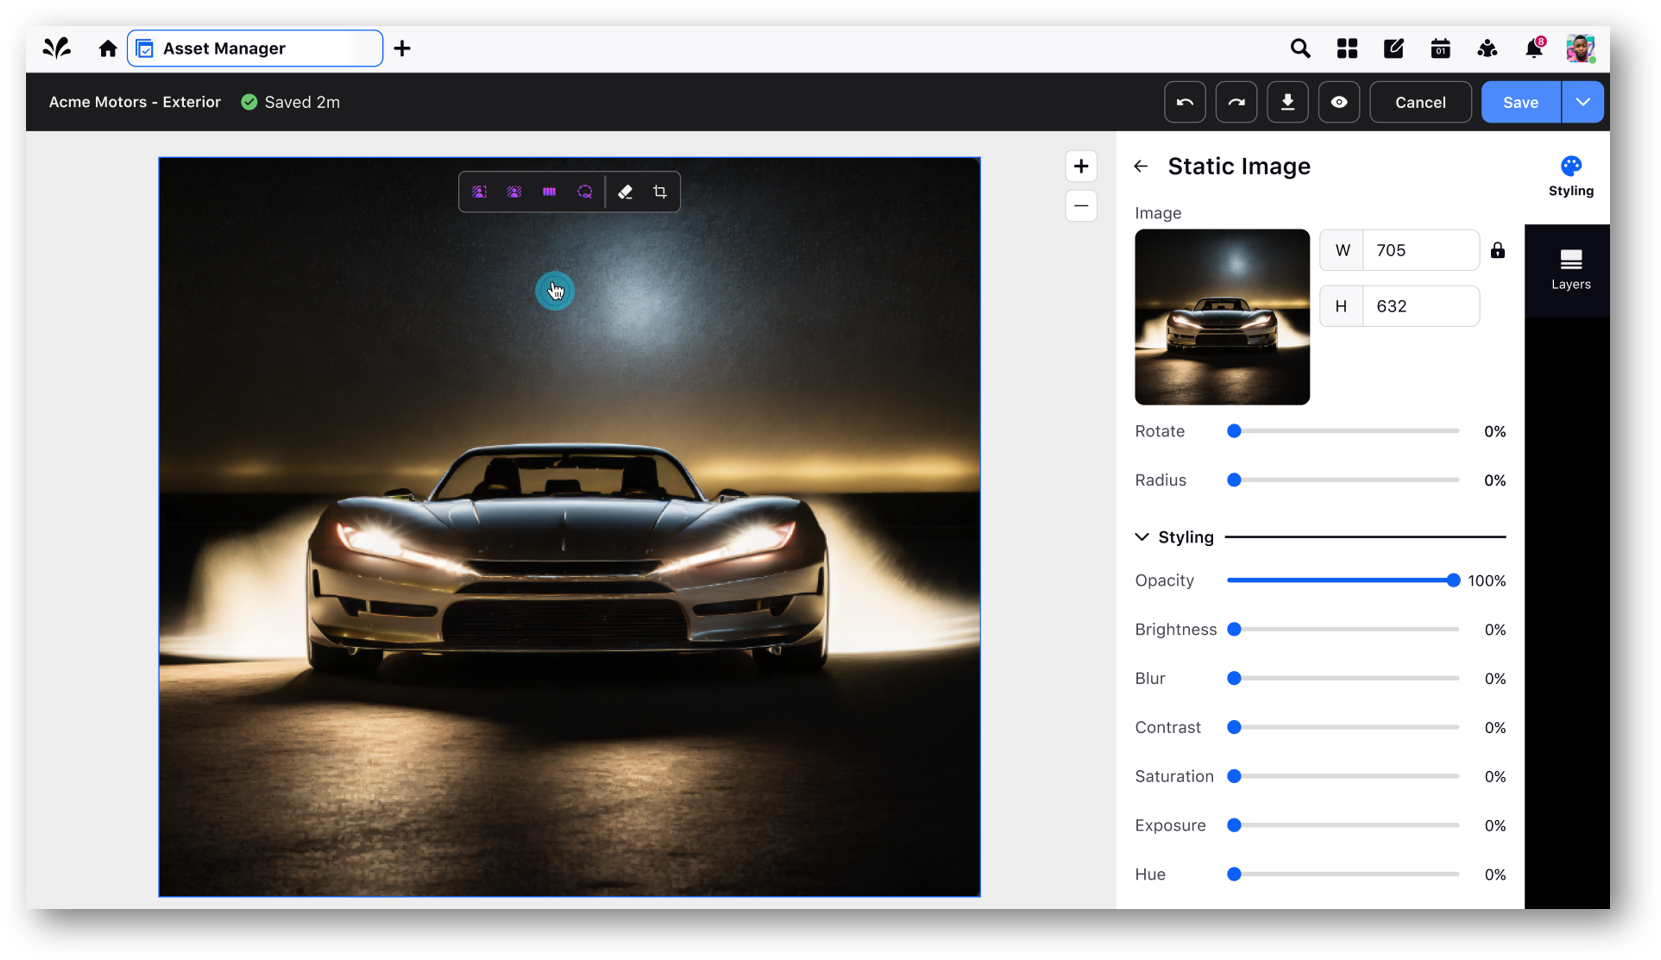
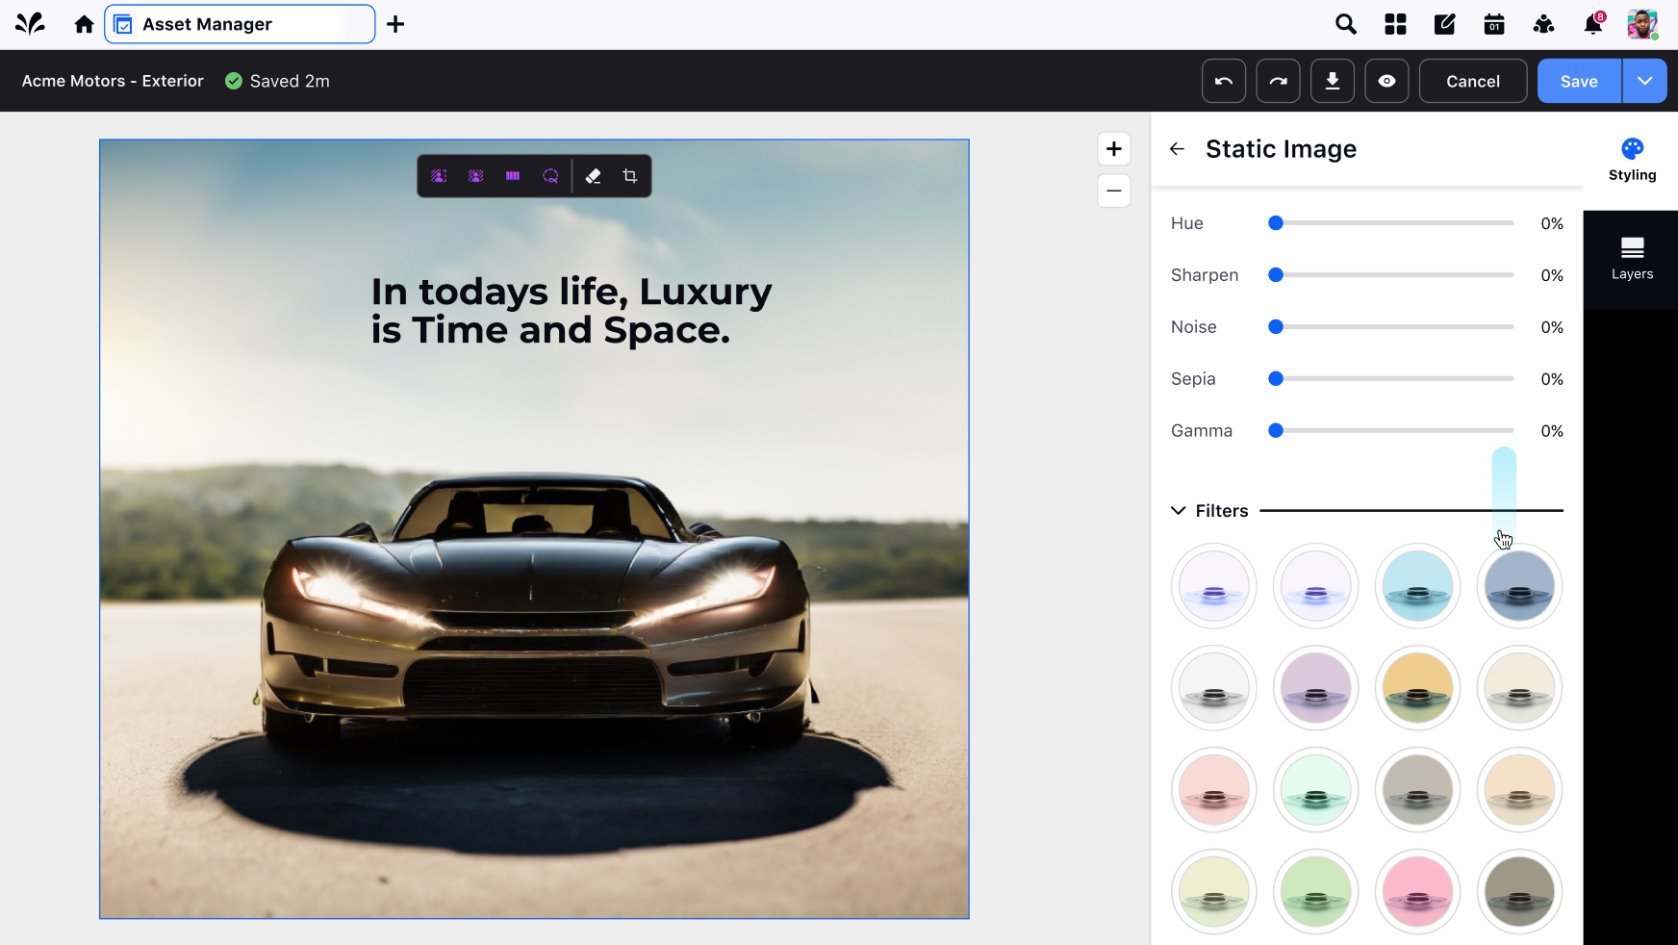
6. Tune the image by sharpening, changing hue, adding or reducing noise, sepia tones and gamma effect.
7. You can also add preset Filters to your image.
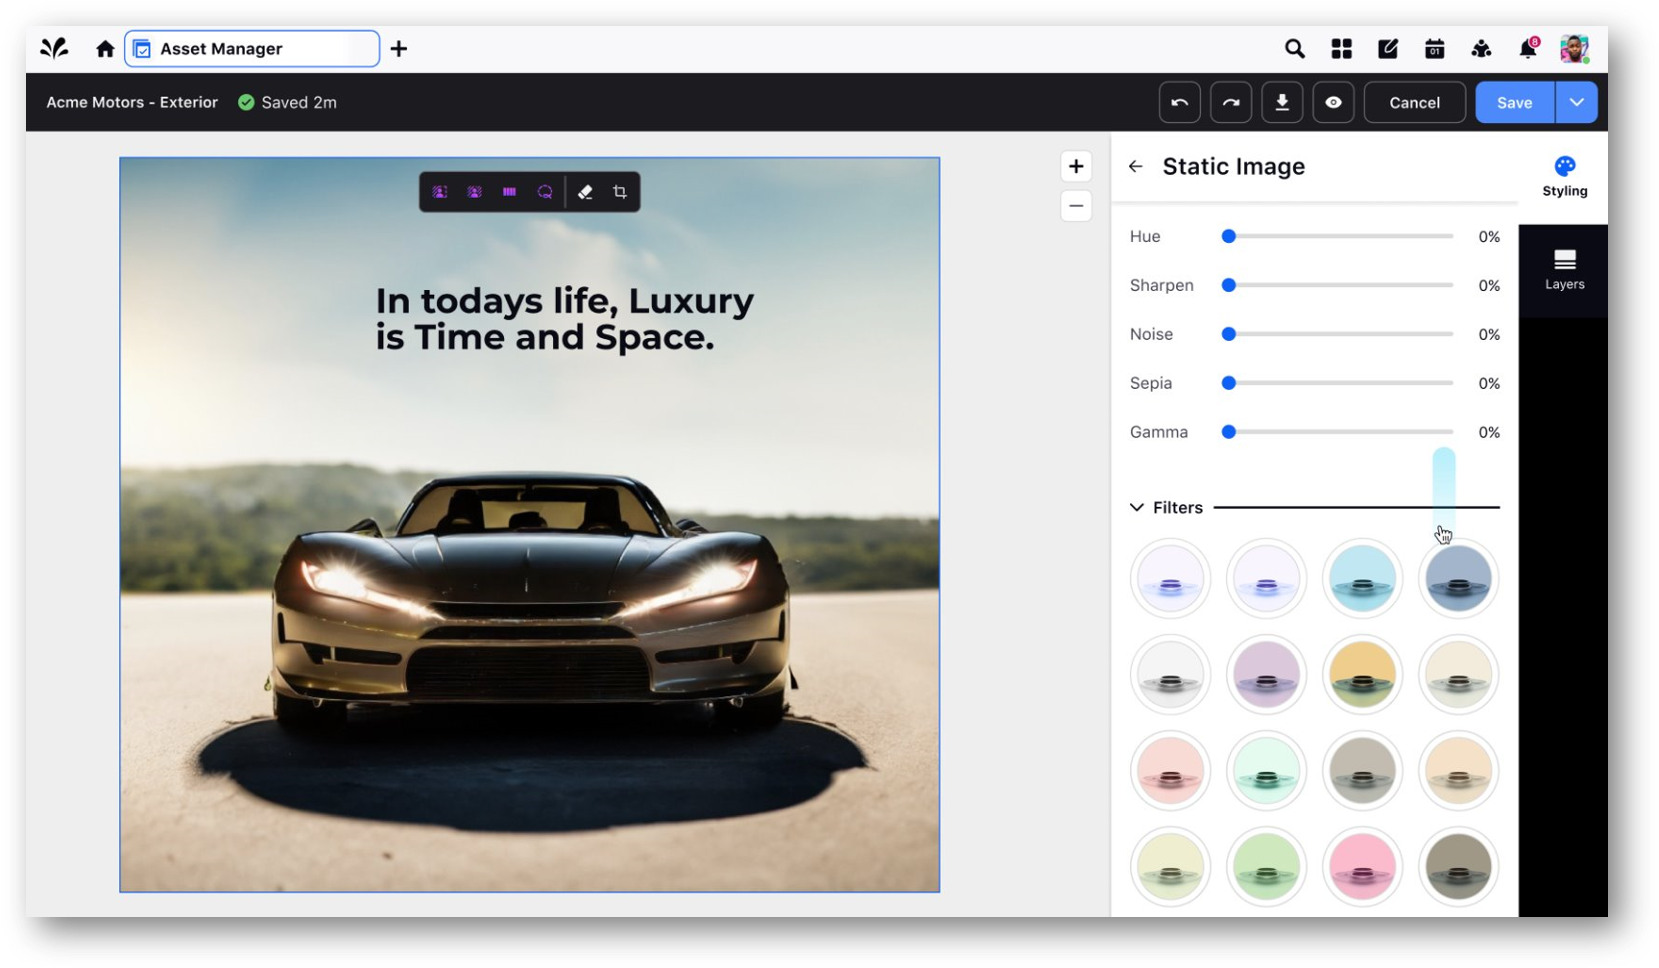
8. The Widgets tab on the right side of your window lets you add text, shapes or other images to you image as overlays.
9. You can use the Layers tab to adjust and manage these Widgets and how they appear on top of each other.
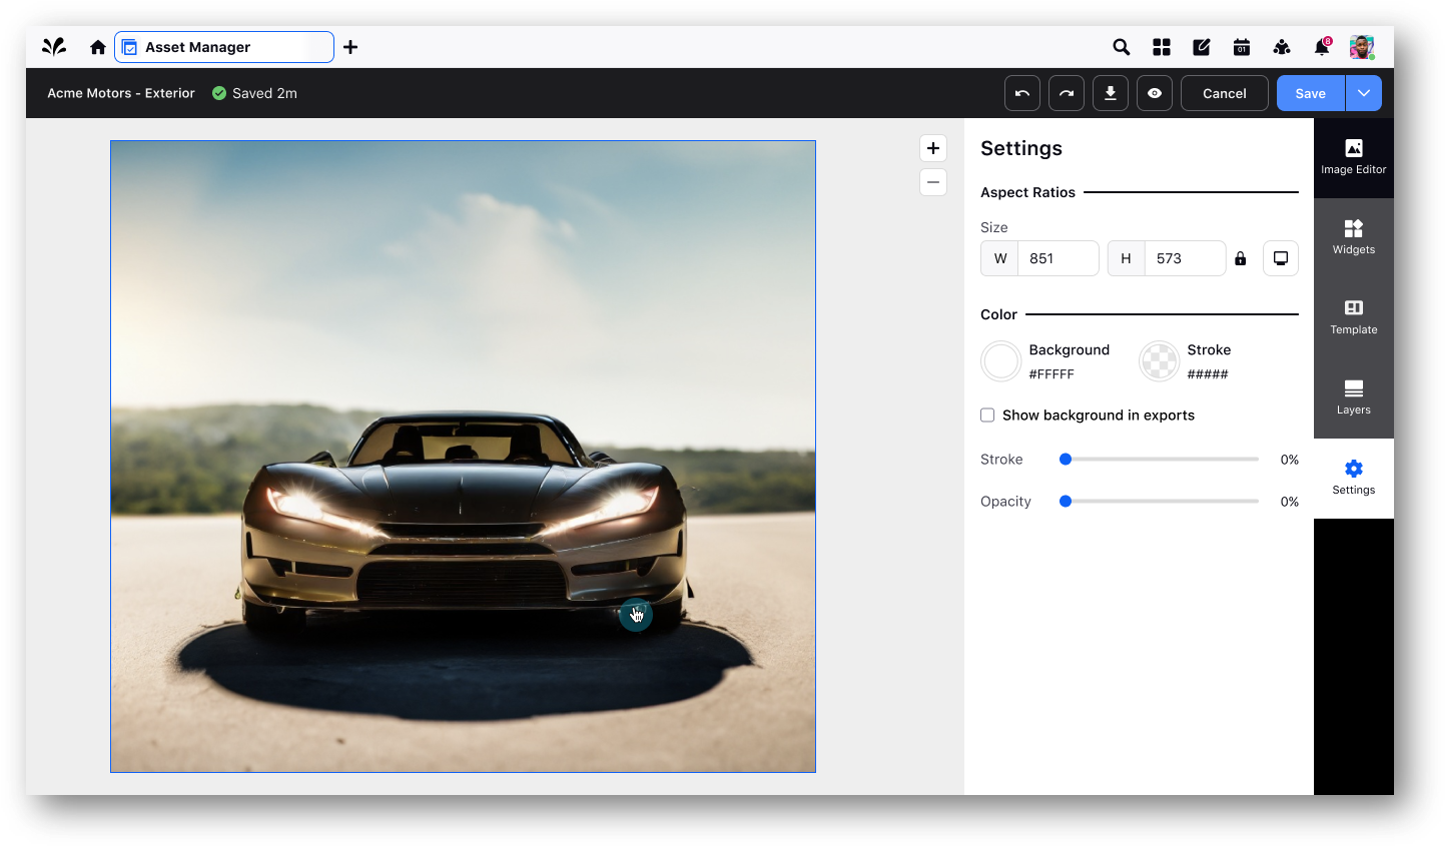
10. The Settings tab lets you adjust canvas settings, like aspect ratio, background colors and opacity.
11. Save your edited image as a Template so that you can reuse it as per needs and apply the same edits to other images.
Remove Background
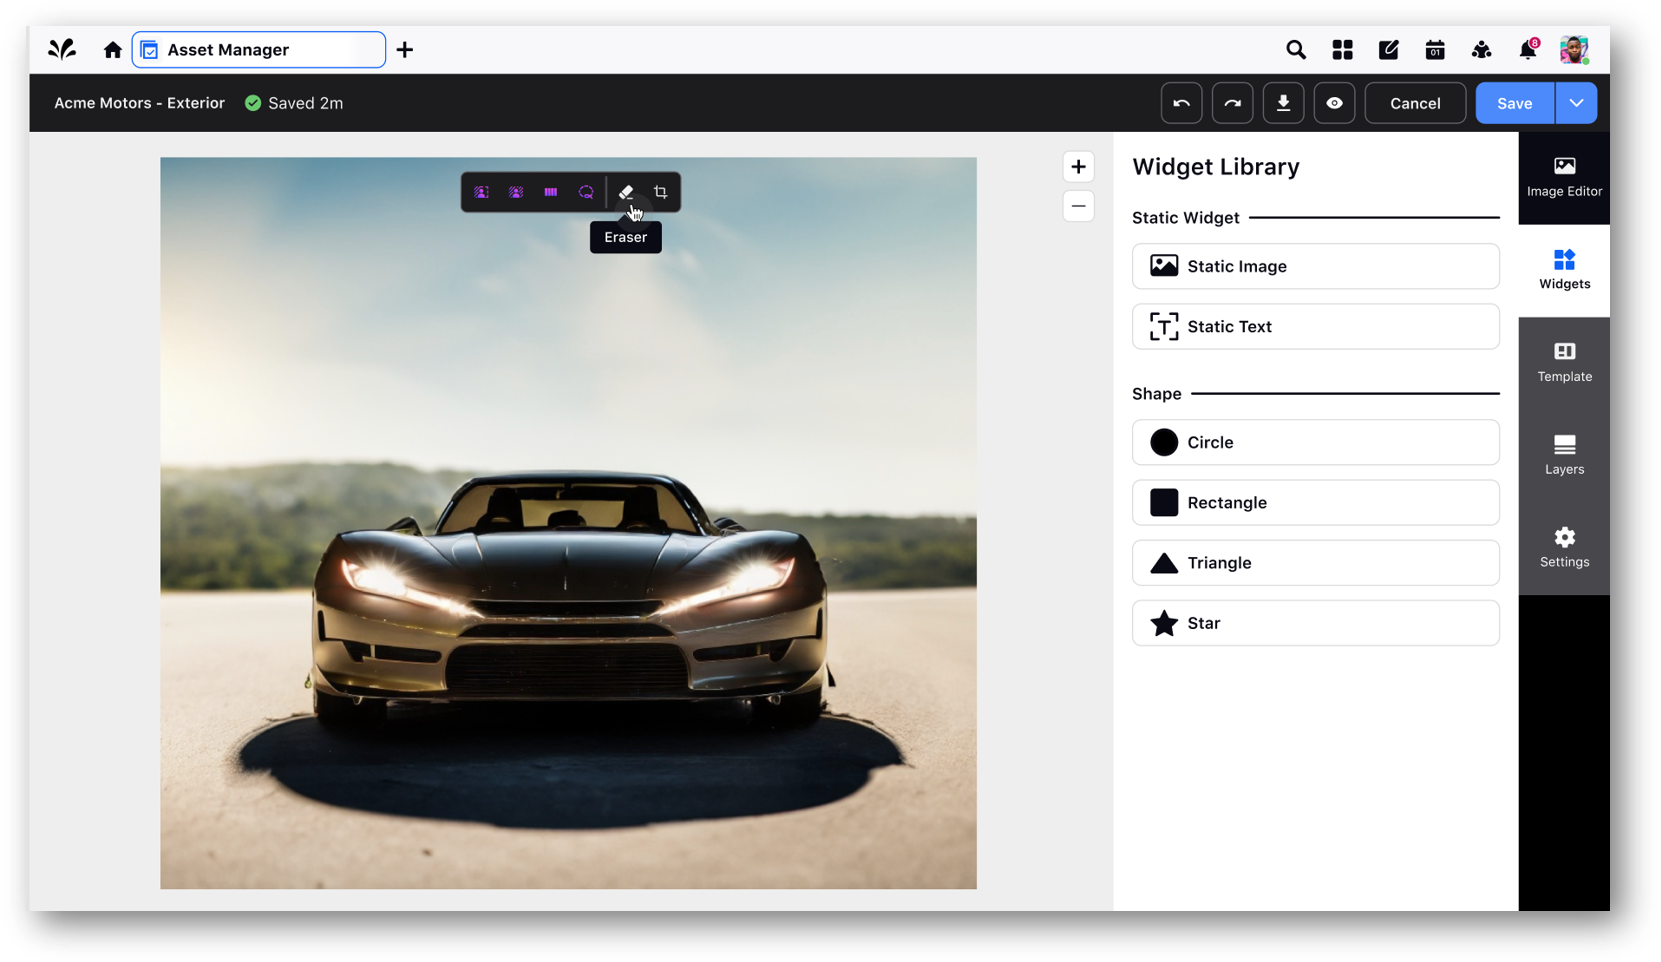
1. Hover over the image on the Preview side and from the toolbar, select the Eraser tool.
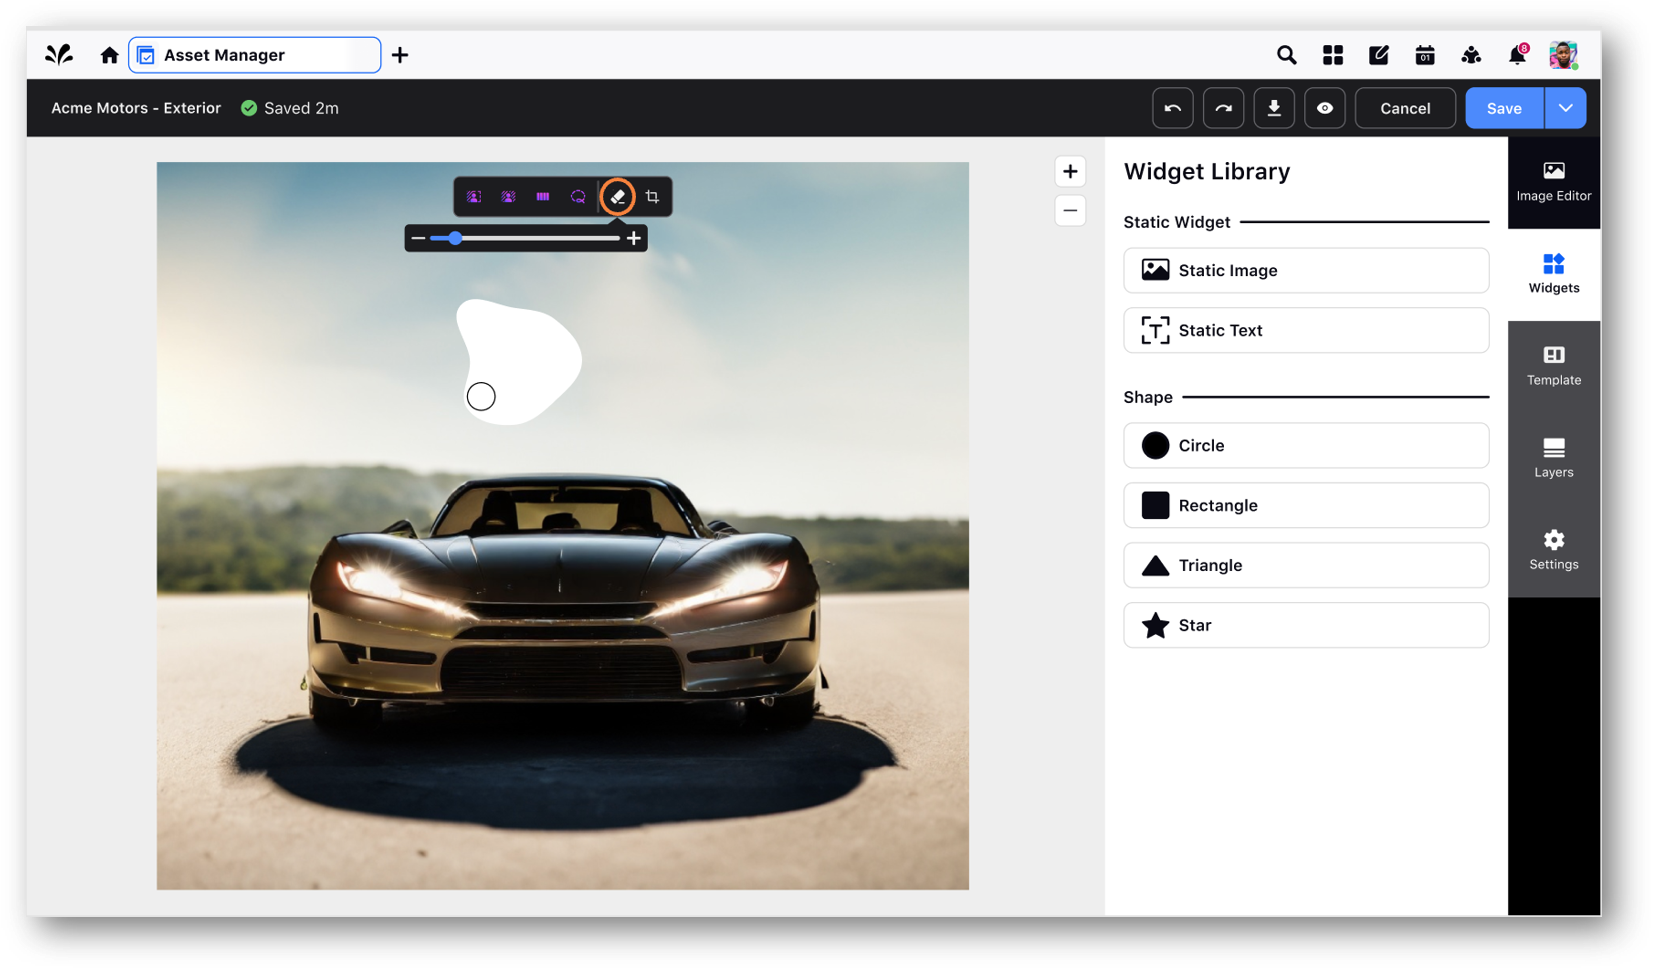
2. You can adjust the size of your Eraser using the size bar. To use this tool, simply drag your eraser across the portions of the image you want to erase.
Crop Image
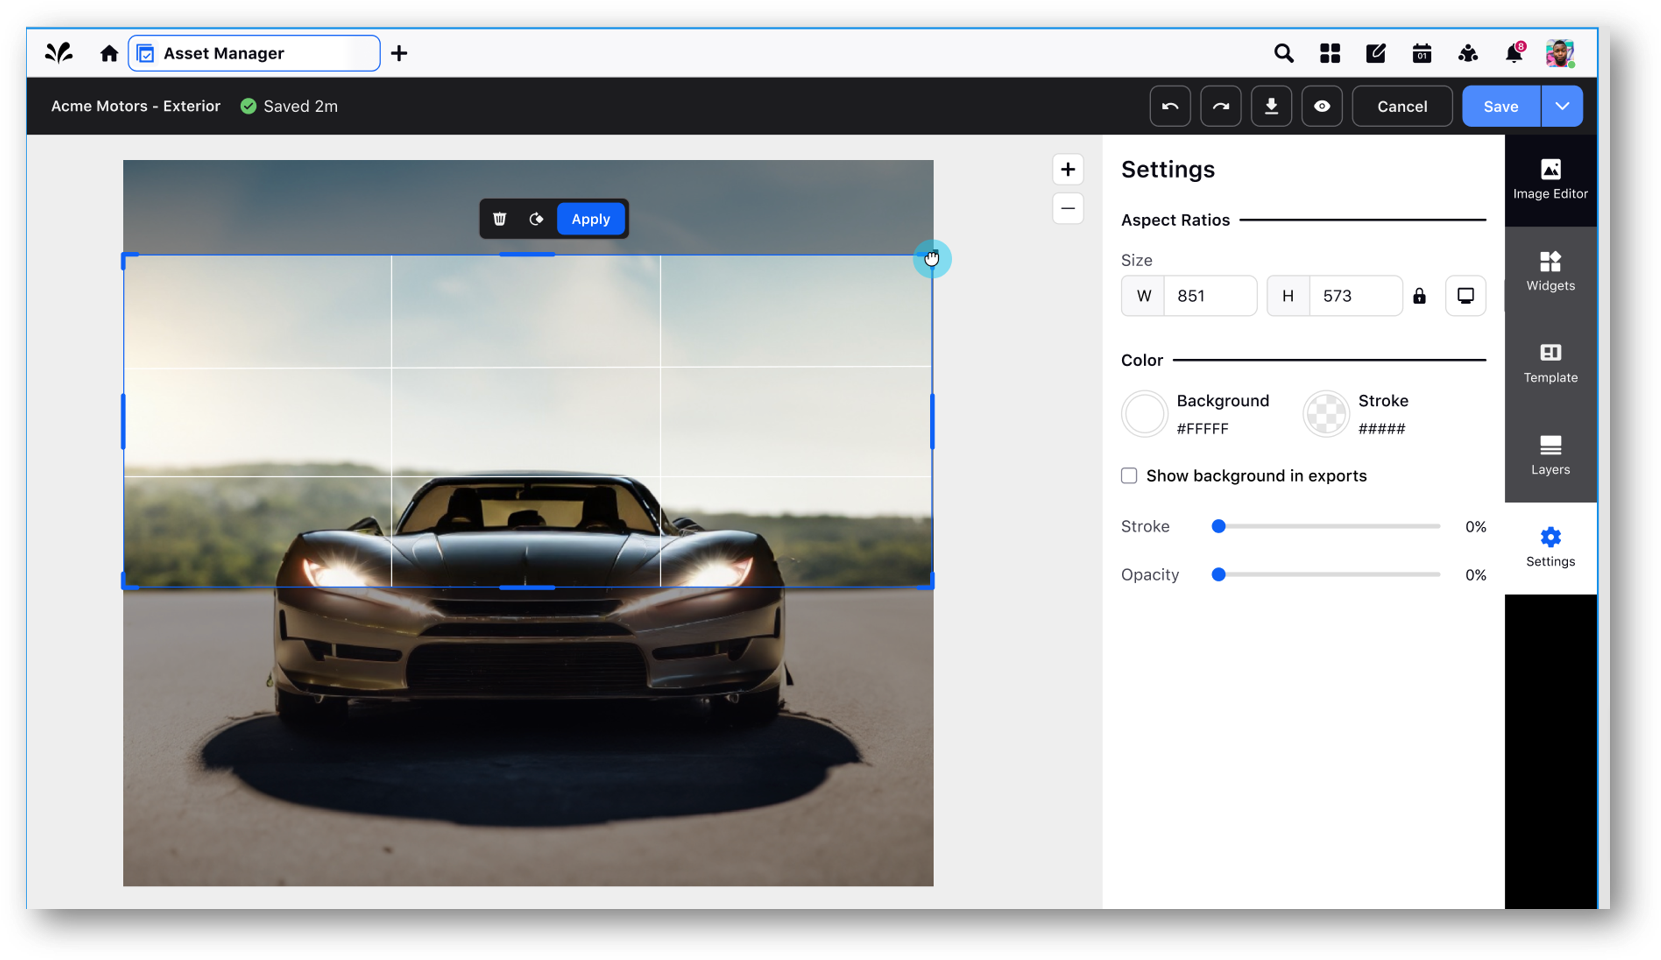
1. Click the Settings tab.
2. Click the Aspect Ratio option to select a specific aspect ratio to crop the image.
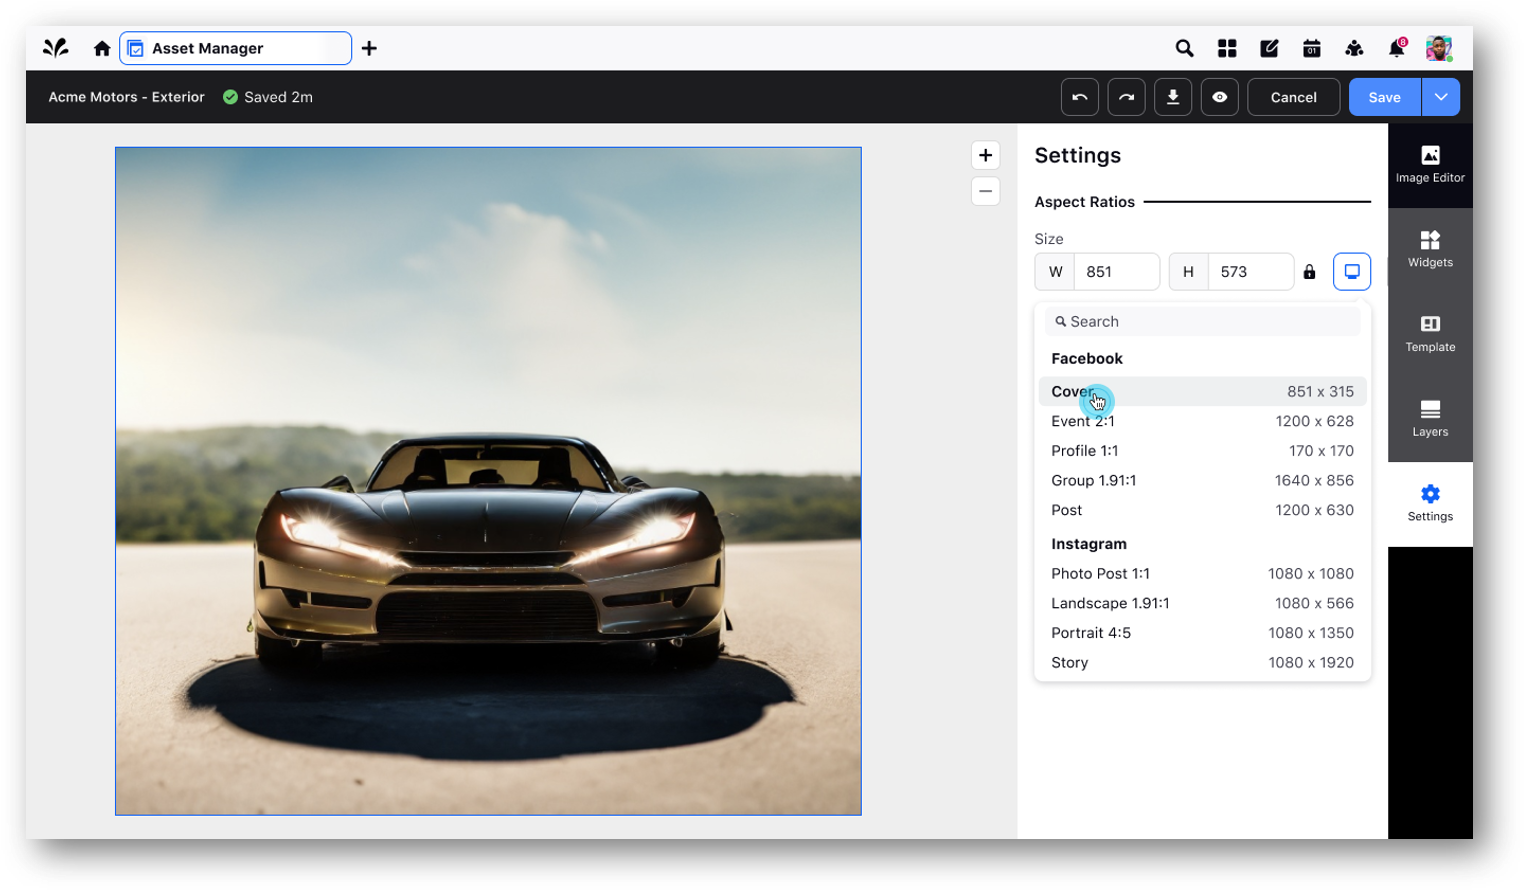
3. You can also manually enter values into the W (width) and H (height) fields to crop the image to a custom ratio.
4. To use the Free Crop mechanism, hover over the edges of the image and use the Arrow tools to drag the edges down and crop according to your requirements.
Widgets
1. Widgets let you add other objects like shapes, text, and other images to your image.
2. Click the Widgets tab and then select a Widget to add it to your image. You can use the Layers tab to adjust the Widgets and move them above or below each other. More on that, later.
3. For Static Image Widgets, you can adjust the height and width of the image, adjust opacity, and rotate the image. You can also adjust brightness, contrast, saturation, exposure and hue. Additionally you can add effects like noise, gamma effects, sepia tone and use stack blur. You can also use preset filters.
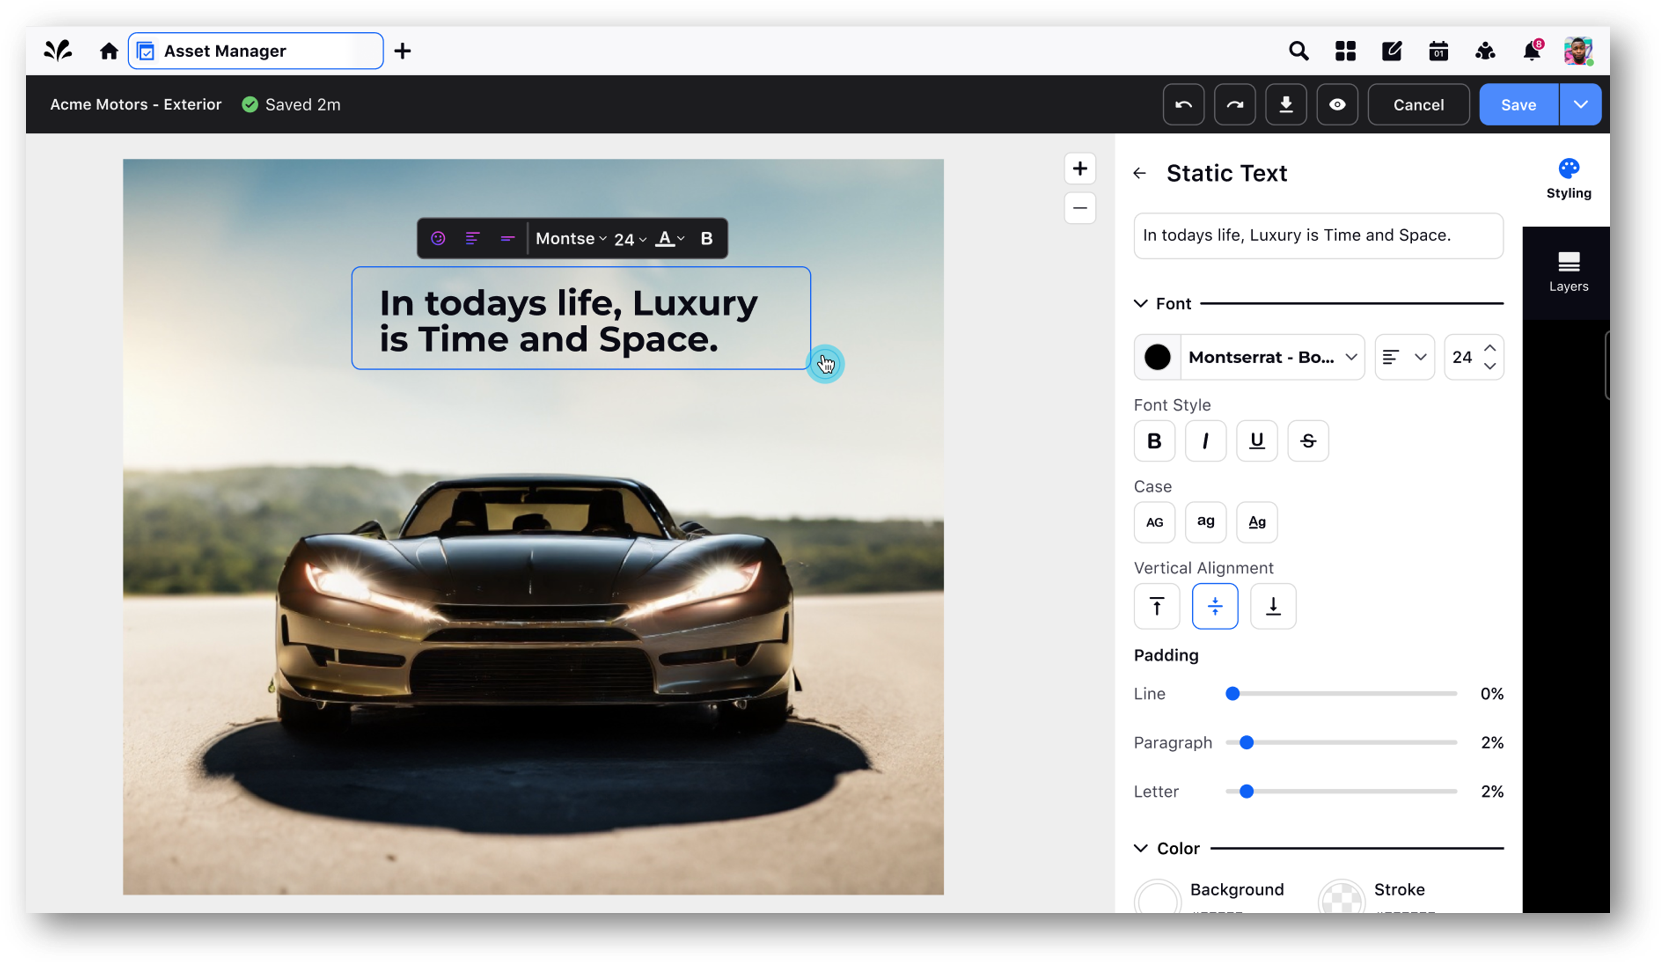
4. The Static Text Widget lets you add text to your image. You can set the Font type, size, style, alignment and case for your text. You can also adjust vertical alignment, add padding to your text and adjust the color.
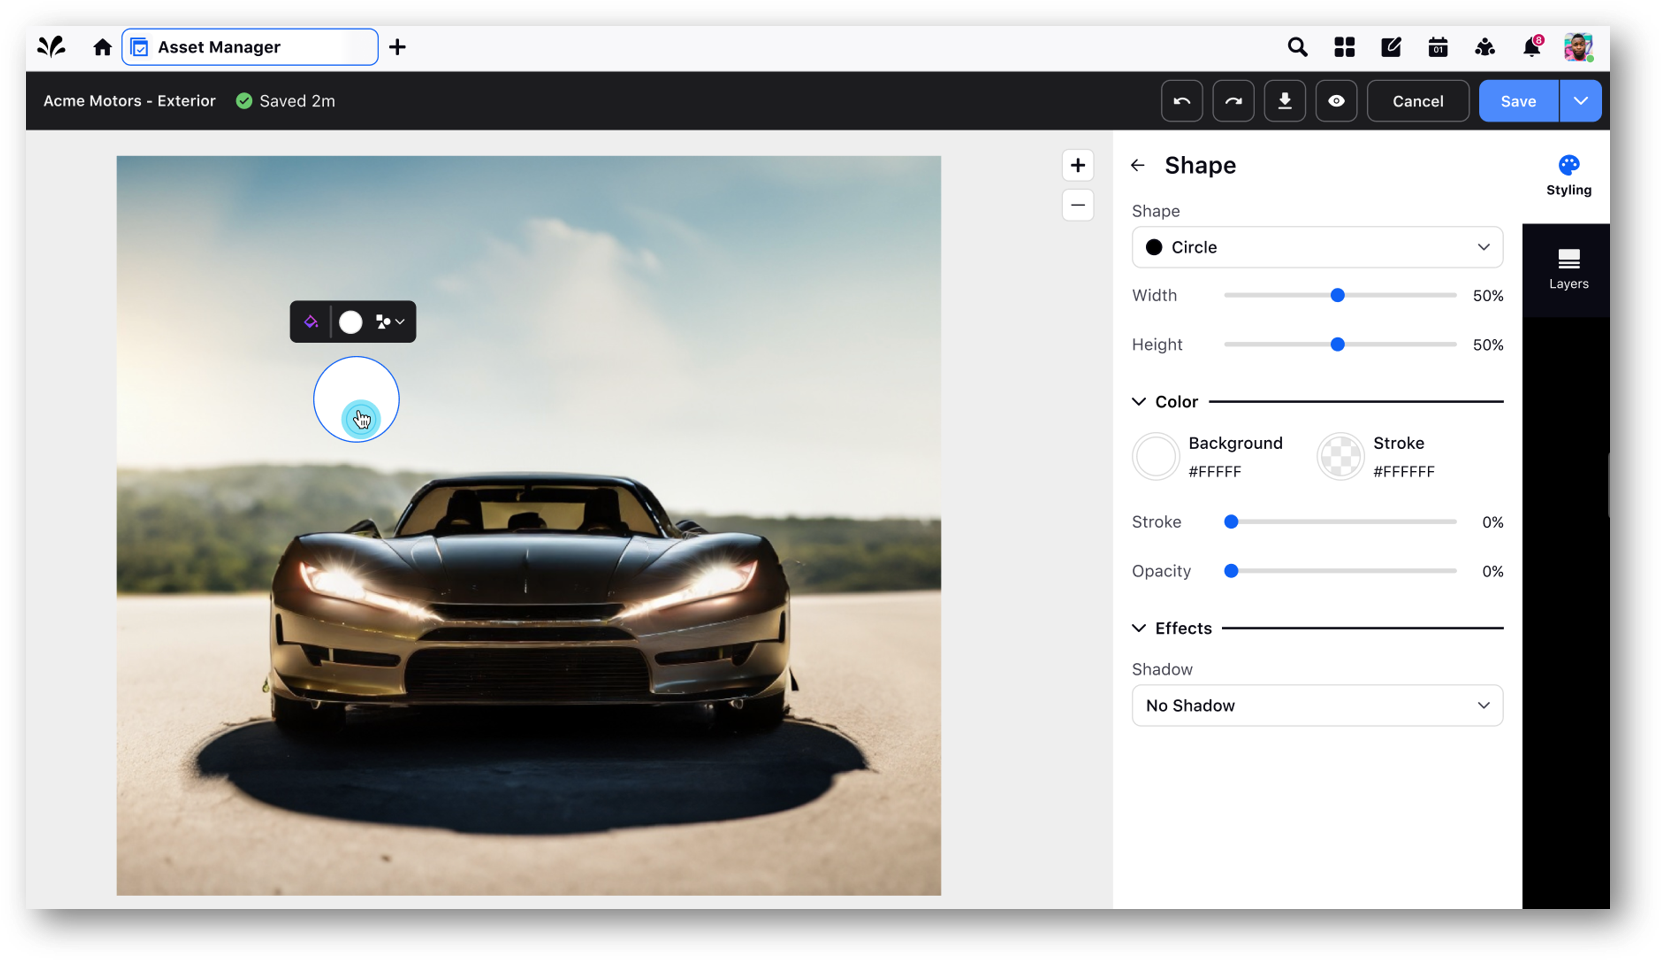
3. You can add either circle, rectangle, star or triangle Shape Widgets to your image. You can adjust the size of the shape, its color and opacity. You can also add effects like shadow to your Shape Widgets.
Layer Control
1. Click the Layers tab.
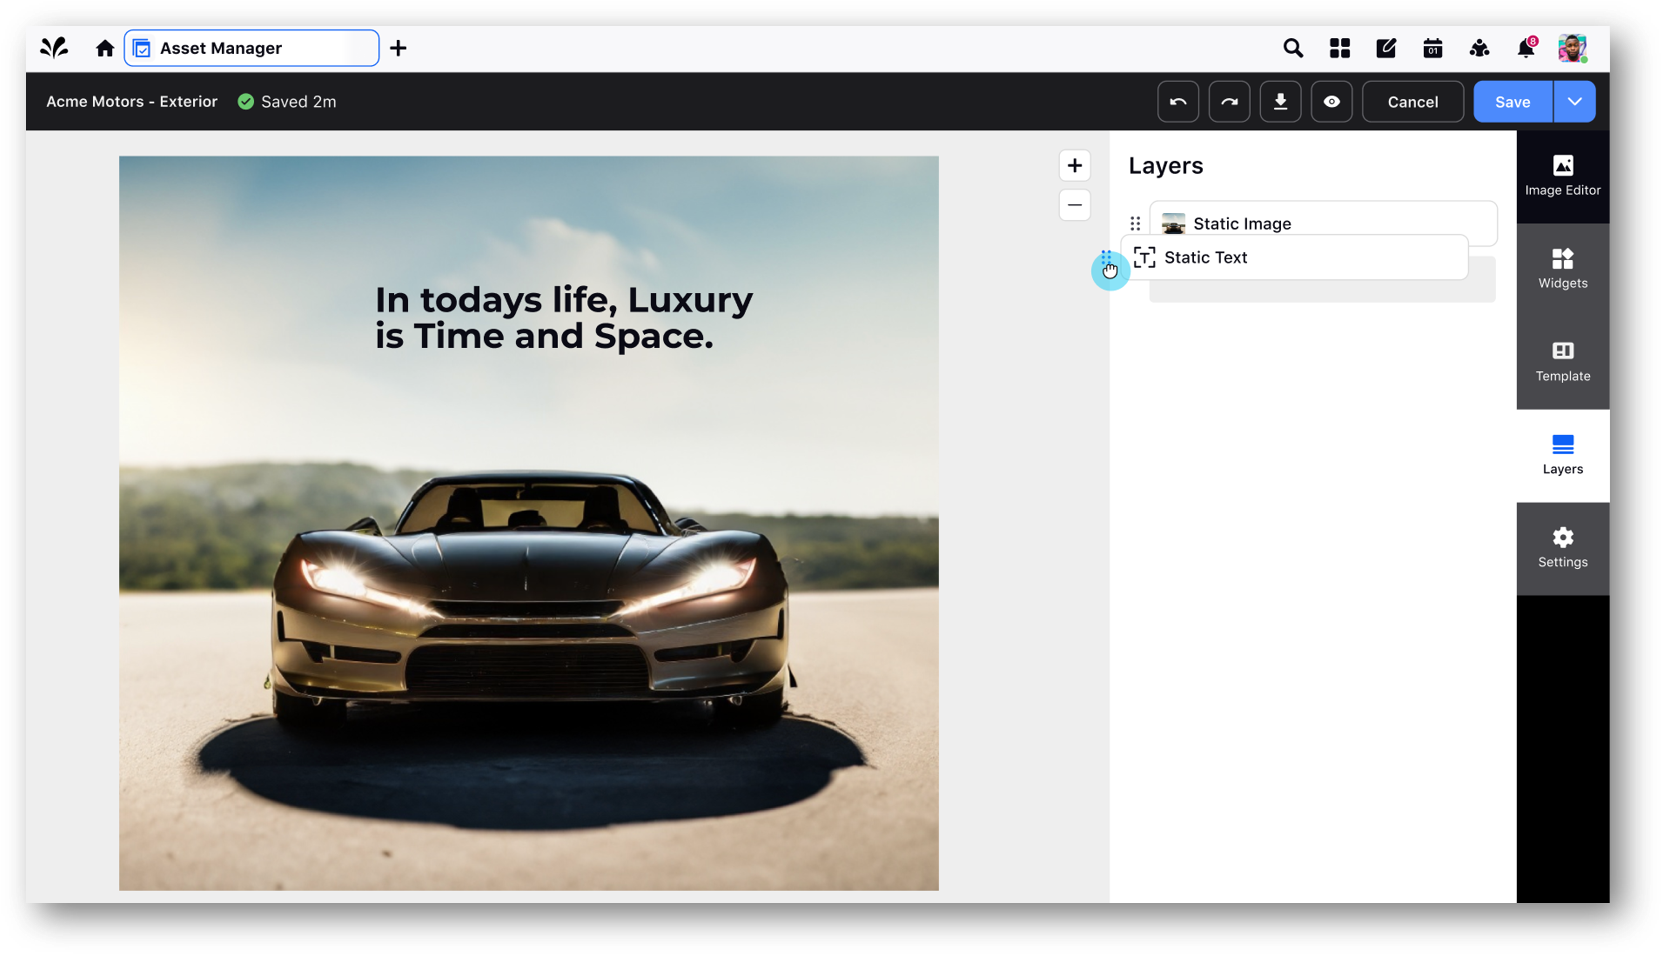
2. You can click and drag the Widgets around and arrange them according to your needs. The Layers tab lets you use drag and drop to arrange Widgets in layers, one on top of the other. Click the Pencil icon to rename a Layer or click the Delete icon to remove it entirely.
Templates
1. You can save your edited image as a template if you want to use it as a preset for other images in the future.
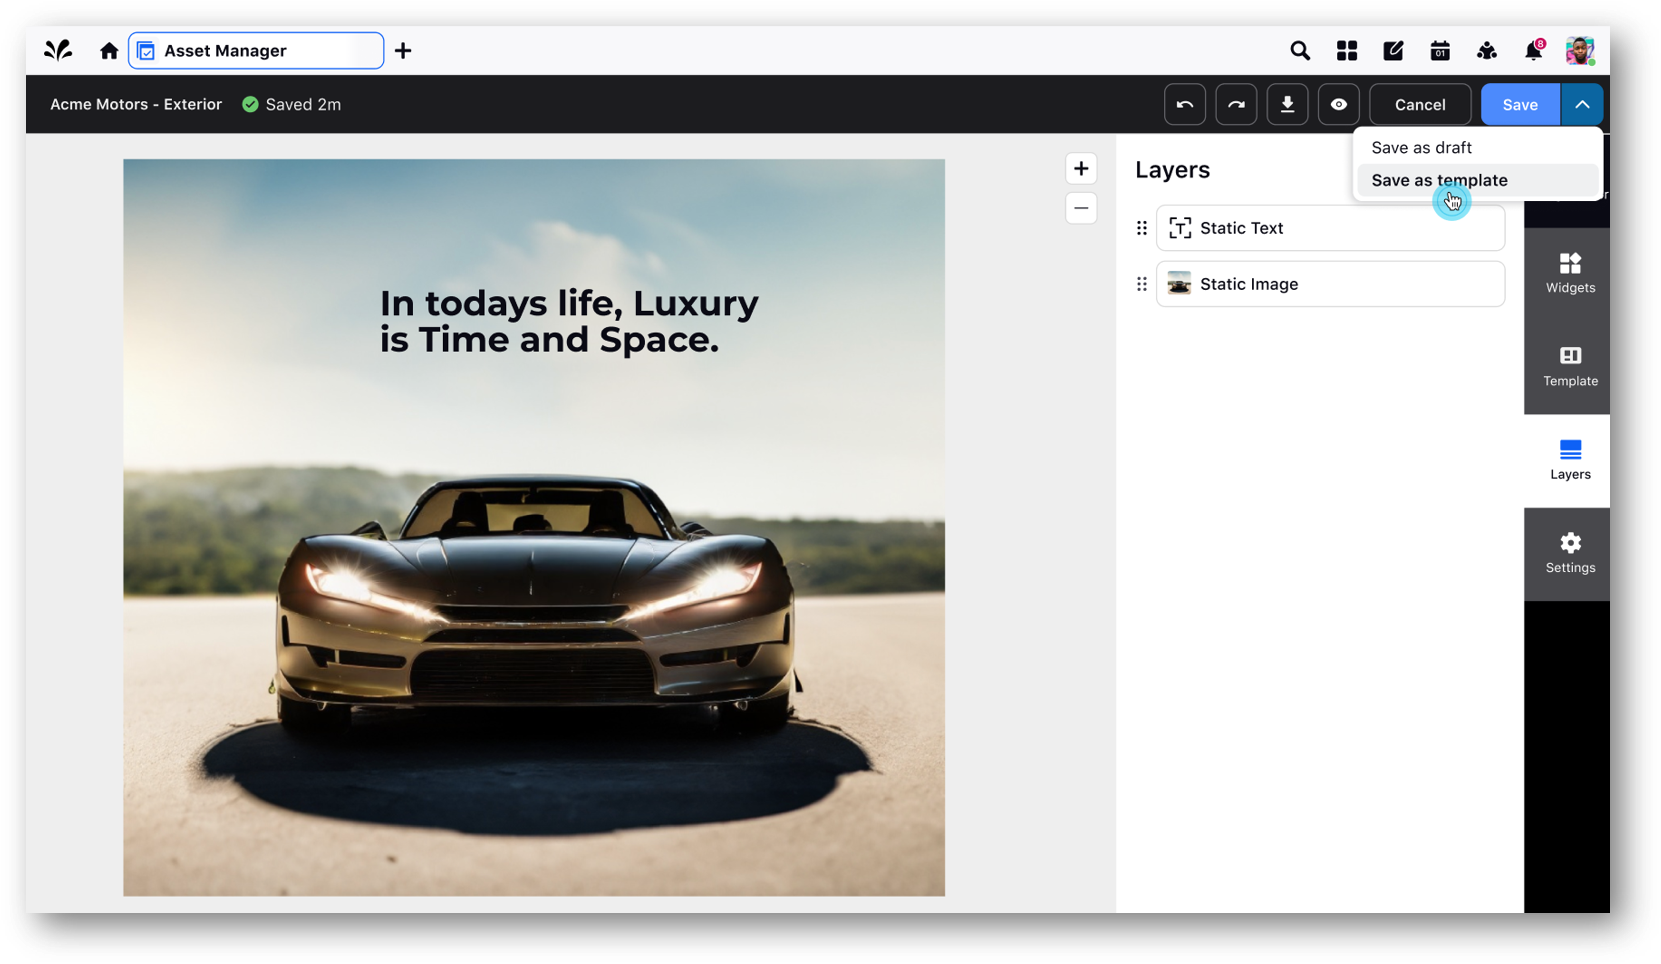
2. To save your image as a template, click the Save button and then select Save as Template.
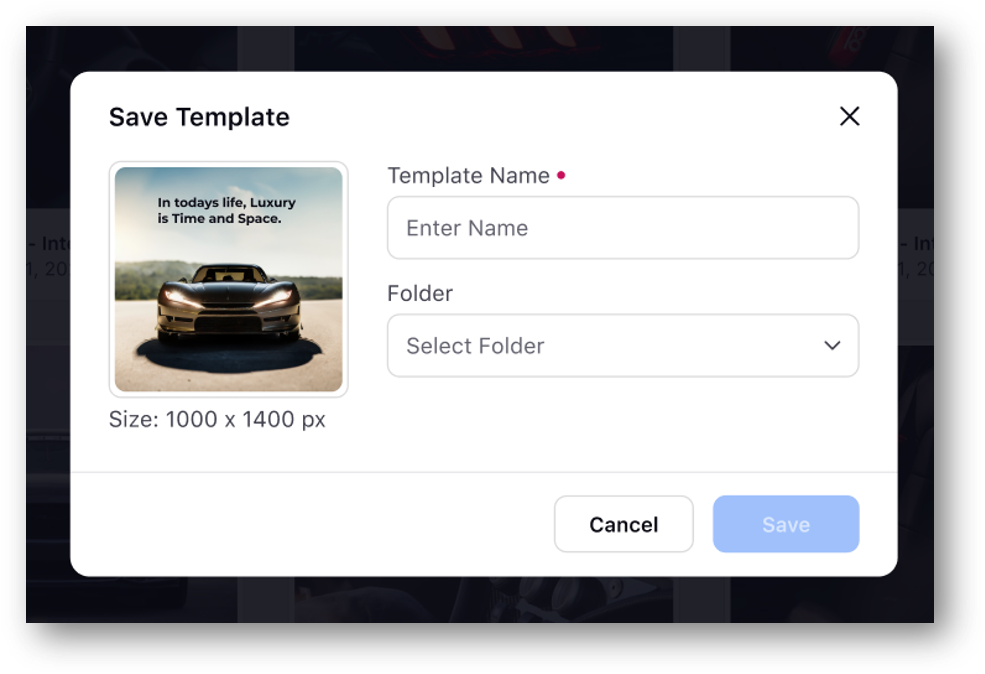
3. Give your template a name and select a folder to save it in. Click Save.
4. To use a template, click the Template tab and select a template to apply to your image. Note that applying a template to your image will override any other edits or changes you've made to it.
