Publish GIPHY GIFs and Stickers
Updated
You can attach GIFs as well as Stickers from Giphy/Tenor while creating/drafting a post in Publisher. Channels that support GIFs have a Add GIF tab in the Media Uploader. You can search and attach GIFs and Stickers while drafting/editing a post. Creating appealing visual content is essential in social media, and the ability to publish GIFs and Stickers allows you to publish compelling and exciting content directly through Publisher.
![]() Tip:
Tip:
GIFs and Stickers are considered image files in Sprinklr. The performance and engagement data for GIFs will be included in Reporting Insights for Images.
You can make sure only your brand-specific GIFs appear in Giphy. Get in touch with your Success Manager to know more.
You can add GIFs from GIPHY/Tenor:
If the DP is enabled - add GIFs from GIPHY/Tenor
If the DP is not enabled - add GIFs from GIPHY
Manage permissions to add GIFs
Click the New Tab icon
. Under the Unified Front Office Platform, click All Settings within Platform Setup.
On the Platform Settings window, click Manage Workspace in the left pane and select Workspace Roles in the right pane.
In the top right corner of the Workspace Roles (Settings) window, click Create Role to add a role.
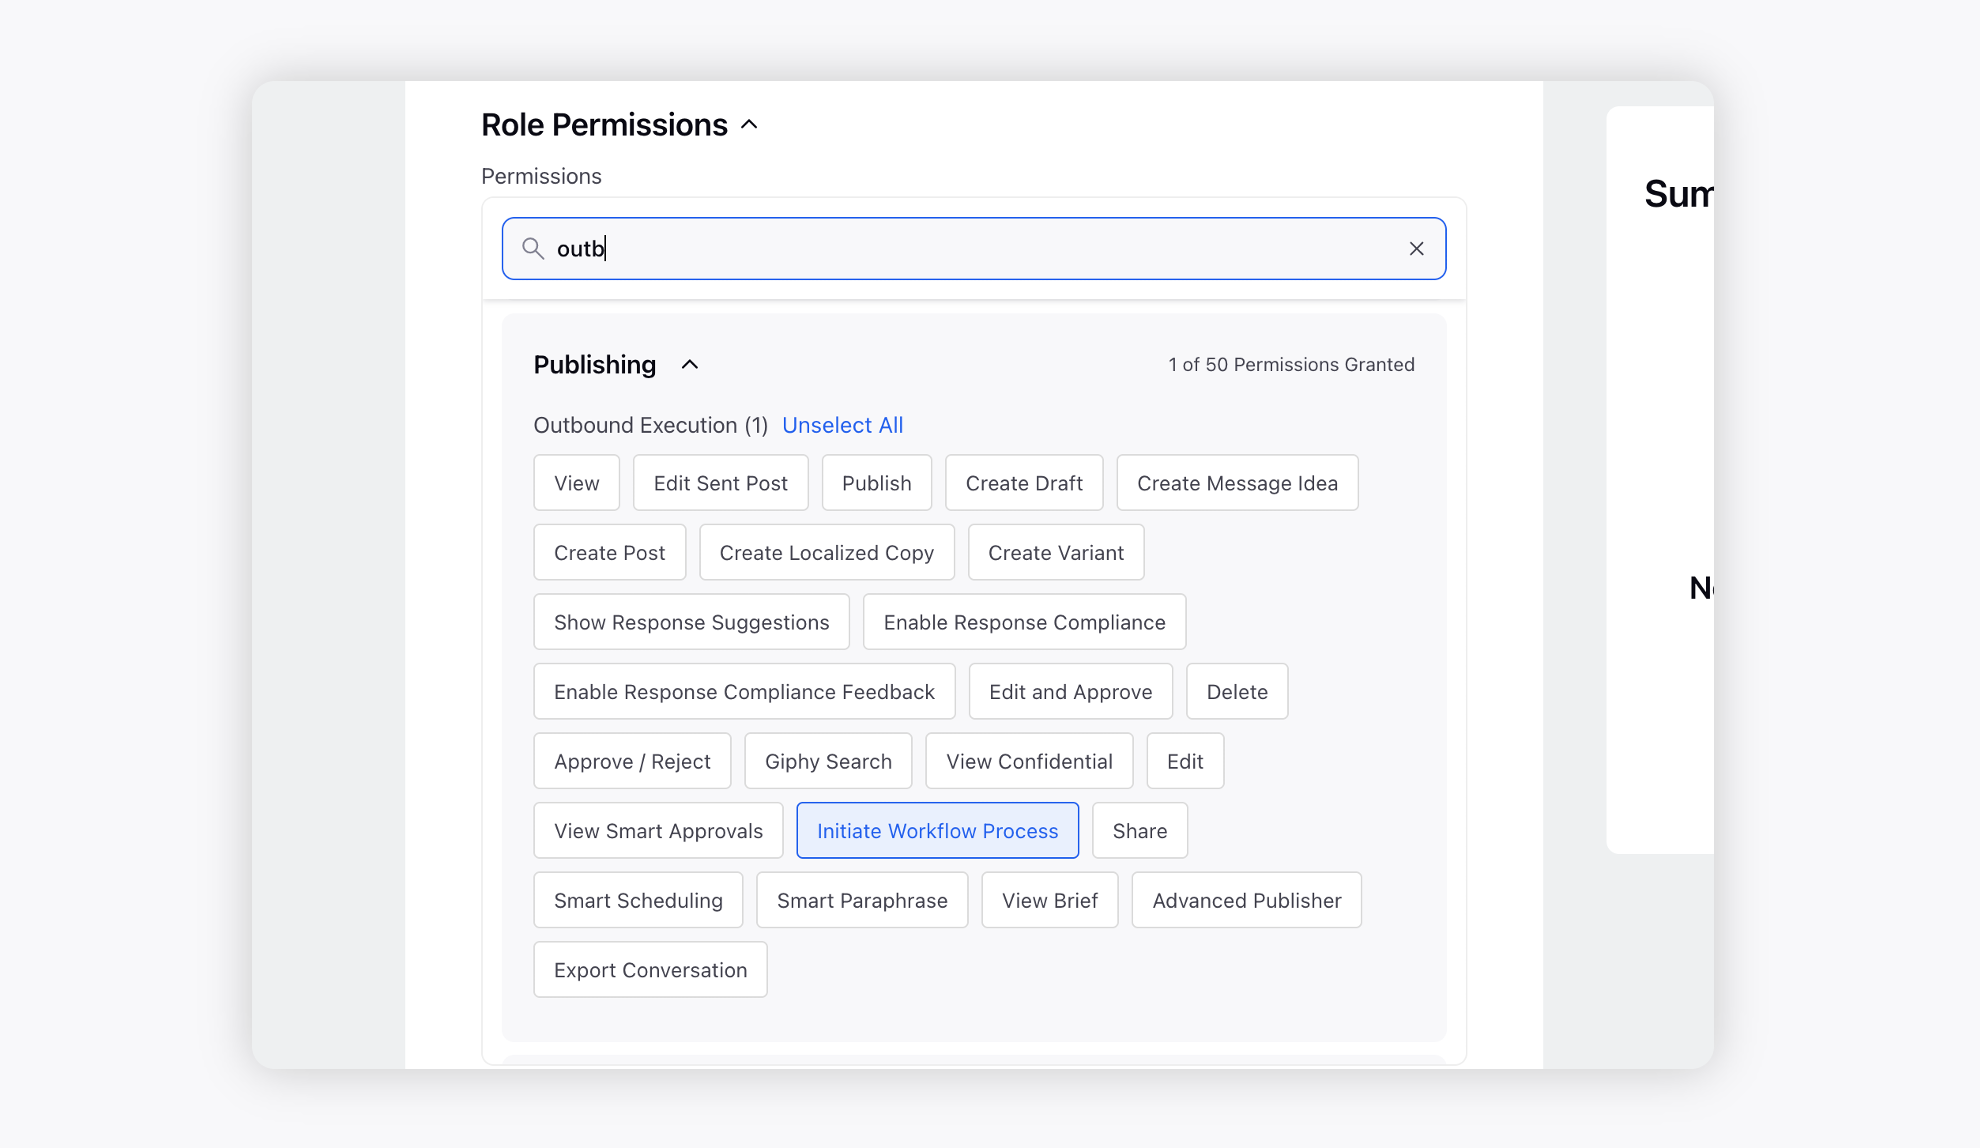
On the Add Role popup window, fill in the role details. And under Outbound Message enable Giphy/Tenor Search within Publishing. For more information, see GIF Permissions — Field Descriptions.
Click Save in the bottom right corner to define roles and permissions for any user.
GIFs Permissions — Field Descriptions
Term | Description |
Role Name | Enter a unique name to identify the Role (ex: Marketing Team, Customer Care Team). |
Description | Enter an optional description for the Role. |
Select Permissions | Select the individual permissions for the Role. |
Users to Assign this Role to | Select individual user(s) who will be provisioned with the Role and its associated permissions. |
User Groups to Assign this Role to | Select the user group(s) who will be provisioned with the Role and its associated permissions. |
Note: Permissioning user groups can be a great way to quickly assign multiple users on your team to a Role. When a user is added or removed to/from a group, that user will automatically have the permissions assigned to the Group without the need to individually assign a role to the user. |
To add an animated GIF in a post using Publisher
Click the Publishing Options icon in the top right corner of the Navigation bar and select Create Post.
On the Create Post window, select your desired social media channel where you want to publish. You can also use Advanced Search to narrow your searche by a series of different filters.
Tip:
You can Pin your favourite and frequently used Account(s) and Account Group(s). You will not have to go through the hassle of adding the same account every time you publish a post. This will lead to quick publishing and increase efficiency.
Select the Type of Message as Image from the drop-down menu.
Enter the content for the post in the Content section.
Within the Content section, click the Select Photo option.
From the Media Uploader pop-up window, switch to Add GIF from Tenor tab.
In the Media Uploader pop-up window, select the Add from GIPHY/Add GIF from Tenor tab for uploading GIF to the post.
Note:
You can search for a specific GIF or select one from the random suggestion in the GIPHY tab.
Preview for GIF is playable as per channel behavior.
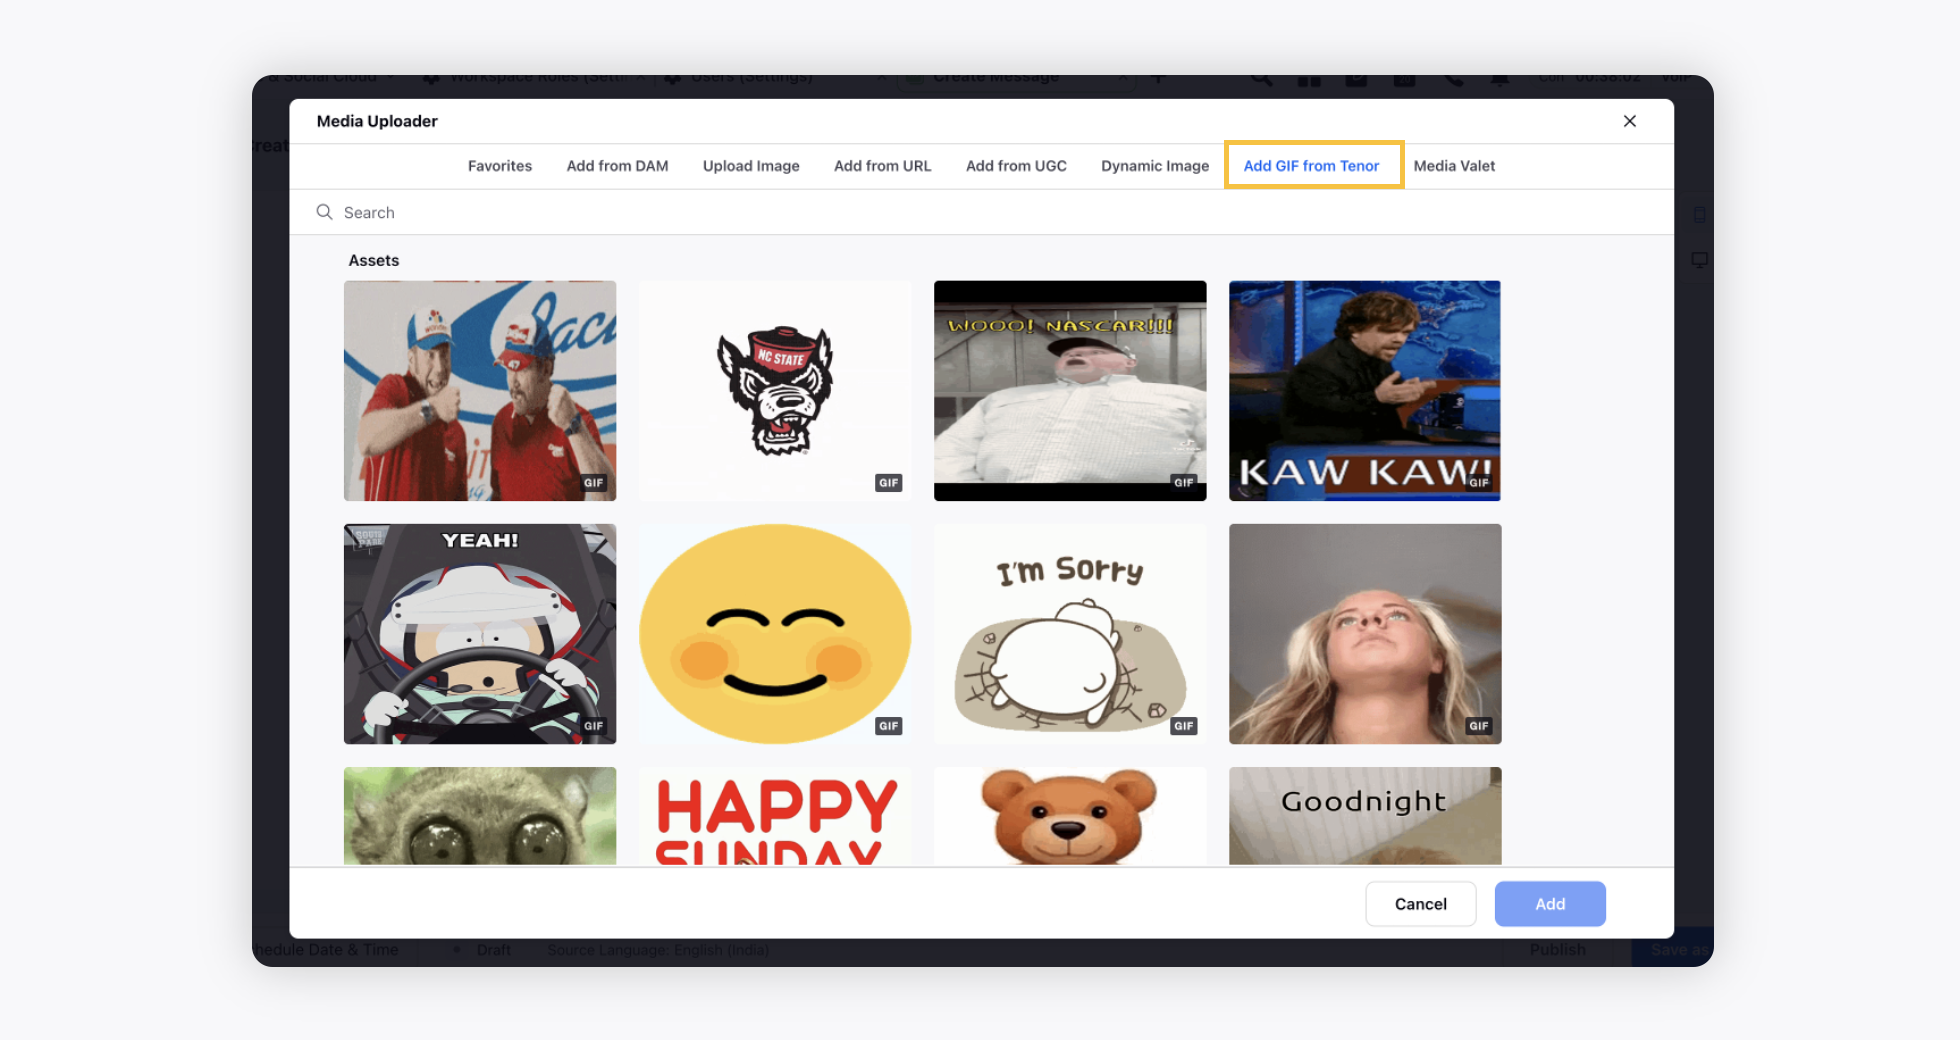
Click Add in the bottom right corner of the Media Uploader pop-up window.
Next, add other details to your post and select Post in the bottom right to publish it on the selected account immediately.
Channels supported for GIFs
# | Social Channel Name |
1 | |
2 | Google RBM |
3 | |
4 | |
5 | LinkedIn Profile and LinkedIn Company |
6 | Sina Weibo |
7 | WordPress |
8 | Tumblr |