Amplify with Advocacy by sending brand posts directly to Advocacy
Updated
Sprinklr allows Admins to send brand posts directly to Advocacy, using the Send to Advocacy feature, available in the engagement column. With the help of this capability, admins can selectively choose which post to send to Advocacy, so that the Advocates can boost these posts later.
Note: The supported channels for the Send to Advocacy capability are LinkedIn, X, Facebook, Instagram, and TikTok.
Steps to use Send to Advocacy
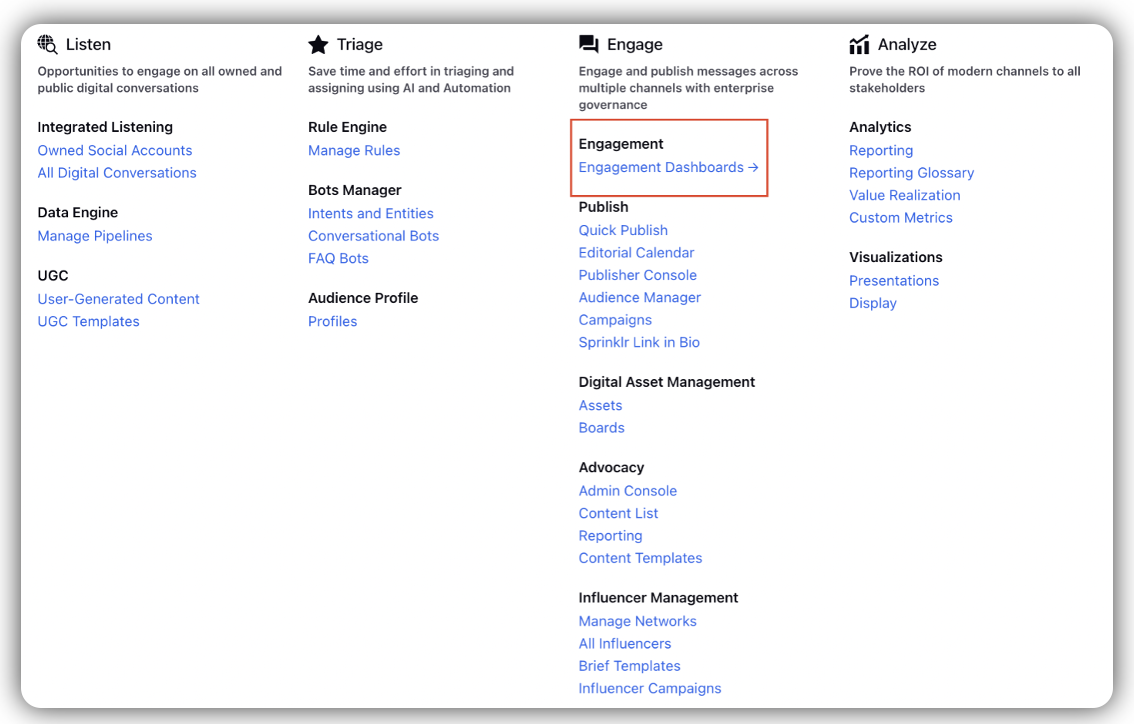
Click the New Tab icon
. Under the Sprinklr Social tab, click Engagement Dashboards within Engage.
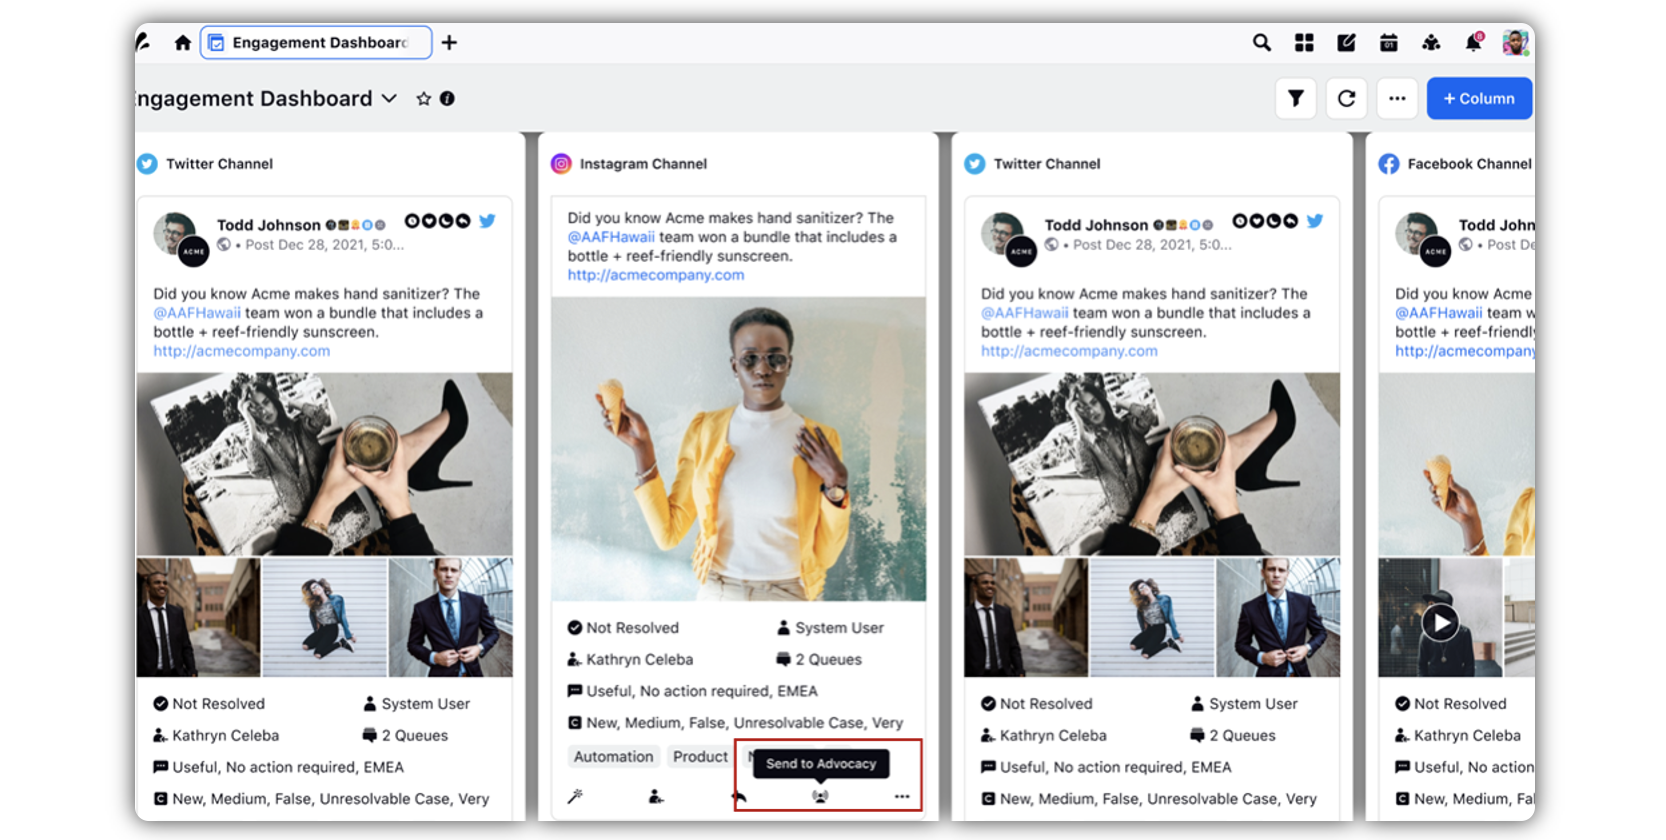
Go to the inbound column for any of the supported channels.
To create an inbound column for channels, see Create a channel specific column.
Hover over the post, and click the Send to Advocacy icon.
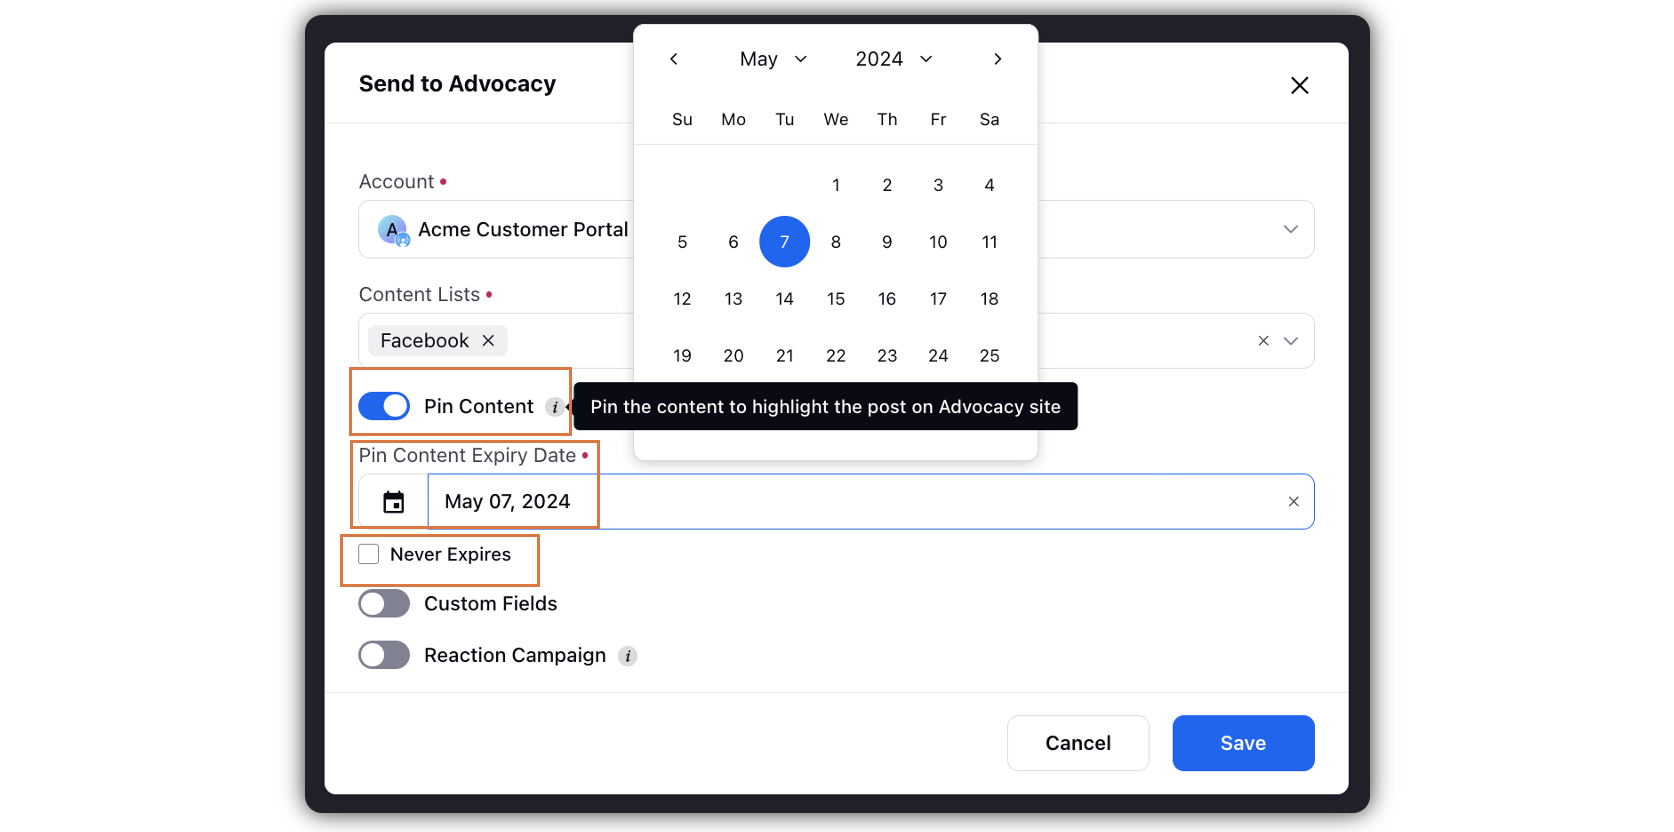
In the Send to Advocacy popup window, select the Account(s) and Content List(s) from the respective dropdowns in the given fields.
Note: The content lists which contain brand post will only be present in the dropdown.

Toggle on Pin Content if you want to highlight the post on the Advocacy site.
Select Pin Content Expiry Date in the given field. Check the Never Expires box if you do not want the pinned content to expire.
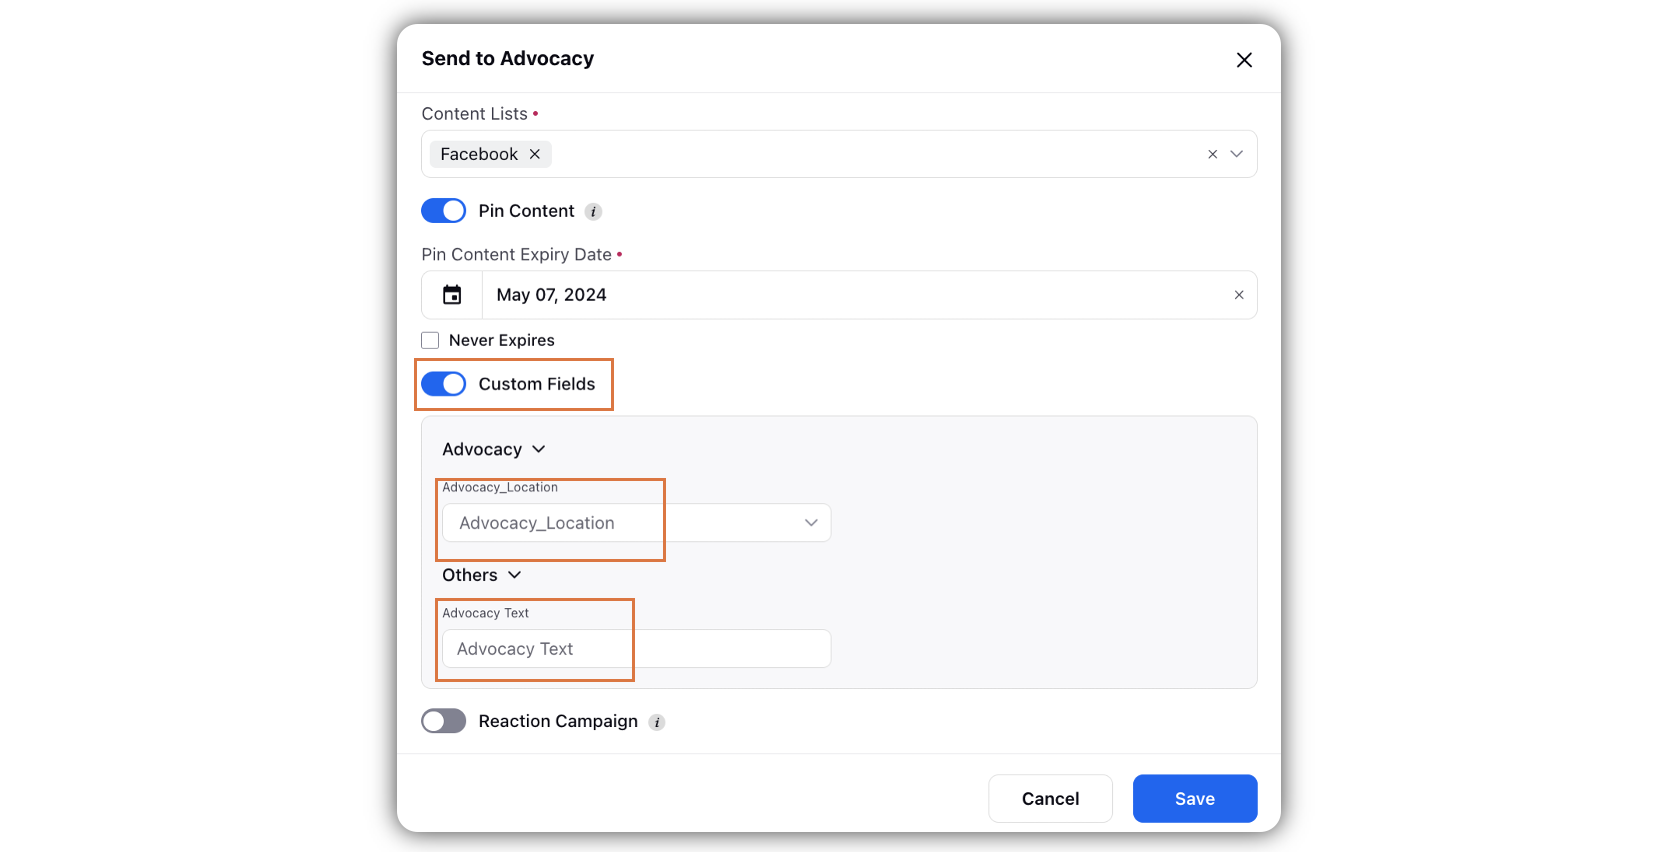
Toggle on Custom Fields to tag the post and target it to required users.
Note: For Custom Fields to be visible in this popup window, the 'Community User' option must be selected within the asset field for the Custom Field, along with either the 'Outbound Message' or 'Message' assets.
Toggle on Reaction Campaign to initiate the Reaction Campaign. To learn more about reaction campaign, see Drive Engagement through Reaction Campaigns.
Note: Advocates will receive a popup on the advocacy site requesting them to like the post and providing an option to automatically like brand posts in subsequent campaigns. Users will receive a popup on the advocacy site requesting them to natively like the post and providing an option to automatically like brand posts in subsequent campaigns.
Enter Name and Description in the given fields, and select Target Audience from the given dropdown.
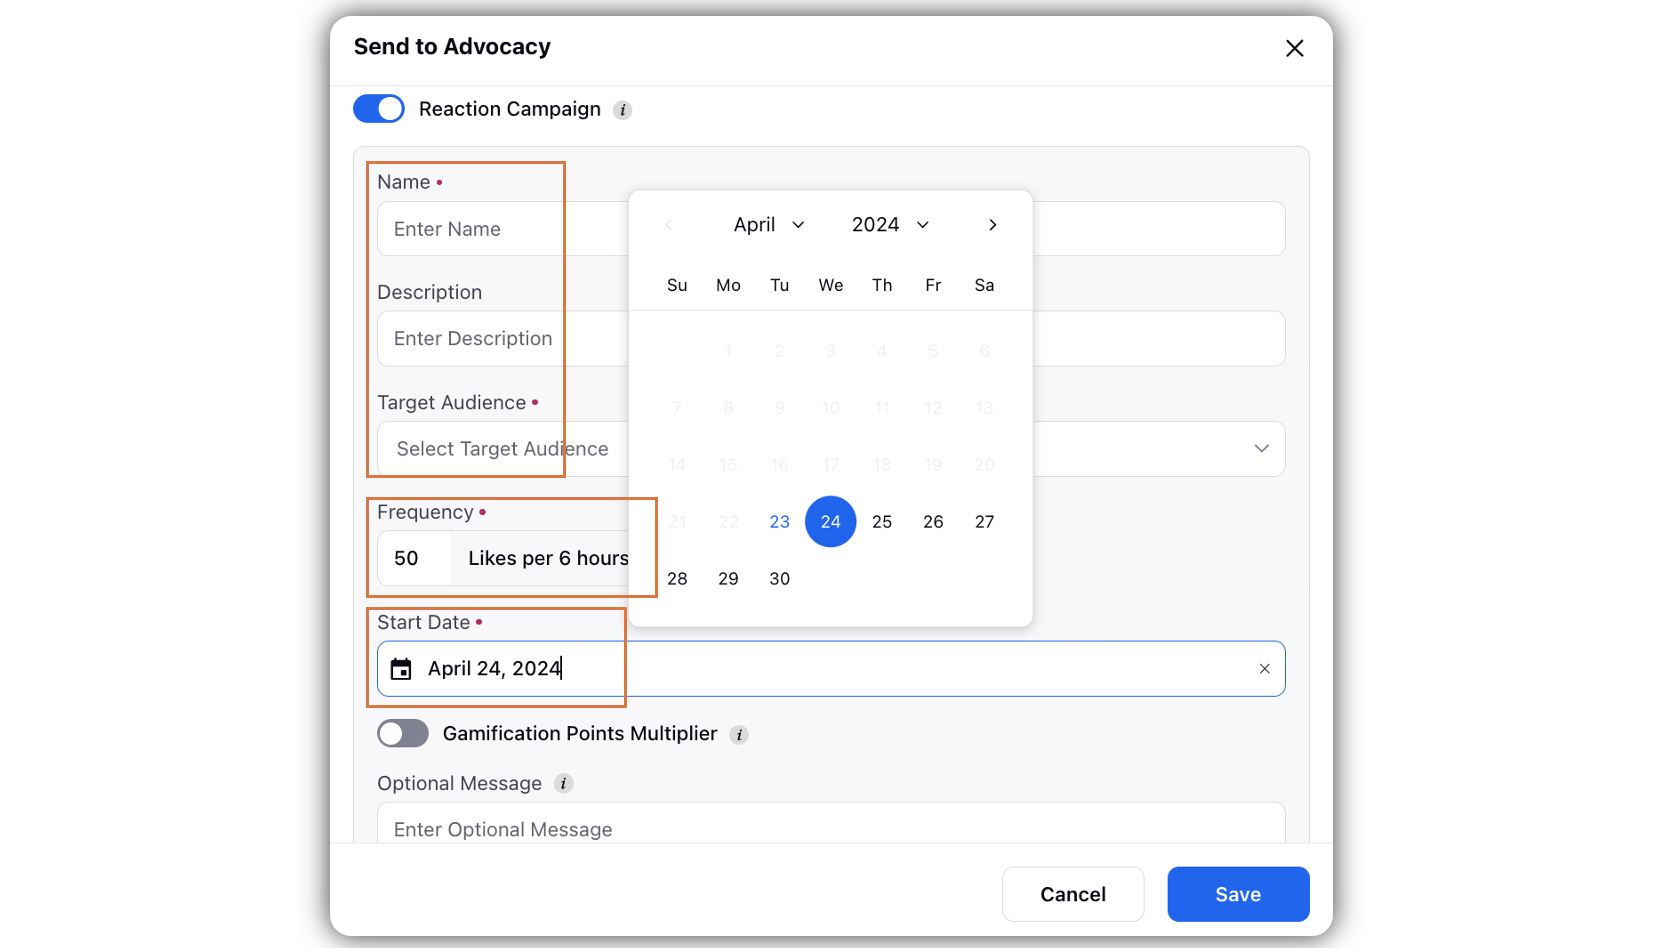
Under Frequency, set the preferred frequency by selecting the values accordingly.
Select a Start Date in the given field.
Toggle on Gamification Points Multiplier, if you want to make this a part of Gamification for the Advocates.
Select the value under Multiplied By.
Under Optionsal Message, enter a message to the advocate. However, as the fields name suggests, it is optional.

Click Save in the bottom right corner, to send the post to Advocacy site.
Note: When users try to resend the same post which has been already sent to the Advocacy site, or share the post in the same content list, they will be shown a warning, informing that the post is already present in that content list in the Advocacy site. However, this warning is not a blocker; the user can ignore the warning and continue to reshare the post.