Create an Advocacy Post
Updated
Advocacy posts can be created with the help of either Sprinklr Quick Publisher or the Site Admin Publisher. You can use the Publisher to publish different types of Advocacy content. For example,
Link Type Post
Image Type Post
Video Type Post
Suggest Type Post
Announcement
Threads
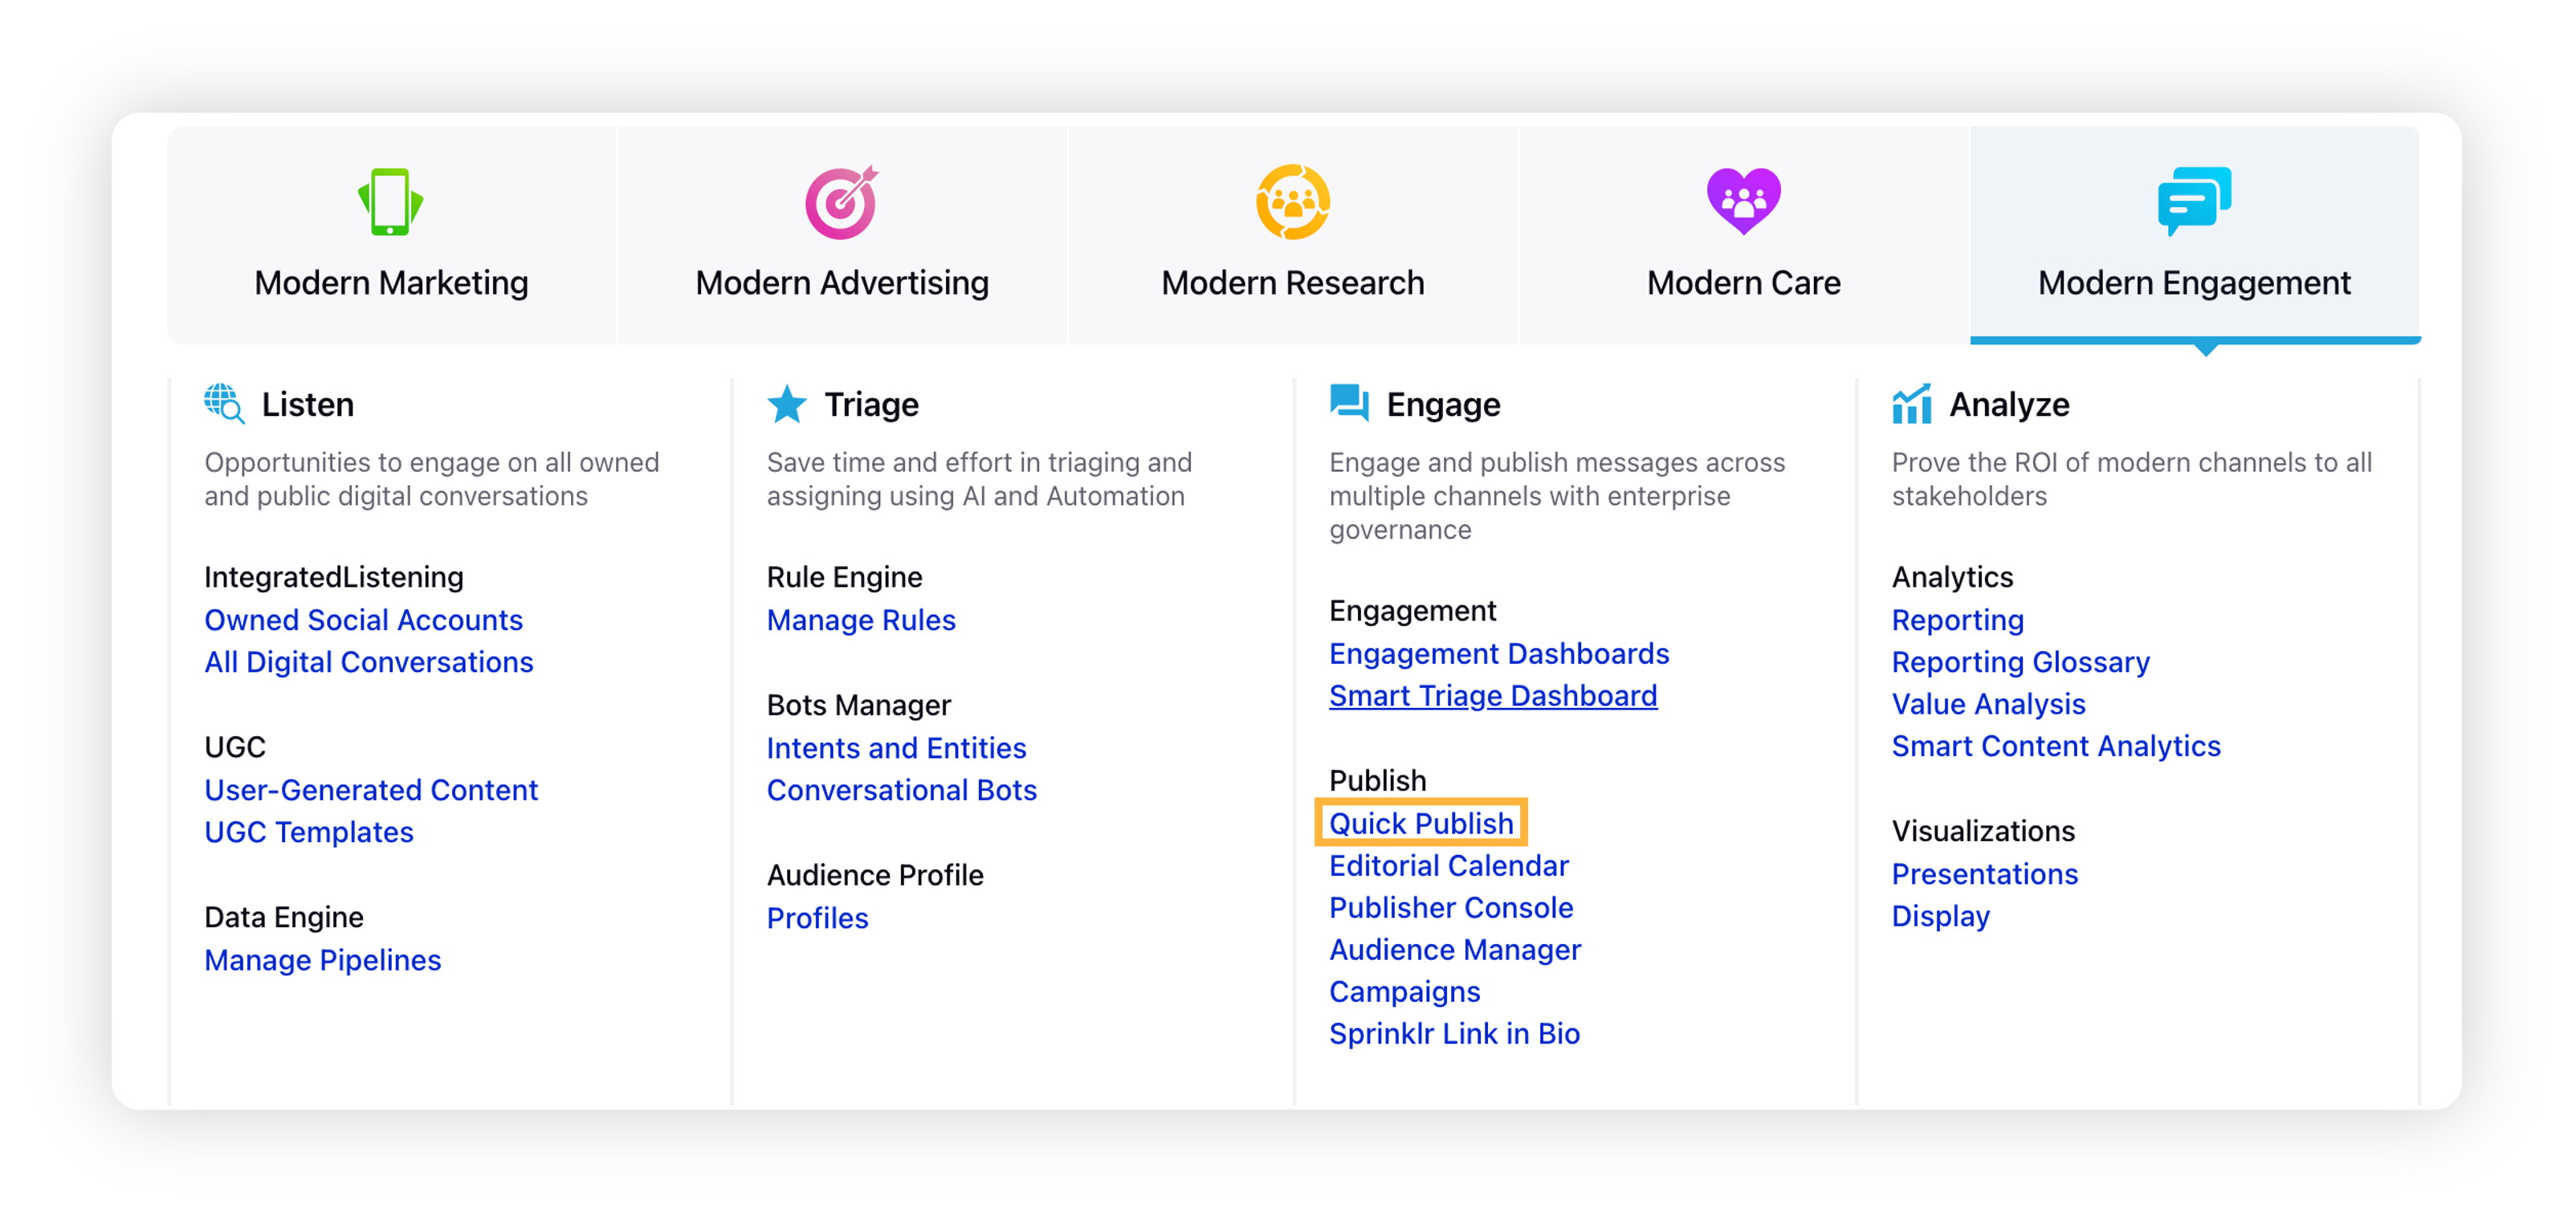
In this article, we will cover the Sprinklr Quick Publisher which allows admins to create different type of Advocacy posts. Navigate to the On-Site Admin section to learn about On-Site Admin Publisher.
Steps to Create an Advocacy Post
Click the New Tab icon
. Under the Sprinklr Social tab, click Quick Publish within Engage. You can also publish through the publishing option available directly on Advocacy sites.
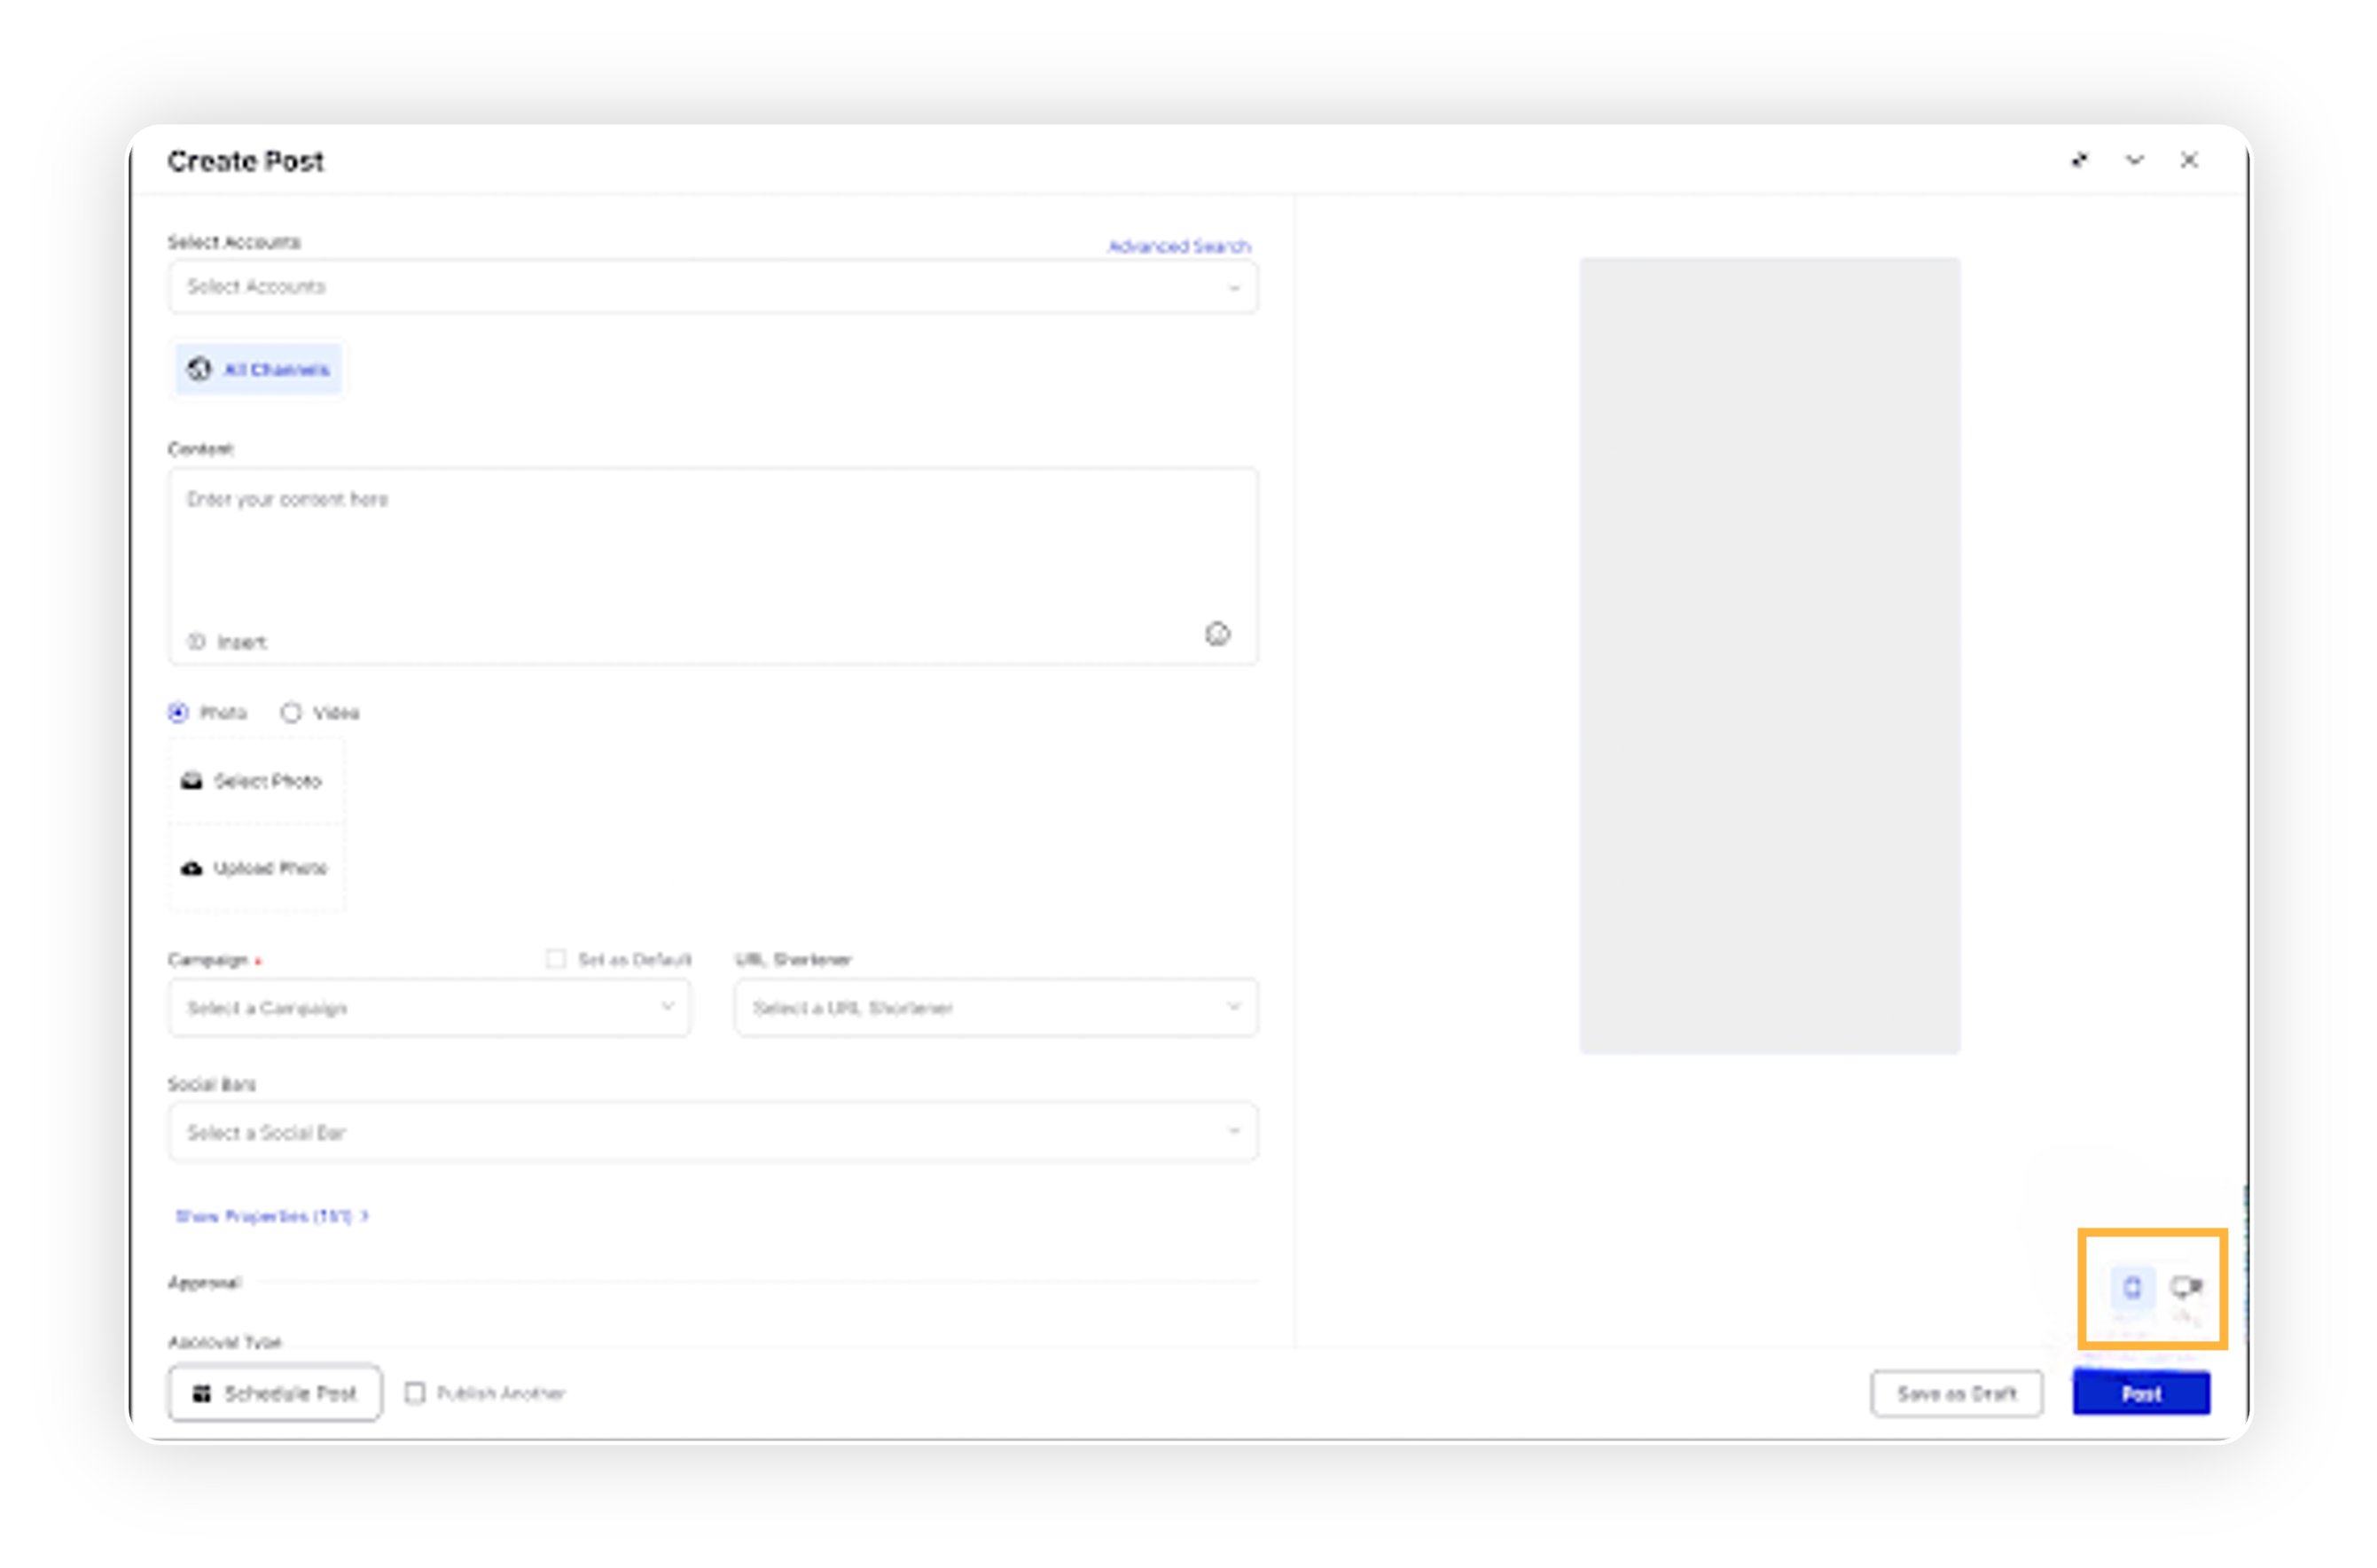
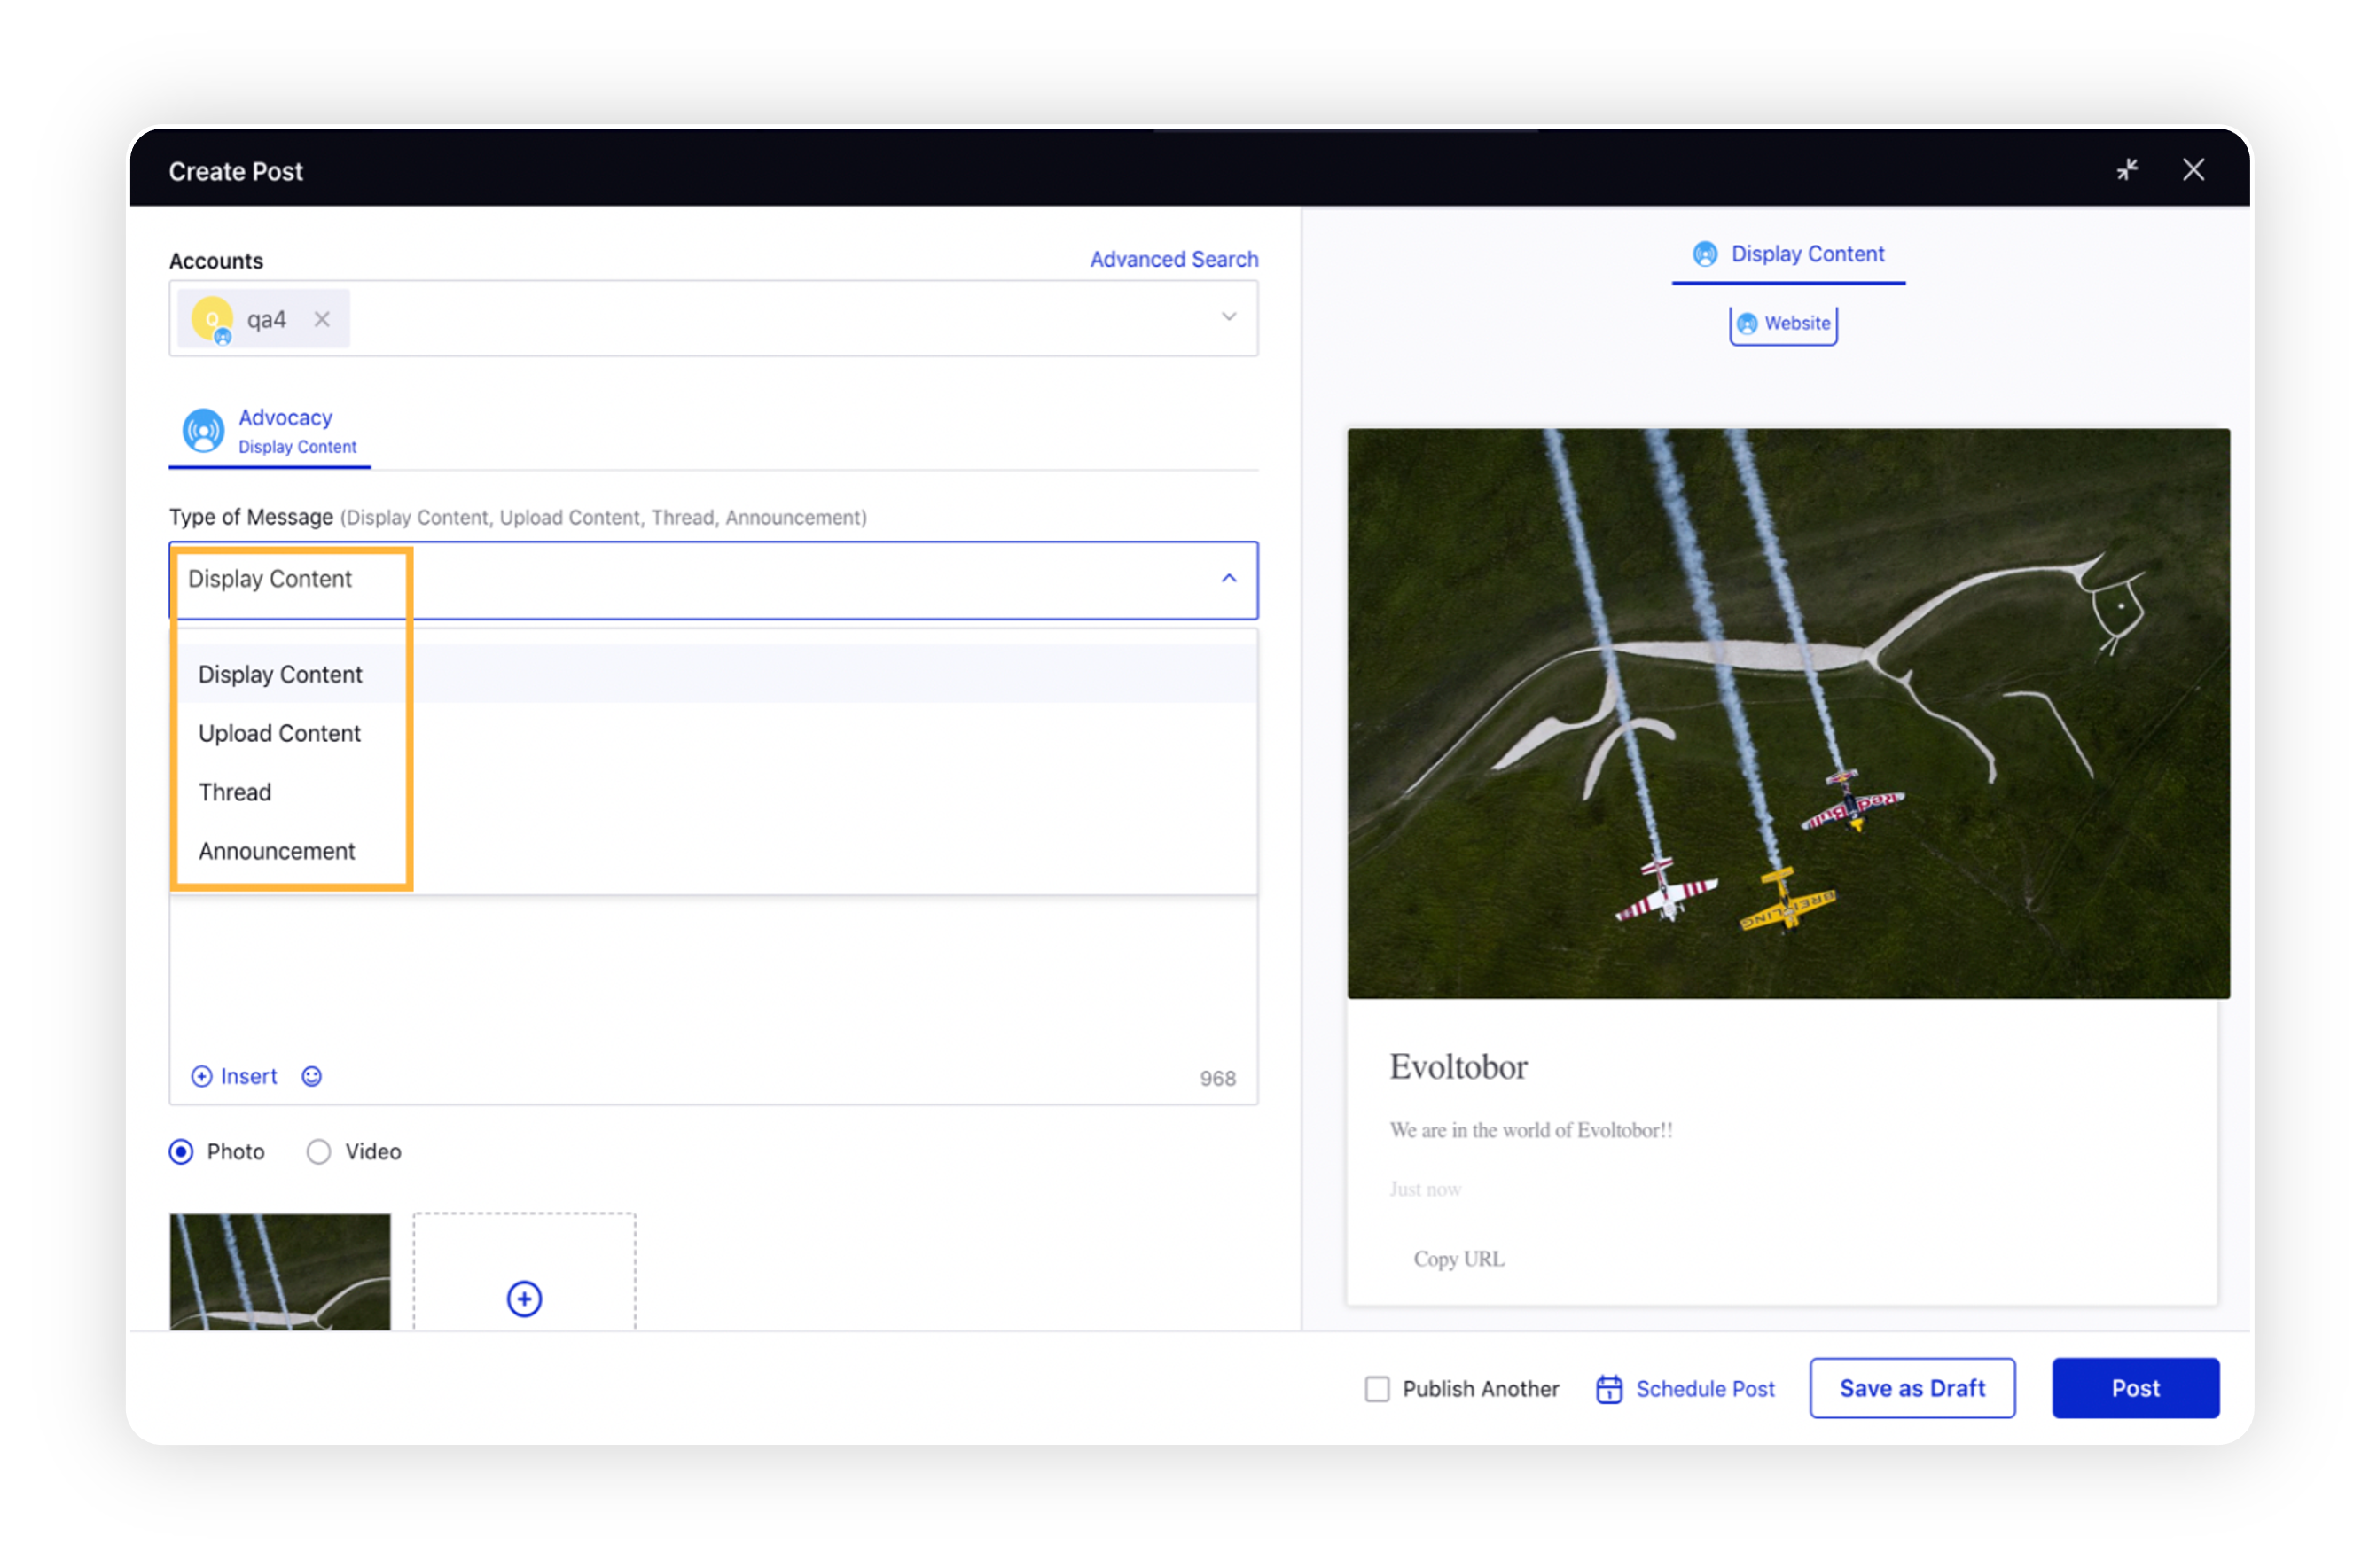
On the Create Post window, search and select the required Advocacy account(s) in the Accounts field. You can also use Advanced Search to narrow your searches by a series of different filters.
The preview of the post will be enabled in the right pane. This will allow viewing a preview of how your post will appear on the Advocacy site.
Select the Type of Message you want to publish from the drop-down menu.
Based on the selected message type, the field name for post content will vary. Enter description or content or message in the given field. You can tag or @mention accounts (for LinkedIn, Company accounts as well as Profiles who have connected their LinkedIn accounts to Advocacy can be tagged or @mentioned) in your posts. Type "@" and then begin typing an account name in the box. You’ll then see a drop-down list of potential accounts you can mention. Select the account you want from the list and continue typing your message.
Select a campaign from the Campaign drop-down menu to associate your post with. You can also set your campaign as default by clicking Set as Default.
You can also select an optional feature of Sub-campaign from the sub-campaign drop down menu to associate your post with.
Select Tags and Social Bars from the drop-down menu respectively.
You can select URL Shortener to shorten every link that you paste in your message.
Apply Properties to the post.
Under the Approval section, set an Approval Type for your post. You can also add an Approval Note.
Click Post in the bottom right corner to publish the post on the selected Advocacy account immediately. You can save the post as draft by clicking on Save as Draft.
You can also schedule your post for a future date and time by clicking the
Schedule Post in the bottom right corner. Click Apply to save your changes.
To continue publishing the post, check the given Publish Another box at the bottom.
Best practices
As a best practice, please ensure the following:
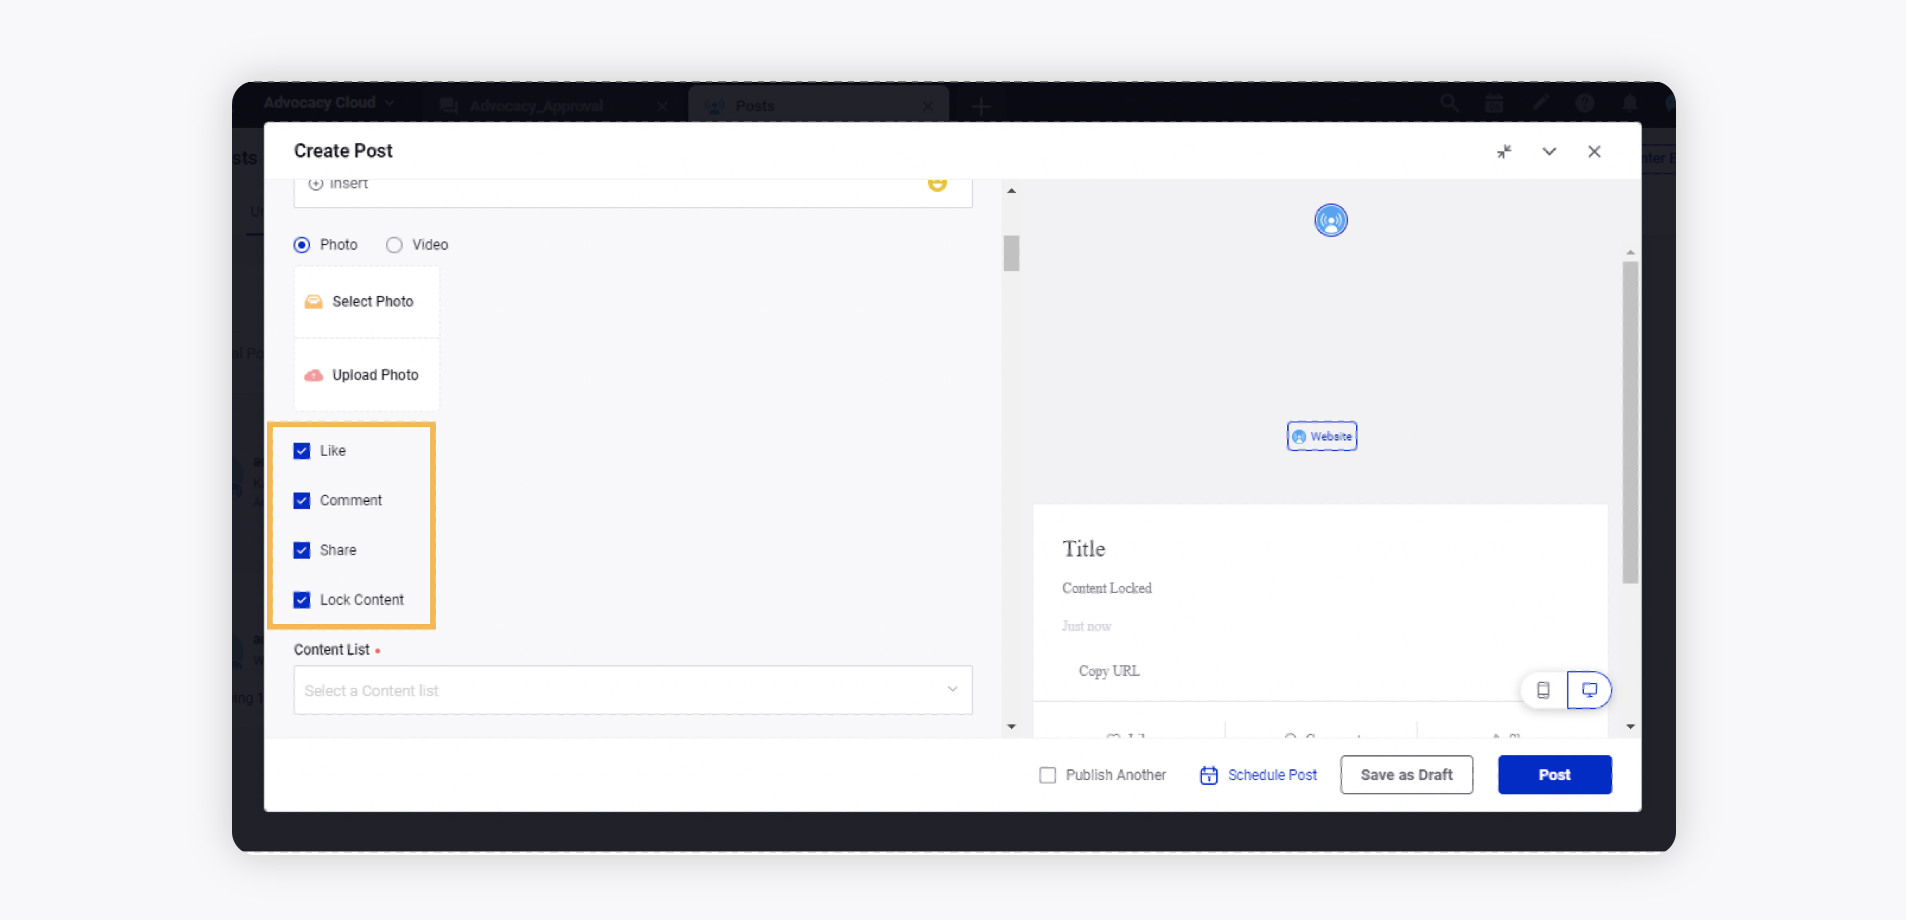
With the share options under the Message box, allow users to like, share, or comment on the content within the network for maximum reach.
Write a caption for the post to engage advocates.