Content Management Using Engagement Dashboard (Advocacy)
Updated
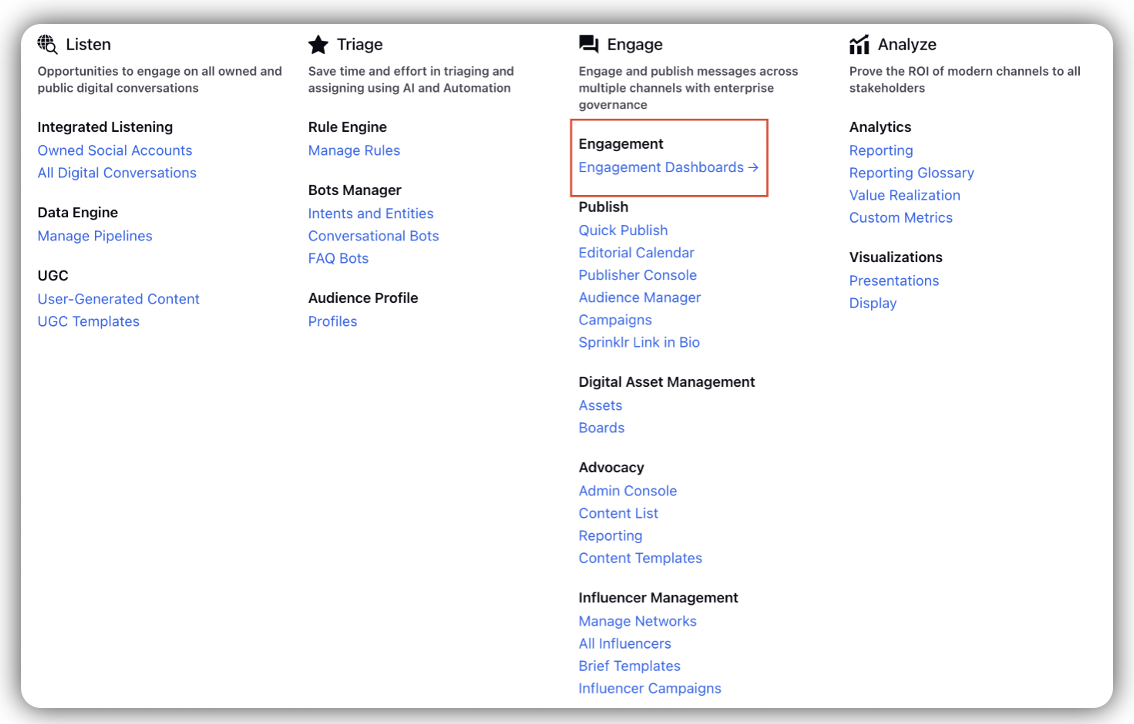
Engagement within Sprinklr provides a way to enhance content approval and publishing using the Engagement dashboard. Engagement Dashboards allow you to create customized channel dashboards in which messages can be viewed, acted upon, engaged with, and assigned. From the Engagement Dashboards, your team can view and act on messages in columns custom-configured to display the content they need to be able to see and act upon.
Importance of Engagement Dashboards
Flexible Workflow Options.
The ability to custom-configure Dashboards to your preferred view.
The option to export column contents to Excel spreadsheet.
The ability to search within an Engagement column by keyword, user, or message tag.
Bulk actions to be taken on multiple messages across multiple columns.
Third-pane actions containing message and profile information, all in a single location.
Steps to Access the Content Management Dashboard
Access the Engagement Dashboards in Sprinklr Social.

Create a dashboard and assign it a name.
Click Add Column in the top right corner to add a new column.
Select Advocacy as the data source.
Select Messages and assign a name to the column. Specify the desired advocacy account name.
The column contains all the messages be it display content, upload content, threads, comments on threads, user suggested content or user shared content.
Select the required category from which you want to see the messages.
Select the content lists if you want to see the posts from a particular list.
Select the Expiry Status or select the author or UGC author if required.
Admins will now be able to apply a date range filter on engagement column for published posts in Advocacy using the Date Range field.
Sorting and Filtering on the Engagement Columns:
Sorting: Admin will be able to sort the posts in the Engagement column based on “Created Time” and “Total Engagement”. “Created Time”, will sort the posts based on the time when it was created and with “Total Engagement” the posts can be sorted based on total engagement on the published posts.
Filtering: Admins can filter the content of the engagement columns using standard filters or custom fields. The standard filters being:
Author
Account
Category
Community User
Content List
Actions on the Engagement Columns:
Apply Macros: Admins can apply macros to the content directly from the detailed third pane or bulk apply macros to the posts.
Change message properties: Admins can change bulk message properties or for a particular post
Details and Editing: Admins can double-click on a post's content to access details and edit it. Additionally, custom properties can be added.
Move Content Between Lists: Admins have the flexibility to shift content from one content list to another.
Expiry Settings: Expiry dates can be set for content, preventing it from being visible to advocates after a specified time. Admins can set expiry for bulk content if needed.
Delete the post: Admins can bulk delete the posts using the engagement columns.
Approval Workflow for the Advocacy Post:
Approval workflows in Sprinklr are designed to set up a process for reviewing and approving content before it is published.
If the approval workflow goes through the queue:
Add a new column by clicking Add column.
Within the Engagement Dashboard, select Outbound as the data source.
Select Approval Queue and assign a name to the column.
Specify the desired advocacy account name and channel as Advocacy.
Select the required approval queues.
Admins can bulk approve/ reject the posts or can do it individually for each post once the column is created.
If the approval workflow is targeted to a particular user:
Add a new column by clicking Add column.
Within the Engagement Dashboard, select Outbound as the data source.
Select Approval Required and assign a name to the column.
Specify the desired advocacy account name and channel as Advocacy.
Select the approval status.
Admins can bulk approve/ reject the posts or can do it individually for each post once the column is created.