Create a Facebook Post
Updated
This article will cover the steps and guidelines on how to create a post to one or more Facebook accounts in Publisher. You can add content, urls, photos, videos, use publish labels, apply macros and custom fields. You can also specify the feed targeting, mention other published Facebook pages, branded Facebook pages for collaboration with other brands.
Steps
Click the Publisher icon
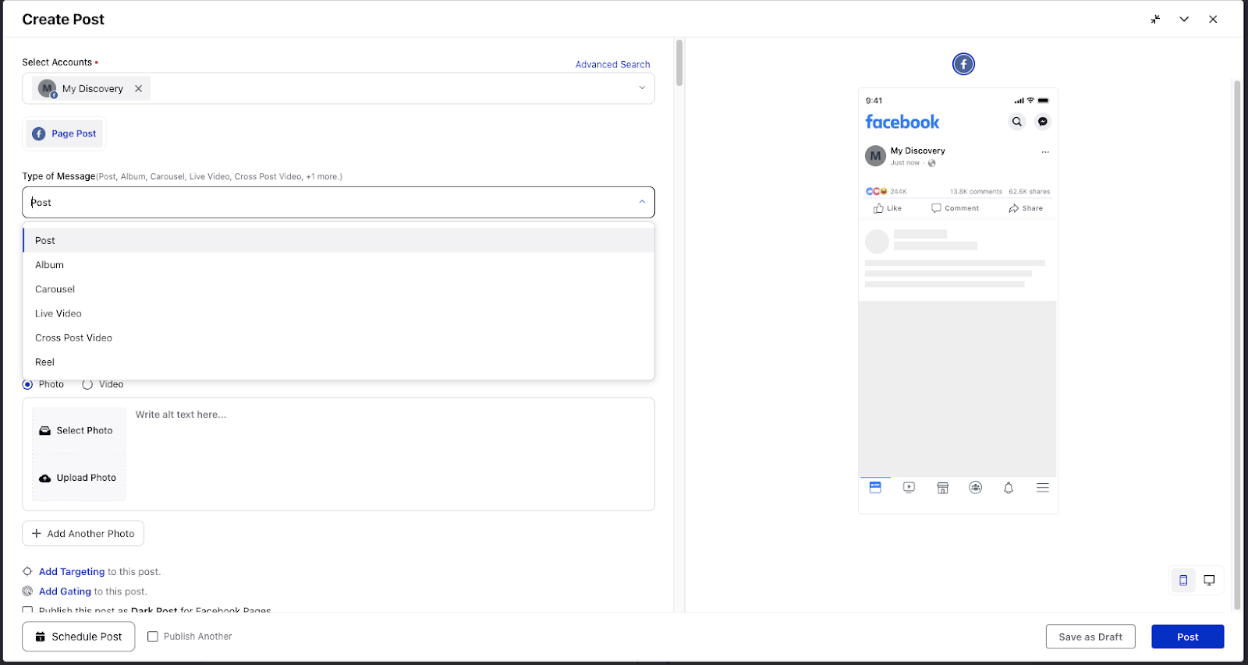
in the top right corner of the top navigation bar and select Create Post. In the Create Post window, select your Facebook Page where you want to publish. You can also use Advanced Search to narrow your searches by a series of different filters.
Select the Type of Message as Post from the drop-down menu.
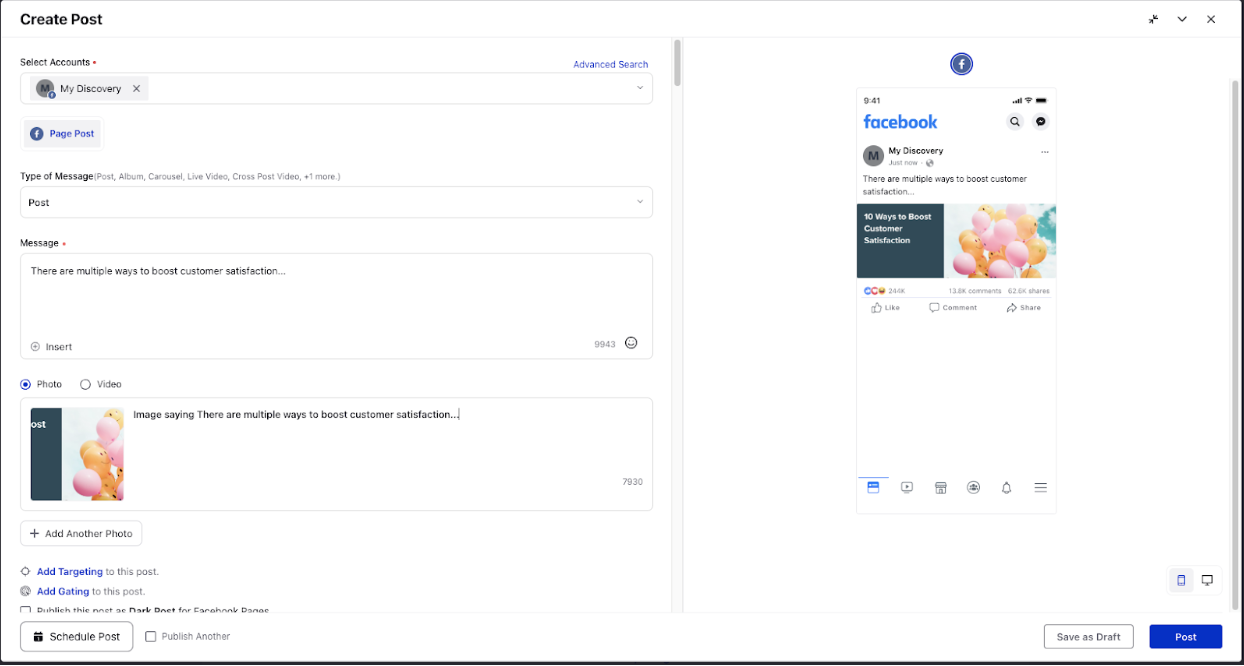
Once you have selected the Type of Message as Post you would like to publish to, enter the content for the post in the Message box. You can tag or @mention Facebook pages in your posts. Type "@" and then begin typing a Facebook Page name in the box. You’ll then see a drop-down list of potential accounts you can mention. Select the page you want from the list and continue typing your message.
You can also add Custom Links, Content Placeholders, previously created Text Templates or YouTube Videos to the post by clicking
Insert icon.
Click the Emoji Picker icon from the Message box to open the emoji menu. Use the icons at the top to browse categories, or search the emoji. Click your chosen emoji, and it'll be added to your message.
Click Photo to add a photo/GIF from the Media Uploader (or Upload Photo to select media to upload from your device) or click Video to add a photo from the Media Uploader (or Upload Video to select media to upload from your device).
To add an alt text for the photo, enter the text in the Write alt text here... message space alongside the photo.
Note :
Keep in mind that this alt text will only be read if someone is using a screen reader to access Facebook.
Alt Text capability is not just available for Facebook Post, but also available for Facebook Album.
You can't add an alt text for Videos.
Under First Comment, enter the comment(may include links, names, promotional content, etc.).

If you wish to add more photos/videos in the post, click
Add Another Media. You can check the preview of the uploaded photos in the right pane.

Click
Add Preferred Audience to this post or
Add Audience Restrictions to this post. For more information, see Targeting & Gating Facebook Posts.
You can also publish the post as a Dark Post or Draft Post and enable Native Scheduling by checking the respective boxes. You can only select one of them at a time, the other two fields will be disabled.
Select a campaign from the Campaign drop-down menu to associate your post with. You can also set your campaign as default by clicking Set as Default. Select a sub-campaign from the Sub-Campaign drop-down menu to associate your post with.
Select Tags and Social Bars from the drop-down menu respectively and apply the respective custom properties to the post.
You can select URL Shortener to shorten every link that you paste in your message. This helps you make the most of the character limit.
Under Approval, set an Approval Type for your post. You can also add an Approval Note.
The preview of the post will render on the right pane. Also, you can click the Preview icon
in the bottom left corner if you have minimized the Create Post window.
Click Post in the bottom right corner to publish the post on the selected Facebook Page immediately. If you are not ready to publish and want to save your post as a draft, click Save as Draft.
You can also schedule your post for a future date and time by clicking the
Schedule Post in the bottom right corner. Select the month, date, and time of publishing. Click Apply to save your changes.
To continue publishing the post, check the given Publish Another box in the bottom.