Cross-Post Live Videos on Facebook Pages
Updated
Sprinklr allows you to cross-post live videos on Facebook pages. If you manage multiple Facebook Pages, you can cross-post live videos across all those pages from Sprinklr. This article will cover the steps to publish a cross-post live video on multiple Facebook Pages.
Prerequisites
Your account must be at least 60 days old.
Your Pages must have at least 100 followers.
You need to have Facebook access or task access to create content.
The primary Facebook pages should have the required permission to cross-post from the secondary Facebook pages.
In order to cross-post Live videos across multiple Facebook Pages, you must be an admin on the other Page(s) you want to cross-post to. Going forward, you'll need to establish a crossposting relationship with another Page. For more information about how to Establish a Cross Posting Relationship, check out How do I allow another Facebook Page to crosspost my Page's videos?
Steps to Cross-Post Live Videos on Facebook Pages
Click the Publisher icon
in the top right and select Create Post.
In the Create Post window, select your Facebook Page where you want to publish. You can also use Advanced Search to narrow your searches by a series of different filters.
Select Live Video as the Type of Message.

Enter the post content under Message. Click the Emoji Picker icon from the Content box to open the emoji menu. Use the icons at the top to browse categories, or search the emoji. Click your chosen emoji, and it'll be added to your description.
Check the Enable Crossposting box.

Under Manage Cross Posting, select the Facebook Pages from the given dropdown.
 Note: In case, within Manage Cross Posting your secondary Facebook Page is not present under the drop-down menu, it is because either you haven't established a crossposting relationship with your secondary Page(s) or your secondary pages are not yet added in Sprinklr.
Enter the Live video title under Video Title.
Below the Video Title, you will find the Stream Key and Stream URL. You must copy it to use it in your live streaming software.
Click
Add Preferred Audience to this post or
Add Audience Restrictions to this post. For more information, see Targeting & Gating Facebook Posts.
You can also publish the post as a Dark Post or Draft Post and enable Native Scheduling by checking the respective boxes. You can only make it one of them at a time, the other two fields will be disabled.
Select a campaign from the Campaign drop-down menu to associate your post with. You can also set your campaign as default by clicking Set as Default. Select a sub-campaign from the Sub-Campaign drop-down menu to associate your post with.
Select Tags and Social Bars from the drop-down menu respectively and apply the respective custom properties to the post.
You can select URL Shortener to shorten every link that you paste in your message. This helps you make the most of the character limit.
Under Approval, set an Approval Type for your post. You can also add an Approval Note.
The preview of the post will render on the right pane. Also, you can click the Preview icon
in the bottom left corner if you have minimized the Create Post window.
Click Post in the bottom right corner to publish the post on the selected Facebook Page immediately. If you are not ready to publish and want to save your post as a draft, click Save as Draft.
You can also schedule your post for a future date and time by clicking the
Schedule Post in the bottom right corner. Select the month, date, and time of publishing. Click Apply to save your changes.
Note: When you schedule Facebook Live posts, an announcement will be published to your Facebook Page alerting your fans of the date and time that you are scheduled to go Live. When ready to go live, access the settings of your live streaming software, and enter the Stream Link and Stream URL generated in step 8.
Begin streaming in your live streaming software. Your stream will appear on the Facebook Page that was selected in Sprinklr.
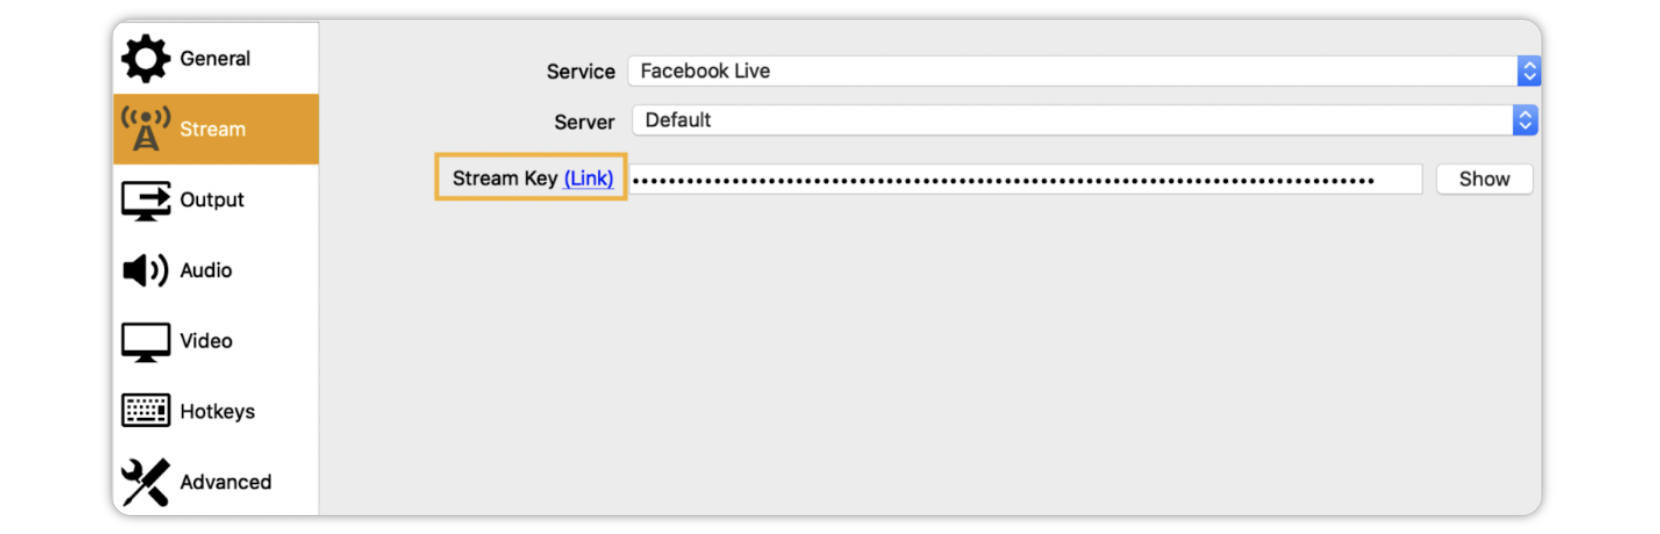
The entry for these assets may vary for different live streaming programs. In Open Broadcaster Software, OBS, for example, this configuration is found in Settings > Stream (shown below).
In the Engagement Dashboards, your Facebook Live video will appear as an outbound post, allowing you to collect reporting data on the engagements of your video.