Create a Column For Instagram Dark Post
Updated
This article tells you how to create an Engagement Column containing dark posts of an Instagram Account. Dark Posts are specifically targeted posts. These posts don't appear on your timeline as organic and boosted posts do but appear as sponsored content on the users' feeds you are specifically targeting.
Steps
In order to be able to monitor and engage with Instagram comments, you'll first need to add an associated Facebook Ads account. In Sprinklr, it's this Facebook Ads Account that will be used to pull in Instagram Dark Posts and the comments on them.
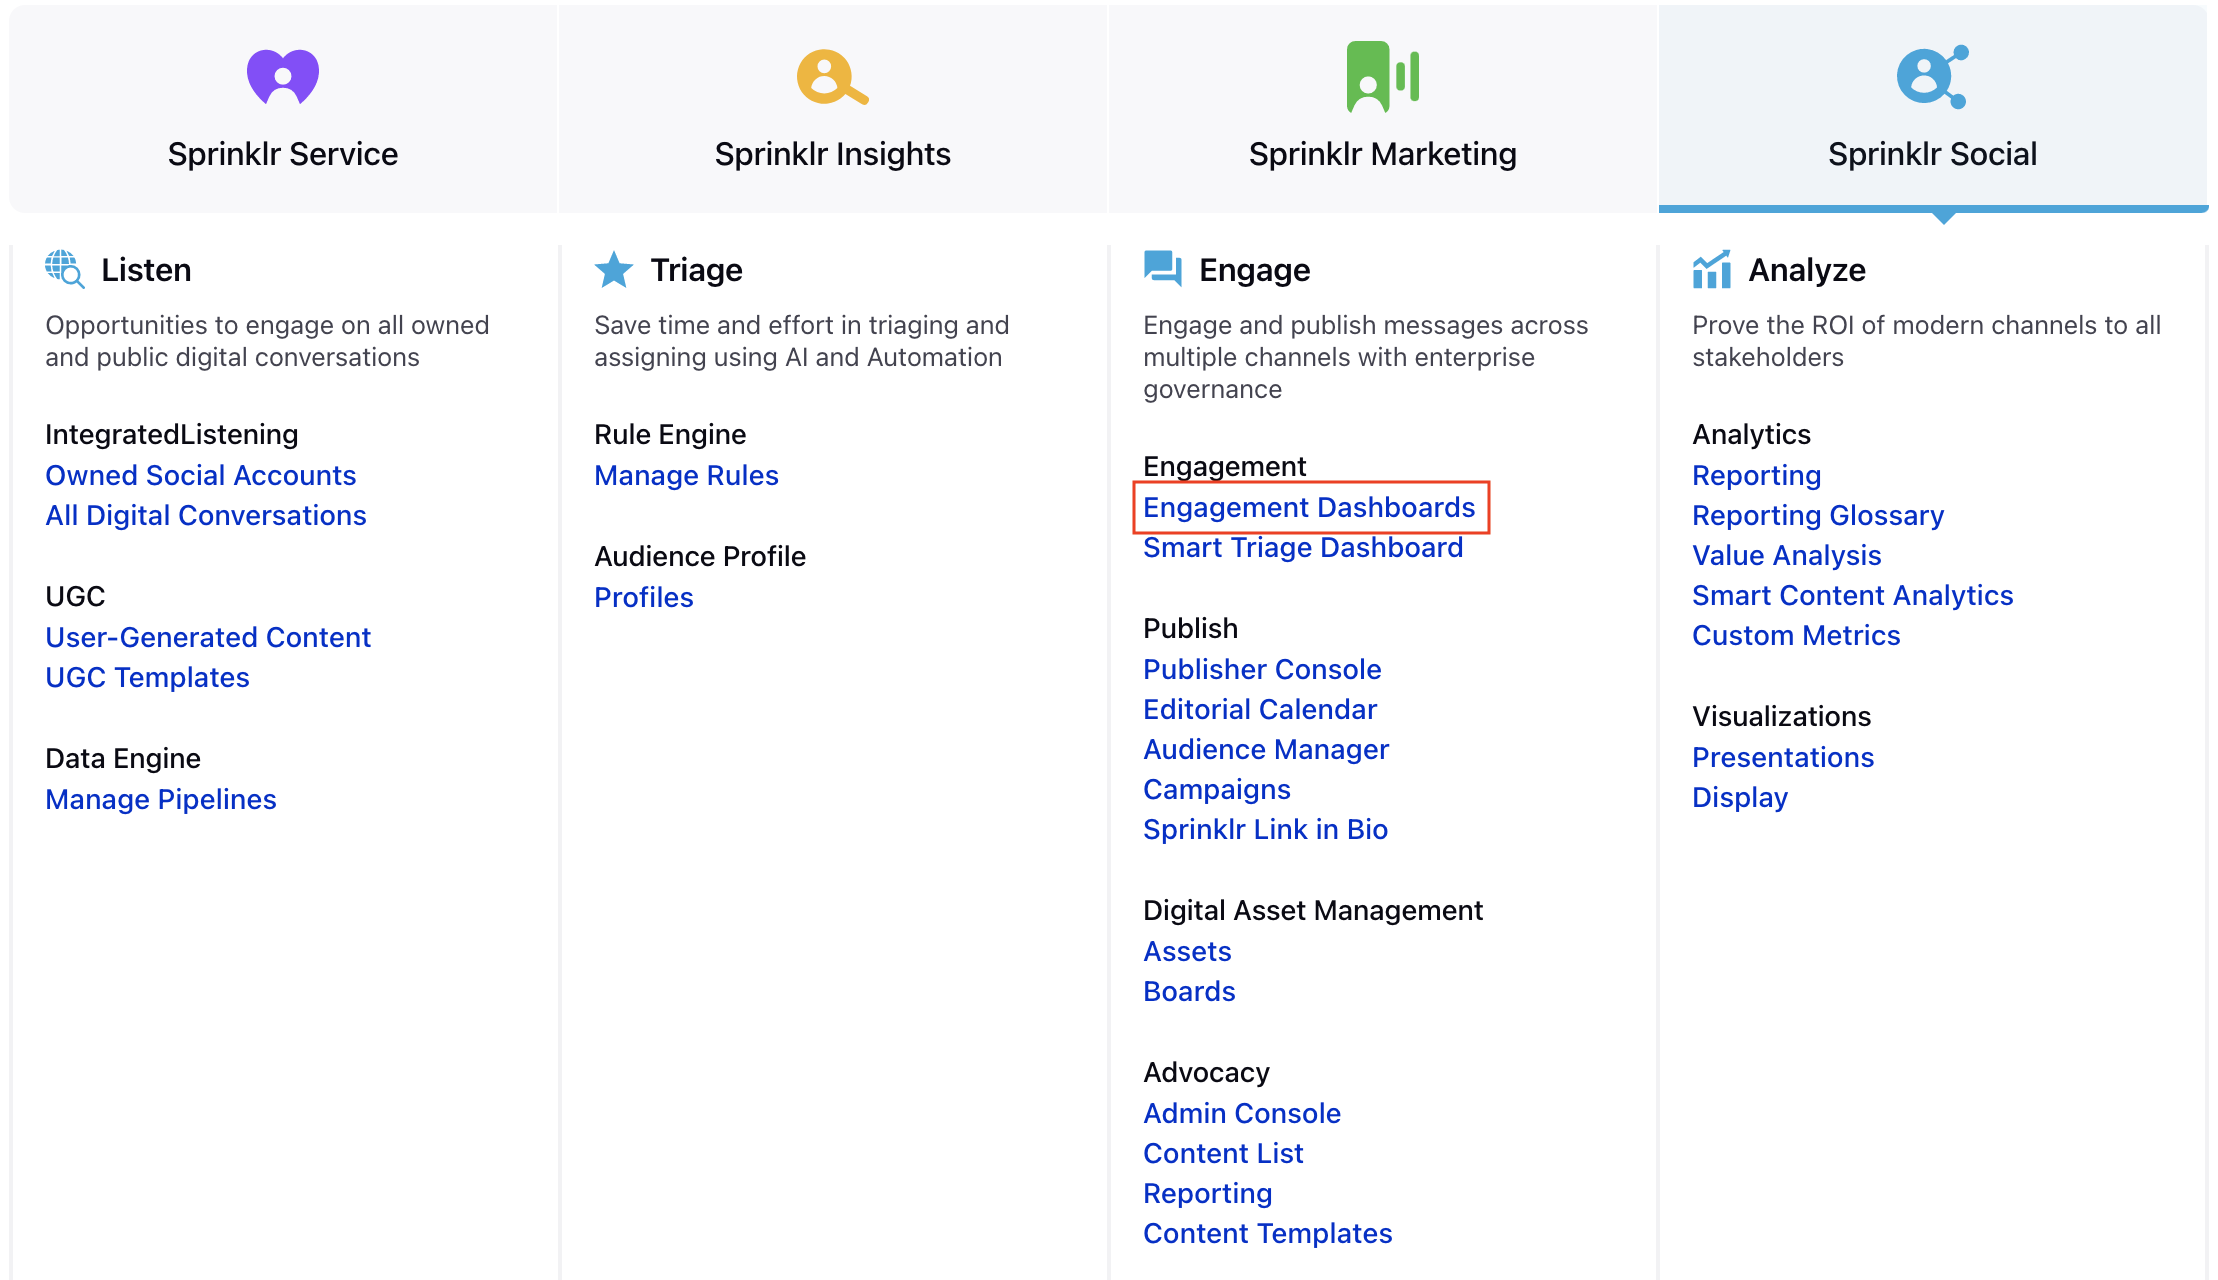
Click on the New Tab icon in Sprinklr. Under the Sprinklr Social tab, click Engagement Dashboards within Engage.
In the Engagement Dashboard, click Add Column in the top right corner to create a new column.
Select Facebook from the Add New Column window. You can search for it in the search bar above
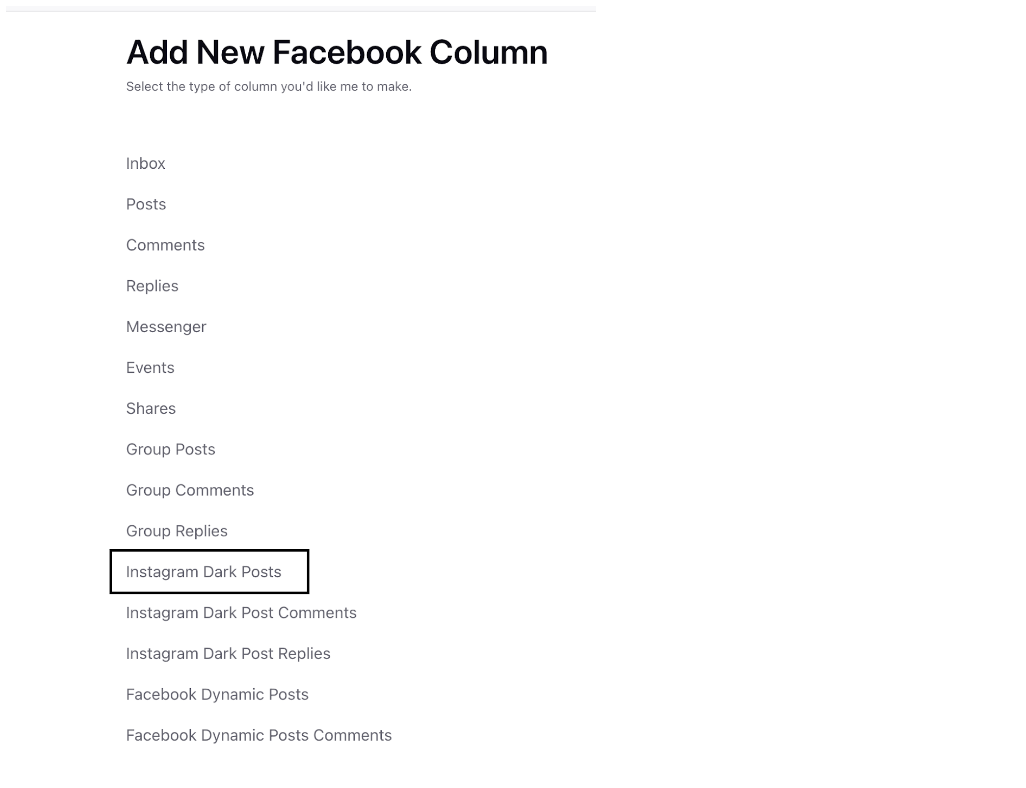
In the Add New Facebook Column, select Instagram Dark Posts as column type to add from the given options.
After selecting the type of column you want to create, enter a Name, Description, and add Accounts per your needs. Provide other Basic Information for your column. The preview of the column will render on the right side of the window. Under Associated Instagram Account, select the desired Instagram Account(s) from the drop-down menu. The Associated Instagram Account field allows you to filter out comments and replies based on Instagram accounts.
Enter Workflow Properties as desired. Workflow properties refer to the properties applied in Sprinklr, either automatically or manually, that determine the message’s workflow status, user assignment, Spam designation, and sentiment.
Provide the Custom properties as desired. Configuring additional properties in an Engagement Dashboard Column, you can specify messages to include or exclude based on the properties that have been applied to the message.
After you have provided all the details for your column, click Create Column in the bottom right corner to create a new column.