Create and Deploy a Trigger-based Journey
Updated
In this article, you will learn how to create and deploy trigger-based Journeys.
Trigger-based Journeys are just like the Journeys on the saved audience, the only difference being that there is no definitive audience segment that you are targeting with the journey. In a Journey with a saved audience, you specify the number of profiles that are going to go through the journey flow, but in case of the trigger-based journeys, a profile goes through the journey flow if a certain condition is met.
What can be the possible triggers for a Trigger-based Journey:
There can two possible triggers for a Trigger-based Journey -
An Audience Update Rule
An Audience Update rule can be set up in Sprinklr which will keep on checking the audience profiles in the system and if some profile’s custom properties are changed and if they qualify certain criteria (set in the conditions of the rule itself), a journey can be triggered. Learn more about setting up such rules here.An API call
You can run automated customer journeys that are triggered by API, based on external events, such as filling up a form by a user on a website, completion of an online purchase, or receiving a message on a social channel. Learn more about them here.
Setting up a Trigger-based Journey
For setting up a Trigger-based Journey in Sprinklr the process is just like creating a conventional journey for a Saved Audience.
The only difference is - you do not need to create a Segment or a Profile List for this.
Create an Asset
Create an asset by choosing the desired template type, for Email, SMS and WhatsApp to be sent to the potential leads in Digital Asset Management.
Create Journey from Journey Facilitator
Strategize and create the journey in the Journey Facilitator using the journey builder and then Deploy it.
Click the New Tab icon. Under the Sprinklr Marketing tab select Marketing section, click Journey Facilitator within Publish
Click Create Journey in the top right corner.
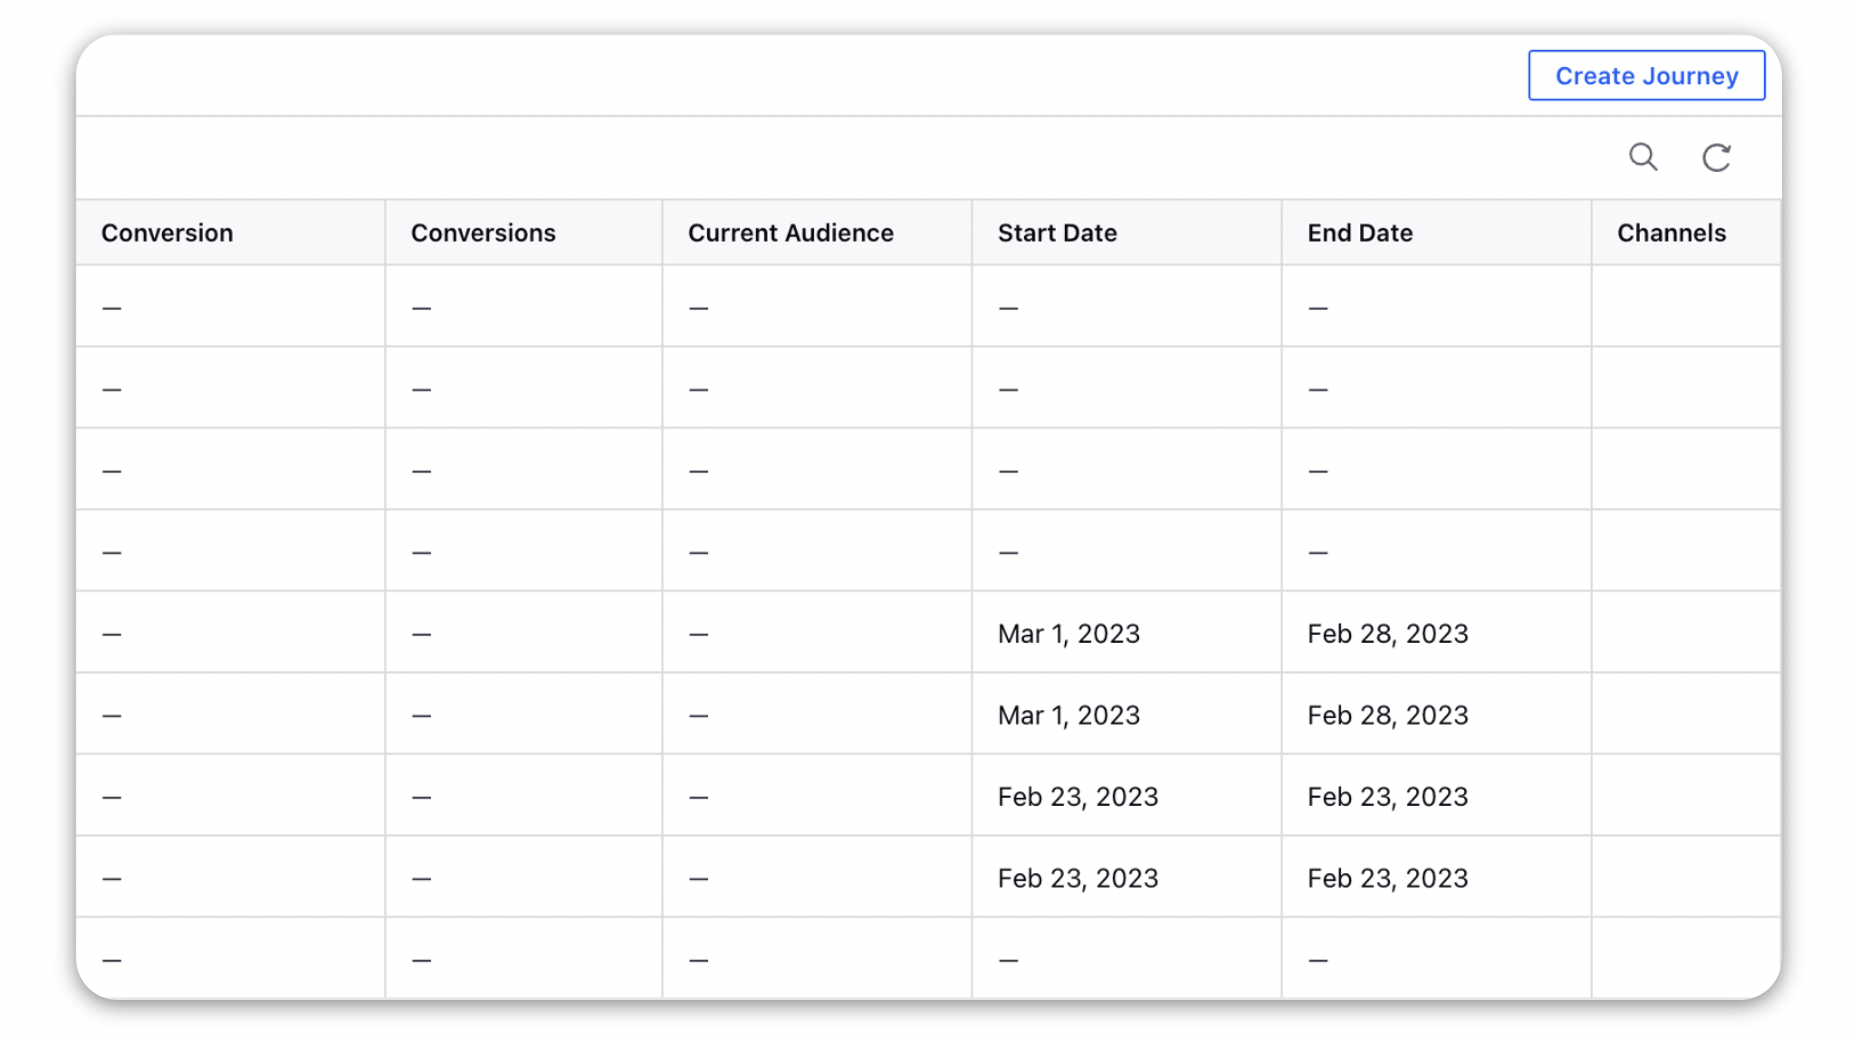
On the Create Journey window, provide basic information such as
Journey Name,
Add to Campaign - Choose a relevant campaign that you already have in Sprinklr or learn how to create a new one here.
Share Settings details - Share the Journey visibility with the relevant users or user groups.
Under the Message Delivery Settings section add a rate limit to be used to send out the messages - for example 500 Per Minute.
Turn ON the toggle switch for Trigger-based rather than selecting a Saved Audience.
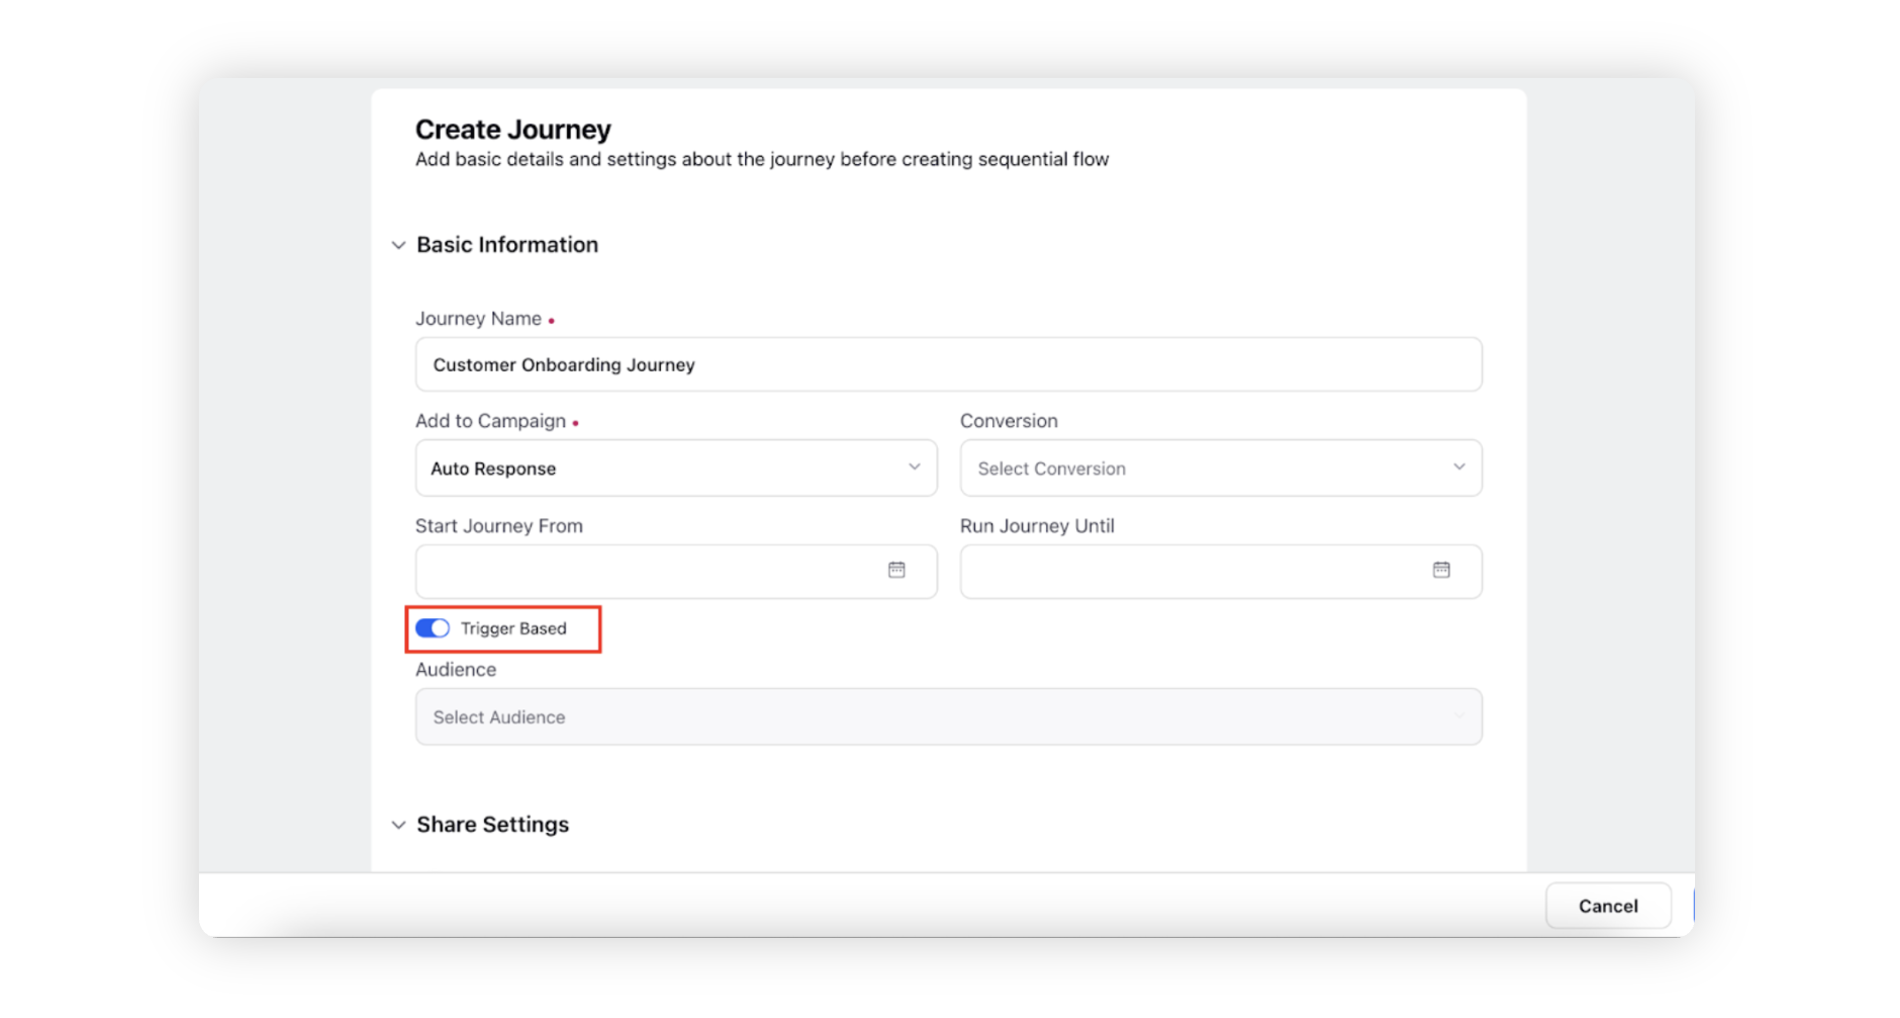
Click Save and proceed at the bottom. You will be redirected to the Journey Builder.
On the Journey Builder window, click on the ‘+’ icon to initiate the journey and choose the action Send Message to be sent to the customer segment that you have chosen in the Audience Profile.
To learn about the other actions in the Journey Builder, click here.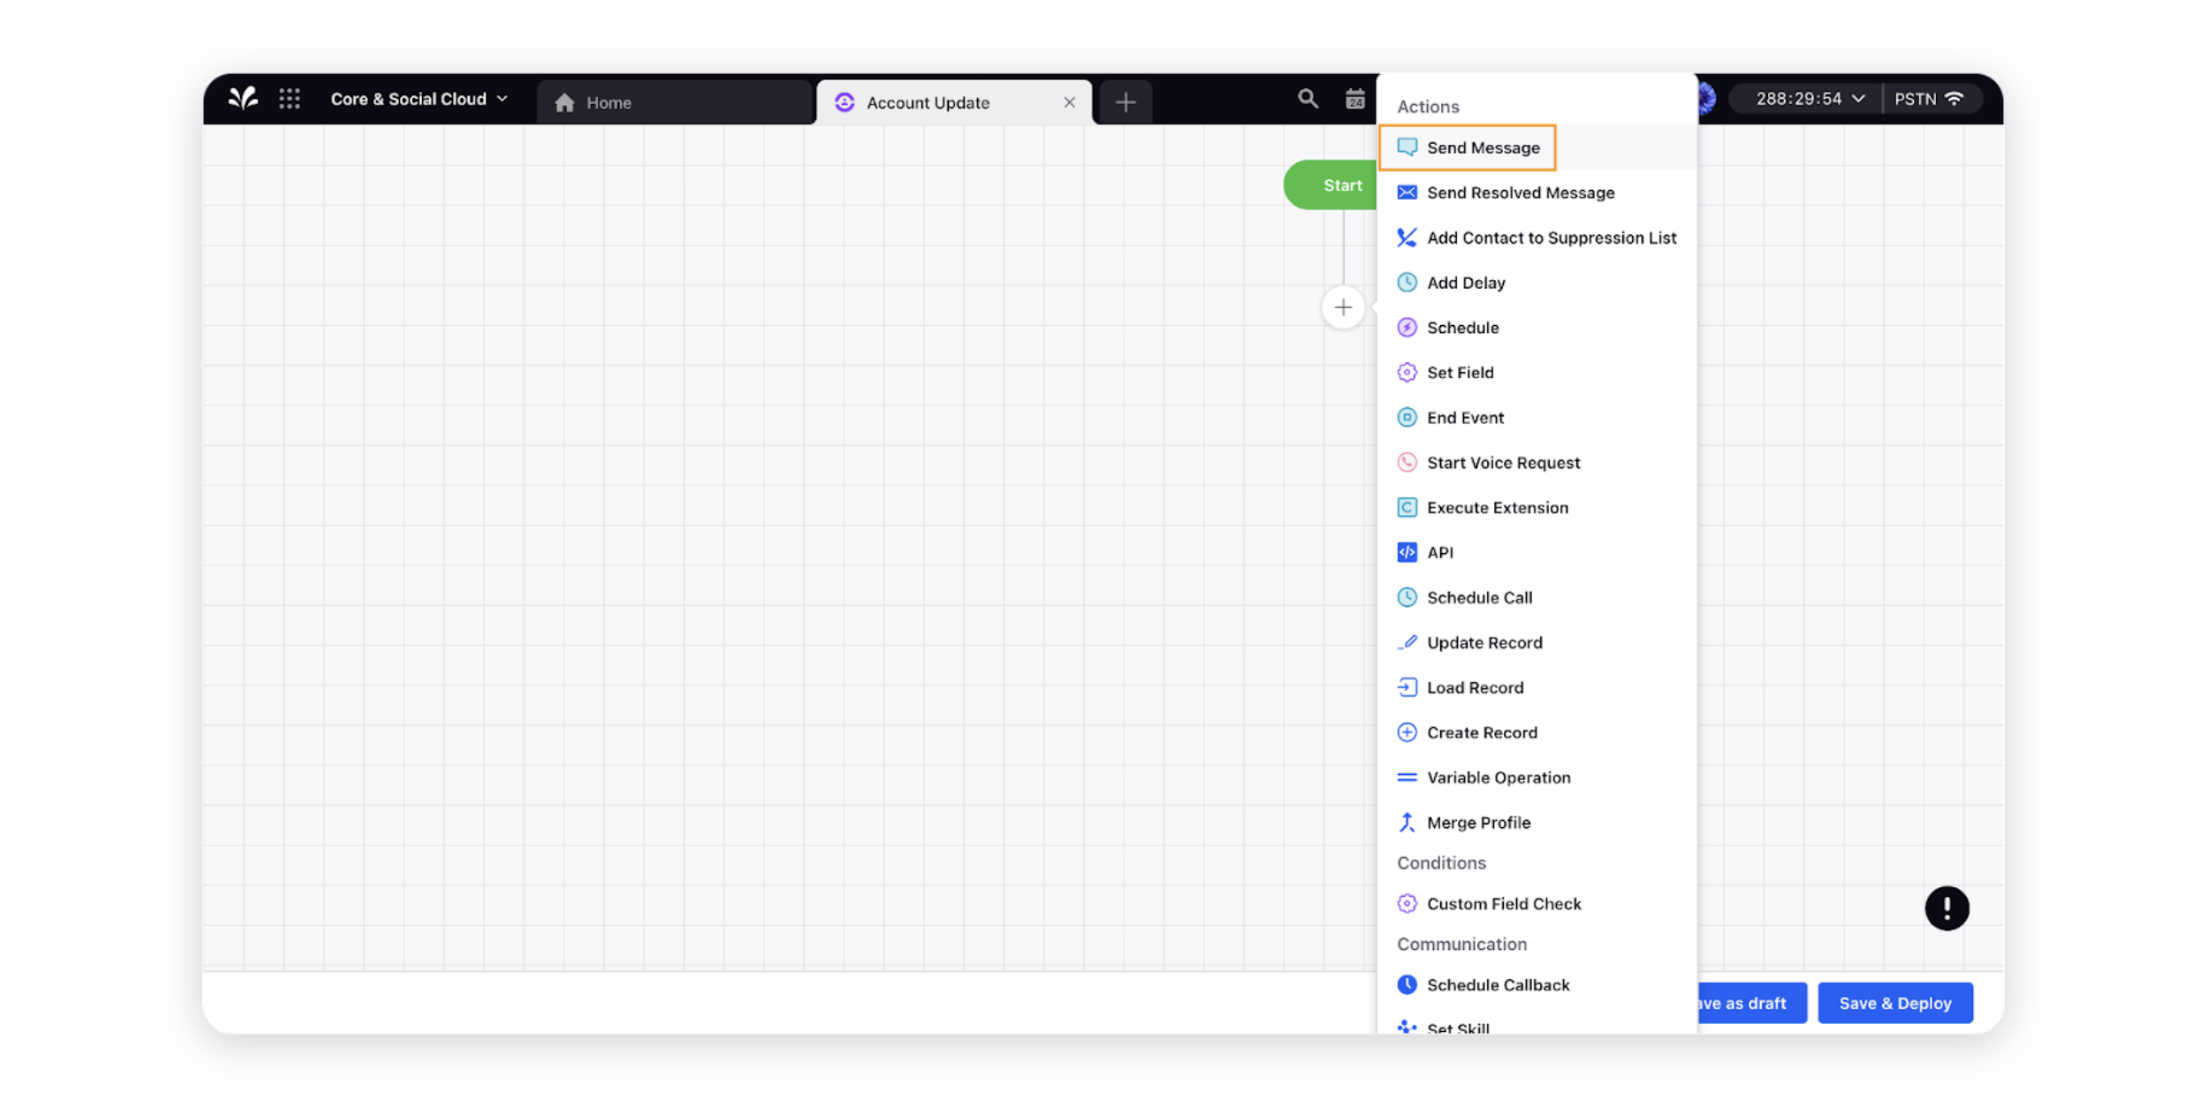
Select the SMS/Email Marketing/HSM Asset created earlier and press Next.
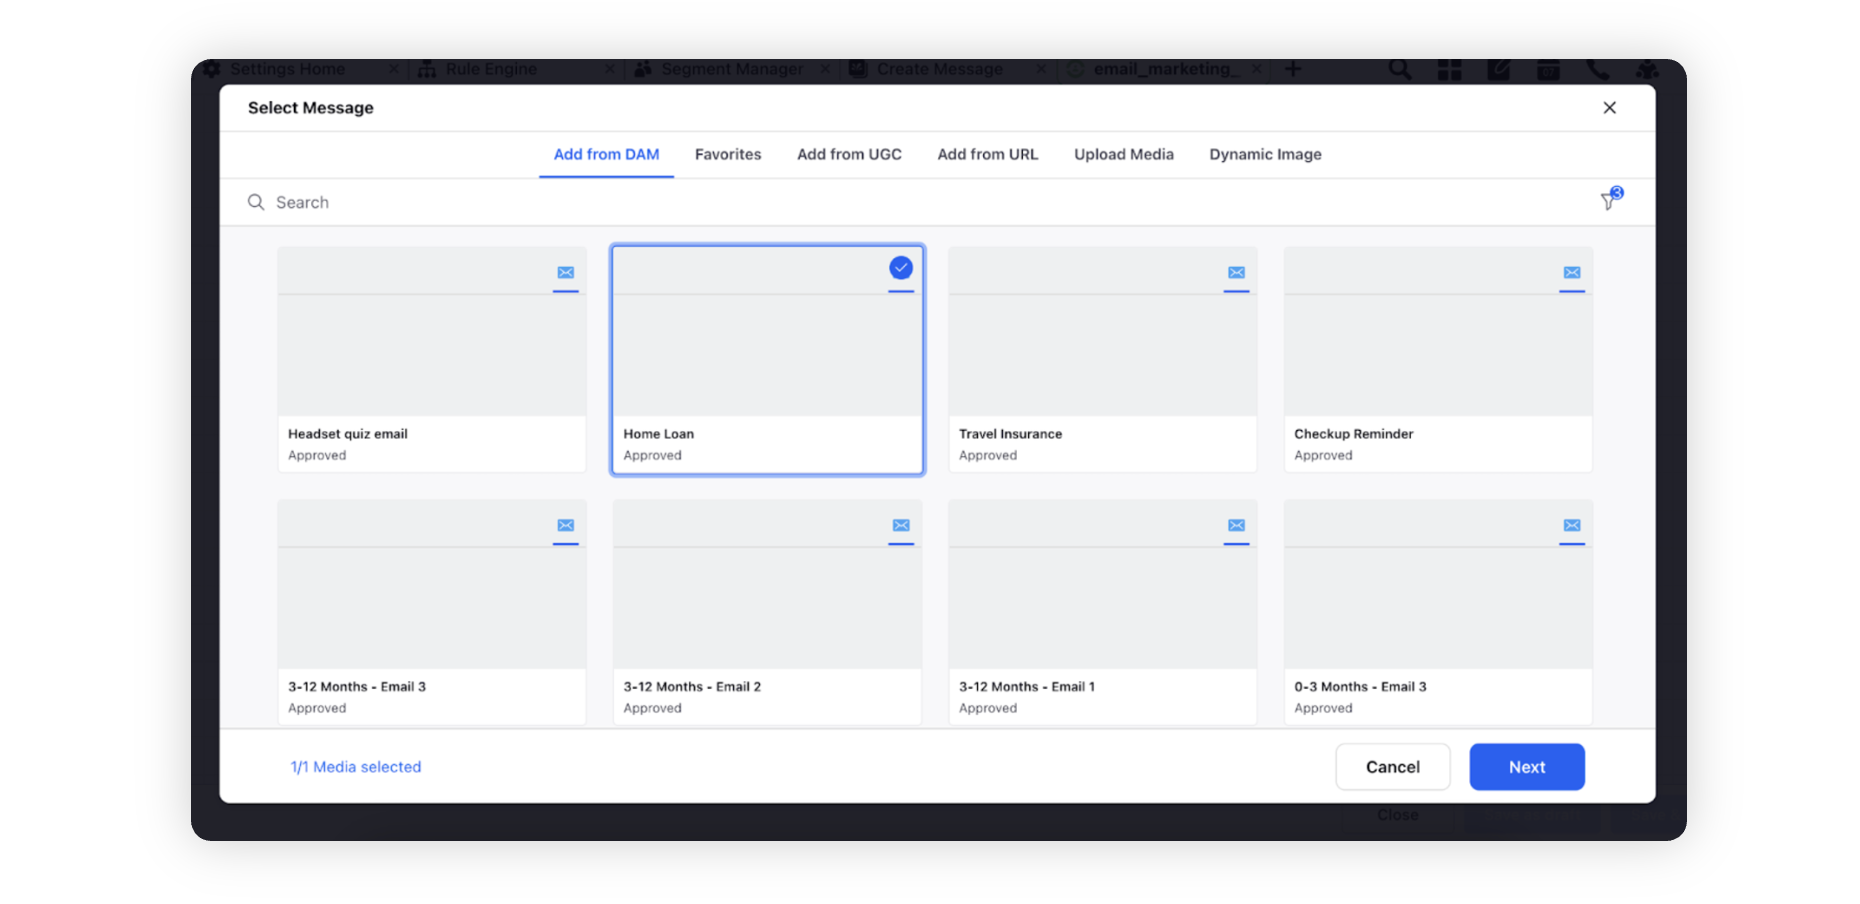
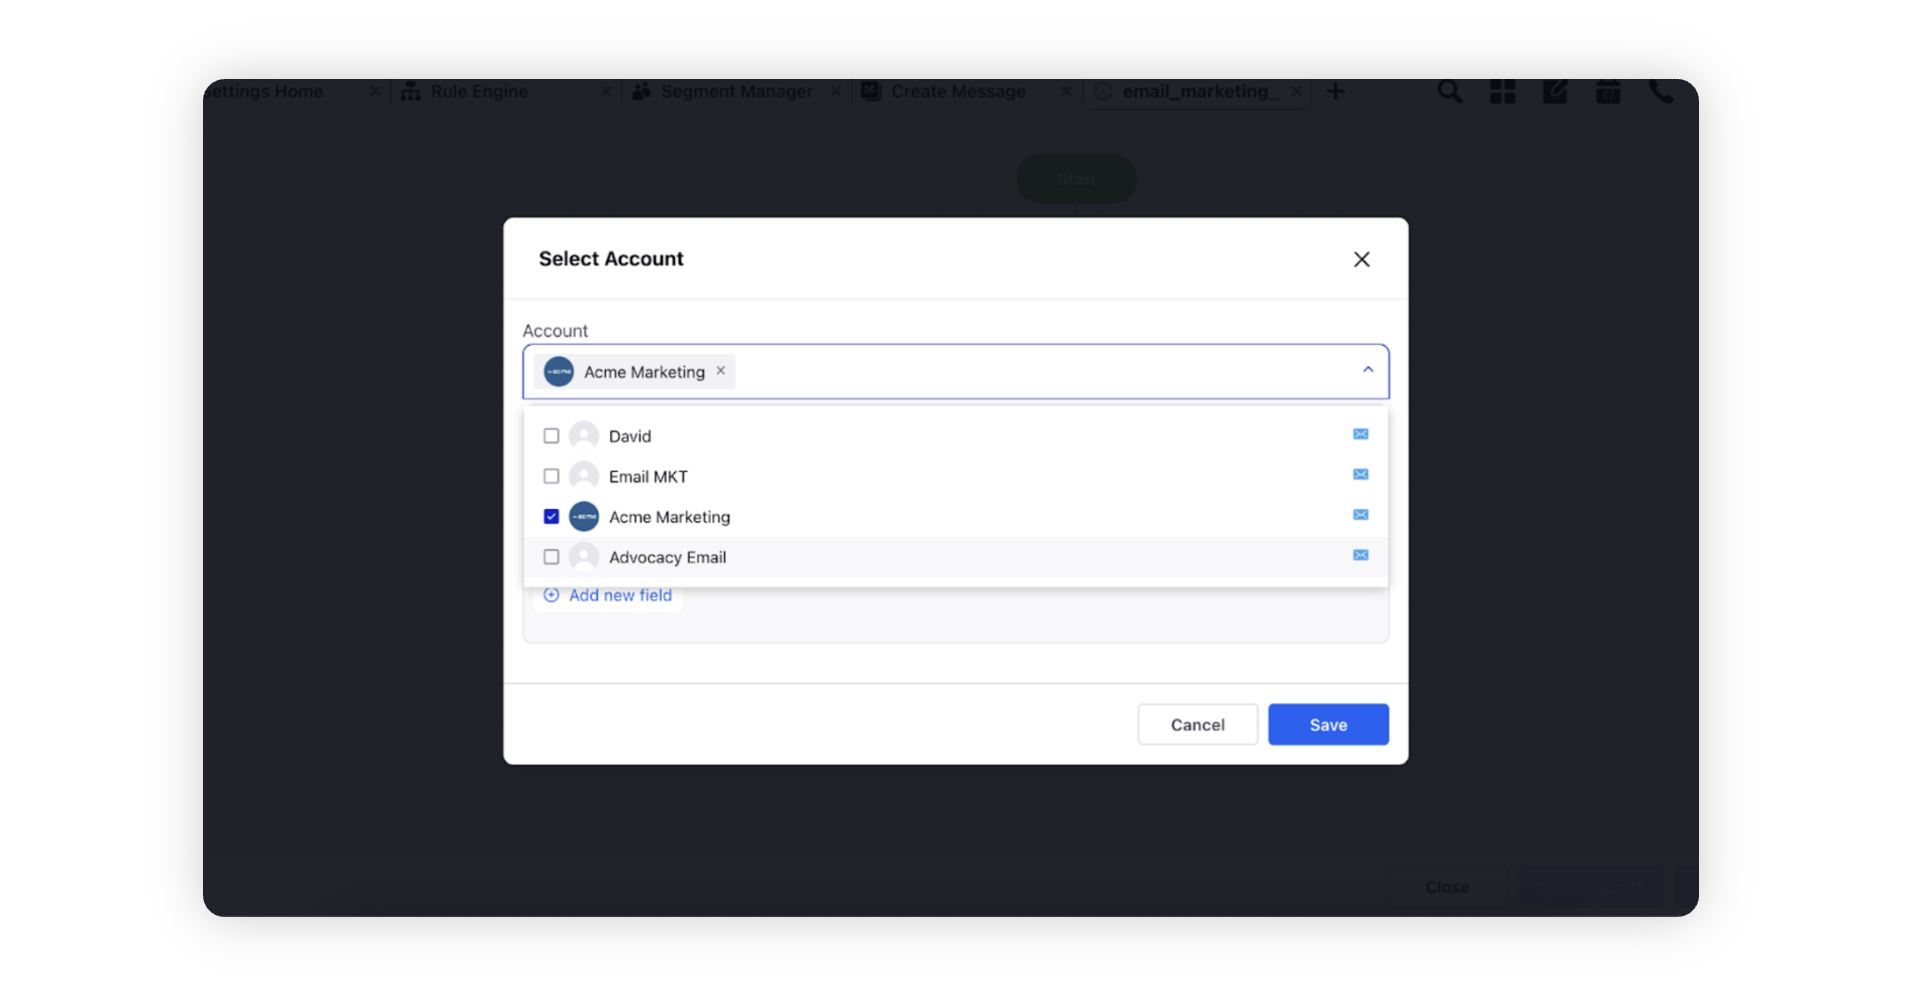
On the Select Account window, choose the account from which you want to send the message to the customers or leads and click Save.
After adding the desired actions in the Journey Builder, select End Event. The journey will end here.
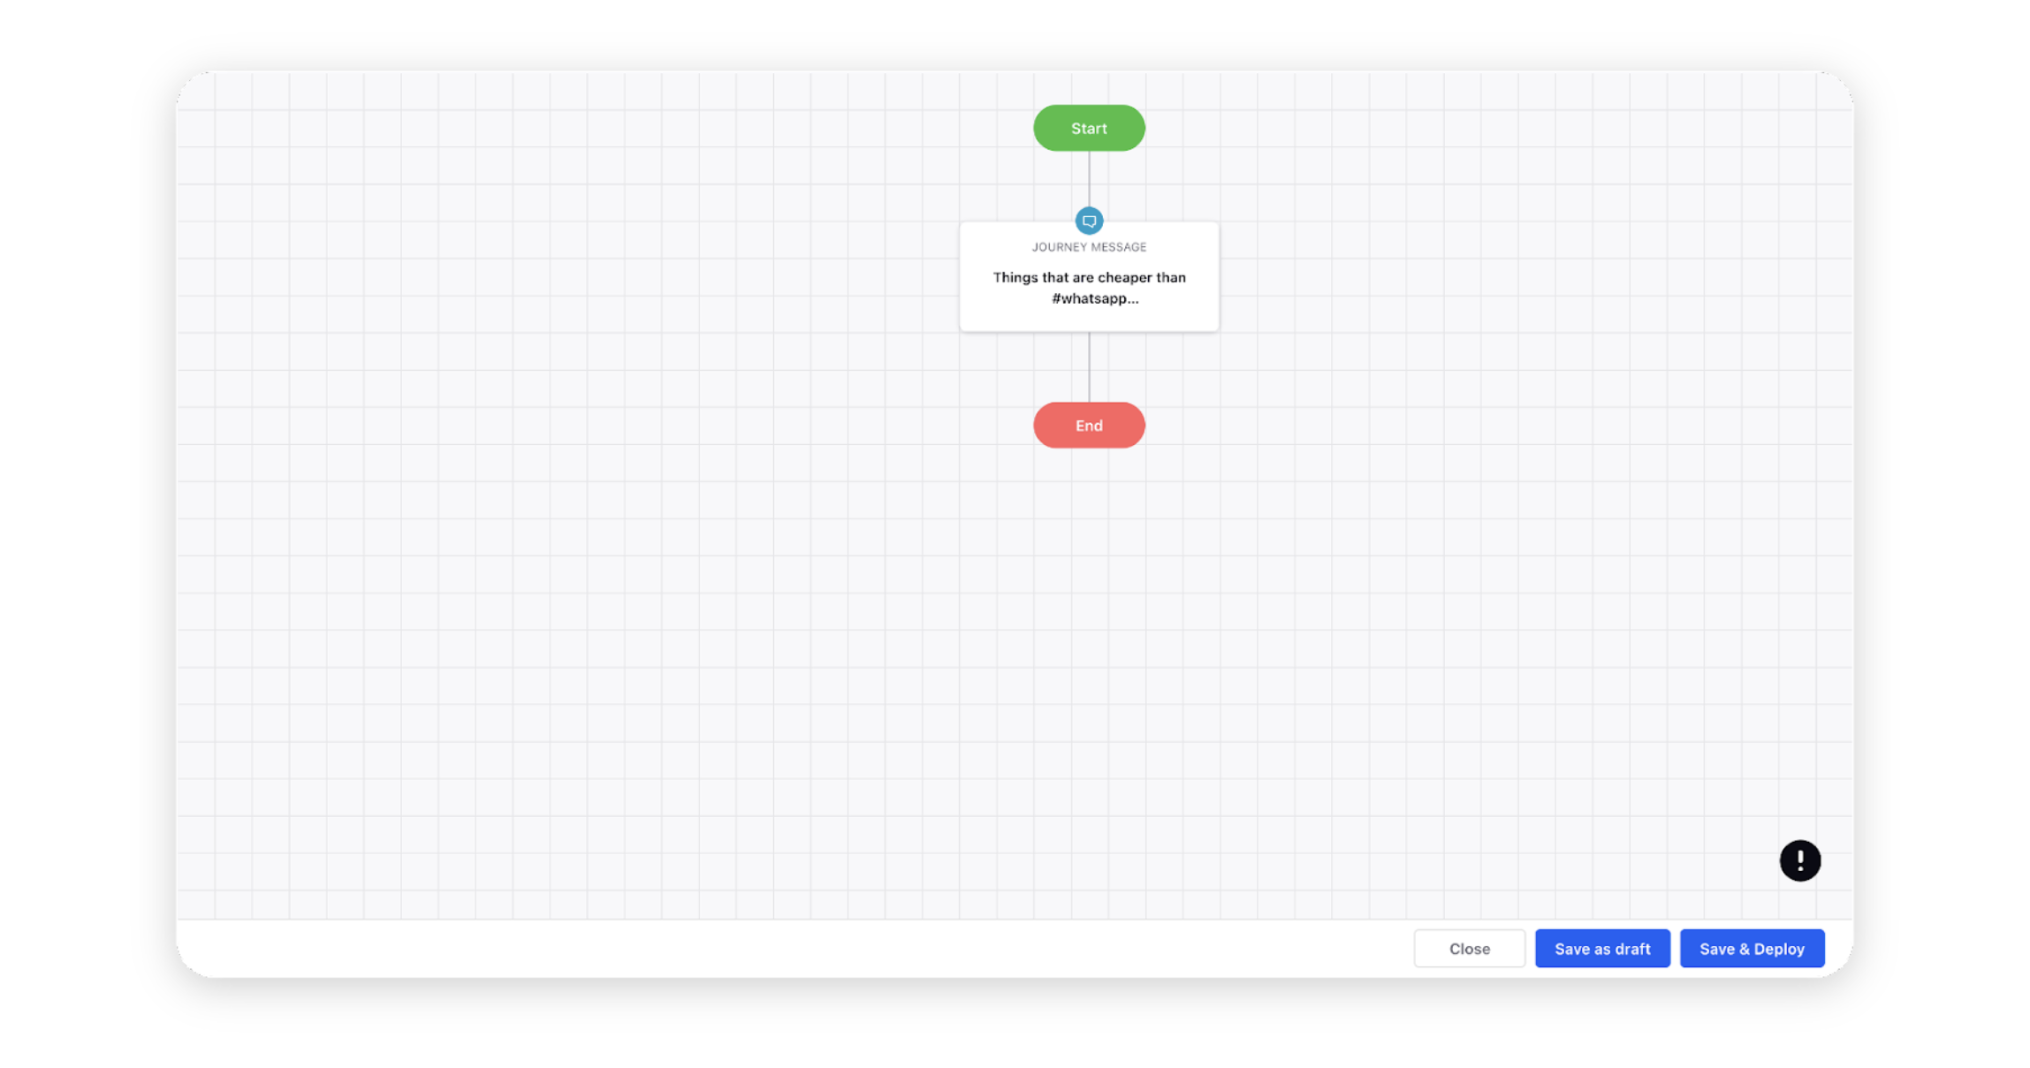
Click Save & Deploy at the bottom and the journey message selected will be sent to whenever an audience profile becomes the part of journey. You can also click Save as draft in case you want to make the changes later.