Sprinklr Live Chat Builder
Updated
Sprinklr Live Chat is a tool that you can use to enhance your brand's online customer service experience. It is powered by bots to answer the simple queries of your customers. You and your customers will also be able to exchange images, videos, and documents. This fast and lightweight live chat can be added to any website by embedding a small code and customizing it as per your requirements. It also works well when opened in a mobile browser.
Relevant user personas
Care Admins | To configure the Live Chat layout based on brand design requirements. |
Care/Digital Marketing Manager | Give a consistent and unified experience to customers on the website/app. |
Enablement note: To learn more about getting the new Live Chat builder enabled, please work with your Success Manager. |
To Add Sprinklr Live Chat Application
Click the New Tab icon
. Under the Sprinklr Service tab, select Live Chat Care within Listen.
On the Manage Applications window, click Create New in the top right corner. This is the place where you can set all configurations and styling for your Livechat. We provide lots of customizations in Livechat so that you can create an application that reflects your brands and use case.

On the Create New Application window, fill in the required fields that are divided into five tabs:
Click Create in the bottom right corner to confirm.
Configure Your Live Chat

Field | Description |
Account Information | |
Image | Add a photo from DAM or upload from your device. |
Account Name | This name is shown inside Sprinklr to identify the account. |
Account Display Name | This name can be shown as brand name to the customer. |
URLs | Contains the list of URLs on which your livechat will be operation. We call this process as whitelisting URLs on where Livechat should be operational. If you are unsure of the URLs for now, you can put "*". Putting an asterisk (*) , means that this particular Livechat will be operation on all websites provided the livechat code is embedded there. Further,
|
Language | |
Default language | Select the language for your widget. If no language is selected, the default language will be English. Languages supported are as follows: Arabic, Chinese, Chinese (Simplified), English, French, Greek, Hebrew, Indonesian, Italian, Japanese, Korean, Malay, Portuguese, Russian, Spanish, Thai, Turkish and Vietnamese Languages with limited availability are Albanian, Amharic, Bokmal (Norwegian), Bosnian, Chinese (traditional), Chinese (honk-kong), Croatian, Czech, Danish, Dutch, Estonian, Finnish, German, Hungarian, Latvian, Lithuanian, Macedonian, Malayalam, Polish, Romanian, Serbian, Slovak, Slovanian and Swedish. |
Additional languages | Select multiple languages to enable the widget in that language based on the browser locale of the customers. a) Non-configurable/static labels such as timestamp, date, error messages, etc. that can not be configured from the builder will be auto-translated in the language from the browser locale of the website visitor. b) For configurable labels such as welcome, how can I help you? that are configurable from the application builder, raise a support ticket at tickets@sprinklr.com with app ID, english labels, languages in which you want to translate, translation of labels in those languages. Once translated from backend, the labels will automatically be shown in the language from the browser locale of the website visitor. Auto translations of static labels are done based on locale language selected from the builder. If no language is selected then the default language would be English. For languages like Arabic, Hebrew, we support changing the alignment of text and messages across Live Chat from right to left. |
Associated Case Work Queue | |
Select Work Queue Work queue will be used to show wait time and agent availability on chat. You can conditionally hide the chat icon based on the availability of agents with particular skills in the selected work queue. | Select a case work queue that will be used to show wait time and agent availability on chat. You can conditionally hide the chat icon based on the availability of agents in the selected work queue or based on the availability of agents with particular skills in the selected work queue. |
Business Hours | |
Select business hours | Select the Business Hours that you have created in Platform Settings. Based on these business hours, you can configure to hide the chat icon. If you select multiple business hours, then business hours will be defined as combination of all selected business hours. Once you select a business hour here, you can enable this setting in "Styling" section. |
Account Groups | |
Select Groups | Select the group(s) that you want to include the account in. |
Permissions | |
Select Action | Select action from these options: All, Publish, Engage, View Reporting, Channel Action, or View Planner |
Users / Users Groups | Select the users or users groups to whom you want to give permission for the selected action. |
Sharing | |
Visible in all workspaces | Check the box to make the account visible in all workspaces. |
Workspaces | Select workspaces or workspace groups on which you want to make the account visible. |
Subscribers | |
Users / Users Groups | Select the users or user groups that you want as subscribers for your application. |
Properties | Fill in the properties as required. |
Personalize Your Live Chat

Field | Description |
Style | |
Chat Style | Color - Select the color for your chat widget. Chat Icon - You can set a custom image for the chat trigger icon in addition to the standard avatars available. When a custom image/avatar is used as a chat trigger icon, you cannot add custom text to it. This will allow you to match the Live Chat widget with your website’s look and feel for a coherent brand experience.
Collapse Icon - You can set a custom image for the chat collapse icon in addition to the standard icons available. Live Chat Icon Text - Set the text to appear alongside the chat icon. Hide Gradient - You can hide the gradient which makes it a solid color. Additionally, you can add Custom Gradient of your choice. Note: You can get a prompt enabled to be shown with the trigger icon or above the home and conversation screen by reaching out to support at tickets@sprinklr.com.
|
Background Pattern | Select the background pattern/color for the conversation screen. |
Live Chat Position | Position the trigger icon on the right or left. Enter the padding value in px to customize the chat trigger icon position. |
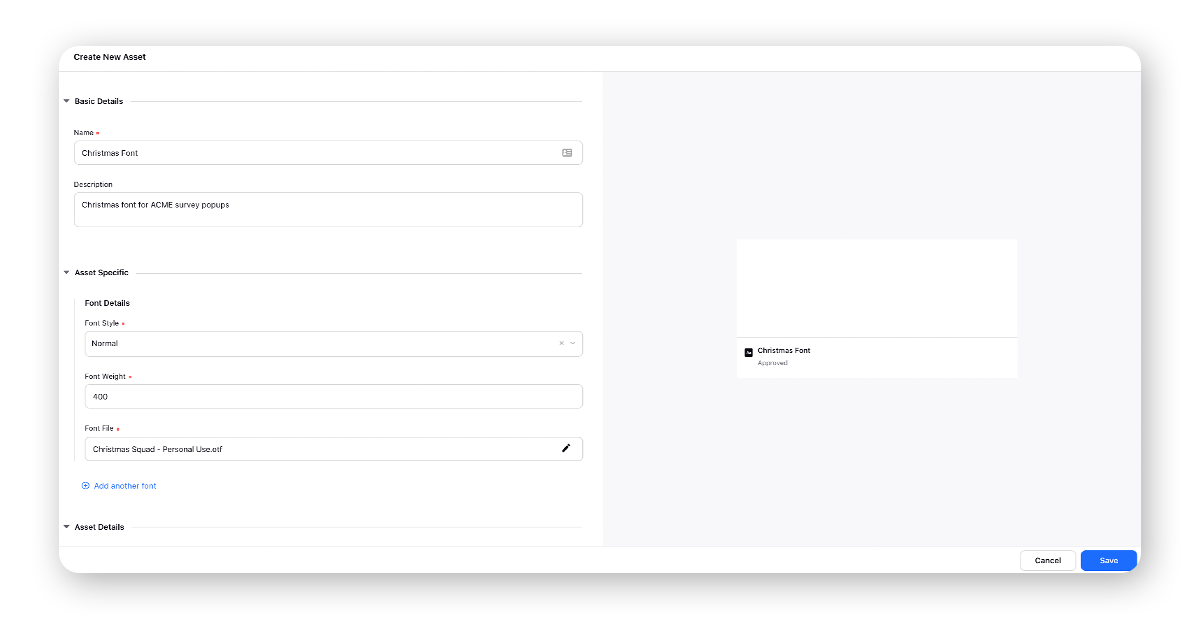
Live Chat Typography | Select a custom font family to match your brand guidelines and give a seamless experience to your customers. First, add a Font Family asset in the Digital Asset Manager and upload the font files. Note that the accepted file formats are .WOFF , .WOFF2, .ttf
Next, select the required font family asset. For more information, refer to the article on Configure Custom Fonts in Live Chat. |
New Conversation Button | Enter the label of the button to start a new conversation. By default, a new case is created upon receiving the first user message. However, enabling the "Create case when new conversation is started" toggle allows a case to be created immediately, without waiting for an initial user message. |
Chat Trigger visibility settings | Always show the chat trigger icon - Always display a chat trigger icon on your website. Show chat trigger icon when triggered by webpage, then keep it visible - The chat trigger icon will only show when the chat window is opened through SDK or proactive prompt. When the window is closed, the chat trigger will still be visible. Show chat trigger icon only when chat window is open - The chat trigger icon will only show when the chat window is opened through SDK or proactive prompt. When the window is closed, the chat trigger will disappear again. Hide the chat trigger icon conditionally - Hide the live chat conditionally based on some attributes like page URL, time spent on page, country, city, region, and any open conversation. The chat icon can also be hidden based on the number of pending cases or number of available agents in a queue or based on your business hours. Note: Currently the widget is displayed just above the chat trigger icon. You can get its position changed to the left or right of the trigger icon by reaching out to support at tickets@sprinklr.com. |
Manage Availability | Enable conditional unavailability of chat application. If hidden, the widget will not be visible even via SDK. |
Persona Configuration | Enable persona avatars: Bot and agent avatars will be visible in the chat. You have the option to select the agent avatar as either Name Initials, Agent Profile Image, or Brand Account Image. Additionally, you can add the desired image for the bot. Enable persona names: Bot and agent names will be visible in the chat. You can choose to display the agent's name as either the Brand Account Display Name or the Agent Profile Display Name. Additionally, you can input the desired name for the bot. Enable conditional persona: It allows for the assignment of different agent avatars and names for different users and user groups. This means that for different sets of agents or agent groups, different avatars (profile pictures) and names will be displayed to customers. Hide persona names in conversation screen: Bot and agent names will be hidden in the conversation screen.
|

Home Screen | |
Note: You have the option to customize the color of the message bar that appears on the home screen when the customer's connectivity status changes or when they go online or offline.
| |
Brand Logo | Add your brand logo. The size of the logo to appear on the conversation screen can be configured by reaching out to Sprinklr support. |
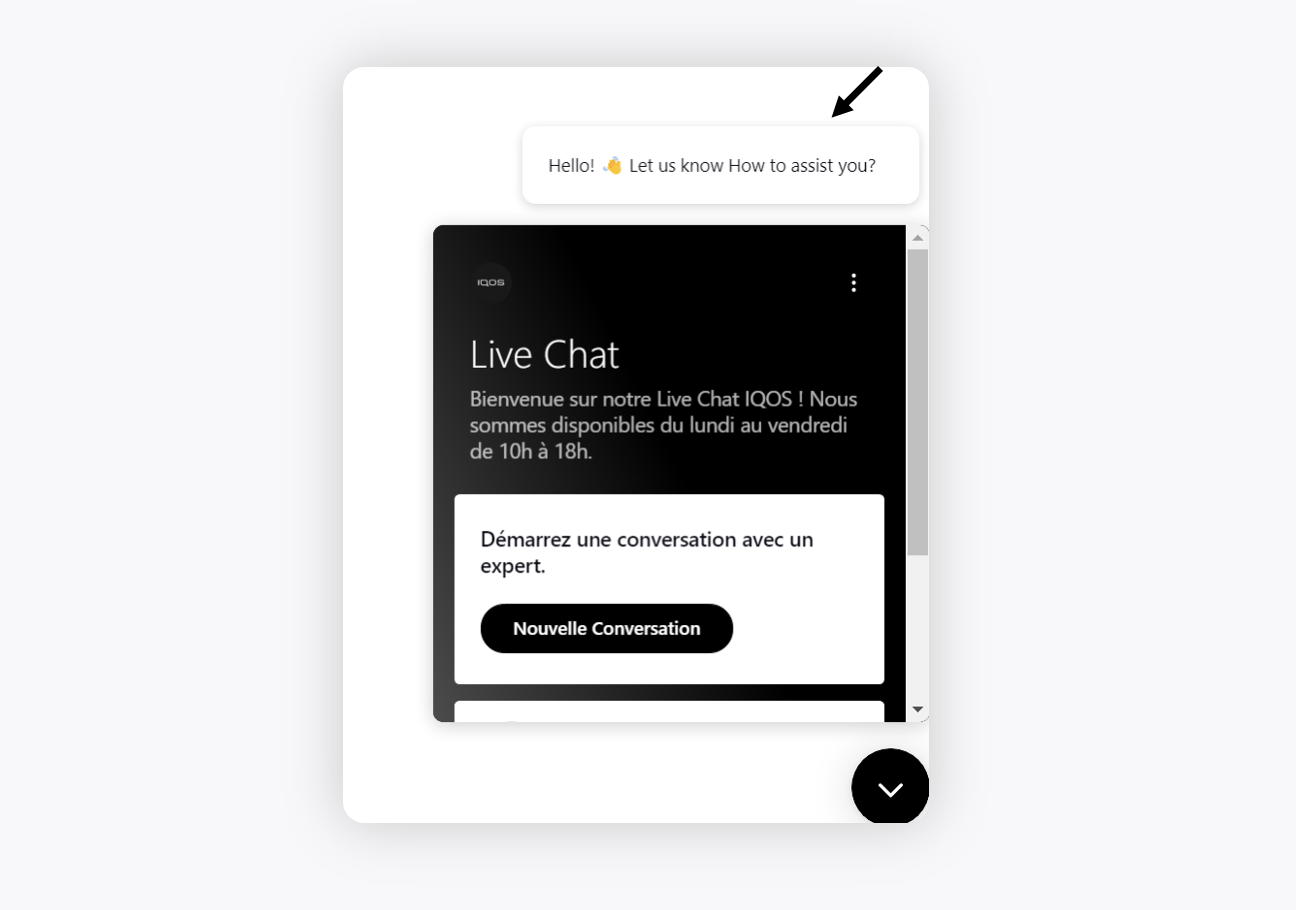
Title | Enter the optional title of your chat. It will be shown on the welcome screen. |
Description | Enter an optional description. It will be shown on the welcome screen. |
Cards | Sprinklr Live Chat supports 5 types of cards:
After adding the cards, you have the flexibility to rearrange their order through a simple drag-and-drop action, providing you with convenient control over the card sequence. |
Conversation History Card | You can modify "Your conversations" label on the conversation history card. User conversation history will be shown when there is at least one conversation present.
|
New Conversation Card | Welcome text for new users - Enter the welcome text which you want to show on the home screen to welcome your new customers. You can use rich text formatting, e.g., colors, bold font or italics, to make your welcome message visually appealing. Hide greeting graphic - Hide the greeting (waving hand) graphic. Visual representation of agents on the card - You can add up to 3 custom or standard agent images on the homepage of the Live Chat widget. Please ensure the images are of specified dimensions - Height: 56px and Width: 56px New conversation button behaviour when limit is reached - When you allow only x open conversations from user, you can also control the behavior and label of the "New Conversation" button when this limit is reached: Replace Button: This will redirect the user to the latest conversation. Disable Button: If the limit is reached, the "New Conversation" button will be grayed out and unusable, preventing users from opening new conversations until they close an existing one.
|
Actions | Add the following actions for the users on the home screen and customize the labels. For some of these, you can also add the confirmation/success/failure messages. Maximize Widget Clear Session Delete All Conversations Close All Conversations Mute Notifications Note that you can get the font color, background color and icon customized for the success/failure notifications.
|


Conversation Screen | ||
Header Title | Enter the title of your chat. It will be shown on the chat screen. | |
Header Description | Enter a description. It will be shown on the chat screen. | |
Welcome Messages | Add the welcome message(s) that you want to show on the chat screen. You can either enter Text Message or select a Template from Digital Asset Manager. You can create Card, Rich Text, Quick Reply, and Contact Details Form templates in multi-languages in Digital Asset Manager and then based on the browser locale of the website visitor, the template will be sent. | |
Conditional Messages | You can select condition(s) and a text/template welcome message that will only appear if the condition is fulfilled, for example, if the customer has submitted his/her contact details, or if the message has come within the defined business hours, or if the user is messaging from any particular browser or device type, etc. You can also add welcome messages in additional languages set in the builder and add the Language or App page Url condition. Hence, based on the browser locale or the website URL of the visitor, the welcome message will be sent. You can add multiple messages and multiple conditions as desired. | |
Actions | Add actions for the users on the chat screen and customize the labels. You can also add the confirmation messages.
| |
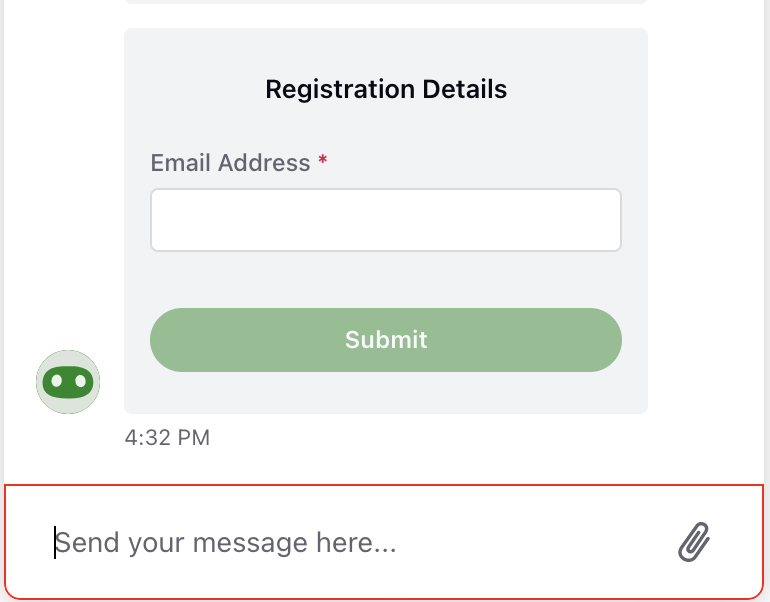
Reply Box | Type the placeholder text for the reply box on widget. You can also set the character limit for user messages on Live Chat and Live Stream. Additionally, to get the border color of the message box changed when the user clicks inside it, raise a support ticket at tickets@sprinklr.com.
| |
Conversation Banner | Select the desired banner type if you want to show a disclaimer/information card at the bottom of the Live Chat conversation. Note that the disclaimer card will not be visible in the old conversations. Add Disclaimer Text with rich text formatting, for example, you can hyperlink a privacy document in the disclaimer text. You can also make the disclaimer card dismissible, i.e., the card will have the cross icon and the users can remove it if they wish to. Additionally, you can get the font color, background color and icon customized for the disclaimer card by reaching out to support. | |
Wait Time & Queue Position | You can use placeholders to indicate average wait time for a live agent or position in the waiting queue in the conversation screen. Eg. For showing queue position in dynamic wait time, we can use this placeholder
Note: You have to define which work queue is associated with the live chat application in the “Configure Your Live Chat” section. | |
Contact Form | Select a contact form from Digital Asset Manager if you want to capture the users' contact details, such as their Full Name, Email Address, Phone Number, etc. before starting a conversation. | |
Persistent Menu | You can provide a persistent menu on live chat widget that will be visible to users throughout their live chat conversation. Using the persistent menu, users can trigger the bot flow from scratch at any point in time. For more information, see Persistent Menu in Sprinklr Live Chat widget. | |
Attachment Types | You have the capability to restrict attachment types if any such attachment types should not be supported in your live chat by selecting from a dropdown menu. | |


Video and Audio

Field | Description |
Enable Video and Audio Call | Enabling video and audio calls will allow agents to initiate calls with customers. Select the AWS Chime or Zoom account from the dropdown. You can also choose whether you want to keep just audio recording, audio and video both, or none. For more information, click here. |
Restrict Camera Permissions | When a call is assigned to the users and groups selected here, camera sharing will be revoked for the dialing customer, where they can use their microphone but cannot share their video. To get the capability enabled, please work with your Success Manager. |
Co-browsing

Field | Description |
Enable Co-browsing | Enabling this will allow agents to get into a co-browsing session with customers. Add the corresponding co-browsing asset. You can also add URL(s) to hide customer's screen while co-browsing and URL(s) for cross domain co-browsing for customers to persist the session. For more information, click here. |
Advanced Settings

Field | Description |
Analytics Settings | |
Sprinklr Analytics | You can leverage custom analytics in Sprinklr Live Chat to track active users and their interactions performed on a widget on the website. You can know the website visitor funnel, and this will also be provided in out-of-the-box reporting in Sprinklr. To learn more about getting this capability enabled, please work with your Success Manager. |
Google Analytics | You can provide Google Tracker ID for which the events need to be tracked. |
Additional Settings | |
Enable sound notification for incoming messages for the user | Allow your customers to receive a sound notification on receiving a new brand message on the Live Chat widget. The users will not receive the notification if they are on the same conversation when the message is received. Also, the users can mute/unmute the notification by clicking the Sound Notification icon appearing in the top right corner of the widget. Note that the notifications should be enabled in users' browser settings. |
Enable 12 hour time format | Enable the 12-hour time format to be visible on the widget to your customers. |
Enable the case number on each conversation | On the Live Chat widget, your customers will be able to view the case number on the conversations. |
Show case status | On the Live Chat widget, your customers will be able to view the case status on the conversations. |
Enable sneak peek of the user's message | Agents have the ability to see what users are typing in real-time during a live chat conversation in Care Console. For more information, click here. |
Expire old conversations when the time exceeds | On conversation expiry, the conversation is removed from the end-user view. However, if an agent replies to an expired conversation, the conversation will become active and visible for the end-user. You can specify the duration since the last message after which the conversation will expire. |
Allow only one open conversation per user | Allow only one open conversation per user. As a result, when a user tries to initiate a new conversation more than once, the New Conversation button will be disabled with a tooltip. Also, in the Display message upon reaching opened conversation limit field, add a message for the tooltip that will appear when a user tries to start a new conversation more than once, such as, Please close or delete the existing conversation to create a new one. |
Mask user's response based on RegEx | You can mask user messages within the live chat interface if they meet specified Regex conditions. Additionally, you can choose to save this data in Sprinklr and display it to the agent. |
Manage chat labels by locale | You can manage custom translations for your chat labels by locale. To do so, upload JSON files containing custom label translations for different locales, following the naming convention of <locale>.json (e.g., en.json for English, fr.json for French). This feature allows you to override the default chat labels and customize translations for specific labels, such as updating the disabledManualInputPlaceholder text (default text: "You cannot type right now"). Only include the labels you wish to modify in the JSON file and remove the rest. Once updated, simply upload the modified JSON file to the builder to apply the custom translations for the selected locales. Here’s the JSON file, External Locale.jsonSample file : External Locale Sample.docx
|
Call to action execution rule This rule will be applied to previous conversations. | Select any case update rule to be executed on previous open conversations. You can use this to unassign/close all the previous cases of the user whenever they start a new one. |
Mobile Application Settings Enable push notifications | Push notifications are sent to a user's device whenever they receive a new message. You can enable or disable push notifications for a live chat application |
Session Screen Manager | You have the capability to manage user session expirations, including configuring the session expiry screen, setting the inactivity duration before a session expires, and customizing alert screens. Client managed: Once it is enabled, continuous user session activity is captured, providing a reliable source to track and manage user sessions. For instance, if you intend to take specific actions on your website based on live chat user activity (such as sending messages, initiating new conversations, or navigating from the home page to the conversation page), you can enable this feature and monitor user sessions by utilizing the following SDK code:
|
Automatically login the user when the application starts | Enable auto login for your customers using SSO. Select the desired SSO, too, from the dropdown. The customers who are already signed in on your website will automatically be SSO authorized to access Live Chat. You can add SSOs within Sprinklr Platform Settings. For more information, see Add a Single Sign-On Service Provider. |
Disable Live chat for non-authenticated users | This allows you to disable the live chat option for non-authenticated users to prevent anonymous chats. |
Dev Tools
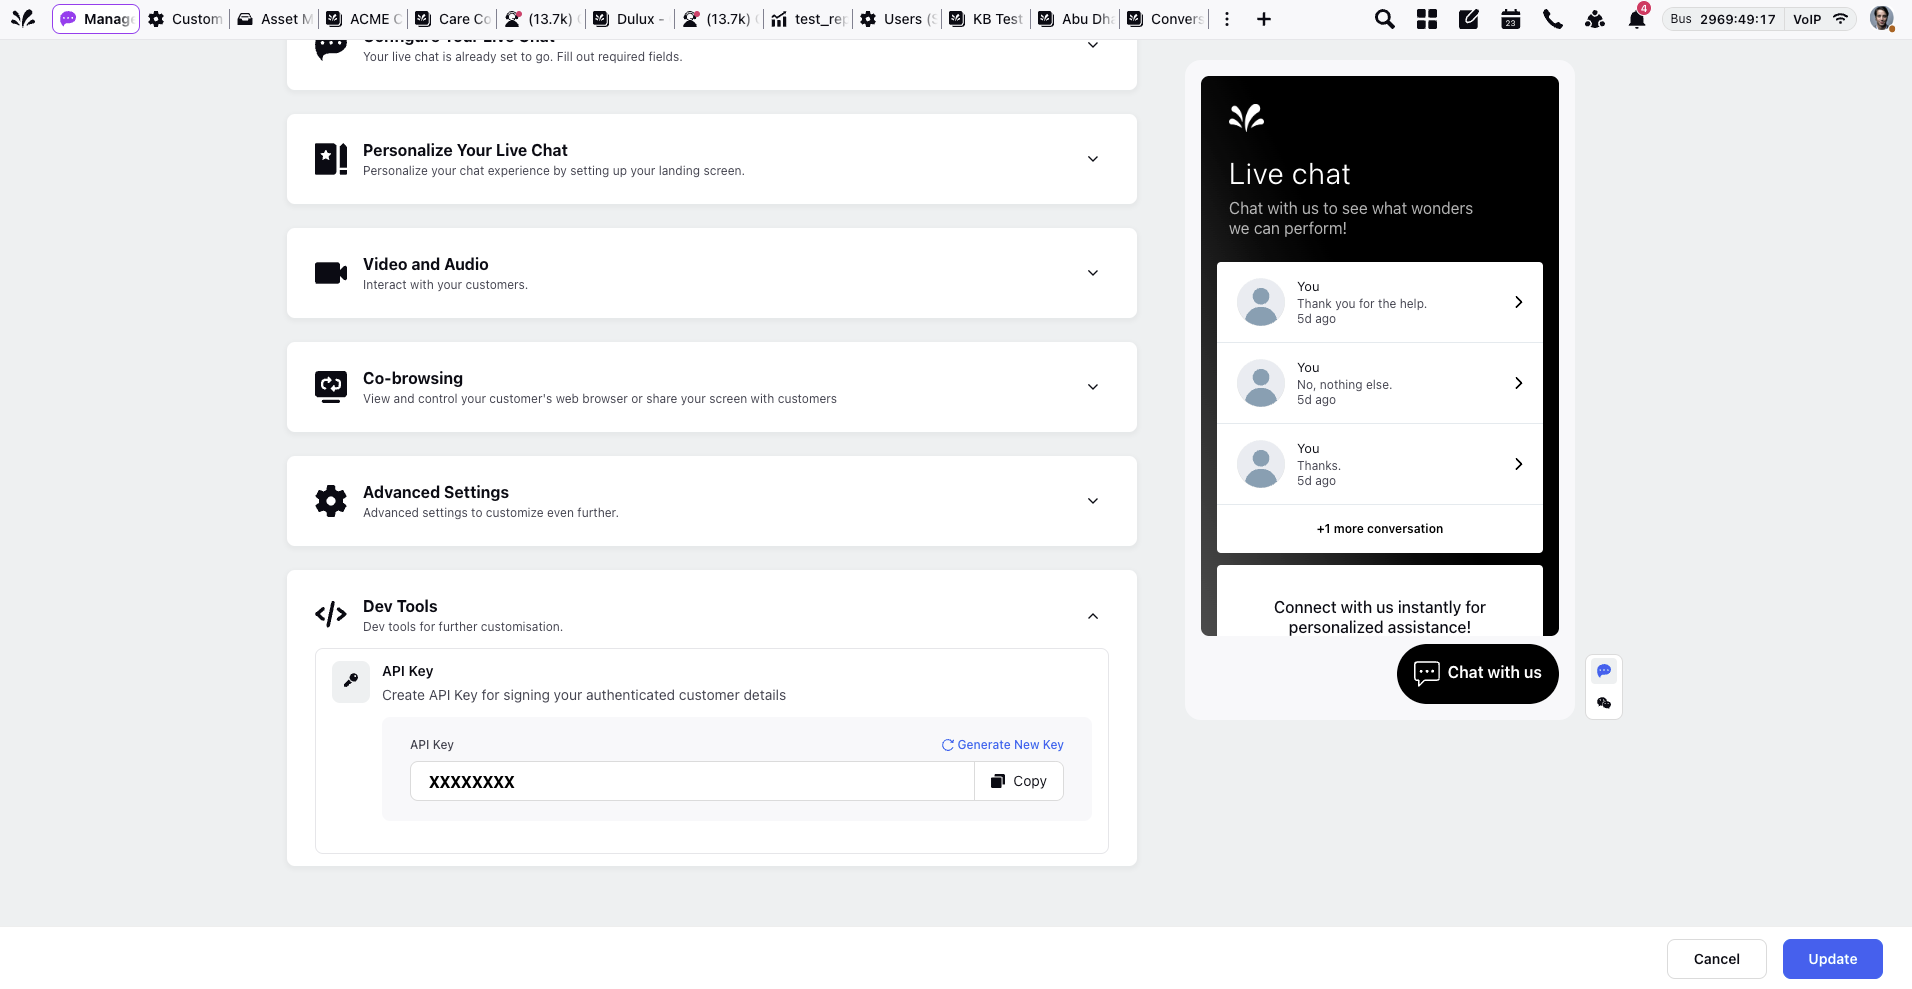
Field | Description |
API Key | This is an unique API key provided for the chat application. It is used to securely generate a hash (HMAC) for user details, ensuring authentication integrity |