How to Manage Scheduled Exports in Ads Reporting
marketing
Updated
8 days ago
, by [Redesign] Sprinklr Help Center
Options available for Scheduled Exports:-
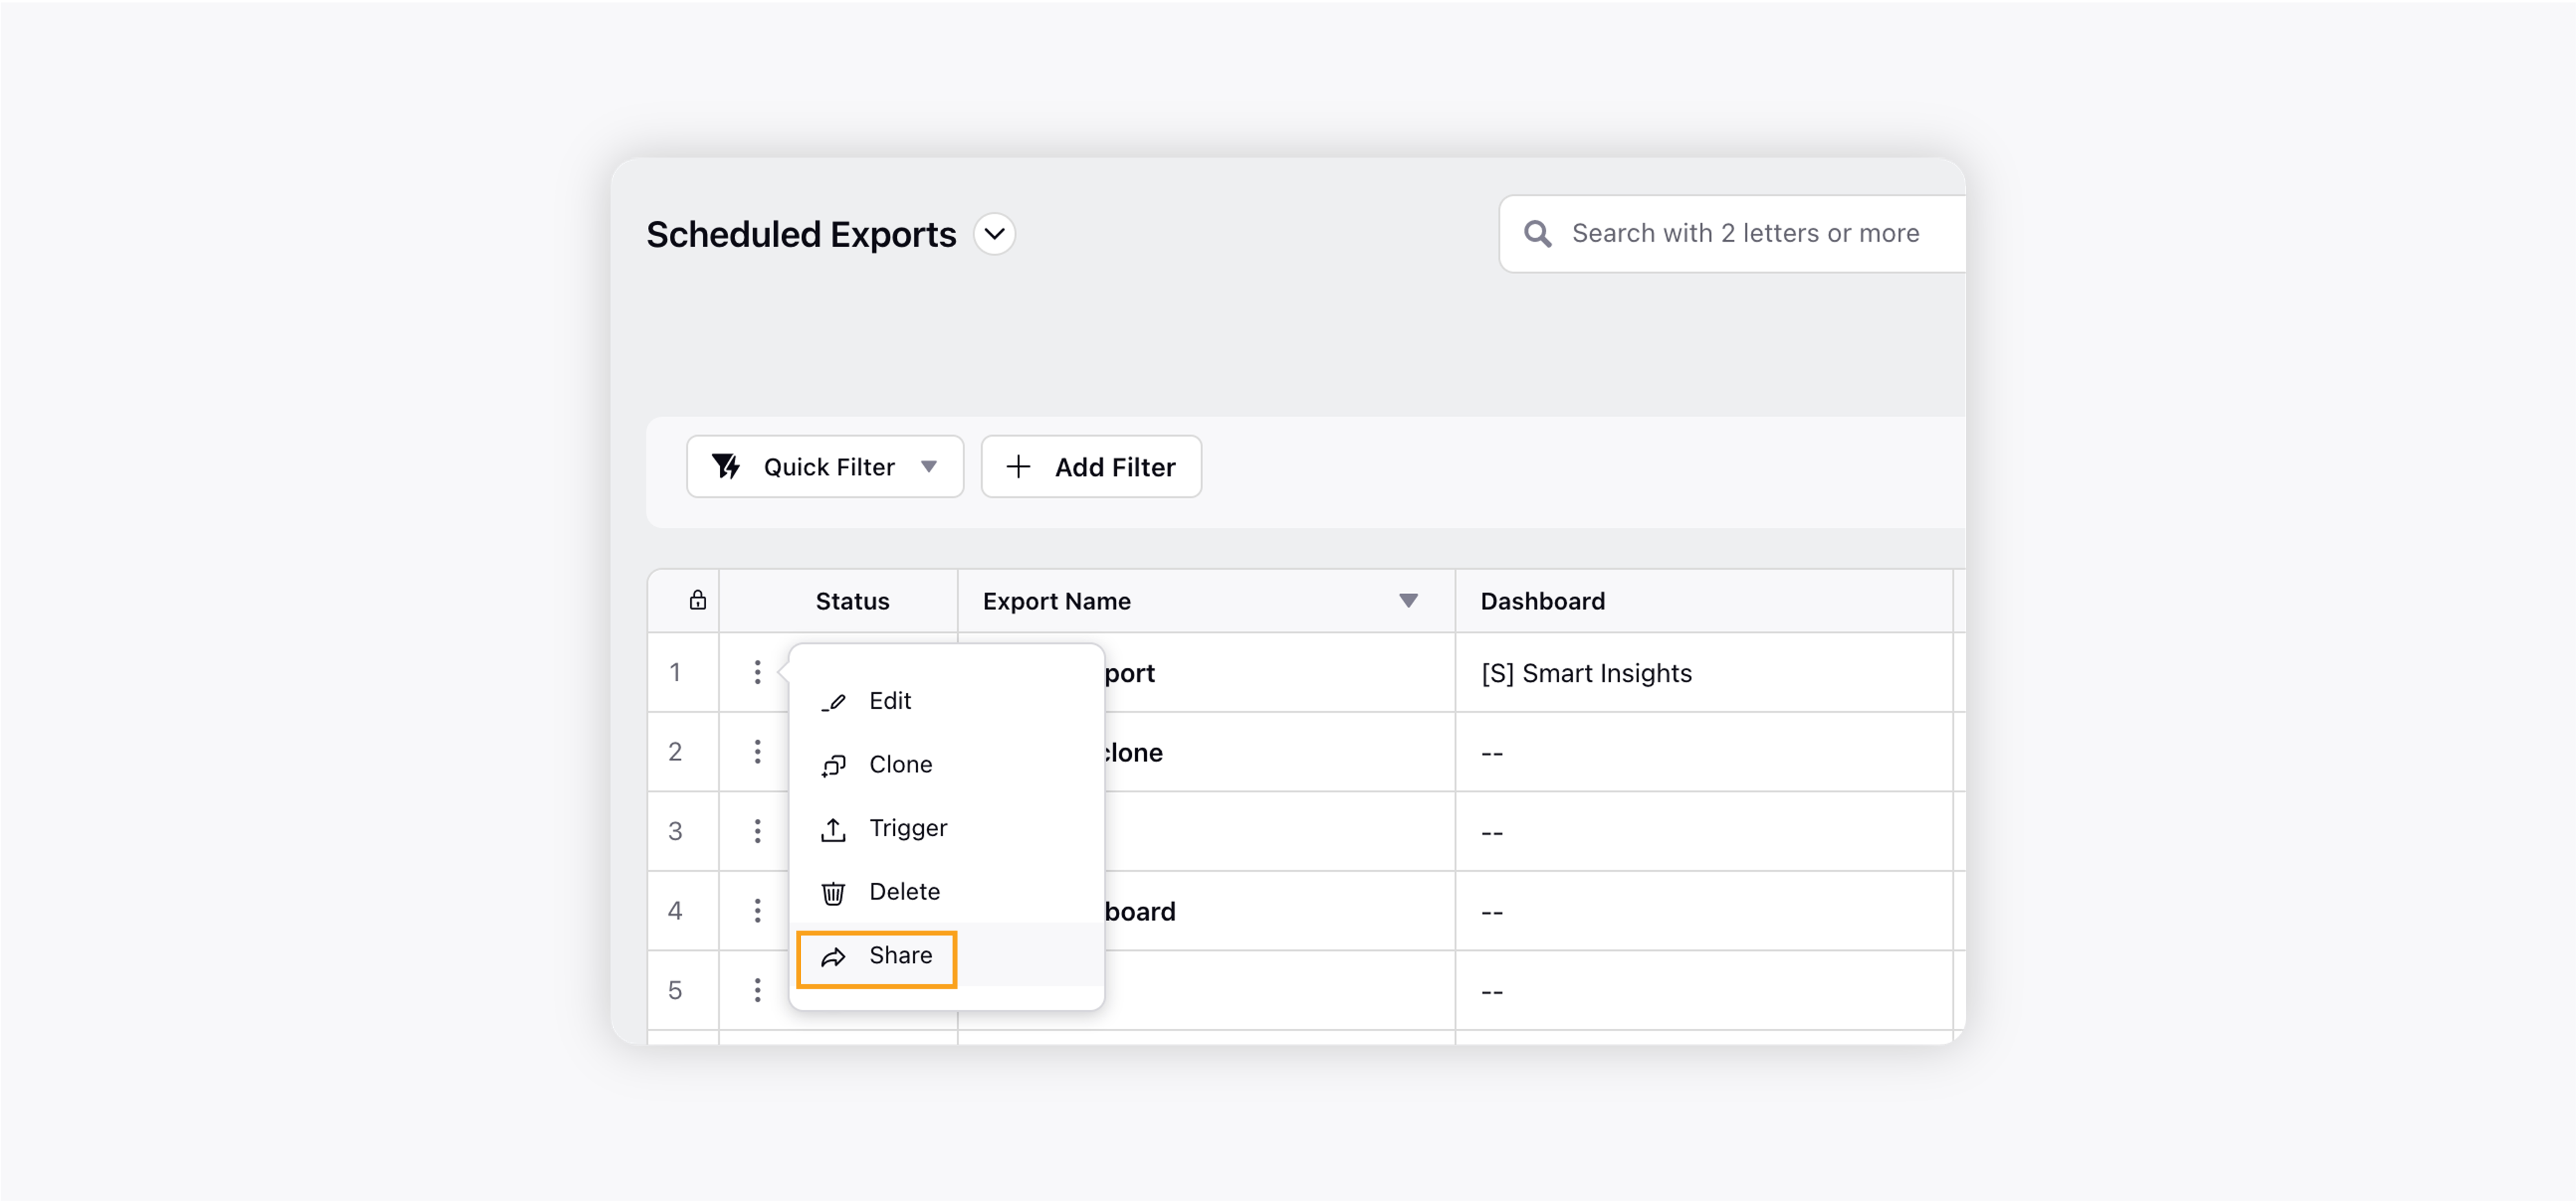
On the Scheduled Exports window, hover over the desired scheduled export Options icon.

Edit: Click Edit to open the Schedule Export window where you can make the desired changes and then save it.
Clone: Click Clone to open the Schedule Export window. Name the Scheduled Export (by default, it will add clone in the end of the existing name). Click Save. A cloned Scheduled Export is added to the Schedule Export dashboard list view.
Trigger: Click Trigger to export trigger for the Scheduled Export.
Delete: Click Delete to delete the scheduled export. A reconfirmation window to delete Scheduled Export will appear. Click Delete to delete the Scheduled Export permanently.
Share: Click Share to share the scheduled export with user(s) and/or user group(s) of a particular workspace. For more information, see – To share Scheduled Exports.
How to edit a Scheduled Export:-
Click the New Tab icon
. Under the Sprinklr Marketing - Advertising tab, click Tools and Settings within Plan.
On the Ads Settings window, select Scheduled Export from the list of options.
Hover over the Options icon
and select Edit alongside the desired Scheduled Export to edit an existing scheduled export.
On the Export Settings window, you can edit various scheduled export details. For more information, see Scheduled Export Edit — Field Descriptions.
Once done, click Save to confirm the changes. You will be redirected to the Scheduled Exports window.
If you want to turn on a Scheduled Export, slide the Toggle icon.
Scheduled Export Edit — Field Descriptions
Term | Description |
Language for exported ads | Select the language in which the Ads are to be exported. |
Name | Enter a name for your export. |
Schedule | Select a schedule for exporting your Ads. |
Email Subject | Enter the subject for the email you will receive on each export. |
Sender Name | Enter the name of the sender. |
Recipients Emails | Enter the emails of the recipients or select from the options of existing recipient emails. |
Email Footer Note | Enter any additional information to this report. |
Add Another Destination | Click to set up the transfer of exports to one or multiple server destinations. |
Limitations
You can export the details of your Ads in an excel file up to the permissible limit of 50K rows.
How to Share scheduled export across users and workspace
To share Scheduled Exports
On the Scheduled Exports record manager window, hover over the Options icon next to the scheduled export you want to share, and click Share.
On the Share Scheduled Export window, first select the Workspace or Workspace Groups in which you want to make your scheduled export visible. And then you can give Edit and/or View permissions, as needed.
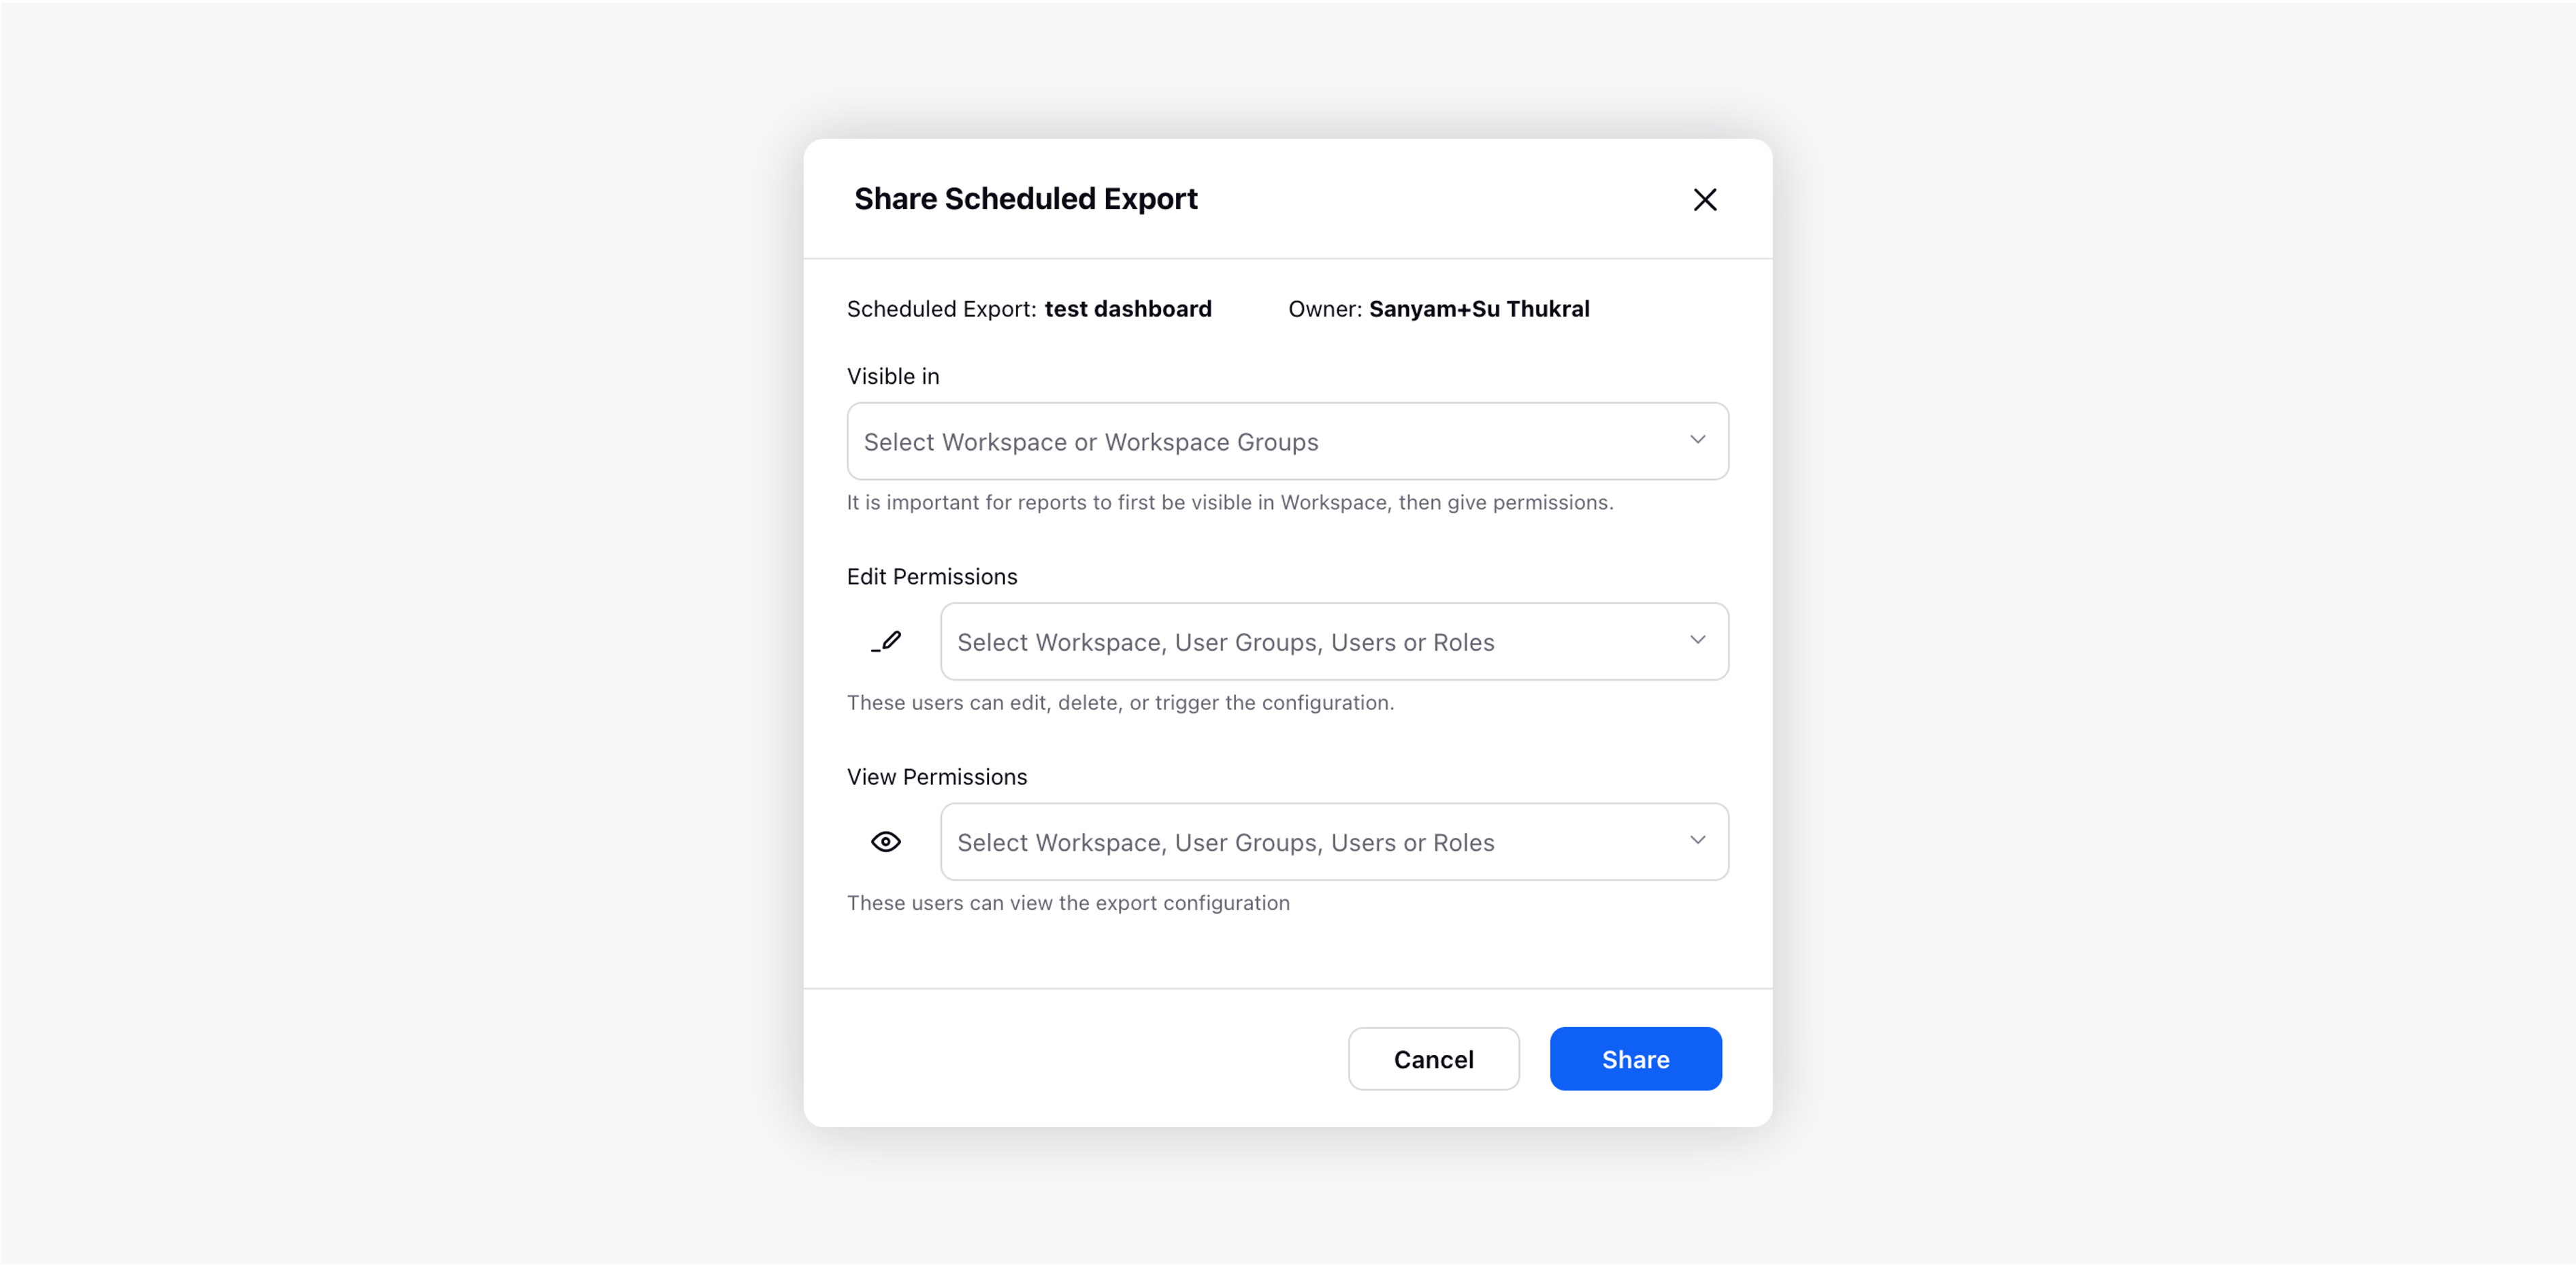
Select workspace, user groups, users, and/or roles you want to share the Edit or View permission with.
Edit: User(s) or user groups with the Edit permission will have all the permissions like editing, cloning, triggering, deleting, and sharing the scheduled export.
View: User(s) or user group(s) with the View permission will only have the 2 permissions – cloning and sharing the scheduled export.
Click Share.
Note:
|
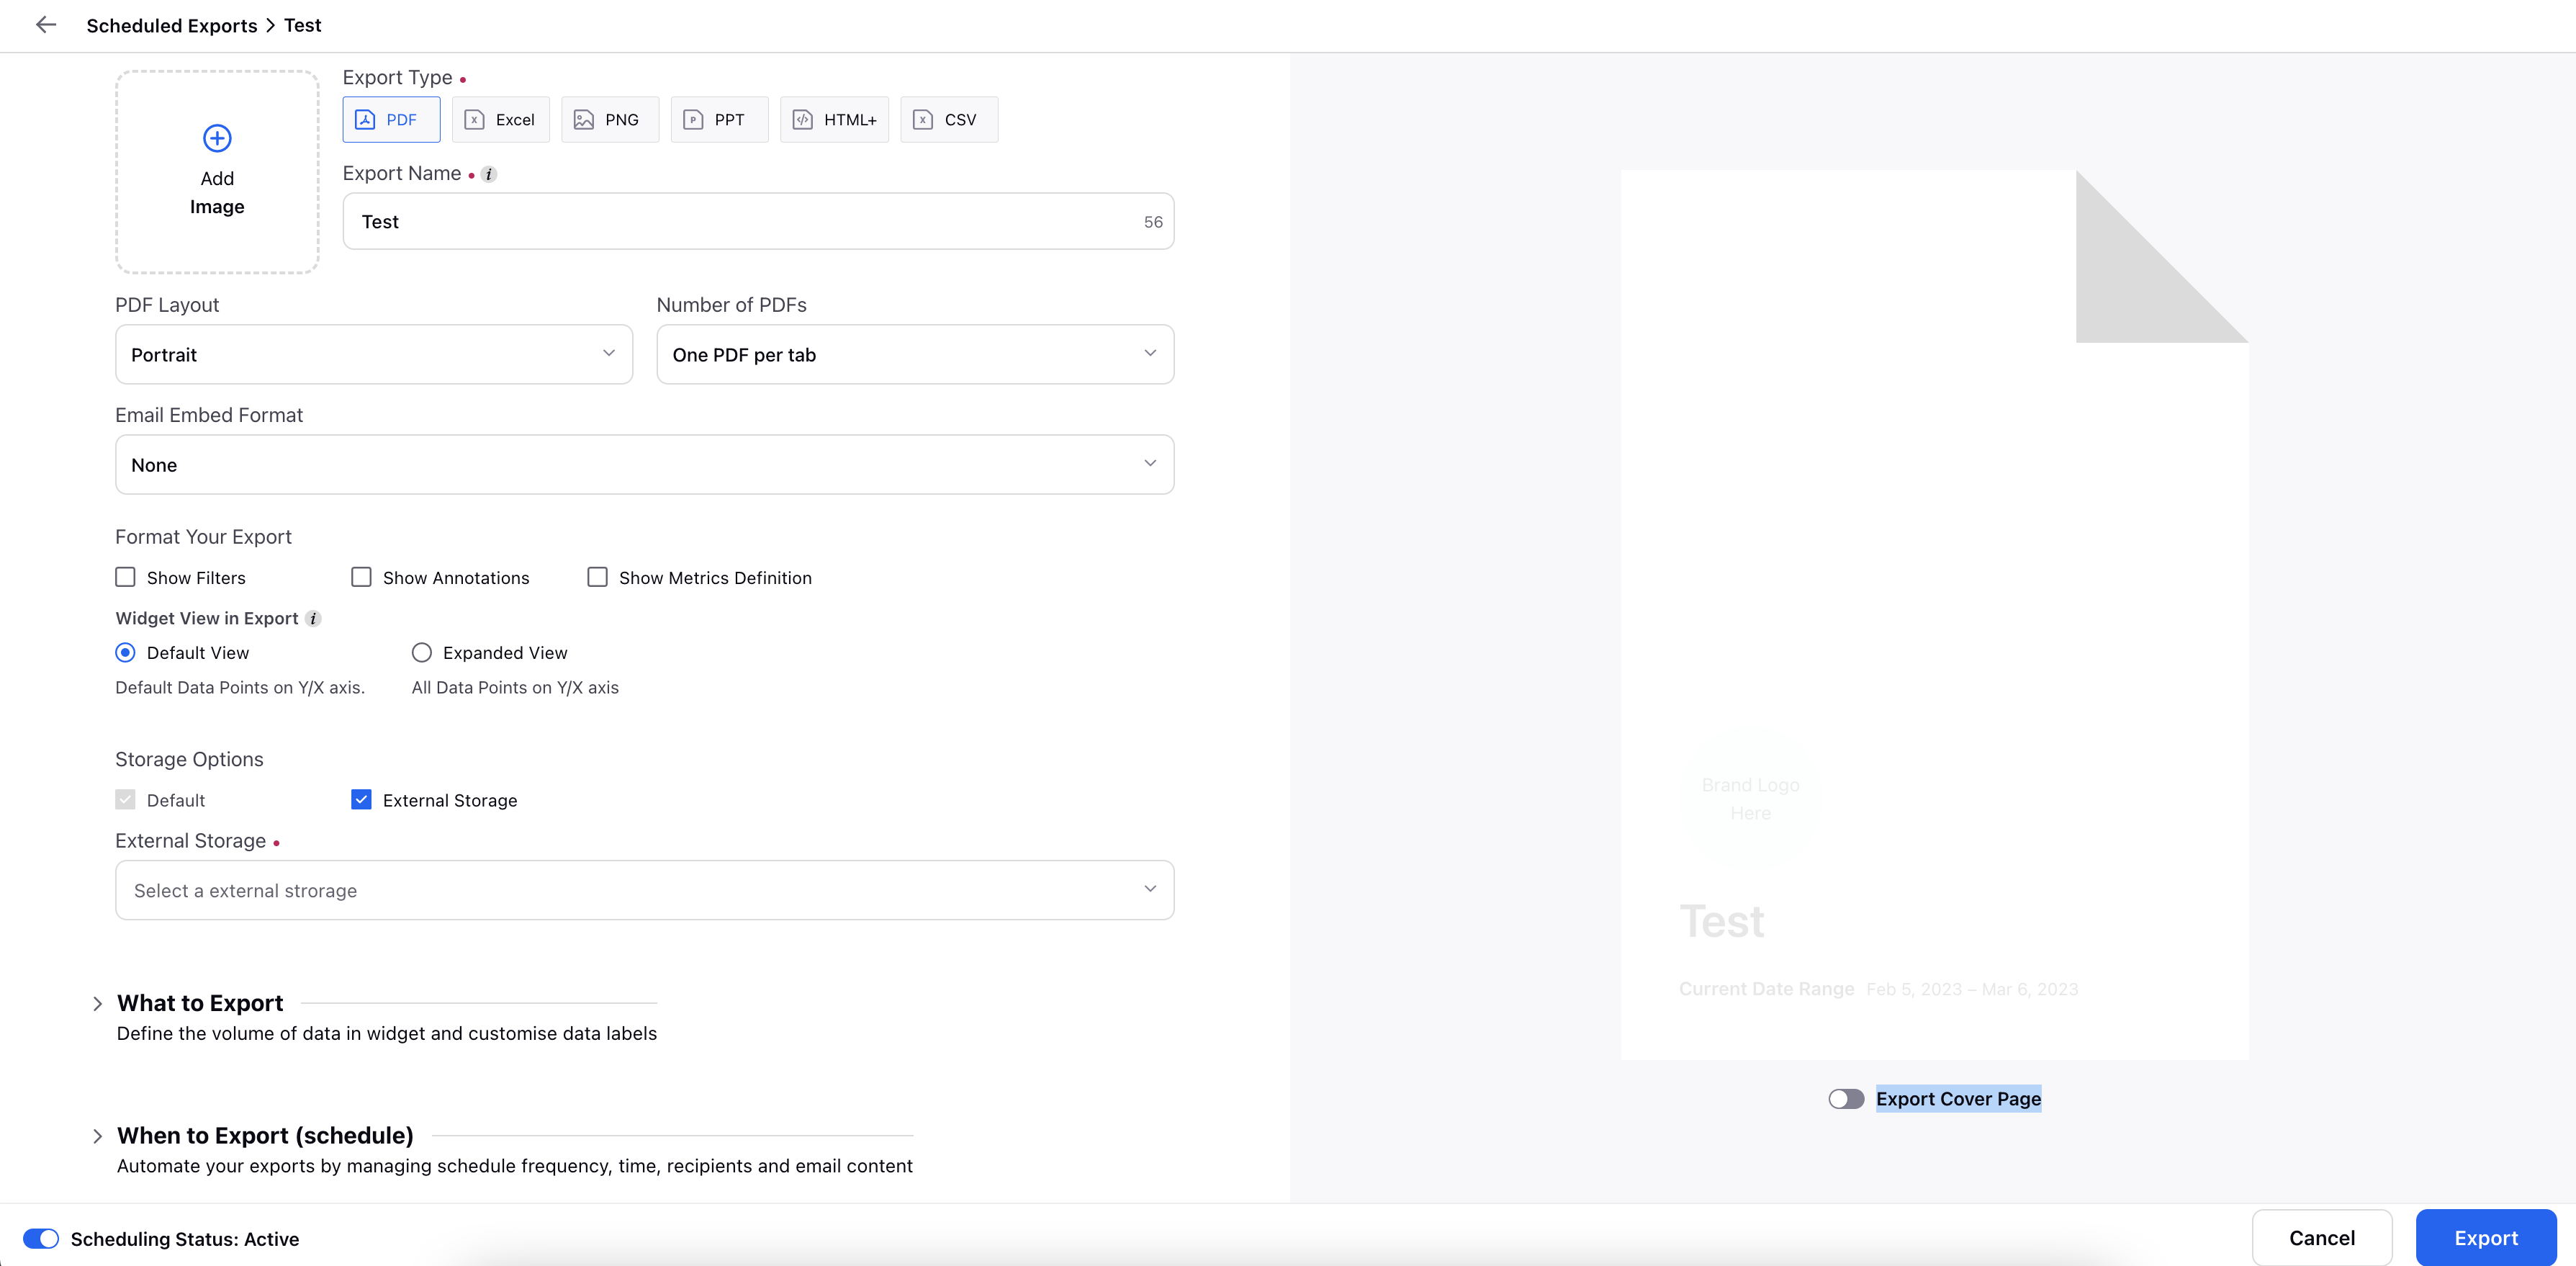
To disable the Export Cover page
If you do not want to use the cover page for your Scheduled Export, you can simply disable it. Go to the Scheduled Export window, and find the Export Cover option in the right pane. By default, the Export Cover option is enabled. Toggle it to the left to disable it. This is demonstrated by the Screenshot below: