Create Custom Dashboard and Manage Tabs
Updated
In this article, you will learn how to create Custom Dashboards and add tabs to them in Sprinklr.
Create a Custom Dashboard
Navigate to the Production Dashboards.
Click on the Show Dashboards button in the top left corner to open the dropdown menu.
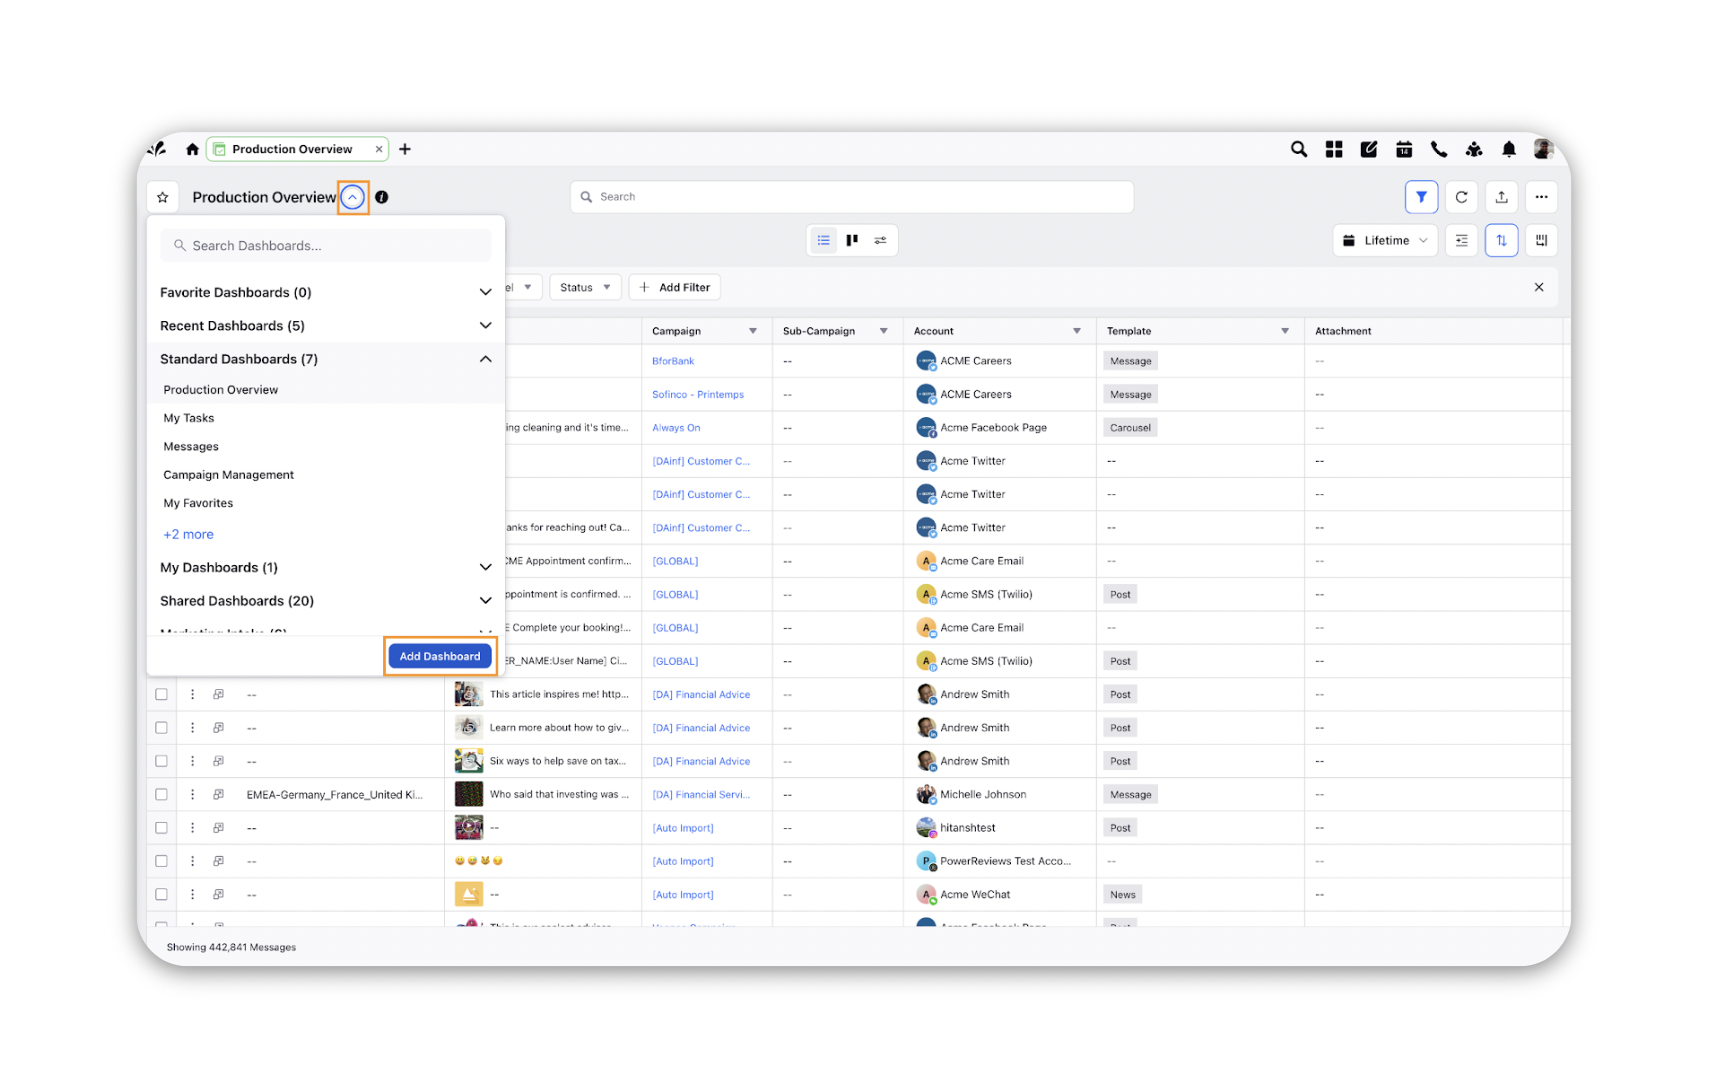
Click on the Add Dashboard button.
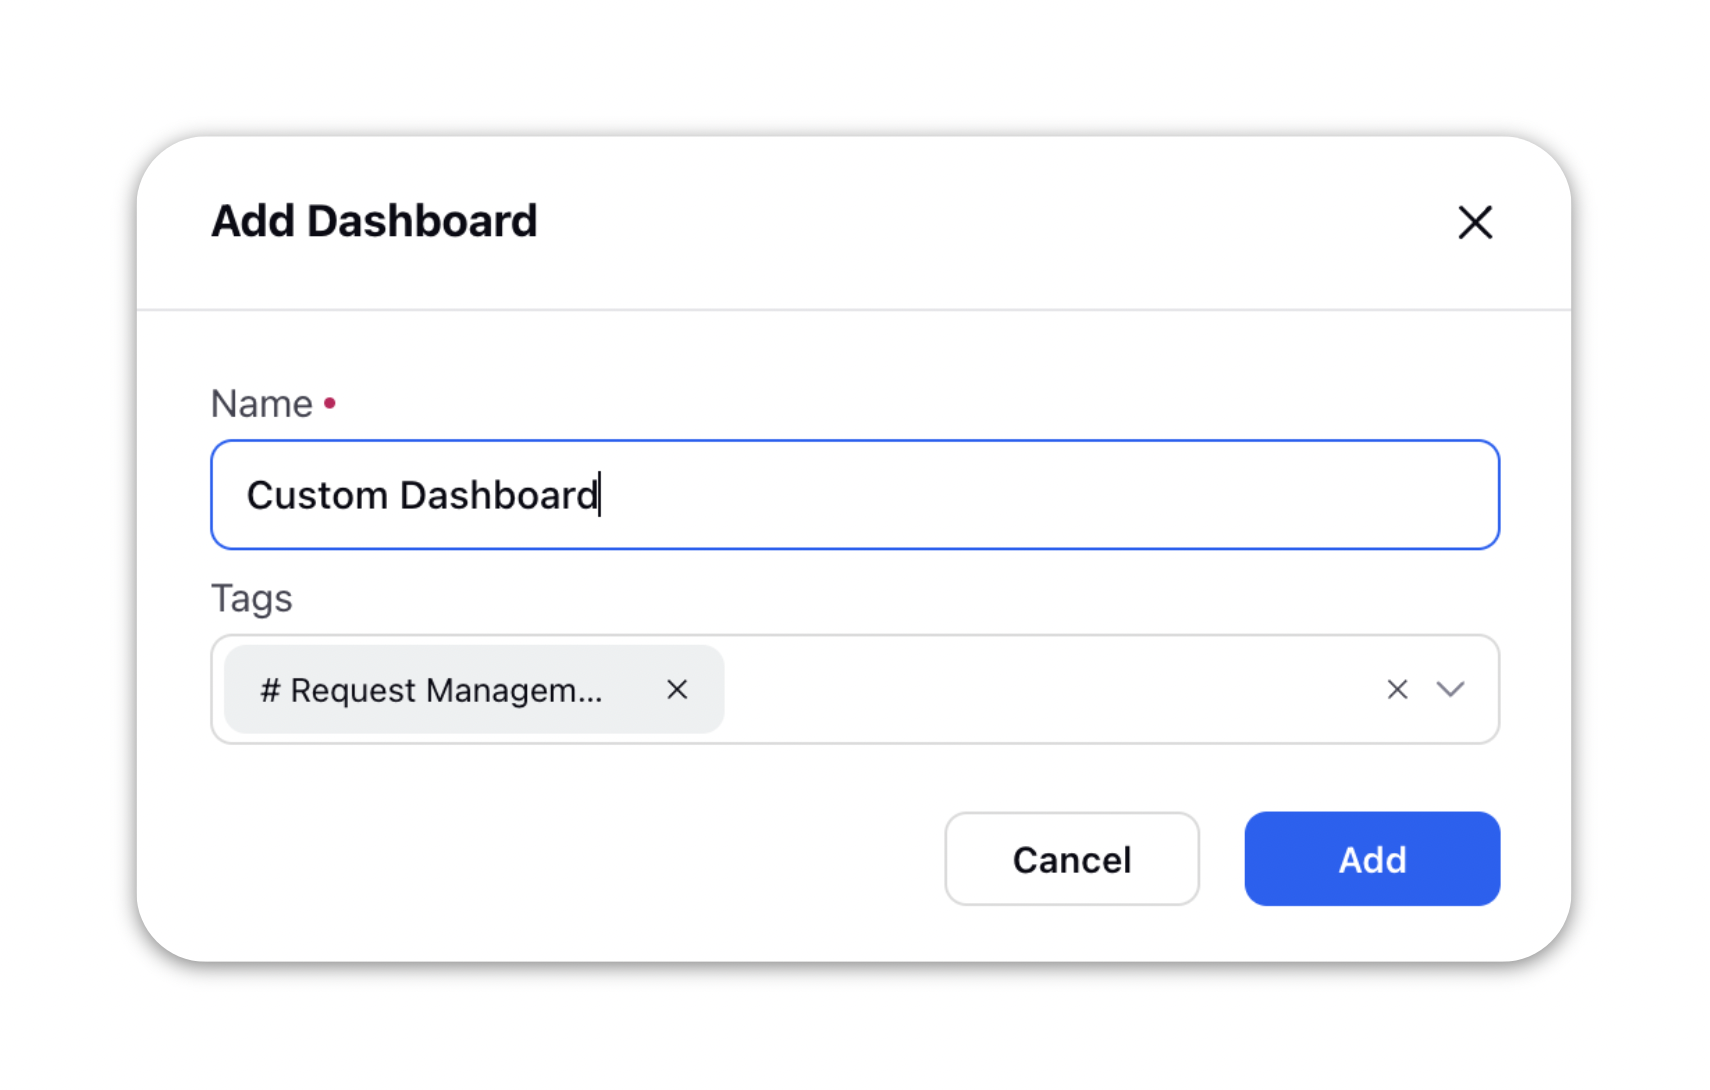
Fill in the Name and Tags associated with your Custom Dashboard in the pop-up menu.
Add your first Tab
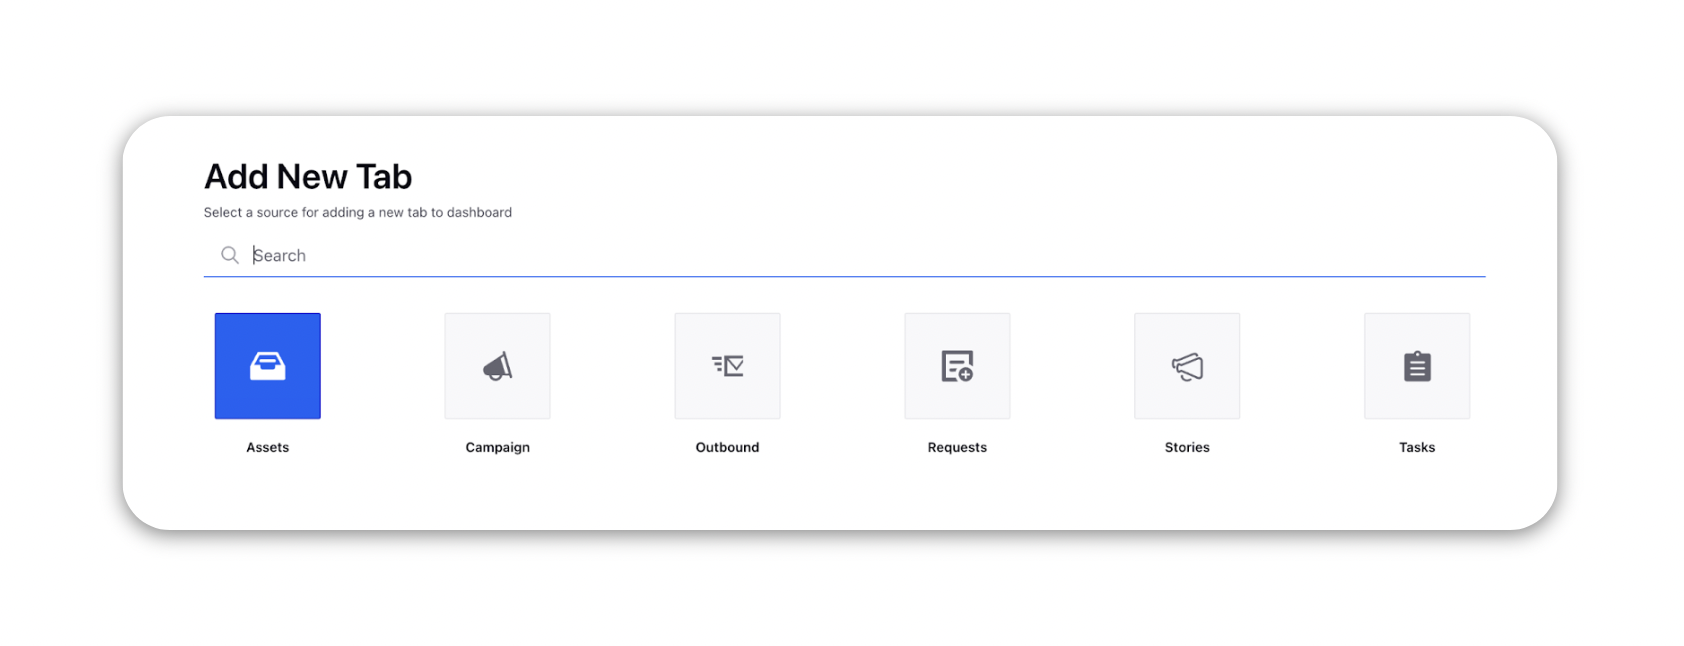
Once your Custom Dashboard is created, you can add your first tab by clicking on the Add Tab button.
Select the source entity you wish to see in that Tab.
Fill in the required information to configure the tab click on Create Tab.

Add more tabs and manage them
To add more tabs and manage the existing ones, click on the Tab Configuration option from the ellipses dropdown.
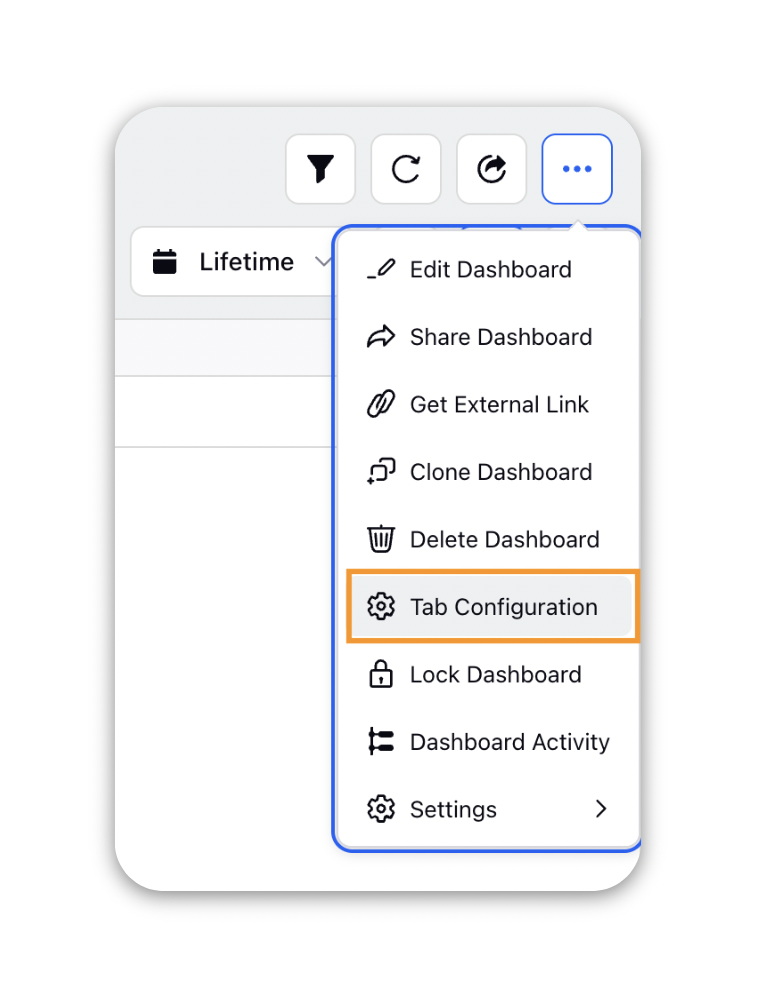
Here you can create new tabs for your Custom Dashboard by clicking on the Create New Tab button.
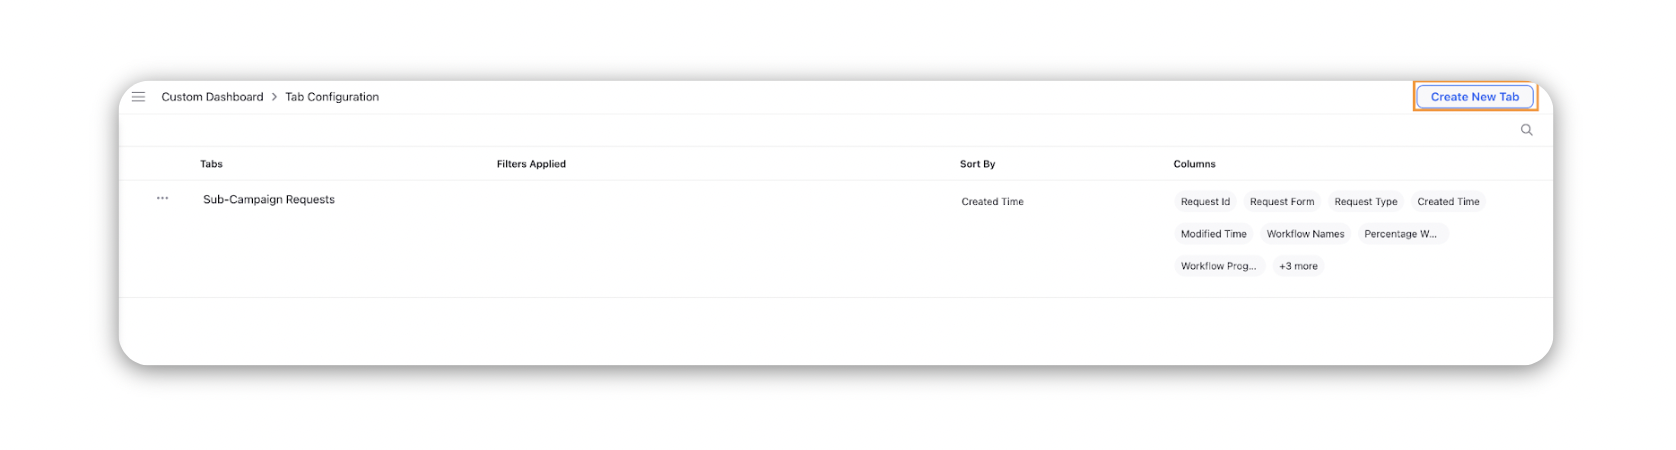
You can also Edit, Delete, Clone and change the configuration of existing tabs in your dashboard.
Note: You need to have required permissions to manage tabs. |