Use Custom Field Check in Journey Facilitator
Updated
In this article, you will learn about the usage of Custom Fields in a Journey.
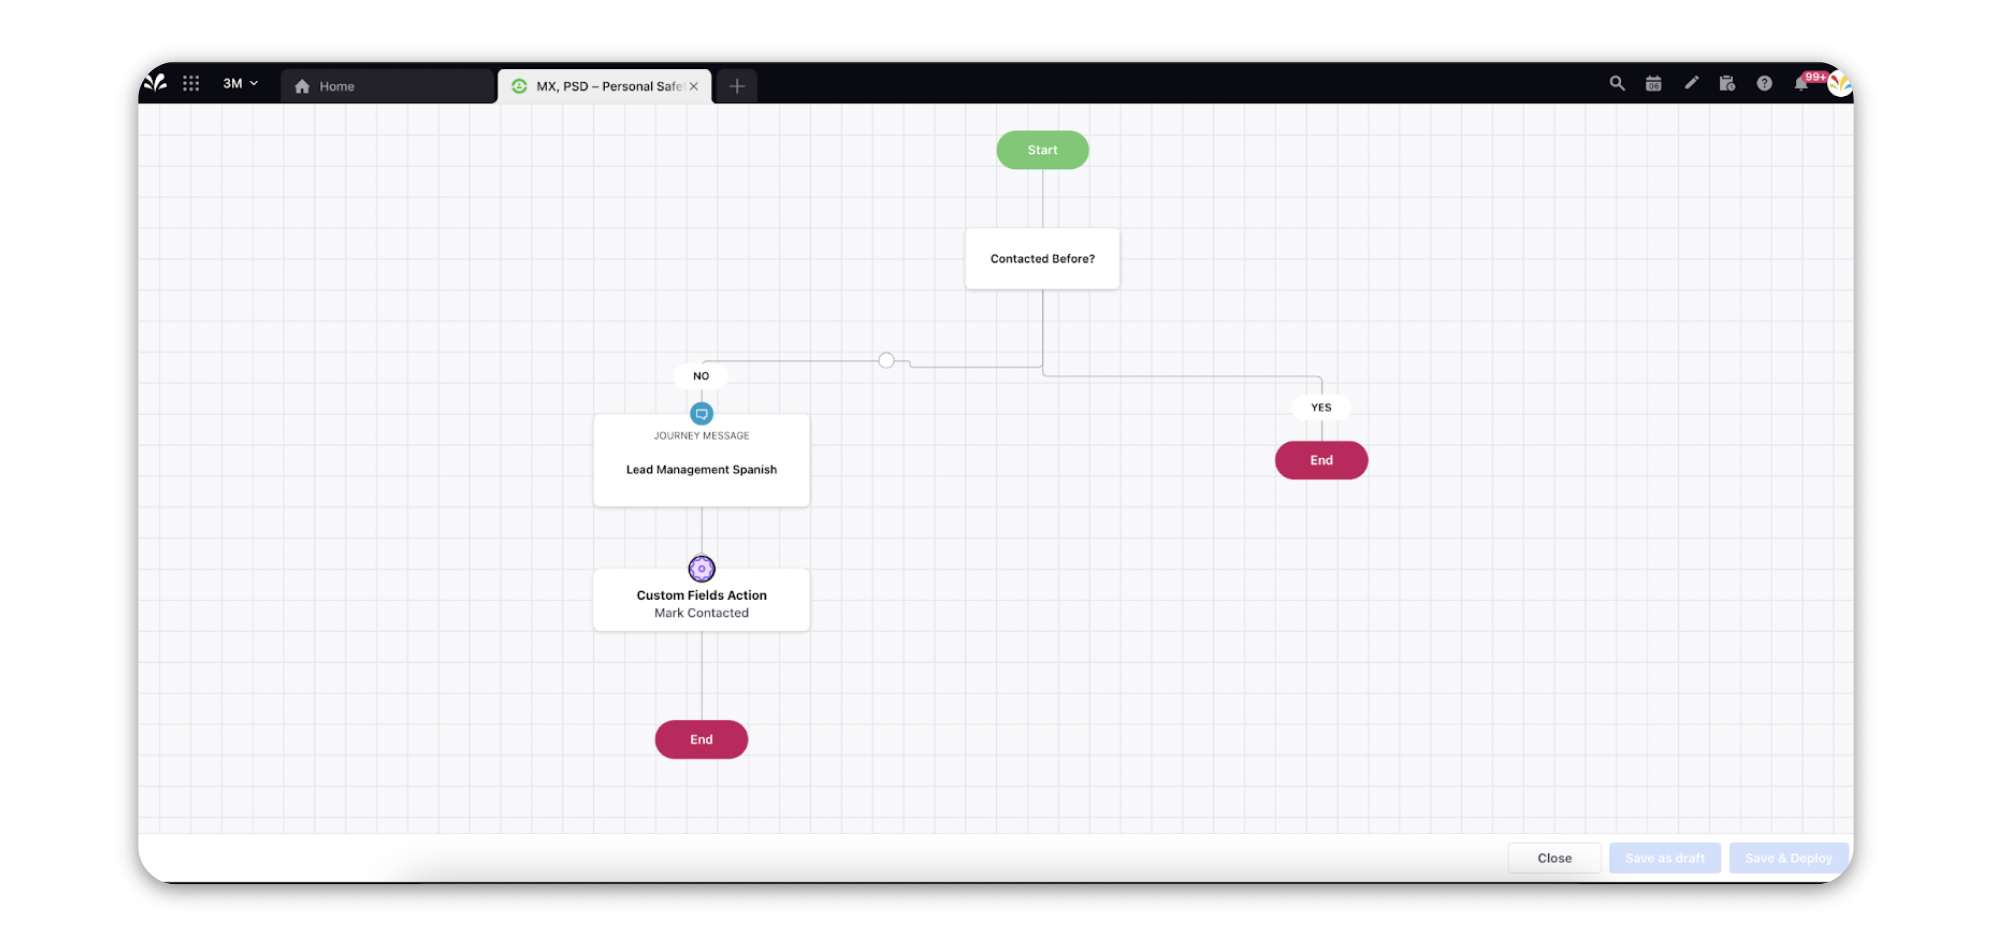
Taking Decisions based on Custom Field values
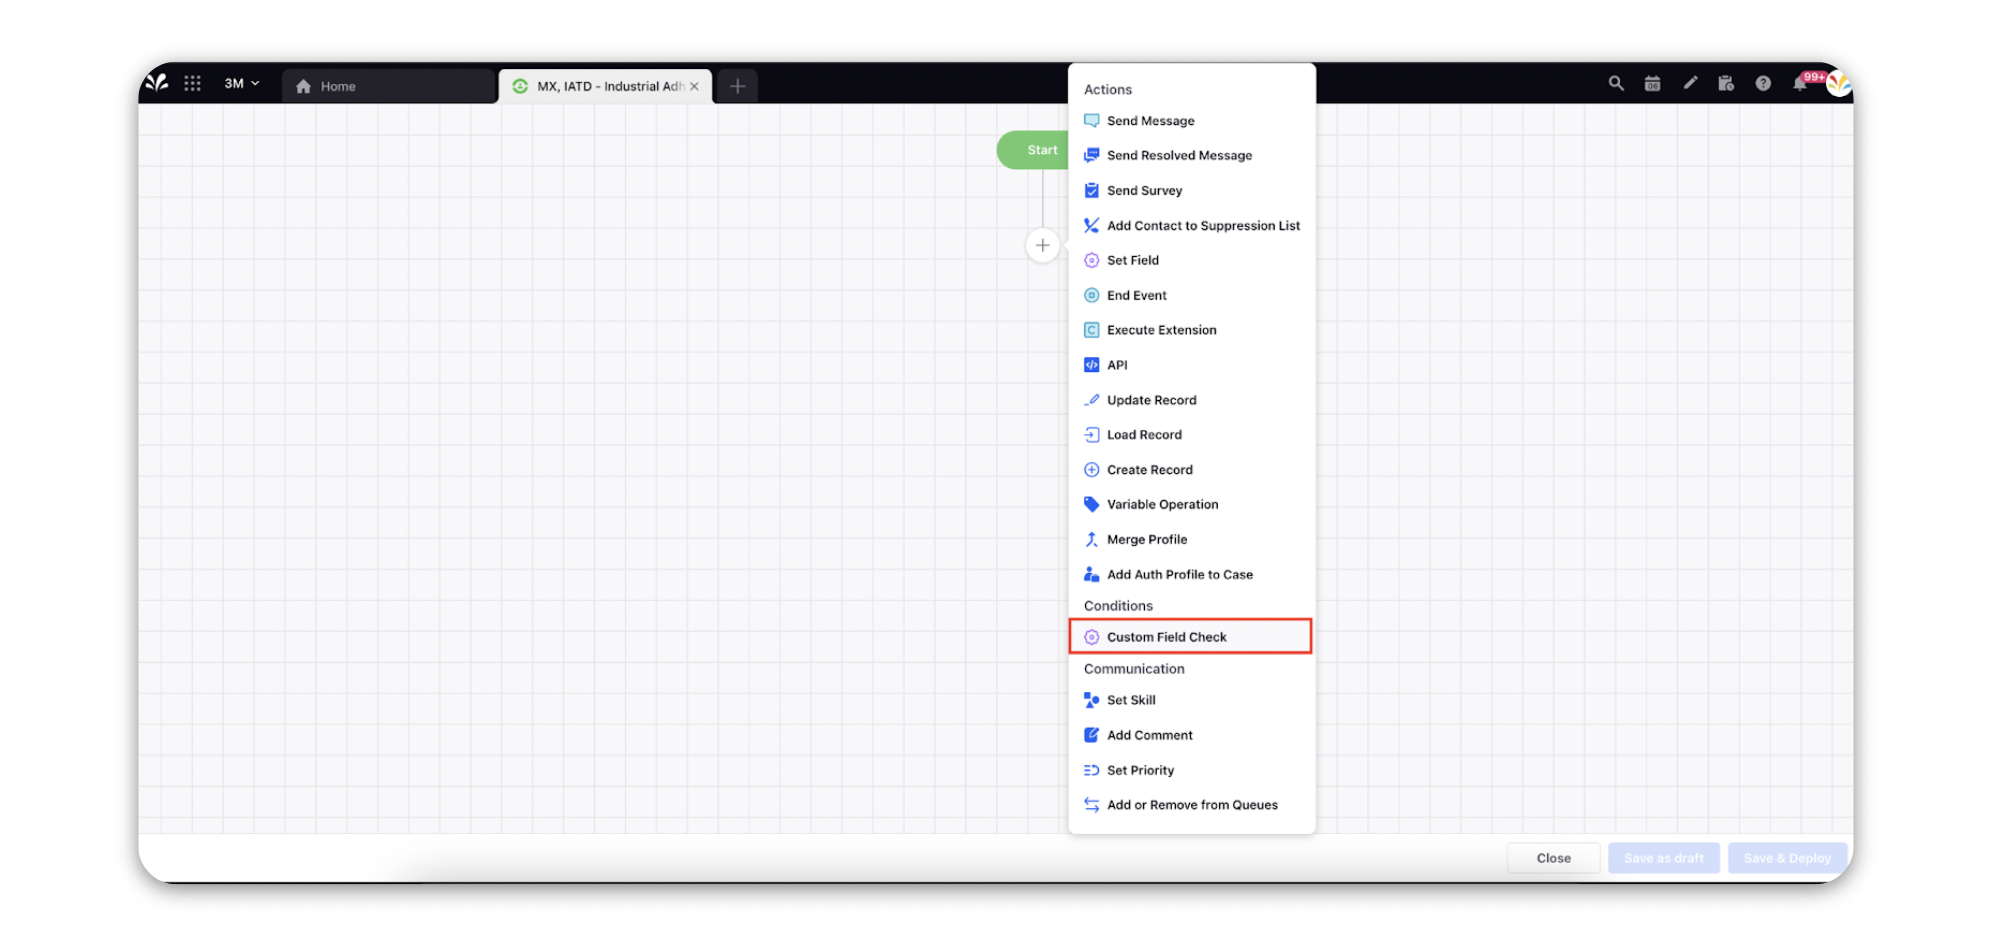
While creating the flow of the Journey in the Journey Builder canvas, you can use the Custom Field Check node under the Conditions section.
This will take you to the window where you can define various paths for the Audience Profiles based on their custom field values.
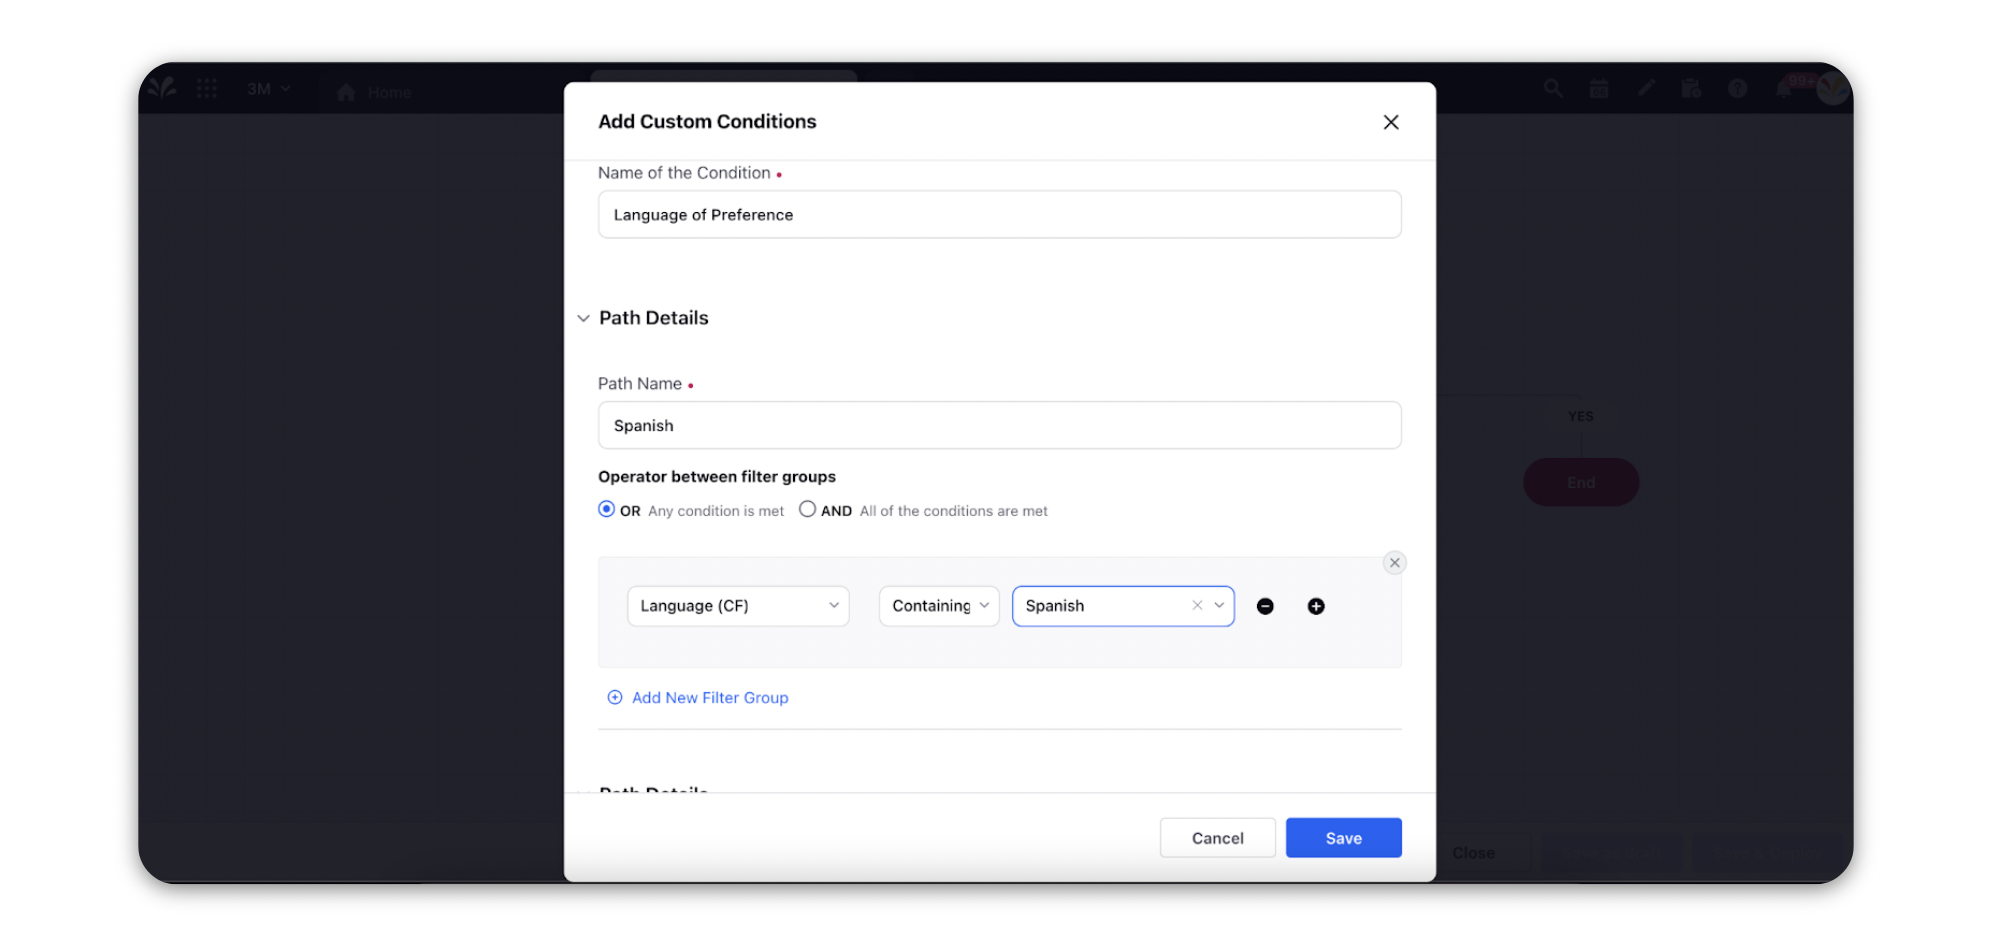
You can take different actions based on the path that the profile has taken.
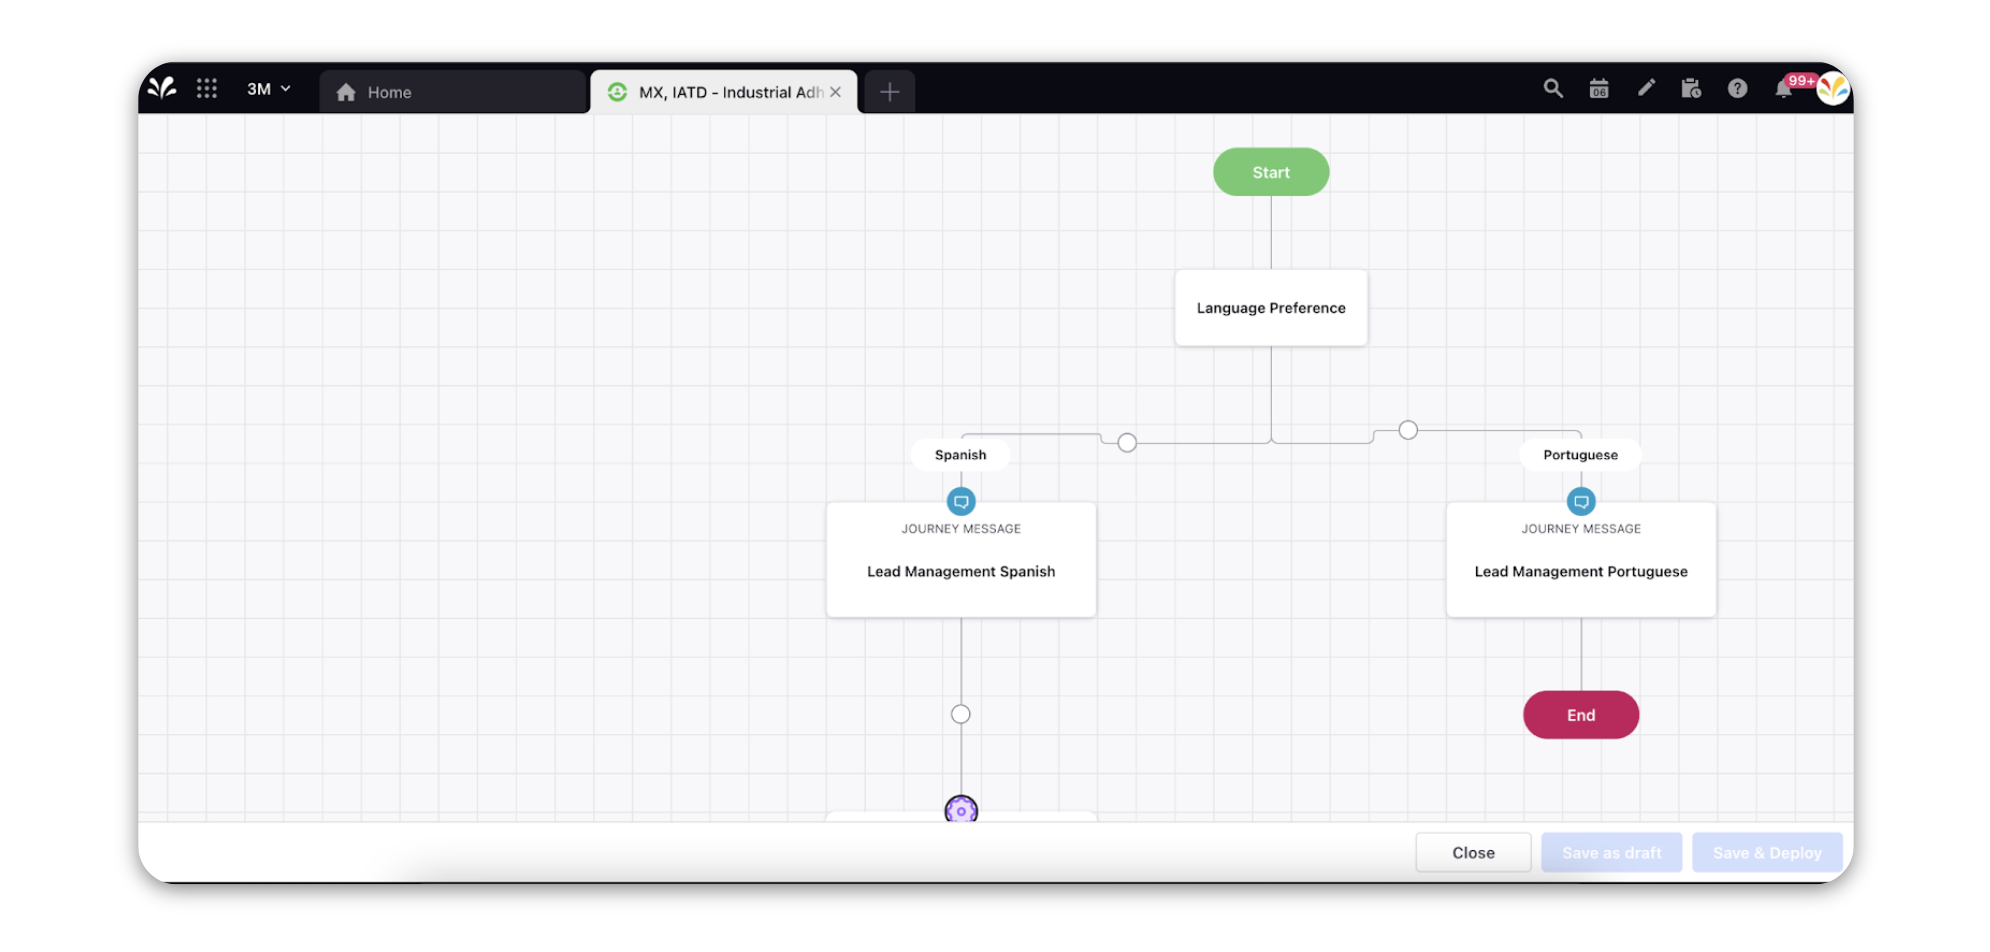
For example, in the below mentioned case, the Journey is checking the Language of Preference Custom Field and sending the right message as per the preference.
Set Custom Field on the Audience Profile within a Journey
You can also set a Custom Field values within a Journey to keep track of everything and take decisions later on based on those custom fields.
Click on the “+” icon in the Journey Builder canvas and select the Set Field action from the menu.
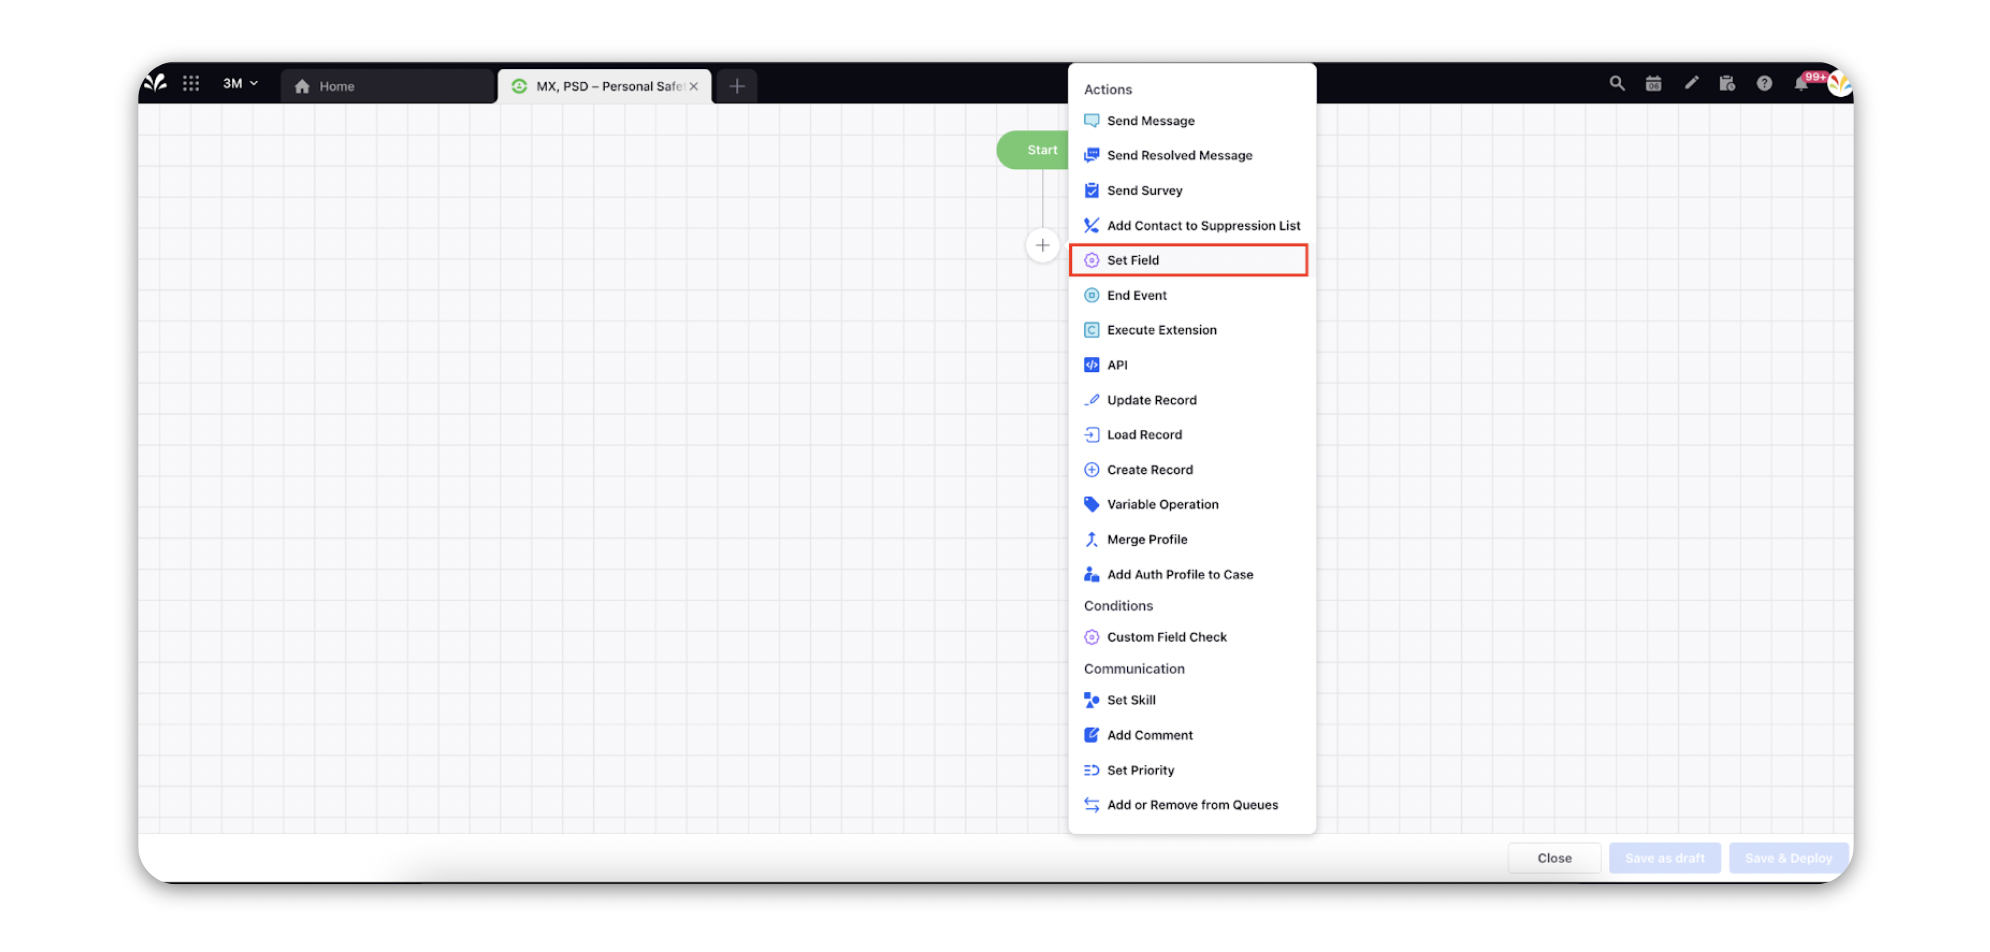
This will direct you to a window that will where you can select the custom fields and the value you need to set for it.
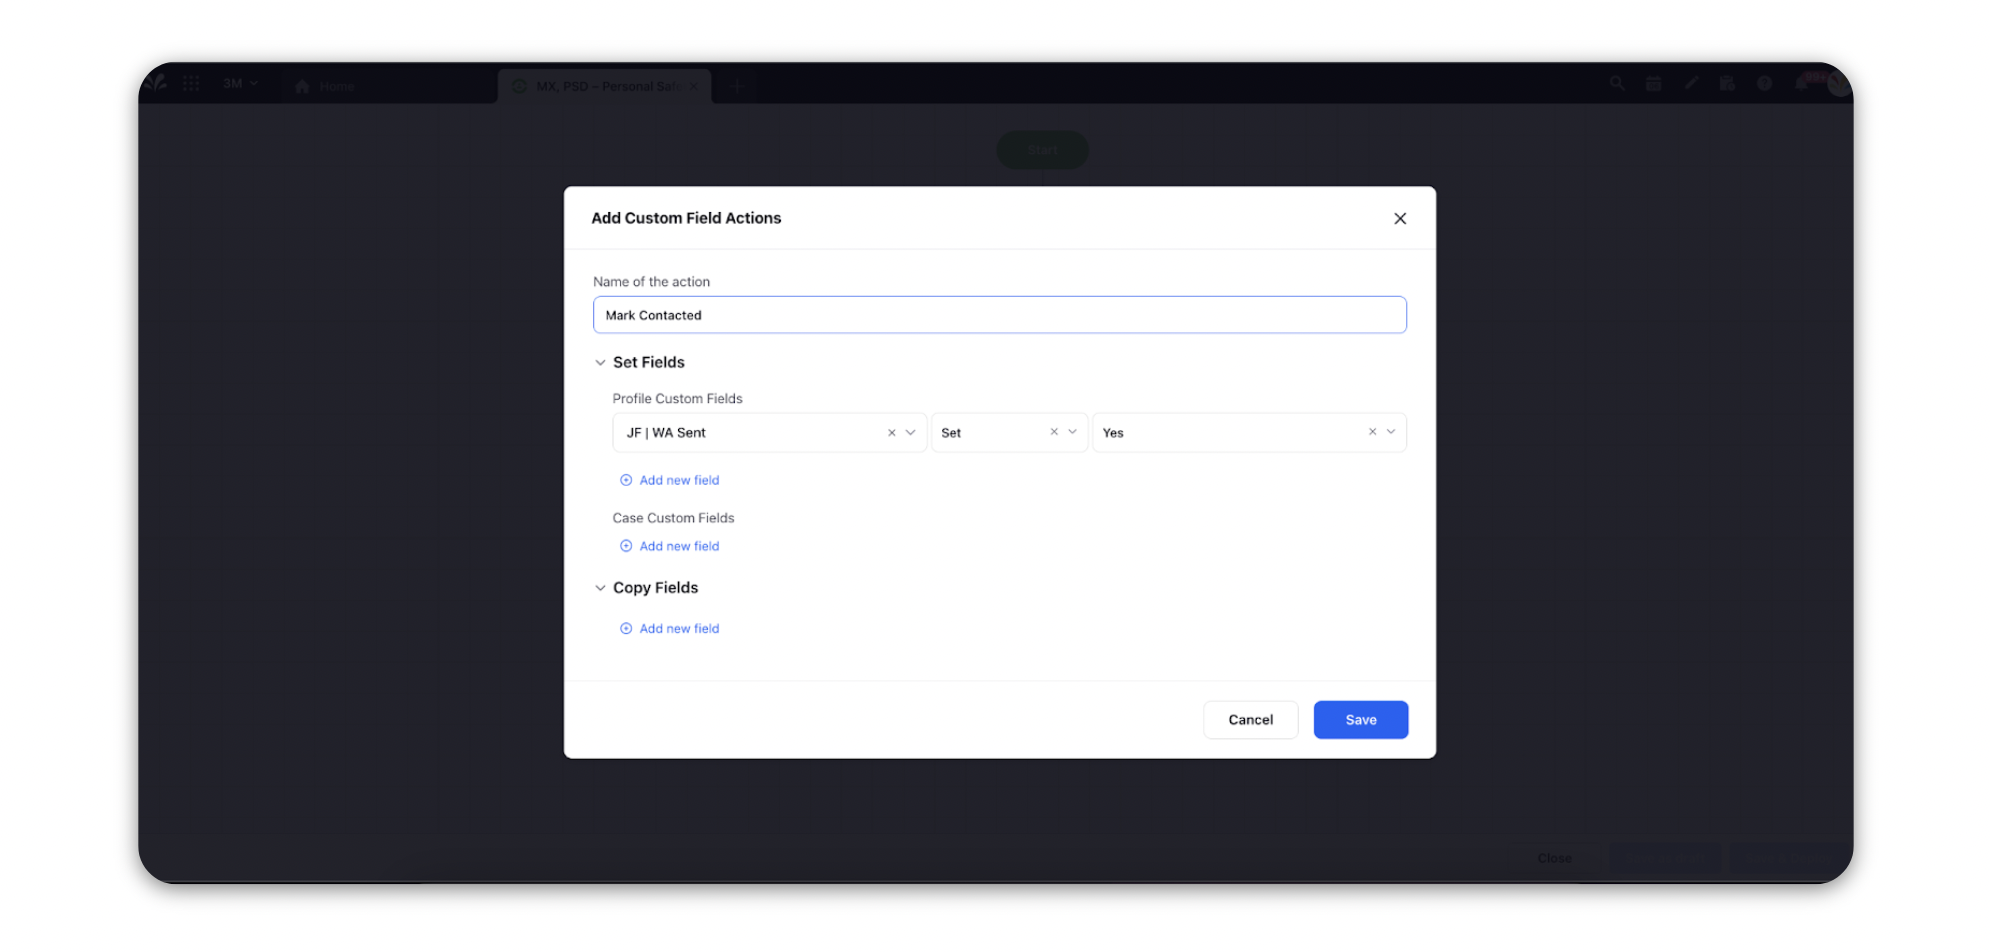
Now, everytime this path is executed for a certain audience profile, the value of the JF | WA Sent custom field will be set as Yes.