Configure an IVR Journey Widget
Updated
Care console is one stop solution for the agents to work on their cases, and solve the customer queries with a unified customer 360 view. Admins can customize and configure the care console layout based on their requirements.
Business Use Case
Brands want their agents to see the information which the customer has provided on IVR. And as Sprinklr IVR also allows us to capture customer identification through integration with client CRMs, it makes it very important to showcase customer information on the Care Console. This helps agents to know about customer queries before answering to the customer. Typical properties which might help agents:
1. Product selected on IVR
2. Query type selected on IVR
3. Customer type identified on IVR
4. Customer identification status on IVR
Solution
Admins can tag all the customer information, and customer journey over IVR on Case custom fields. We can use the Care Console Properties Widget to showcase these fields.
Configurations Steps
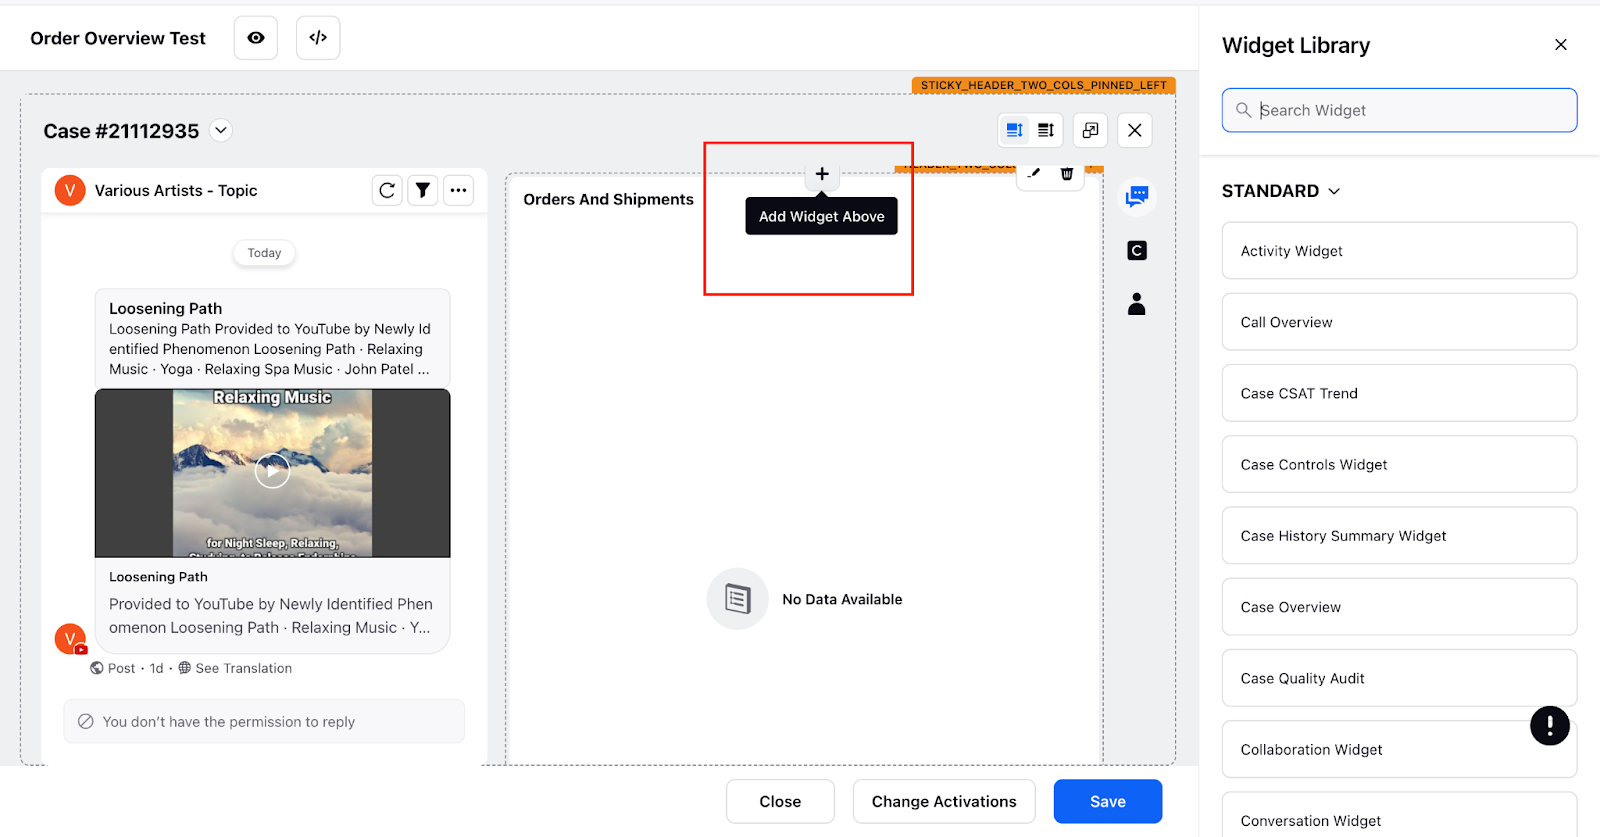
We need to open the record page in which we want to add the IVR Journey Widget
Go to Sprinklr Care Console Manager or open https://<env>.sprinklr.com/care/console-manager
Open the record page which you want to edit
Click on Add Widget where you want to insert a new widget.
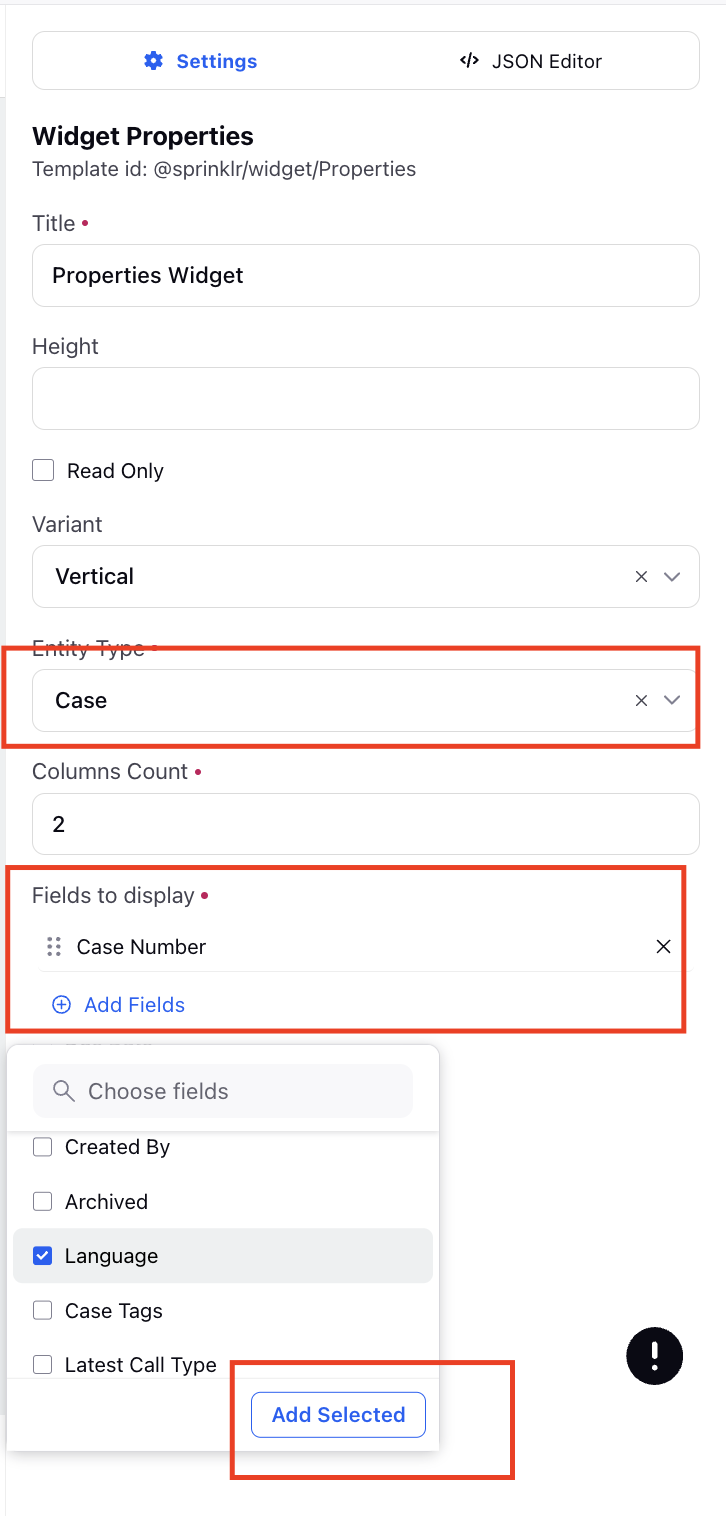
Select Properties type of widget.
Choose the entity type as Case
Select the fields which you have tagged on IVR and want to show to the agent.
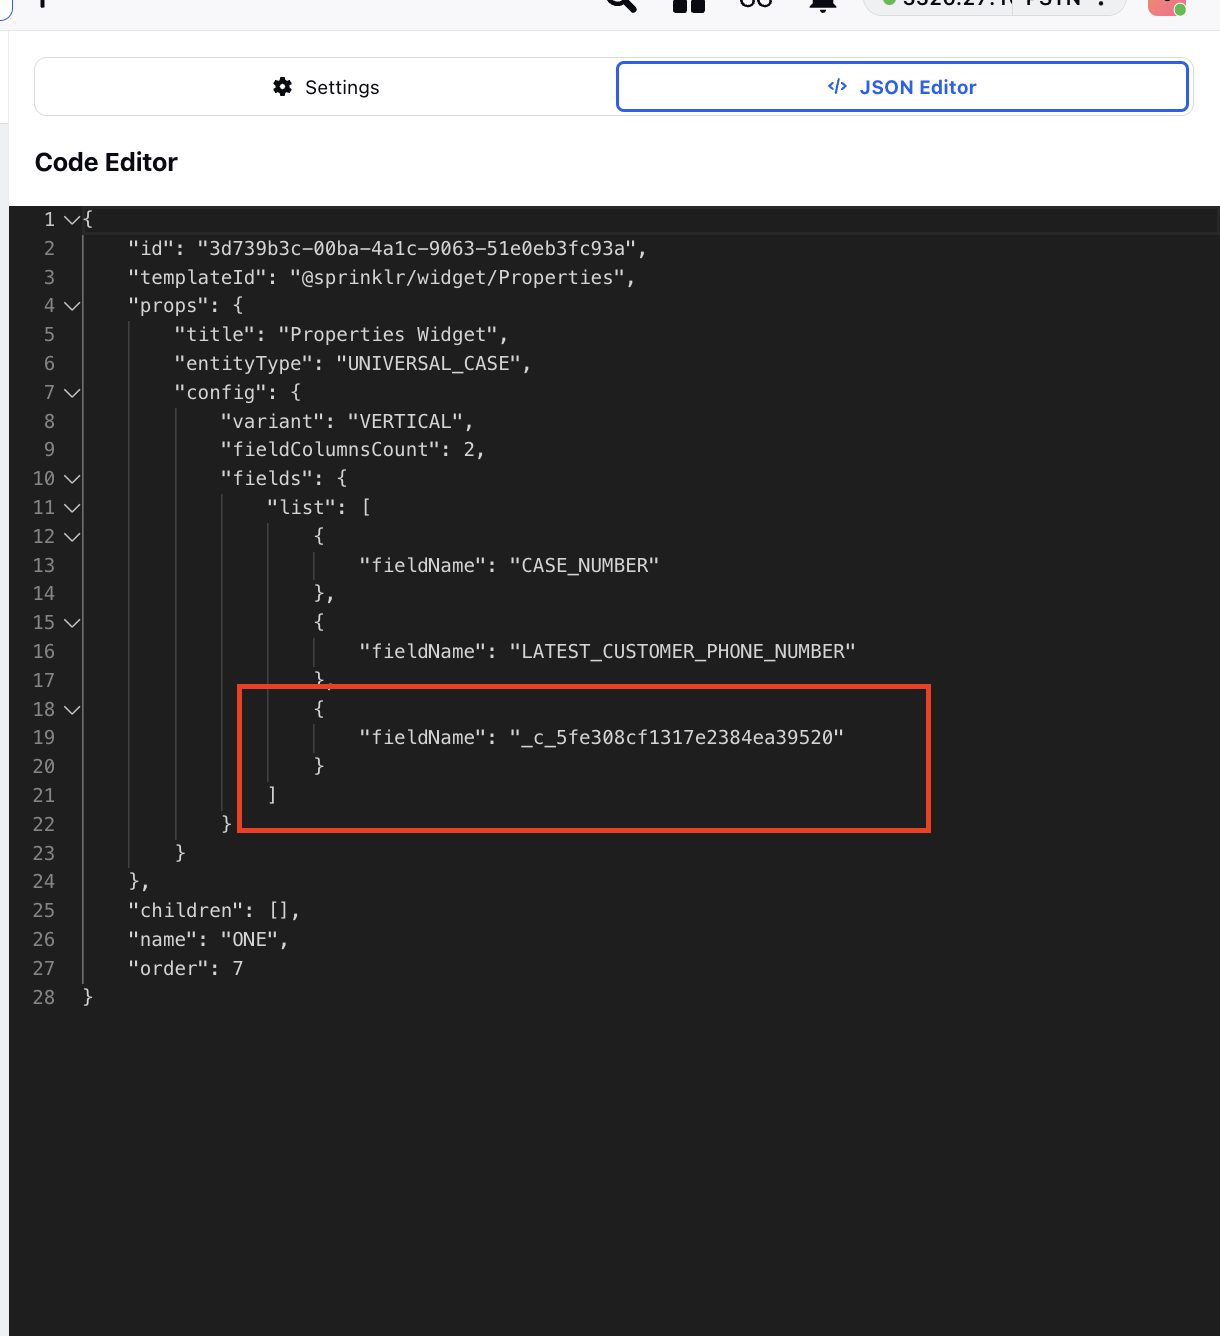
Sometimes, the case custom fields might not appear in the dropdown of select fields. In this case, we can go to the JSON code editor.
Add the custom field name in the following format.
{
"fieldName": "_c_5fe308cf1317e2384ea39520"
}Make sure your JSON format is correct by validating it at https://jsonformatter.org/
Click on Apply Changes and save and deploy the record page.