Create a Date/Time picker message template
Updated
A time picker prompts the customer to choose an available time slot, such as to schedule a meeting or an appointment. Calendar conflicts are also shown to help the customer making an informed decision. After picking a time, customers can revisit their choice in the conversation view to add the event to their calendar.
To create a Date/Time Picker template
Click the New Tab icon. Under the Sprinklr Social tab, click Assets within Engage.
Click the dropdown icon alongside Add Asset in the top right corner, and select Omni Chat Templates from the dropdown.
On the Create New Asset window, enter a Name and Description for the asset in the respective fields under Basic Details.
Under Asset Specific, select Time Picker from the Template Type dropdown and Apple Messages for Business from the Channel dropdown.
Under Received Message, click the Upload Image icon and add the desired image (not mandatory). Enter Title (mandatory), Subtitle (not mandatory) and preferred Style (not mandatory) in the respective fields. Style is the size of the icon inside the template. You can select the desired size from the dropdown.
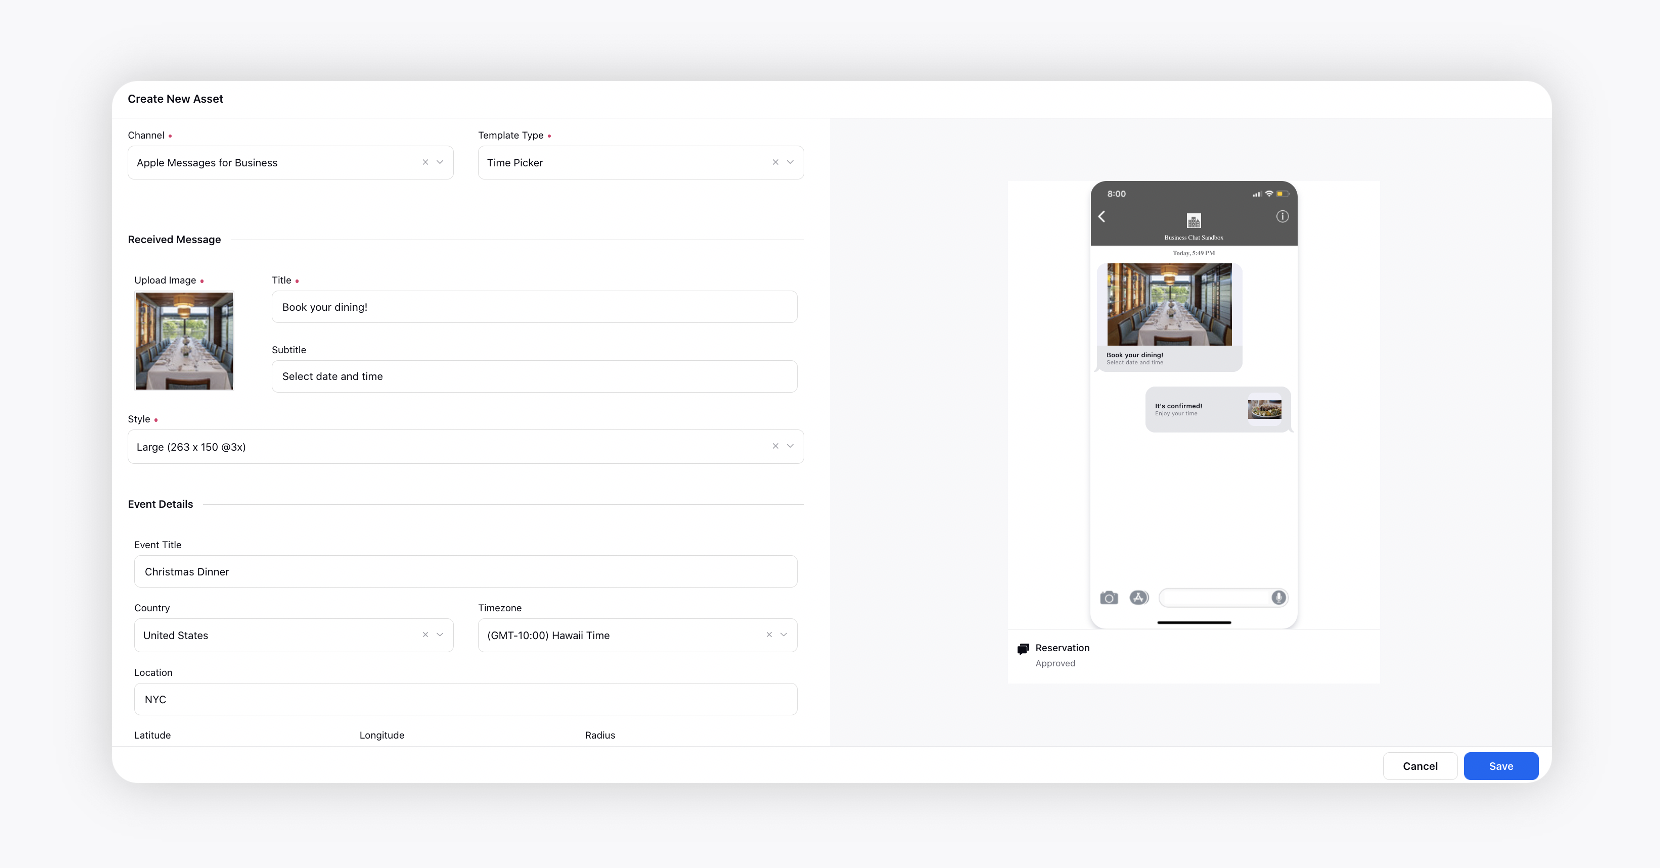
Under Event Details, enter the event details. Add Date and Duration of the appointment/event. You can also add new time slots depending upon the requirement.
Under Reply Message, click the Upload Image icon and add the desired image. Enter Title, Subtitle and preferred Style in the respective fields. All these fields are not mandatory.
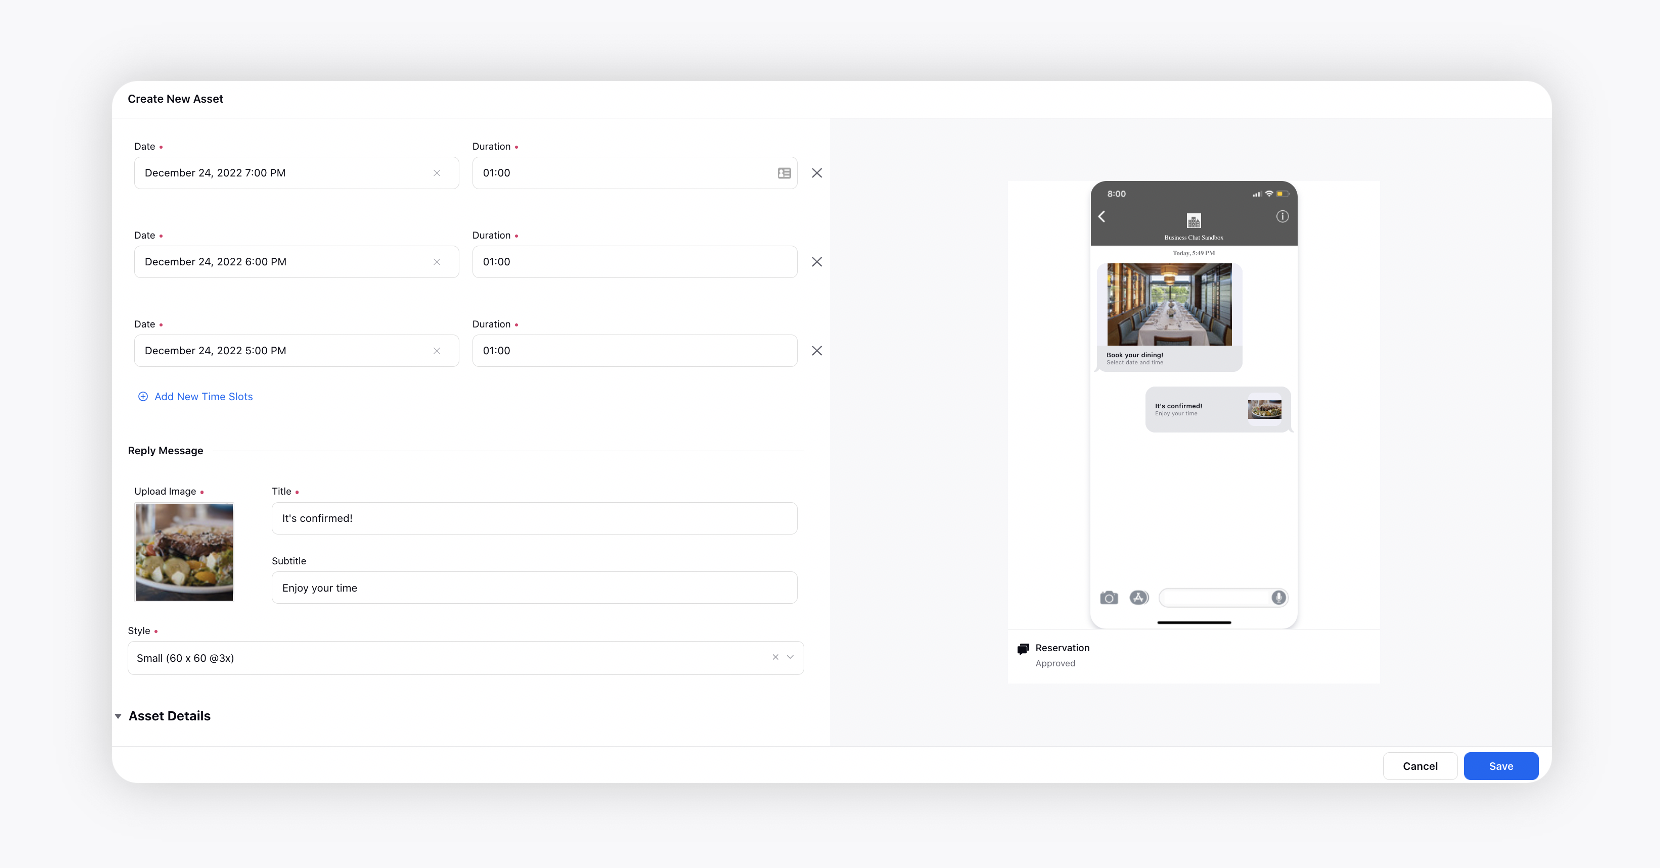
Under Asset Details, enter the asset details like Campaigns, Status, Available From, Visible From, Expires on, etc.
Under Asset Sharing, select the Workspaces and Users/Users Groups you want to share your asset with. Check the Visible in all workspaces box to make it visible in all workspaces.
Next, apply the desired Properties to the asset.
Click Save in the bottom right corner to create the template.