Manual Dialer
Updated
Business use case
To provide users the ability to manually call customers by dialing the numbers from various parts of the Sprinklr platform.
Sprinklr solution
Apart from the predictive and preview dialer, Sprinklr provides many dialer configurations, out of which there is a dialer called manual dialer which can be used to dial the numbers manually and place the calls.
Why is it necessary?
Predictive dialer, preview dialer, etc. dialers do not provide the feature of dialing a number manually, thus manual dialer is used whenever the users need to dial a number in order to connect with the customer/lead. This also helps the users to redial the customers if, during the conversation, the call gets disconnected by mistake.
Configuration of Manual Dialer
Click the New Tab icon. Under the Sprinklr Service tab, click Voice Care within Listen.
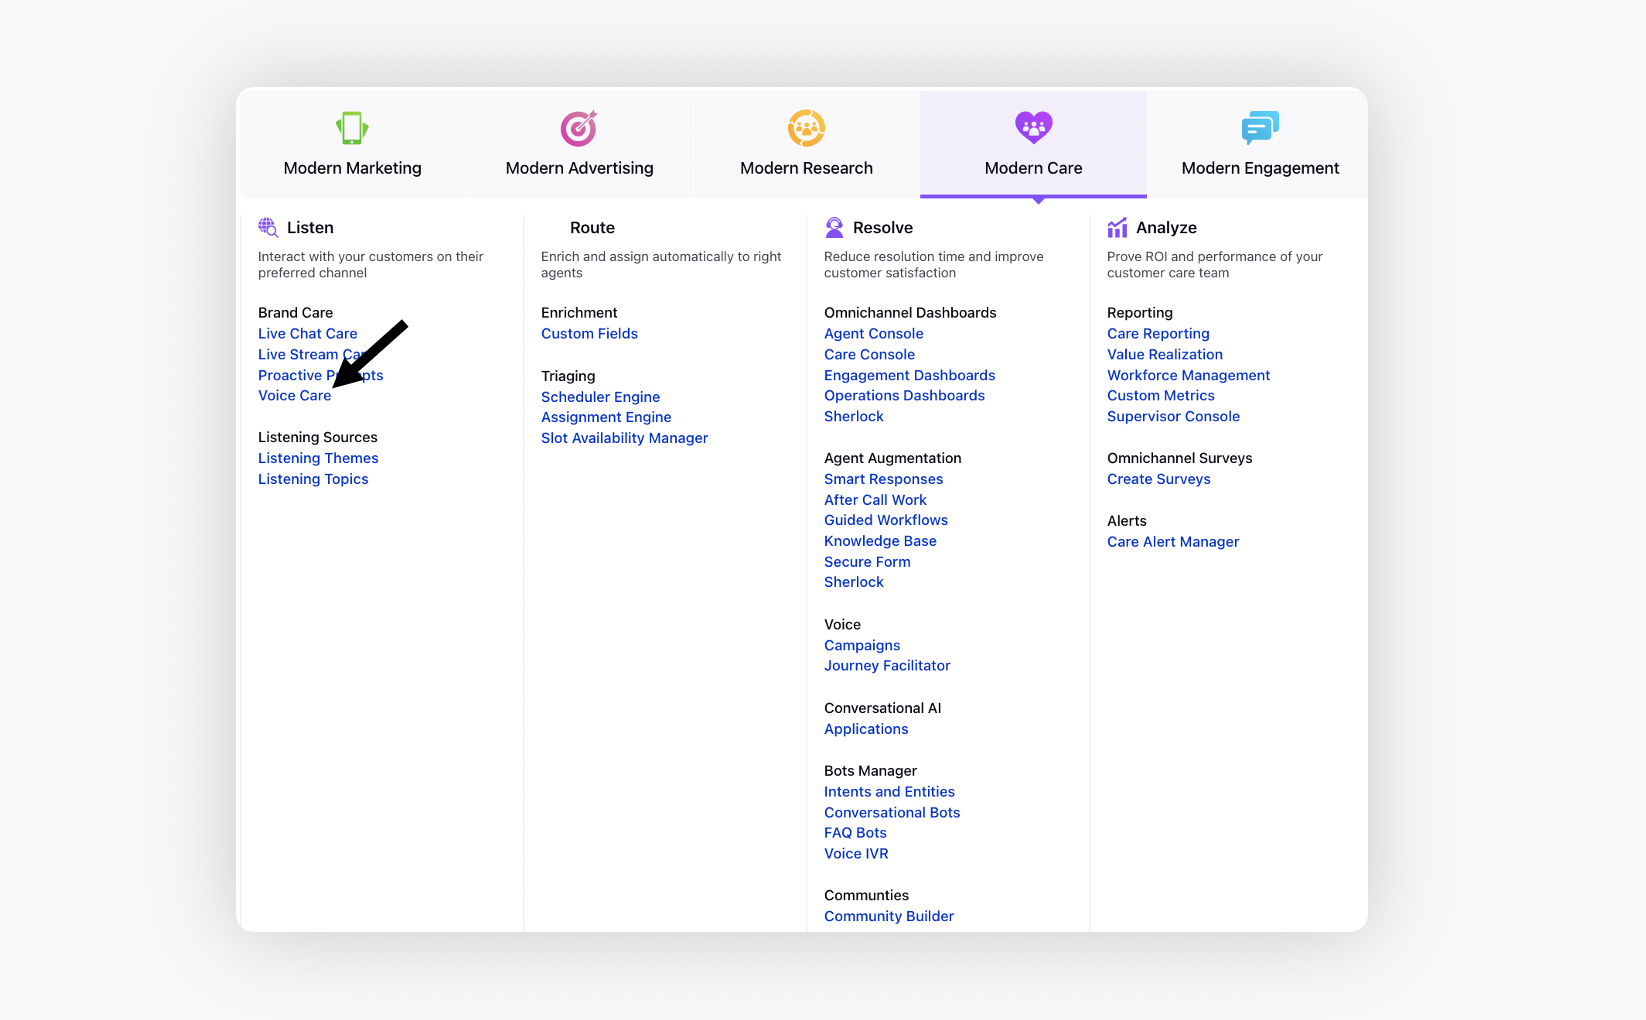
Navigate to Dialer Profiles from the left pane.
Click Add Dialers in the top right corner.
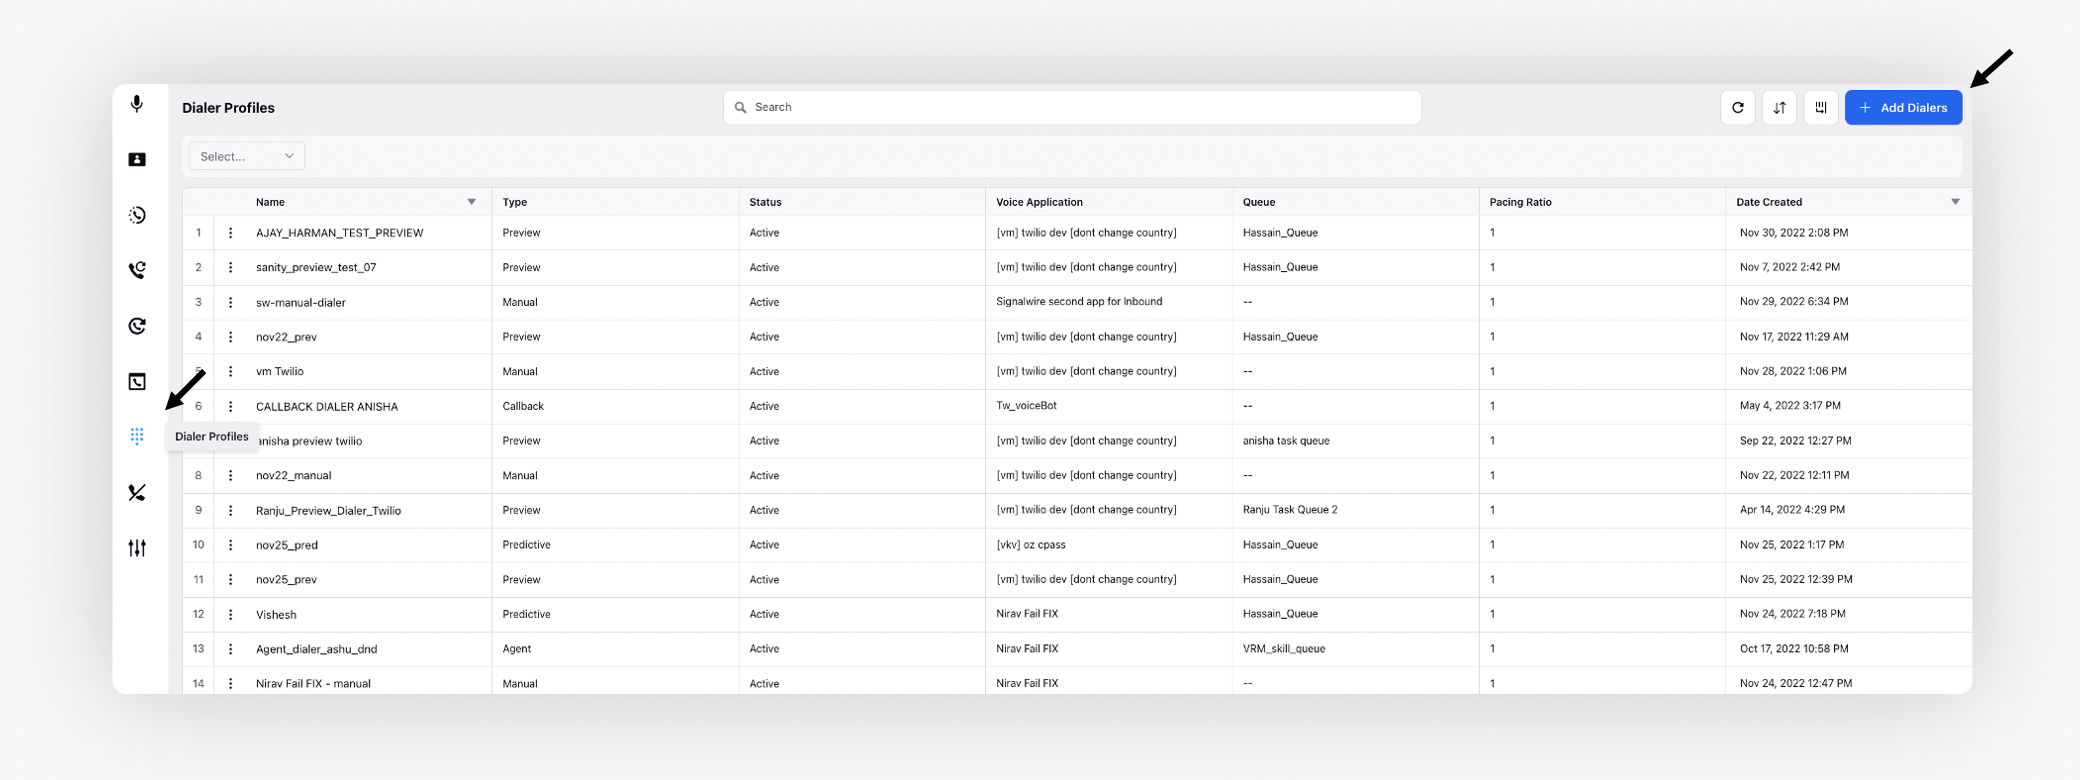
Add all the relevant details to create a manual dialer.
.png)


Field | Description |
Dialer Name | This field is mandatory and contains the name of the dialer. |
Description | This field is optional to enter any notes or reason of creating the dialer. |
Dialer Type | Specify the dialer type which in this case will be Manual Dialer. |
Status | Specify if it is in operating state or not. There are three statuses
Dialer would only place calls in the active state. |
Rule | Rules can also be assigned to Manual Dialers based on the business necessities which get triggered whenever a manual call is placed. |
Call Ring Time | Call ring time is basically the time for which the call will be dialed at customer end, i.e., the duration for which the customer is called before the calling stops if they don't pick up. |
Call Setup Time | Call setup time is basically the time the dialer awaits the confirmation whether the customer has been dialed or not.
This means the dialer will wait for 15 seconds to receive confirmation from Telco (Telecommunication service provider) whether a call has been placed or not. Once the call is set up, it will ring for 60 seconds for the customer before it gets answered or receives any other telephony outcome. |
Enable Recordings | Enables the recording of the calls which can be used by quality managers for auditing purposes. |
Enable Transcripts | This enables the transcripts of the recorded calls which can be used by the quality managers for auditing purposes. |
Enable DNC Calls | Enabling this gives the dialer rights to call customers or dial the phone numbers which are in DND list and do not give consent to be dialed. |
Campaign | If a campaign name is entered here then all the manual calls would be made under that campaign which makes it easy to track in the reporting dashboard. |
Compliance Policy | This ensures that all outbound calls through the selected dialer follow the specified recording and data retention rules defined in the compliance policy. |
Speech Profile | The appropriate speech profile for accurate transcription based on the case language. If left blank, the system uses the default profile set in Outbound Settings. |
Language Selection | Language preferences can be configured at the dialer level based on customer lead attributes to ensure that transcripts are generated in the appropriate language for different leads dialed from the same dialer. When a call is initiated, the system verifies if a language is configured at the dialer level and whether the specified attribute value matches the customer's lead. If both conditions are met, the corresponding language setting is applied. If no match is found, the default language specified at the dialer level is used. In the absence of a default language at the dialer level, it defaults to the workspace language setting. |
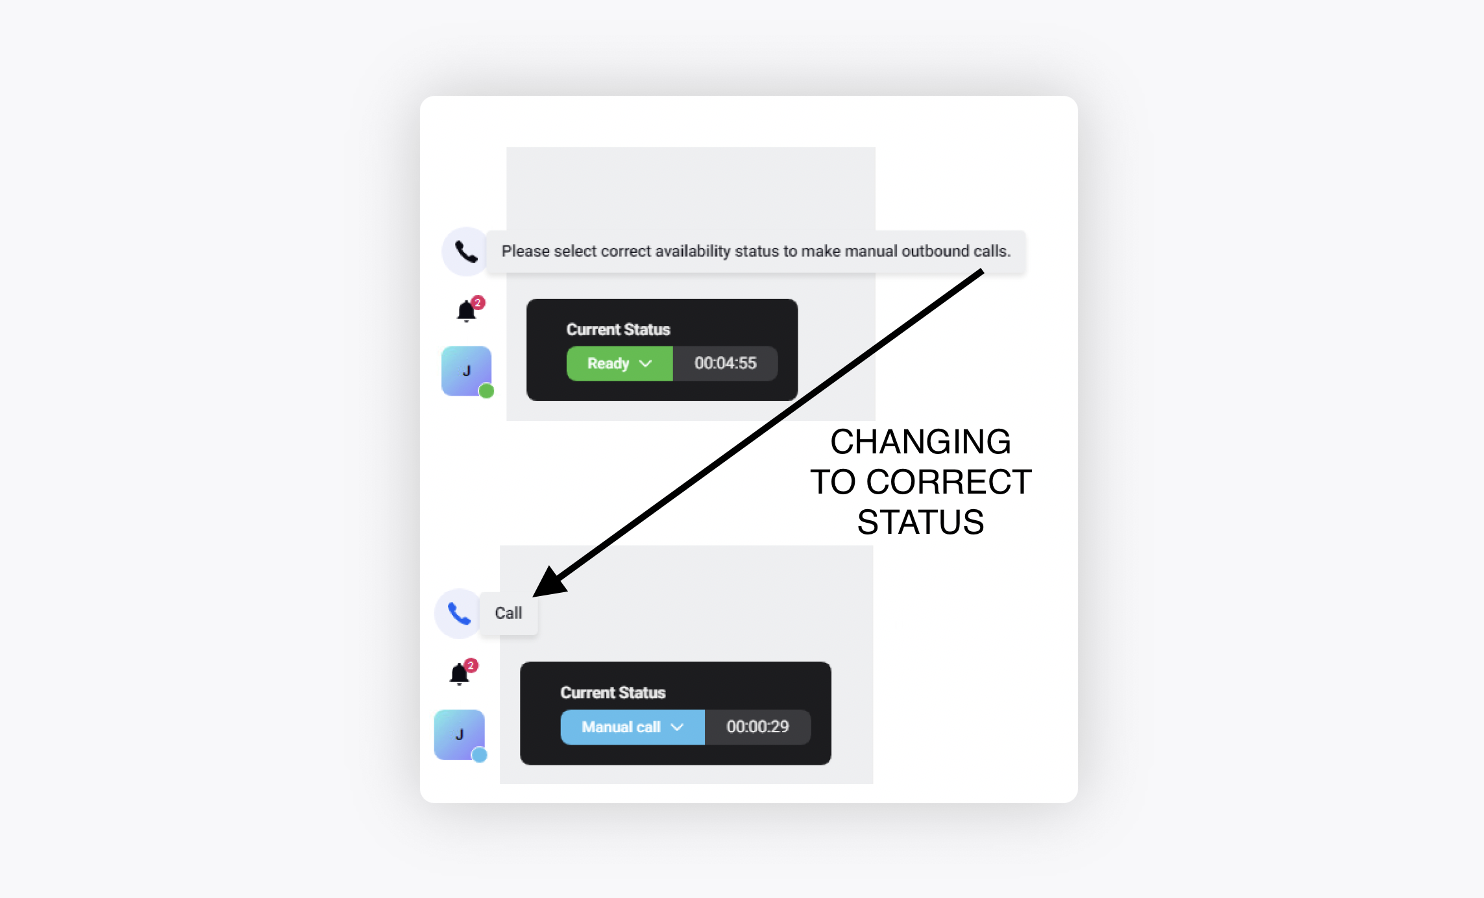
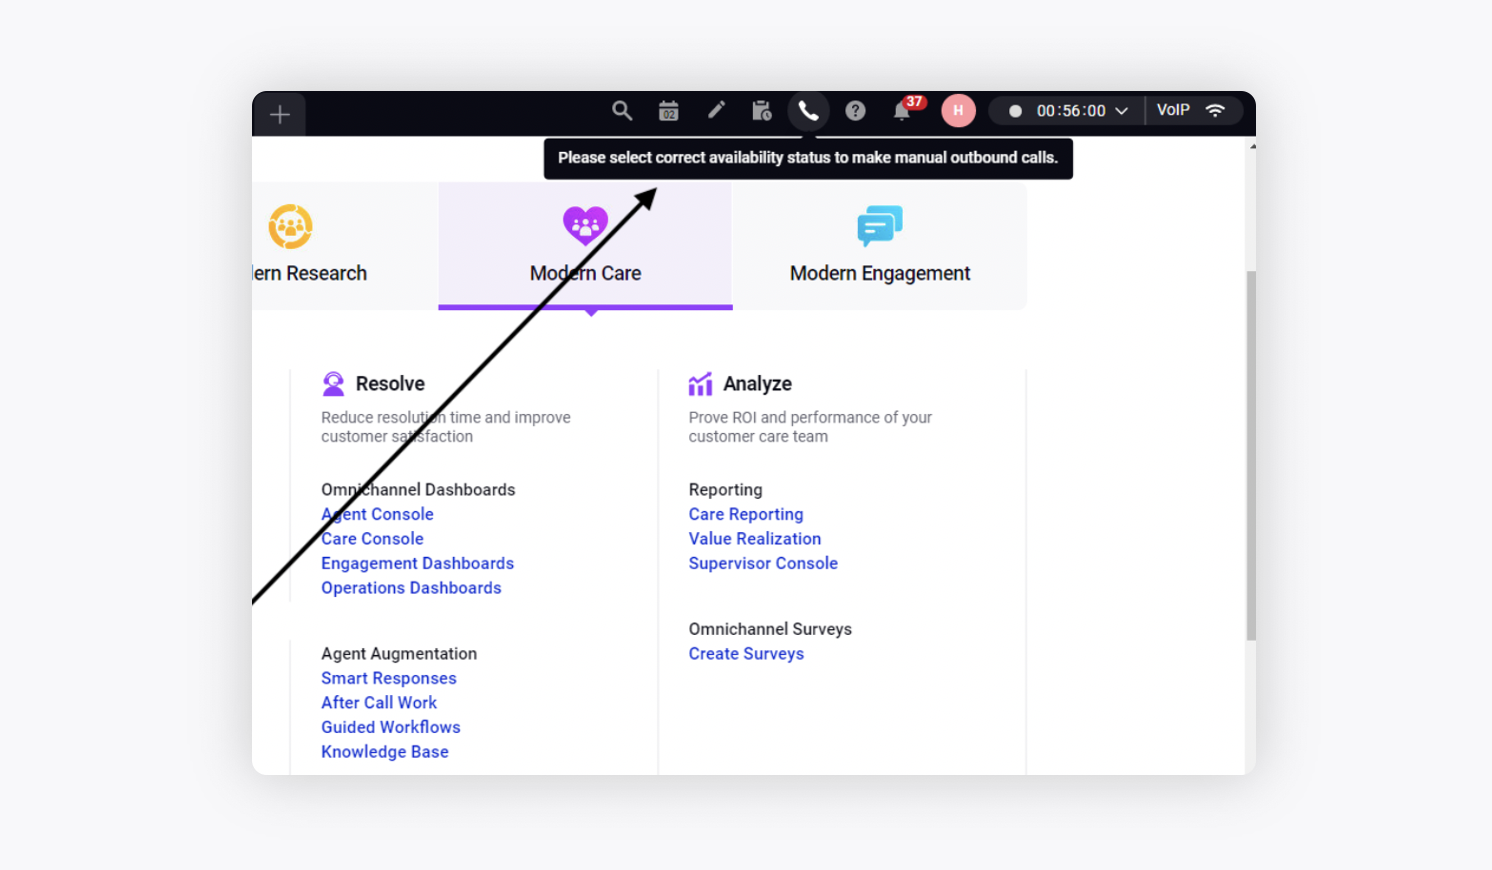
Select User Availability Statuses | This field consists of the status in which the agent or the user would be able to place a manual call. Example If this field contains “Manual Call”, then the user would only be able to manually dial when (s)he is in “Manual Call” status and not in any other. Multiple statuses can be selected here. |
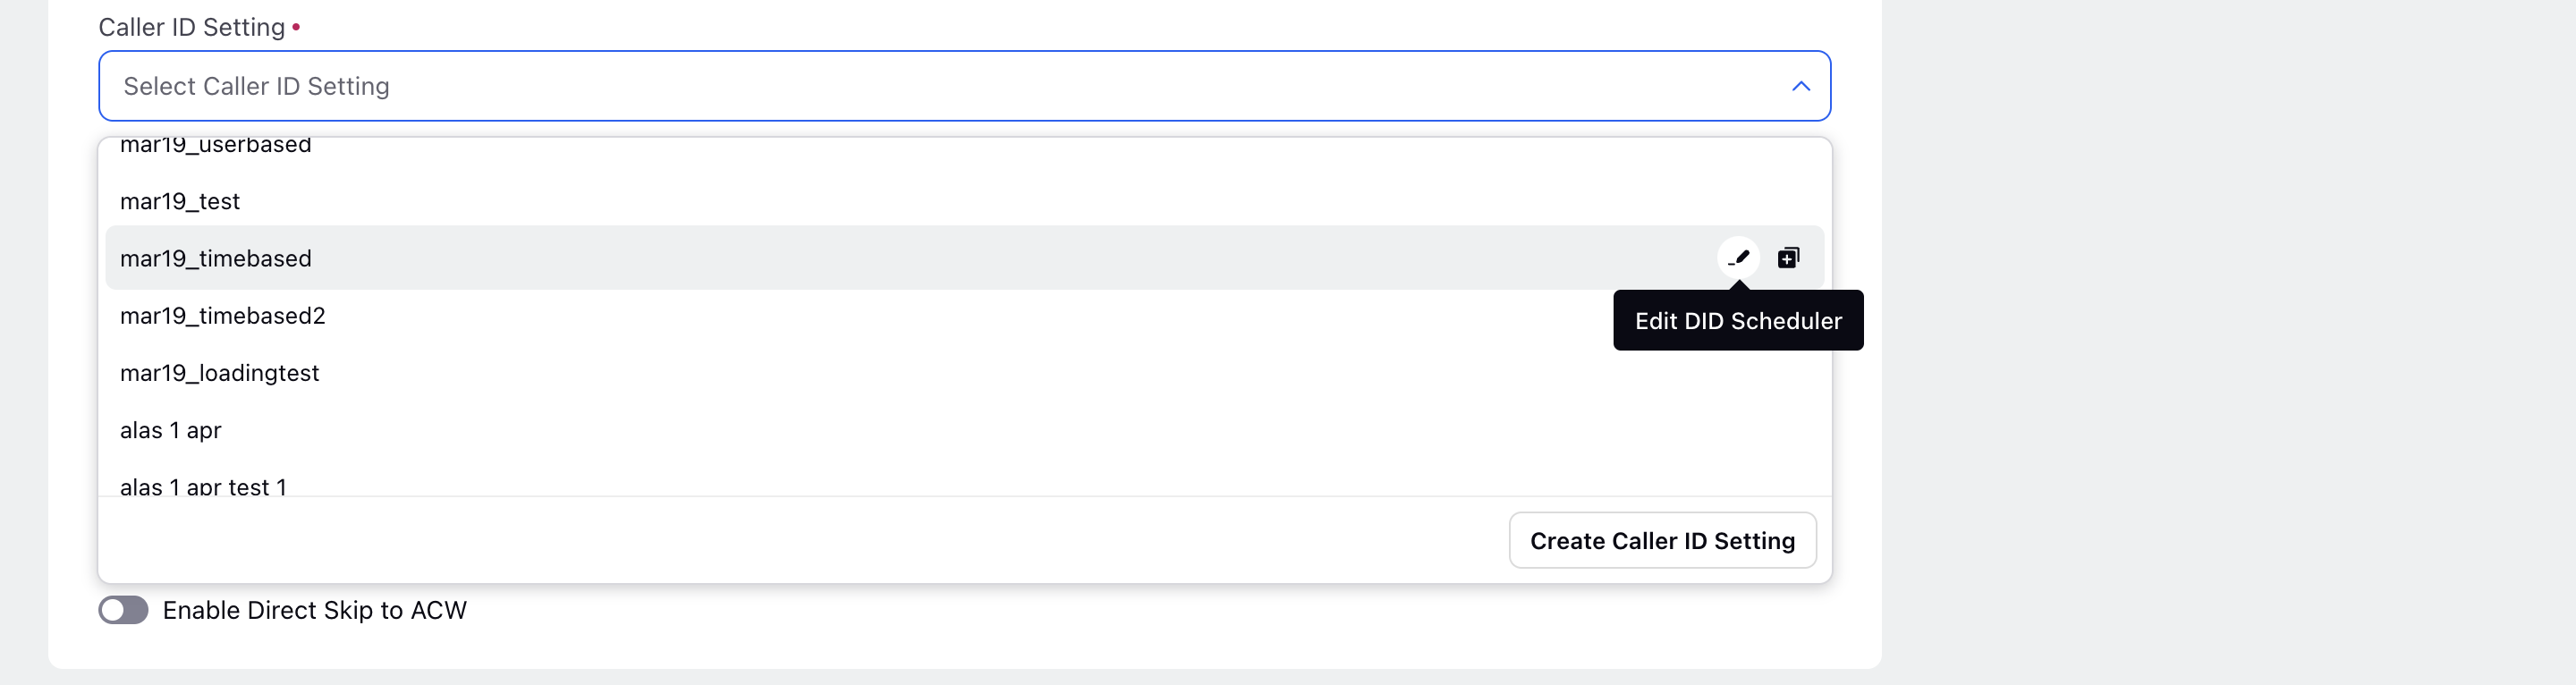
Caller IDs | Select the desired Caller ID Setting based upon the use case. There are six types of Caller IDs.
All configurations made within the Caller ID Setting for the selected scheduler, including settings such as default voice application, DID numbers, and other configurations, will be displayed in the right pane of the dialer profile. You can also edit, clone and create a new Caller ID Setting from here.
|
Voice Application | Application in which the DID numbers and the voice account is shared. Twilio, Avaya, Amazon connect and Ozontel are the voice accounts used by Sprinklr. One voice application can be used in multiple dialers. In order to dial numbers, a voice application should also be added. |
DID numbers | These are the caller IDs from which the customers will receive the call. You can select the DIDs from the dropdown list which displays the DID numbers present in the Voice application. |
Workspaces sharing | Share the dialer with specific workspaces. The dialer would be visible only in the workspace in which it is created and the workspaces mentioned here. |
Users/User Groups sharing | Share the dialer with specific users or user groups. |
Custom Properties | Add the desired custom properties. These custom fields can be created by selecting "Asset" as Dialer Profile. |
5. The final step of this configuration is to create a campaign.
Campaign for manual dialers is required for the following configurations:
Adding the expiration date of the campaign after which the dialer might not be used.
Applying the required Business Hours to define the time of the day during which this dialer would place the calls. After or before the business hours, calls would not be dialed from this dialer.
Retry strategy based on the telephony outcome, i.e., if the customer is not able to being connected because of the phone being switched off, customer did not answer, etc., can also be applied to the callback campaign.
No segment is required in this campaign as it can be used at any time and not on a particular segment.
Manual dialer usage across the platform
Agent persona
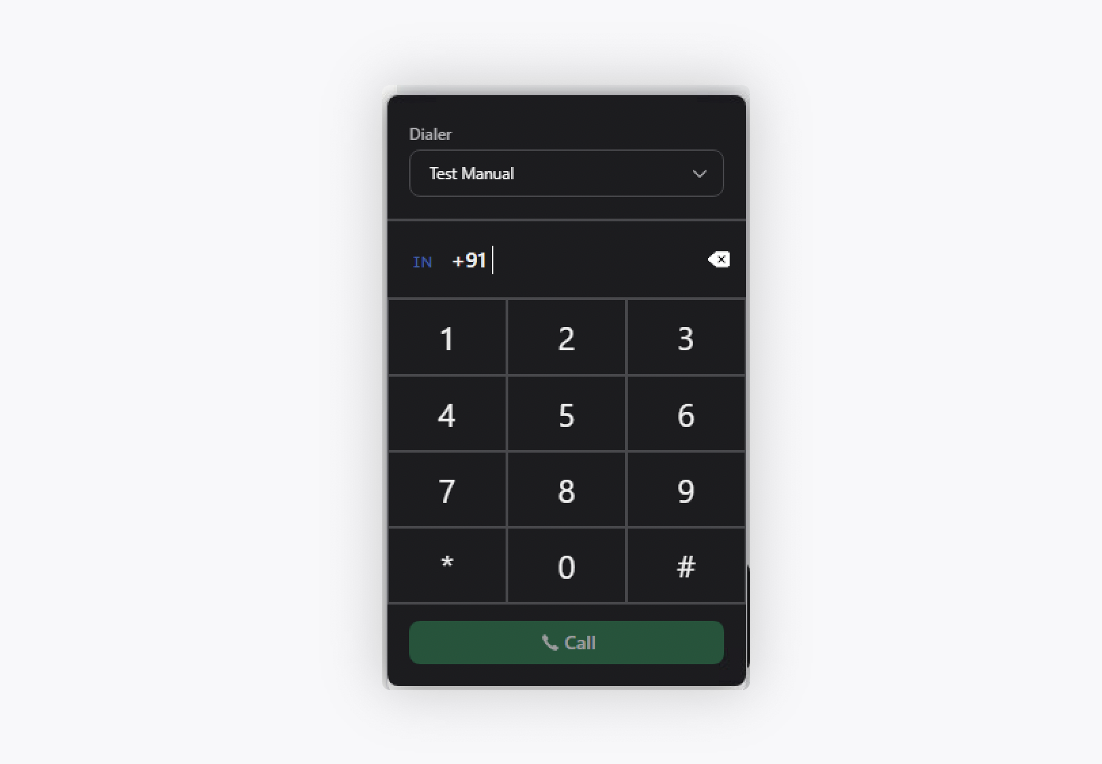
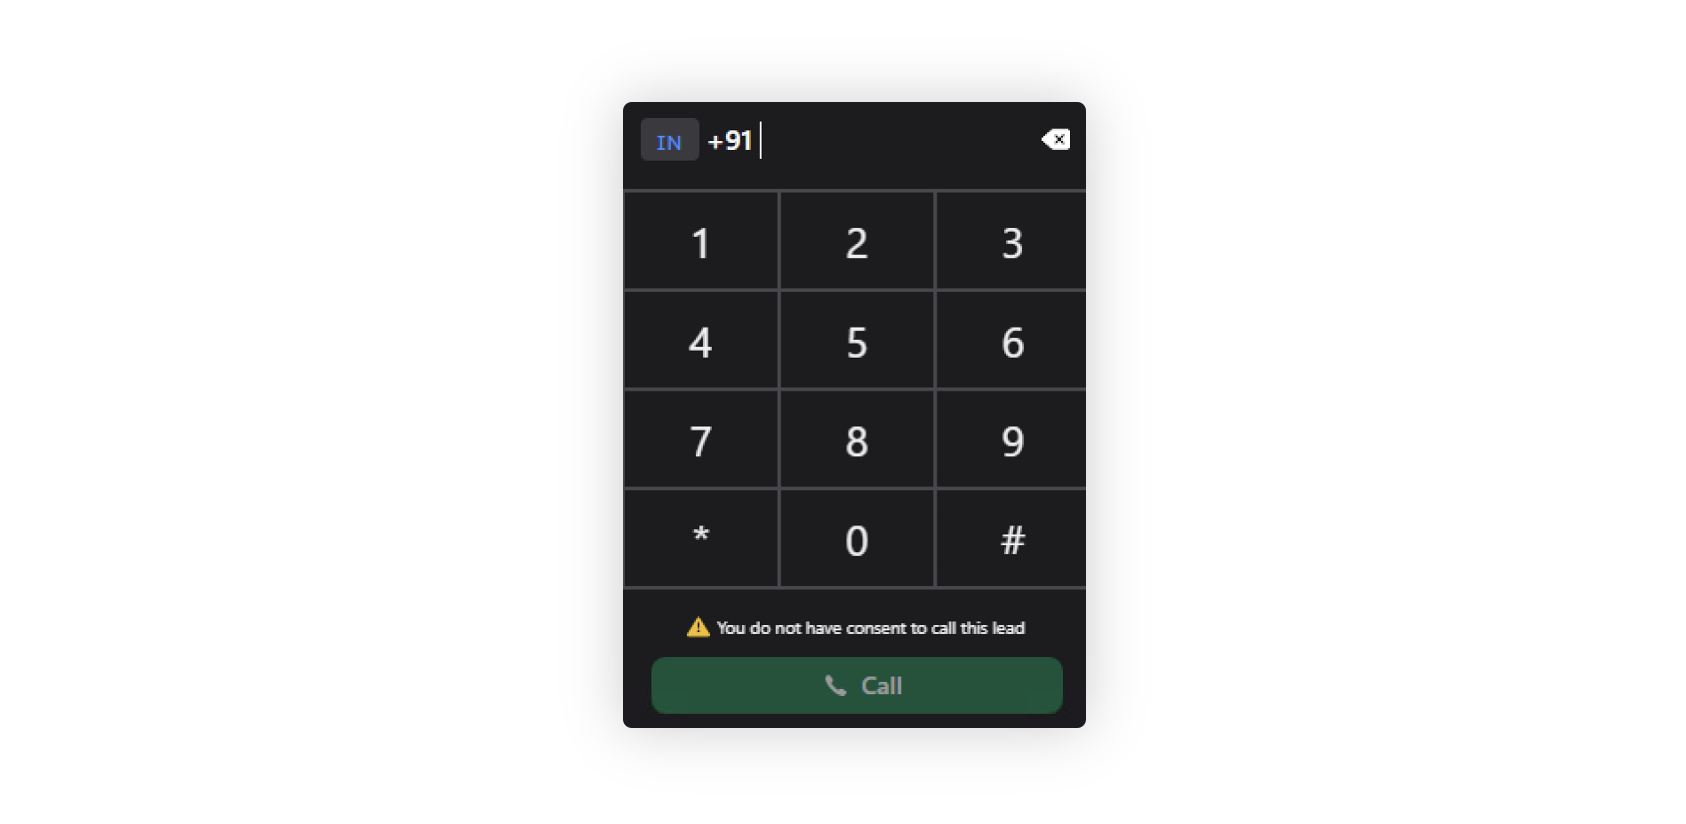
Manually dialing the number
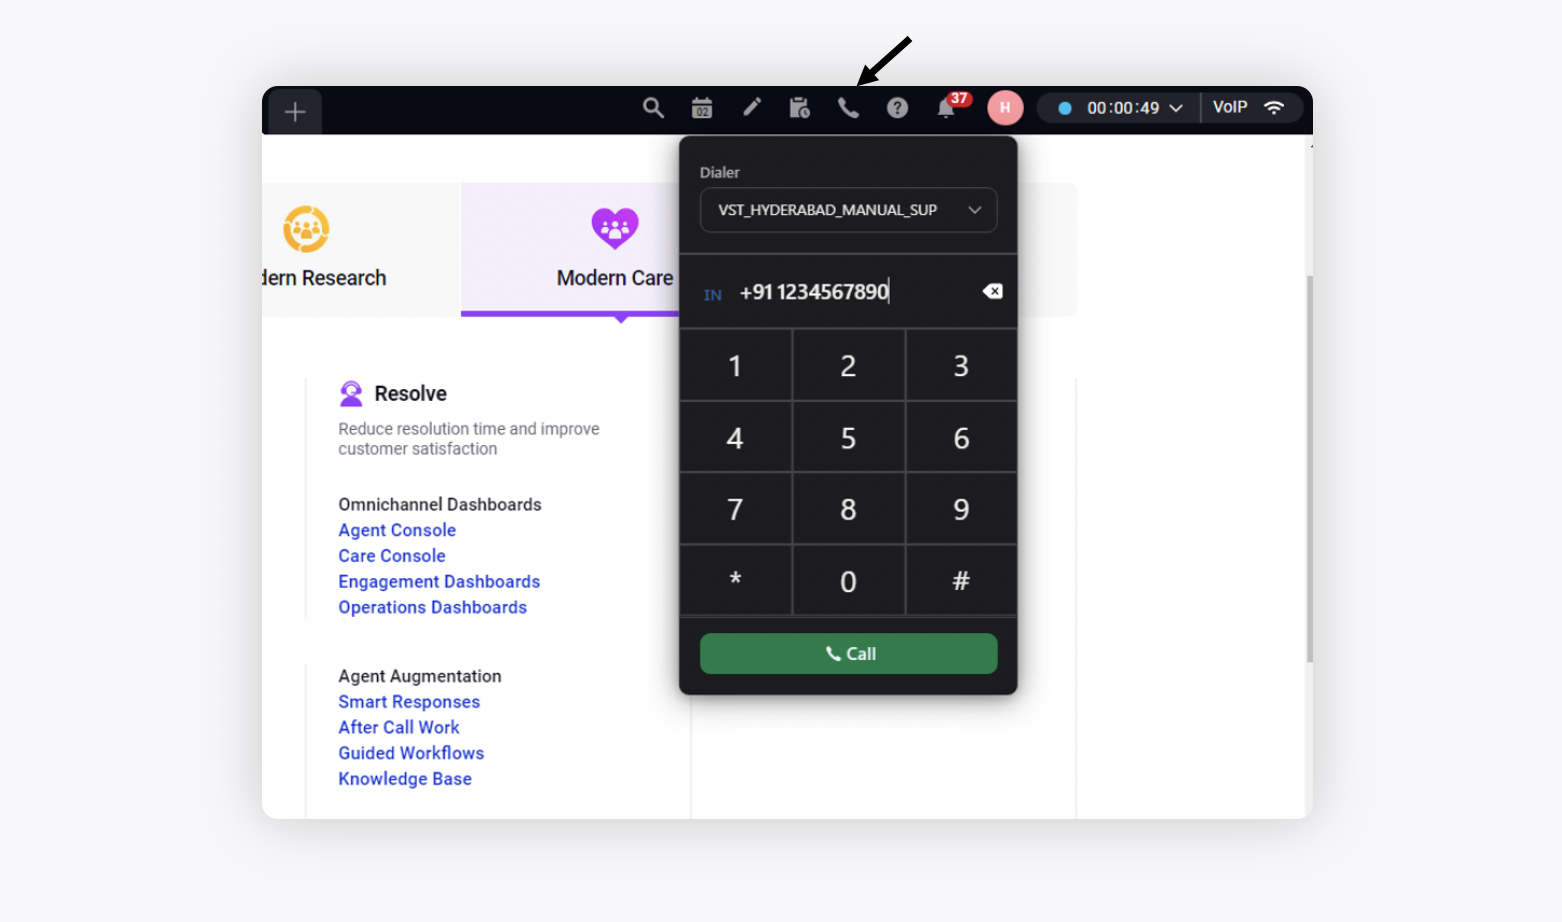
Under agent persona, once the agent has changed the User Availability Status to the one mentioned in the dialer configuration (s)he will be able to click the Call button on the left.
A dialpad gets open on which the user/agent can type the required number and choose the dialer from dropdown menu.
Once the number is enetered, the call button is enabled and the user can place the call.
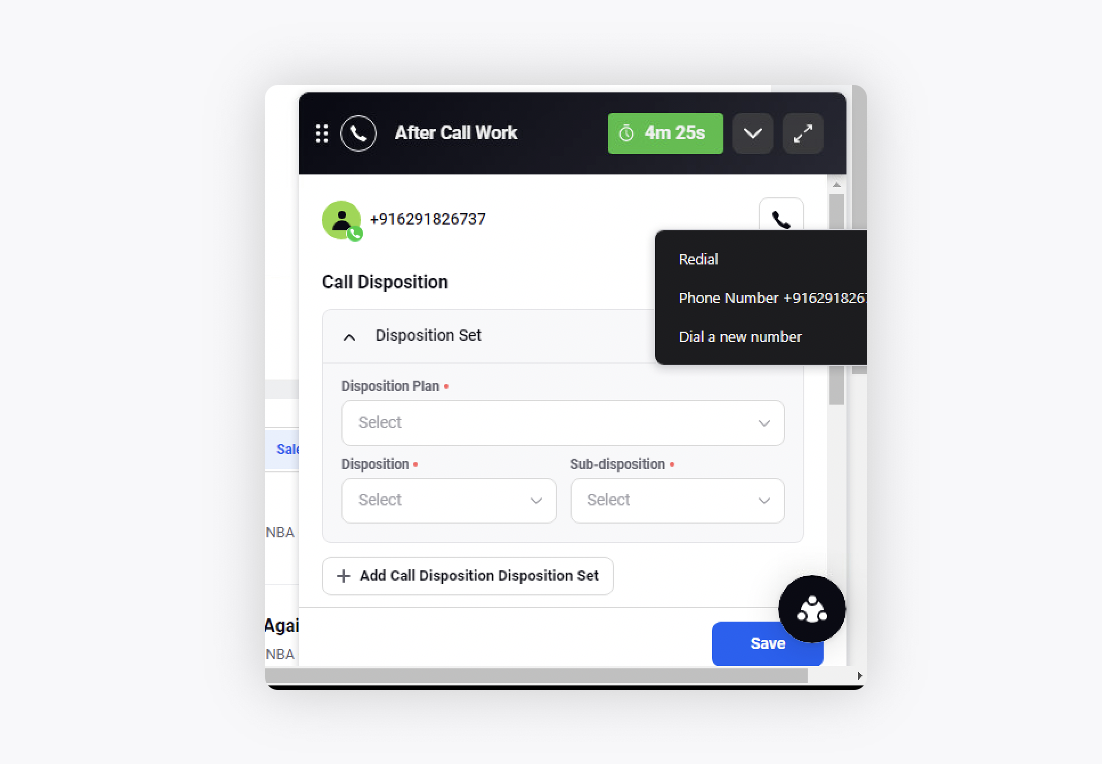
Redial
Sometimes the customer gets disconnected during the conversation and then to redial the customer from ACW (After Call work), the manual dialer is used.
Radial dials the same number.
Phone Number dials the number mentioned there.
Dial a new number opens the dialpad again from where the user can dial another number.
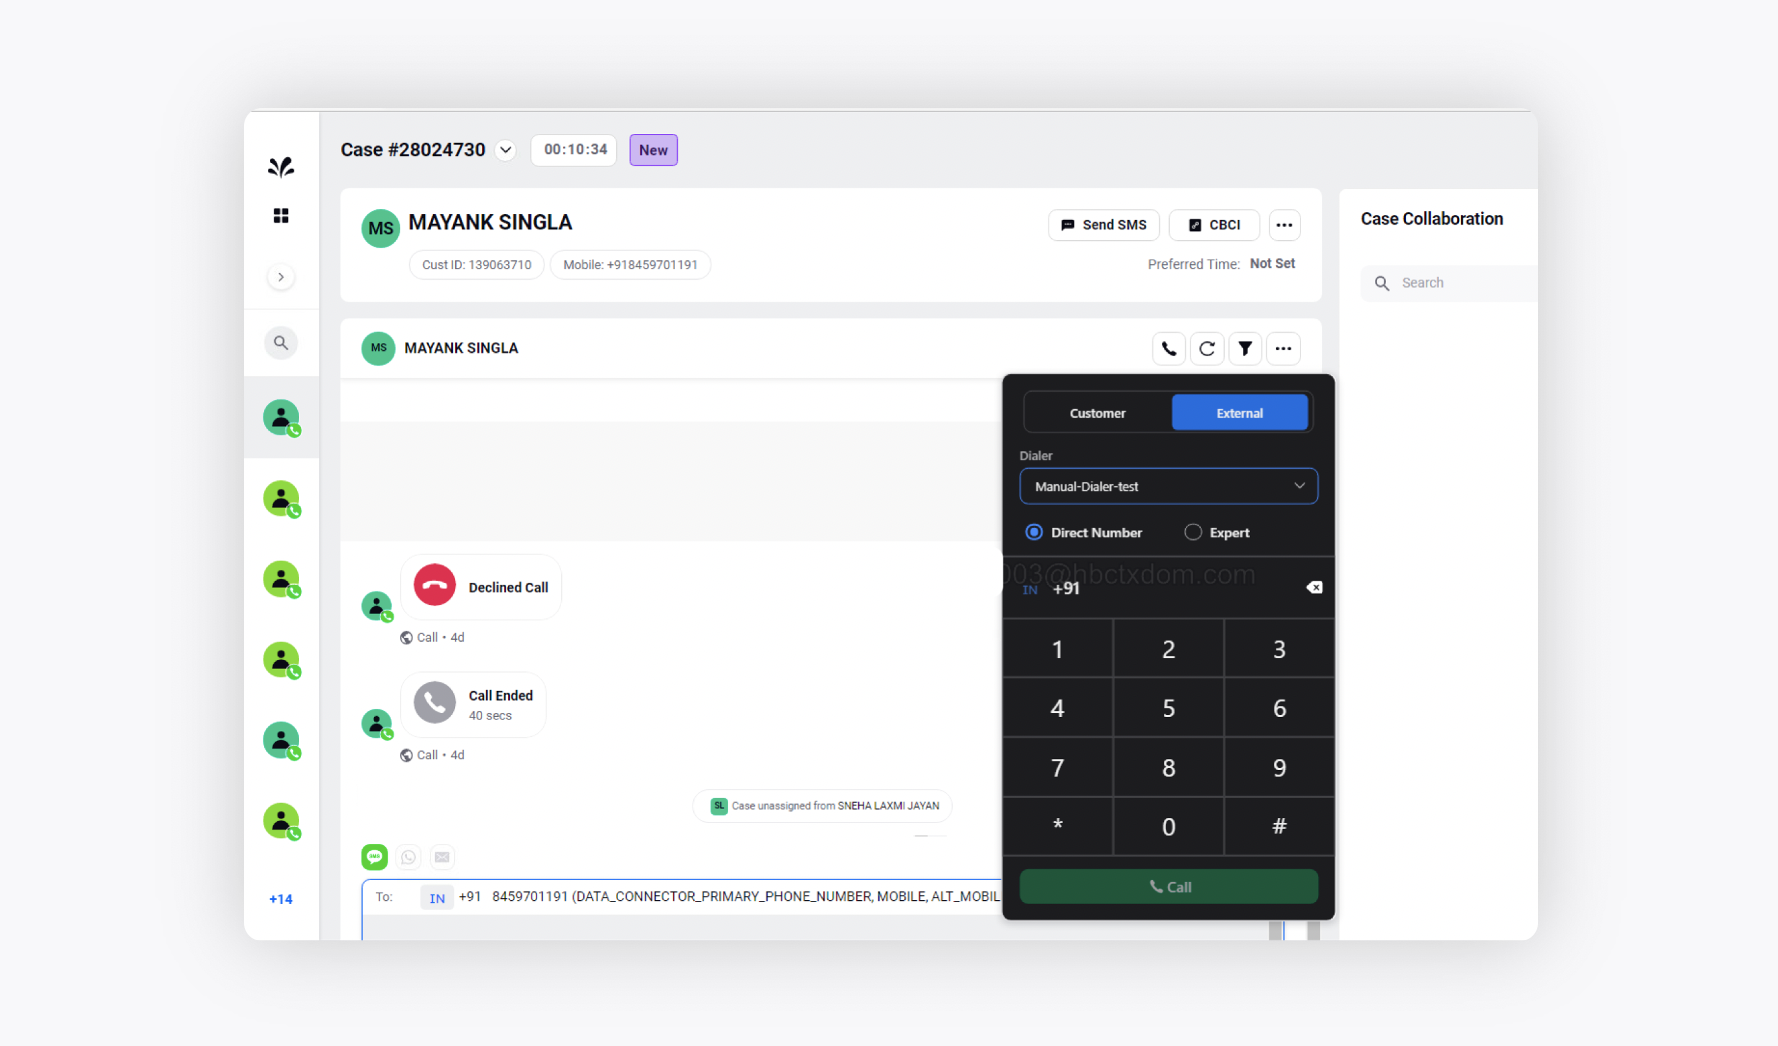
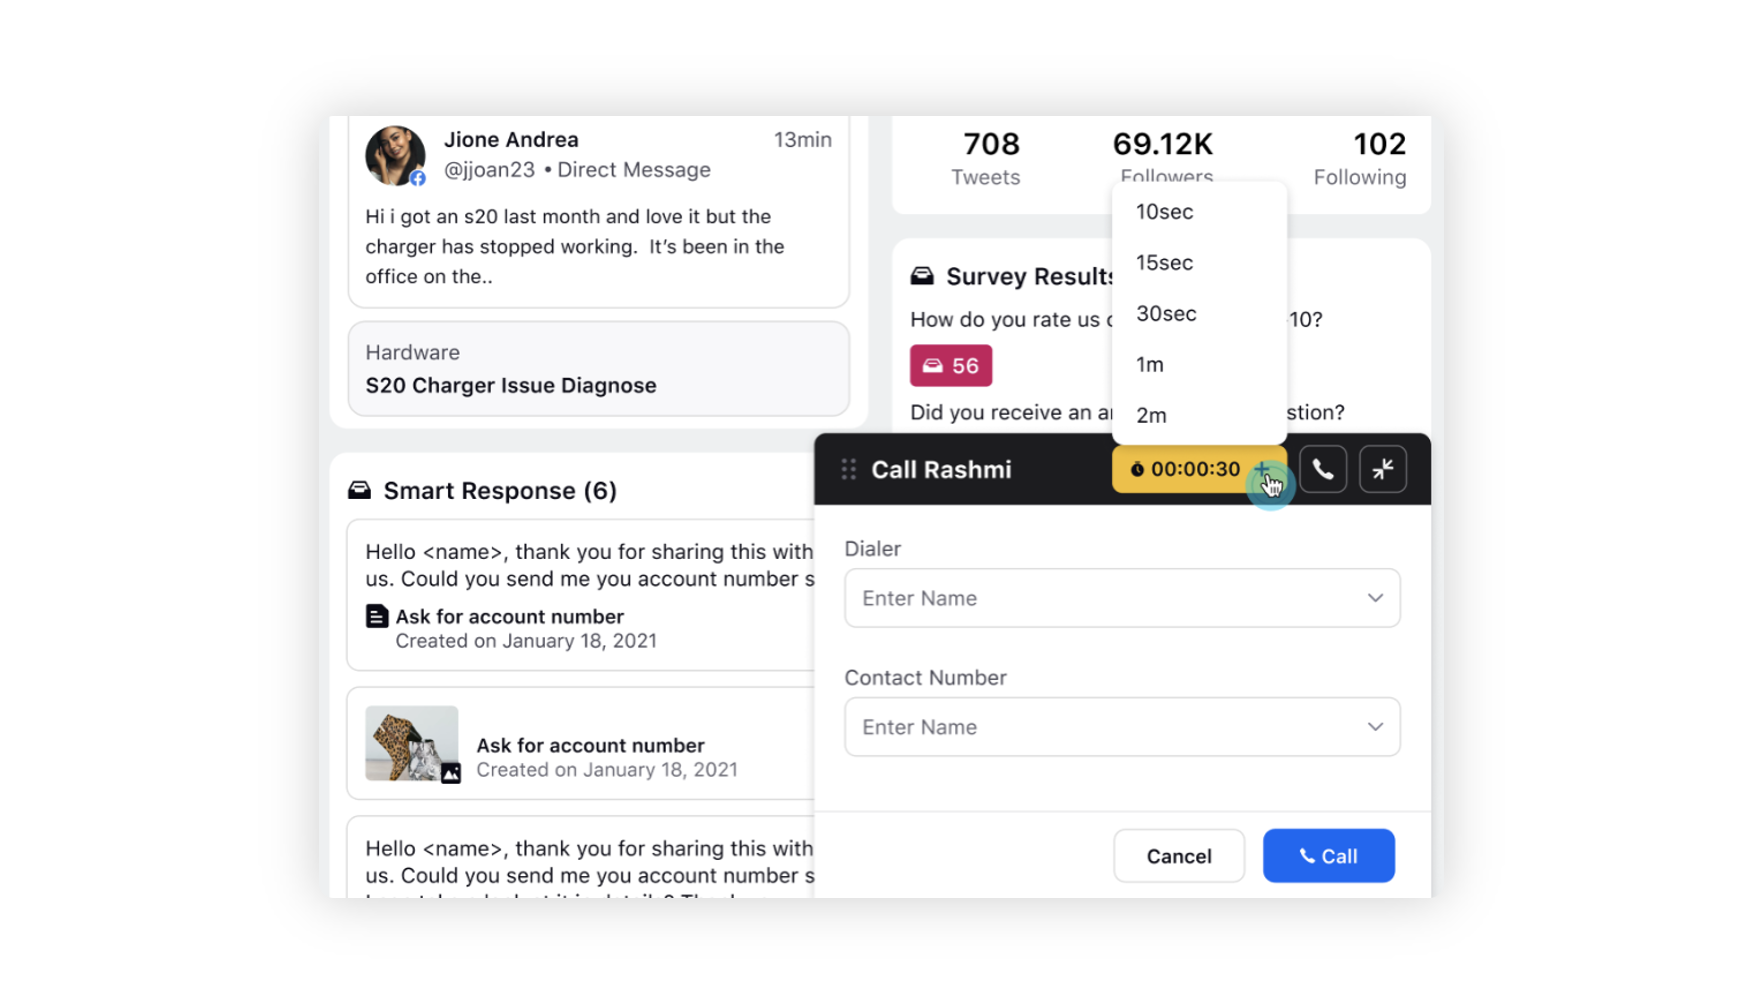
Conversation widget
In conversation widget, users will see a call button on the top bar of the widget which gets enabled only when the required status is chosen.
As soon as the button is enabled, users can click on the button to place the call. There are two options for placing a call.
Customer: Directly dial the customer whose conversation widget is being opened. Dialer can be chosen from the drop down menu.
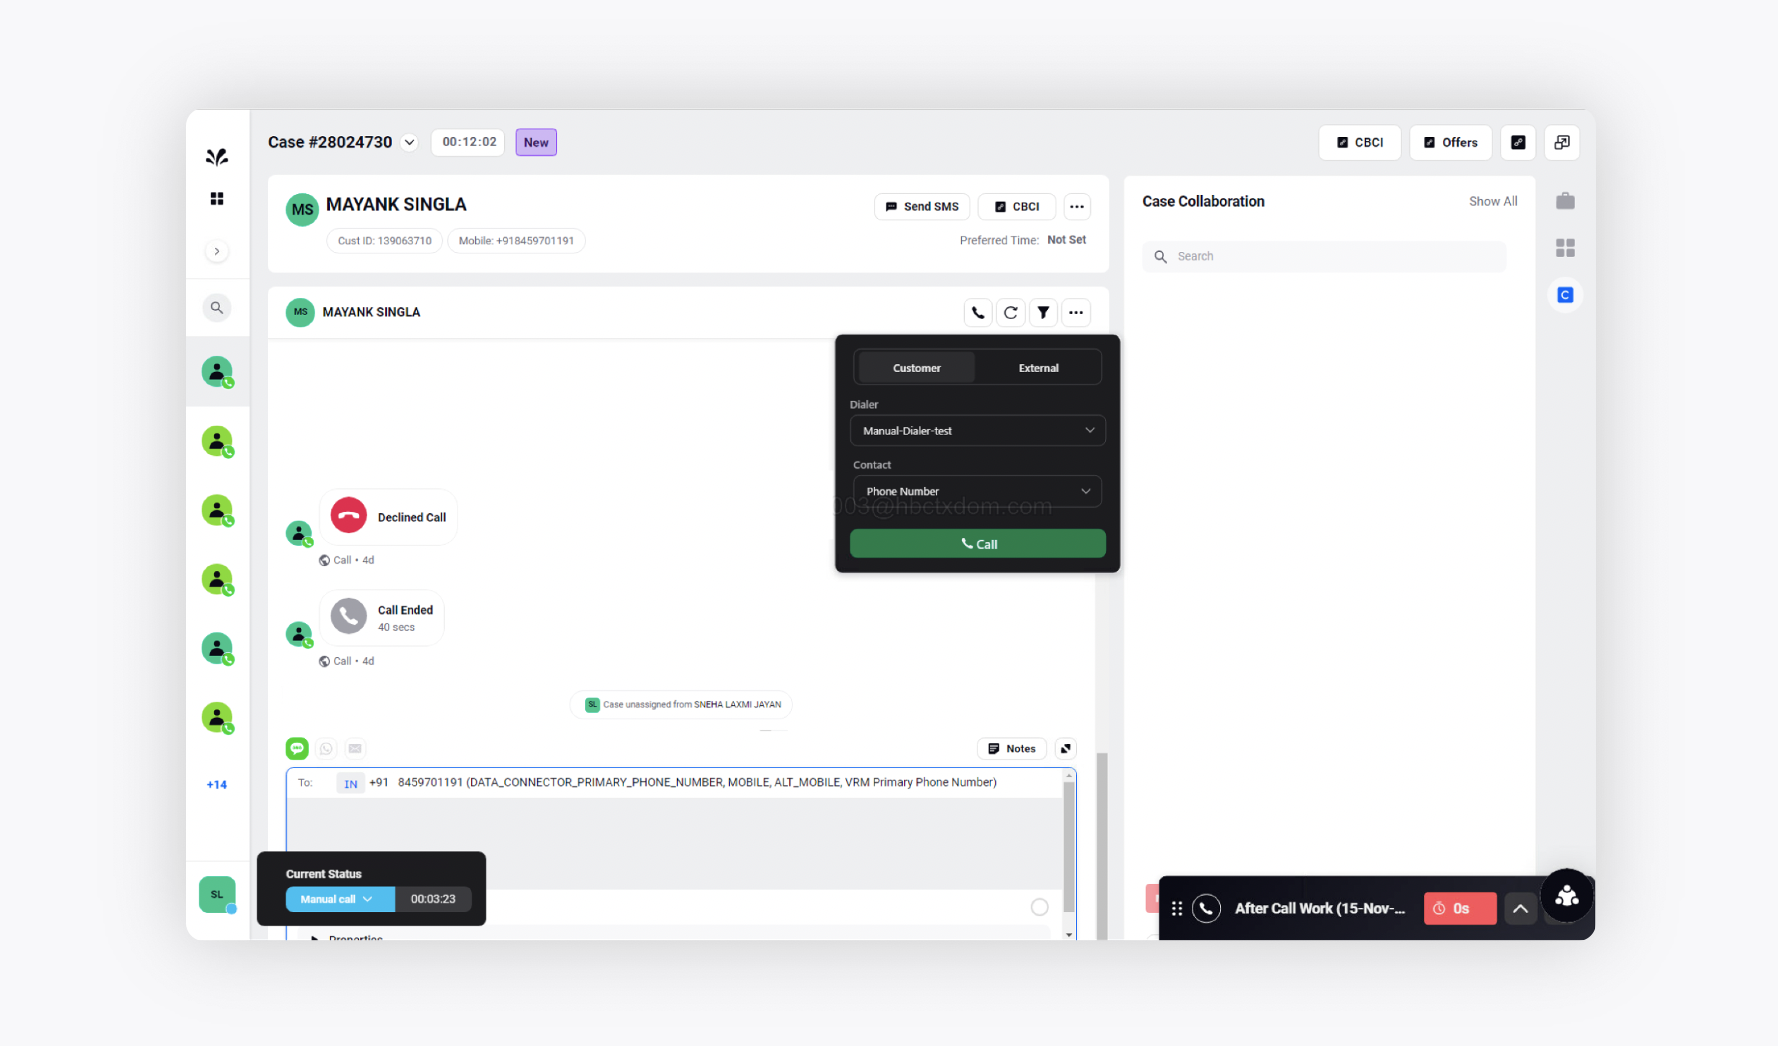
External: Manually dial to a new number.
Adding a third party in the call
In order to add a third party in the call, the users can press ADD from the call controls and the dialpad will open using which they can dial the required number.
Admin view
Admins can also place a call by selecting the correct User Availability Status. Once the status of the admin matches with the one mentioned in the dialer configuration, the admin will be able to place a call from the Call button in the task view.

Supervisors and quality managers can also place a manual call by being on the required status.
Additional Features
Semi-Automatic Calling
With the manual dialer, you have the option to enable semi-automatic calling for agents. This feature initiates a timer, such as 90 seconds, after which the call is automatically dialed. Agents will be given the option to extend this timer by the preferred duration. If agents wish to initiate the call at any time, they can utilize the call option to begin the conversation. To learn more about getting this capability enabled, please work with your Success Manager.
Auto Fill Manual Dialer
By creating Dial Preview Rules within Rule Engine, you can establish profile attributes such as Channel, Spoke Location, Hub Location, and Subsegment as conditions and align these attributes with a specific dialer profile.
![]() Note: To learn more about getting this capability enabled, please work with your Success Manager.
Note: To learn more about getting this capability enabled, please work with your Success Manager.
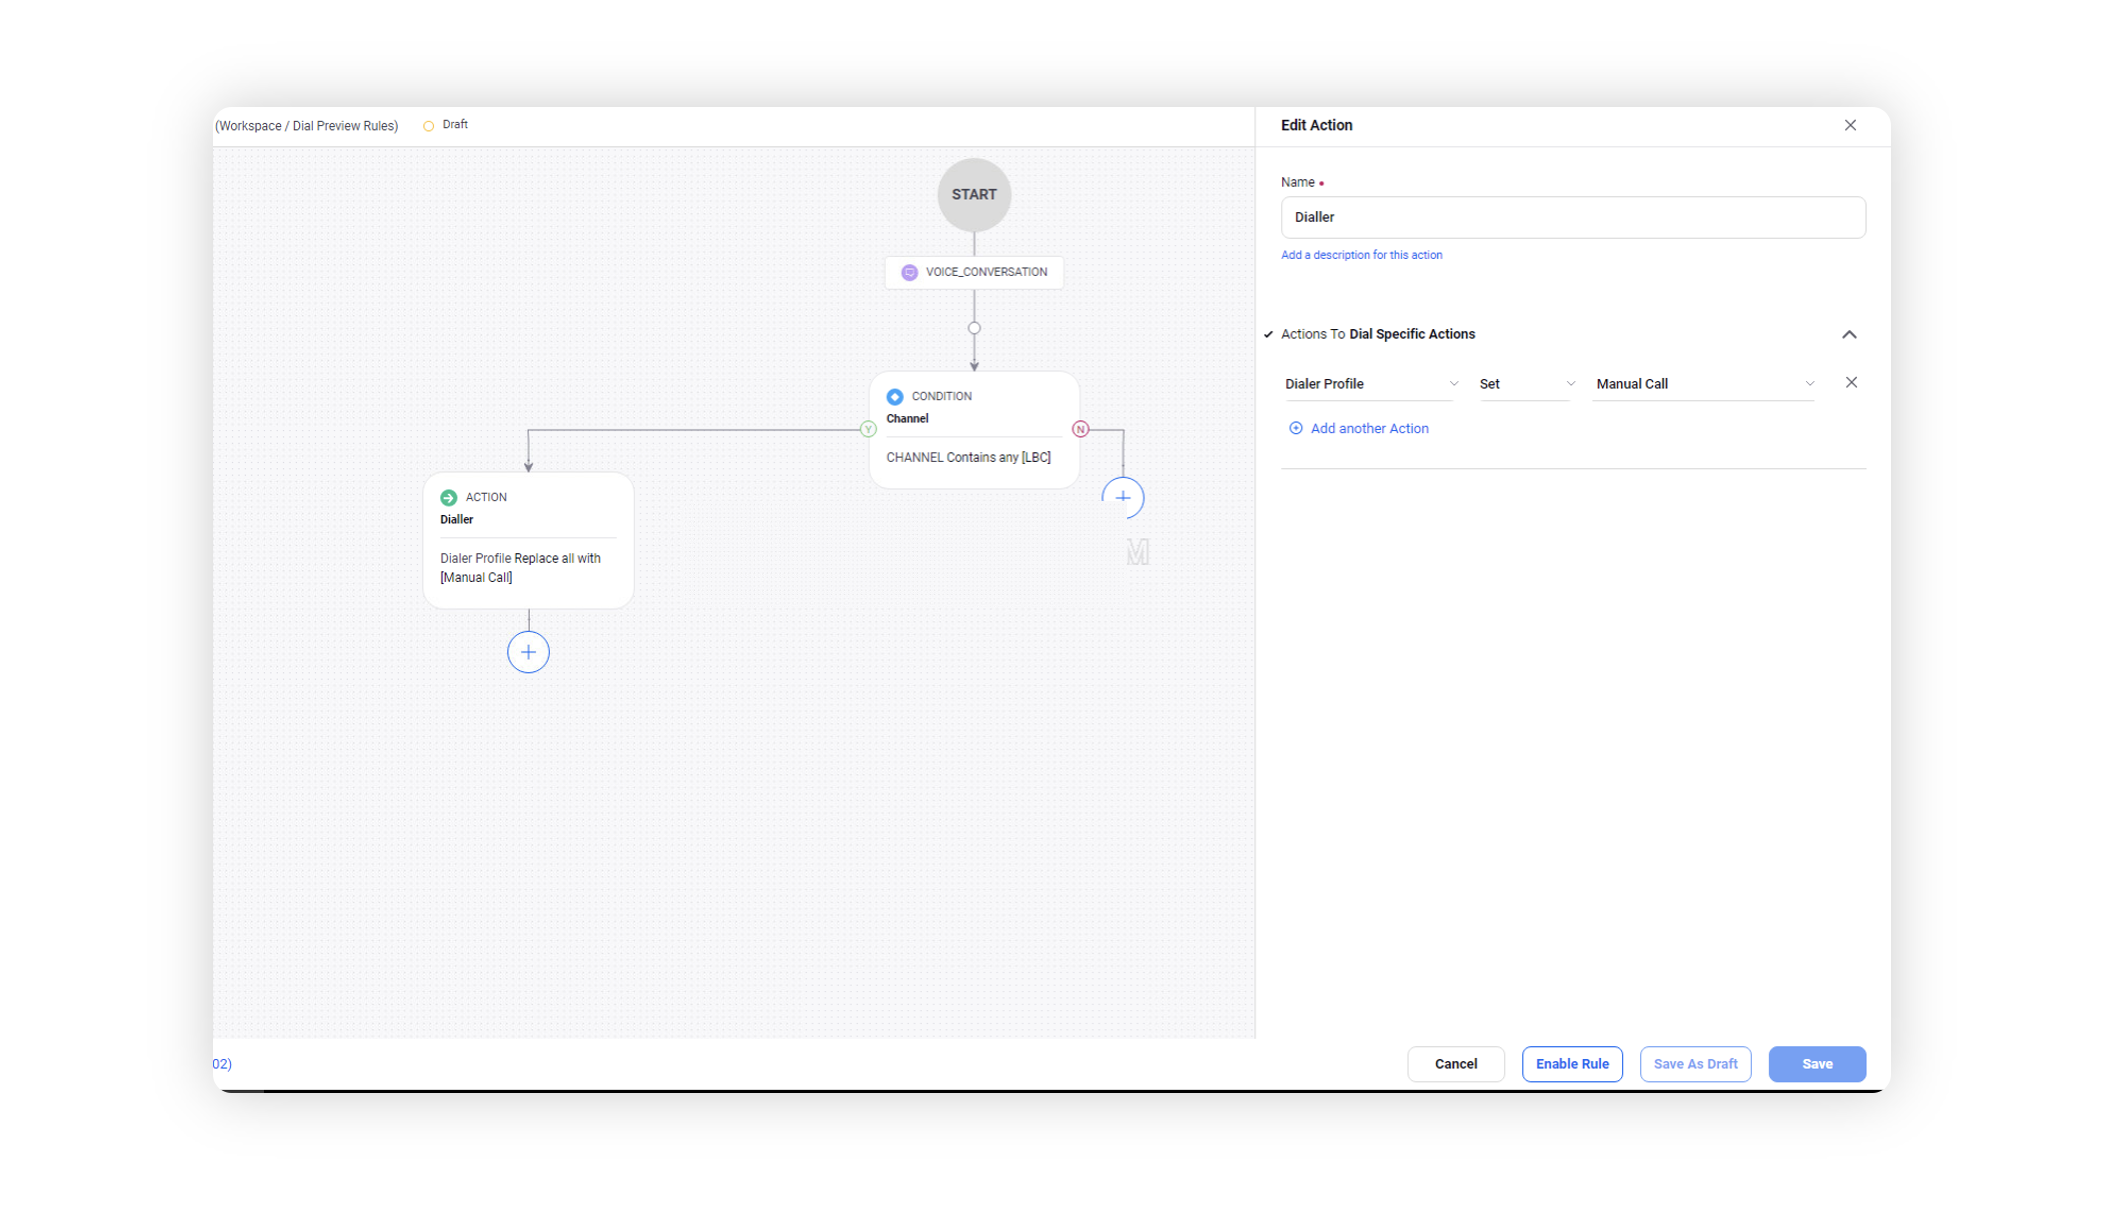
Hence, when agents dials a number, the dialer will be automatically selected based on the defined criteria and agents will not be able to switch dialers, enhancing adherence to call routing strategies. In cases where an agent attempts to dial a number for which they lack eligibility, an error message will promptly alert them, preventing unauthorized calls. You also have the capability to restrict the visibility of country codes to agents within the Persona App Manager settings. This feature allows you to control which country codes are displayed to agents based on your organization's requirements.
Points to Remember
Dialer type needs to be chosen wisely as it cannot be changed once the dialer is created.
No queue is required in this dialer as this can be used by all the users it is shared with, including admins to place a call.
Manual dialers require no segment in campaign creation.
Once you create the campaign for the manual dialer, add the campaign name in the manual dialer configuration under campaigns for ease of reporting.
If DNC is enabled in the dialer, it will only be visible where it is required and not everywhere on the platform to prevent its misuse.
Manual dialer is only used to enable users to make calls from various reporting section.
FAQs