Preview Dialer
Updated
Preview Dialers
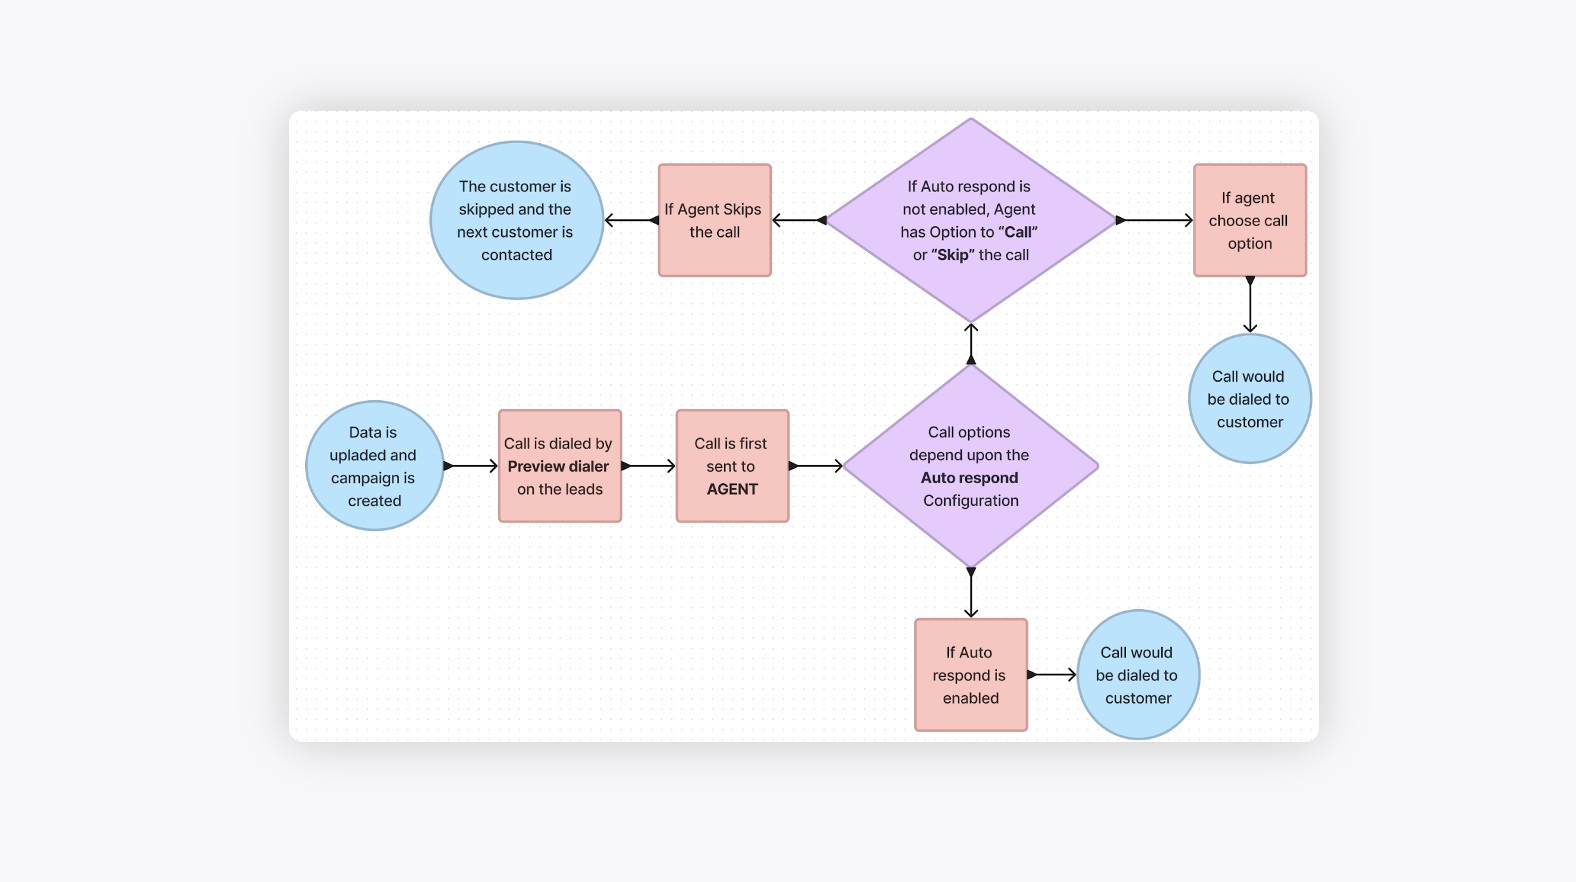
Preview dialers are agent-first dialers where a call is first sent to the agent in order to increase or generate more productive calls.
Help call center agents review customer information through a window when they initiate or receive a phone call.
Add significant value to customer service teams as the preview can offer omnichannel information required to support the customers with full context.
Used for high-value campaigns. Correctly executing the call with the best possible information available to the agent to reduce call time and deliver a better experience, as well as to optimize the chances of closed sales, increased donations and collections, etc.
Workflow of the preview dialers
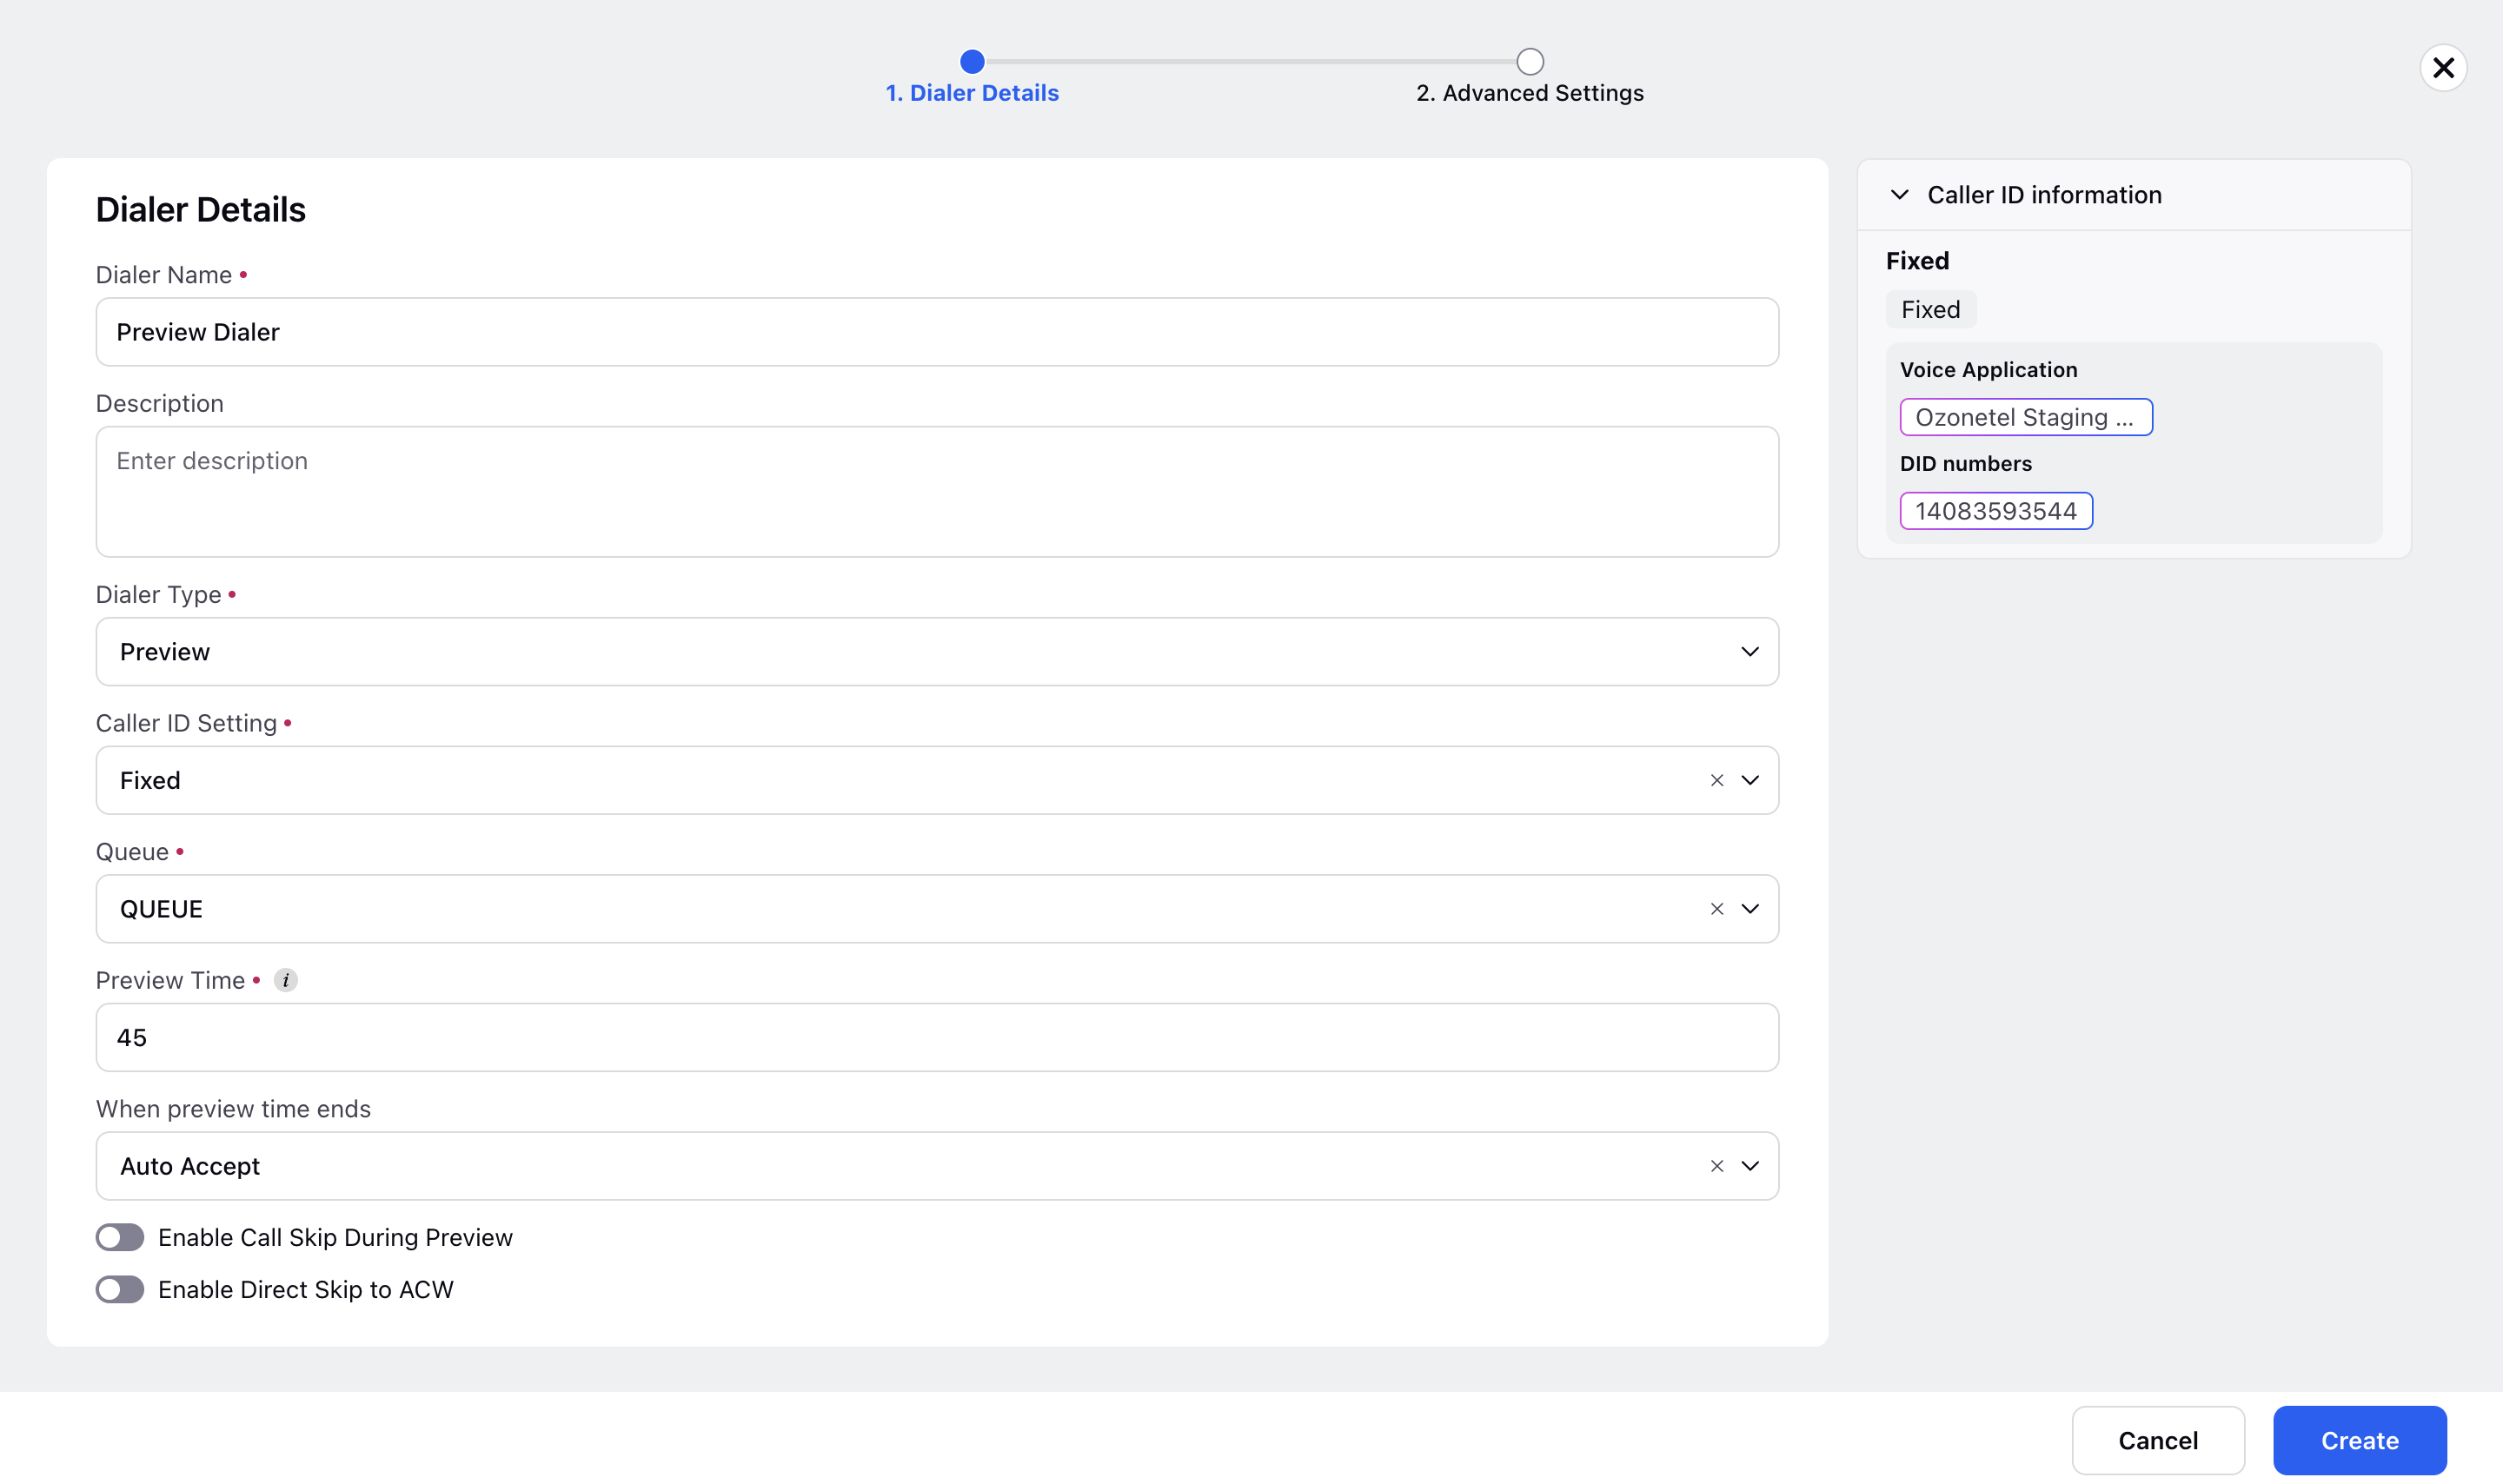
Configuration of preview dialers
On the Dialer Profile window, add the details as explained below.


Field | Description |
Dialer Name | This field is mandatory and contains the name of the dialer. |
Description | This field is optional to add any notes or reason of creating the dialer. |
Dialer Type | Specifies the dialer type which in this case will be Preview. |
Status | Status of the dialer specifies whether it is in operating state or not. There are three statuses:
Dialer would only place calls in the active state. |
Rule | Rules can also be assigned to manual dialers based on the business necessities, which will get triggered whenever a manual call is placed. |
Call Ring Time | Call ring time is basically the time for which the call will be dialed at customer end, i.e., the time for which customer is called before the calling stops if they don't pick up. |
Call Setup Time | Call setup time is basically the time the dialer awaits the confirmation whether the customer has been dialed or not.
This means the dialer will wait for 15 seconds to receive confirmation from the telco (telecommunication service provider) whether a call has been placed or not. Once the call is set up, it will ring for 60 seconds for the customer before it gets answered or receives any other telephony outcome. |
Compliance Policy | This ensures that all outbound calls through the selected dialer follow the specified recording and data retention rules defined in the compliance policy. |
Language Selection | Language preferences can be configured at the dialer level based on customer lead attributes to ensure that transcripts are generated in the appropriate language for different leads dialed from the same dialer. When a call is initiated, the system verifies if a language is configured at the dialer level and whether the specified attribute value matches the customer's lead. If both conditions are met, the corresponding language setting is applied. If no match is found, the default language specified at the dialer level is used. In the absence of a default language at the dialer level, it defaults to the workspace language setting. |
Enable Recordings | Enables the recording of the calls which can be used by quality managers for auditing purposes. |
Enable Transcripts | This enables the transcripts of the recorded calls which is also used by the quality managers for auditing purposes. |
Enable DNC Calls | Enabling this gives the dialer rights to call customers or dial to phone numbers which are in DND list or which do not give consent to be dialed. |
Number of Channels If configured on Dialer level, it will override the campaign settings. | Number of parallel calls that would be made in one iteration across all campaigns. |
Queue | The queue defines the list of agents for whom the call would be placed by the dialer. Inline queue creation is supported. For example, there are 5 agents in the queue and when the dialer dials, the call would land to one of the agents who is idle (the one who has the capacity to take the call) out of the 5 agents present in the queue. Queues can be created in Unified Routing. |
Calling on/Preferred Agent ID Field | This option is utilized to prioritize assigning calls to a preferred agent, ensuring consistency and a personalized customer experience. It allows for preview or agent-first calling, ensuring that a specific customer is consistently served by the same agent rather than being handled by different agents. Additionally, this feature assists admins in assigning customers with high potential to specific groups of agents. Inbound calls from the same customers will also be directed to the specified agent. Profile: User ID or email ID attribute of the agent that are present inside the profile can be selected here. Audience Lead: User ID or email ID attribute of the agent that are present inside a lead can be selected here. |
Preview Time | Preview time specifies the time that agents would have in order to decide to choose whether they want to connect with the customer or skip the call if auto response is enabled. The time specified here is in seconds by default. For example, if the preview time is 30 seconds, then the agent would have 30 seconds to decide whether they want to connect with the customer or skip the call depending upon the configuration below. |
Allow agent to skip call while on Customer Preview |
|
When preview time ends | When the preview time ends and agents neither dial nor skip the call from the popup, there are three options for handling the call: Auto Answer (default): The call will be automatically answered. Auto Skip: The call will be skipped automatically. Mark as Missed Call: The call will be marked as missed. By default, the system is set to auto answer calls. However, if you choose to mark the call as missed, you can select the agent status to transition to. For example, you can set the status to "Not Available" to ensure that further calls are not assigned to the agent. |
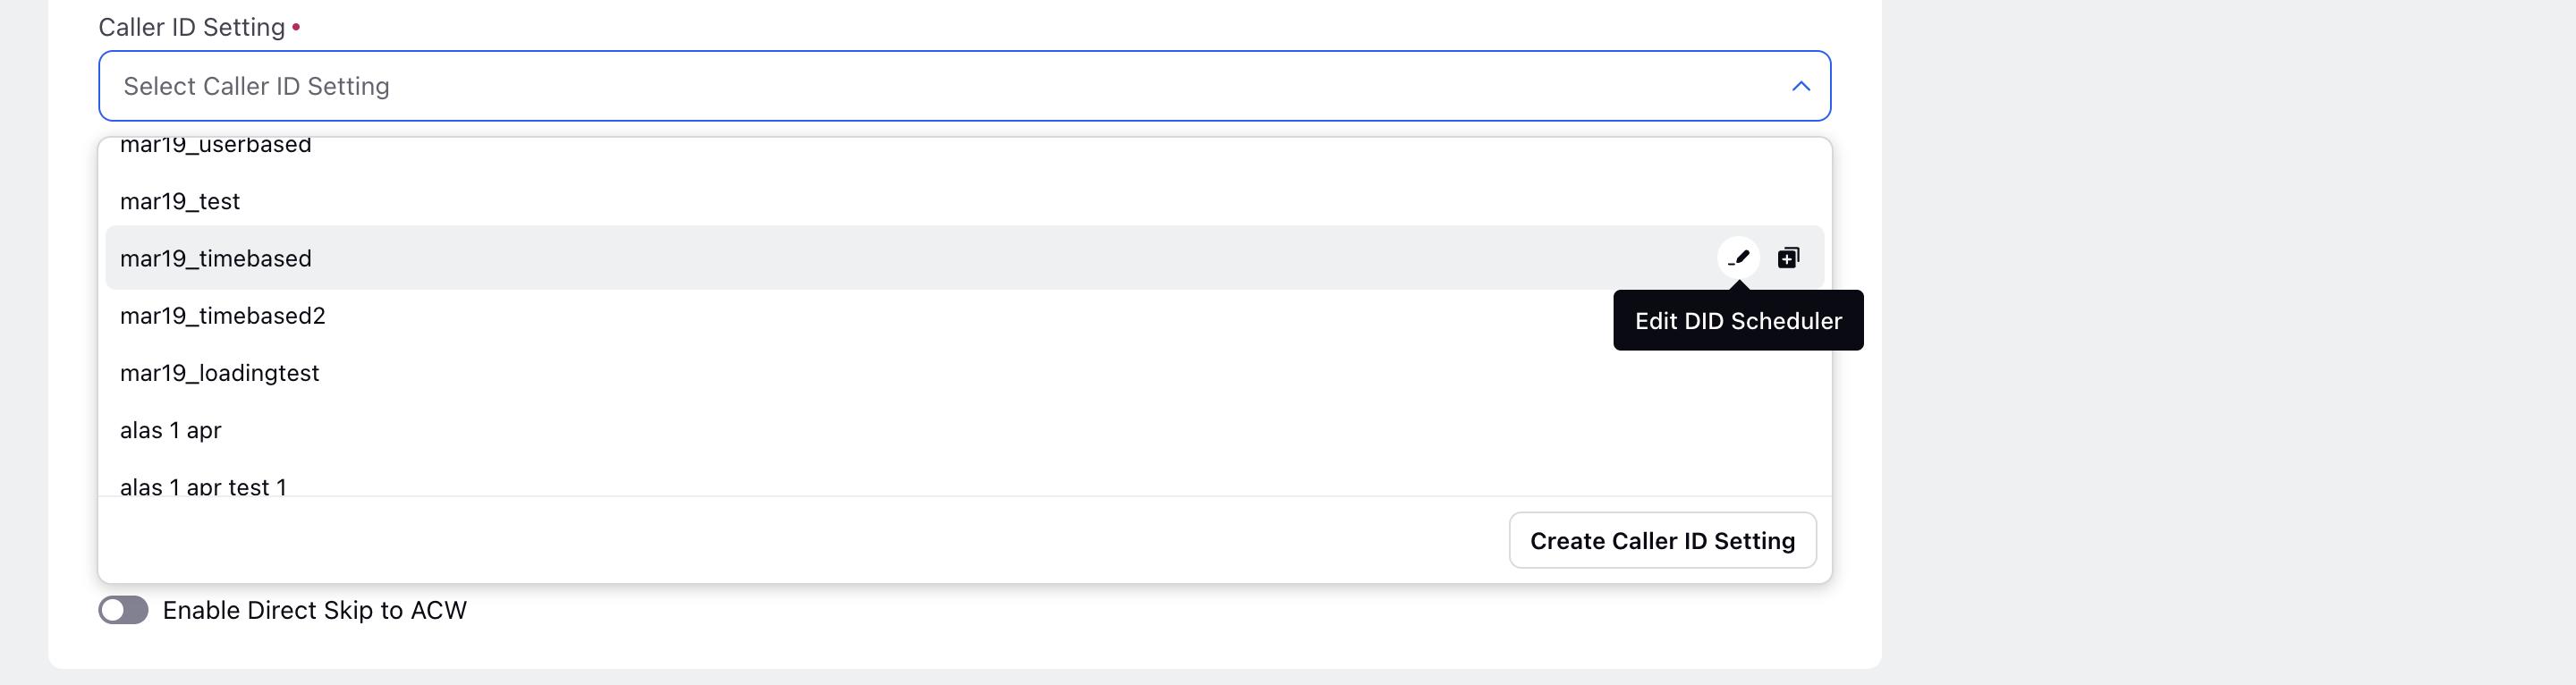
Select the desired Caller ID Setting based upon the use case. There are six types of Caller IDs.
All configurations made within the Caller ID Setting for the selected scheduler, including settings such as default voice application, DID numbers, and other configurations, will be displayed in the right pane of the dialer profile. You can also edit, clone and create a new Caller ID Setting from here.
| |
Voice Application | Application in which the DID numbers and the voice account is shared. Twilio, Avaya, Amazon connect and Ozontel are the voice accounts used by Sprinklr. One voice application can be used in multiple dialers. In order to dial numbers, voice application should also be added by the users. |
DID numbers | These are the caller IDs from which the customer will receive the call. Users can select the DIDs from the dropdown list which displays the DID numbers present in the voice application. |
Custom Field | Select the user based custom field which stores the caller DID for the agent. |
Sorting Criteria | Enter the criteria by which calls should be sorted in a campaign, based on any attribute. The sorting can be both ascending and descending, and multiple sorting criteria can be selected to implement nested sorting. |
Campaign Weightage | Campaign weightage is used when a user wants to use the same dialer to dial calls from various segments present in different campaigns. The sum of campaign weightage of all the campaigns in the dialer should be exactly 100. Note:Supervisors can now modify campaign weightage directly from the Voice Campaign Console without needing to edit the dialer configuration. This is enabled through the "Grouping by Dialer Profile" option in Campaign Monitoring. Supervisors can view and adjust the campaign percentages directly from the monitoring screen for campaigns shared with them. However, campaigns not shared with supervisors will remain uneditable.
|
Campaign Priority | Set the priority of the campaigns in a dialer profile to define the order in which the dialing will happen across different campaigns containing the same set of agent queues. With campaign priority, dialing happens sequentially. |
Add Preview Ringtone | Users can add specific ringtone as per choice. The ringtone will be played throughout the preview time. If user doesn't add any ringtone, the default ringtone would be played. |
Disable Ringtone Loop | Checkbox to disable ringtone loop. Let's say the preview time is 5 mins and preview ringtone time is of 1 min, so during preview time, the ringtone would only be played for 1 min and for the rest 4 mins, it would be blank. |
Custom Properties | Add the desired custom properties. These custom fields can be created by selecting "Asset" as Dialer Profile. |
.png)
.png)
The final step is to create a campaign.
Campaign for preview dialers is required for the following configurations:
Adding the expiration date of the campaign after which the dialer might not be used.
Applying the required business hours, which is defined as the time of the day in which this dialer would place the calls. After or before business hours, calls would not be dialed from this dialer.
Retry strategy based on the telephony outcome, i.e., if the customer is not able to get connected because of their phone being switched off, customer did not answer, etc., can also be applied in the call back campaign.
Type of weightage that can be segment or list weightage.
Segment activation which includes the segment from which the leads are being called.
Summary
Presents contact information to the agent before dialing.
Used to reach high value contacts.
Benefits
Eliminates call abandonment.
Agents are in full control of interactions.
Agents can carefully review customer information and case data in advance.
Drawbacks
Least efficient dialing mode.
Risk of excessive agent idle time (if preview timer is disabled).