Command Center: Alerts visualization for faster response and action
Updated
In today's fast-paced digital landscape, businesses must stay vigilant and responsive to potential crises and customer concerns. To address this need, our command centre product offering has integrated a powerful Crisis and Alert Management feature. This feature leverages AI algorithms and manual volume thresholds to intelligently track crisis and facilitate prompt actions with real time popup alerts and horizontal Tickr strip for active monitoring.
Based on historical trends, Smart Alerts leverages AI to recognize patterns in message volume and sentiment before flagging any abnormalities. Compared to the static social alert thresholds, the dynamic thresholds within Smart Alerts Dashboard reduce false alarms and provide early warning for both viral content and brewing crises.
Proactive crisis detection: identify any potential crisis as soon as possible, allowing your team to detect and manage them before they happen and minimize the damage to your brand.
Trending content monitoring: identify the messages resonating with your audience and leverage viral content to increase engagement and reach with your customers.
Sentiment monitoring: keep an eye on the sentiment of engagements with your brand messages and campaigns to better understand how consumers react to your content.
Service operations: Be on the lookout for a sudden increase in the number of new cases and how those are impacting SLAs (Service Level Agreement) for better team efficiency and proactiveness.
Note: All the alerts need to be set up through the alert manager in a specific engagement column for that to be used in Display. You can refer to the following articles for same. Use Sprinklr Alert Manager to mitigate the brand crisis Create a Smart Alerts Column |
Steps to set up alerts Popup and Tickr in Display
Click the New Tab icon
 . Under the Sprinklr Insights tab, click Display within Distribute.
 Select the desired storyboard on which alerts need to be configured and set up.
In the storyboard, navigate to the Settings tab in the right pane.
Toggle the Alerts slider to enable/disable them for the selected storyboard settings.
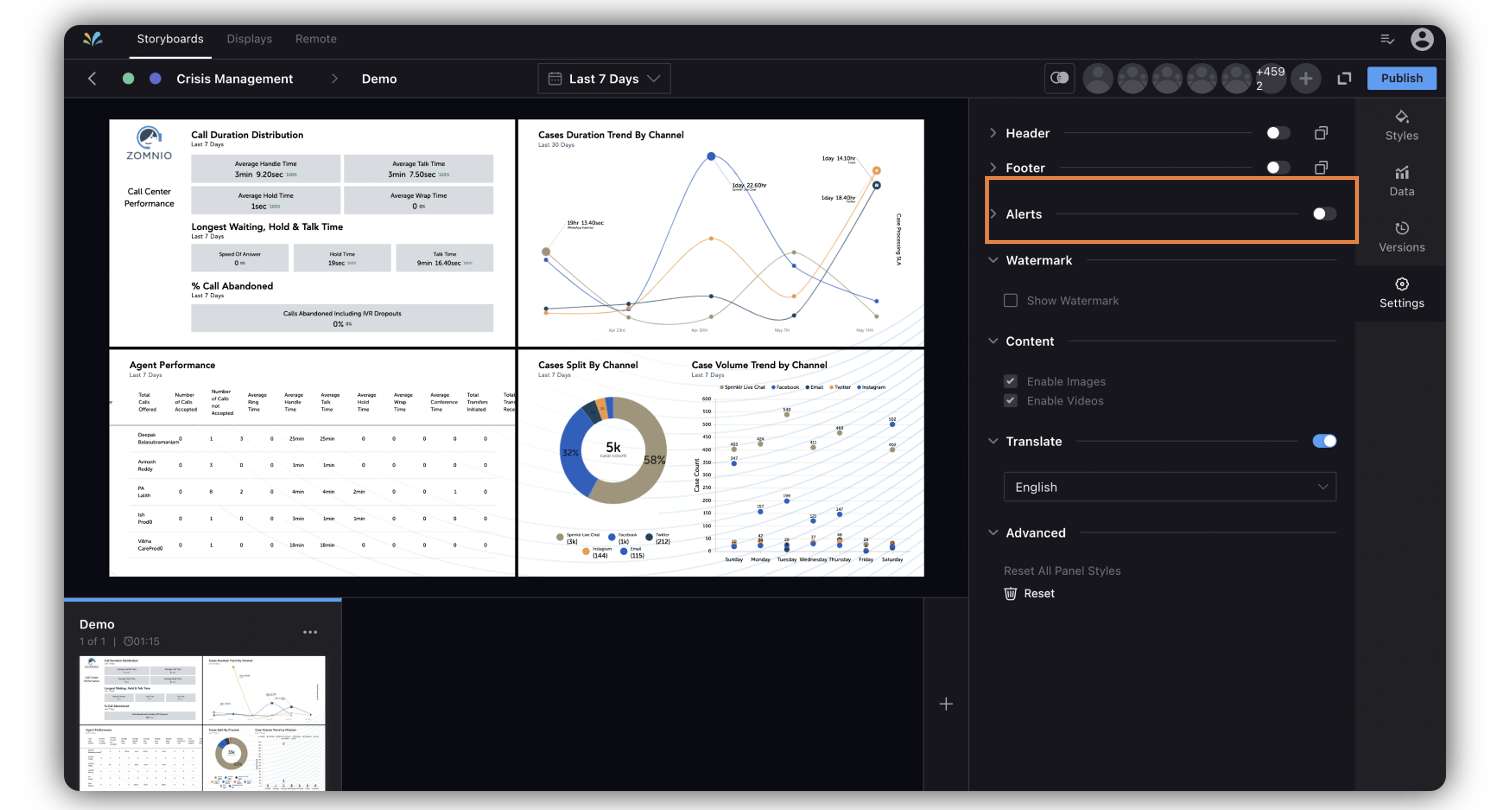
After enabling the toggle switch, you can select how you want to be alerted on ongoing alerts.
Popup to get notified in real time on your screens whenever a new alert is identified which dynamically navigates to series of alerts in order of created time.
Tickr to monitor the alerts continuously from the last 24 hours. Further you can position the Tickr to your liking with ability to size it as required for your display set up.
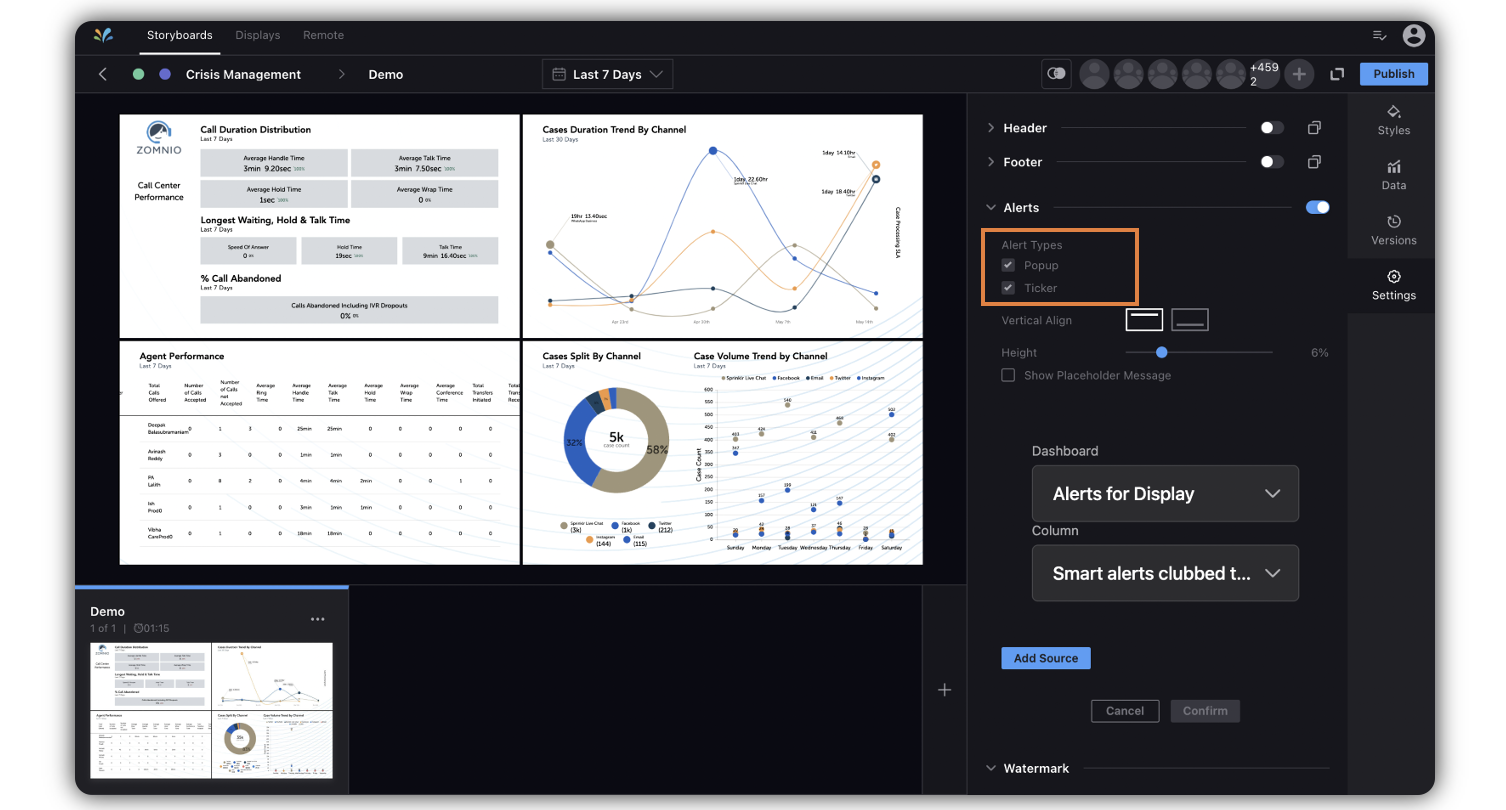
Once you have selected the type of alerts needed, you can then configure the desired dashboard column from which alerts will be highlighted on Display.
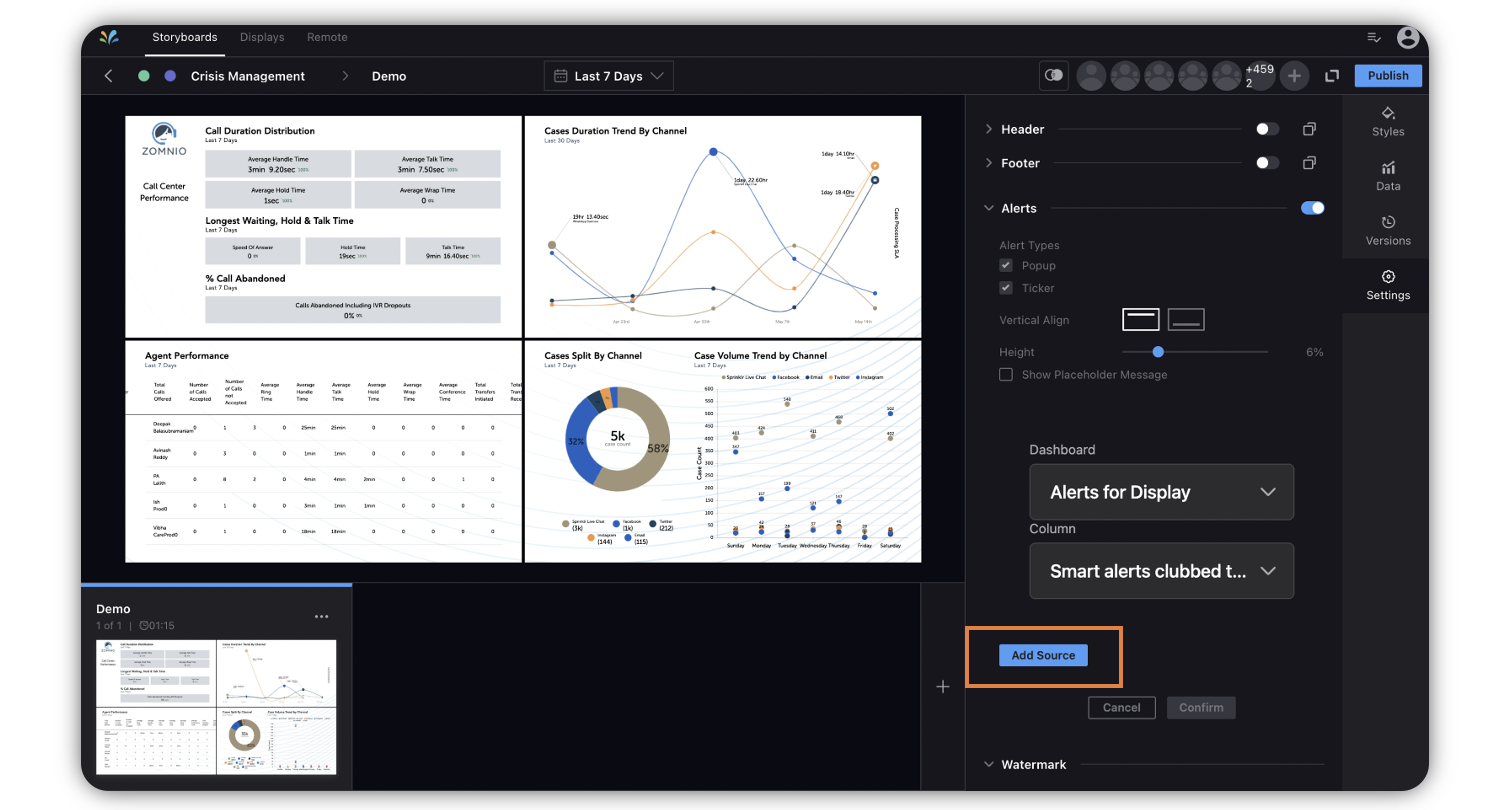
Similarly, you can add further columns from which alert needs to be displayed on your screens by clicking Add Source.
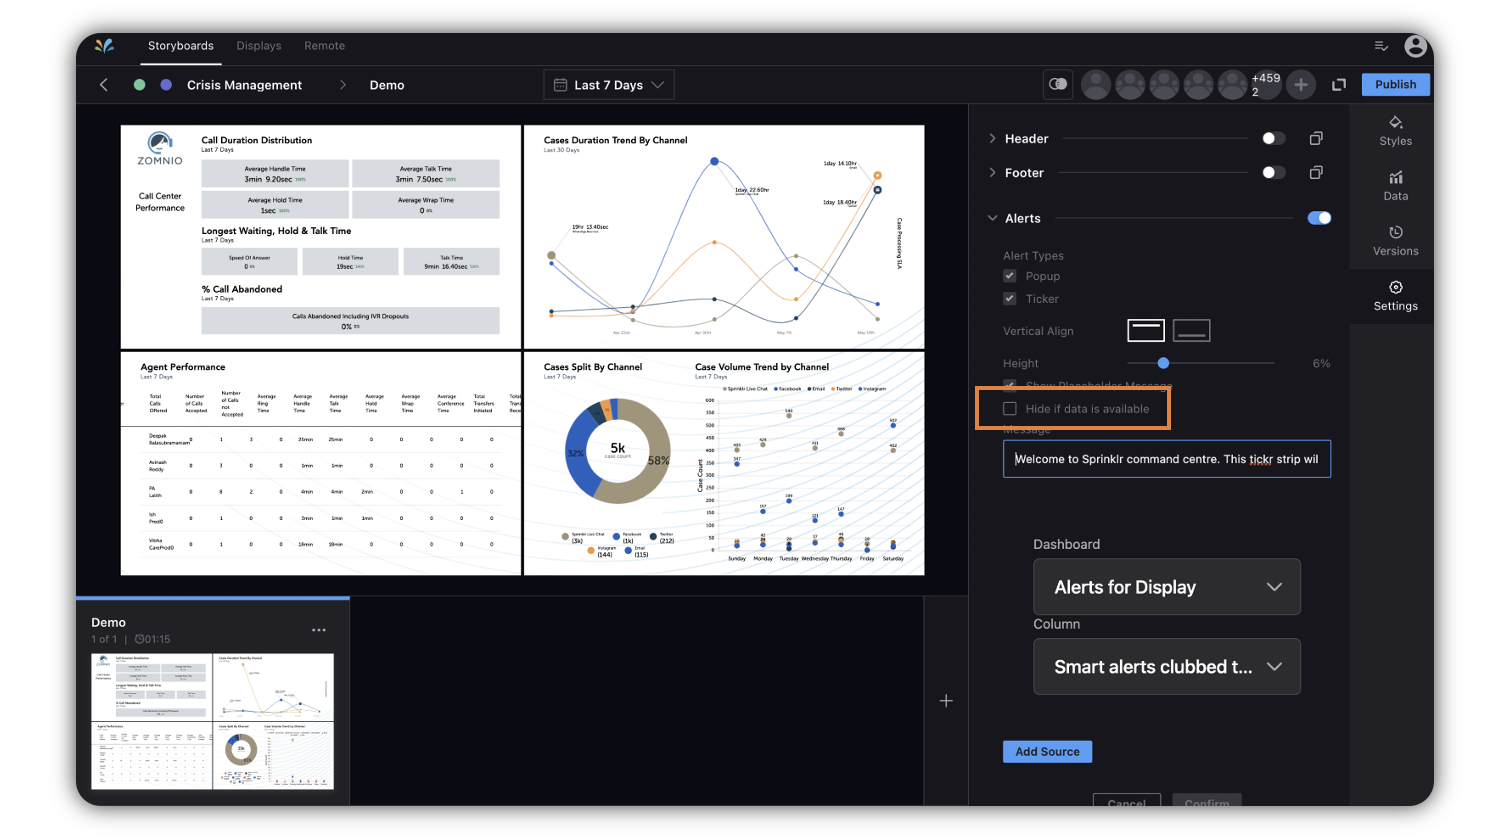
You can put a custom message on Tickr by selecting Show Placeholder Message and giving the desired input.
Note:
If Hide if data is available is selected, then custom message will only show in case there are no alerts to be displayed.
Once you have configured all the changes, click Confirm to save the desired changes in the storyboard.
Click Publish to have these changes synchronized with your Display URLs.