Add Quick Filters in Planners / Editorial Calendars in Distributed
Updated
Quick Filters allow you to quickly filter your Editorial Calendar without having to manually apply filters by easily accessing saved filter views. Selecting Quick Filters will allow you to choose from an already created list of filters and apply it. Below, you will find out how to create, edit, delete, and apply Quick Filters in a Planner or Editorial Calendar within Distributed.
![]() Note: This capability needs specific enablement. Get in touch with the Success Manager to get this capability enabled in your environment.
Note: This capability needs specific enablement. Get in touch with the Success Manager to get this capability enabled in your environment.
Steps to Add Quick Filters in Planners / Editorial Calendars in Distributed
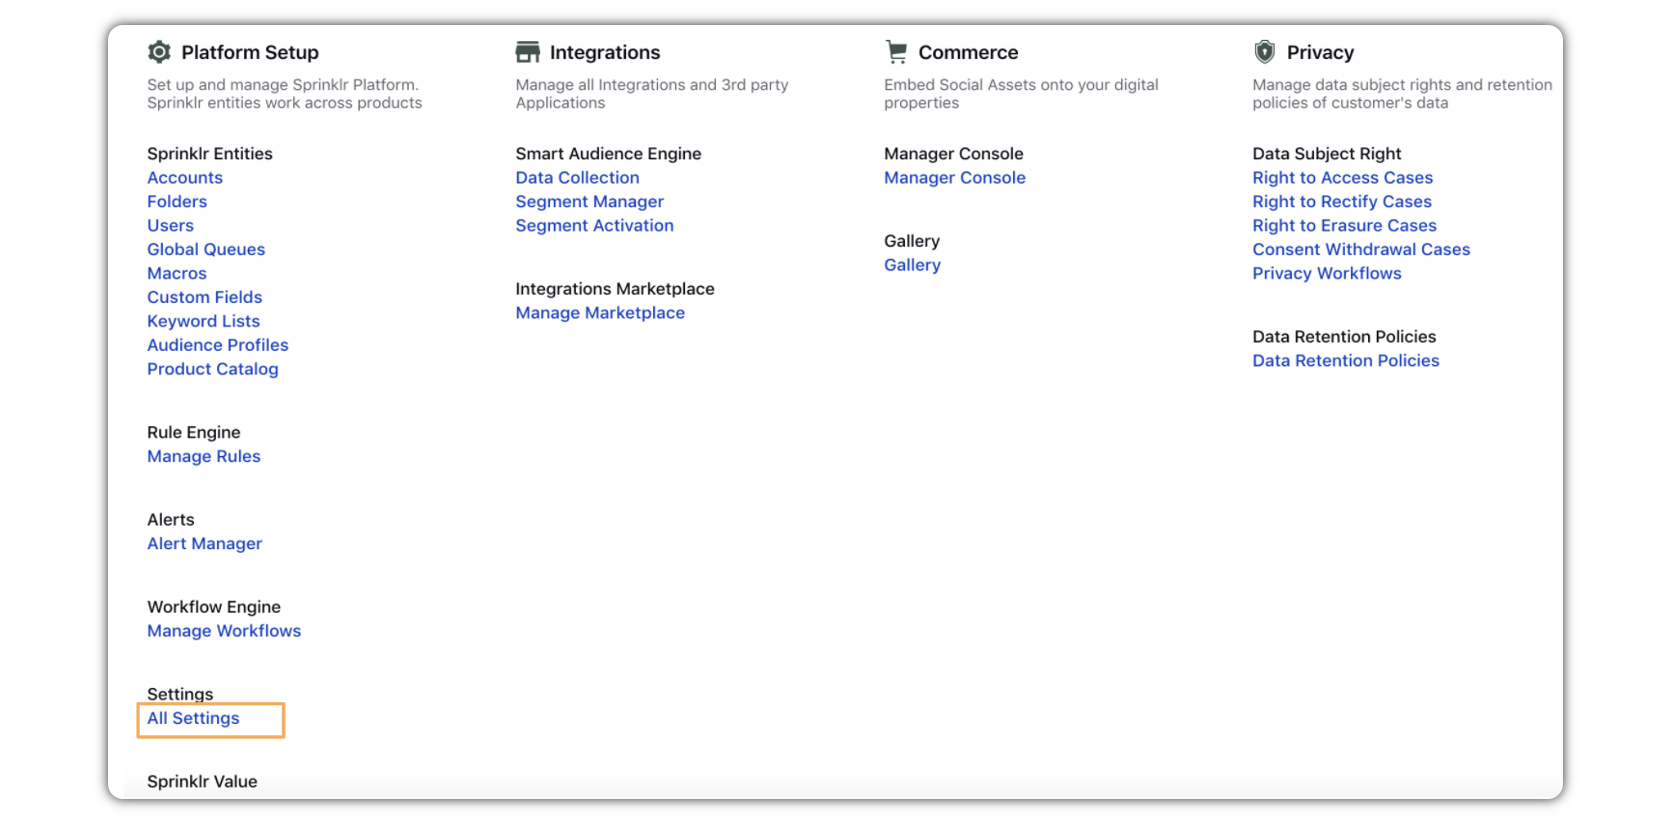
Click the New Tab icon
. Under the Governance Console, click All Settings within Platform Setup.
Search Distributed Control Panel and select it.
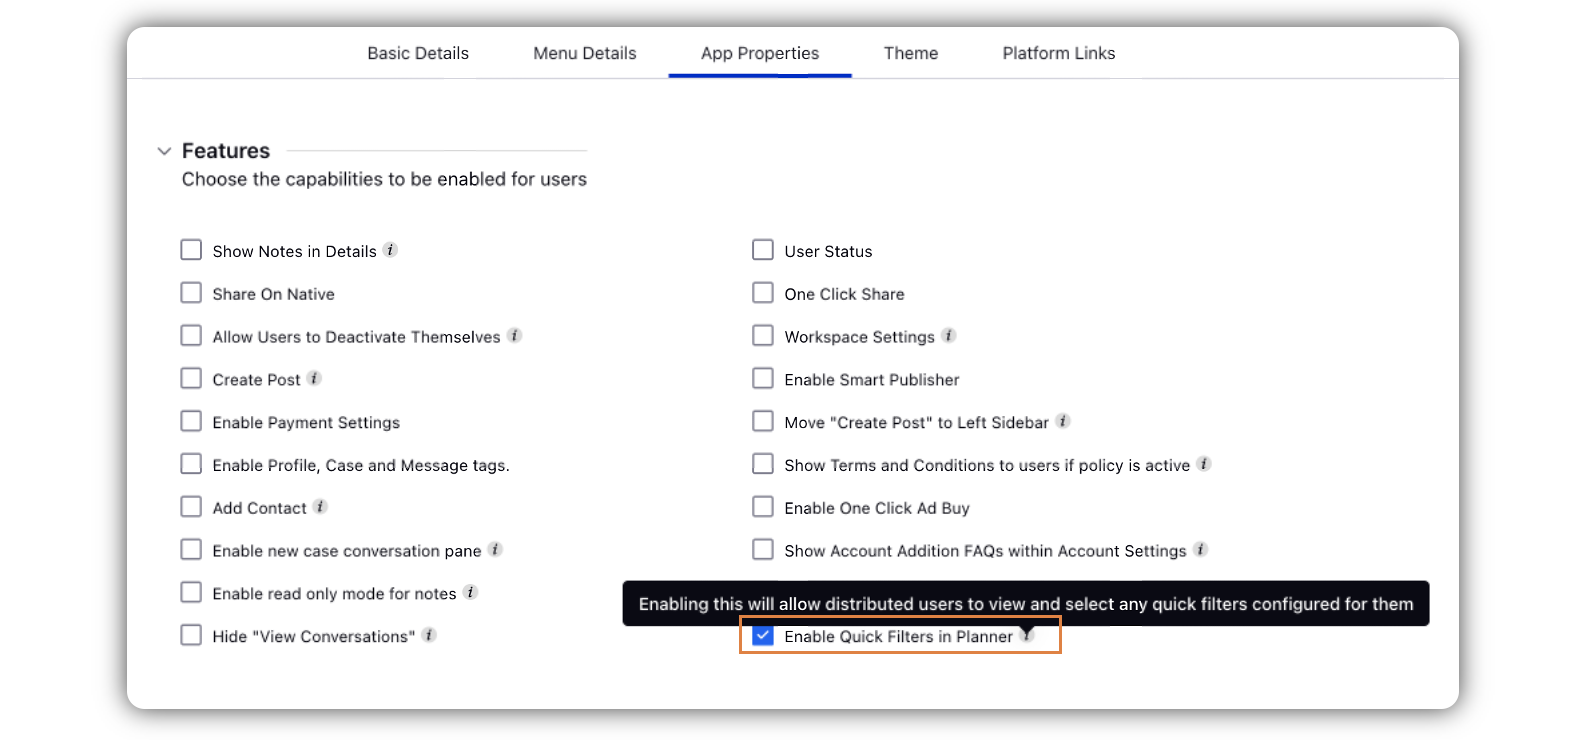
Go to the App Properties tab of the relevant configuration.
Sekect the checkkbox for Enable Quick Filters in Planner.
Go ahead with the rest of the settings for Distributed control panel and click Save in the bottom right corner.
View and Use Quick Filters in Planner within Distributed
Log in to the Distributed environment.
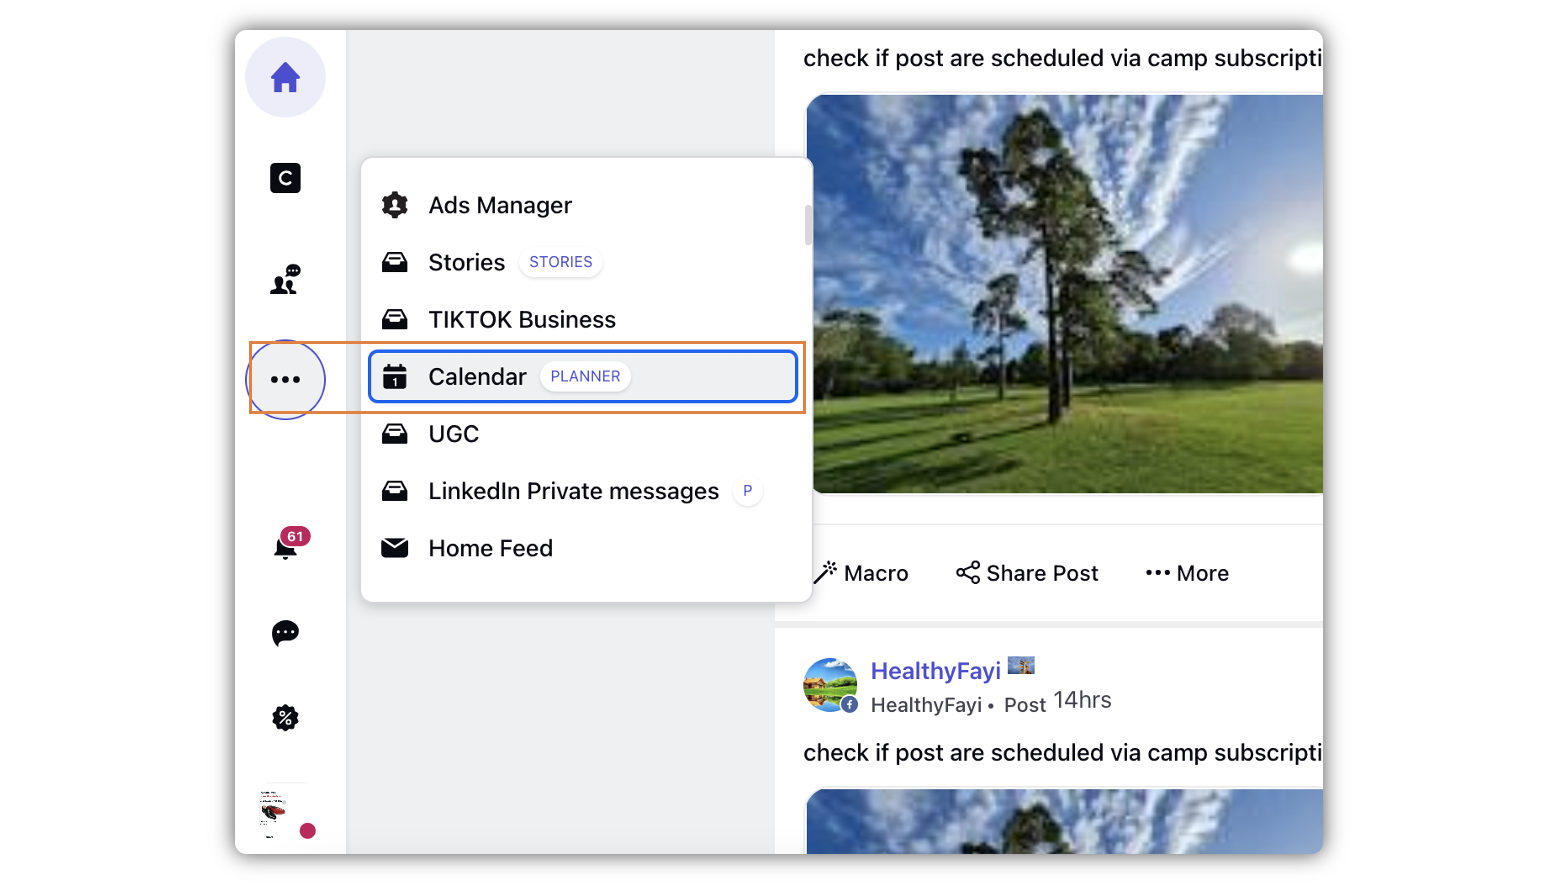
Go to Planner or Calendar.
Click the dropdown icon beside Quick Filter and serach for the filter you have created, and apply it.
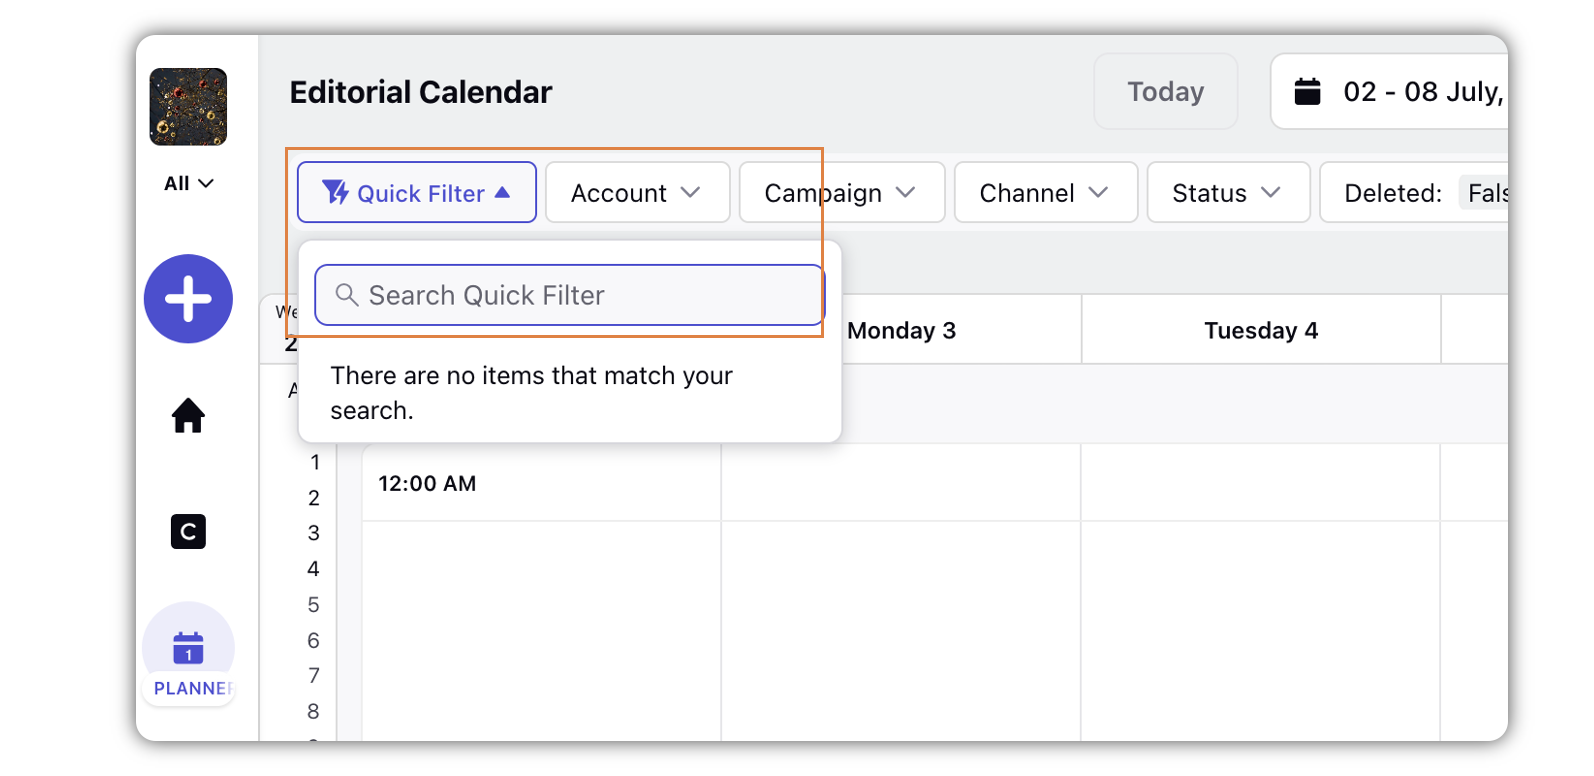
Click Add Filter to add a new quick filter.

Steps to Enable Added Quick Filters in Planners / Editorial Calendars in Distributed Control Panel
Click the New Tab icon
Search Distributed Control Panel and select it.
Click New Configuration in the top right corner or edit an existing configuration.
Go to the Menu Details tab and scroll down to the Select Tabs section.

Click the Dropdown icon and select the tabs and quick filters.


Click Save in the bottom right corner to save the menu.
Click Save in the bottom right corner to save this configuration.